Shopify allows you to create B2B Companies in your Shopify store. Our tutorial will walk you through how to bulk import or migrate Shopify B2B Companies using the Matrixify app.
This process is perfect for businesses looking to efficiently manage their B2B clients on Shopify. Whether you’re migrating from another platform or just starting out, our step-by-step tutorial will simplify the process of importing your B2B Companies in bulk.
Let’s dive in and explore how you can leverage Matrixify to optimize your B2B operations on Shopify.
Steps in short to bulk import Shopify B2B Companies
- Create customers in Shopify.
- Download Matrixify Companies Demo File.
- Fill in your company data in the Matrixify Companies template.
- Import File – Use the Matrixify app to import your prepared file.
1. Create Shopify Customers
Before you can import Companies, you need to ensure that the customers you want to link to these companies already exist in your Shopify store.
If those Customers do not yet exist, you can bulk import them using the Matrixify app.
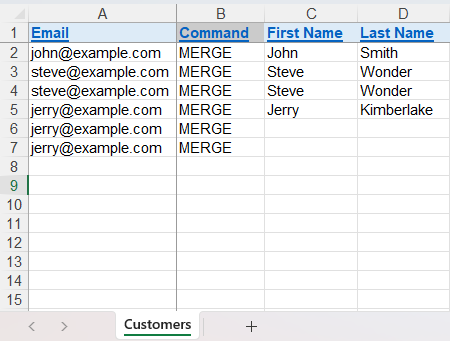
The only required field you need in the Customers import file is Email , as this is what will be used to link the Customer to a Company. But you can also include other columns from the Matrixify Customers template such as First Name, Last Name and others.
You do not need to import Addresses for the Customers as those will be set for the specific company locations.
2. Download the Companies Demo file
The second step in importing Companies into Shopify B2B using the Matrixify app involves downloading the Matrixify Companies Demo file.
This file serves as a reference for your import, providing a template that outlines the necessary format and fields for your data.
Once downloaded, you can open the file in your preferred spreadsheet software and use it as a guide when preparing your own data for import.
3. Prepare your Companies import file
Fill in your company data according to the Matrixify Companies template.
Company Locations
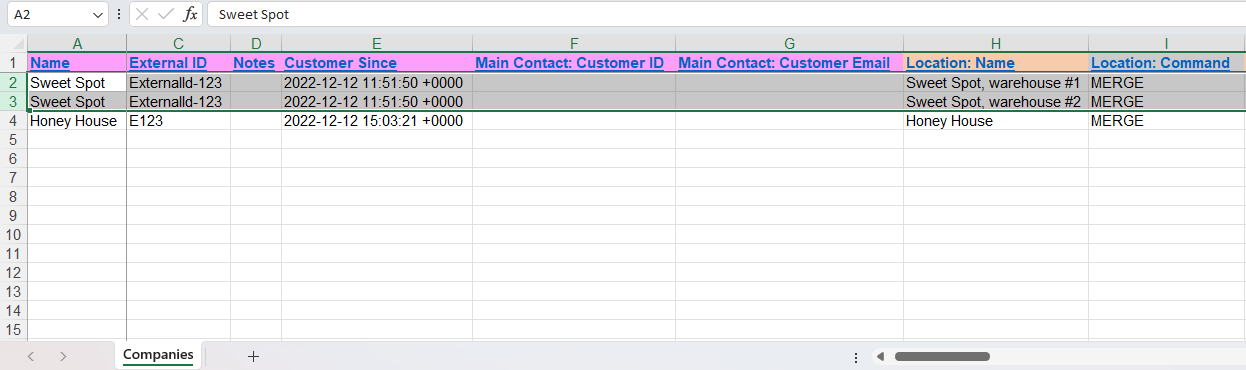
If a Company has multiple Locations then each such location would be filled in a new row next to other rows from the same company.
In these rows, all the Basic Columns for the Company would have the same values, only the Location and Customer columns would be different.
In the below example, you can see the “Sweet Spot” Company with two locations:
Location Catalogs
It is also possible to link a Catalog to a Company Location. To do so you would need to add the column Location: Catalogs to your Import file. The value for this column should be a semi-colon separated list of Catalog names that you would like to assign to the Company Location.
If the Location has multiple rows, then Catalogs will only be read from the first row of that Company Location.
Linked Customers
If you’re linking customers to the companies, use the Customer: Email column in the Companies import sheet to identify the customer who would be added to the Company location.
Key column when linking the Customer to the Company is Customer: Location Role. Leaving this column empty would mean that the Customer is linked to the Company but not to the Company Location.
Set the value as Ordering only or Location admin to link customers to the Company and assign their roles in the Company.
If multiple Customers are linked to the same Location, you would have multiple rows with the same Location details.
Naming the import file
To ensure that Matrixify detects the file correctly as Companies, make sure that the sheet/tab name in the file is “Companies” as it is in the Demo file.
You can import an Excel XLSX file with the Matrixify app, so no need to save it as CSV. The file name for the XLSX file does not matter.
But if you must use a CSV file, then instead of the sheet/tab name, the file name would need to contain the word “Companies”, for example, “my-shopify-companies.csv”.
4. Import your file
The final step to bulk import B2B Companies to Shopify using the Matrixify app is to upload and import your prepared file.
Once you’ve ensured that your file is correctly formatted and named, navigate to the Matrixify app in your Shopify store.
In the app, you’ll find an “Import” section. Here, you can upload your file, either by clicking to select the file from your device or by dragging and dropping the file into the designated area.
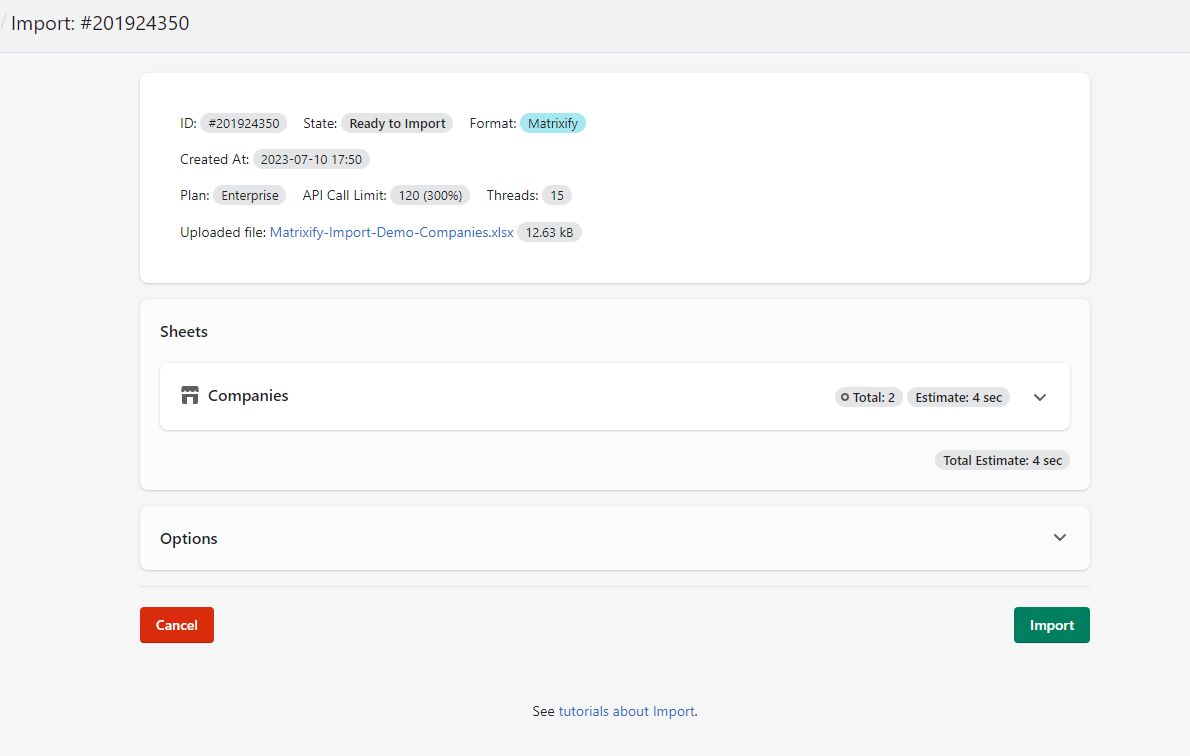
After uploading, the app will analyze your file and display an overview of the data to be imported.
If everything looks correct, you can proceed by clicking the “Import” button. The app will then start the import process, and you can monitor the progress directly within the app.
If you encounter any issues or have any questions during this process, don’t hesitate to reach out for assistance.
Good to know
- See Shopify manuals explaining B2B Companies.
- You can also export your Shopify B2B Companies with the Matrixify app to use them in your own reporting.
- The exported file can also be imported back into Shopify using it for bulk updates.
- You can also use this tutorial to migrate Shopify B2B Companies and Clients from other platforms by converting the file to Matrixify Companies template.


