
With the Matrixify app, you can convert Smart Collections (Automated Collections) into Custom Collections (Manual Collections).
This can really come in handy when you have a lot of Smart Collections and Shopify limit of 5000 total Smart Collections is getting tight for you.
Steps in short
- Export Smart Collections.
- Update Handles in the exported file and import the file.
- Download previously exported file and import as Custom Collections.
- Download previously exported file and set to delete Smart Collections.
- Enjoy!
Warning: Don’t delete Smart Collections before you have imported Custom Collections, because if you will first delete Smart Collections, you will delete all their featured images as well.
Additionally if your store Menus (Navigation) reference Smart Collections, by deleting the Smart Collections your Menus may break.
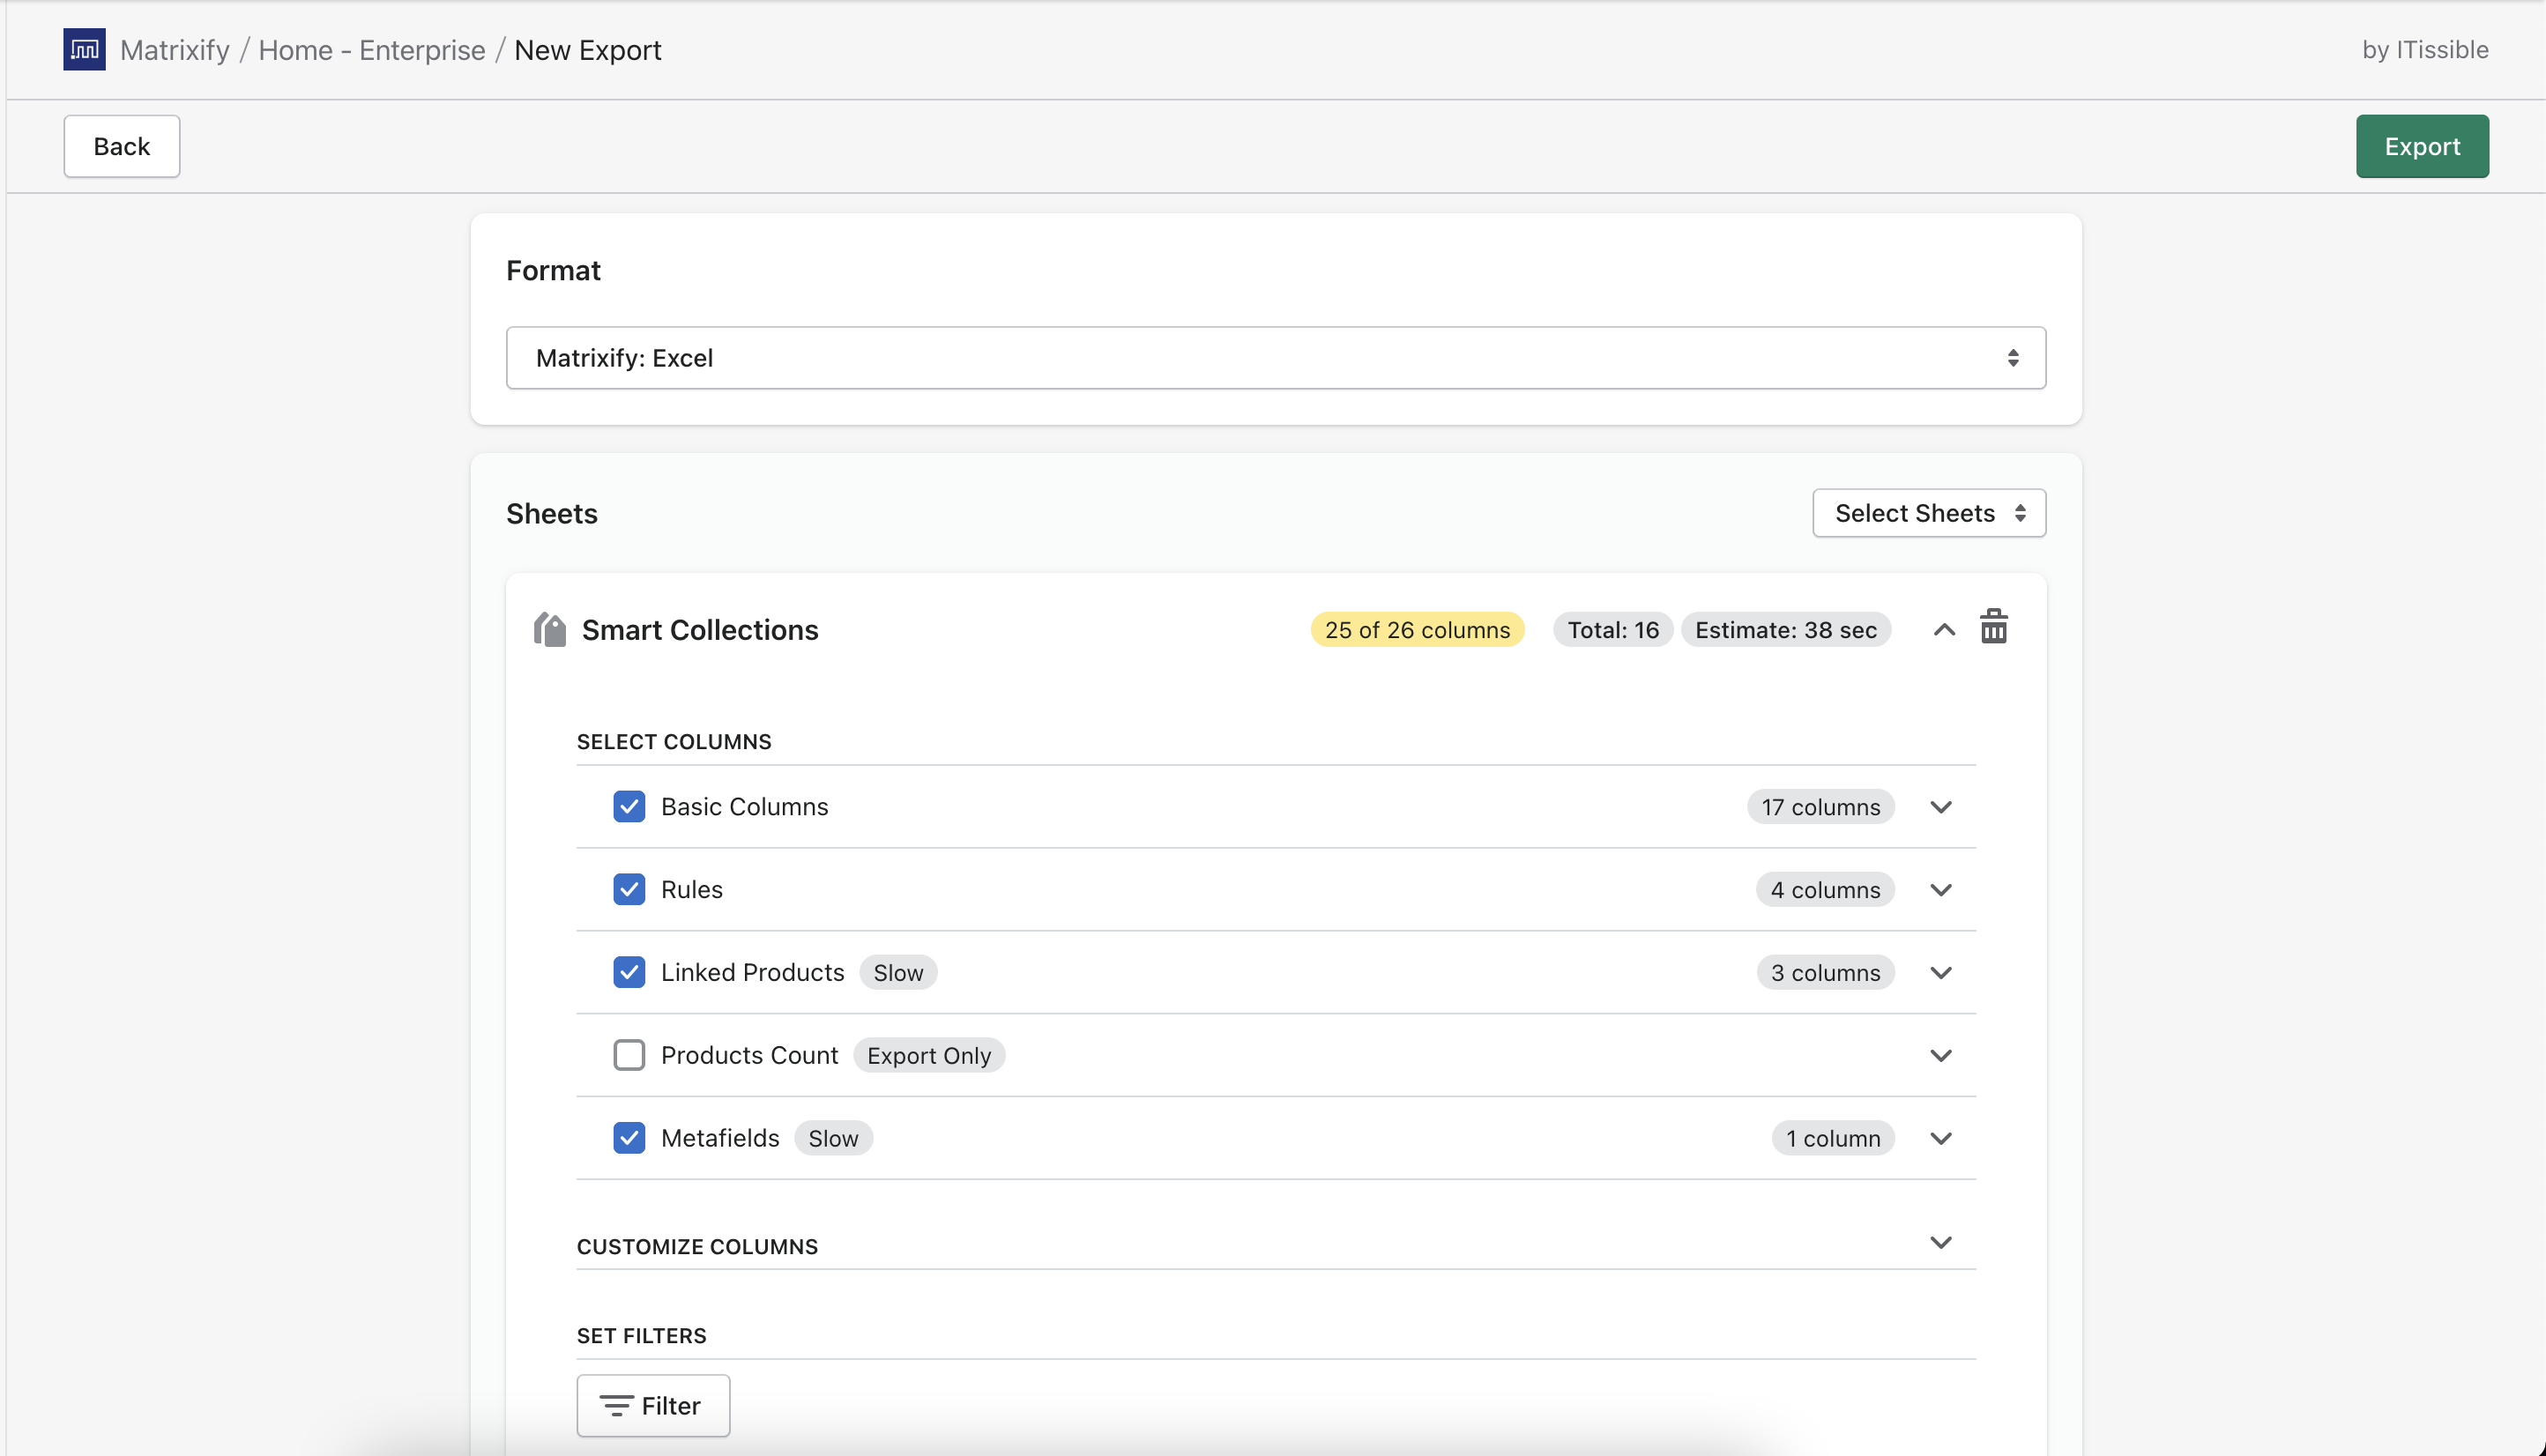
1. Export Smart Collections
First, we will need to export all Smart Collections which will need to be turned into Custom Collections.
To do so you will need to go into the Matrixify app and in the Export section of the app, you will need to select the sheet “Smart Collections” by pressing the “select sheets” button with the sub-checkboxes. You do not need to select the “Products Count” checkbox as this cannot be Imported again.
Then select export format Matrixify: Excel or Matrixify: CSV. We strongly suggest using Matrixify: Excel file format if exported data will not exceed any of known Excel limits.
Press the “Export” button to start the export.
2. Update Handles in the exported file and import that file
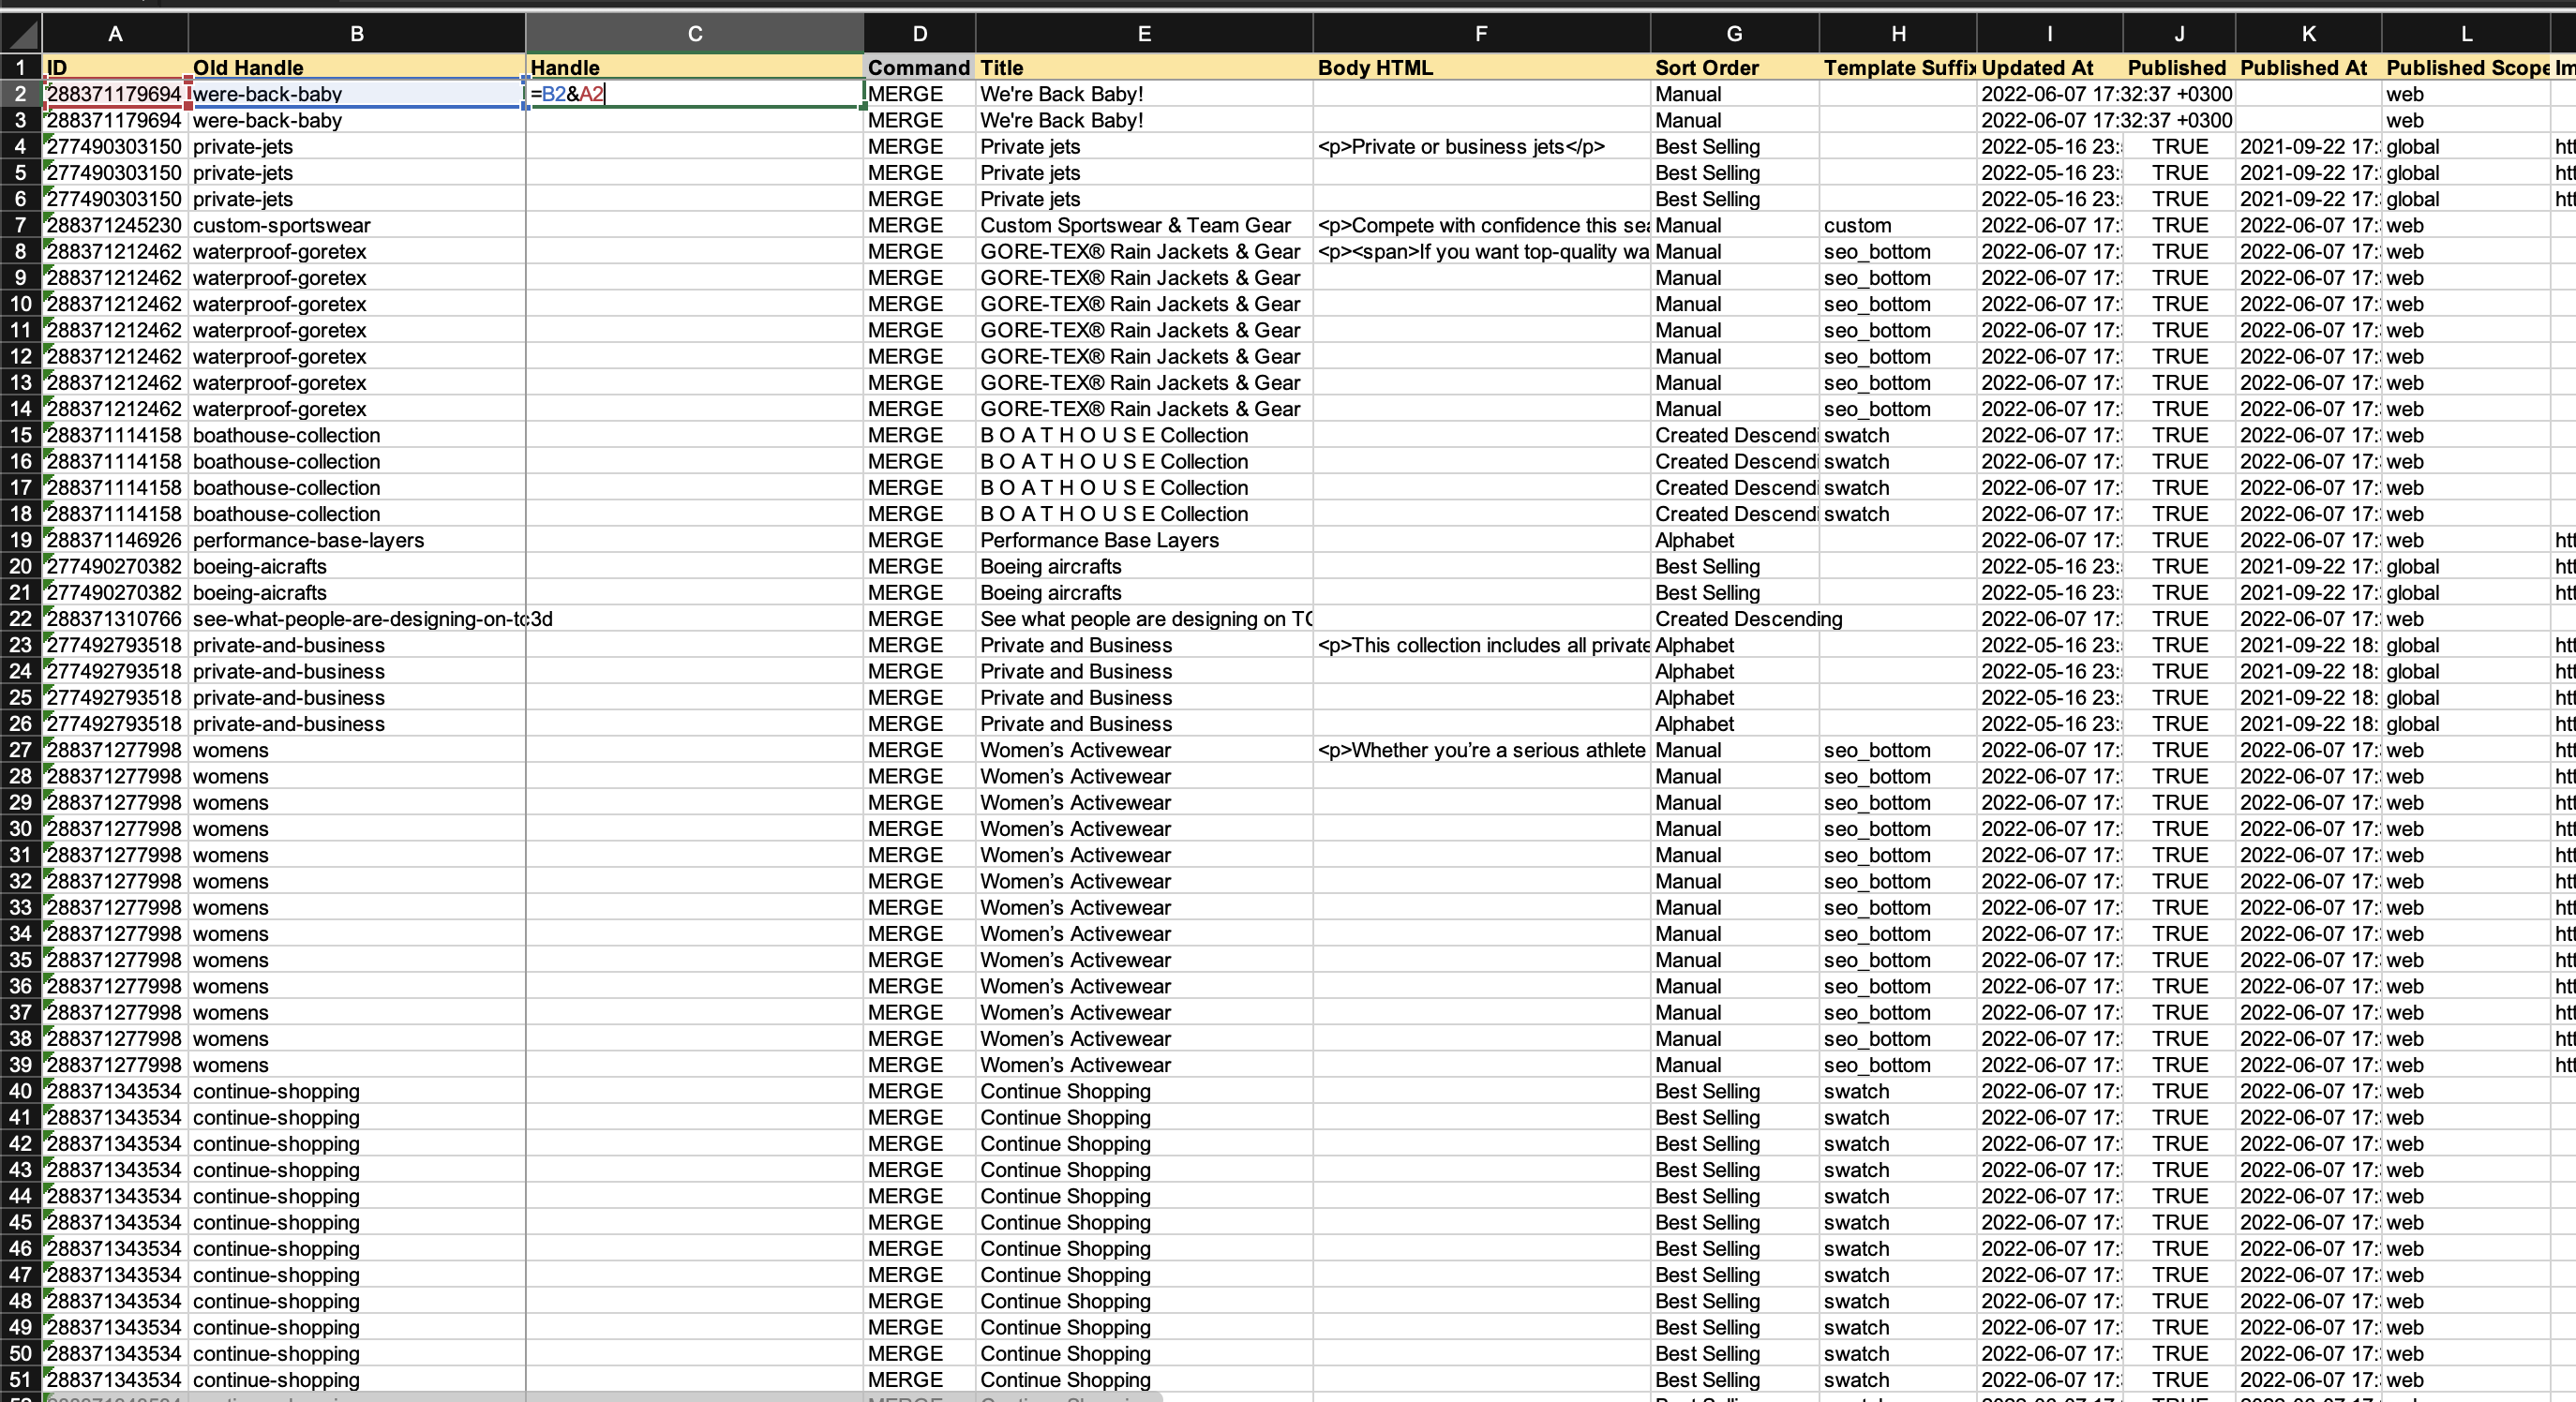
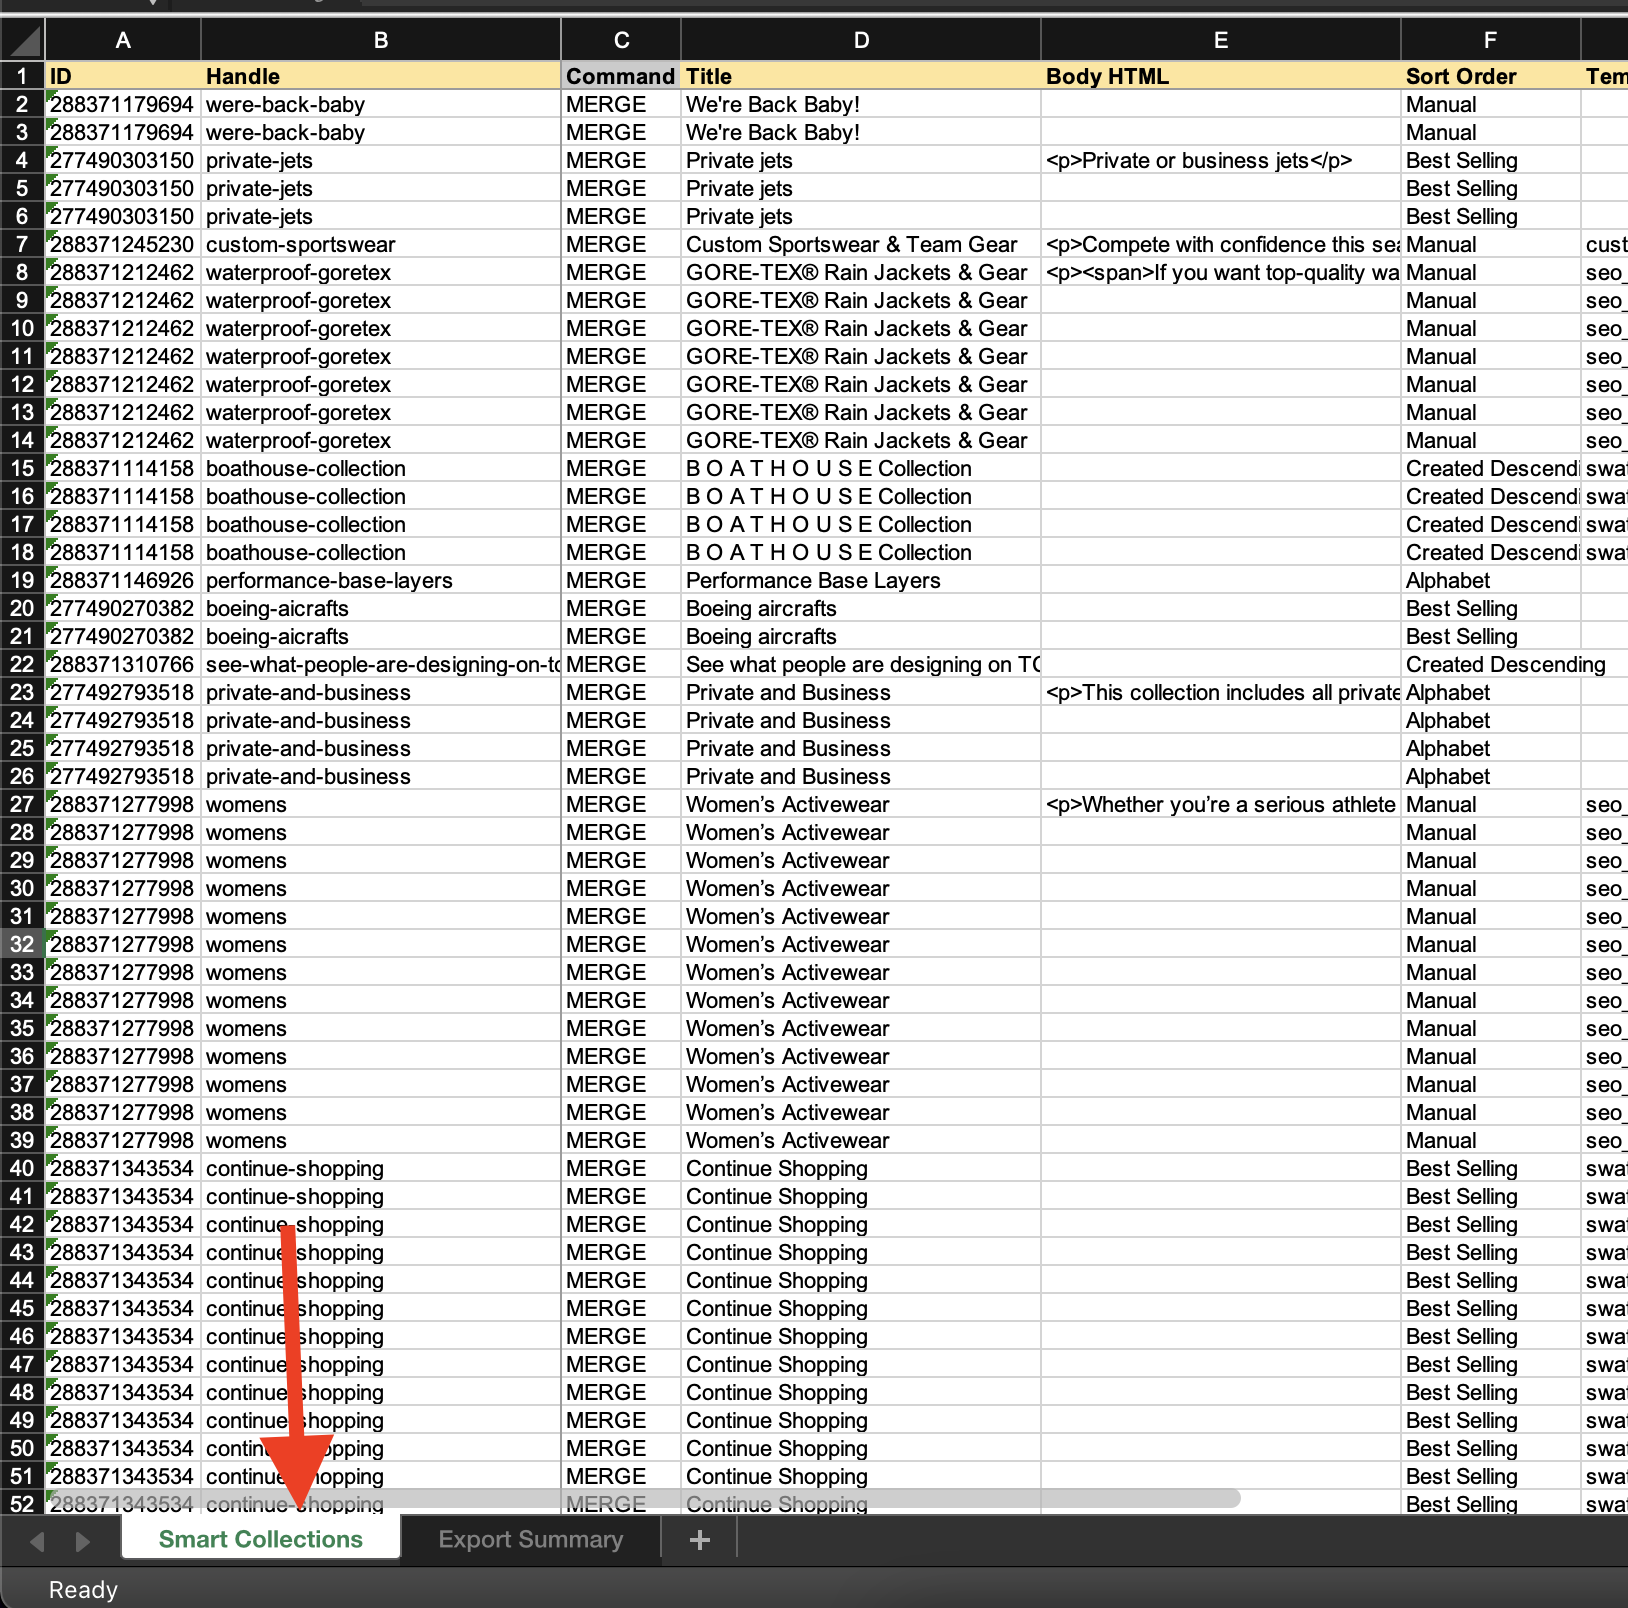
Once the export will be finished you will see the “Download Exported File” button, click this to download the file.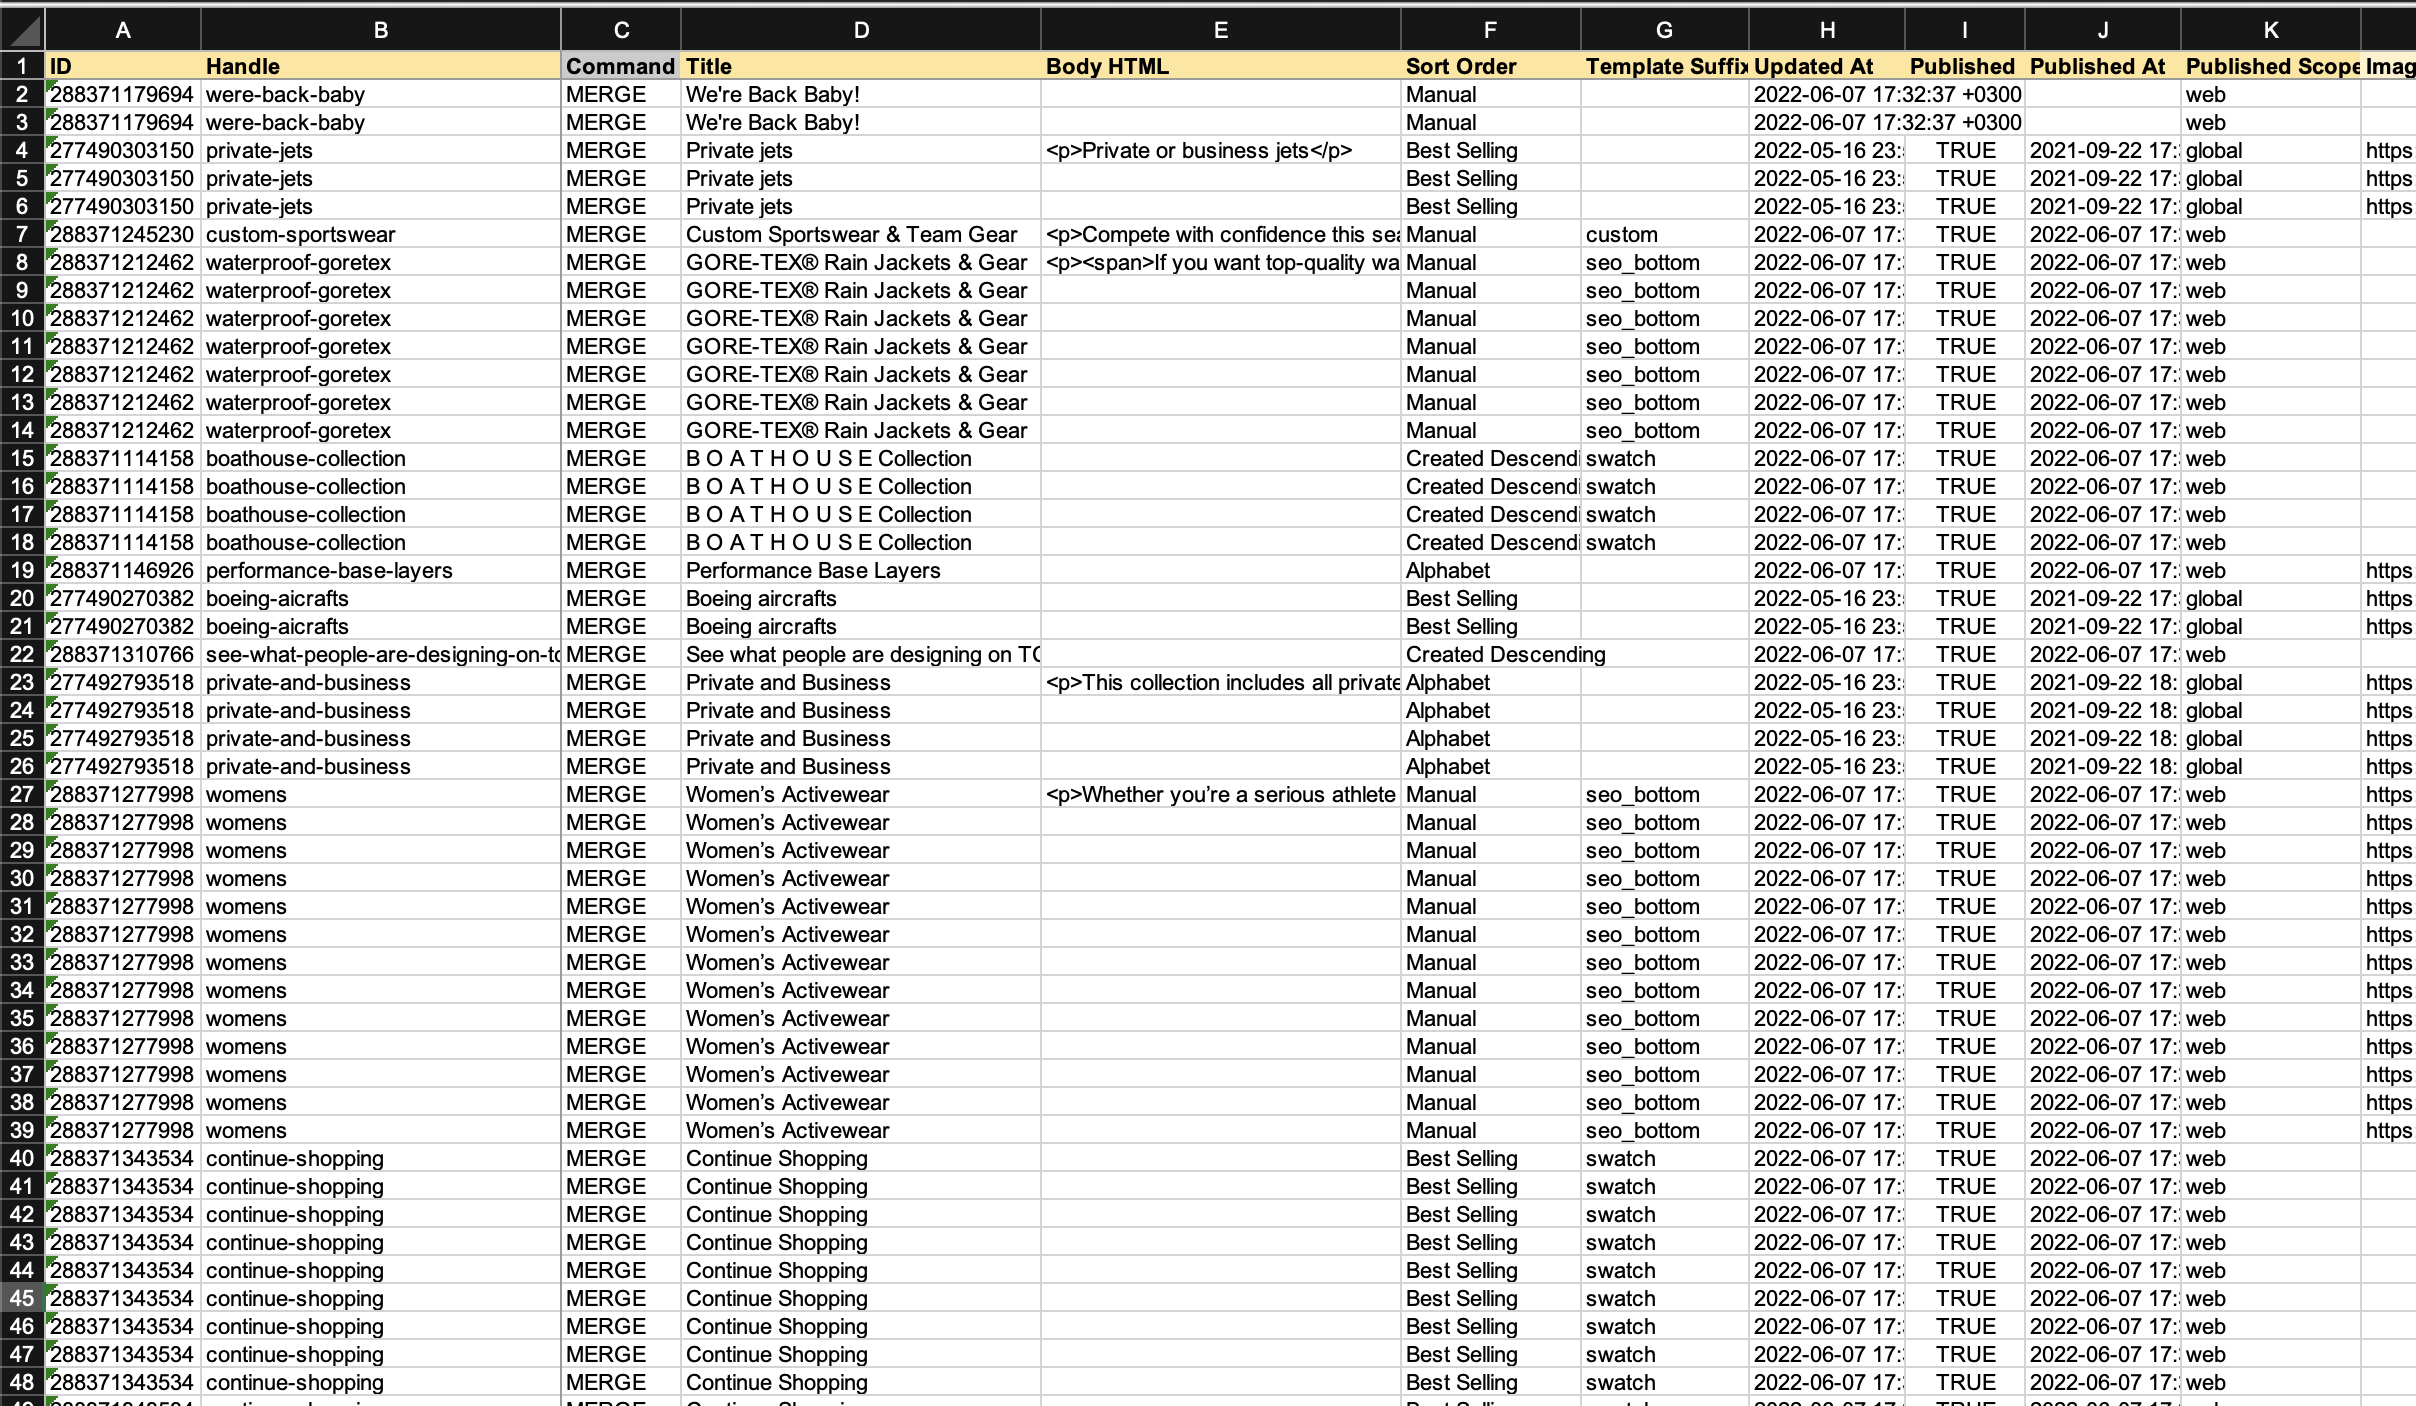 Now we will need to change the Handle for existing Smart Collections so we can import Custom Collections with correct Handles (the same Handles as you had for your collections).
To do so we will rename the current “Handle” column to “Old Handle”:
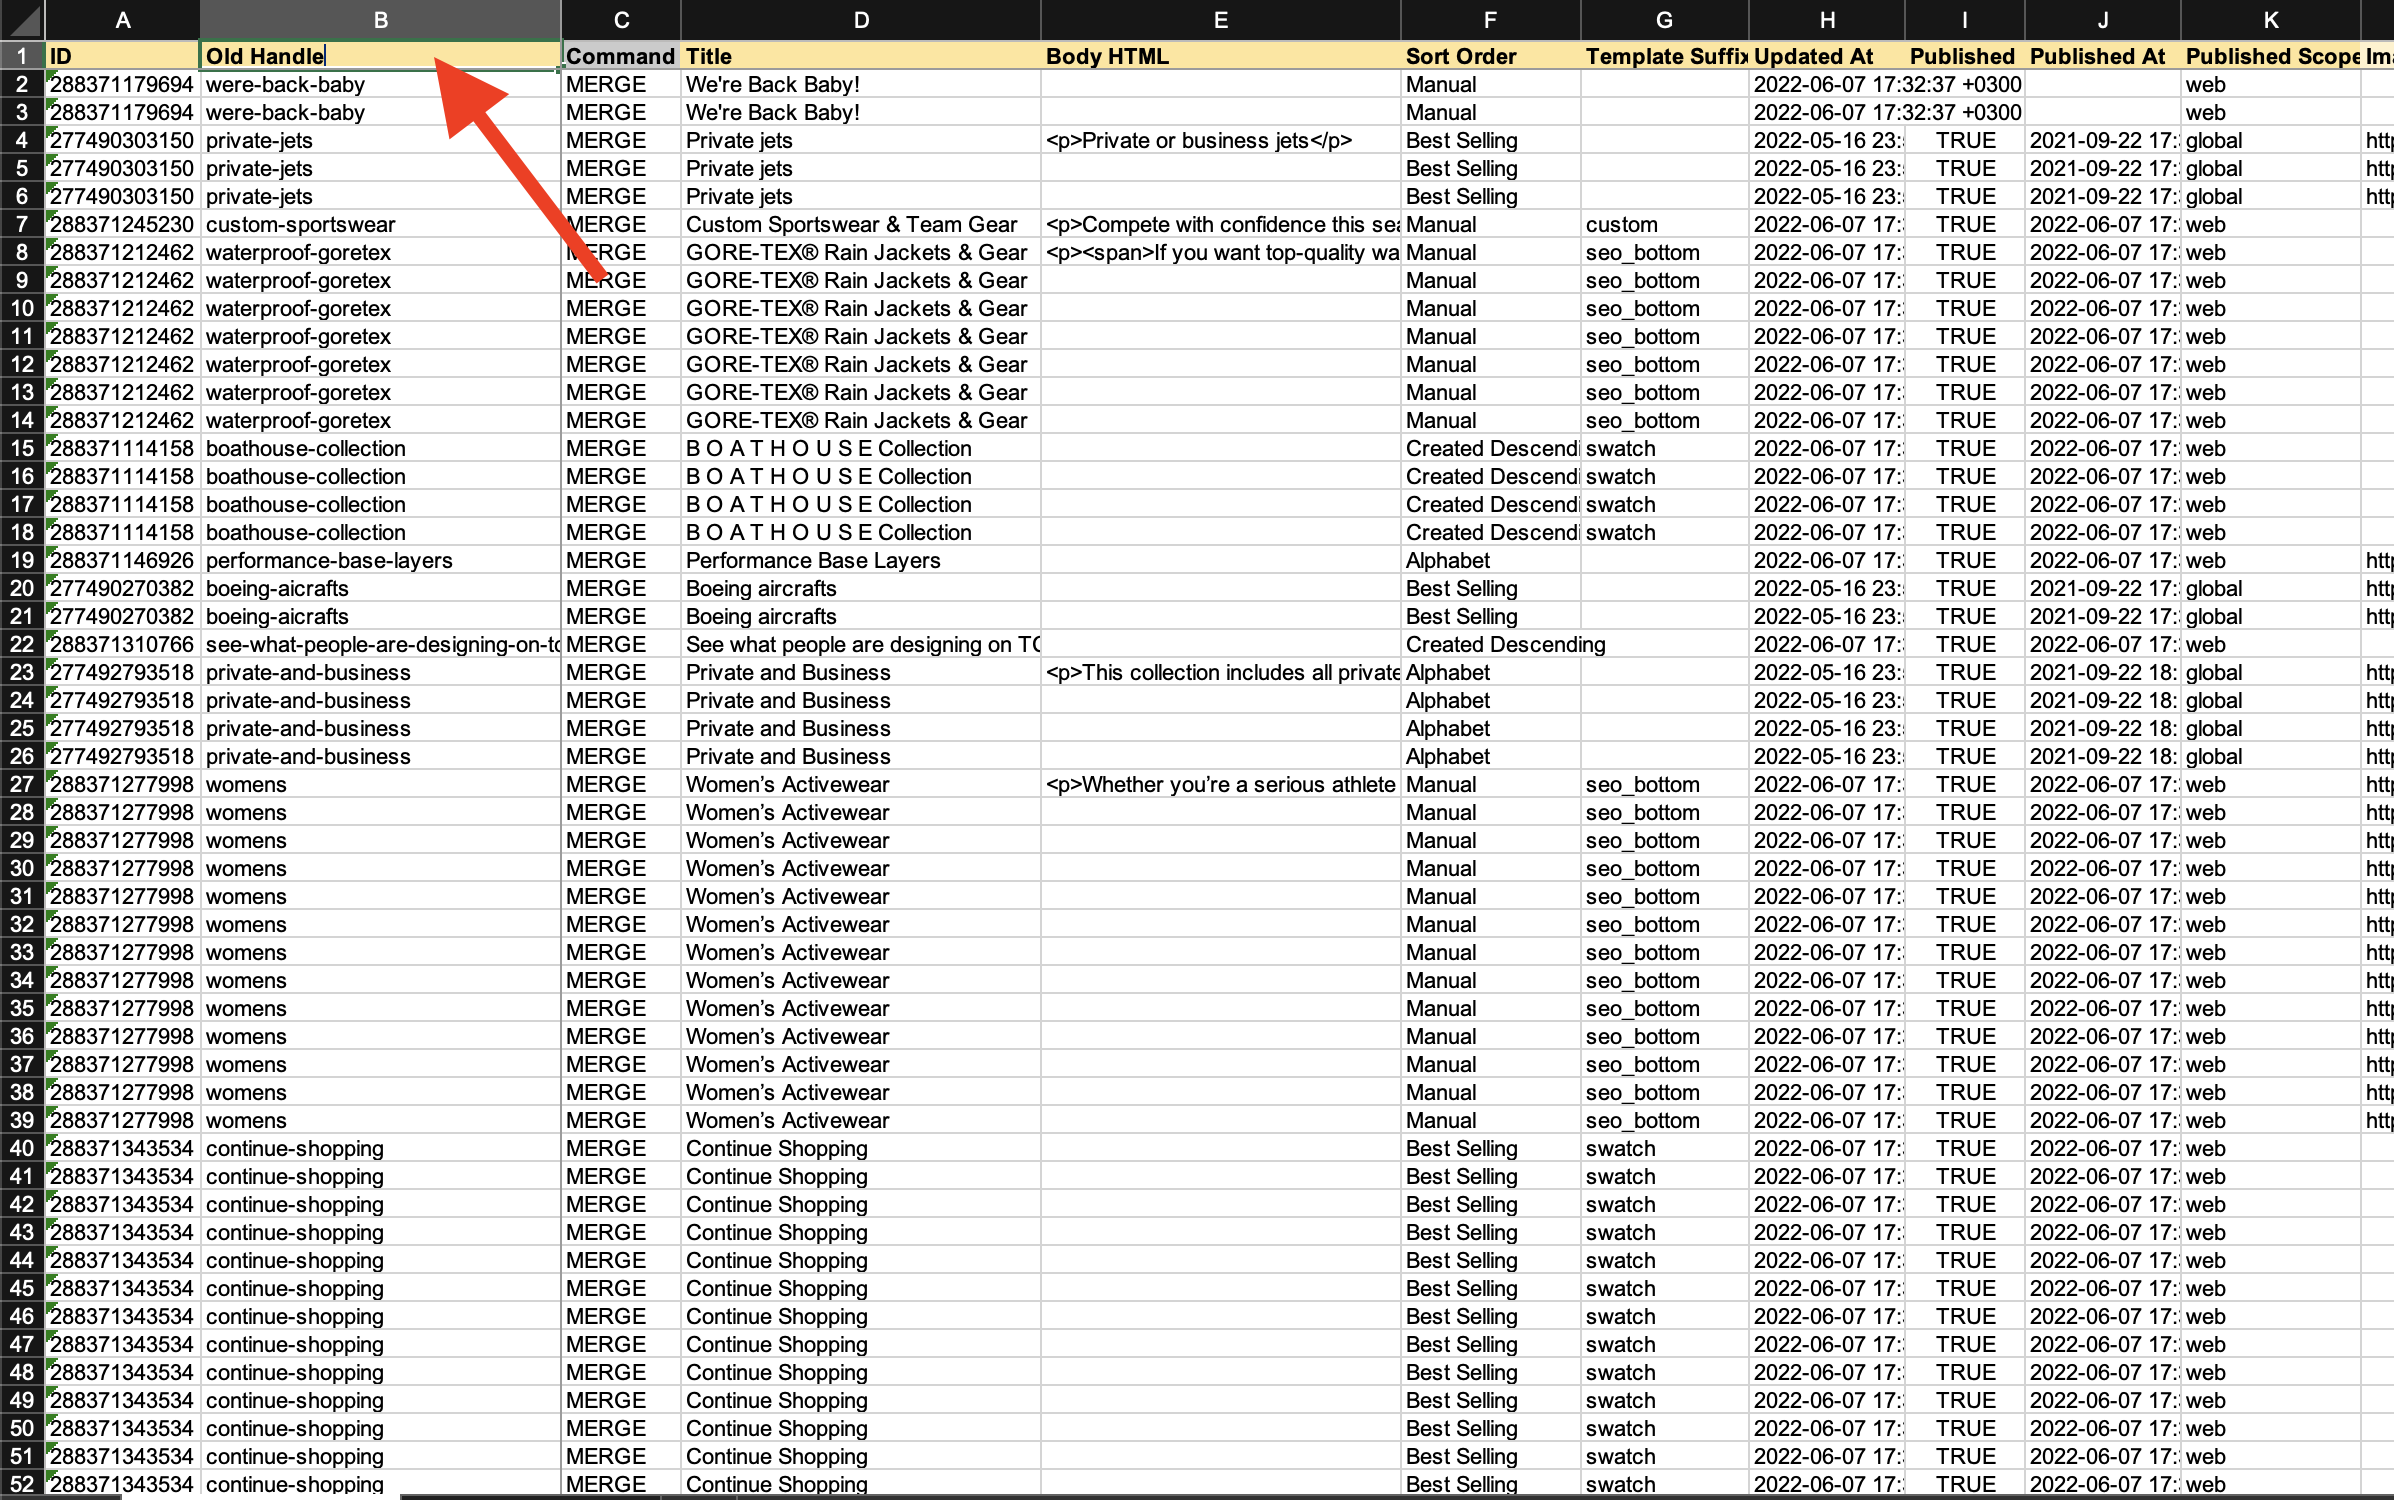 Once that is done add a new column to the file and name it “Handle”. This will be the column with our new, temporary Handles.
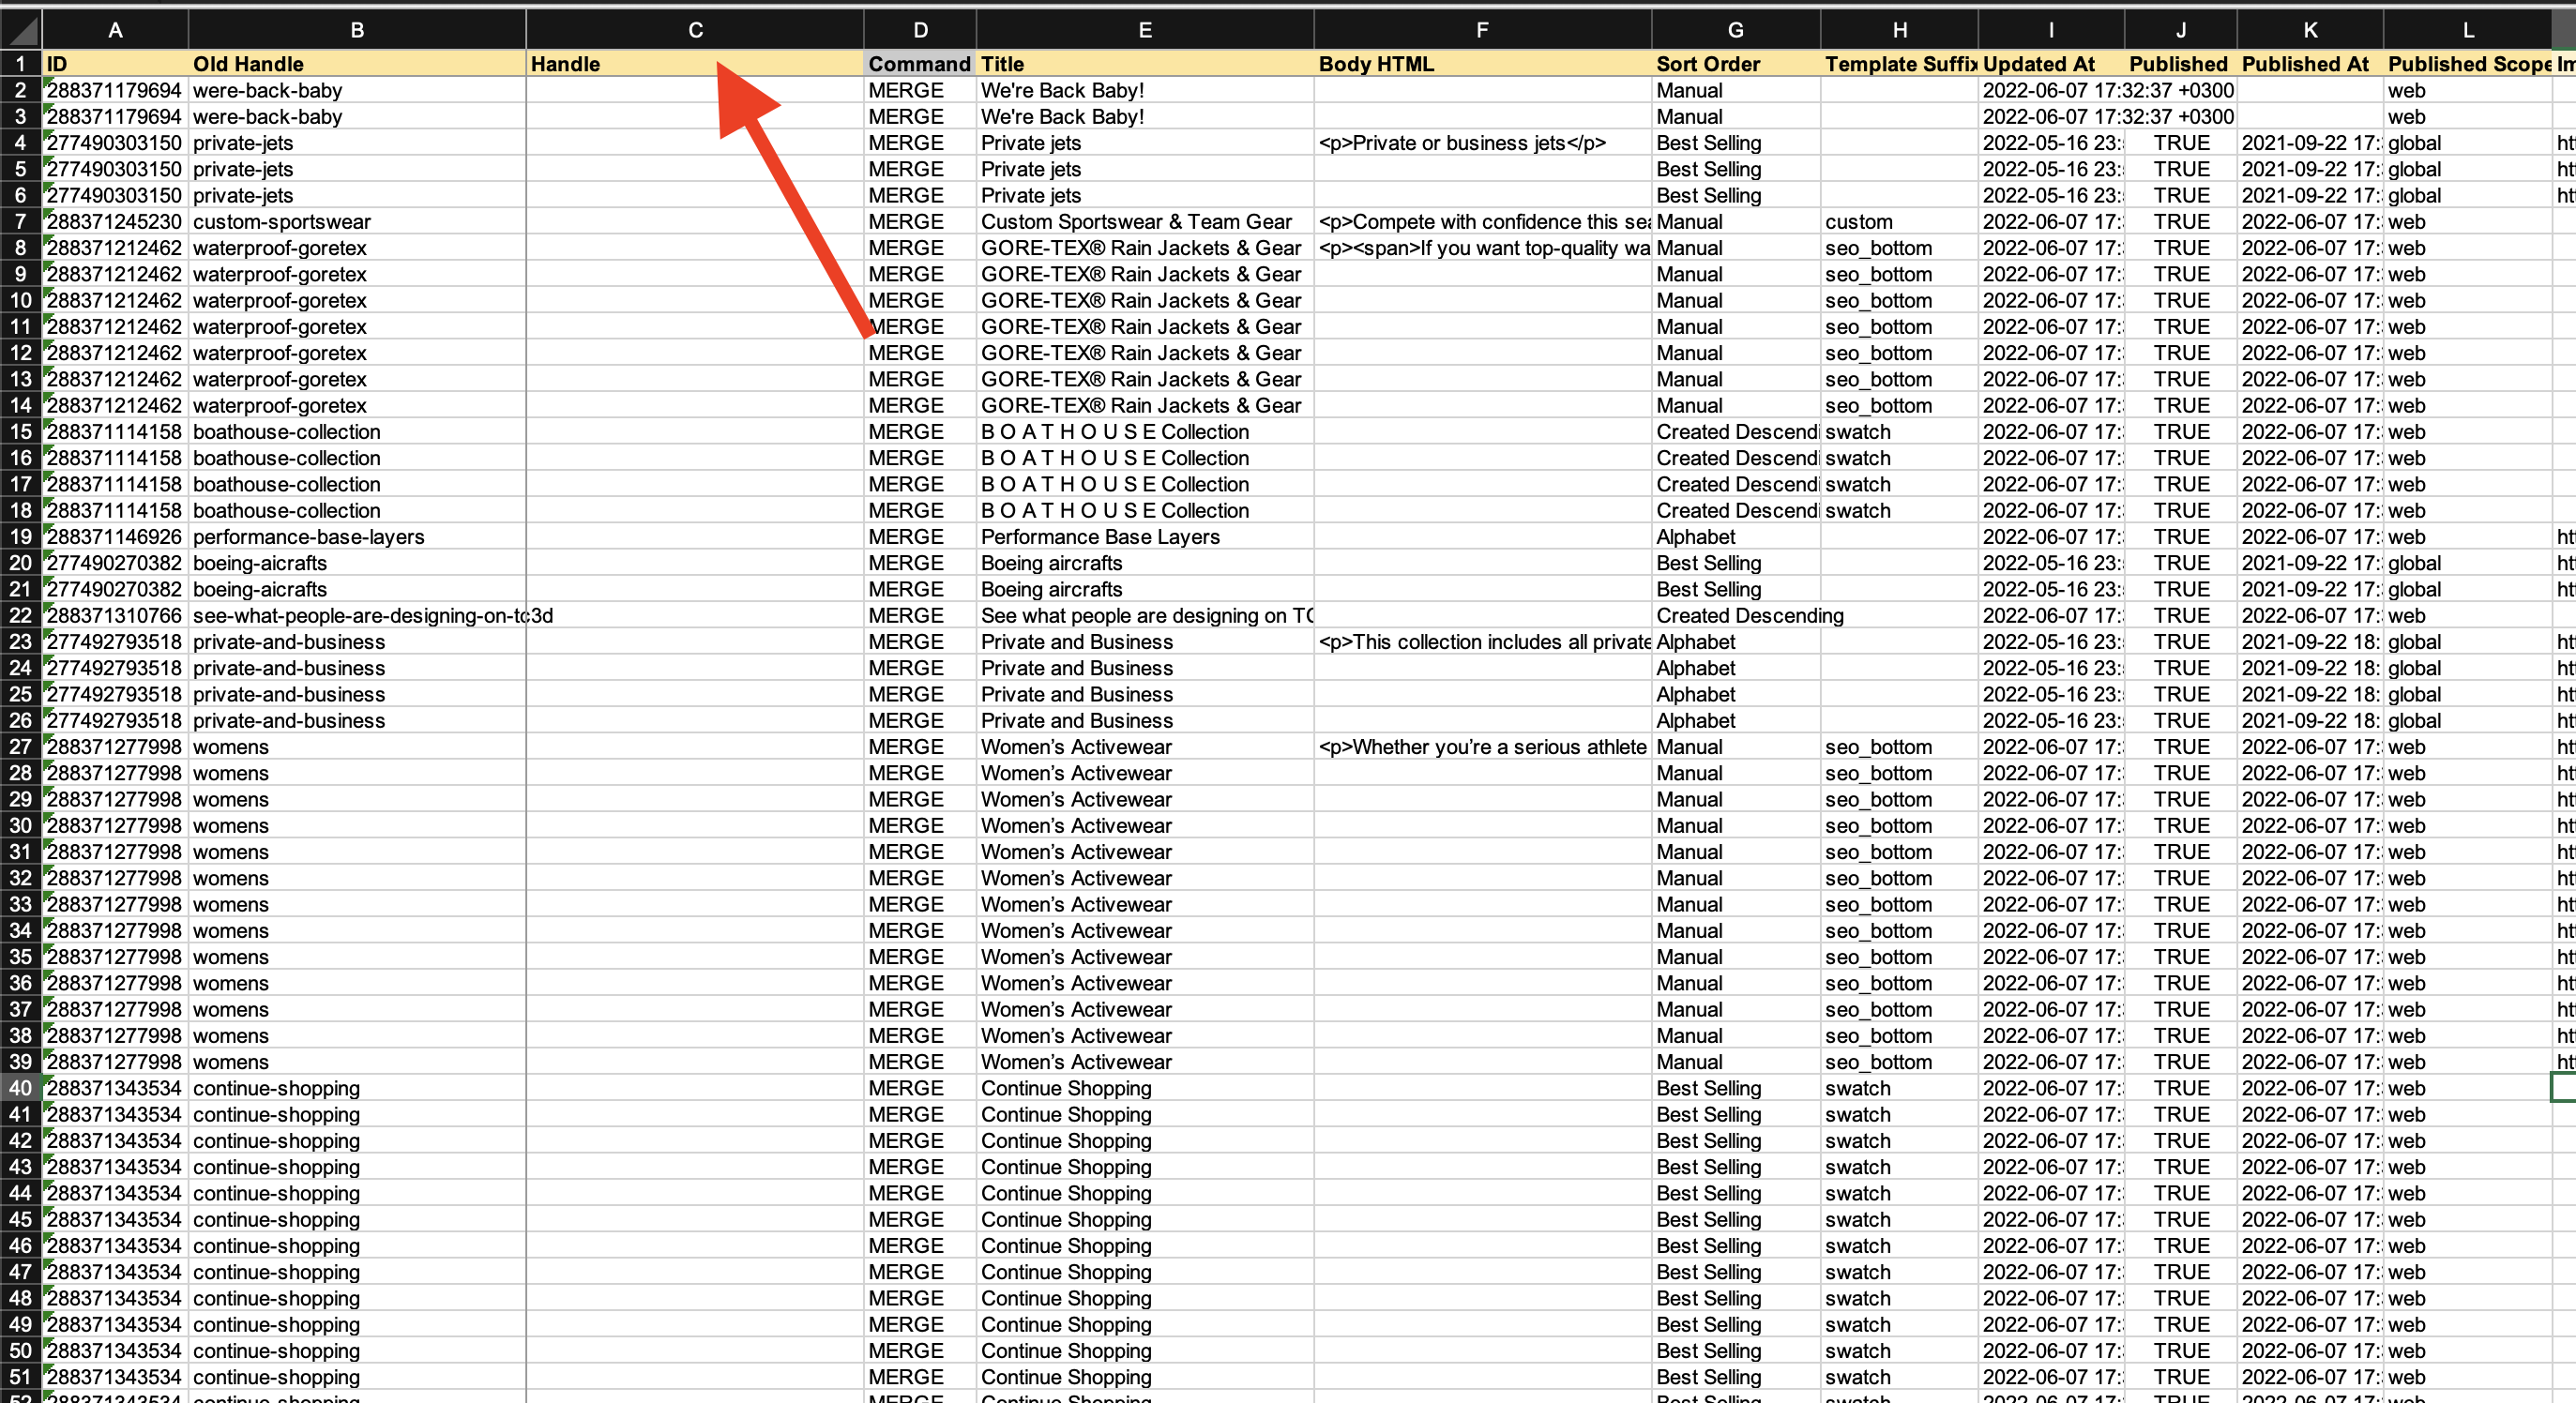
With the Matrixify, if using Excel file you can also import a file that contains formulas so we will do that here to fast generate temporary Handles in the “Handle” column.
Let’s use a formula to add an ID to the current Handle. Since this is a temporary Handle then it does not matter what we add to it, as long as its different from the existing Handle.
=B2&A2
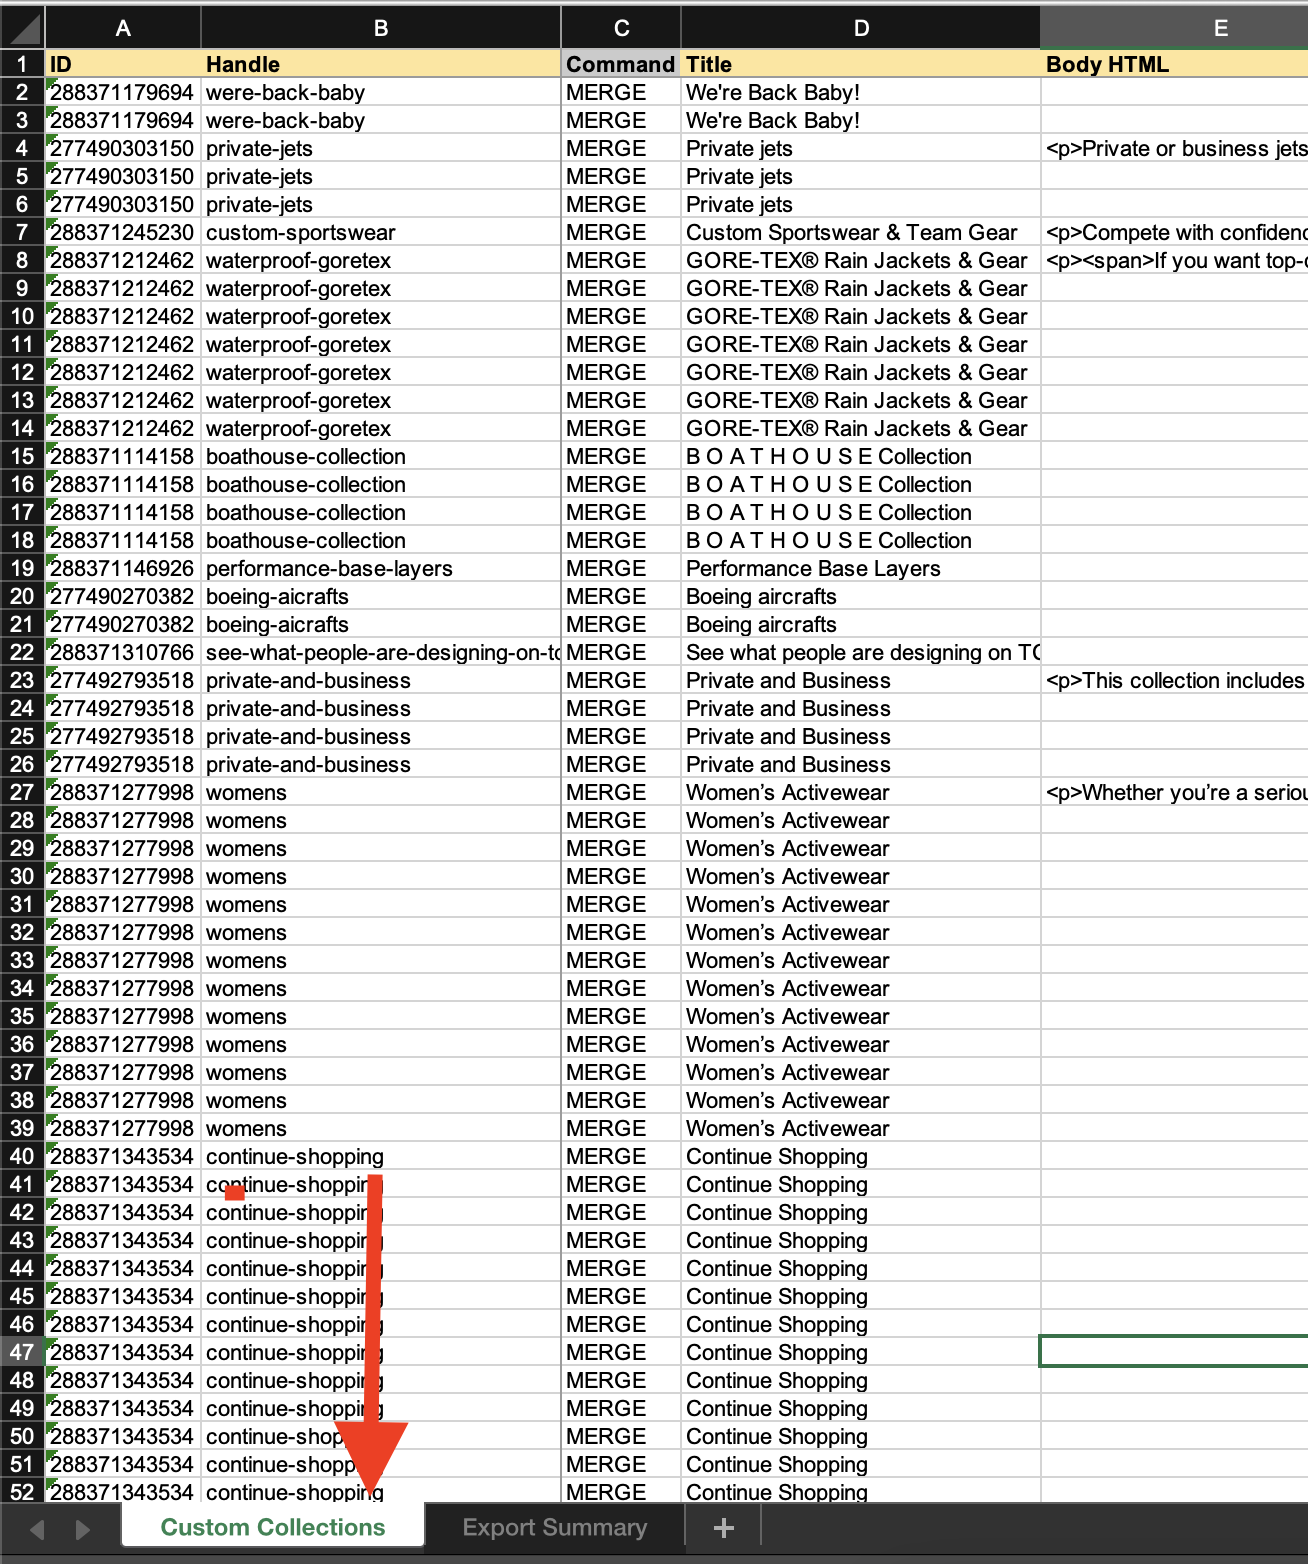
 Then select the cell with the formula and in the bottom right corner of the cell double-click on the small square to fill the rest of the file with this formula automatically.
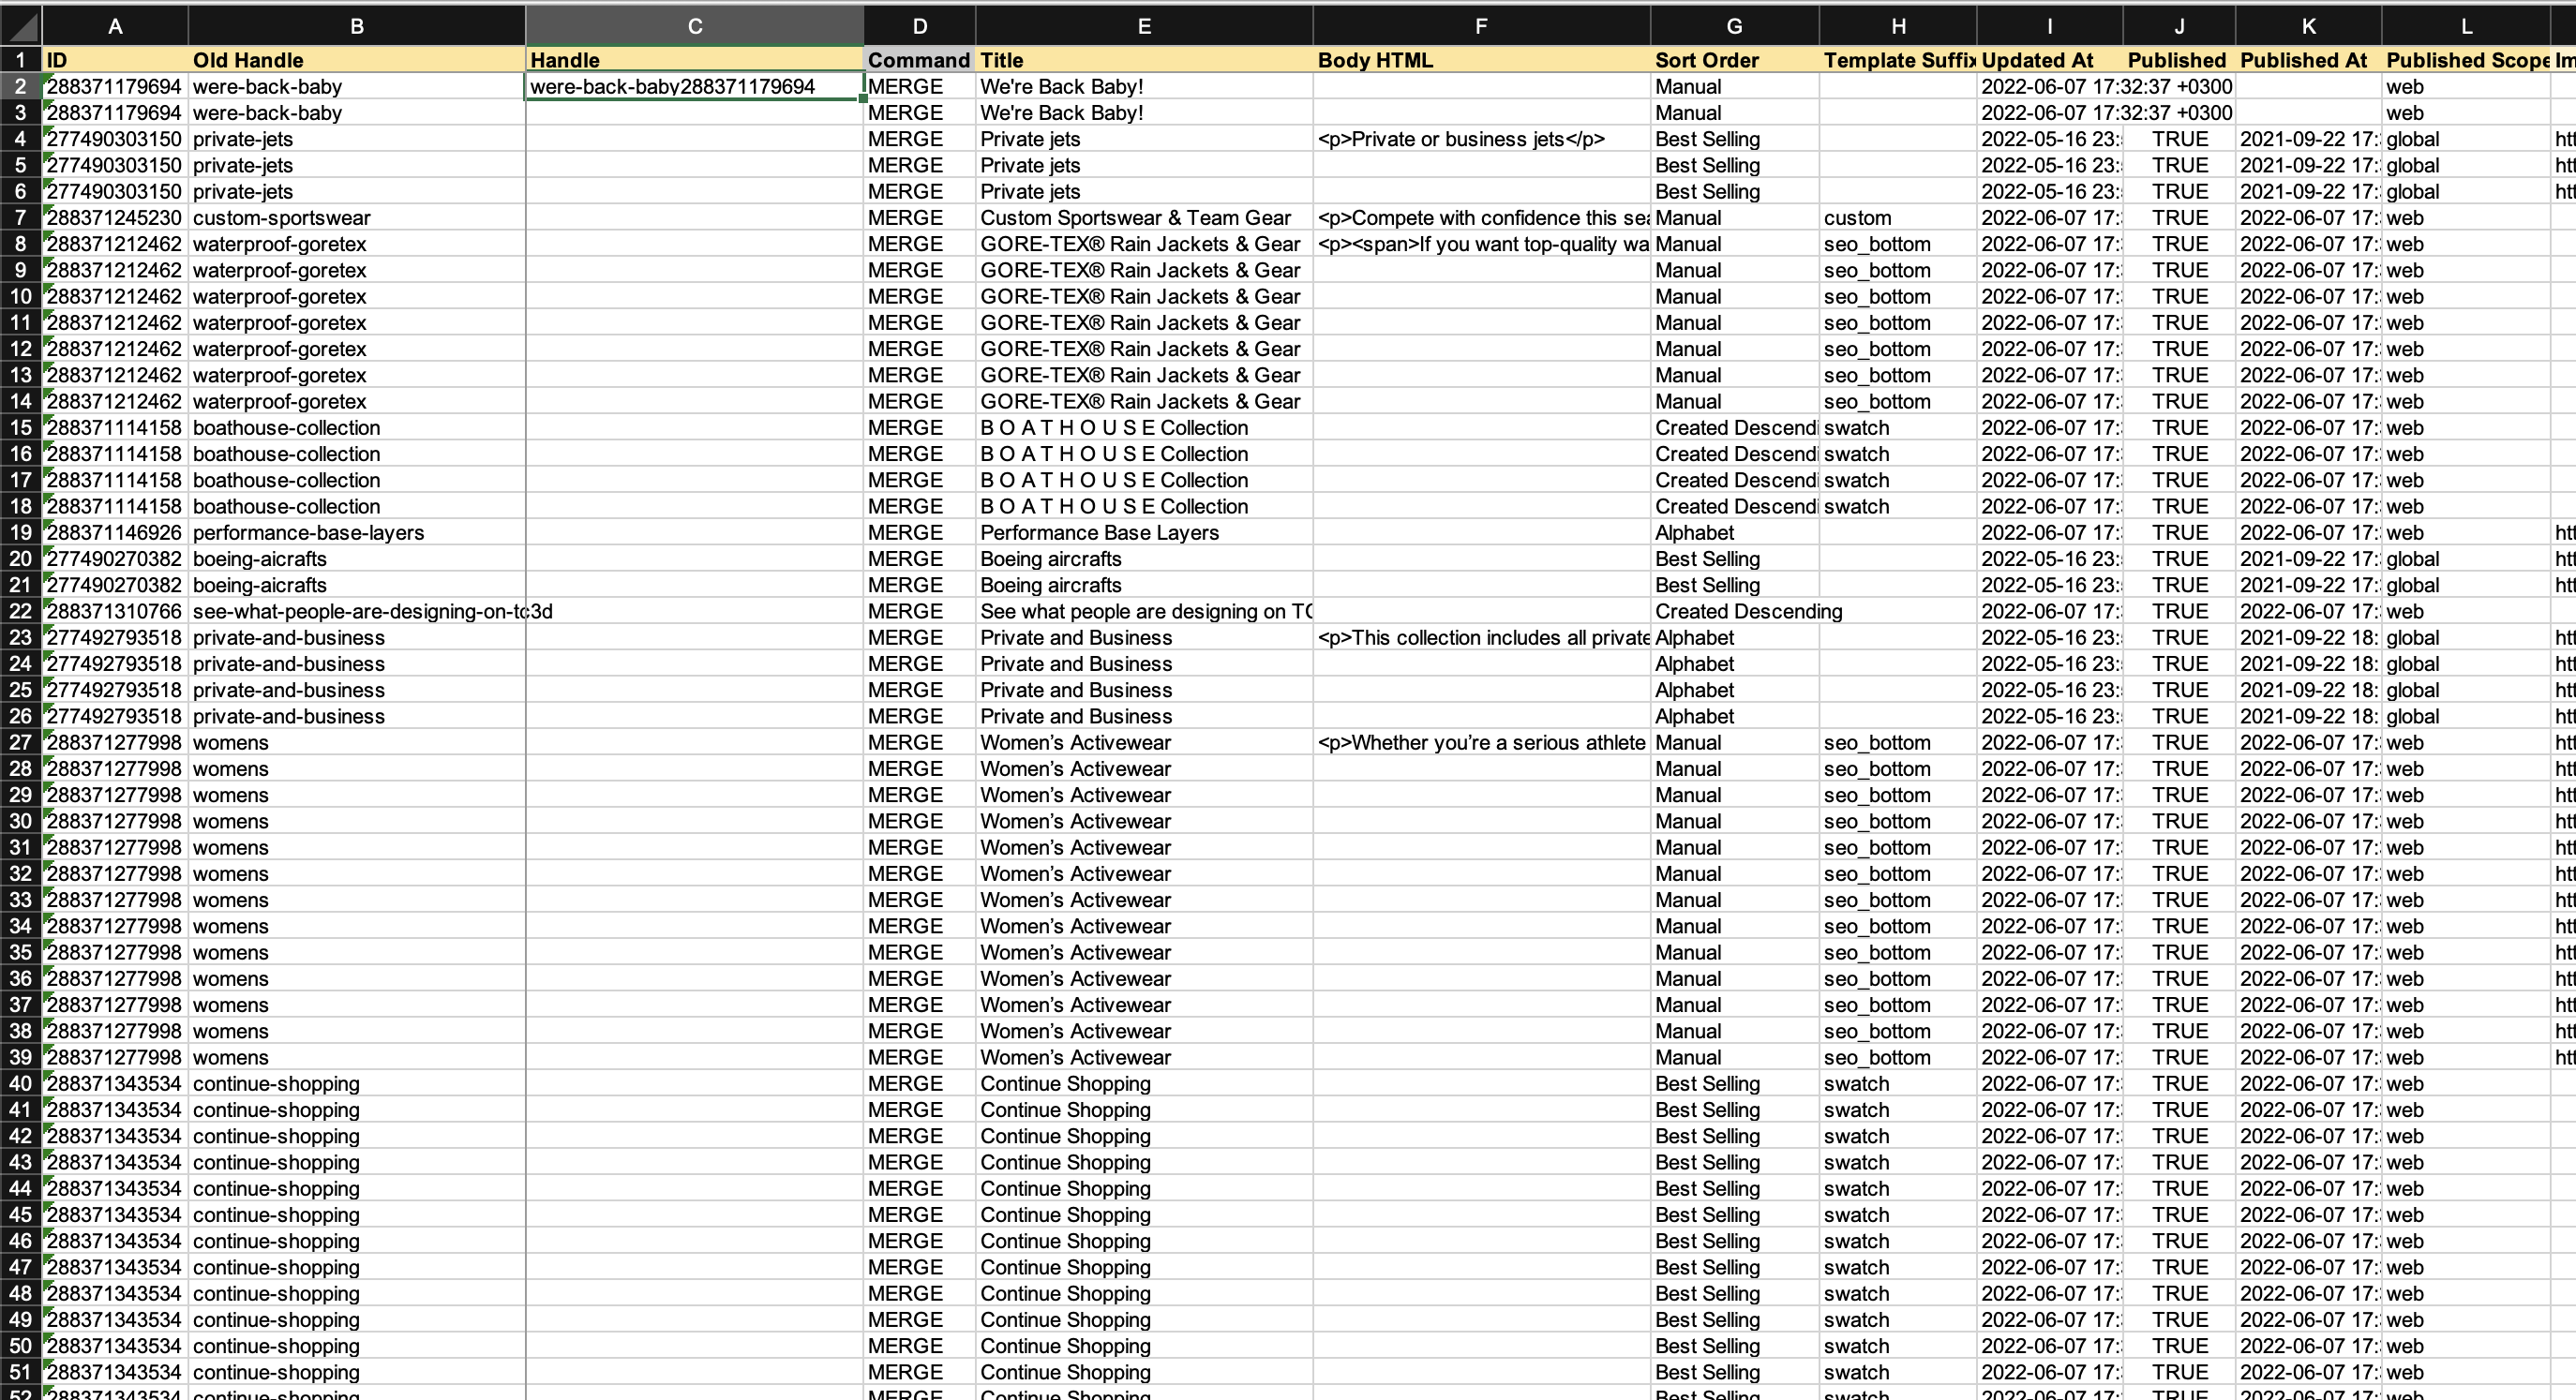
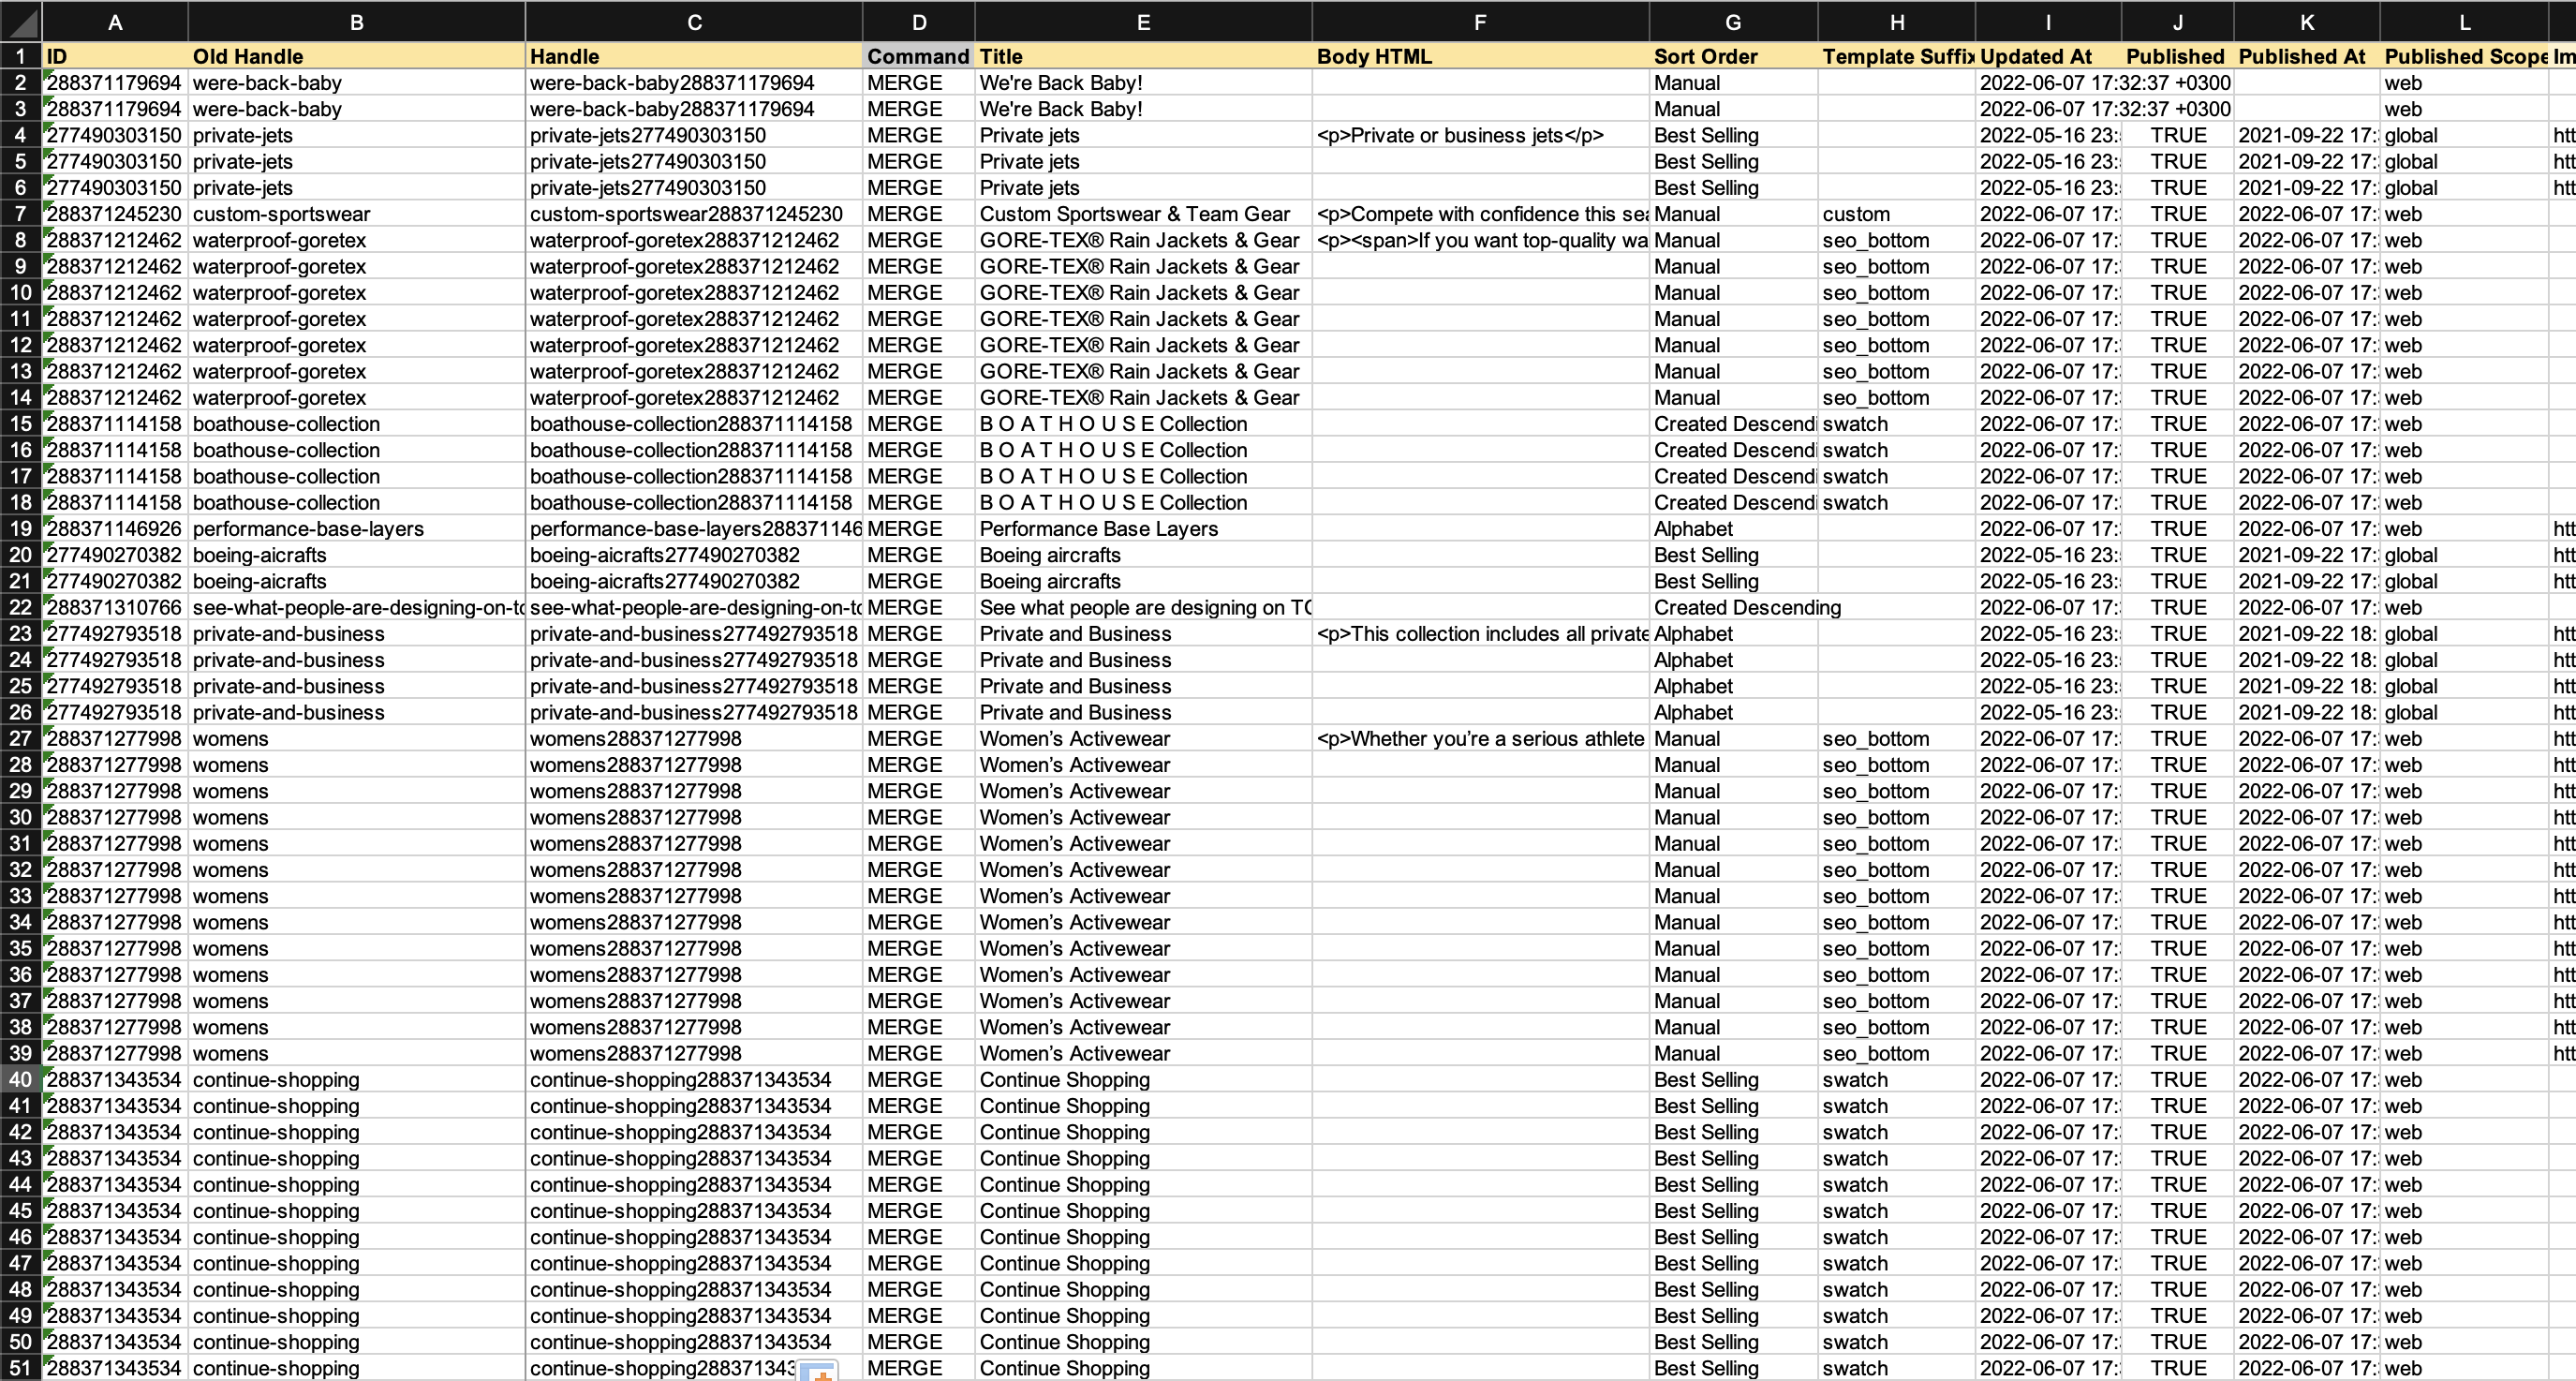
Now we have filled the file with our new Handles so we can import save this file and import without any more edits.
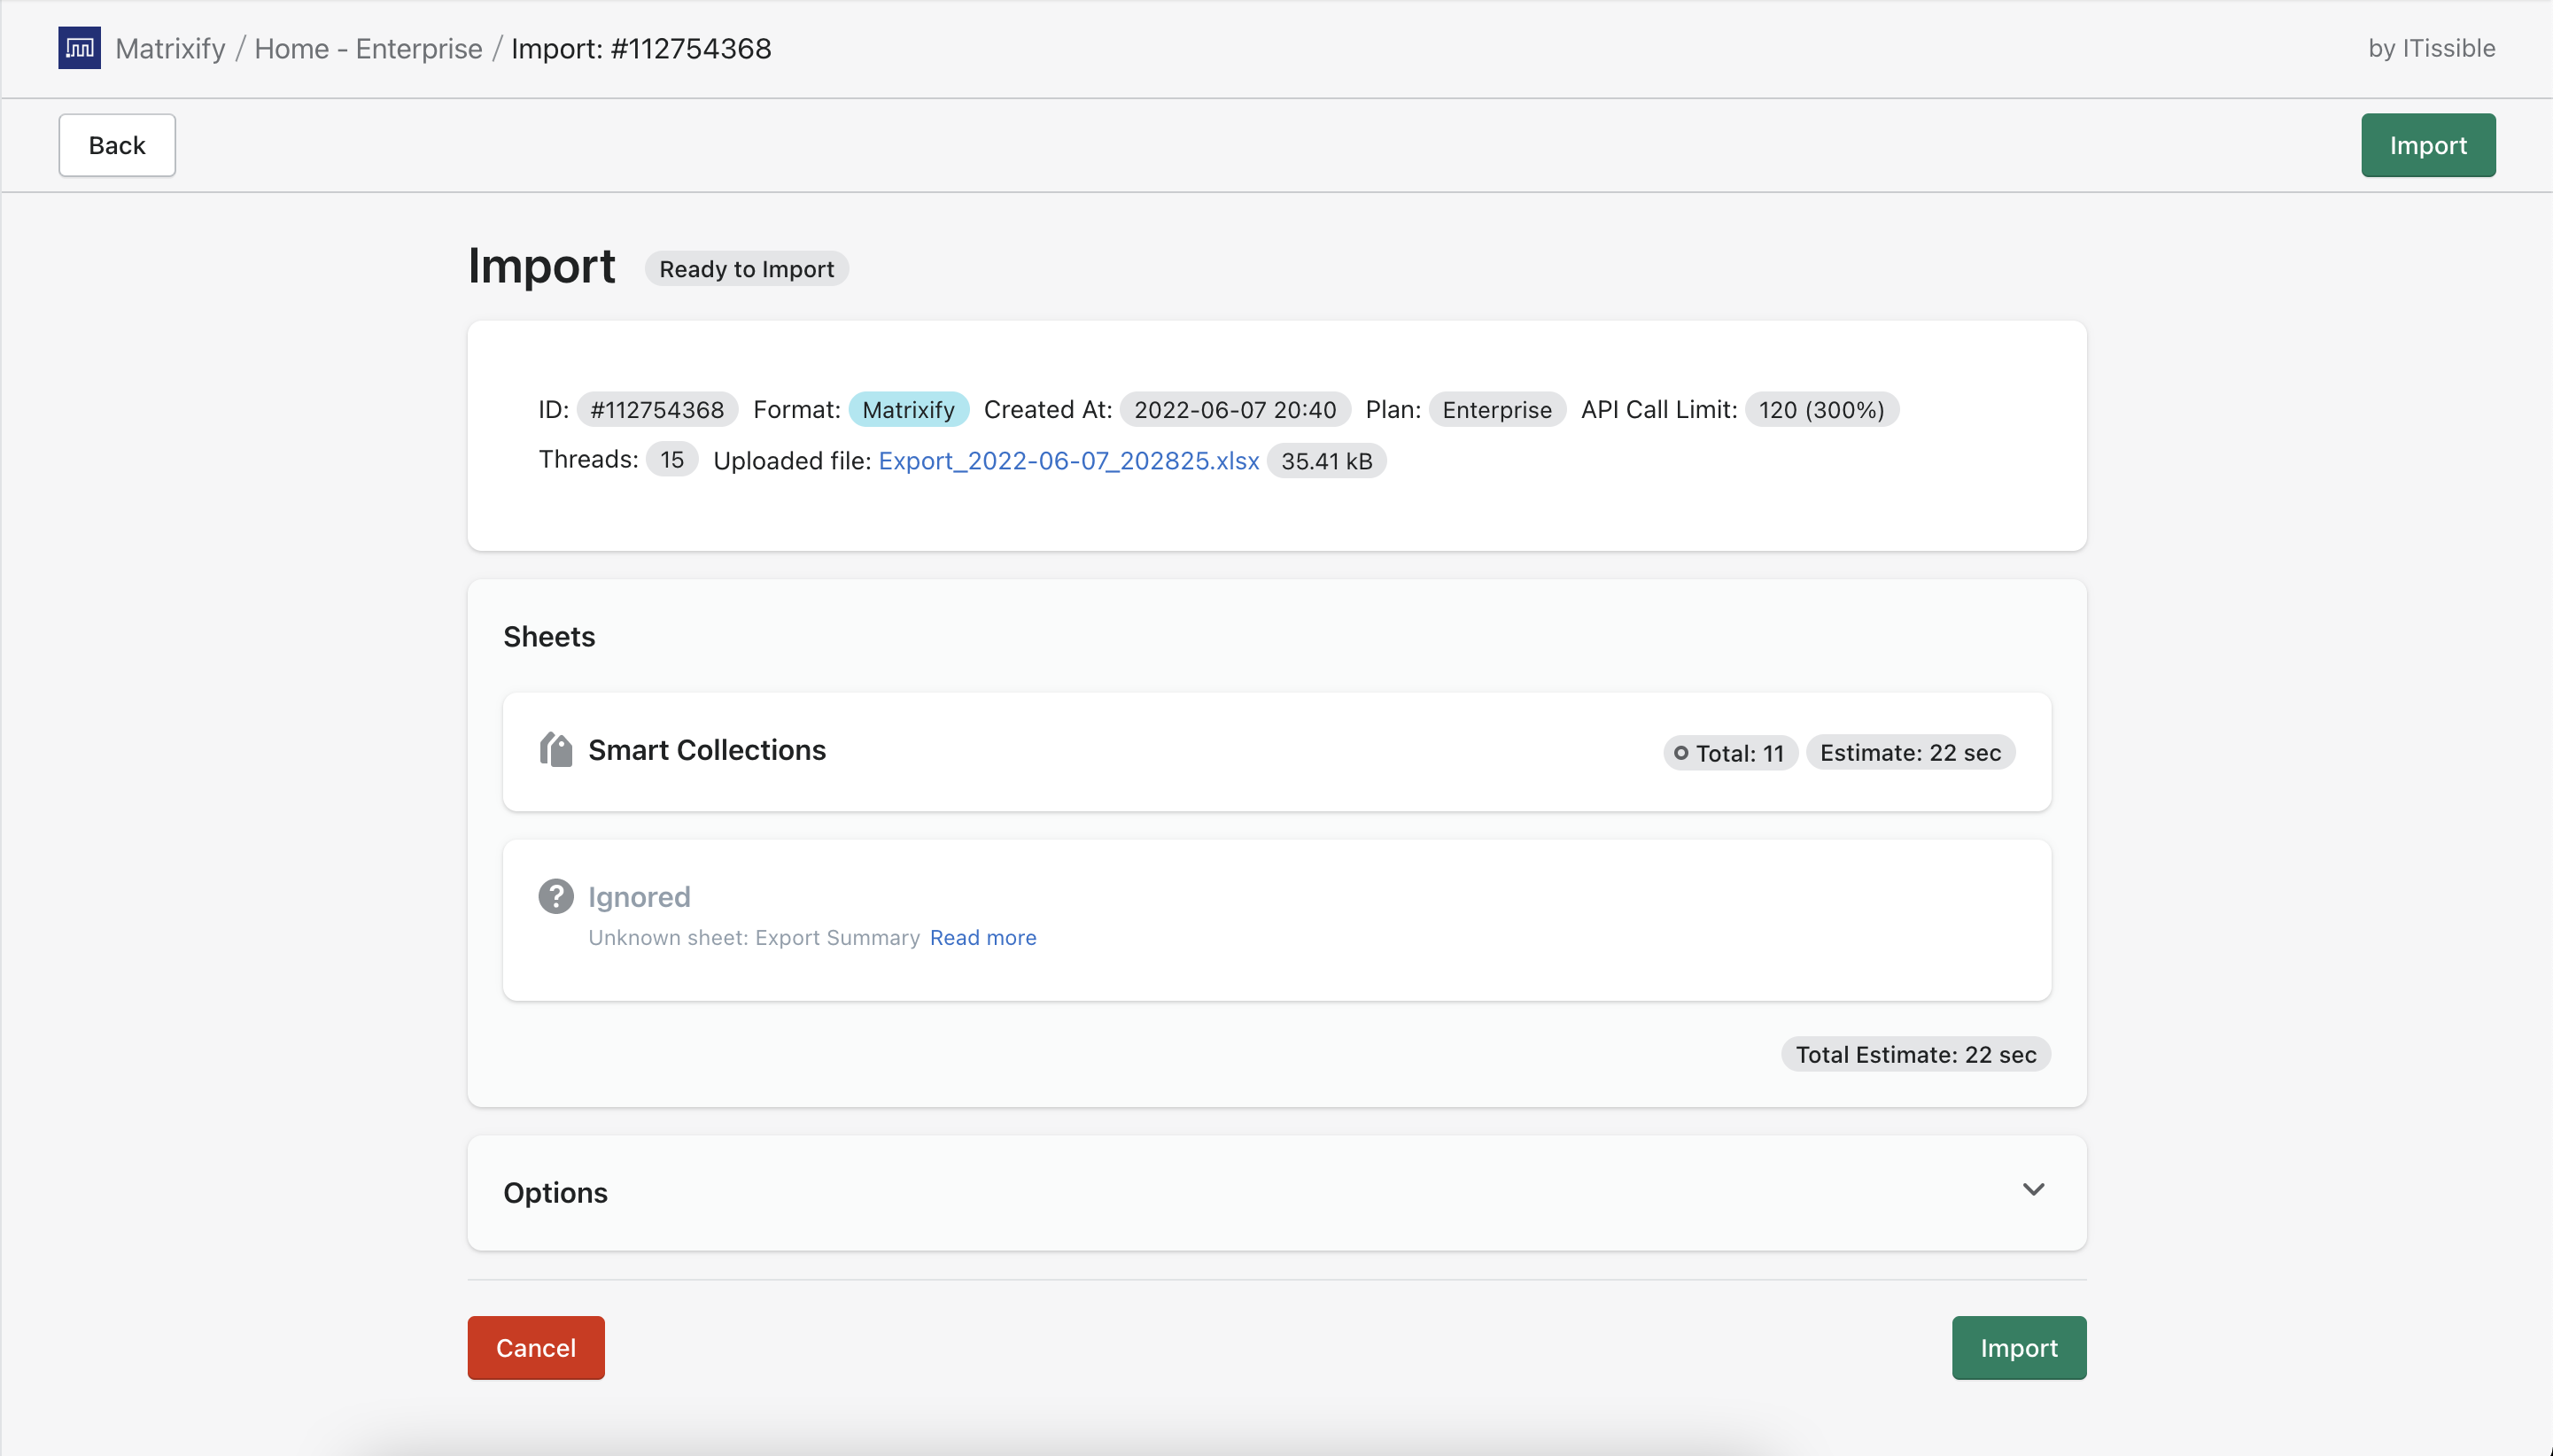
Go into the Matrixify app Import section, upload the file and wait for the app to finish analyzing the file.
Once the import shows as “Ready to import“, make sure that the app correctly recognized your file as Smart Collections.
To tell the app that you are importing Smart Collections you need:
- If using CSV file then the file name needs to contain the word “Smart Collections”, for example, “my-shopify-smart-collections.csv”
- If using XLSX file then the sheet/tab name in the file needs to be “Smart Collections”. The file name for the XLSX file does not matter.
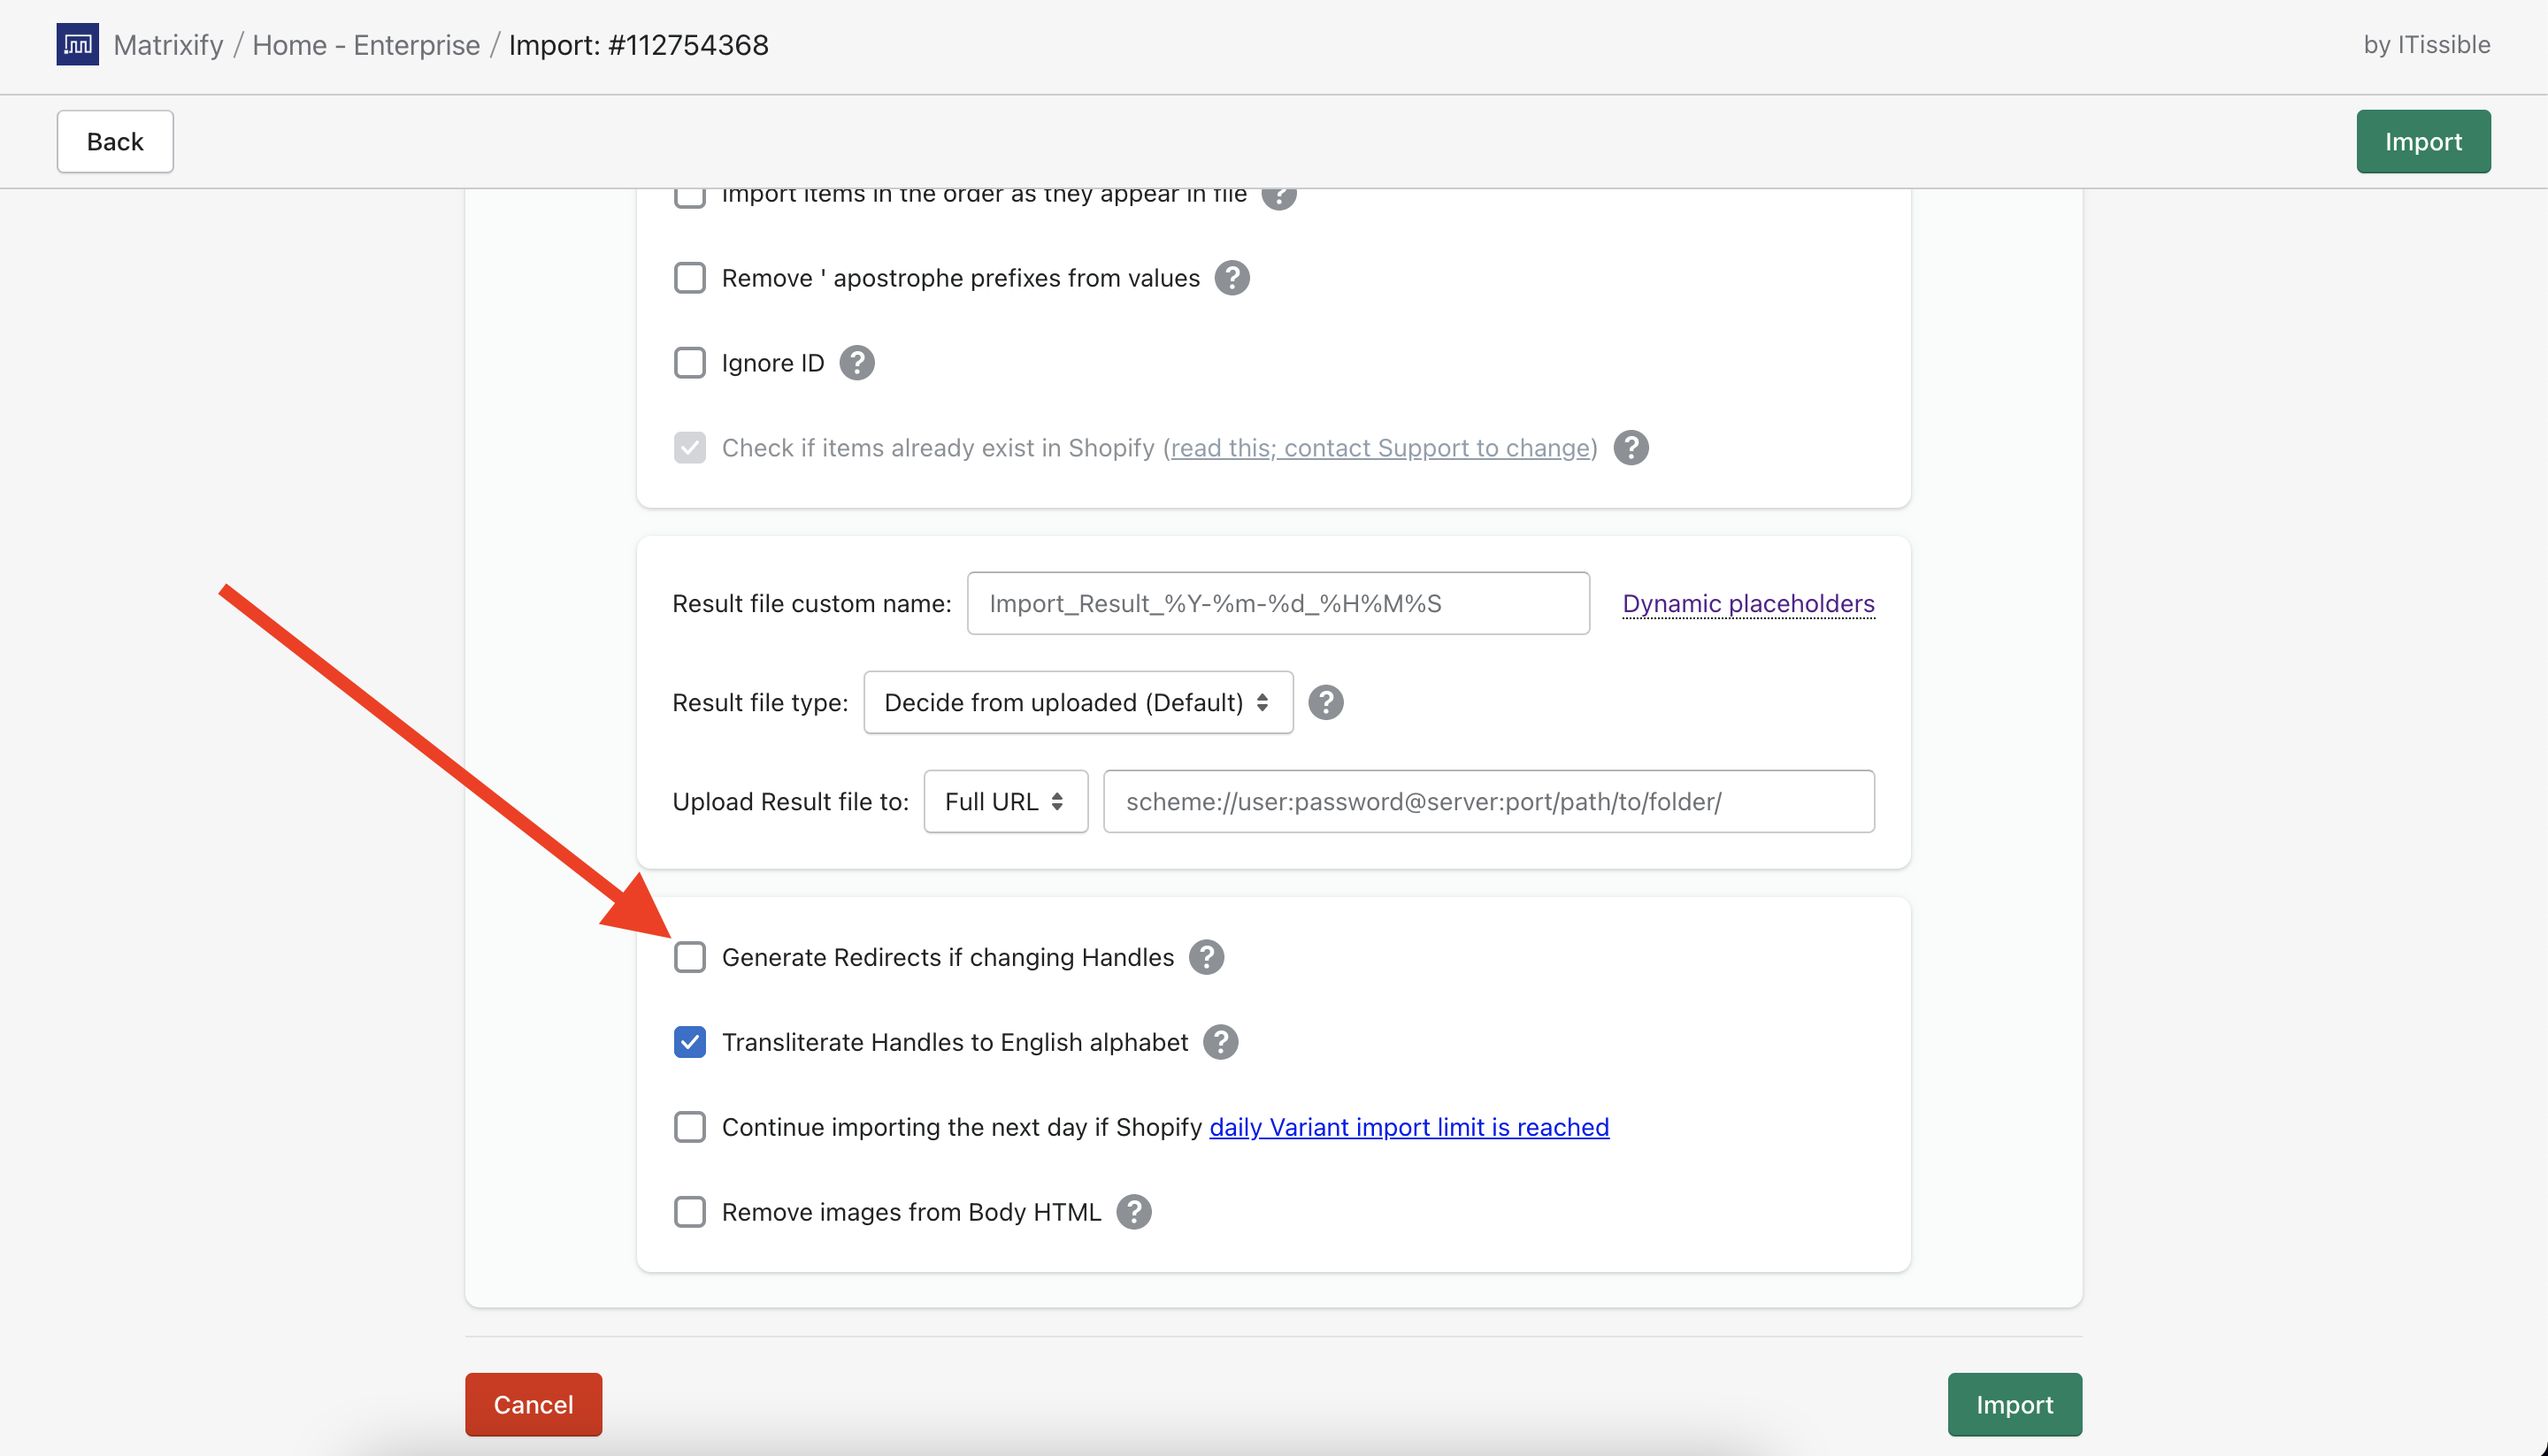
Once you have uploaded the file, open the Options section and un-check option “Generate Redirects if changing Handles” so that no redirects are generated in the store when updating these Handles.
Once you are ready, press the “Import” button to start the import.
3. Download previously exported file and import as Custom Collections
While the import is running to update the Handles for your Smart Collections we can prepare the file to import our Custom Collections.
First, navigate back to the Export section of the app and download the exported file again so have a fresh file without any edits.
No need to start new export as our previously exported file has all the information.
In the file locate the sheet/tab name “Smart Collections” and rename to “Custom Collections“.
Nothing more needs to be edited.
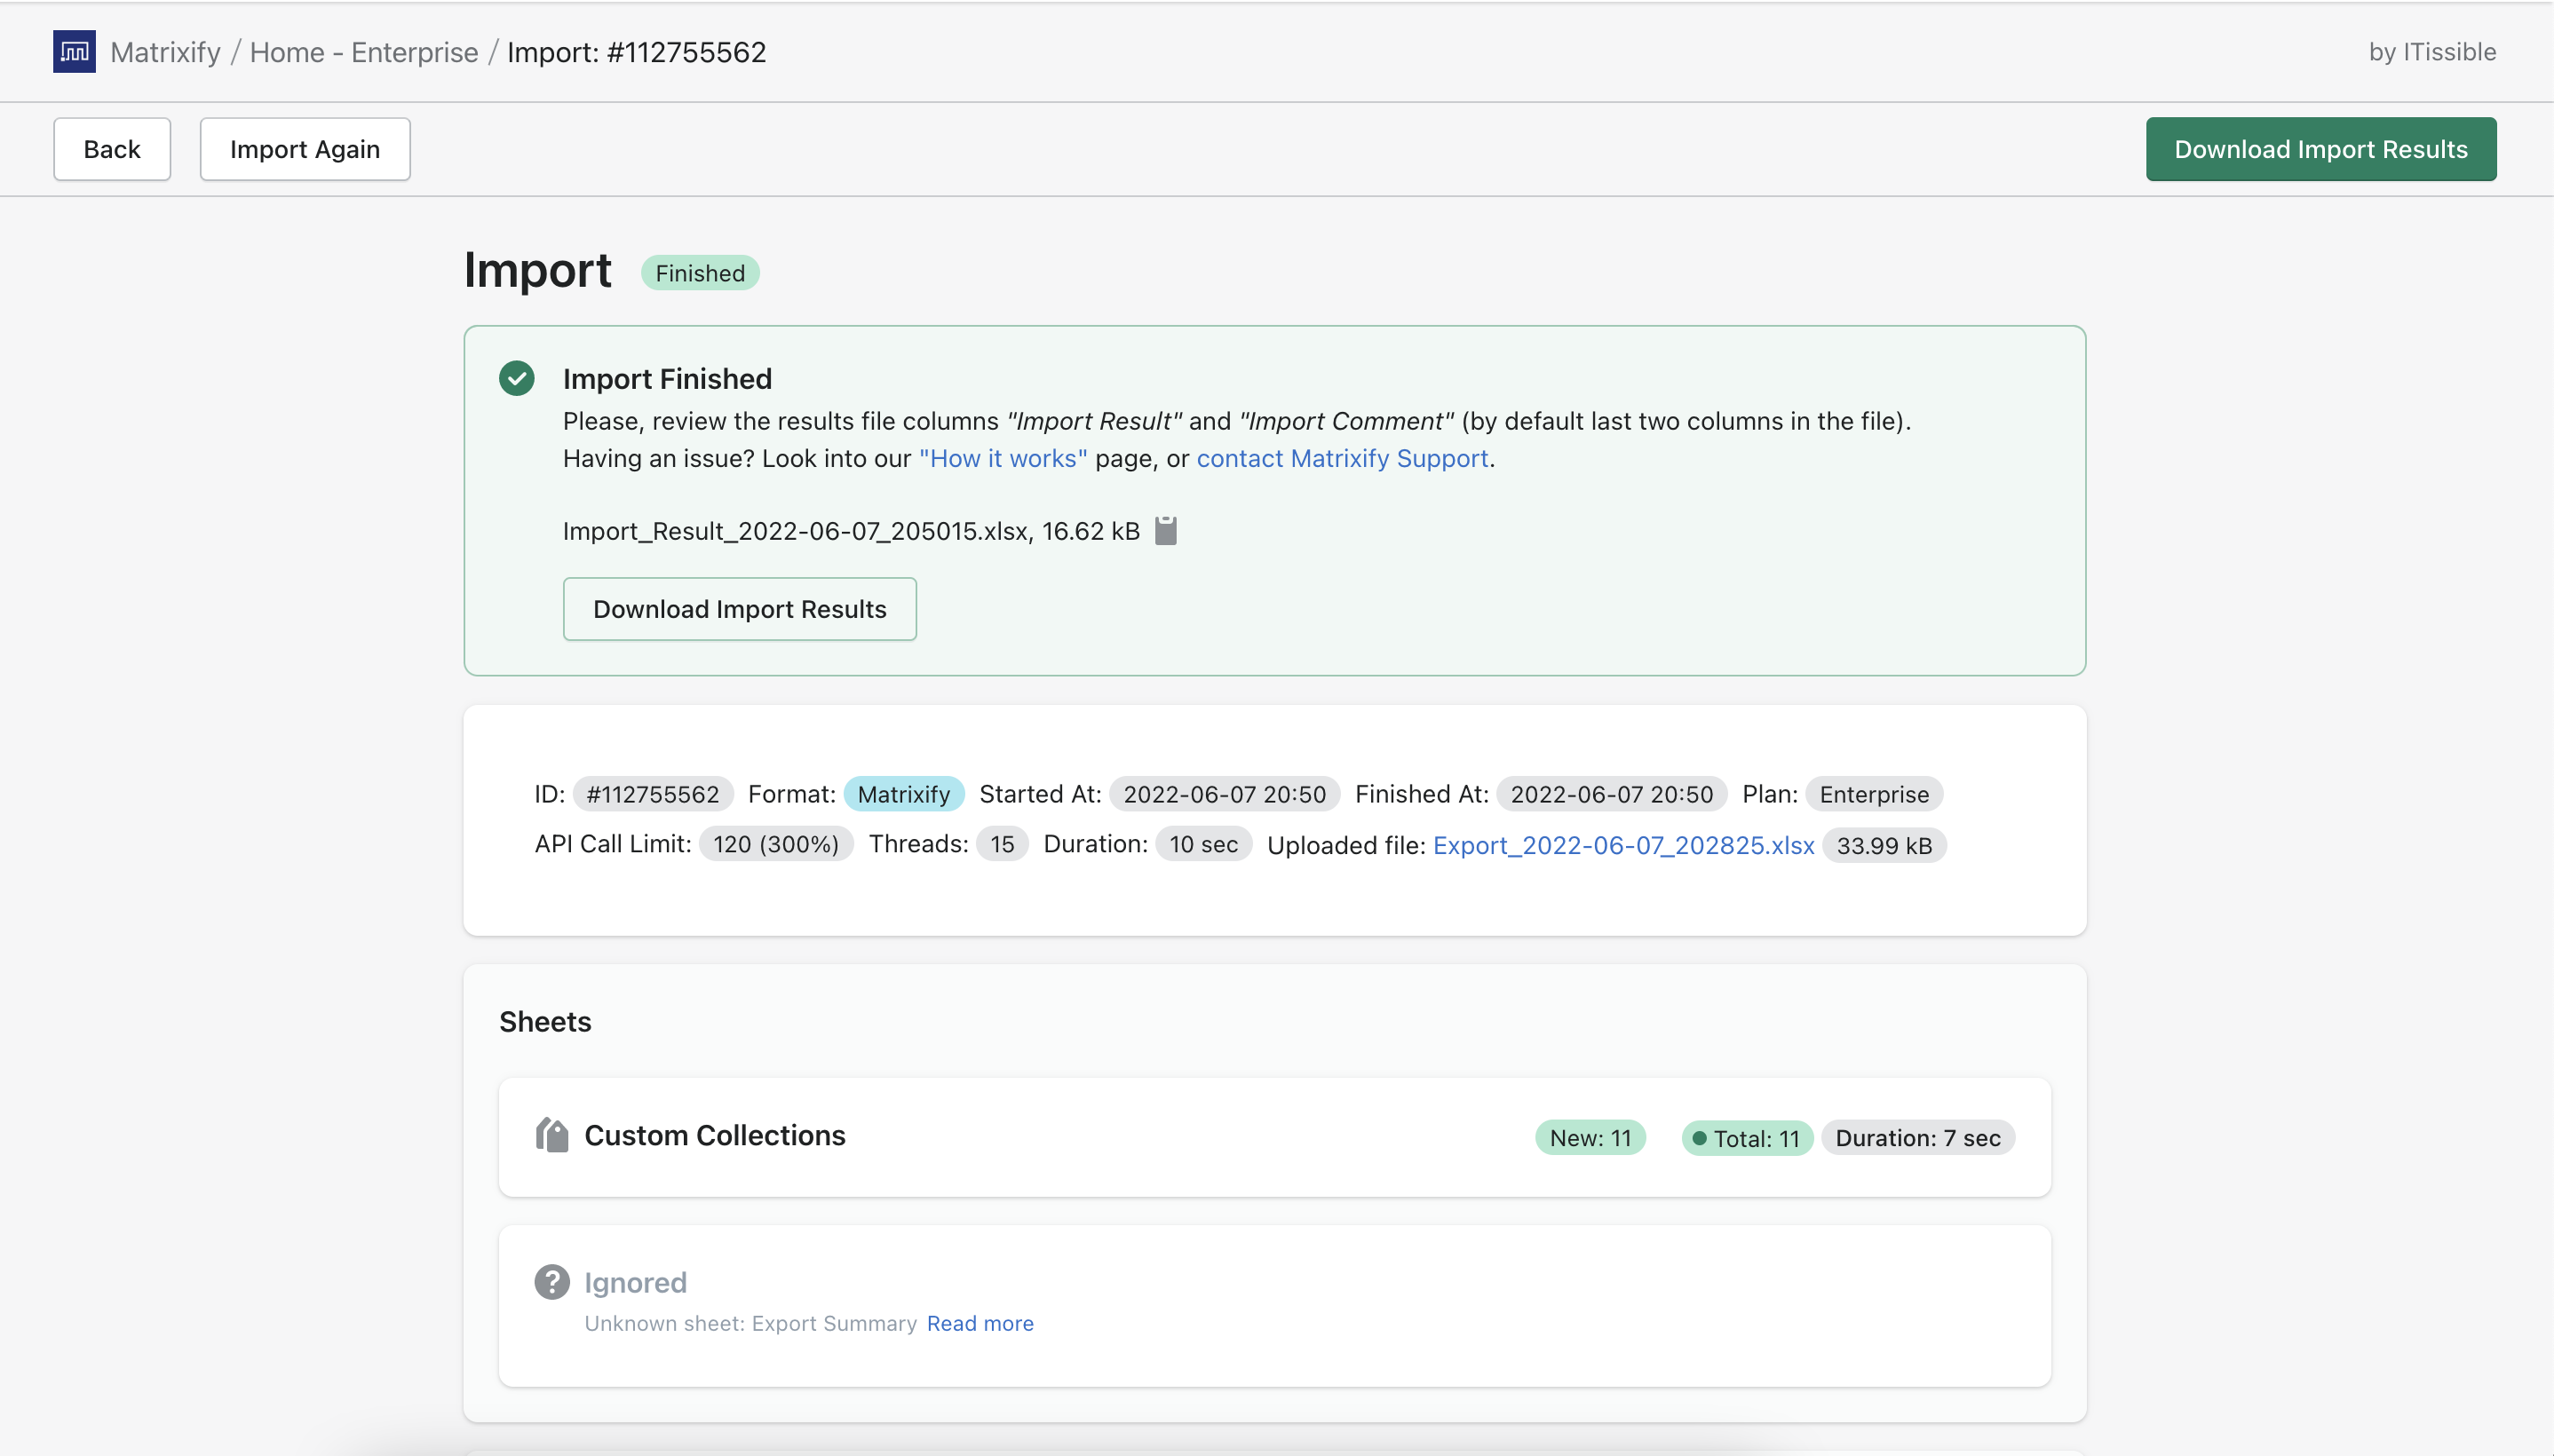
Now, wait for the previous import to finish and once it’s done import this file to create Custom Collections.
Once the file is uploaded make sure that the app recognized the sheet as Custom Collections.
4. Download previously exported file and set to delete old Smart Collections
Now you have created the Custom Collections with all the items and images (because of the images we needed to first create Custom Collections and only then delete old Smart Collections).
Make sure that your new Custom Collections have all the images and products there.
The last step to do is to delete old Smart Collections.
To do this again download previously exported file from the Matrixify export section without creating new export.
Since the Handles now are updated then to minimize the confusion we will delete all columns that we do not need. Here we only need the following columns:
- ID
- Command
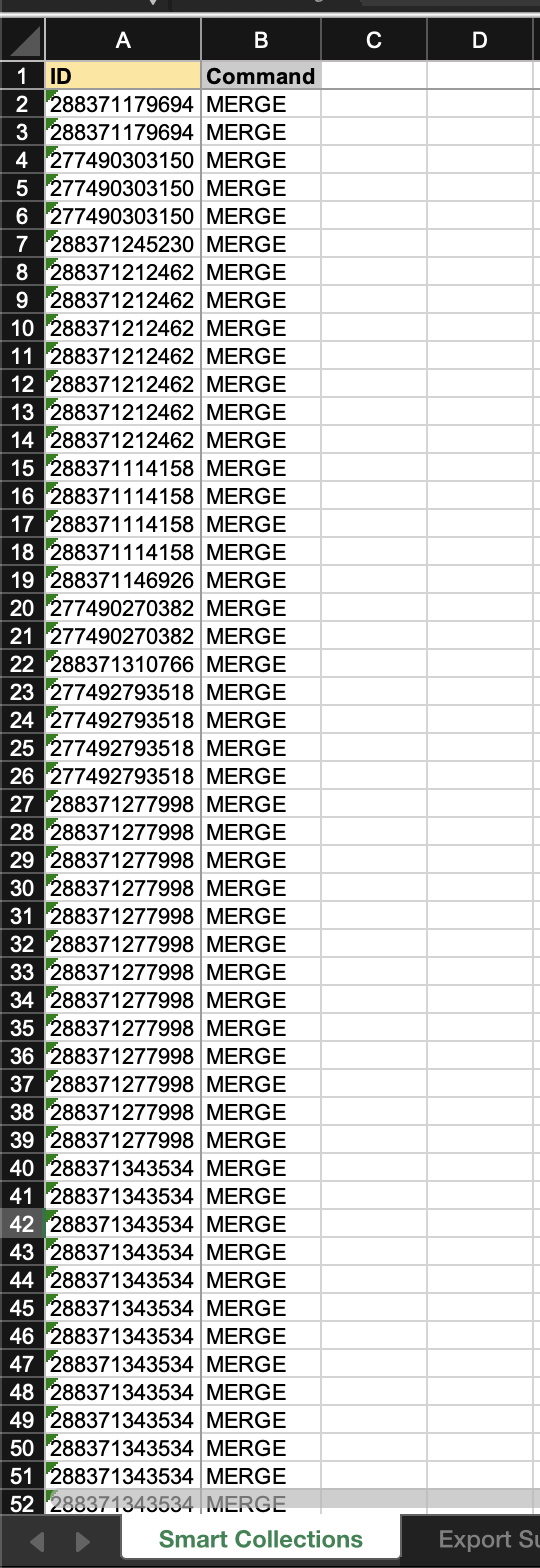
Once that is done we change the “Command” columns value to “DELETE” by filling it in the second row and double-clicking on the small square on cells bottom right corner.
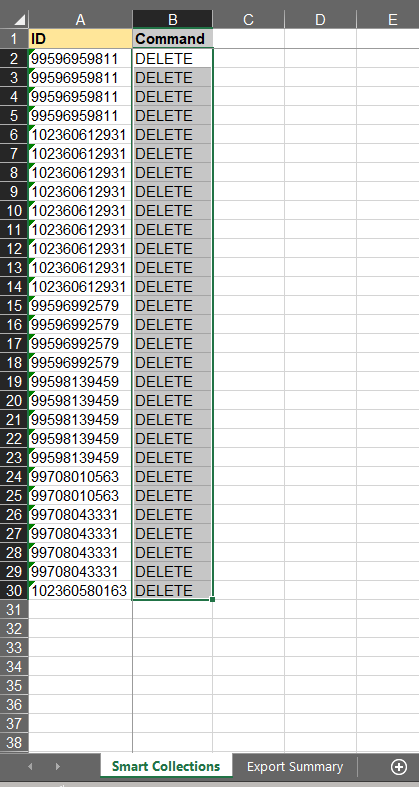
Make sure that the sheet name is “Smart Collections” as we will be deleting those.
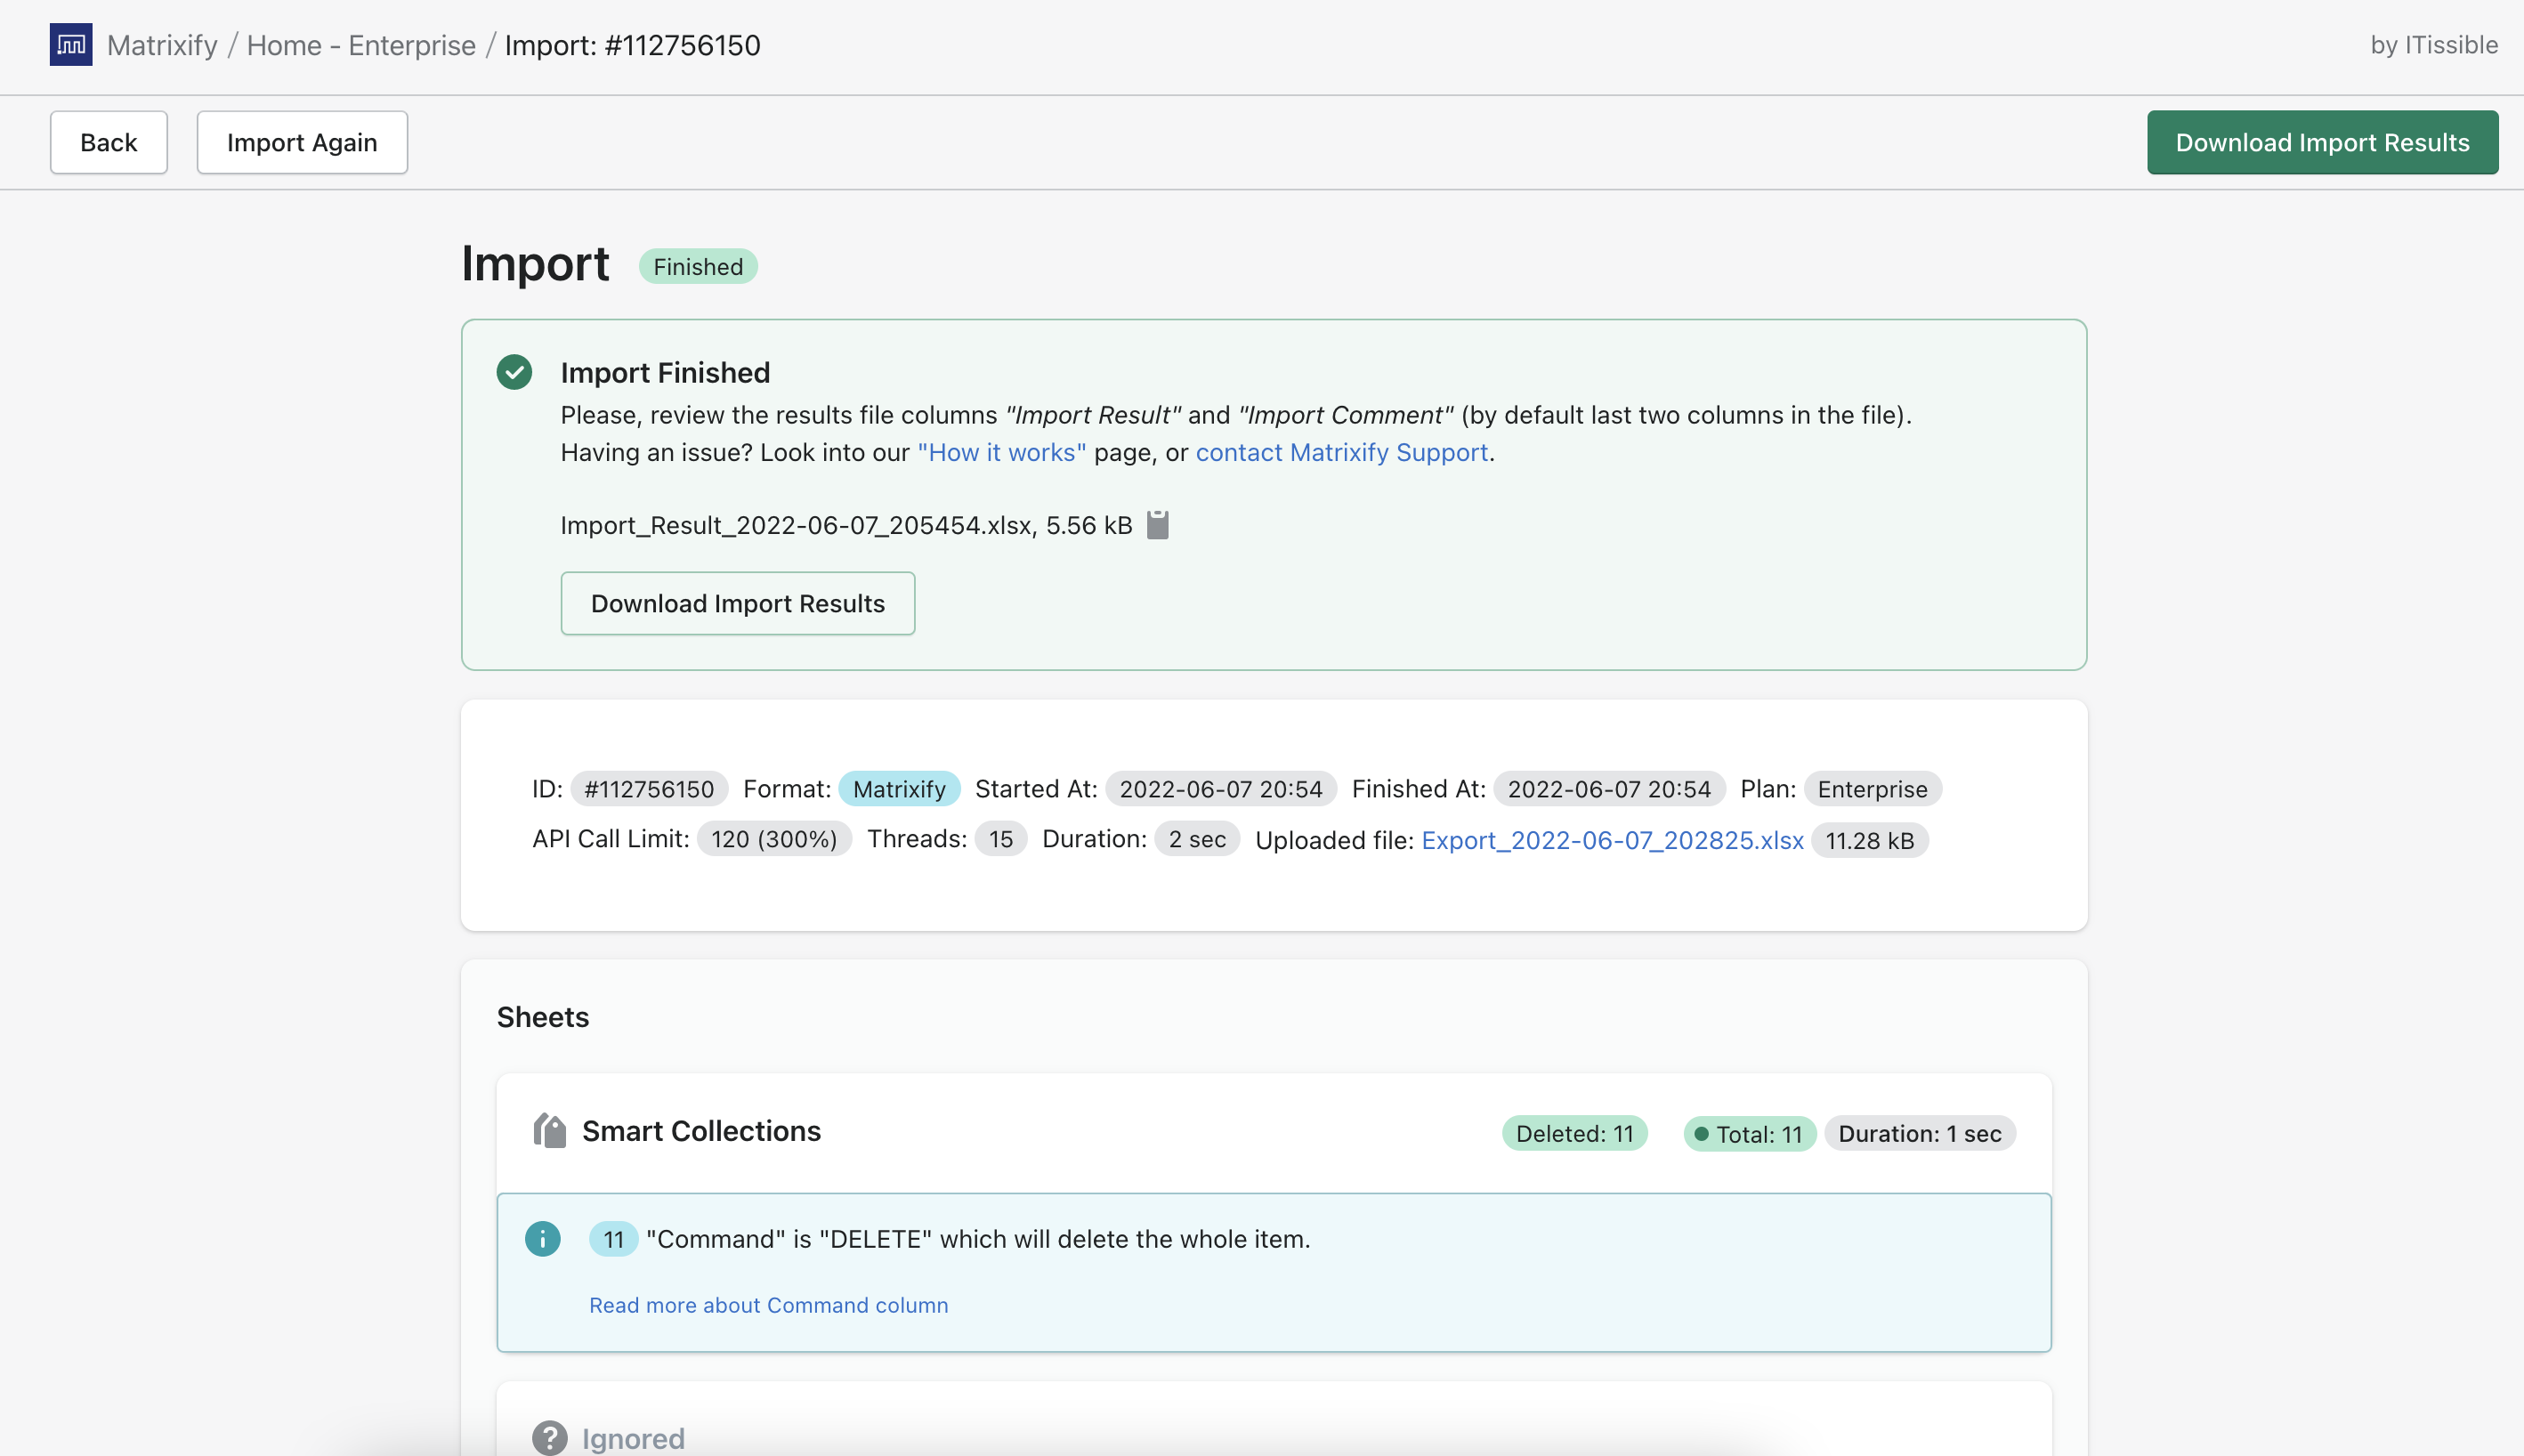
Once that is done we again go into the Matrixify Import section and assuming that the previous import is finished we upload the file.
Double check if the app understood that you are uploading Smart Collections and press the “Import” button.
5. Enjoy!
Once the import will be finished all those Smart Collections will be deleted. Now you only have Custom Collections in your store so you are no longer affected by the Shopify 5000 Smart Collections limit.
What to do next?
- Install the Matrixify App.
- Check out the documentation for our Custom (manual) Collections sheet or Smart (automated) Collections sheet.
- Check other collection related tutorials.
- Contact Matrixify support if you run into any issues or have additional questions.


