
Adding your Shopify Metobject entries manually might be a long and dull process. Make it simpler by using the Matrixify app and create your Metaobject entries in bulk with an import, making your Shopify store management more efficient.
Let’s dive in!
Steps in short to bulk import Shopify Metaobject entries
- Set up Shopify Metaobject definitions in your Shopify Admin -> Settings -> Custom data section.
- Prepare your Excel import file with the necessary columns in the Matrixify Metaobject template.
- Import Metaobjects into your Shopify store with the Matrixify app.
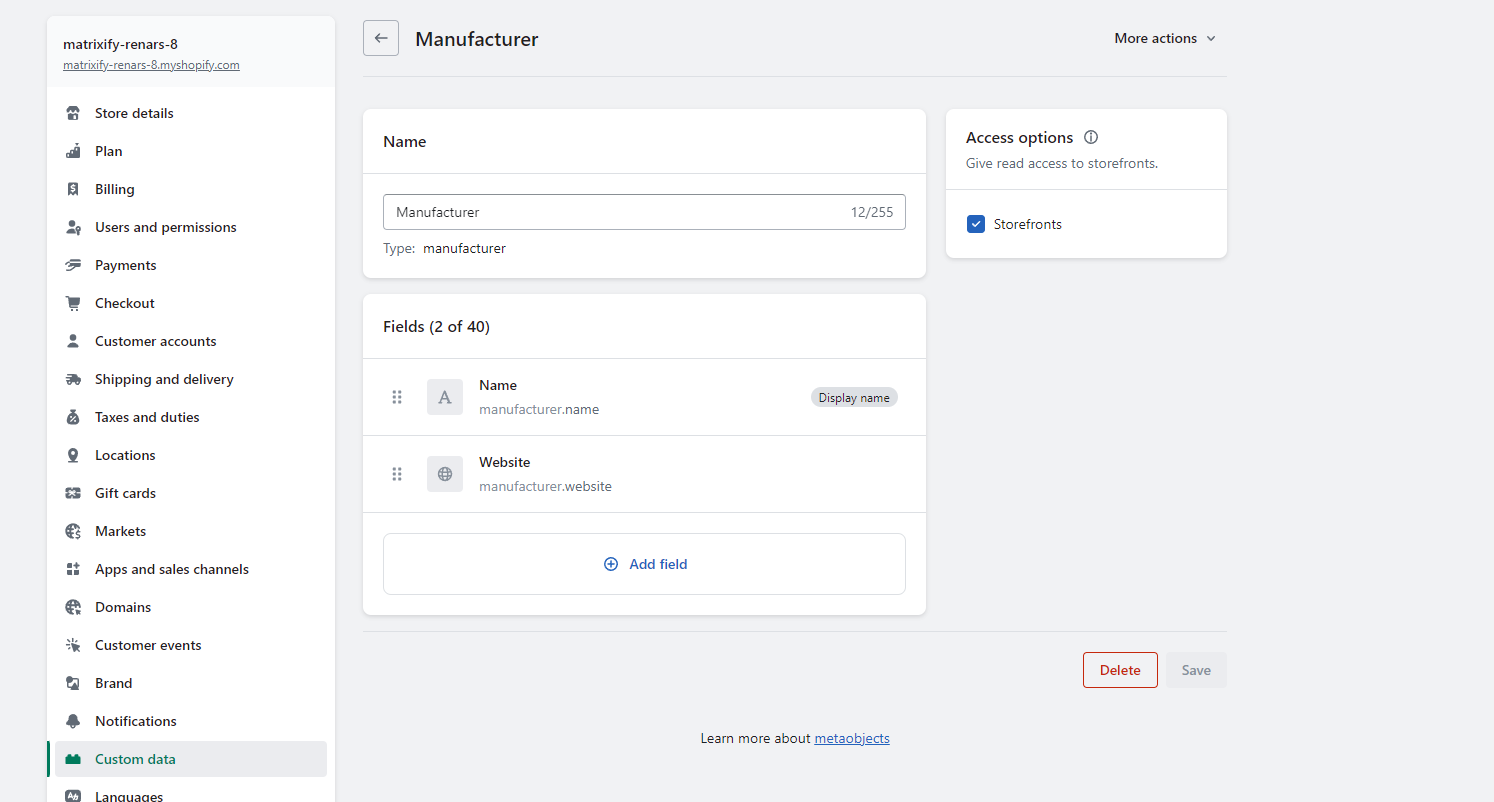
1. Set up Metaobject definitions
Setting up Shopify Metaobject definitions is an important first step before you can import Metaobject entries using the Matrixify app.
Each Metaobject entry is linked to a specific Metaobject definition. So those definitions do need to exist in the store before importing entries.
Navigate to your Shopify Admin -> Settings -> Custom Data section.
Create Metaobject definitions with fields and their types as you need.
Note that the types you set in the definition fields will change how the values are written in the Metaobject entries.
You can see Shopify Metaobject manuals for more details about how to set up definitions, what types you might need, and other data.
It is important to first understand what fields and types you need and only then import your entries.
For this example, we will create the Metaobject definition “Manufacturer” with two fields “Name” as Single line text type and “Website” as URL type.
Once you have definition/s set up, we can move into creating an import file.
2. Prepare your Metaobject entries import file
To create your Metaobject entries import file first download the Matrixify Metaobjects demo template file.
In this file, you see one example, with only fields that are required for this import.
Now you can start filling in the file with your own data.
Data structure
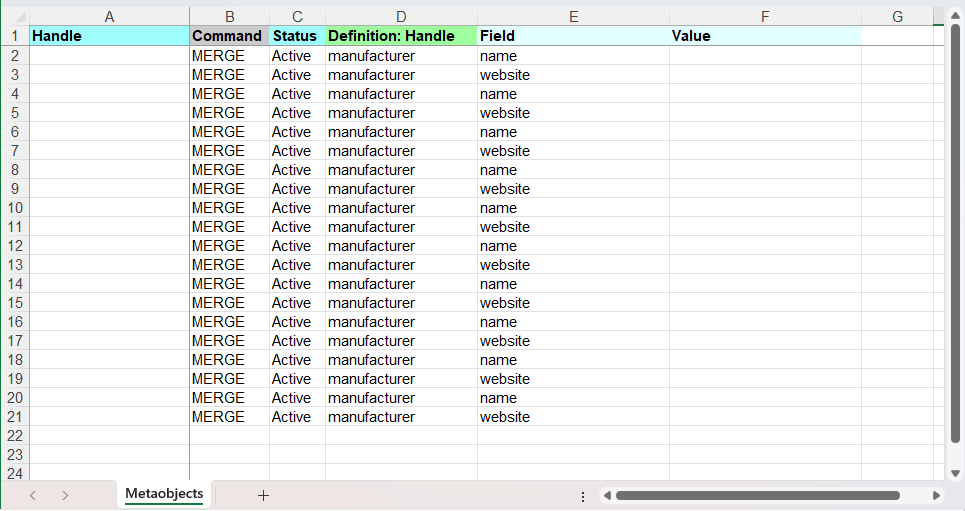
The structure of the file is simple – for each entry, you need to have as many rows as there are fields set up in the definition.
Our example definition had two fields, then the import file also will have two rows per entry.
As an example, we will import 10 entries. In the file, we will have 20 rows filled with Metaobject entry data + 1 row for the column headers.
Filling in your own data
From there we can now fill data in Command, Status, Definition: Handle and Field columns (See Matrixify Metaobjects documentation page where each column from our template is explained).
Commandcolumn would be set to valueMERGEas the default value.Statuswould be set toActiveas we want for all those definitions to already be active.Definition: Handlewould be filled in all rows to the value that is linked to the entries. You can find this value in the Metaobject definition under “Name” section, field called “Type”.
In our example, the definitions handle will bemanufacturer.Fieldcolumn would have both fields listed repeating so that both rows from the same entry are next to each other.
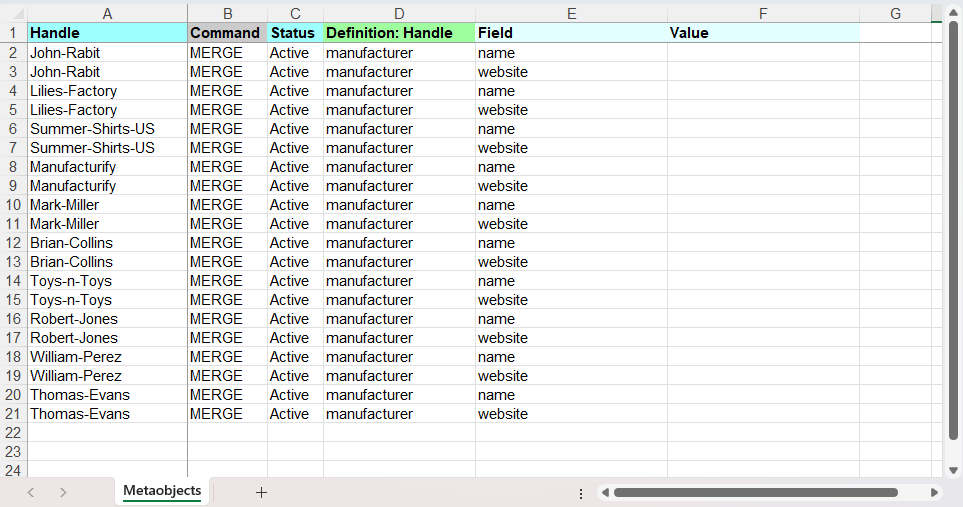
Then we can fill in the data for the Handle and Value columns.
In the Handle column, you need to set what will be the entry’s unique identifier.
Shopify by default will set the Handle and Display name from the value filled in the field that is assigned as “Display name” in the Metaobjects definition.
In our example, this is the Name field so let’s fill the Handle columns with manufacturer names.
Note that in the Handle column, you cannot have special characters or spaces. If you see the error, Handle is invalid returned when importing, then likely you have some special characters or spaces left in the Handle for that Metaobject entry.
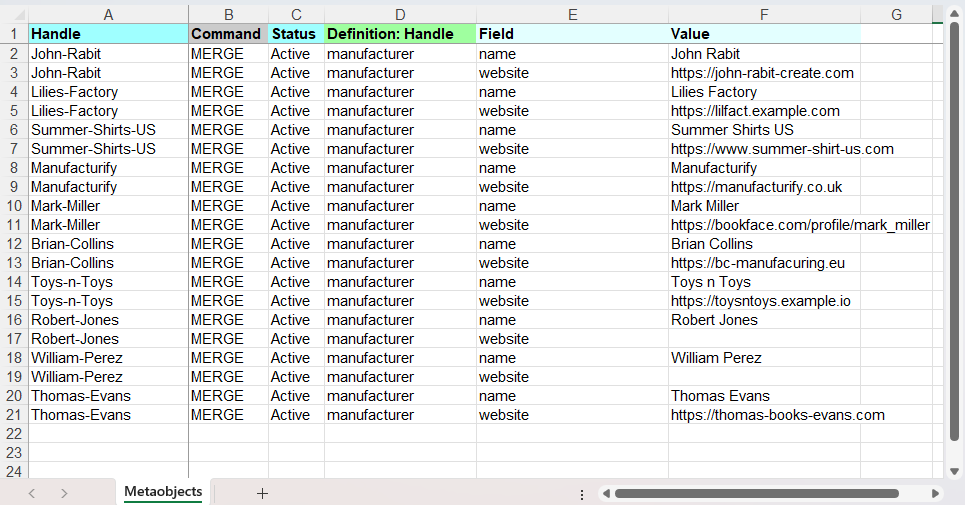
For the Value column we need to fill in the actual values for each Shopify Metaobject entry:
Correct sheet name
Once you have your data filled in the file, you need to do a last step before importing – making sure that sheet name is set correctly.
If using Demo file as per this tutorial, then sheet/tab name in the Excel file should already be Metaobjects.
If using CSV file, then make sure that file name contains word “metaobjects”.
3. Import Shopify Metaobject entries
Now that file is set up, go into the Matrixify app in your Shopify store.
In the app Home page Import section, you can upload your file.
Wait for the app to analyze the file’s data and ensure that app correctly detected the import as Metaobjects and that the Metaobject entry count is correct.
See our “How it works” page for more details about the import process.
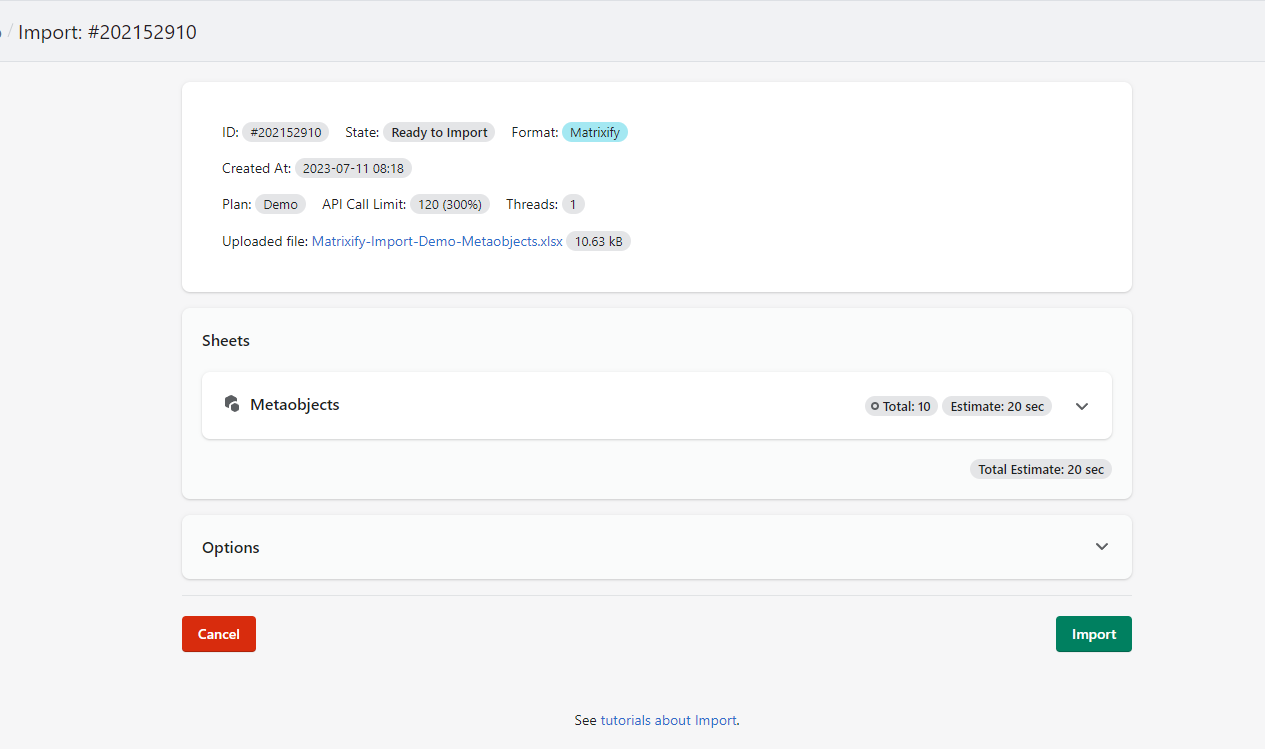
If all looks correct, press the “Import” button and start the import.
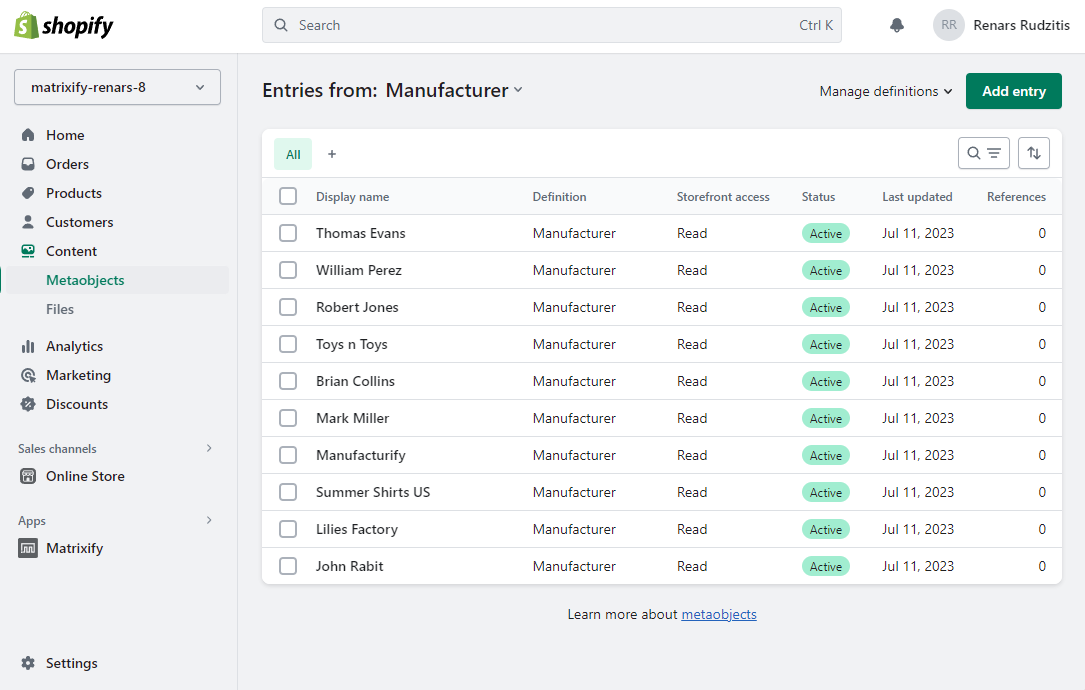
Once your import is finished, head into your Shopify Admin -> Content -> Metaobjects section and enjoy your newly bulk-created Metaobject entries.
Good to know
- If you see errors returned for your Metaobject entries in the import file, you can download the Import Results file and in it see an exact error message and for what Metaobject is the error. Fix the issue in the same Results file and import back to update those that imported and create those that did not.
- When importing Metaobject entries with fields that are reference type (product reference, variant reference, etc.) – we check if this reference already exists in your store. If that does not exist, we assume that it will probably be imported later with the other sheets in the same file. So we automatically generate a new sheet “Generated Metaobjects” and add those Metaobject entries as rows to that new sheet. When all the other sheets are imported, then we again import the Generated Metaobjects sheet, with the assumption that now when all the data is imported, we will find those references for those particular Metaobject entries. This feature allows you to properly migrate Metaobjects between different Shopify stores, including Metaobject entries with reference type fields.
- If your Metaobject entry import has an error “Capability is not enabled: publishable”, it means that you are importing
Statuscolumn value, but Metaobject definition has “Active-draft status” option disabled. To resolve the issue either ensure that theStatuscolumn is not in the import file or has an empty value, or enable the “Active-draft status” option for the Metaobject definition. - In Shopify, you can use Metafields, instead of Metaobjects, to save your custom data at an item level. See our Tutorial on how to bulk manage Shopify Metafields.


