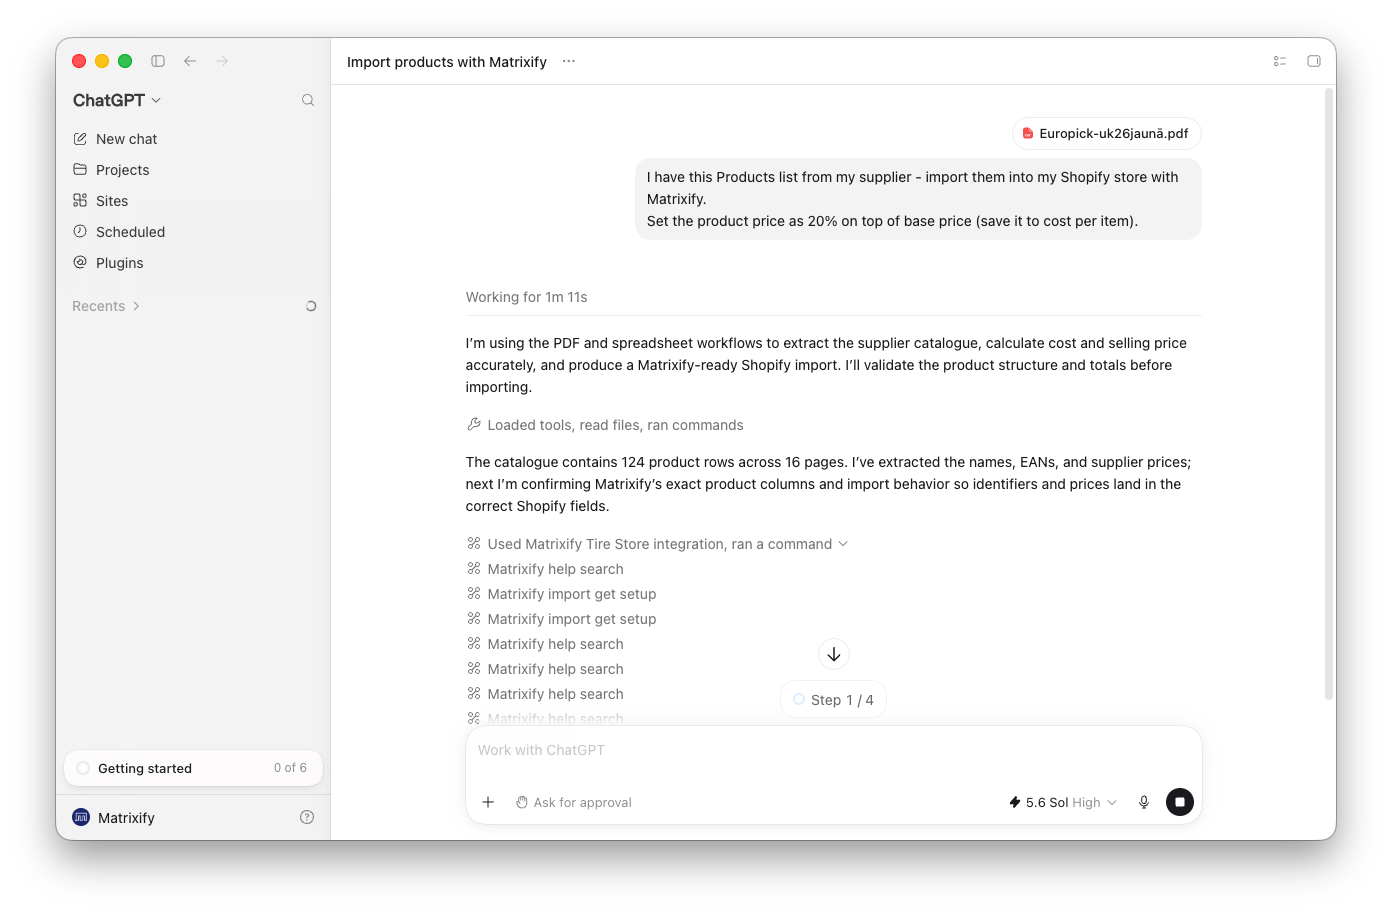
If you already use ChatGPT to draft Product descriptions, plan promotions, or make sense of a messy supplier spreadsheet, the Matrixify MCP connection lets you take the next step: actually changing your Shopify data from inside that same chat. Instead of copying ChatGPT’s output into a file and running an Import by hand, you connect ChatGPT directly to Matrixify and let it do the work – reading your store, building the Export or Import for you, and reporting back when the job is done.
The connection runs over the Model Context Protocol (MCP), an open standard that lets ChatGPT securely call Matrixify’s tools on your behalf. Once it’s set up, you can ask ChatGPT in plain language to Export products, update prices in bulk, Import a supplier feed, or check on a running job, and much more! Every one of those actions runs through Matrixify against your real Shopify store, with the same reliability you get from the app itself.
This tutorial walks through enabling MCP in ChatGPT Desktop, generating your Matrixify token, and connecting the two so you can take your Shopify data management to the next level.

Steps in short
- Install the ChatGPT Desktop app (if you don’t have it yet).
- Generate an AI Agent MCP Token in the Matrixify app Settings.
- Add the Matrixify MCP server in ChatGPT Desktop and connect.
- Manage your Shopify store in bulk by chatting with ChatGPT.
1. Install the ChatGPT Desktop app
To connect Matrixify to ChatGPT, you will need to use the ChatGPT Desktop app, which is where you can add and manage MCP servers.
If you already have the desktop app installed and signed in, you can skip ahead to the next step.
If not, download ChatGPT Desktop here, install it, and sign in with your ChatGPT account.
2. Generate AI Agent MCP Token
To let ChatGPT act on your store, it needs to authenticate with Matrixify. This is done with an MCP token that you generate inside the Matrixify app. Each user who wants to connect ChatGPT generates their own token.
In your Shopify admin, open the Matrixify app and go to Settings -> AI Agent MCP Tokens, then click the Generate Token button.
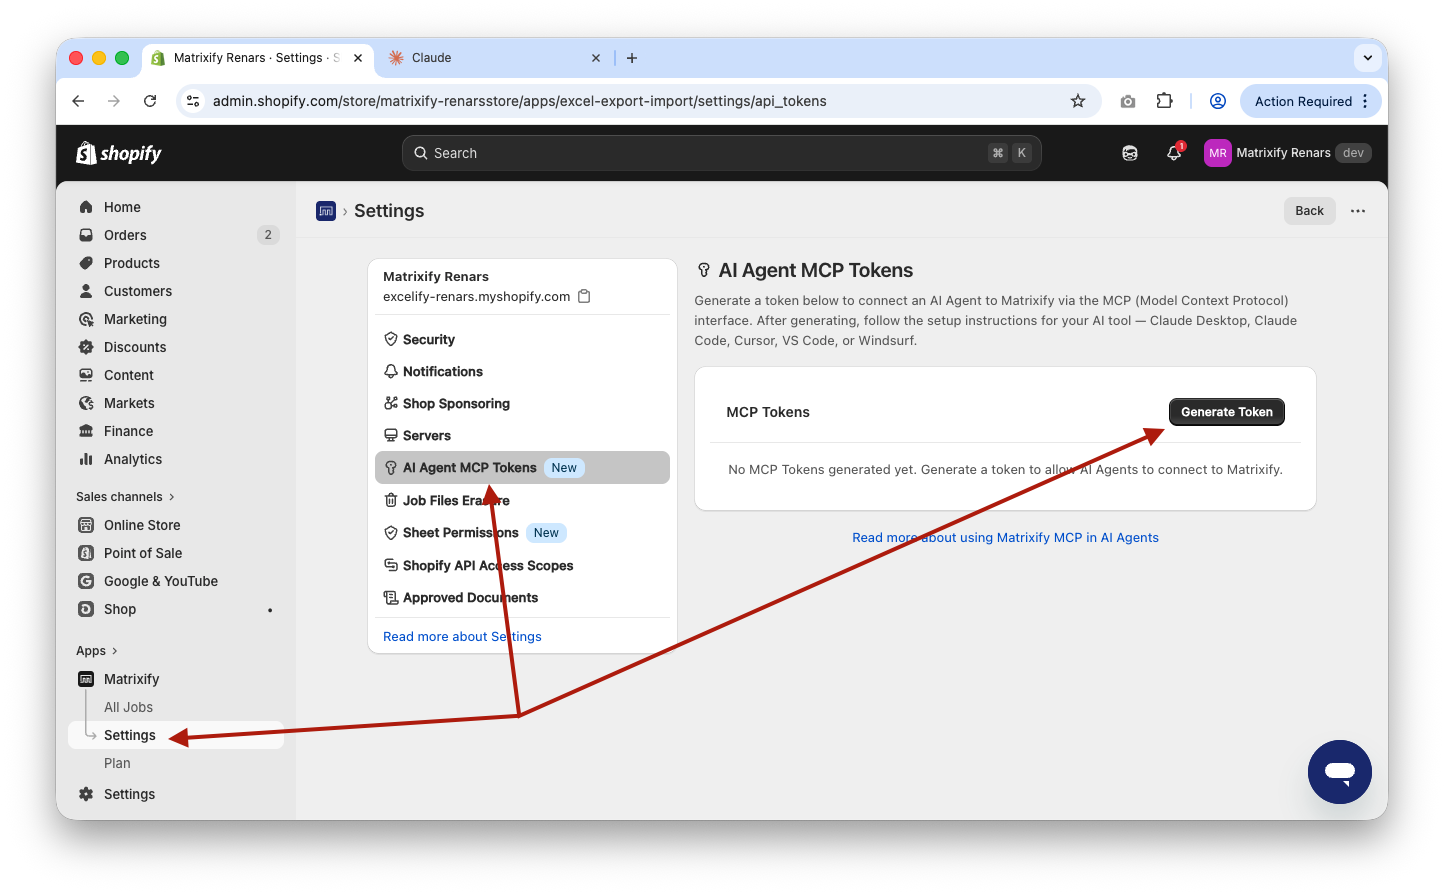
In the pop-up, you can optionally give the token a name (helpful for recognizing it later) and set when it should expire. Click Generate to create the MCP access token for the Matrixify app.
A window will open showing your new MCP token together with the MCP Server URL for this store. Copy both or keep this page open for now – you’ll paste them into ChatGPT in the next step. Because the URL is specific to this store, connecting several stores is simply a matter of generating a token in each store’s Matrixify app and using its own URL.
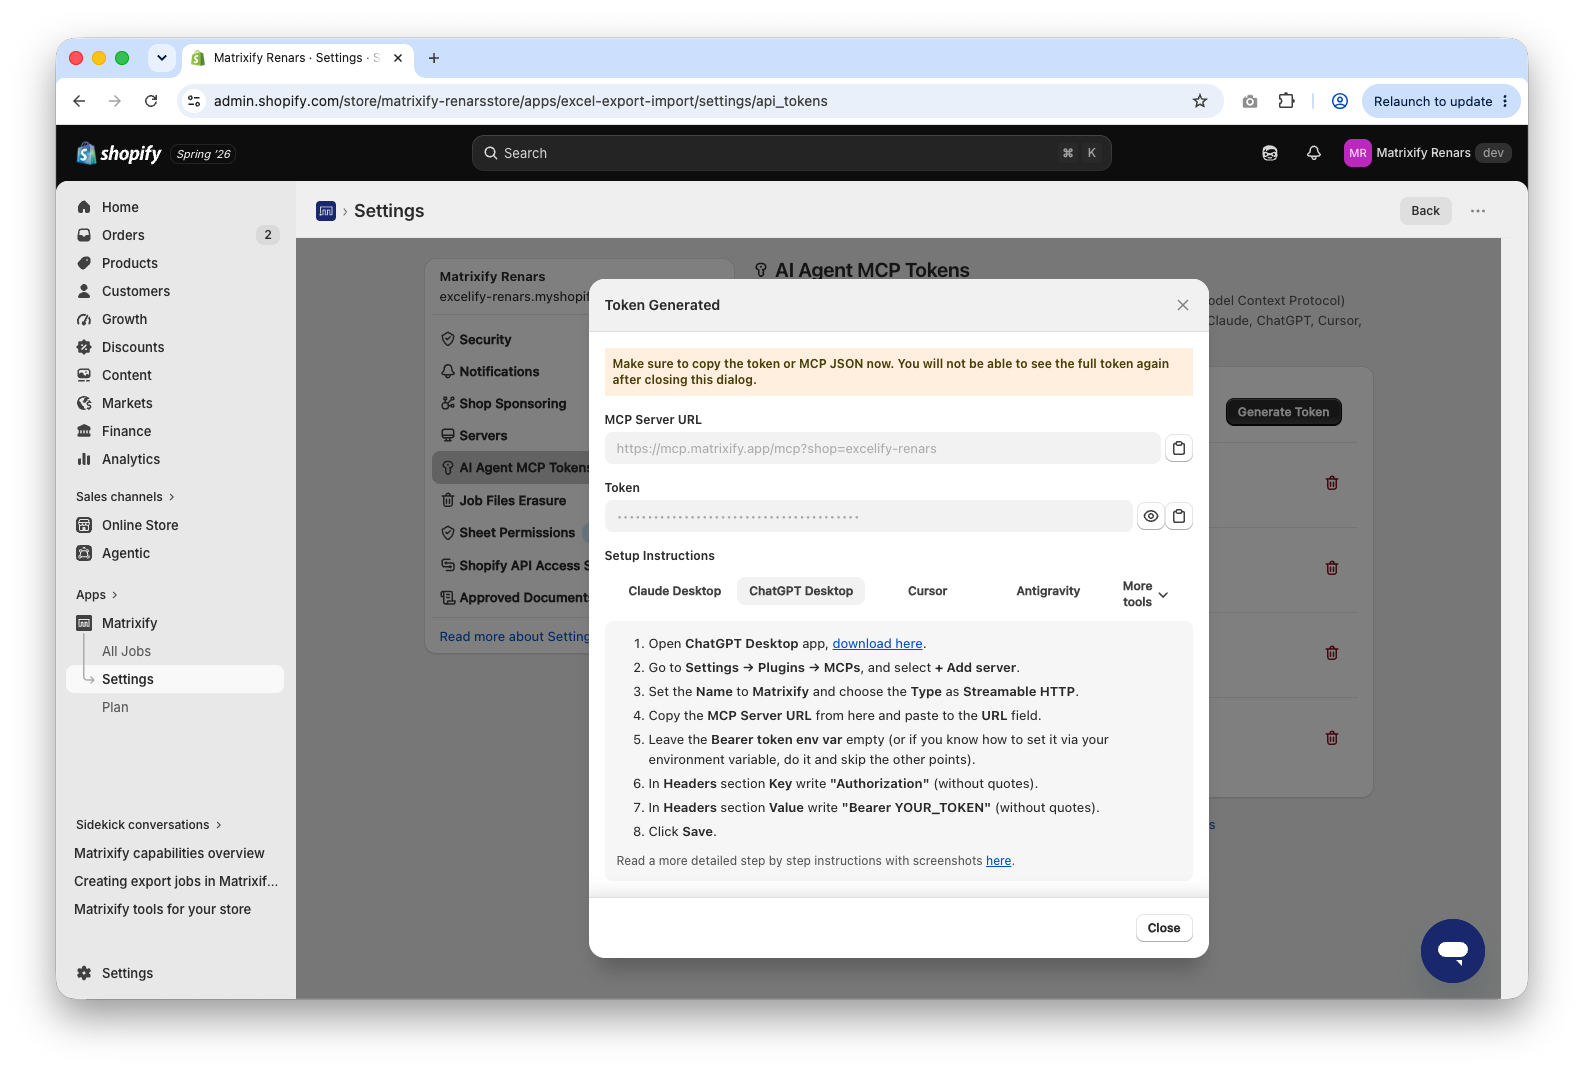
Treat your MCP token like a password. It lets ChatGPT perform Shopify data operations on your behalf through Matrixify, including bulk Imports, Exports, and updates. Don’t share it; each team member should generate their own. To revoke access later, return to Settings -> AI Agent MCP Tokens, and delete the token – this immediately disconnects any ChatGPT session using it.
3. Connect Matrixify MCP server to ChatGPT Desktop
Now connect ChatGPT to Matrixify using the token and URL from the previous step.
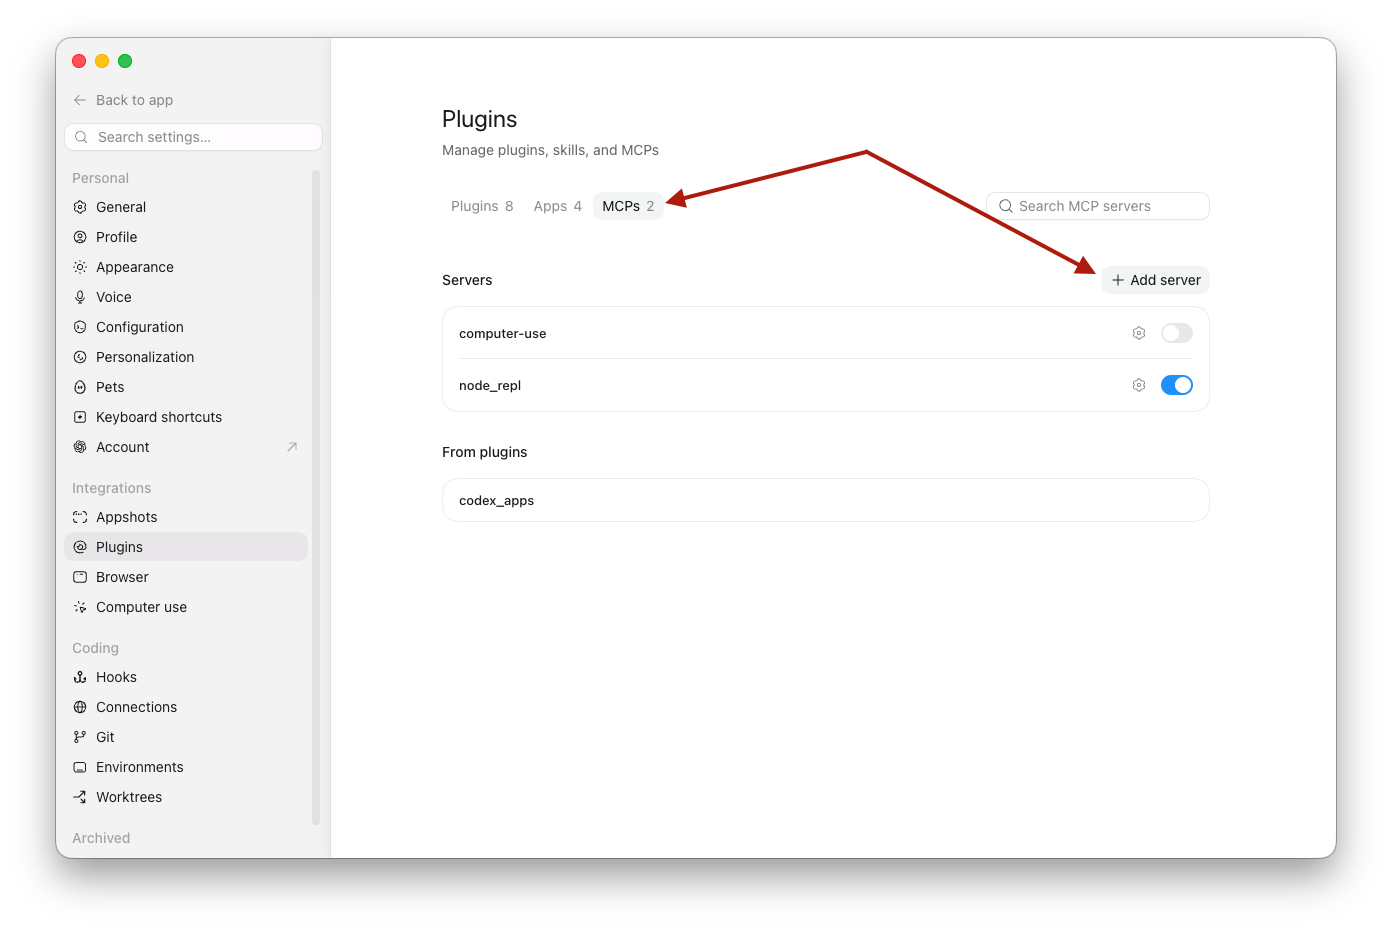
In the ChatGPT Desktop app, open Settings -> Plugins, select the MCPs tab, and click + Add server.
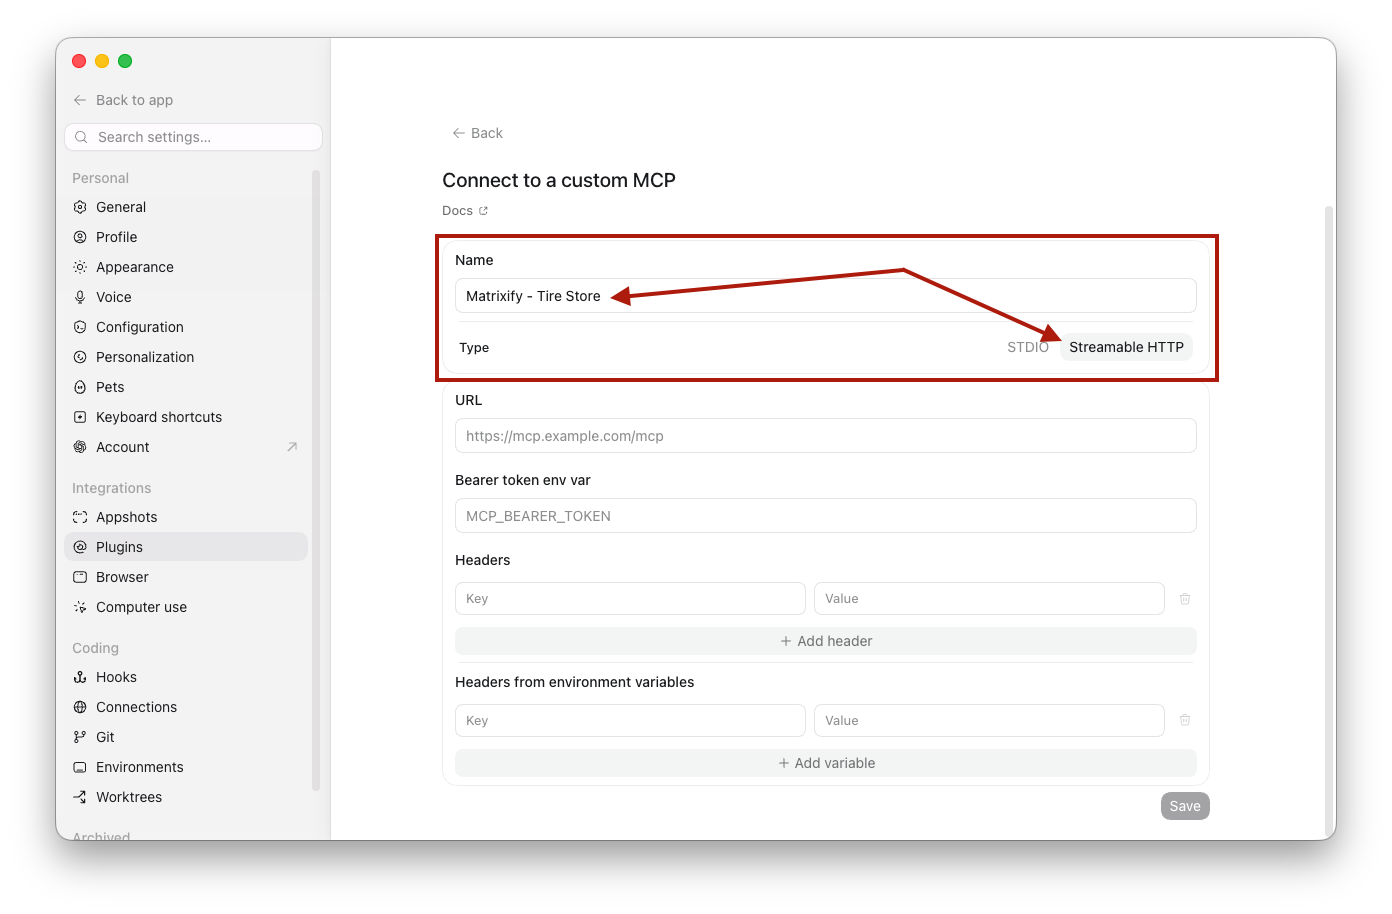
In the Connect to a custom MCP form, fill in the details:
Name– you can set any name for the server, but for better future usage, it should be namedMatrixify. If you plan to set up multiple MCP servers for multiple stores, then also include the store name, for example,Matrixify - Tire Store.Type– should be selected asStreamable HTTP.
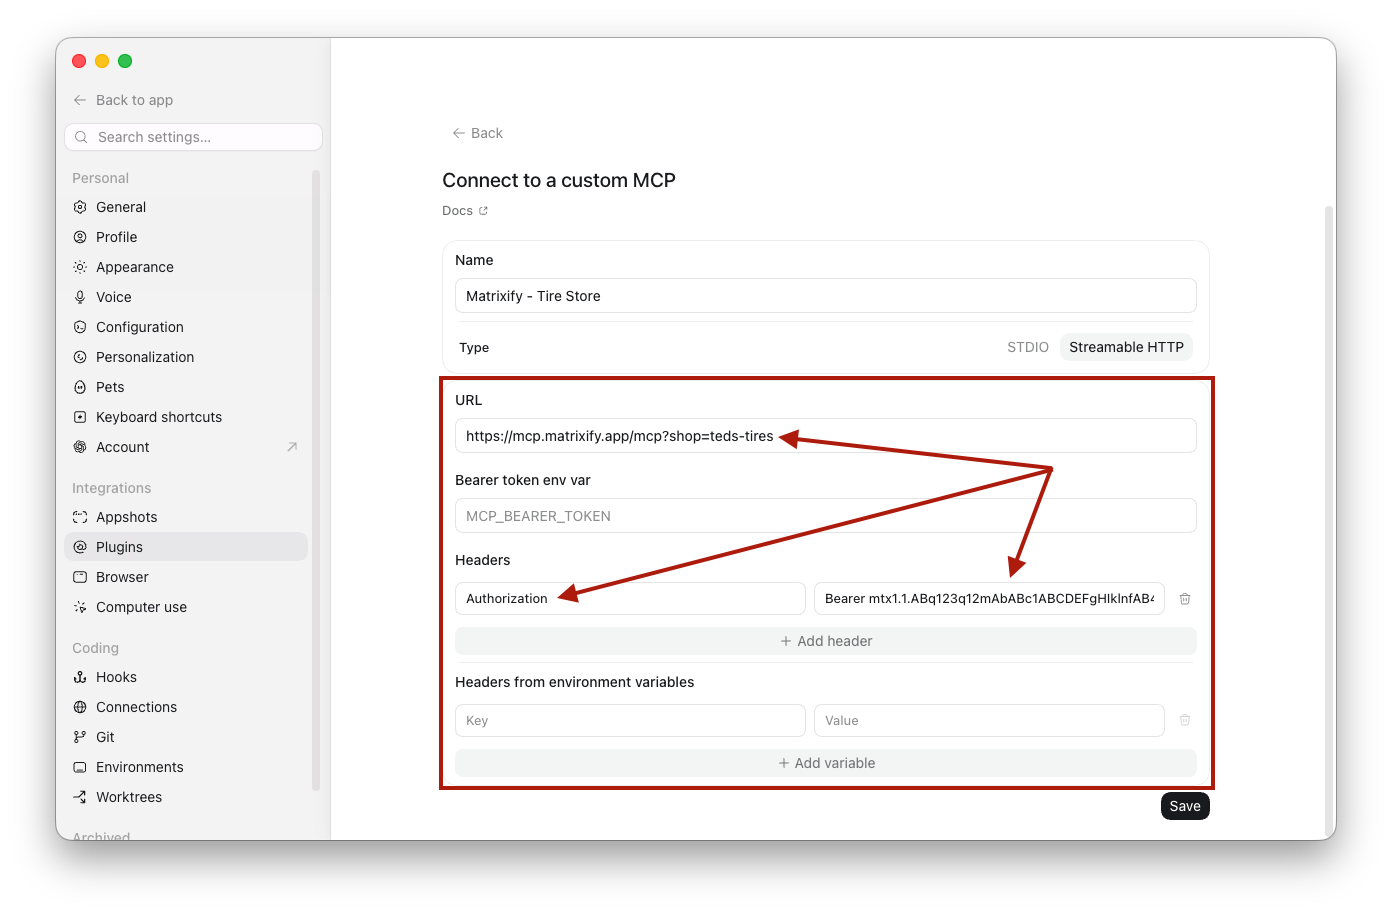
Once you switch the type to Streamable HTTP, the form shows the fields for a remote server:
URL– paste the store-specific MCP Server URL from the Matrixify token screen in Step 2, for example,https://mcp.matrixify.app/mcp?shop=teds-tires.Bearer token env var– leave the Bearer token field empty. Instead, add the token as a header.Headers:Key– set to valueAuthorization.Value– set to valueBearer YOUR_TOKEN. Replace YOUR_TOKEN with the token from Step 2.
Important: You must keep the wordBearerand the space before the token, for example:
Bearer mtx1.1.ABq123q12mAbABc1ABCDEFgHIk....
Click the Save button. ChatGPT will connect to the Matrixify server and add it to your MCPs list, and its tools become available in chat – creating exports, running bulk imports, checking job status, searching the Matrixify help documentation, and more.
4. Use the Matrixify app through ChatGPT
With the Matrixify MCP server connected, you can now manage your Shopify store in plain language, right inside ChatGPT. Anything you’d normally do in the Matrixify app – exporting, importing, updating, migrating, or scheduling jobs – you can now trigger by describing it in a chat, and Matrixify runs it against your store.
A few example tasks you can ask for:
- Export data — “Export all products that are out of stock to an Excel file.”
- Bulk update — “Increase the price of every product in the Accessories collection by 10%.”
- Import from a supplier file — “Import this supplier feed and only update inventory and prices, don’t touch anything else.”
- Check on a job — “What’s the status of my last import?”
- Find how to do something — “How do I bulk-delete draft products with Matrixify?” (ChatGPT searches the Matrixify documentation for you.)
Because every action runs through Matrixify, you get the same reliability and field-level control as the app itself – just driven by conversation instead of spreadsheets.
Matrixify MCP will work in both “Chat” and “Work” mode in your ChatGPT app, but we suggest using “Work” mode, as it’s better suited for connecting to tools like Matrixify and running multi-step data operations reliably.