
You have more than one store on Shopify, and now you need to synchronize their contents regularly.
Here’s how you do that using Matrixify app.
Steps to automatically synchronize data from one Shopify store to another
- Synchronize Shopify Admin -> Settings -> Locations between both stores.
- Store A: Setup the scheduled regular export of the data you want to synchronize.
- Store A: Enable public downloads in Matrixify settings.
- Store A: Wait for the first export to finish and copy the exported file URL.
- Store B: Setup the scheduled regular import from the URL of the regular export.
Let’s get to it!
1. Synchronize Locations between stores
Go to Shopify Admin -> Settings -> Locations in both stores and make sure that you have the same amount of Locations and Location Names are the same. This is needed to migrate Products and Orders for stores with multiple locations. When importing into Store B the app will try to set Inventory Qty for each location as listed in the exported file. If such a location would not be found the Product will fail to import.
You can skip this point if you do not use multiple locations.
2. Store A: Setup the scheduled regular export
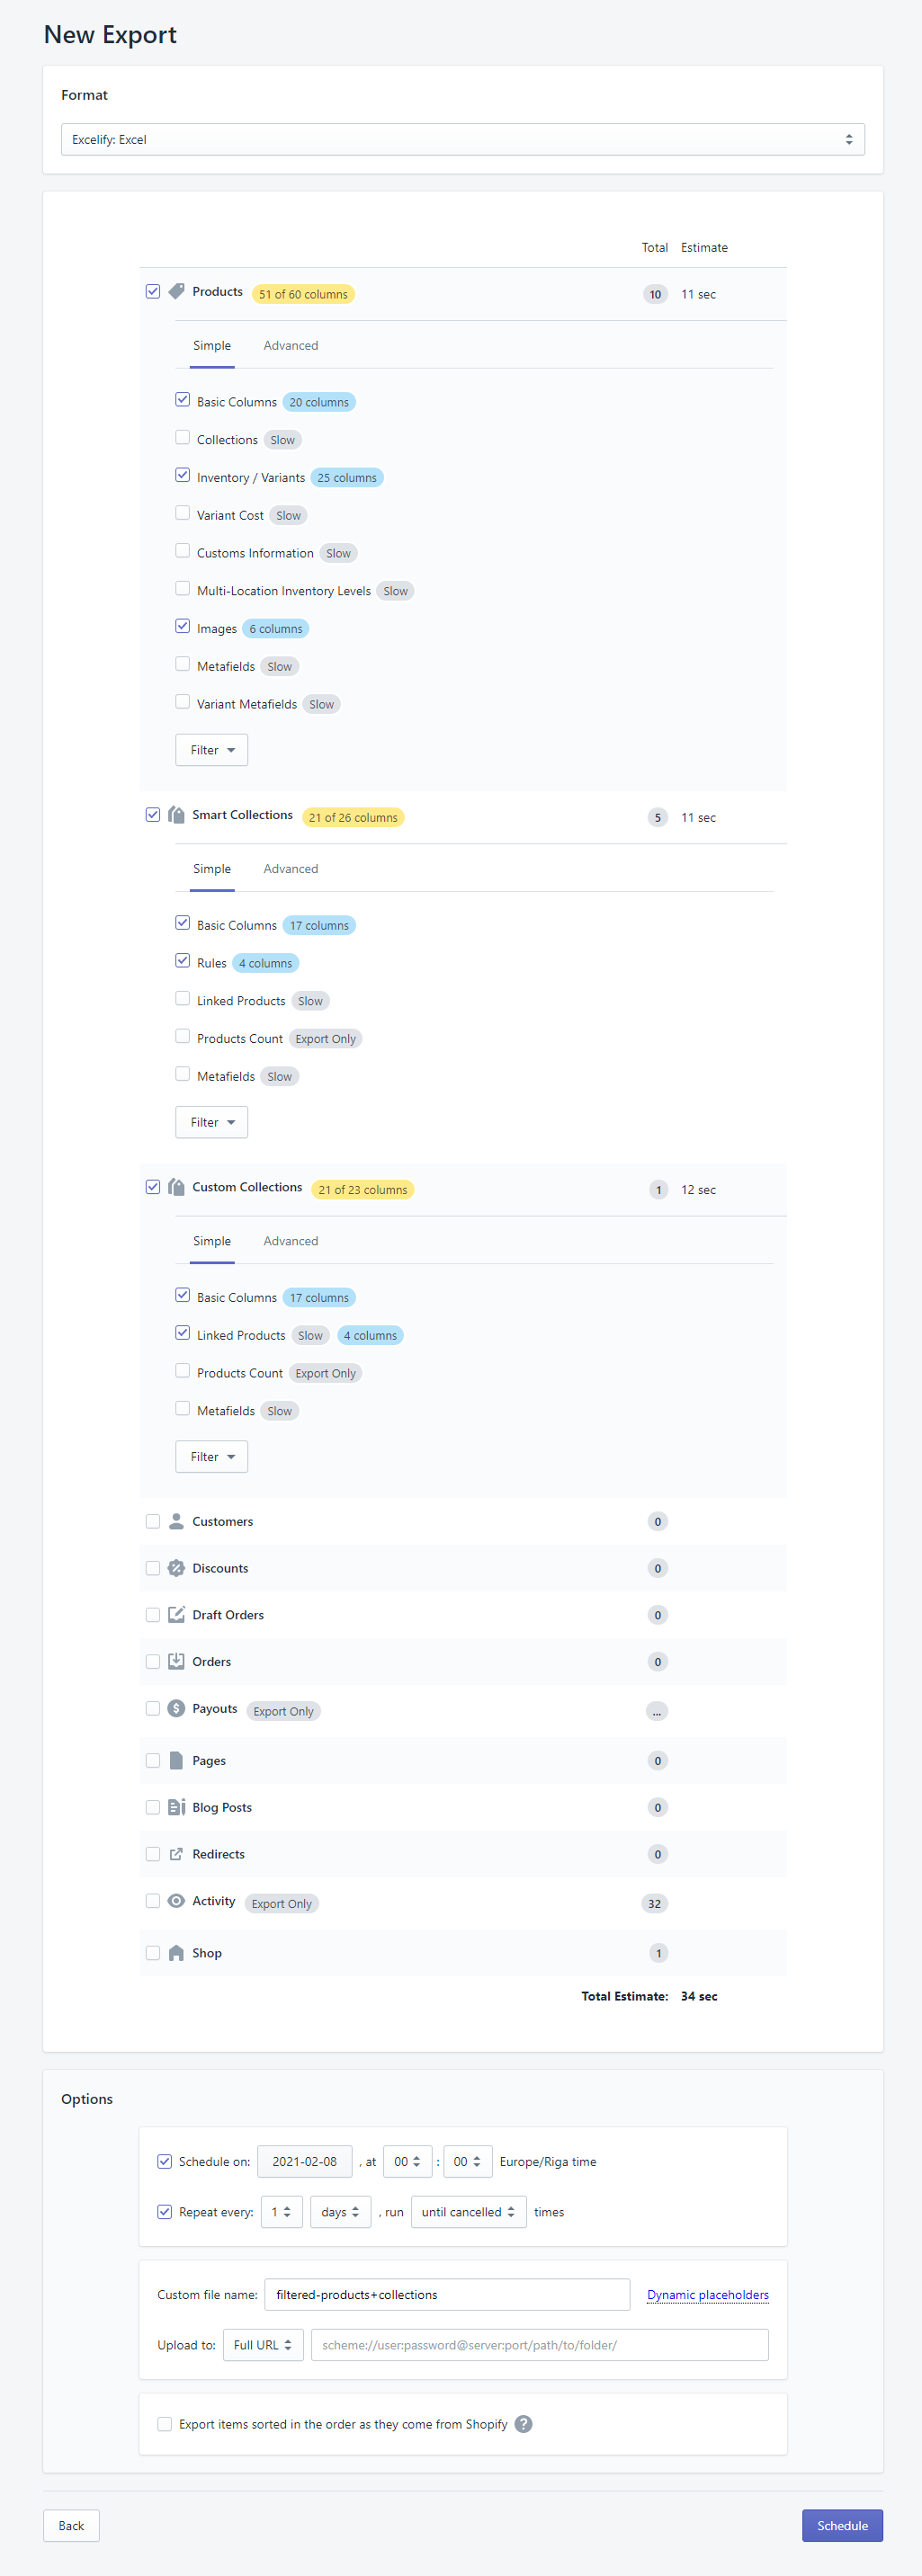
Mark the items you want to export.
You can even set the filters, for example, to export only Products that have a certain Tags, or products that exist only in certain Collection. Use any of the available filters in the app.
Then, under the Options button, you need to set up the:
- Schedule on: choose the starting date of the first export and time. In this example, it will start the first export today at midnight of the store time zone.
- Repeat every: set the interval when to repeat that same export, and how many times to repeat it. In this case, it will export every day and will repeat it forever.
- Custom file name: and this is the most important part. You need to set the custom file name for your export because this will ensure that your exported data will always be available at the same URL. We will use that URL in the scheduled import.
Then press “Schedule” to schedule it.
3. Store A: Enable public downloads in Matrixify settings
Head into Matrixify settings in your store and in section “Security” select the checkbox Allow downloading your files by external services.
This is needed so that file can be downloaded from the URL by other stores, not only the one where export was created.

4. Store A: Copy the exported file URL
If you have set the repeated export to start today at the time that has already passed, the app will start the export shortly after you schedule it – to complete today’s export.
Open the “All Jobs” page and see that the export is done.
When your first export is finished, the page should look like this:
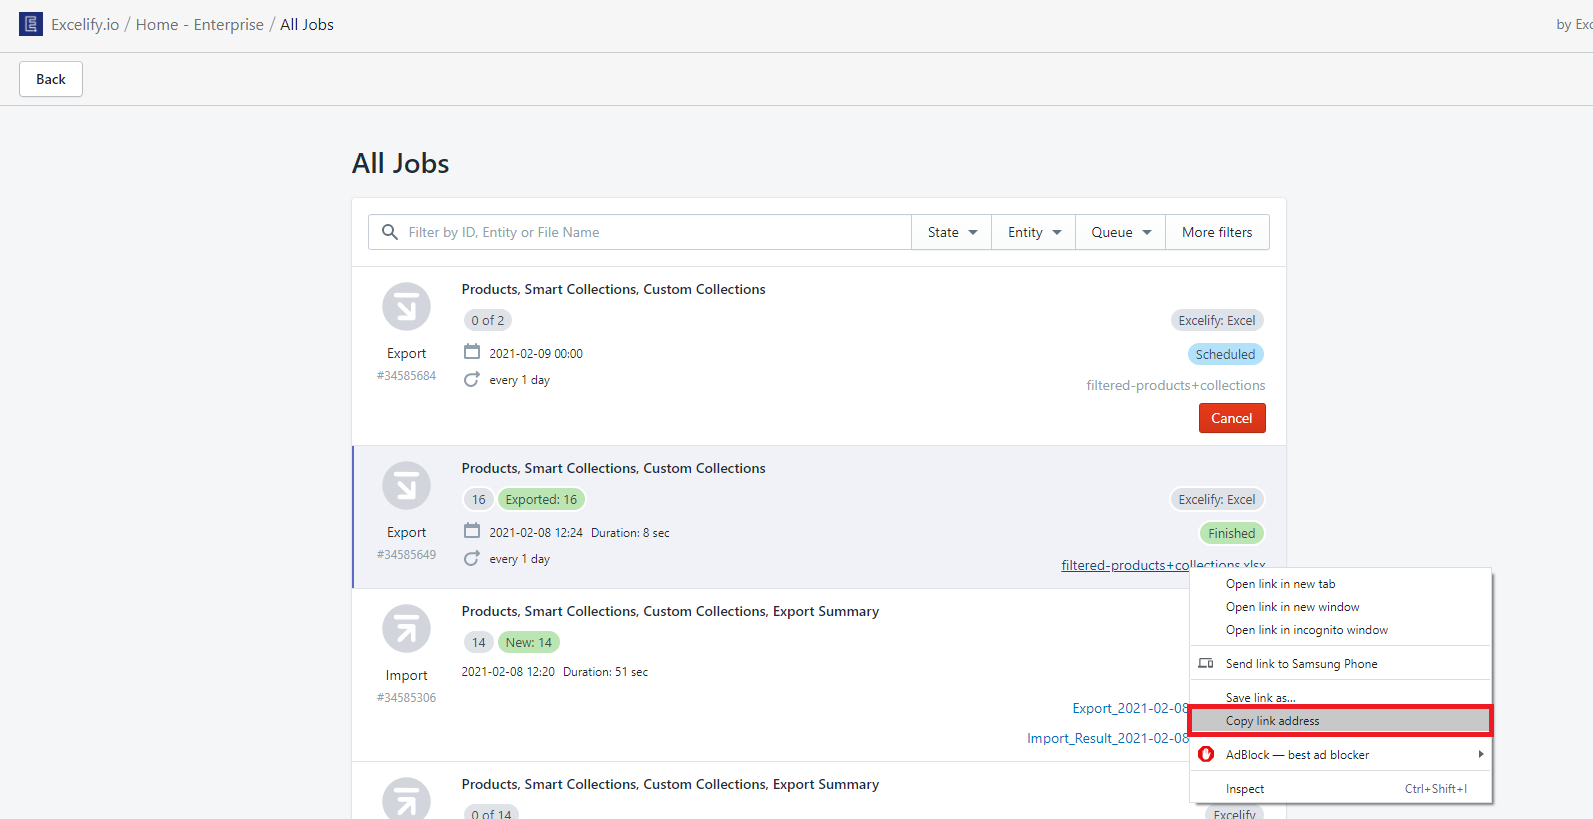
There you will see the next scheduled export for tomorrow, and then export that finished today.
You will see that the completed export has the file there – your custom-defined file name.
Right-click on it, and “Copy Link Address“.
Remove query parameters from the URL
This link will include the job details as parameters at the end. Those would need to be removed.
Paste copied link in some text editor which should look something like this:
https://app.excelify.io/files/excelify-renars/1234a4b74cffff8a123b8ss8d/filtered-products+collections.xlsx?job=49581459&kind=exported
Remove all parameters from end of the link and copy new link which should look like this:
https://app.excelify.io/files/excelify-renars/1234a4b74cffff8a123b8ss8d/filtered-products+collections.xlsx
5. Store B: Setup the scheduled regular import
Now, open the app on your other store – that where you want the data to get imported from store A.
And scroll to the Import section of the app.
There you will see the box where you can paste the URL of the file to upload.
Paste your copied URL there, like that:
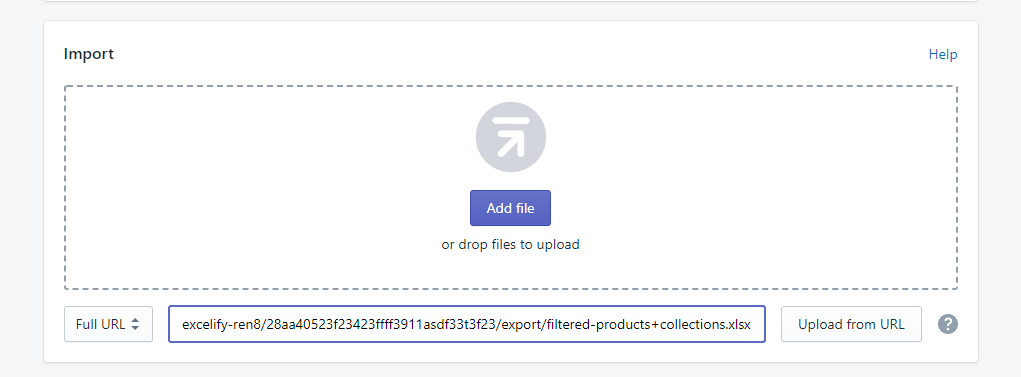
Then press the “Upload from URL” button.
It will upload the file, and the app will analyze it. And just hold the horses, don’t press the Import button here.
Instead of that, scroll down to the Import Options section.
And then set up your schedule so that it always starts at the time that is after your export would finish. In this example, we have set the export to be on midnight, so we will set the import to happen at 1am every day, starting from today.
Notice how it has the “Take import file from URL:” filled with your URL – it means that every time the app will run this repeated import, it will use the fresh file from that URL you pasted earlier.

When everything looks nice, press the “Schedule” button.
Again, if the time for today’s import is already passed, the app will shortly start the import to complete the first import for today. And that is a good way to check that it did work as you expected.
You can find that import status on the “All Jobs” page.
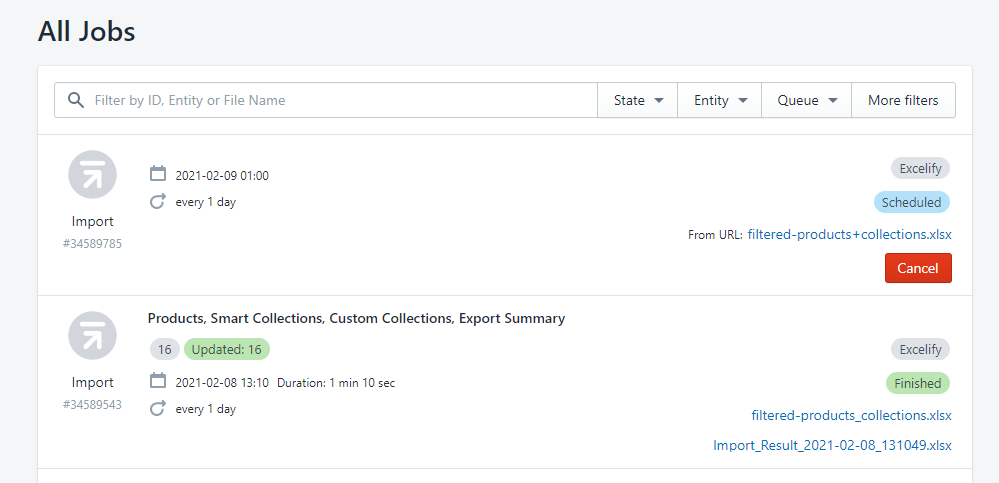
That’s it!
Now it will sync your stores just the way you want it!
Good to know
- You can synchronize any kinds of items – Products, Collections, Discounts, Customers, Pages, Blog Posts, even Orders.
- You can synchronize items partially by using Filters when setting up your repeated export. For example, you can synchronize just products with certain Tags, or that are in just the certain Collection.
- You can have several syncing processes happen at the same stores. No limitations, but just bear in mind that running two processes at the same time will make their speed two times slower.
- You can set up the same synchronization in both directions – just set up the same logic from store B to store A.
- The scheduled time uses the time zone from your Shopify store.
- Read our tutorial on how to clone/duplicate your Shopify store.


