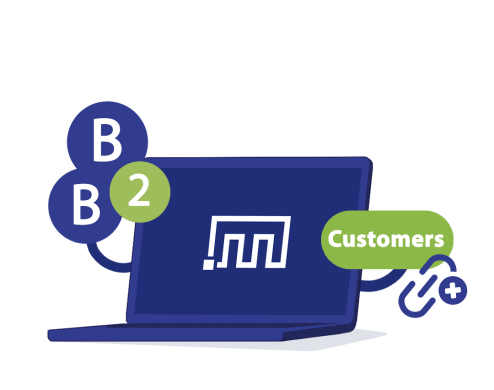
Assigning customers to Shopify B2B Companies and Locations is essential for managing price lists, payment terms, and access controls across your wholesale accounts. Doing this one-by-one in Shopify Admin can be slow — especially when you need to connect hundreds or thousands of customers to the right company and specific location. With the Matrixify app, you can bulk assign customers to Shopify B2B Companies & Locations using a simple CSV or Excel spreadsheet Import. Map Customers by their Email or ID, reference the correct Company and Company Location, and update everything in one go!
Steps in short
- Export your Shopify Companies and Customers using Matrixify.
- Edit the exported file:
- Save the file and import your edited sheet as the Companies entity.
1. Export Shopify B2B Companies and Customers
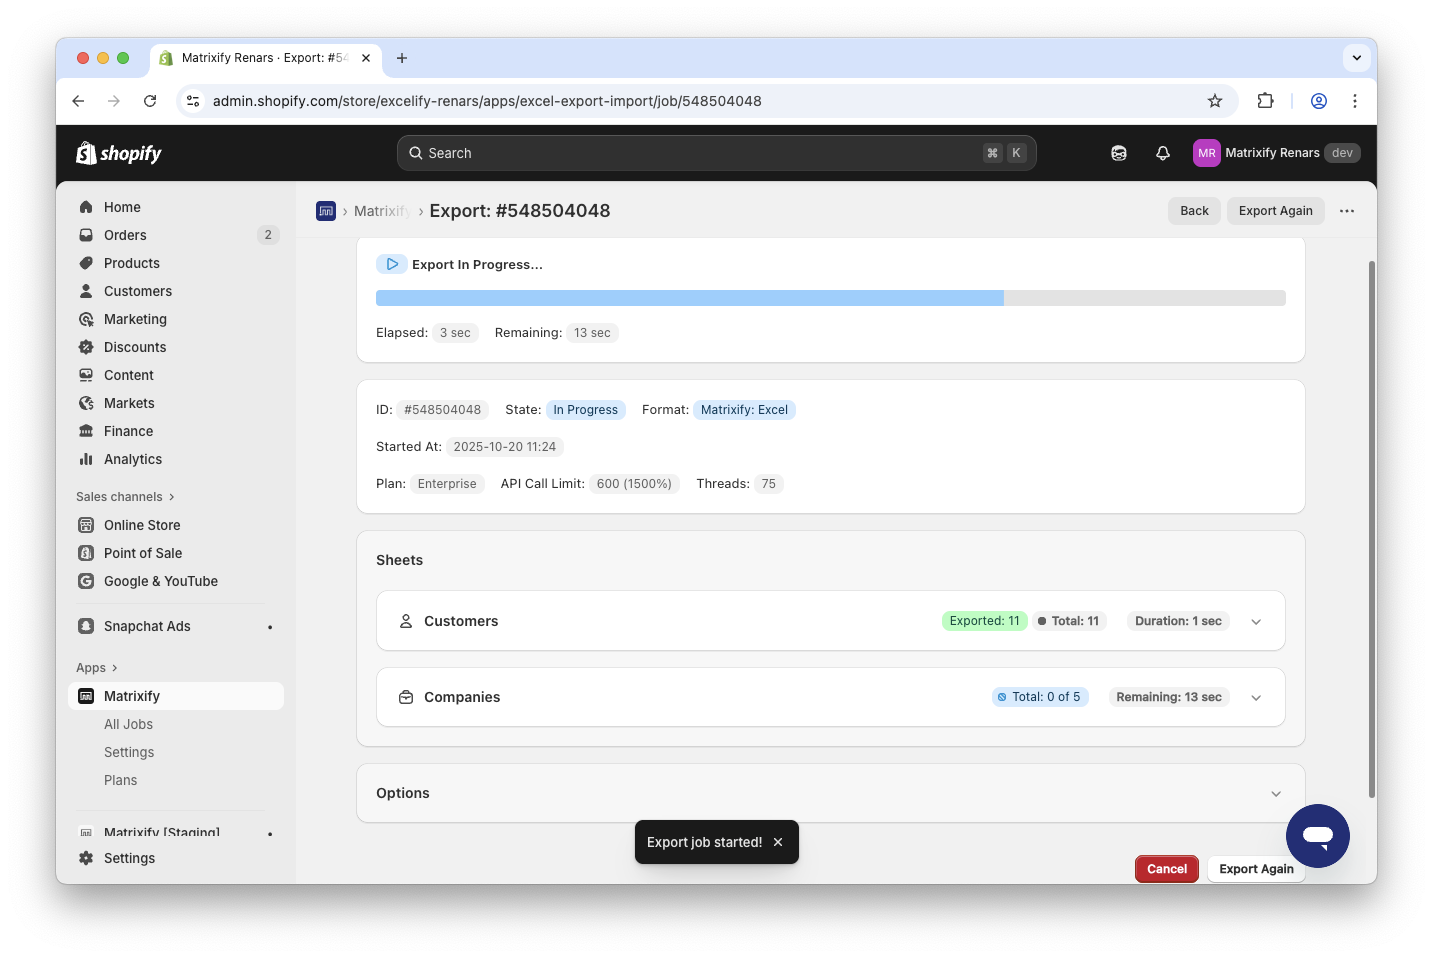
Start by creating an Export you’ll use for mapping customers to the right B2B Company and Company Location.
In the Matrixify app Home page, locate the Export section and press New Export to configure a new export.
In the Format section, select the export format Matrixify: Excel. This format will make sure that Matrixify exports an Excel XLSX file. It is preferred to work with Excel XLSX files as they are a lot more user-friendly than CSV, and in this tutorial, we will be working with two sheets, so editing will be simpler if they are within the same Excel file.
From the Select Sheets dropdown select to export both Customers and Companies sheets:
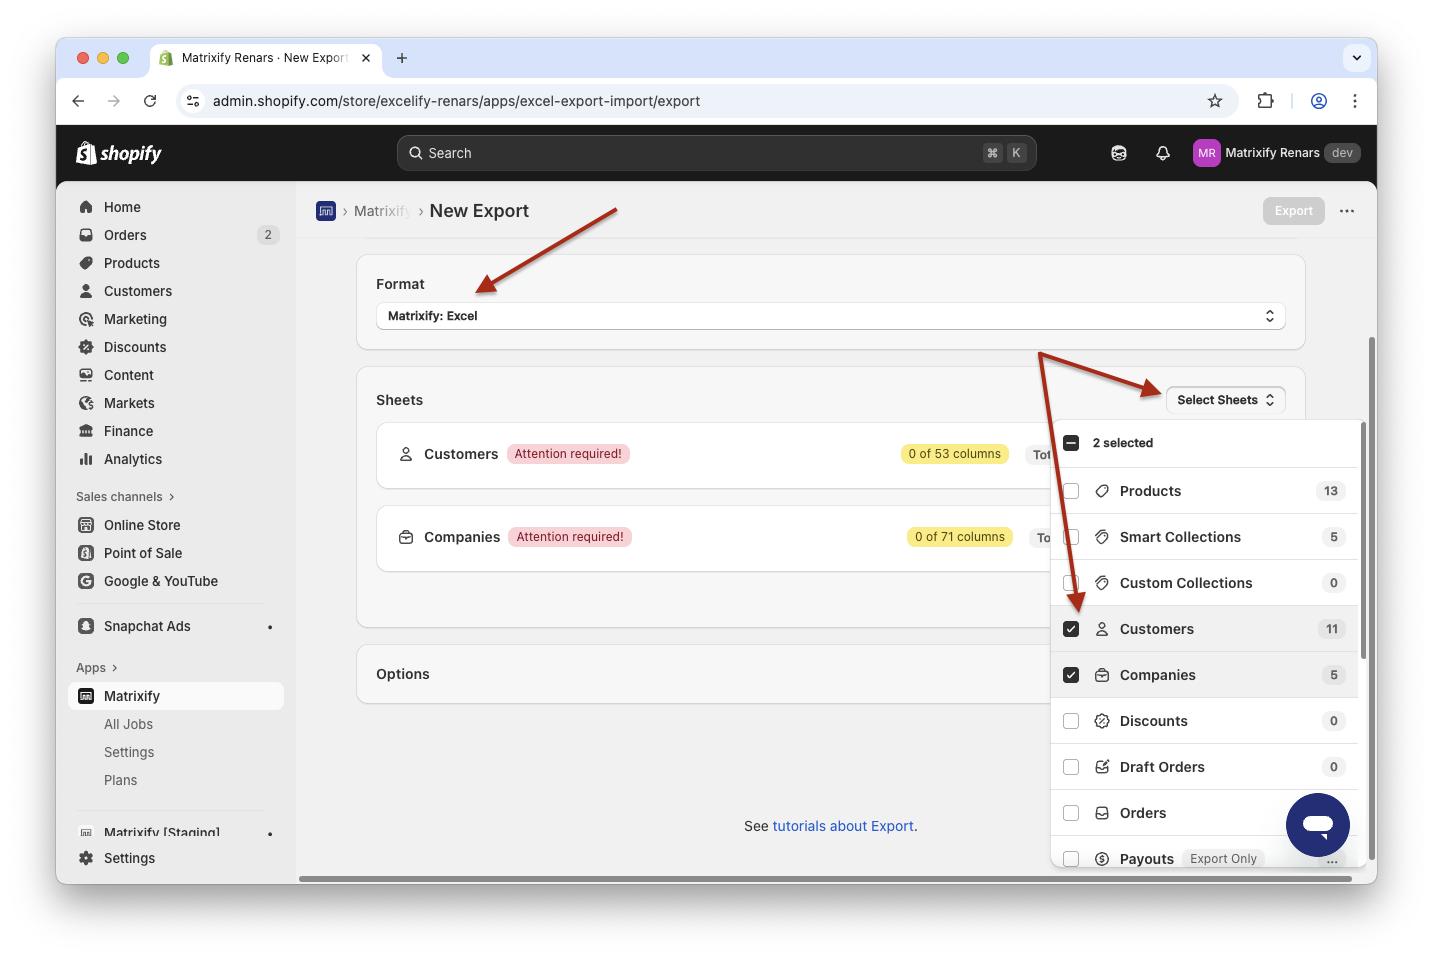
Now you can open the Customers and Companies sheets to configure what columns to export.
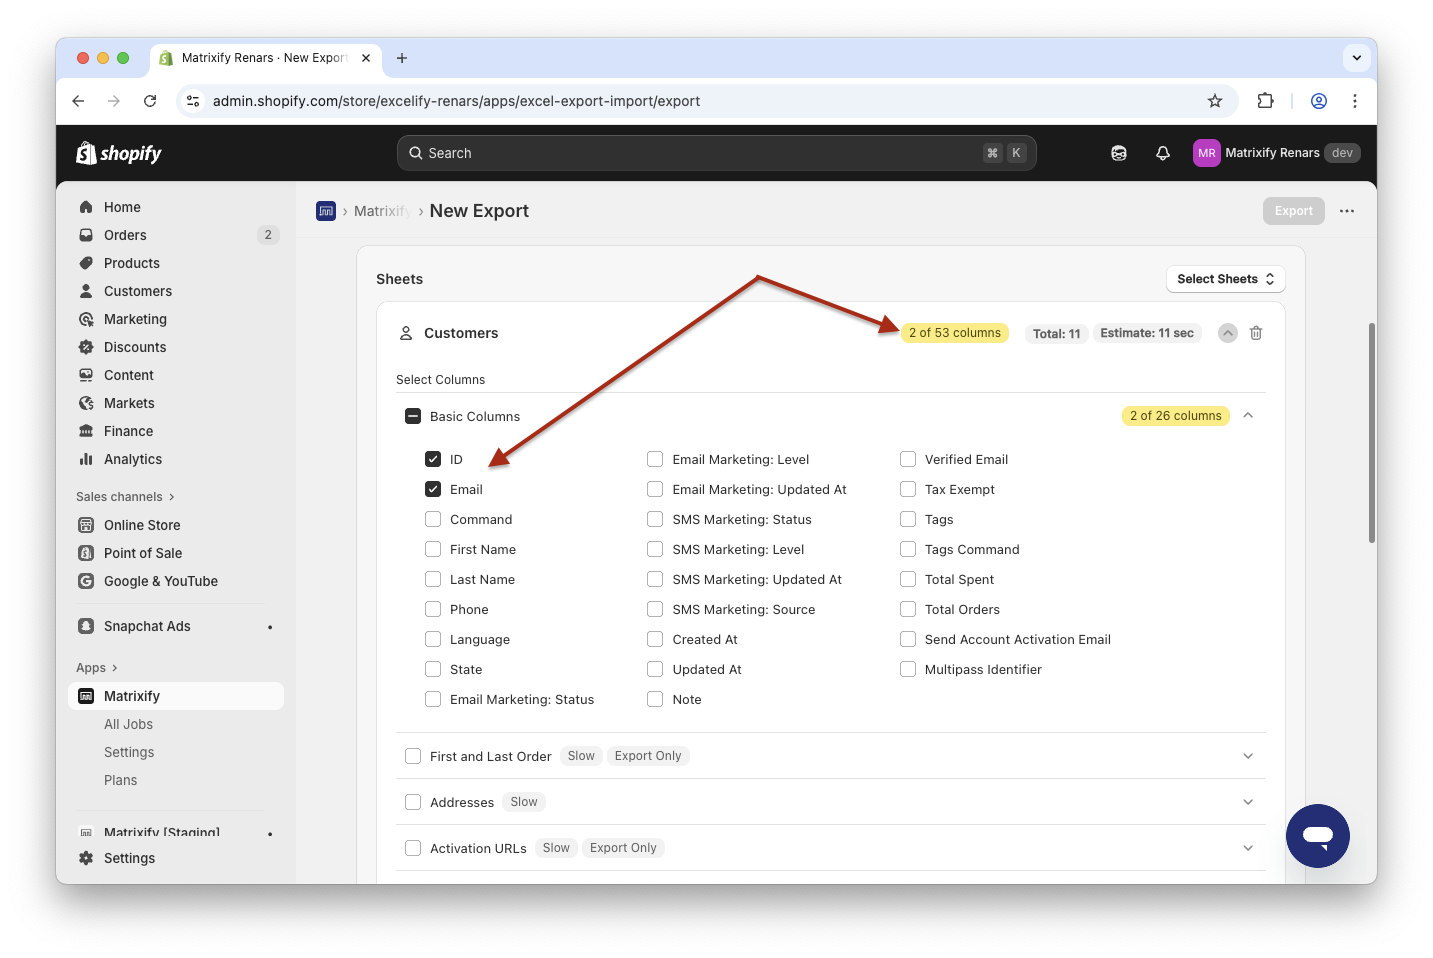
For the Customers sheet, select only two columns from the Basic Columns column group – ID and Email.
The ID is the most reliable key for matching data when importing; Email is a practical fallback from ID and can be useful if you need to visually confirm records. You don’t need names for this task, but if it helps you verify who’s who while editing, you can add First Name and/or Last Name columns for your reference.
If you need to assign specific Customers to Companies not all, then you can click on the Filters button for the Customers sheet to apply filters to the export job.
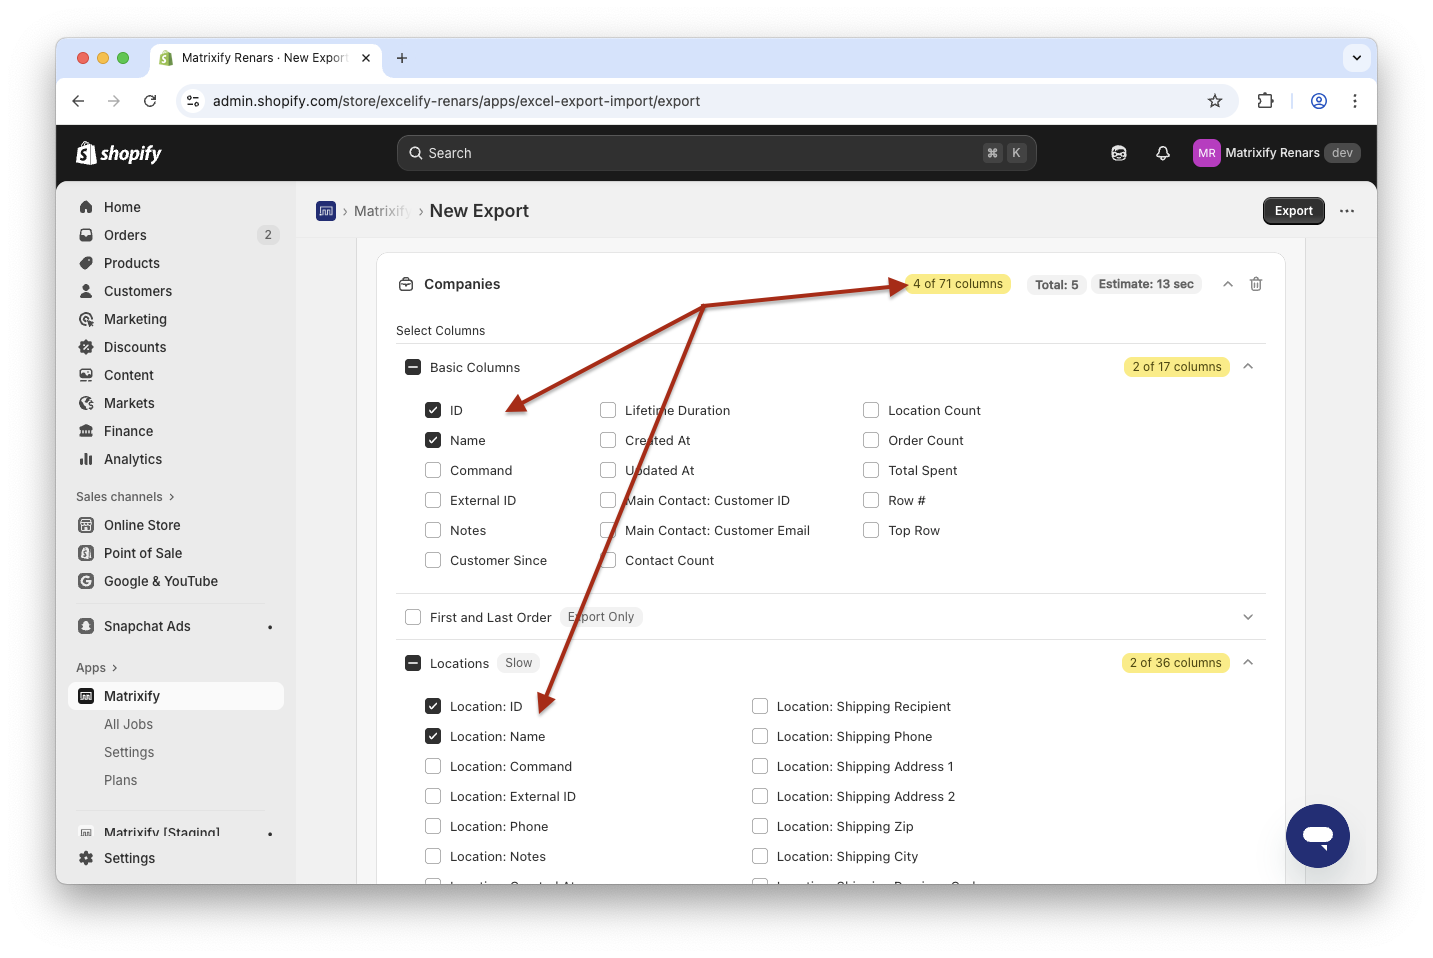
For the Companies sheet you need to select only 4 columns:
- under
Basic ColumnsselectIDandName, - under
LocationsselectLocation: IDandLocation: Name.
If needed, you can also select other fields such as External ID, Location: External ID for your own reference, but they are not needed for this specific task.
Keep this export focused—fewer columns mean less noise and fewer mistakes when you transform the file in the next step.
Once the new export has been configured, press the Export button to start the export job.
2. Edit your Companies and Customers spreadsheet file
Once the export has finished, press the Download Exported File button in the app to download your file.
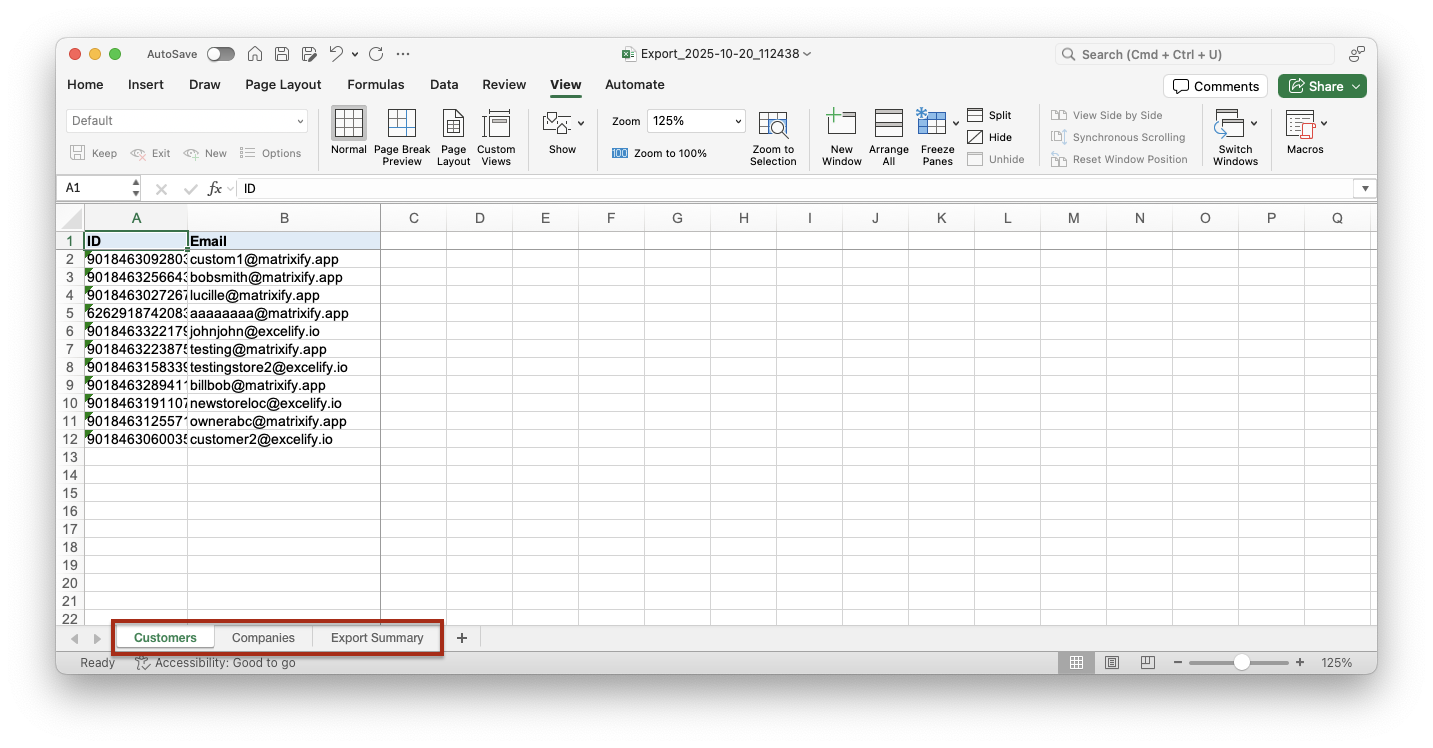
In the exported file, you will have 3 sheets – Customers, Companies and Export Summary.
To assign Customers to Companies, you will need to update the actual Companies in the store and thus will need to import a Companies sheet.
Likely, you have more Customers than you have Companies, so in this use case, it would be simpler to adjust the Customers sheet to be the new Companies sheet.
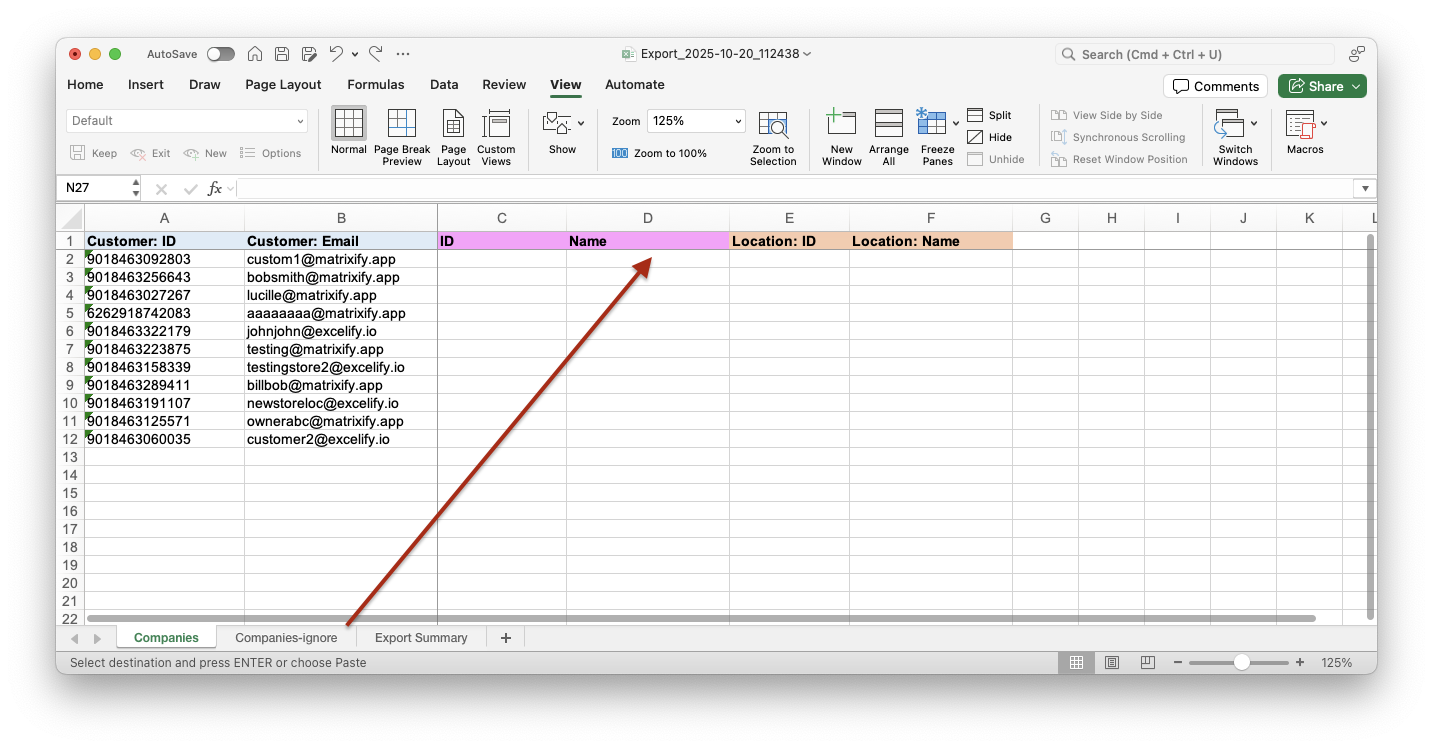
Adjust Customers sheet
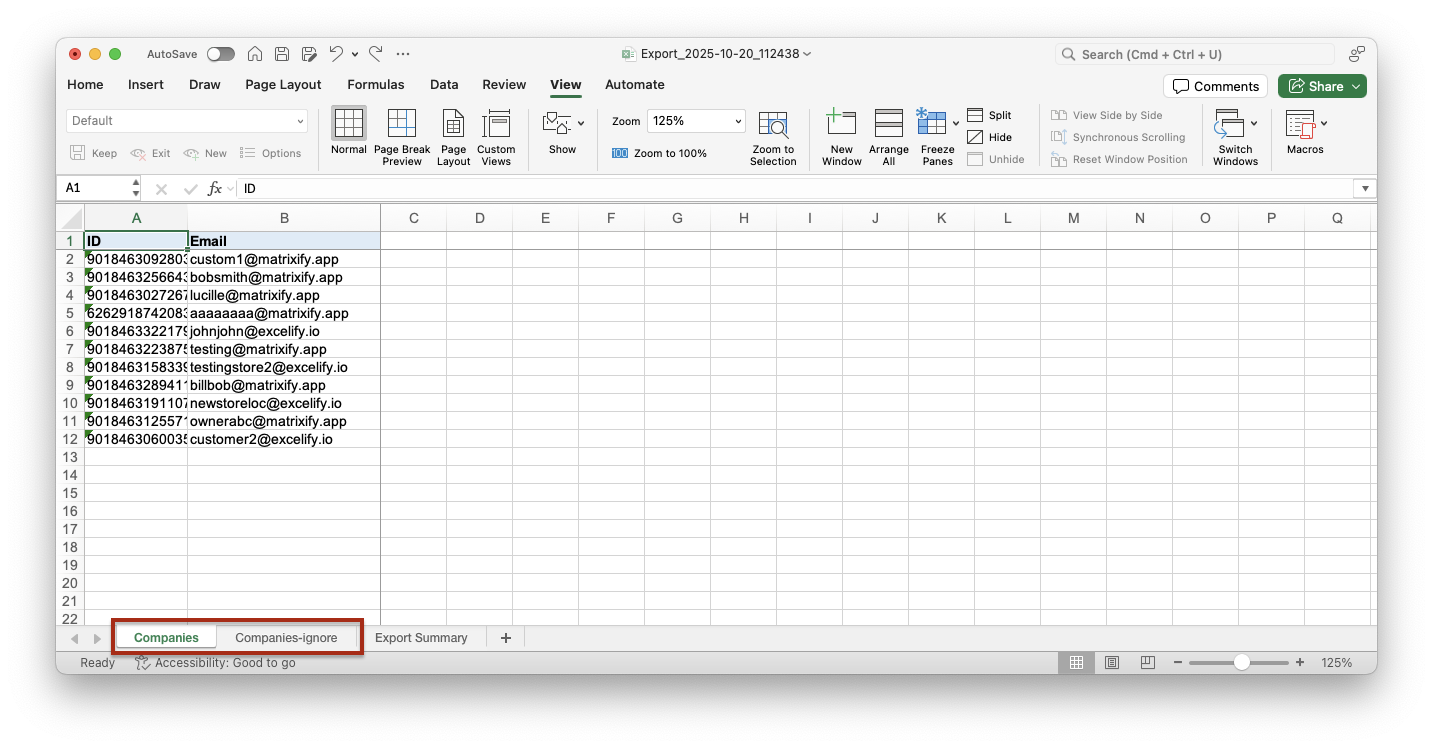
For clearer editing and Import process, let’s first rename the sheet/tab names:
Companiessheet can be renamed toCompanies-ignore. Any name other than “Companies” will work here, so that you know this sheet will not need to be imported.Customerssheet must be renamed toCompanies. This will be the sheet that we edit to assign and link Customers to your B2B Companies and later import into the app.Export Summarysheet can be deleted or remain as is. It will be ignored by the app automatically and not imported.
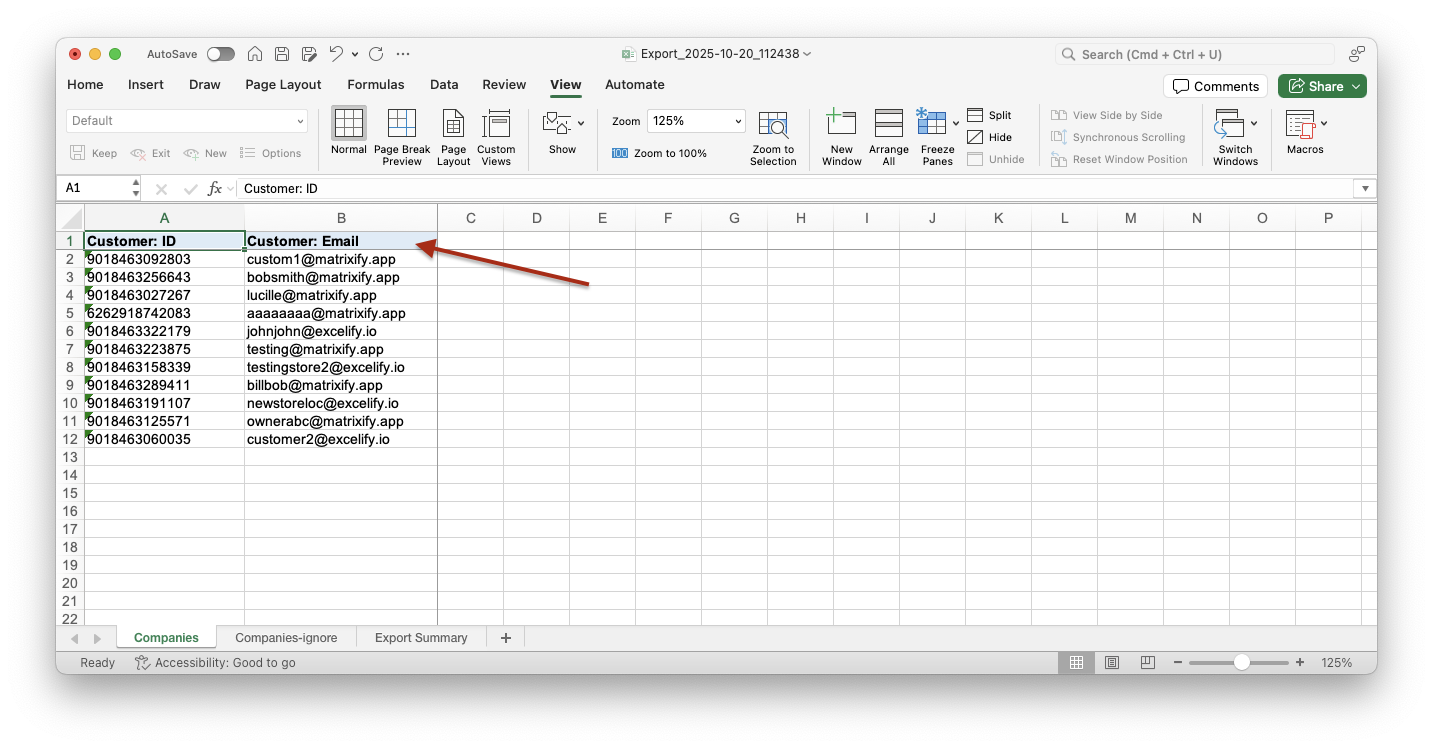
In the Companies sheet, the customer’s ID and Email fields have different column headers, so let’s rename those:
IDcolumn renamed toCustomer: IDEmailcolumn renamed toCustomer: Email
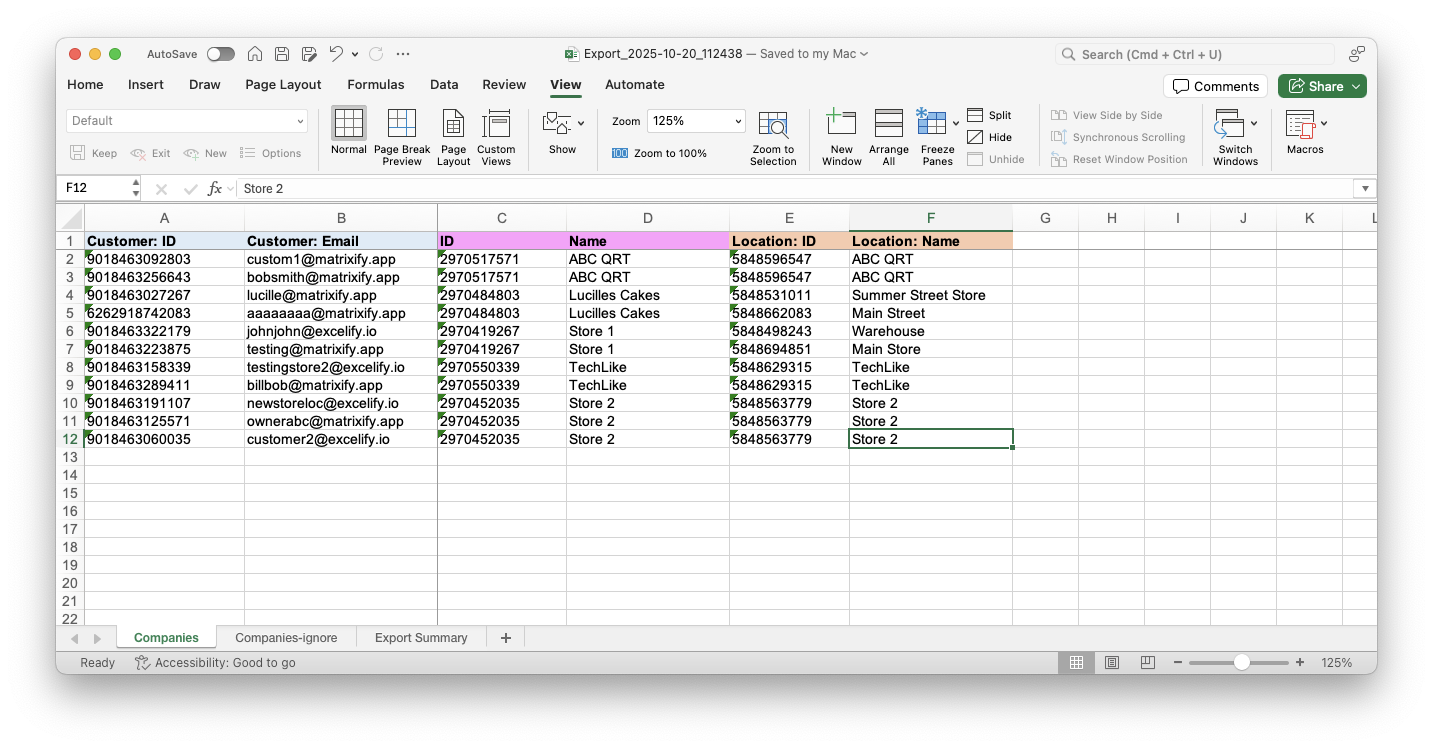
Assign B2B Company details to Customers
In the sheet with a list of Customers, you should delete rows for Customers that you do not wish to assign/link to your Shopify B2B Companies. This file should only have rows with Customers that you wish to assign to Companies.
Copy column headers from the old Companies sheet Companies-ignore to the Companies sheet.
Now, in those columns, you can copy row data from the old Companies sheet Companies-ignore to the Companies sheet, thus assigning each customer to a specific Company Location.
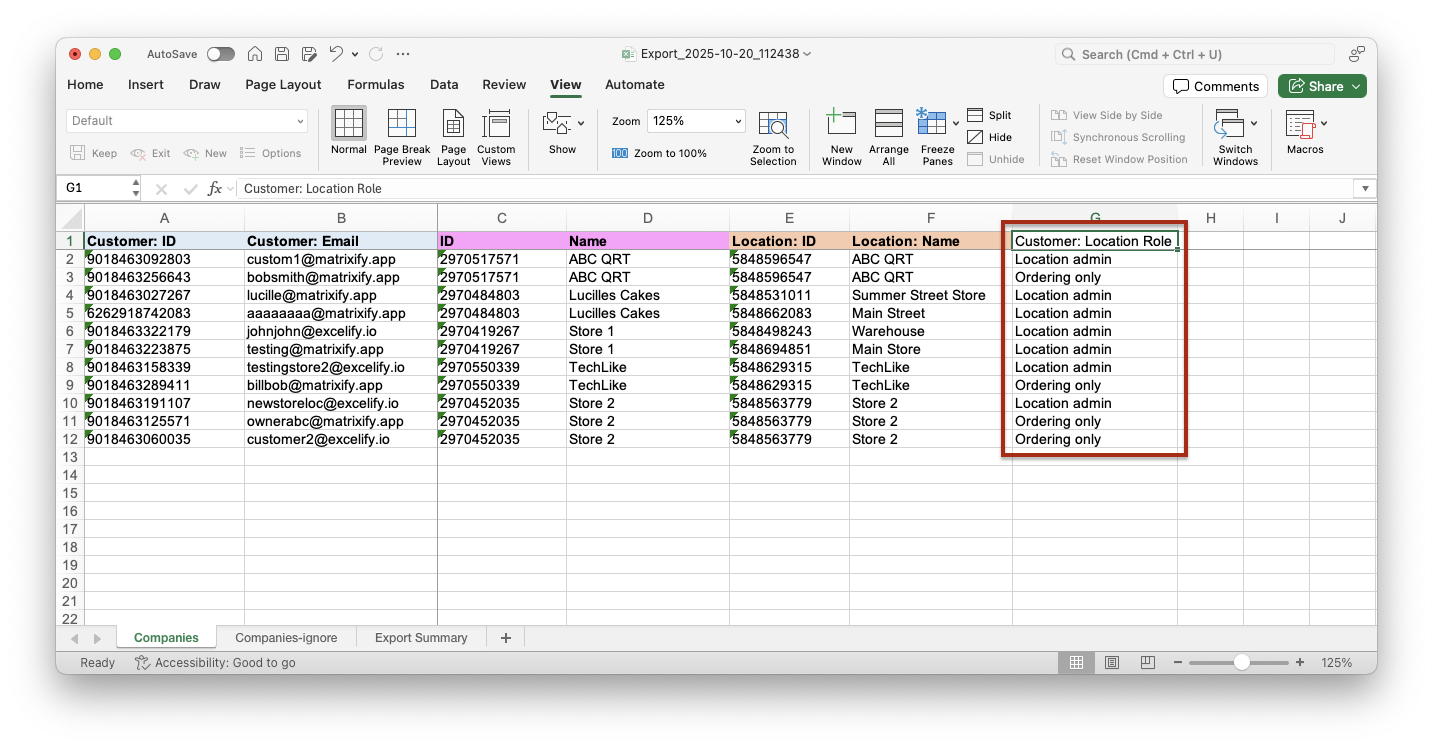
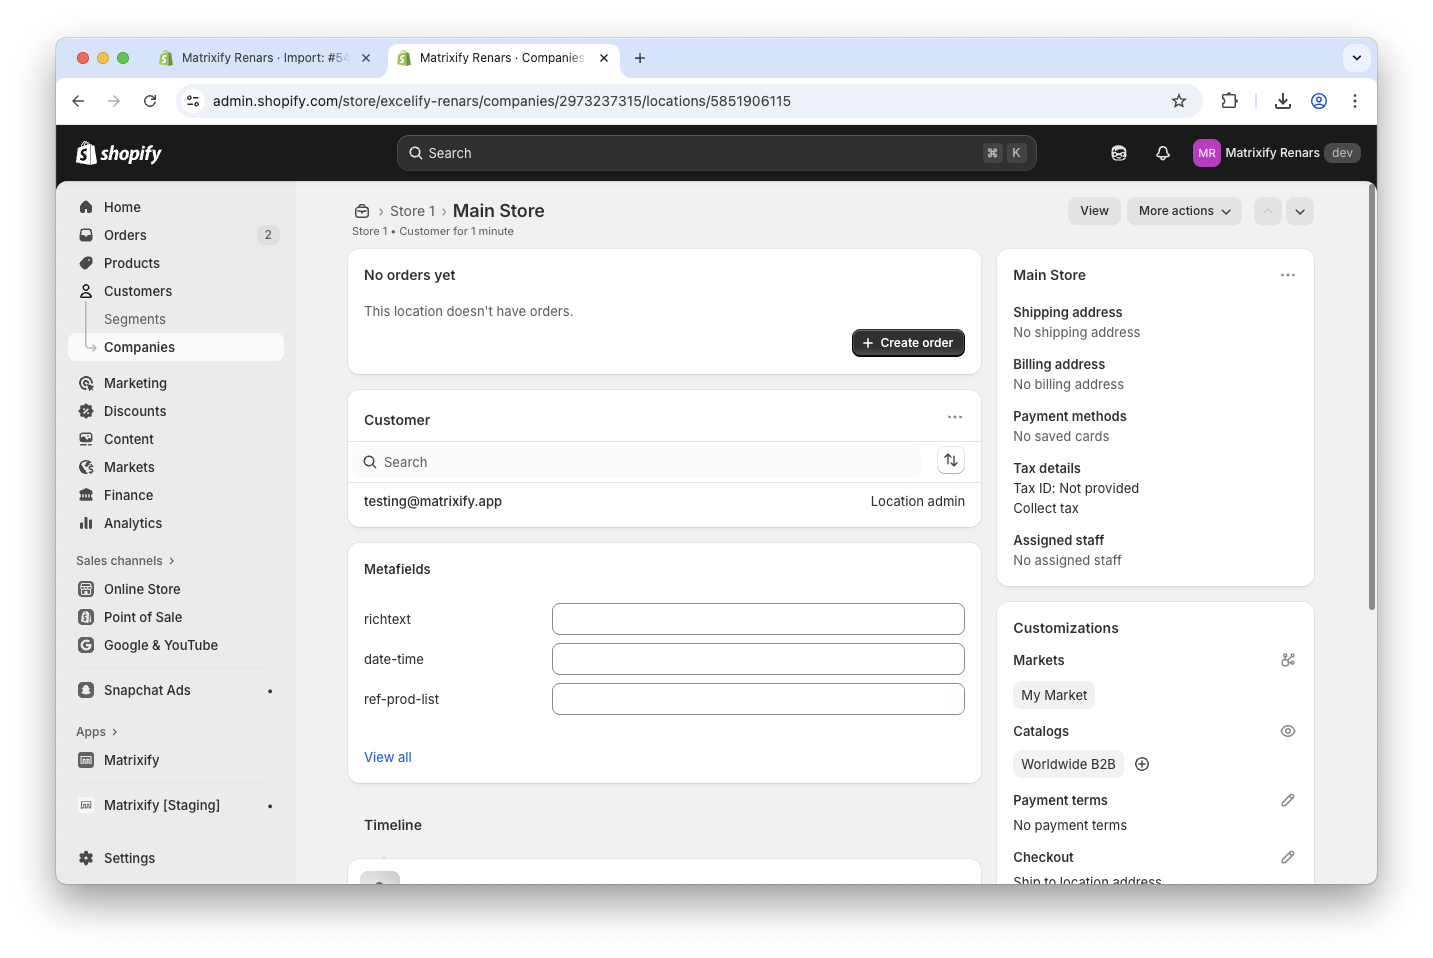
The last important part we need to edit in the file is to add the Customer: Location Role column. When importing, this will be the column that forces the Customer to be added to the B2B Company Location and sets that Customer’s role in the Location.
The column needs to be filled with one of two values – Ordering only or Location admin.
3. Save and import with Matrixify
Save your file and go to the Import section in the Matrixify app and upload your edited file.
Once uploaded, the app will analyze the import file. After the app has analyzed the file, make sure that the edited Companies sheet has Companies entity assigned and that all other sheets as ignored.
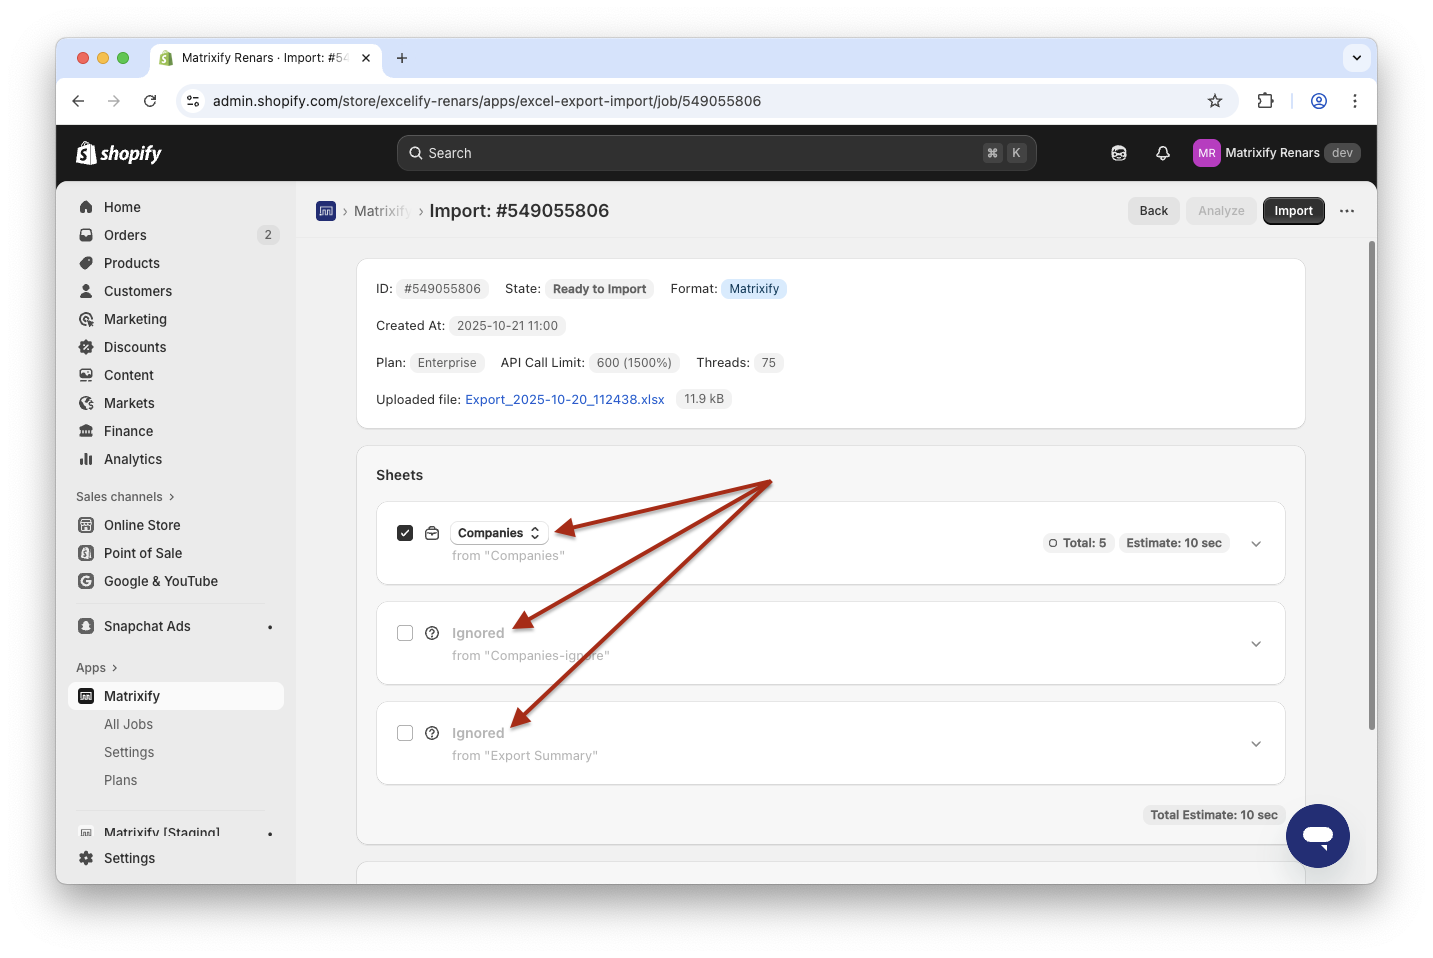
If all looks good, press the Import button to start the import job. You’ll be able to see real-time progress and results after the import completes.
After the import has finished, your Shopify stores’ B2B Companies have been updated, and Customers assigned to the Company Locations.
Good to know
- See Shopify manuals for more details on Shopify B2B Companies.
- Read Matrixify Companies documentation explaining all columns from the Companies sheet template.
- Check out other tutorials to bulk manage your Shopify B2B Companies.


