Managing Shopify B2B access often means cleaning up who’s allowed to order under each Company Location. When teams change, accounts are closed, or cleanup is needed, you may need to bulk remove and unassign Customers from Shopify B2B Companies and Company Locations.
You can quickly unassign Customers from B2B Locations in bulk with a spreadsheet using the Matrixify app’s Export and Import features. This tutorial shows how to export the minimum data you need, prepare a clean B2B contact removal file, and import it safely—so you can revoke access at scale by unassigning Customers from Company Locations or bulk removing from the whole Company.
Steps in short
- Export Shopify B2B Companies with Locations and Linked Customers using Matrixify.
- Edit the exported spreadsheet
- Save the file and import with the Matrixify app to bulk update your Shopify B2B Companies.
1. Export Shopify B2B Companies
Start by generating a focused Companies export that includes just the fields you need to target removals.
In the Matrixify app, create a new export and from the Select Sheets drop-down select to export the Companies sheet.
Include these essential columns:
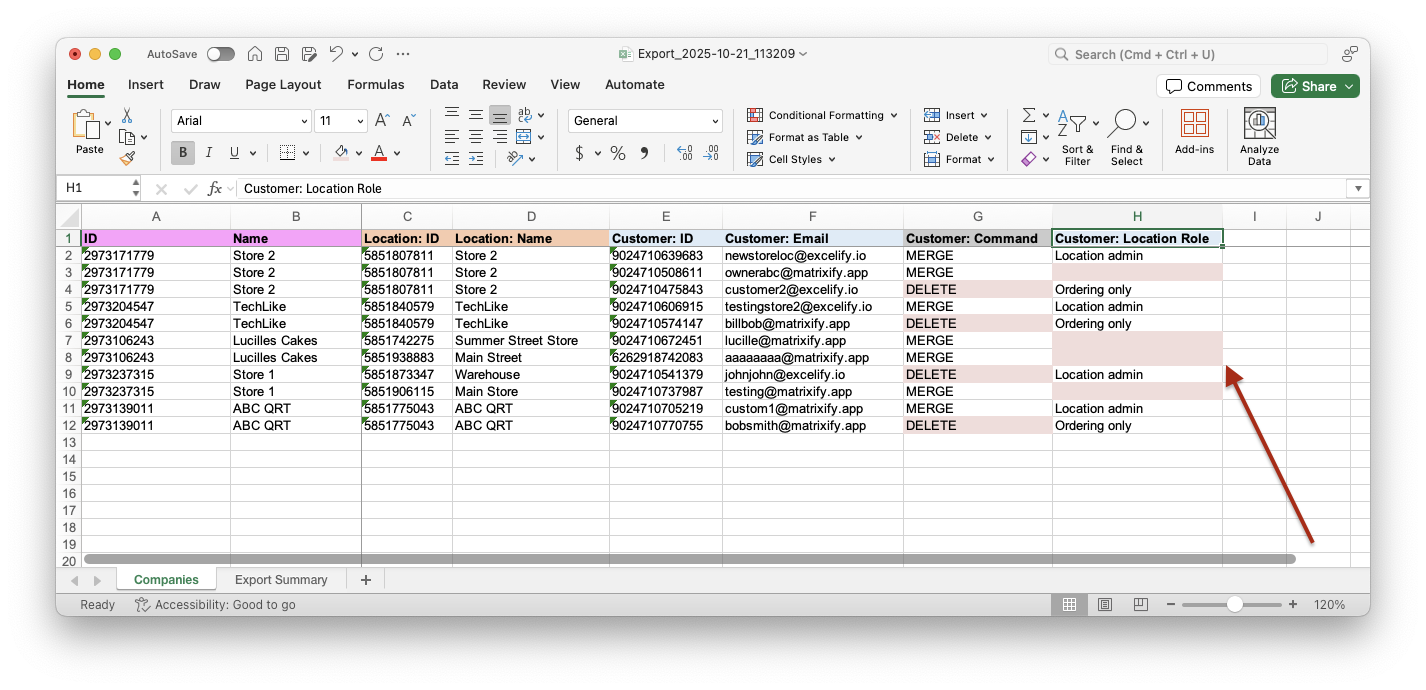
IDandName– to identify each B2B Company.Location: IDandLocation: Name– so you can pinpoint the exact Company Location where Customers should be removed.Customer: IDandCustomer: Email– to identify the Linked Customers.Customer: Command– to manage Linked Customers within the B2B Company.Customer: Location Role– manages the Customer’s role within a specific Company Location.
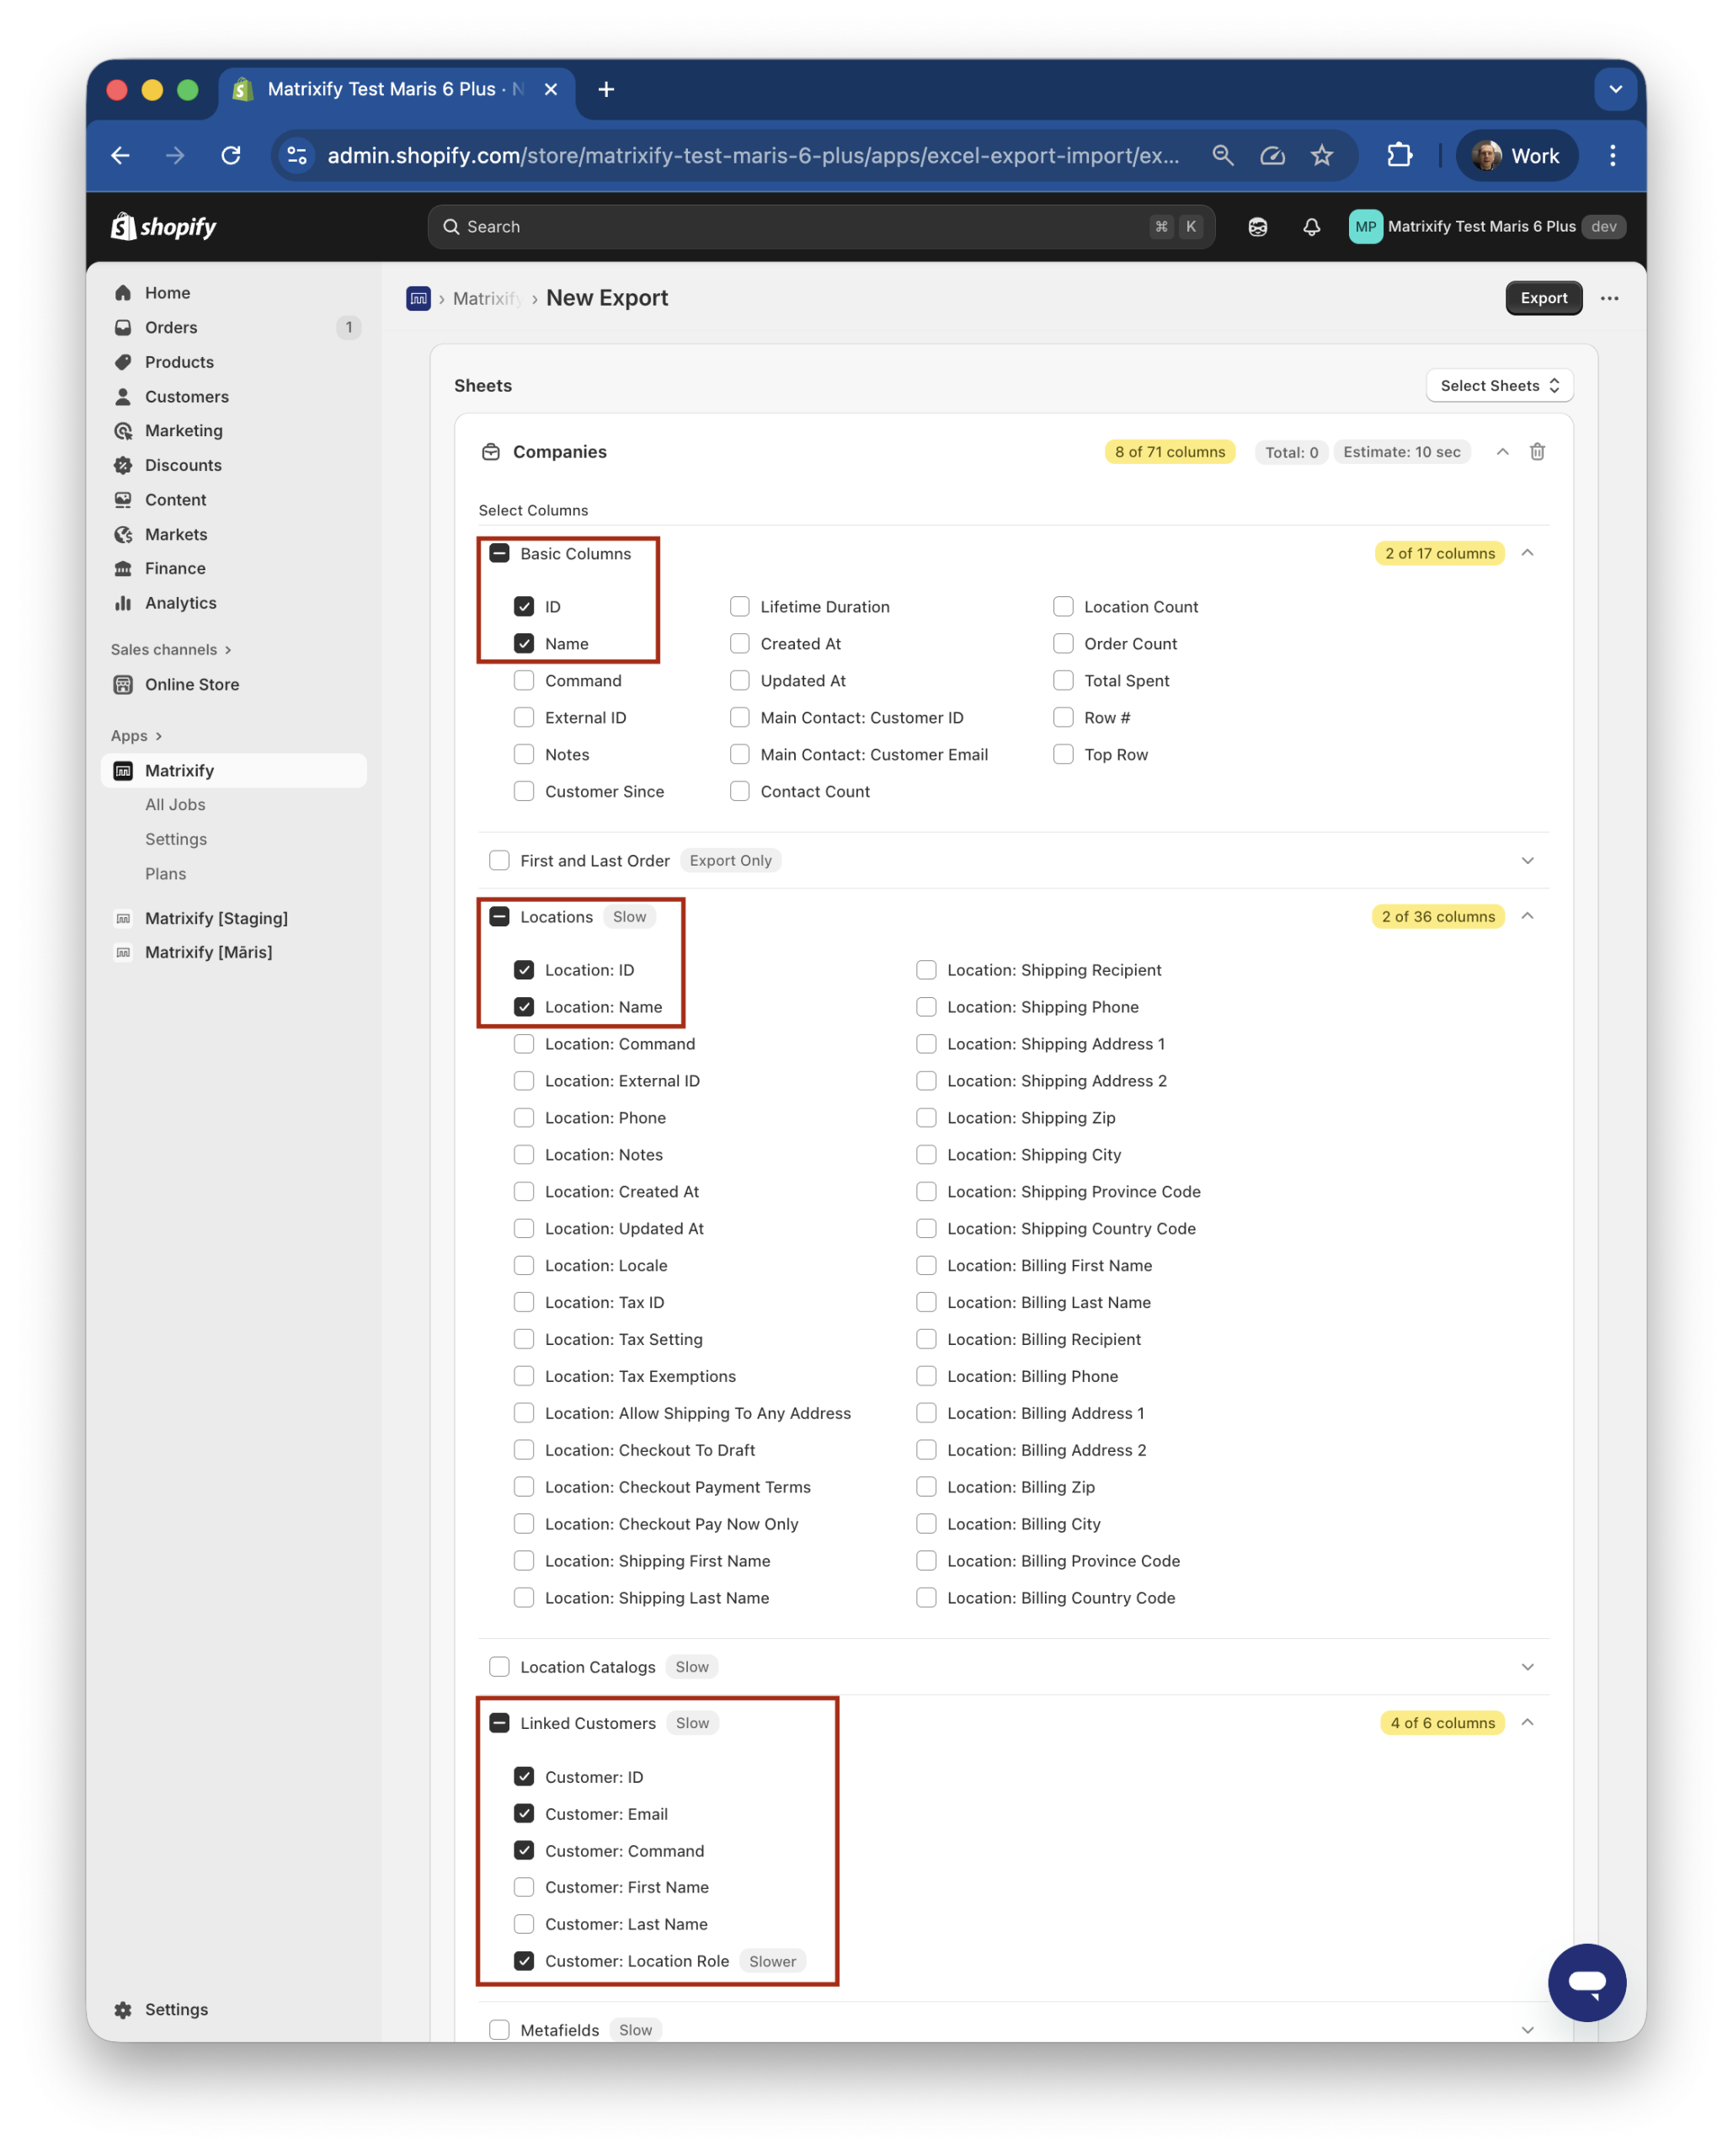
No further adjustments are needed – you can press the Export button to start the export job.
2. Edit B2B Companies spreadsheet
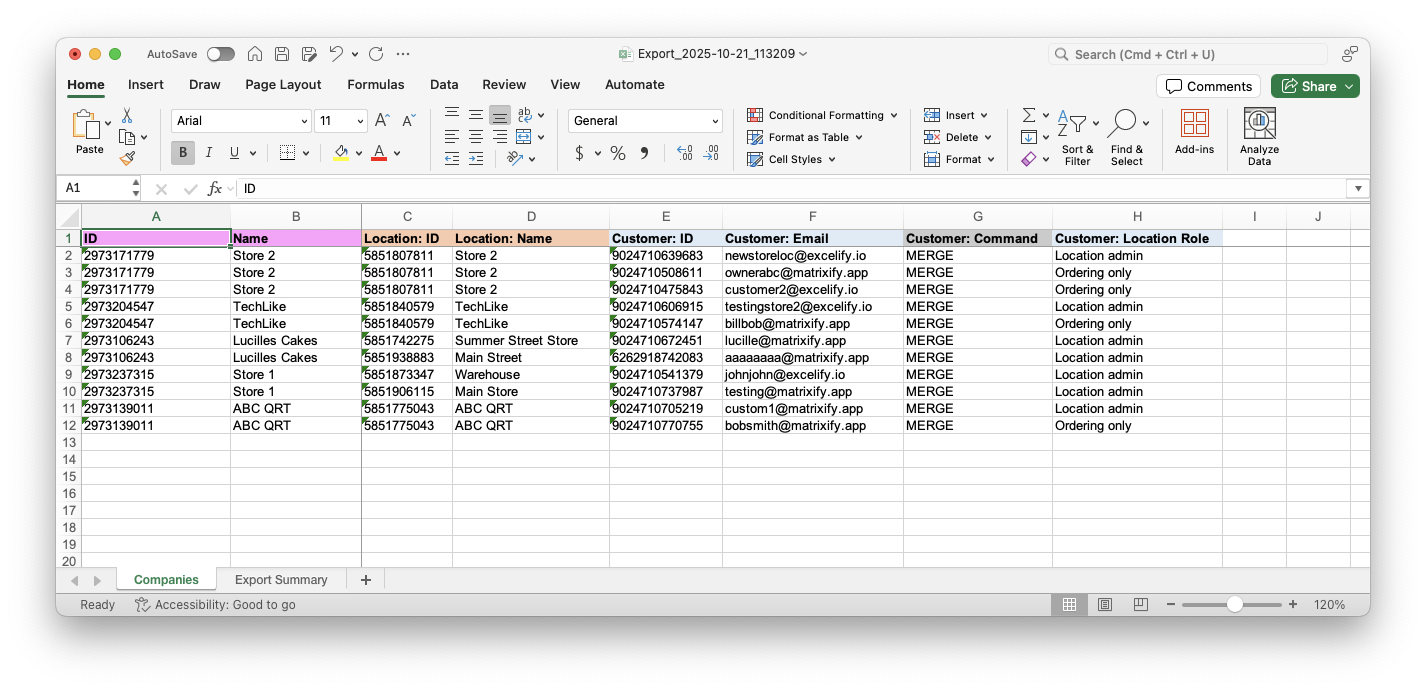
In the exported file, you will have as many rows as you have Customers linked to the Company. If multiple Customers are linked to the same Location, you will see your file containing multiple rows for that Location.
From here, you can edit the file to either remove the Customer from the whole Company or remove just from a specific Company Location.
Remove Customer from the whole B2B Company
A Customer in the whole B2B Company is managed by using the Customer: Command column.
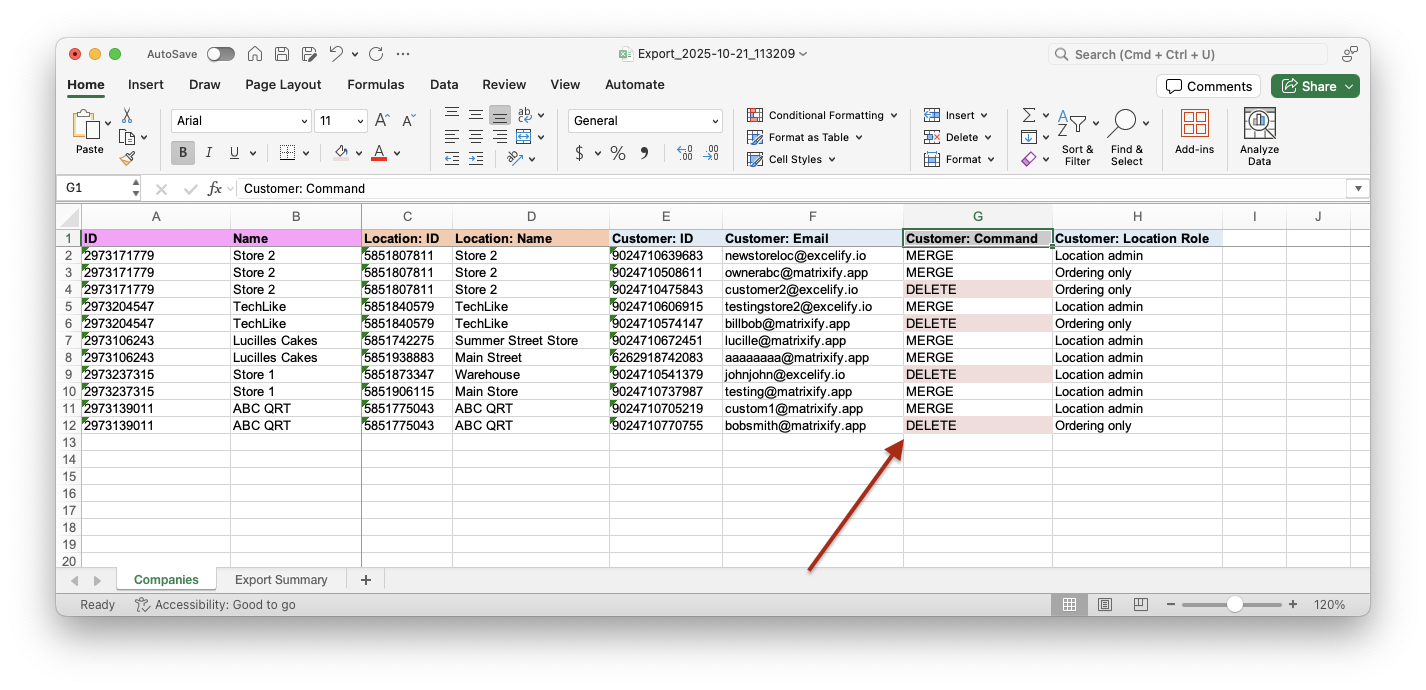
By default, the value in the column is MERGE. For Customers that you wish to remove from the whole Shopify B2B Company, change the Customer: Command column’s value to DELETE.
By setting the Customer: Command column’s value to DELETE, you will only remove the Customer from the Company; this will not delete the Customer from the Shopify store.
With Matrixify, you can also bulk delete Customers from your store.
Remove Customer from specific B2B Company Location
If you want the Customer to remain within the B2B Company but no longer be linked to a specific Location, you can remove the Customer: Location Role column’s value from the file and import the cell blank.
When importing, the Matrixify app will see that this Customer does not have a Role within Location in that row and thus remove the Customer from the Location. In a similar way, you can also change the Customer Role in that specific Location – by updating the Customer: Location Role value.
To make the file and your data import clearer, you can also remove rows of Customers and/or Locations that you do not wish to make any changes to, but you can also leave them in the file as they were exported.
3. Save the file and import with Matrixify
Once the file has been adjusted to suit your needs, save it and return to the Matrixify app in your Shopify store. Upload your file to the Matrixify apps Import section.
Make sure that the app detects the import sheet as Companies and that the count of Companies is correct. Note that the app does not count rows in the file, but actual unique Companies.
This is a simple but effective safety check before importing, to ensure that no data has been mixed up during file editing.
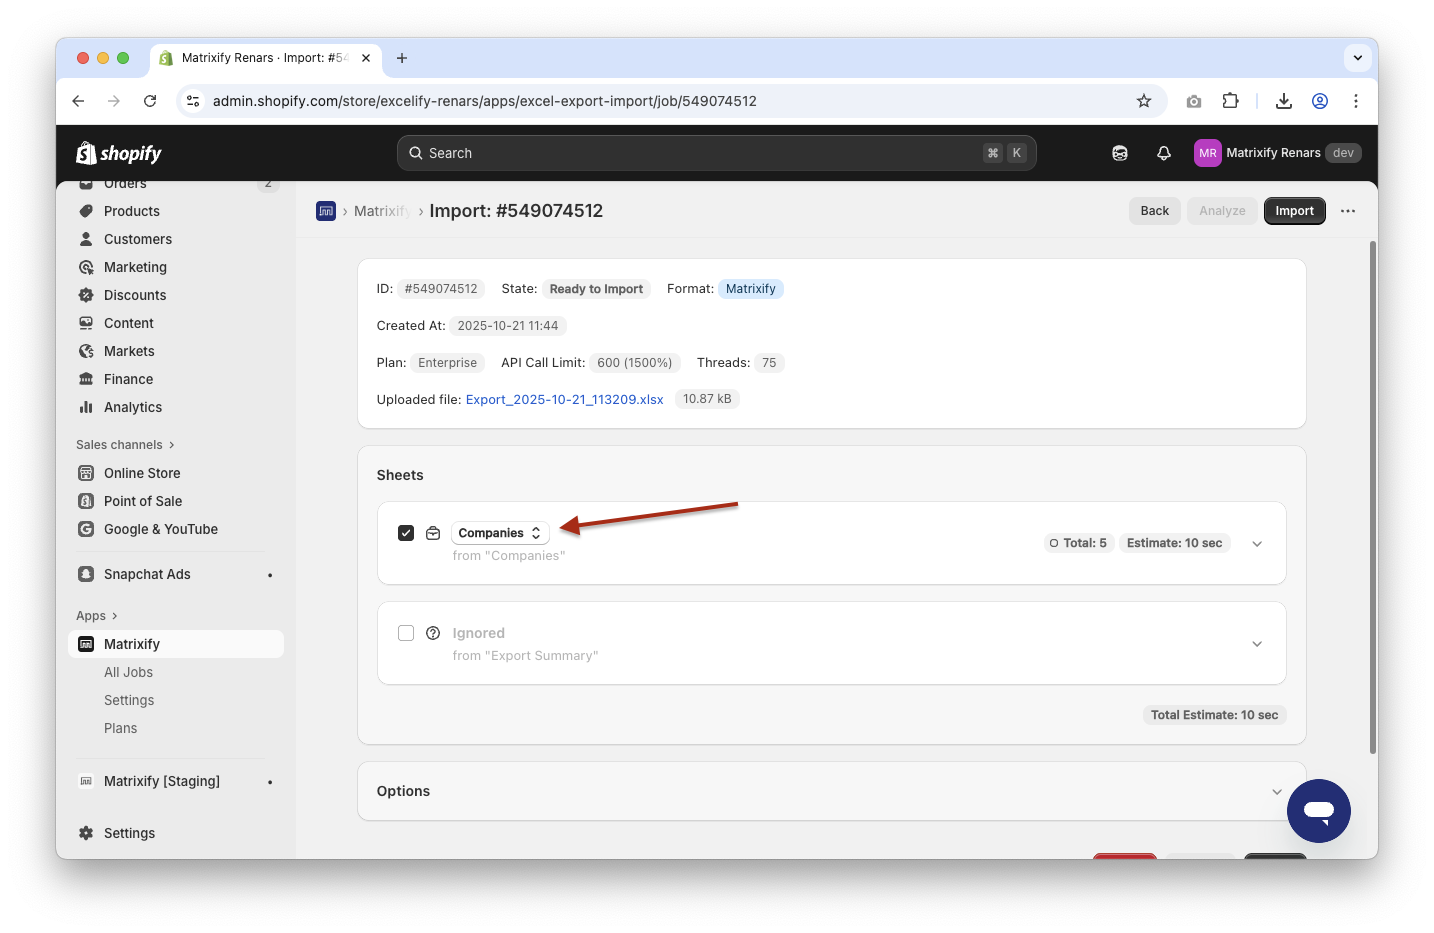
If everything looks correct, press the Import button to start the import. Once the import is complete, all the Companies should be updated according to the edits made in the uploaded file.
Good to know
- See Shopify manuals for more details on Shopify B2B Companies.
- Read Matrixify Companies documentation explaining all columns from the Companies sheet template.
- Check out other tutorials to bulk manage your Shopify B2B Companies.


