
With Matrixify you can easily delete and update your Customer addresses in bulk. Let’s take a look at how to do it.
In Short
- Export your Customers with Addresses.
- Set “Address Command” column value to “DELETE” for the addresses you wish to delete.
- Delete the unnecessary columns and rows from the file. Needed columns to delete Customer Addresses:
- ID
- Address ID
- Address Command
- Save, import and enjoy!
1. Export Customers with Addresses
First, you would need to export the Customers with their addresses. You can also apply filters to export only the Customers that you wish to update.
In the Matrixify Export section in the drop down “Select Sheets” select the checkbox “Customers” then select “Addresses” and “Basic Columns”. If needed, click on the filter icon to apply filters. Near the Export button, select the file format you wish to export to (preferred: Matrixify: Excel).
Click the “Export” button to start the export.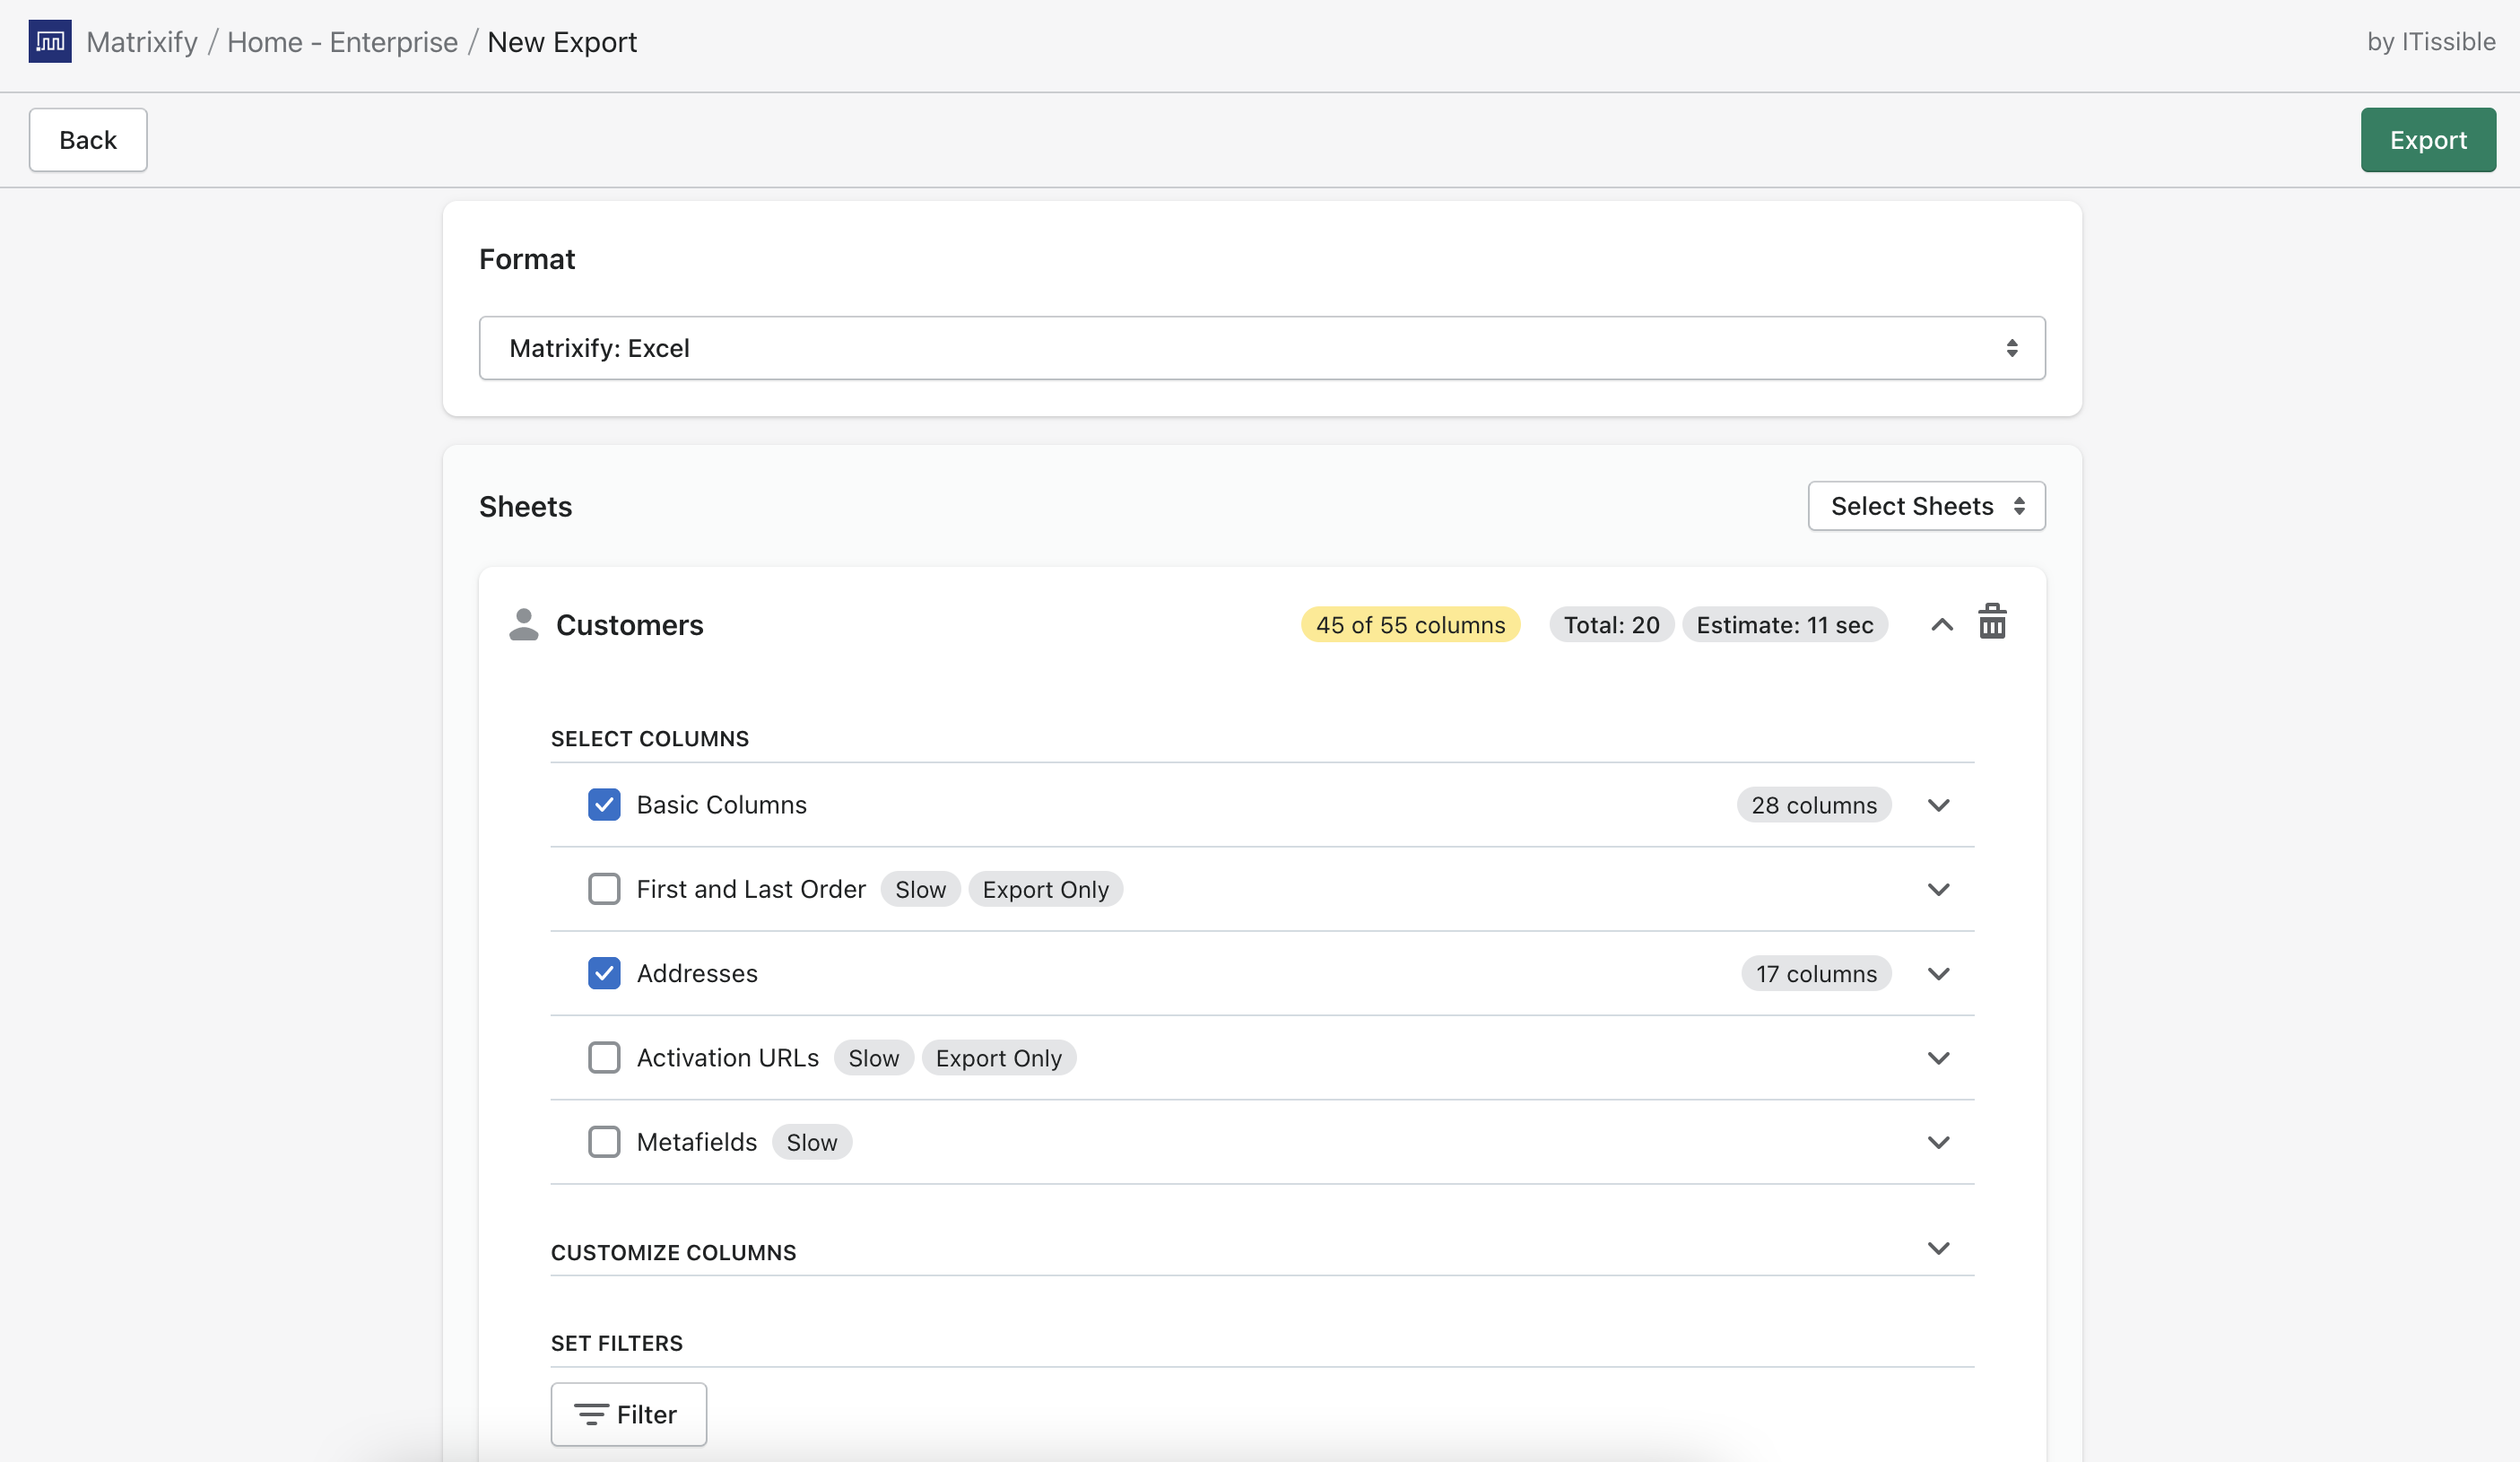
2. Set “Address Command” value to “DELETE” for the addresses you wish to delete
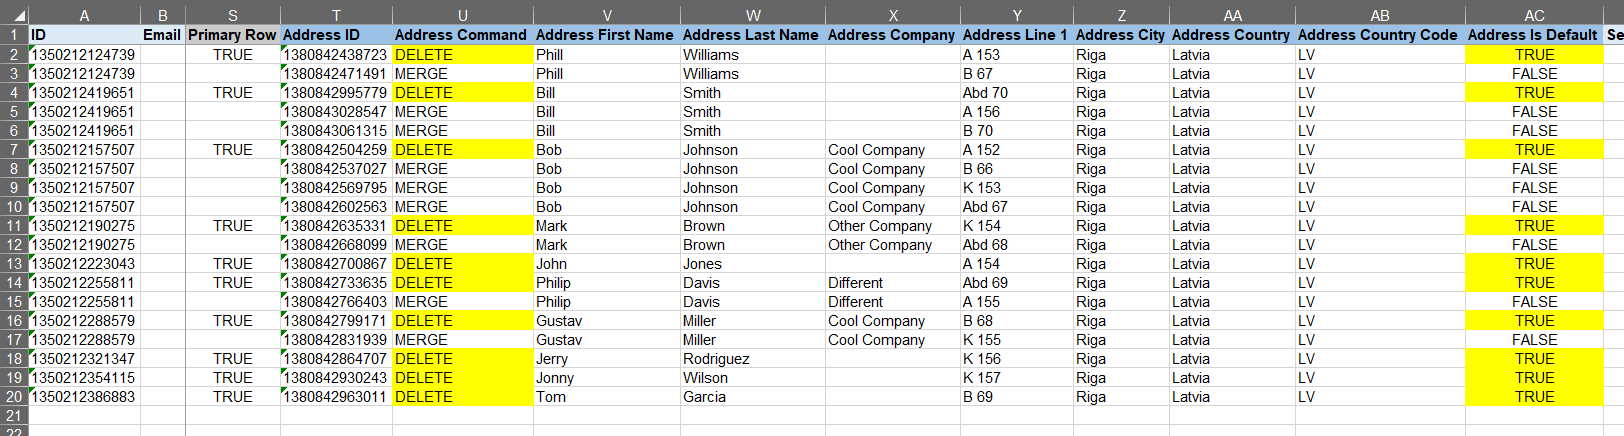
Once the Export is finished you can click on “Download Exported File” button to download the file. In this file, you will see all your exported Customers with their addresses. If a Customer has multiple addresses then that Customer will have multiple rows in the file, one for each address.
Now we can take a look at what addresses we wish to delete. You can also assign to delete Default address for a Customer, but since in the Shopify Customer cannot exist without the default address the app will select next address as default. If there is no address to pick as the next default, it will create a new empty default address with only Customers First Name and Last Name.
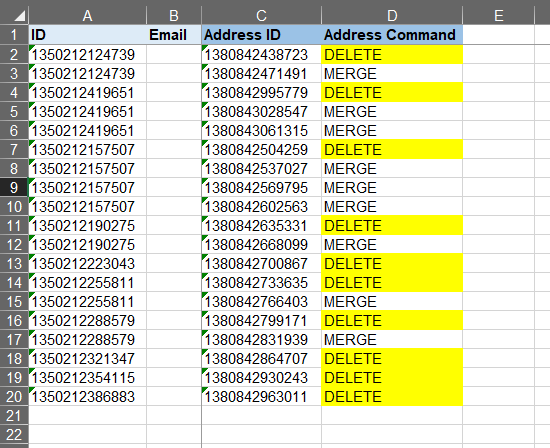
To indicate that you wish to delete the address edit column “Address Command” to “DELETE“. In this example I will set to delete all Default addresses for my Customers. You can see if the address is a default address for Customer by the column “Address Is Default“.
Before:

After:
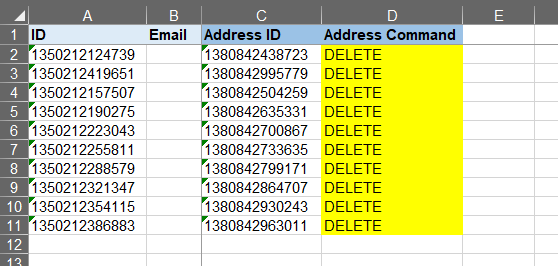
3. Delete the unnecessary columns and rows from the file
Now we can delete the columns that we do not wish to update. This will also improve the import speed. We will only need these columns:
- ID
- Address ID
- Address Command
Do not worry if some of your customers don’t have emails, then they will be updated by the ID column.
After deleting columns we can remove the rows that we do not wish to edit. In this case, it would mean to delete the rows with addresses that you are not deleting.
4. Save, import and enjoy!
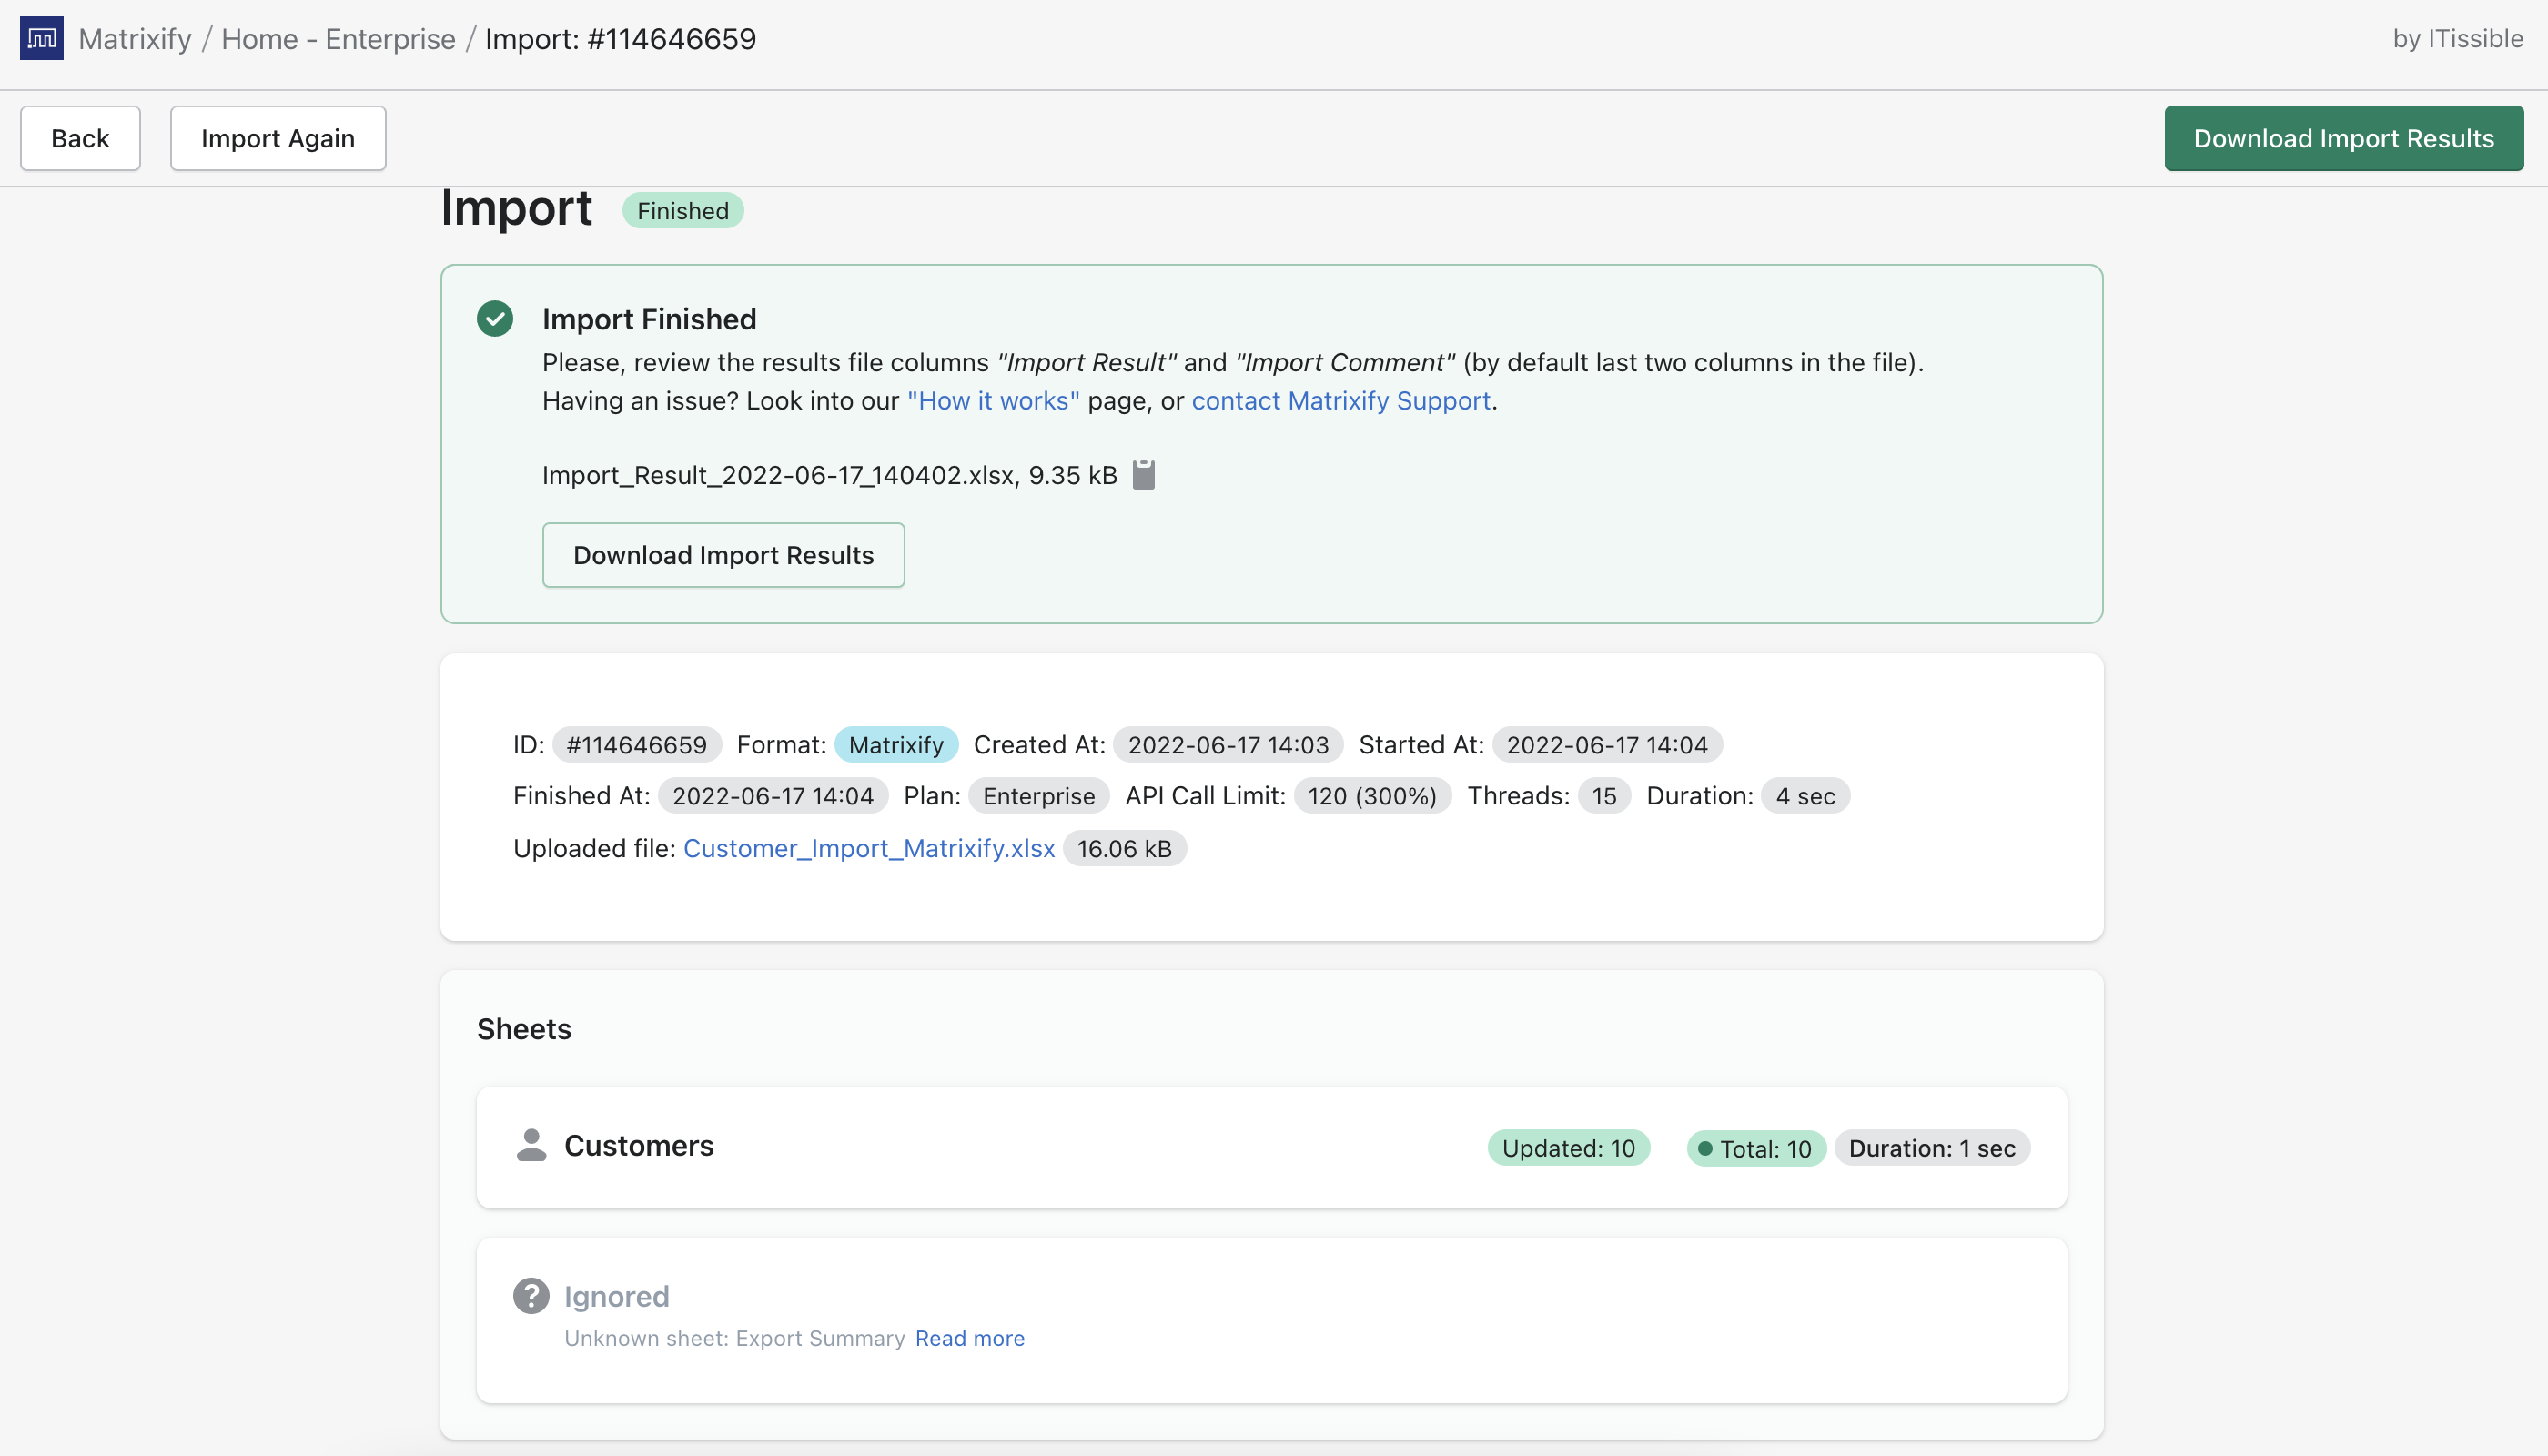
Now you can save the file. Go back to the Matrixify app and import the file in the Import section. The app will analyze the file and count how many Customers you are importing.
Press the Import button to start the import.
If you see any Failed items, then after the import has finished, you can download the Import Results file and look into the “Import Comment” column. It will tell why particular Customers has failed. Then you can fix that issue and re-import just those failed and fixed rows again.
What to do next?
- Install the Matrixify App.
- Check out the documentation for our Customers sheet template.
- Check other related tutorials.
- Contact Matrixify support if you run into any issues or have additional questions.


