
Now with the Matrixify app, you can customize your export to specify what columns to export and in what order!
Let’s go through how you can do that!
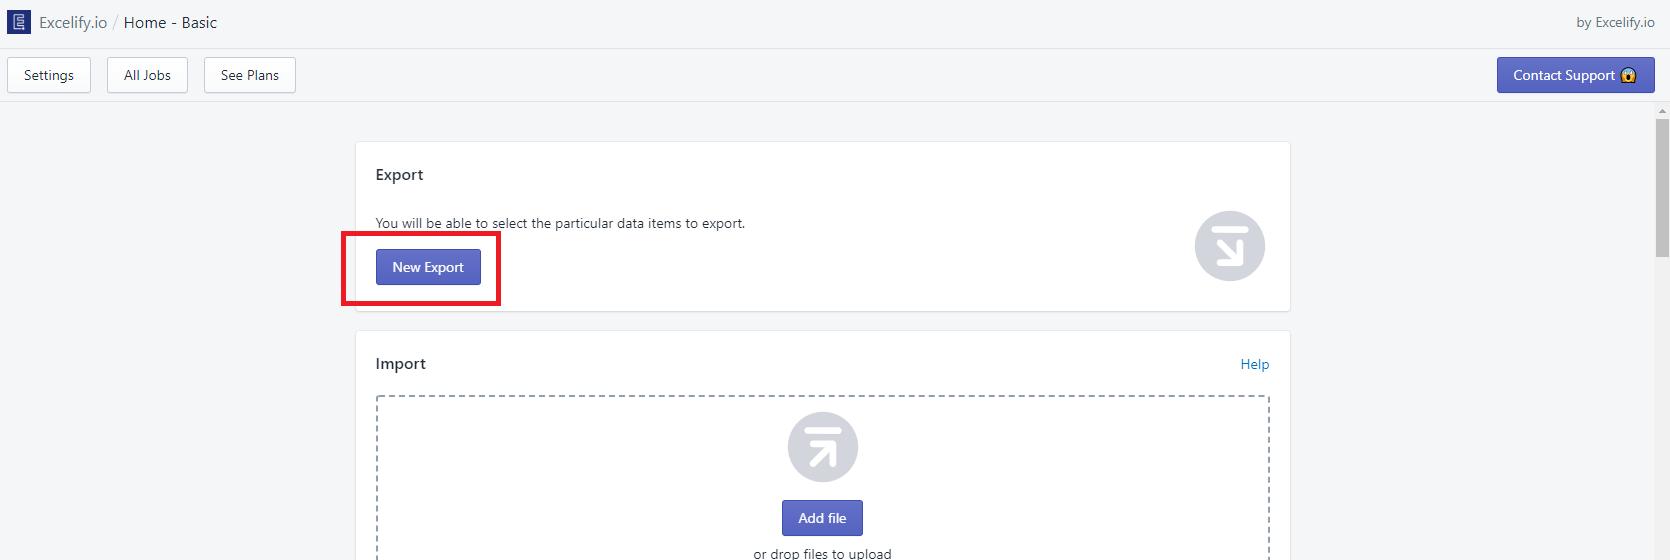
1. Creating new Shopify data export
Go into the Matrixify app and in the Home page Export section press the “New Export” button.
The app will open a new page where you can set up and configure your export.
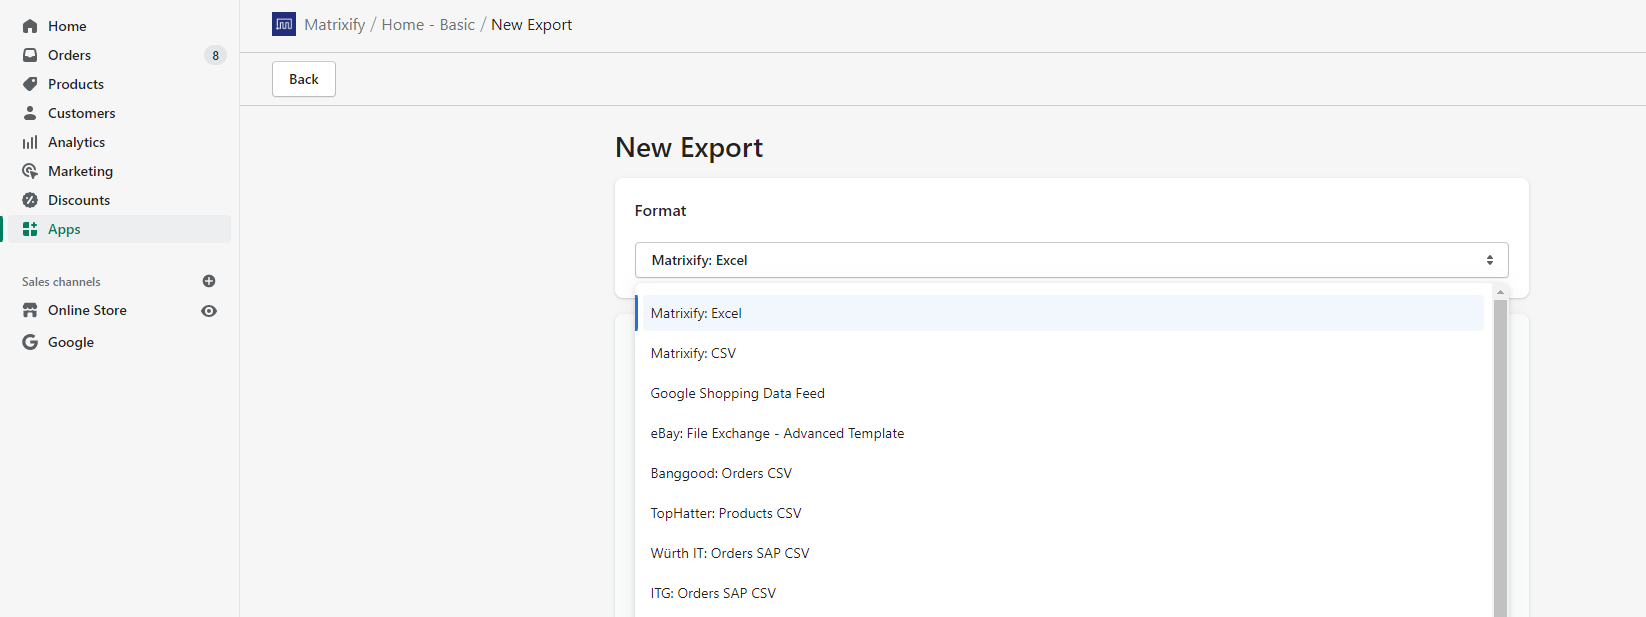
2. Select the data export format
First section of the new export is selecting your export format.
Click on the dropdown menu to select your preferred format.
Adjustable columns are available in both Matrixify formats:
- Matrixify: Excel – exports to Excel XLSX file
- Matrixify: CSV – exports to CSV file
Select one of these formats.
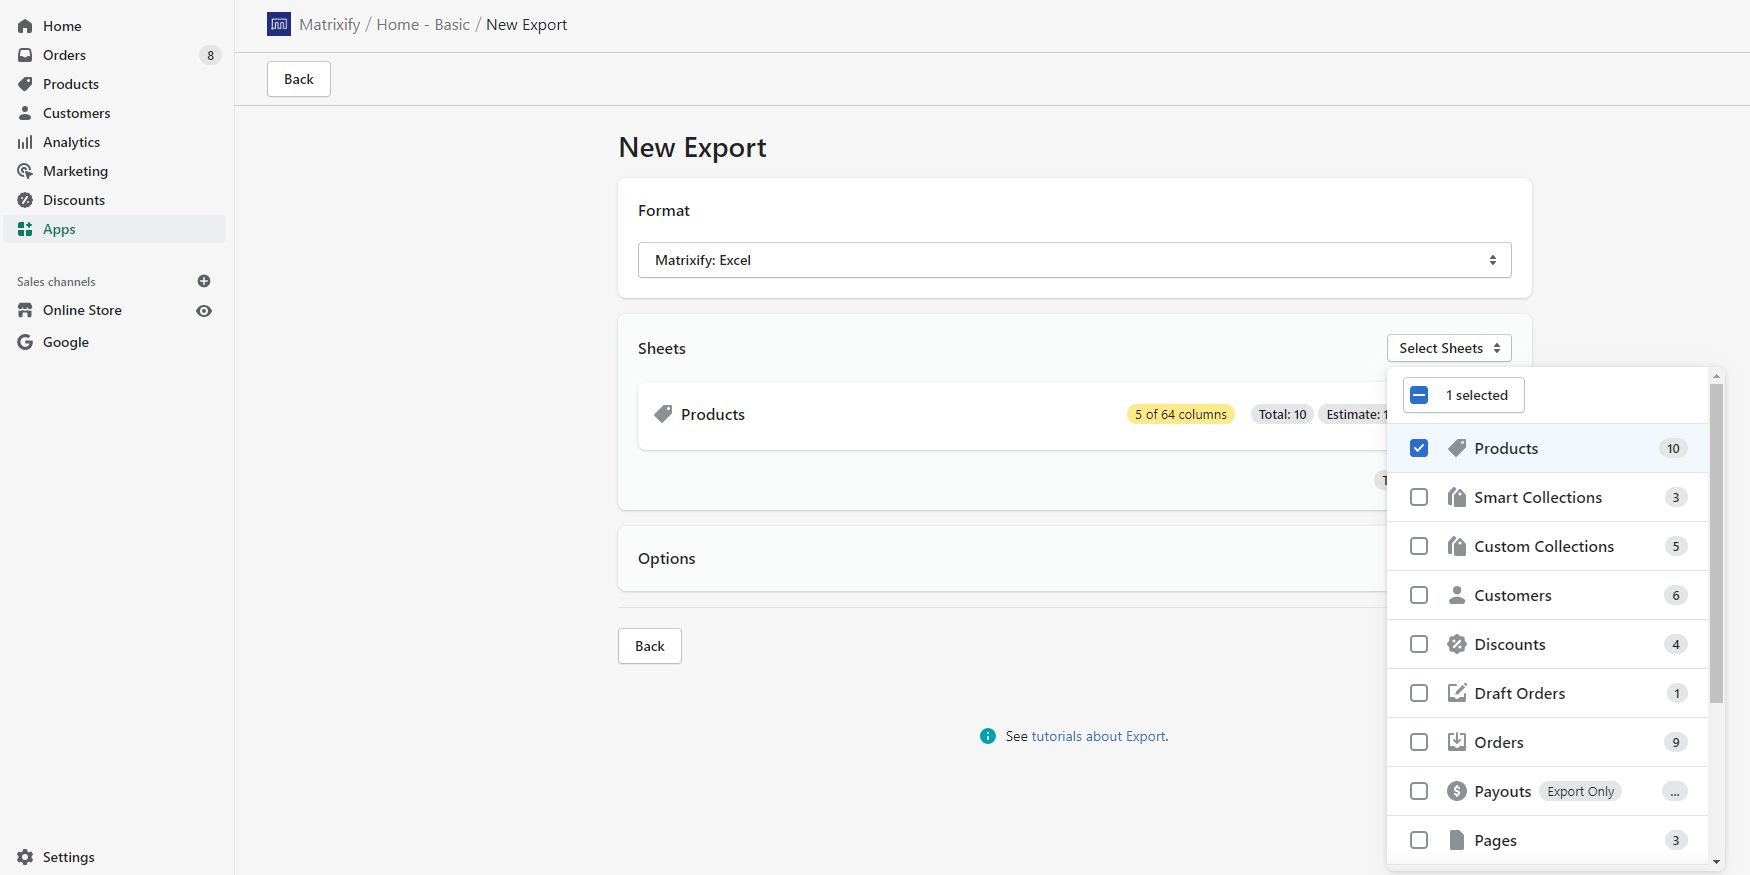
3. Choose what to Shopify data to export
In the next “Sheets” section, you can select sheets of what to export, for example, I will select to export the Shopify Products.
You can also select and the same way adjust other exportable entities, such as Orders, Collections, etc.
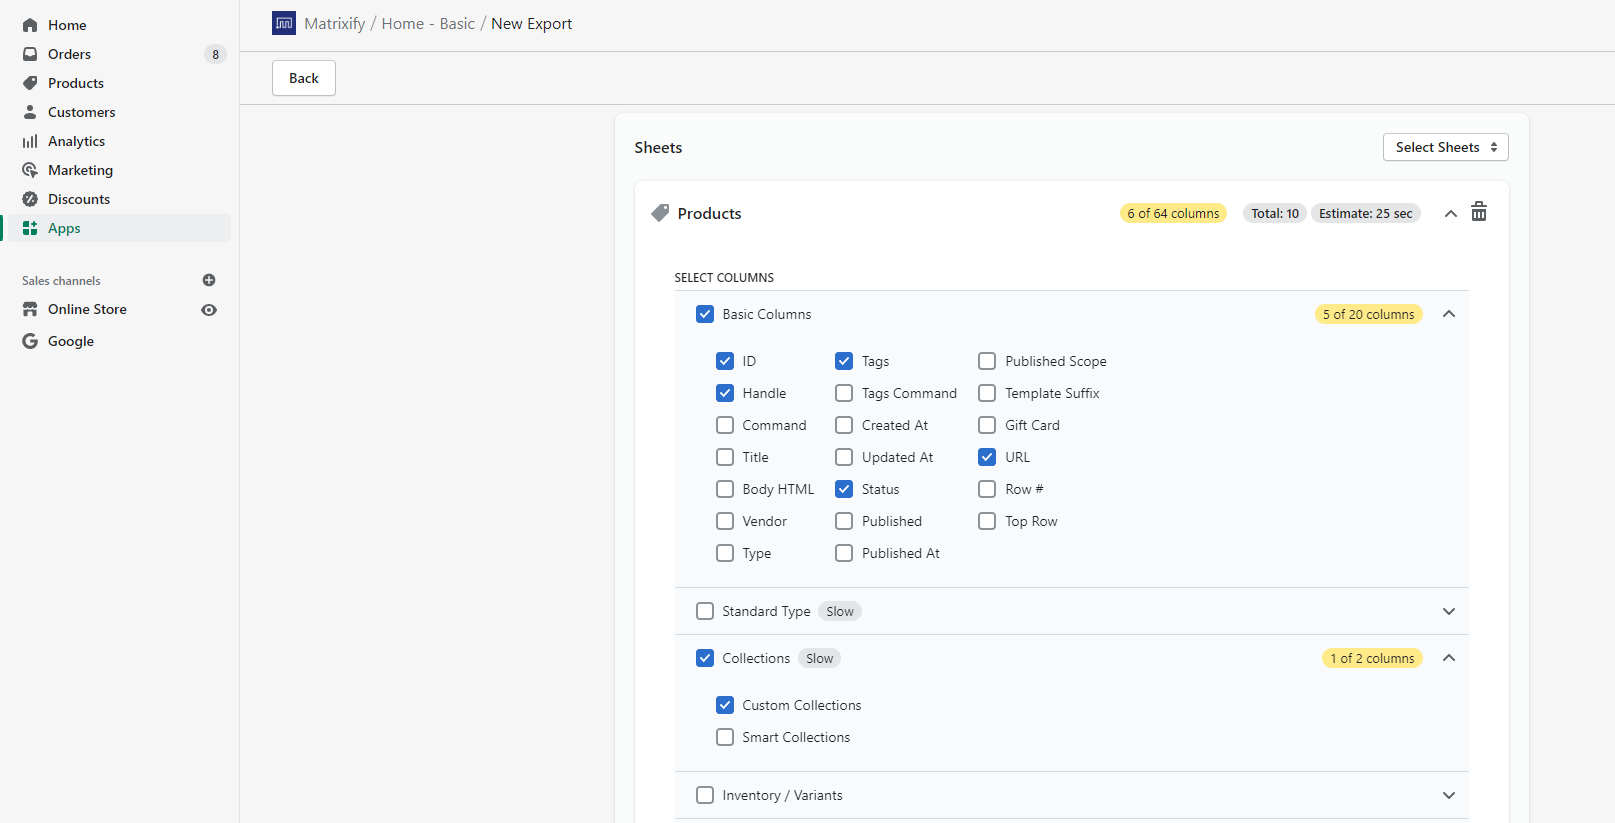
4. Customize Shopify columns to export
Now is time to select exactly what data to export from Shopify and customize it.
Select Columns
Click on the entity you wish to adjust, such as Products to open it and select data.
Click on the group of fields to select all columns under this group and/or open it to select individual columns to export.
You can find what fields are under each group in Matrixify template sheets documentation.
Selecting a group will display how many columns are under this group.
Customize Columns
Once you have selected what columns export to export – open the “Customize Columns” section where you can remove individual columns, or change their positions.
All fields you have selected to export for this entity will be visible in this section.
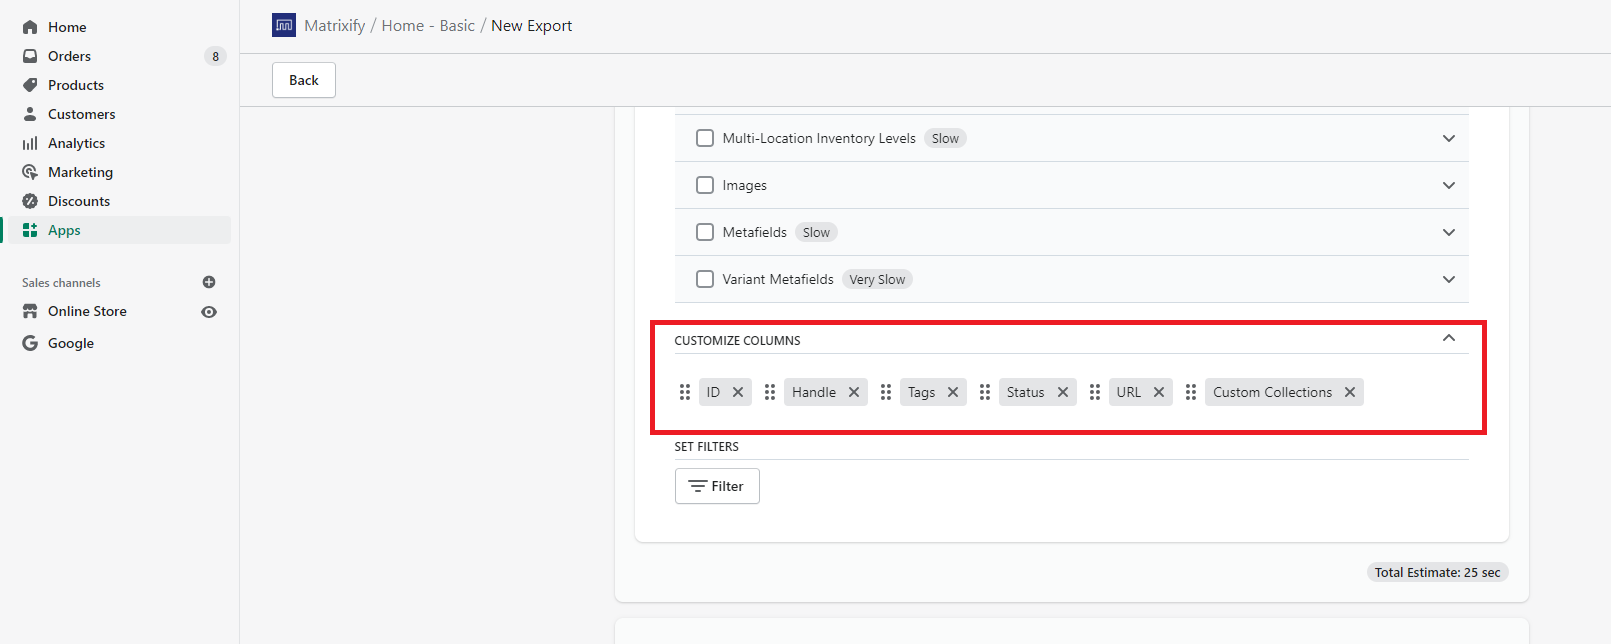
You can add or remove fields by checking or unchecking them in this dropdown, or you can click on the field tags “X” button to remove it.
To change exported field order you can drag the columns by the 6-dot symbol of each field.
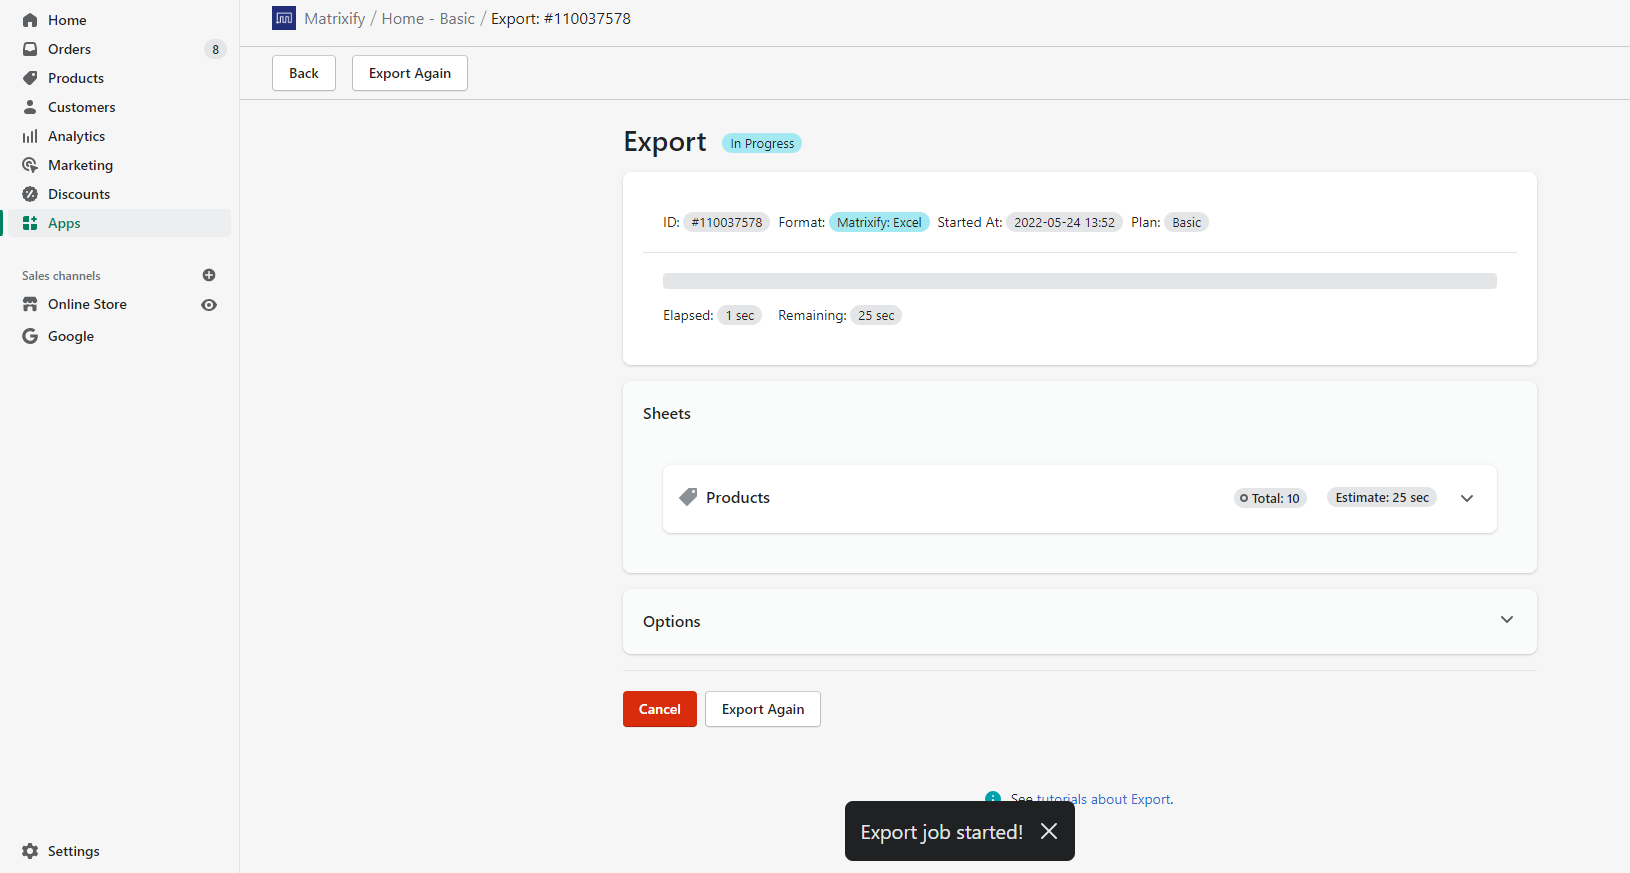
5. Start the export
Once you have selected columns you wish to export, you can click on the “Export” button to start the Export.
While export is going you will see the progress of how many items are exported and estimated time remaining to finish.
At this stage, you are free to close your browser as everything is happening on our servers.
6. Download and enjoy your export
One the export is finished, click on the “Download exported file” to download your custom file.

What to do next?
- Read Matrixify “How it works” page to learn other important aspects and features of the Matrixify app.
- Reach out to us if you have any questions!


