
Metafields are custom fields in Shopify and managing them manually in Shopify Admin might be a complicated task.
Here we will take a look at how to bulk manage your Shopify Metafields with Matrixify.
With this tutorial, you can bulk import and export Shopify Metafields that have Metafield definitions and also Metafields without definitions, you can find both in Shopify Admin -> Settings -> Custom Data.
Matrixify app allows you to bulk manage, export, import, and update almost all entity Metafield values that Shopify supports natively – Products, Variants, Collections, Customers, Companies, Company Locations, Orders and others.
See Matrixify Metafields documentation for an exact list of entity sheets that support exporting and importing Metafield values.
The process for bulk updating Metafield values works in the same principle for all data entities. You would just change what entity you are exporting when you create an export in the app.
Steps, in short, to bulk manage Metafields:
- Set up Metafield definitions in your store.
- Create Matrixify app export with Basic Columns with Metafields.
- Edit Metafield column values.
- Save and import.
- Check your updated Metafields.
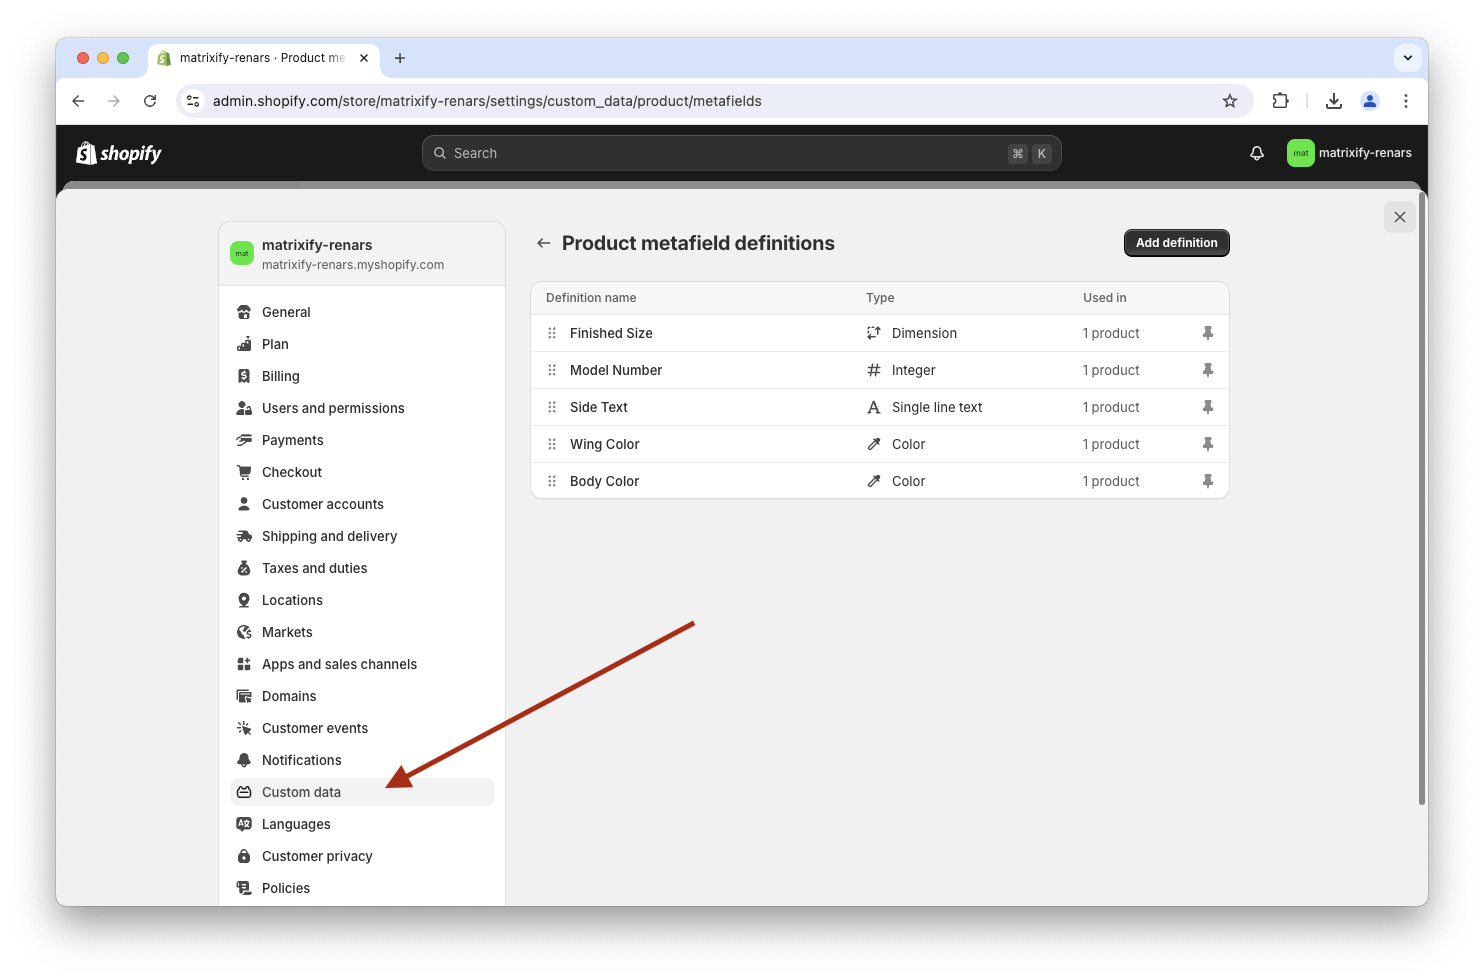
1. Set up Metafield definitions in your store
First, we need to make sure to set up Metafield definitions in your Shopify store.
Metafield Definitions create a structure for your Metafields, with specific types and set limitations for the values you have in Metafields.
You can set them up in your Shopify store Admin -> Settings -> Custom Data. See the Shopify manual on how to create and set up Metafield definitions.
2. Export Shopify Metafields to a spreadsheet
We can now go to the Matrixify app and create a new export to a spreadsheet file where we can update the Metafields for our Products in bulk.
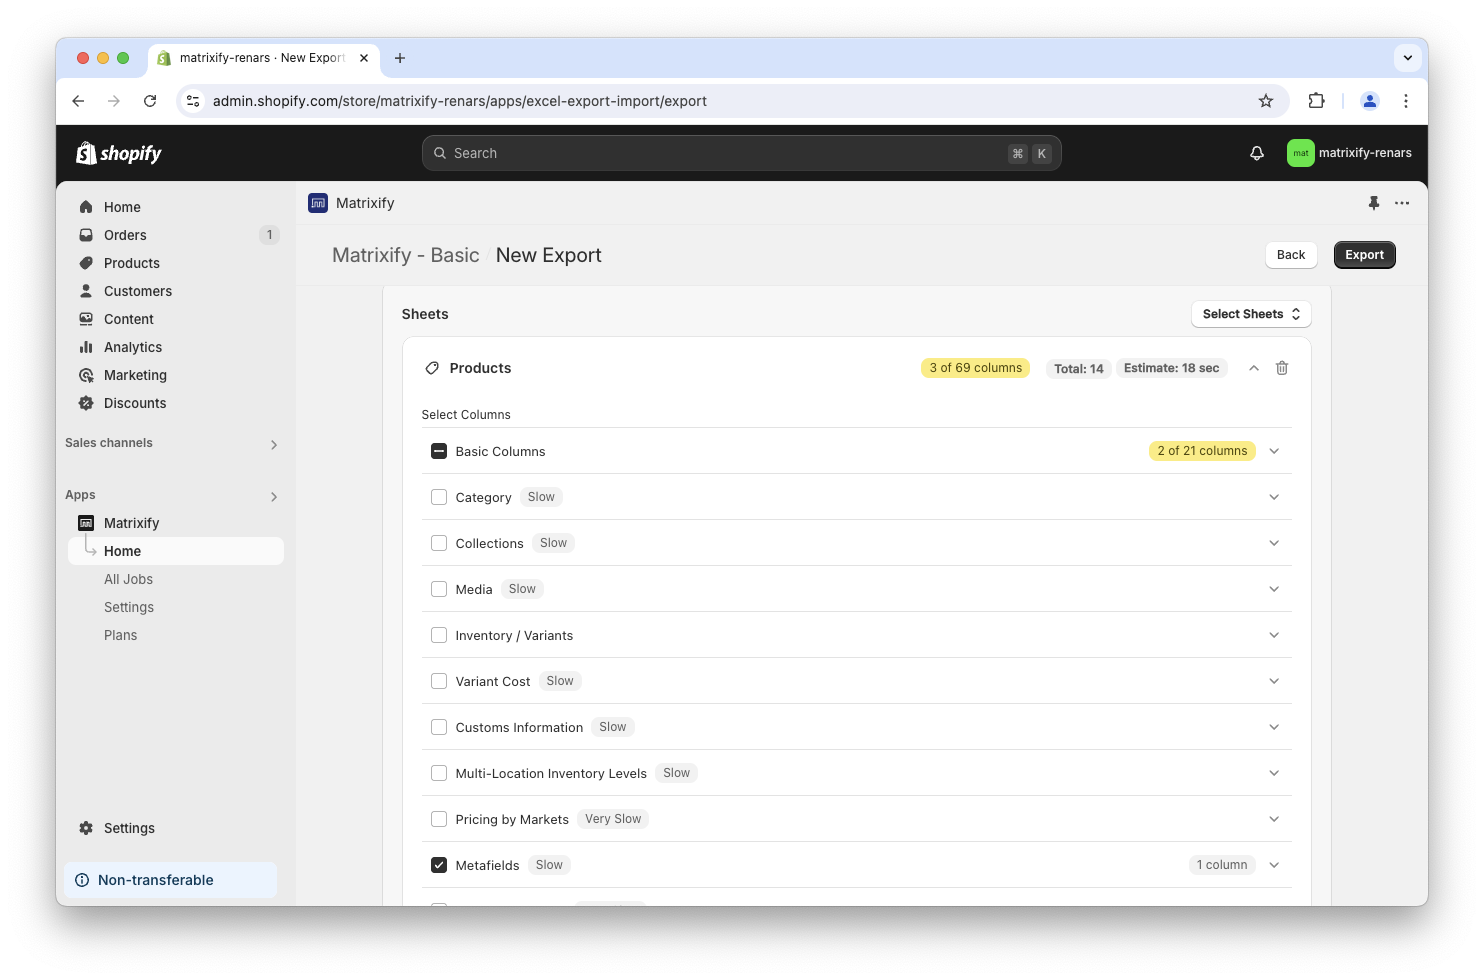
In Matrixify, create a new export, select the export format Matrixify: Excel and select to export the Products sheet.
As we only need to update Metafields then we do not need to select to export all Product details.
Under the Products sheet section, open Basic Columns column group and select columns ID and Handle.
Select also Metafields column group.
It should look like this. Note that there are only 3 columns selected to export – ID and Handle under Basic Columns and Metafields.
These are recommended minimum columns needed for the Matrixify app to be able to identify the item and update values in Metafields without updating other Product data.
Metafields column group will show as only 1 column as the app does not know how many Metafield columns there will be in total.
If you are updating other Metafields then you would have the following minimum recommended columns:
- Product Metafields
Select sheetProducts.
Select columnsID,HandleandMetafields. - Variant Metafields
Select sheetProducts.
Select columnsID,Handle,Variant IDandVariant Metafields. - Collection Metafields
Select sheetSmart CollectionsorCustom Collecitons(depending on which ones you are working with).
Select columnsID,HandleandMetafields. - Customer Metafields
Select sheetCustomers.
Select columnsID,EmailandMetafields. - Order Metafields
Select sheetOrders.
Select columnsID,NameandMetafields. - Draft Order Metafields
Select sheetDraft Orders.
Select columnsID,NameandMetafields. - Company Metafields
Select sheetCompanies.
Select columnsID,NameandMetafields. - Company Location Metafields
Select sheetCompanies.
Select columnsID,Name,Location: ID,Location: NameandLocation Metafields. - Page Metafields
Select sheetPages.
Select columnsID,HandleandMetafields. - Blog Post Metafields
Select sheetBlog Posts.
Select columnsID,HandleandMetafields. - Shop Metafields
Select sheetShop.
Select columnsMetafields.
You can also add other columns in your export file if they can help you work with your data or if you need them to fill values in your Metafield columns.
But note, that depending on what other data you have selected, it could make the file structure more complex with multiple rows per item.
You can also apply column selector to “filter” Metafields columns – export only specific Metafields columns when you don’t need all of them in the exported file.
Read more on how to apply the Metafield column selector.
You do not need to select any other checkboxes in the Options section at the bottom of the page. The default export setup will work fine here.
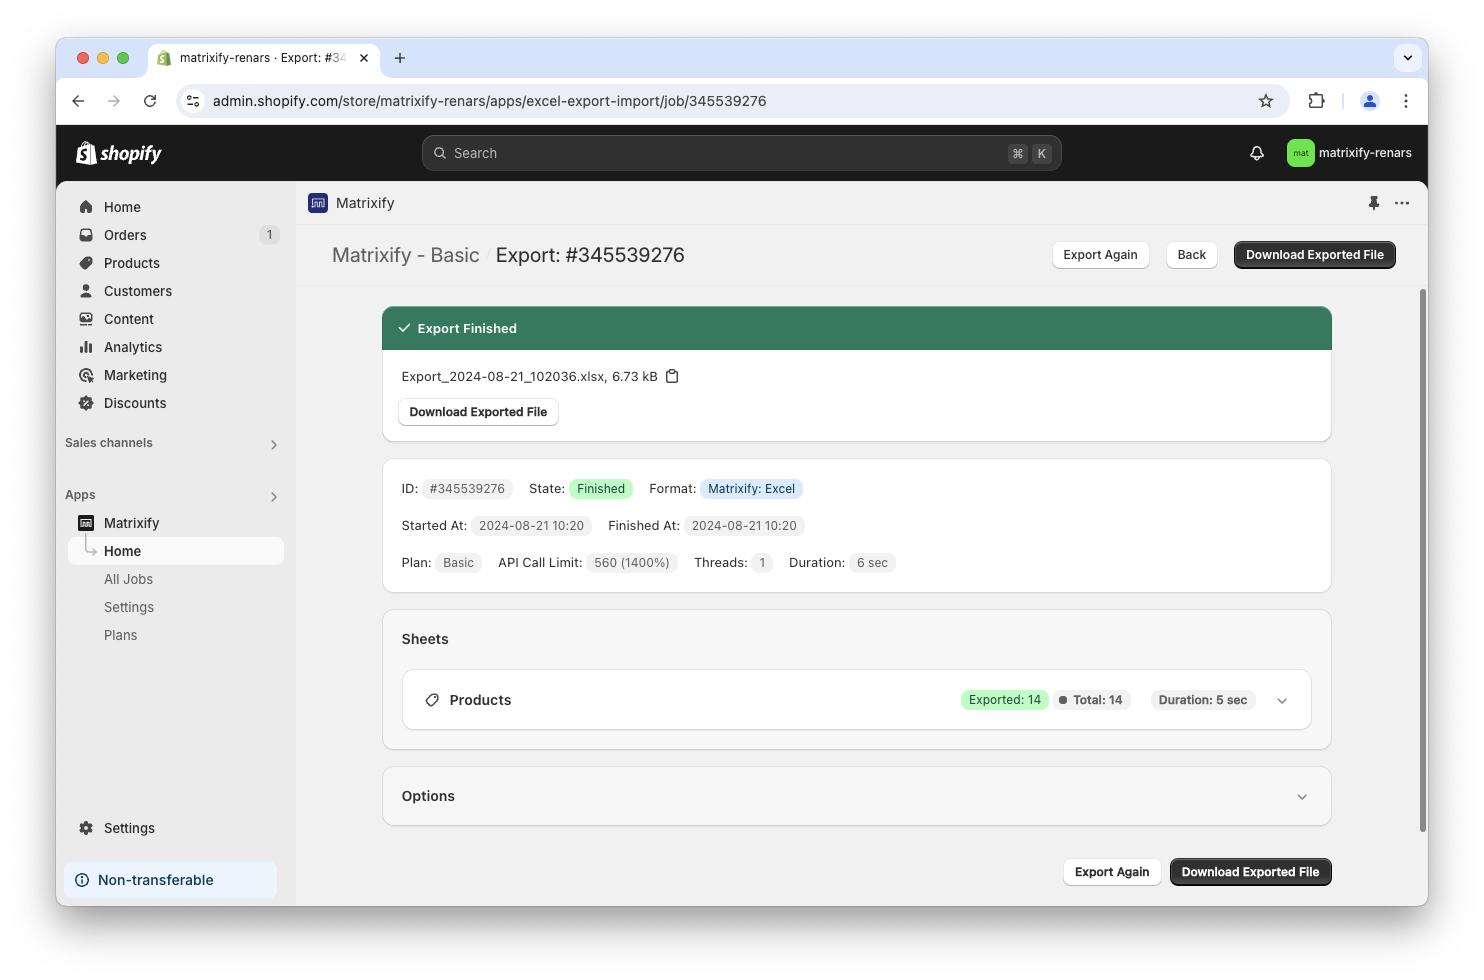
Click the Export button to start the export and download the exported file when finished.
3. Edit Metafield column values
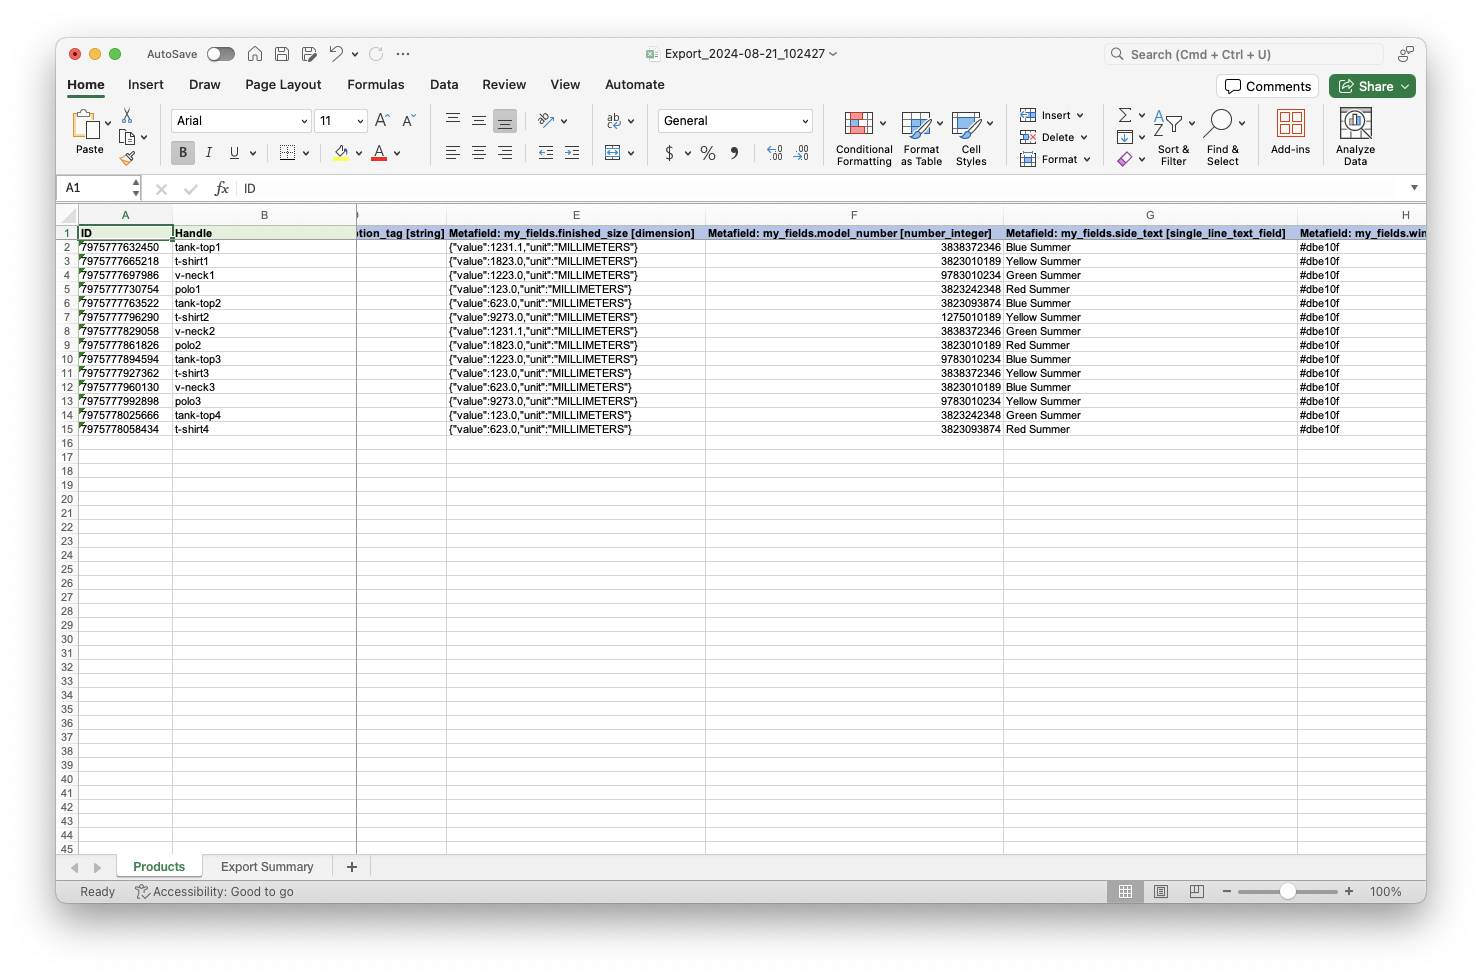
In your exported file, you can see Metafield: columns with column headers containing Metafield namespace, key and type and in rows you see Metafield values for any Products where the value is set.
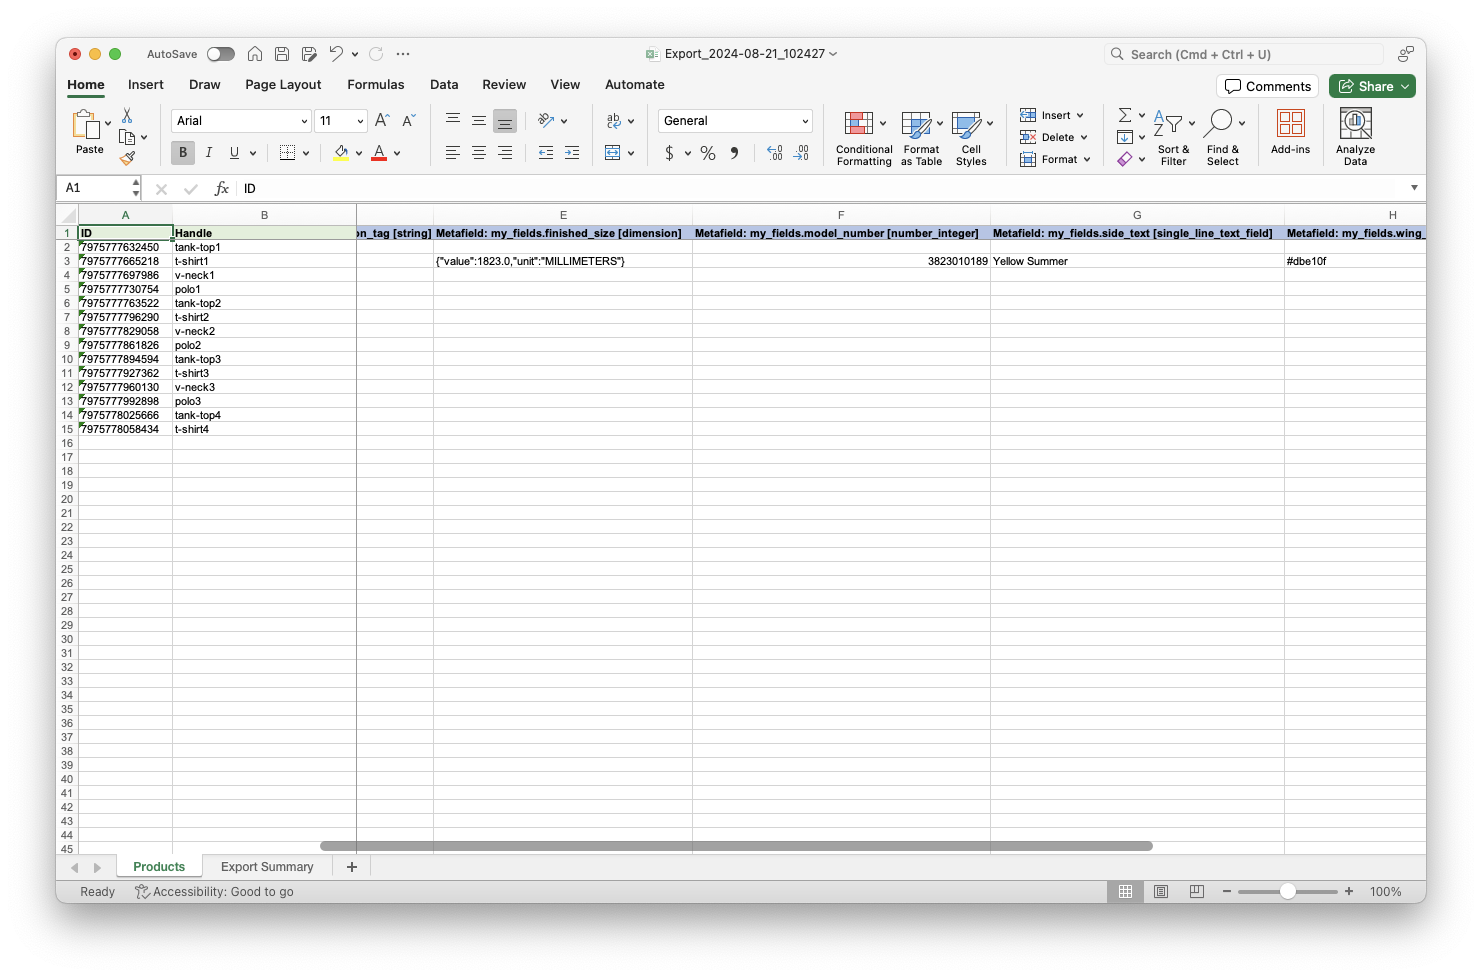
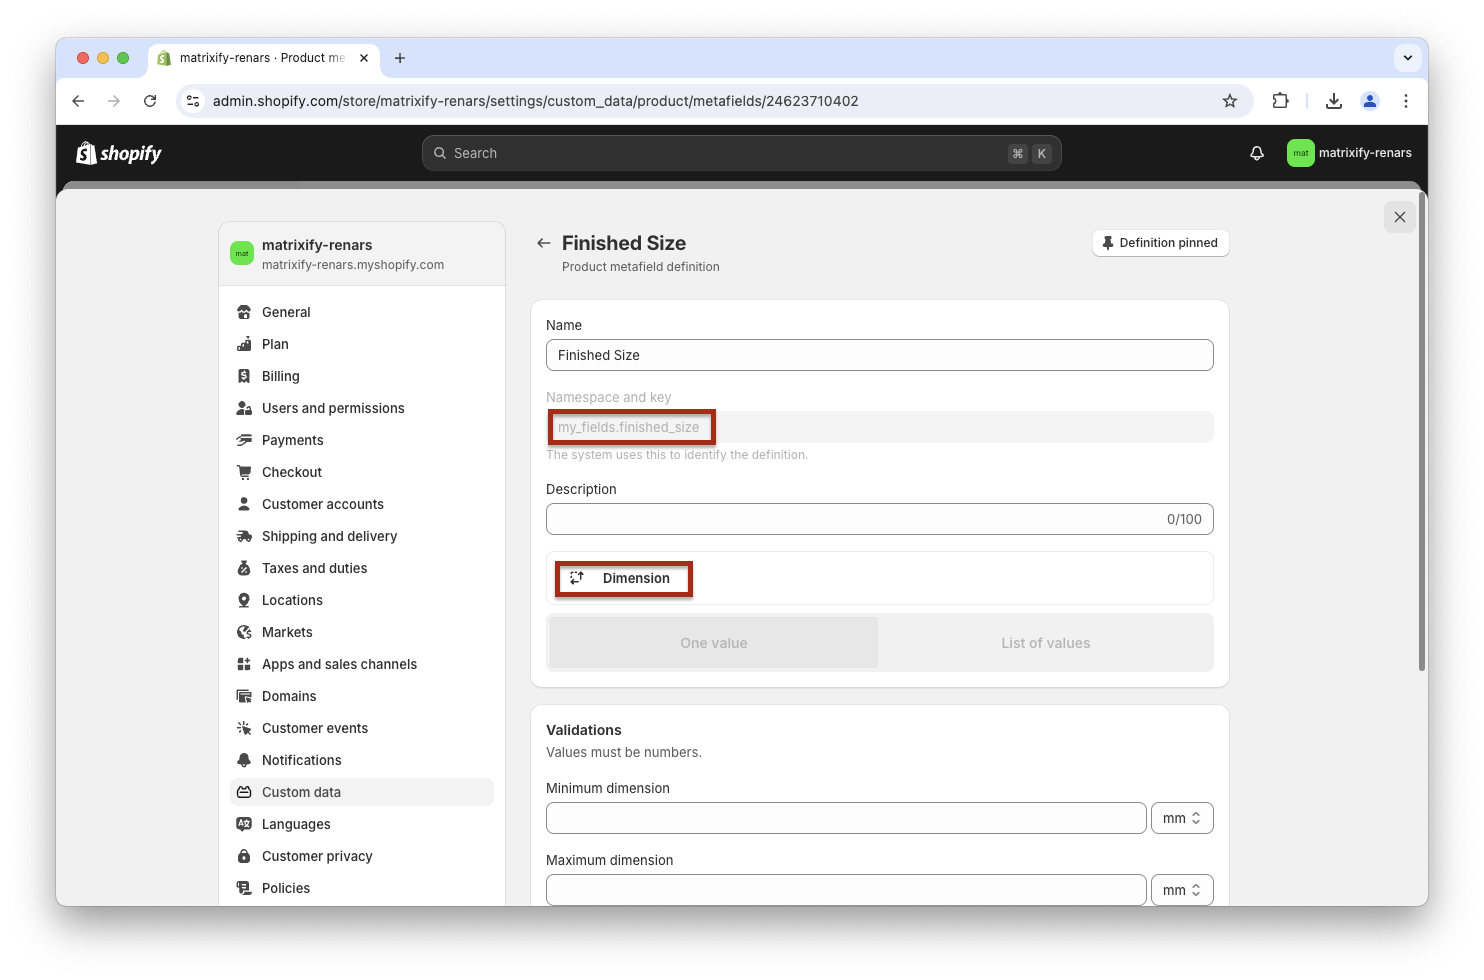
Metafield column is constructed in the following template Metafield: namespace.key [type]
In Metafield definitions, you can also see namespace.key and the Metafield type.
In the below screenshot example, Metafields namespace is my_fields and key is finished_size and type is “Dimension”.
You can check out Matrixify Metafields documentation on how to correctly read namespace, key, and type from Metafield definitions.
You can also use the exported Metafield column headers in your other import files to import those Metafield values.
Now we can update values for those Metafield definitions.
It is important to list the value in the same structure as it was exported/example provided in our documentation for each type.
So if the dimension type value is JSON {"value":54.0,"unit":"m"} then you need to apply it the same for other products.
Importing an empty value for the Metafield column will delete this Metafield for the respective row item in Shopify.
Here you can see the values filled for other Products as well:
4. Save and import
Now that the file is ready. You can save it and head back into the app.
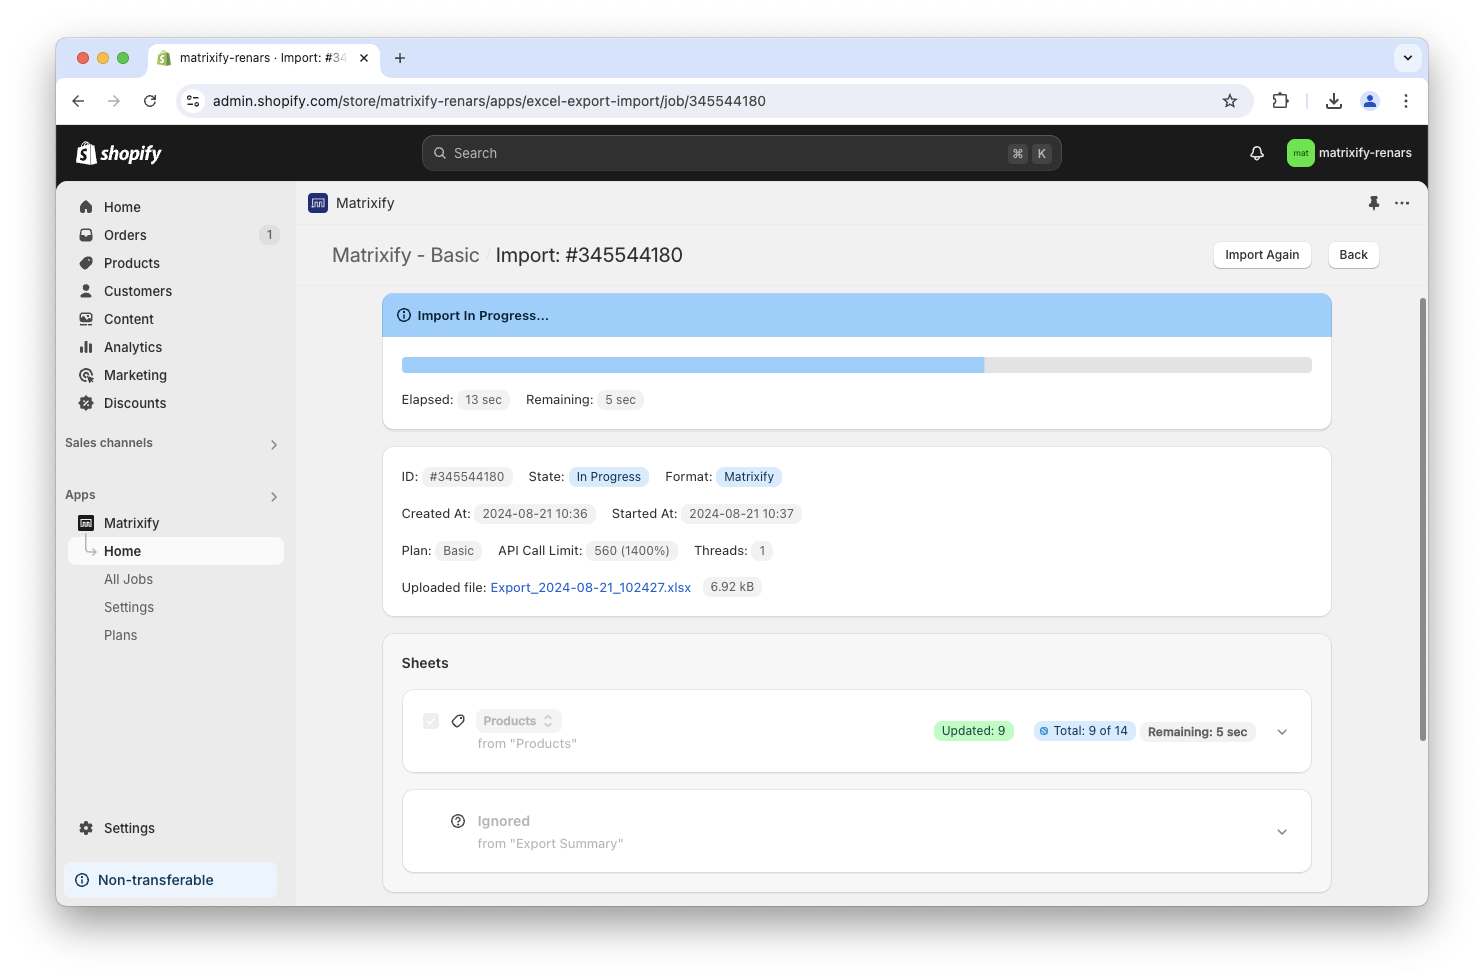
In the Matrixify app home page Import section upload your edited saved file.
First, the app will analyze the data. If all looks correct, then you can click the Import button to start the import.
5. Check your updated Metafields
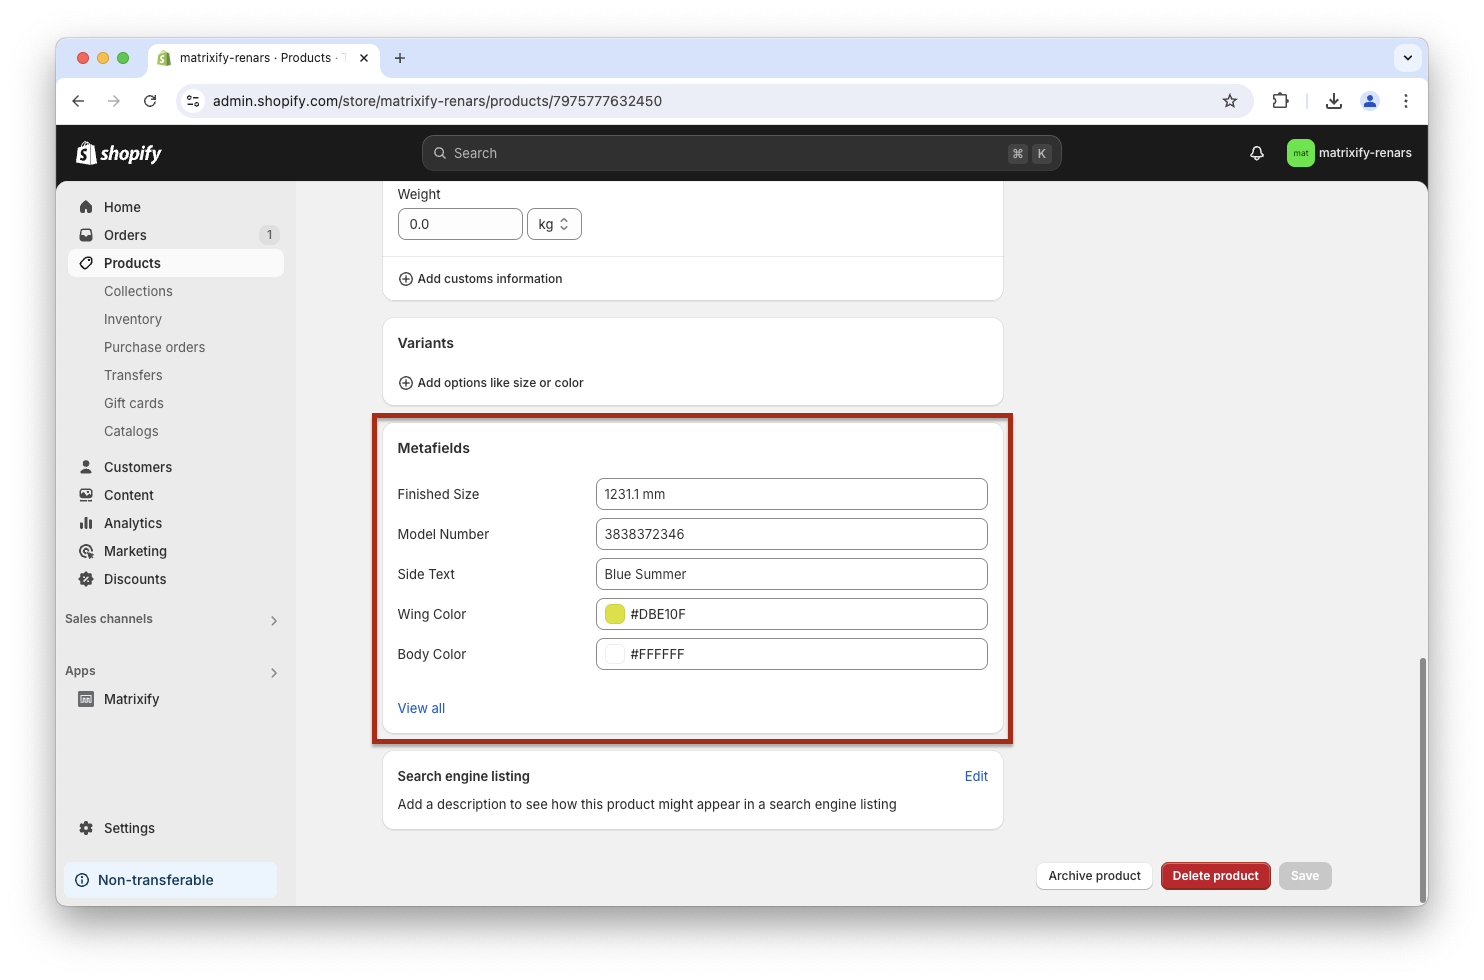
Once your import has finished, you can check and enjoy your updated Metafield values!
Displaying Metafields
Metafields are custom fields that you can use in various places, for example, if you need to store some custom information that you will use in your exported reports, but one of main metafield usage is to display this custom stored information in your store.
In the Shopify theme editor, you can include your Metafield values from Metafield definitions.
Follow Shopify manuals here on how to set up Metafields in your theme.
If you need help with integrating Metafields in your store’s theme, then you can hire a Shopify expert from the Shopify Experts Marketplace or Matrixify Trusted Experts page.
Good to know!
- More detailed information about displaying Metafields on your storefront/theme can be found in the Shopify tutorial about Metafield object.
- Receiving an error message
Value: can't be blank.means that in your file there is a list Metafield which has list element as empty string and Shopify API does not allow to set such a Metafield value.
For example, list metafields value["Red","","Yellow"]would causeValue: can't be blank.error due to empty string"". Instead, you should use Metafields value["Red","Yellow"]. - Products that have a specific Metafield value empty in export do not have this Metafield at all.
- If you import the Metafield without a [type] in the column header, then we will assume the Metafield definitions from:
- Metafield Definition – if that Metafield has a definition, then we will apply the same type as in the definition
- Existing Metafields type – we will see if this particular item already has a Metafield with the same namespace and key and if it does, then we assume the type of the existing Metafield for that particular item (e.g. Product)
- Assume from cell value – we will “infer” the type from the cell value, e.g. if it looks like an integer, then we will assume the type
number_integer, if like text, thensingle_line_text_field, and so on.
- Each individual item (e.g. Product) that does not have a Metafield Definition, can have the same
namespace.keyMetafield with their own different Metafield type. So be careful when creating Metafields without definitions – make sure that you specify the[type]for all of them in the column header, otherwise, when we infer the types, those might appear as different types for each item. - More detailed information about metafield columns you can find in metafields documentation.
- Metafields are filled only in the first row for the item. For example, if you export Cusotmers with Addresses, you would have multiple rows for the same customer, but Customer Metafields will only be filled in the first row. If you need to fill Metafield columns in all exported file rows if one item has multiple rows then ask our support!


