
Amazon FBA has the report of “Amazon Fulfilled Shipments” which you can import to Shopify as Orders using the Matrixify app.
Each Fulfillment is created as a separate Order. However, if one Amazon Fulfillment has several line items, then those are added to the same Order as Line Items.
That’s because different fulfillments can be made by Amazon on different days, and thus cannot be merged to the same Order if importing each day separately.
Steps in short how to Import “Amazon Fulfilled Shipments” to Shopify as Orders
- Export your “Amazon Fulfilled Shipments” from Amazon Seller Central as a “CSV Download” file.
- Rename the exported file so it contains the words “Amazon” and “FBA“, e.g. “amazon-fba-2020-08-10.csv”.
- Upload your file to the Matrixify app.
- Disable staff order notifications in Shopify
- Press “Import”.
- Check Import Results.
1. Export your “Amazon Fulfilled Shipments” from Amazon Seller Central
Log into your Amazon Seller Central and navigate to Sales -> Amazon Fulfilled Shipments.
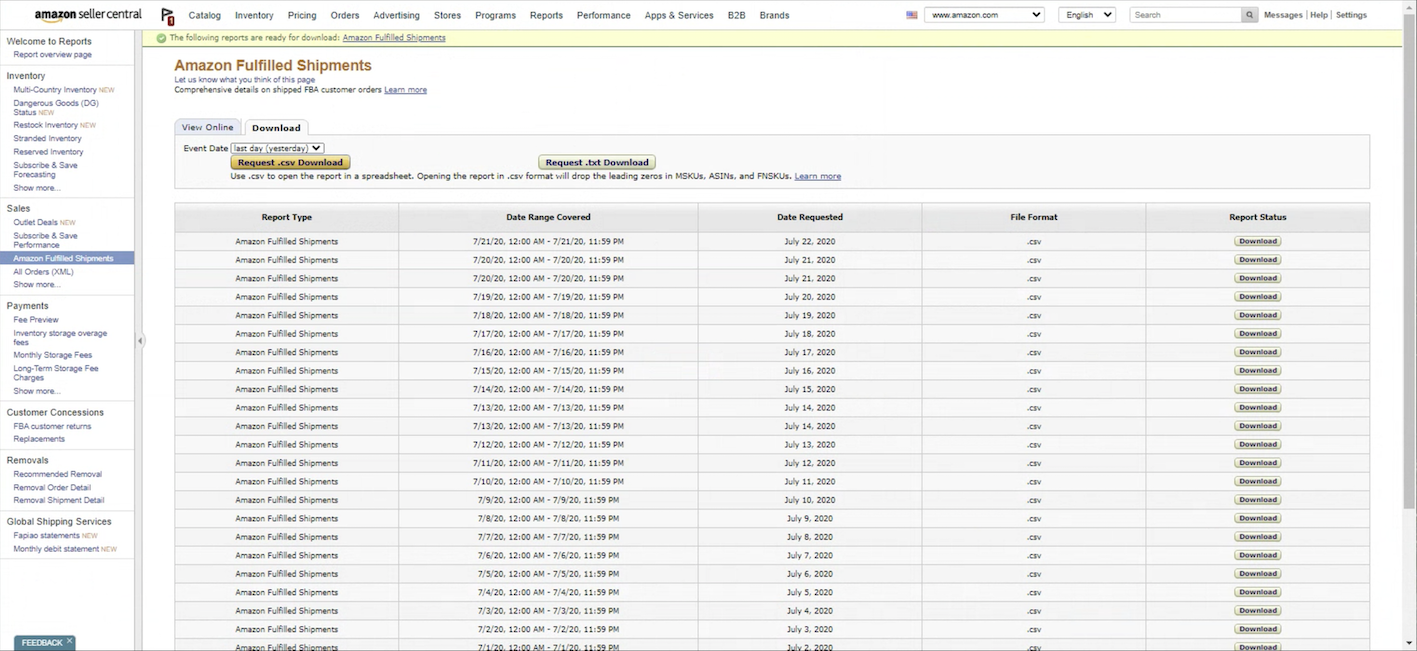
On “Event Date” choose the time interval to export.
Press “Request .csv Download”.
Wait until the report generates.
In the “Report Status” column press “Download” when the report has generated.
2. Rename the exported file so it contains the words “Amazon” and “FBA“
You can hint to Matrixify of what the import file is by adding certain keywords to the file name.
In this case, to tell the Matrixify app that you are importing the Amazon FBA file, your file name needs to contain the words “Amazon” and “FBA” (case insensitive).
For example, your file name could be like this: amazon-fba-2020-08-10.csv
3. Upload your file to the Matrixify app
Drag-and-drop or choose the file to upload in the Import section of the Matrixify app.
Matrixify will analyze it and will tell you what is found in your file.
Check that the file is recognized correctly:
- It should detect that the Format is “Amazon”
- It should show that it found some Orders in that file

Note that your Amazon Fulfilled Shipments report file can contain several fulfillment rows for each Order. Matrixify app is grouping them together by the Amazon Order ID into a single Shopify Order. So the total count of Orders might not be the same as the rows in your Amazon FBA report CSV file.
4. Disable staff order notifications in Shopify
If you as the store owner don’t want to receive e-mail notifications from Shopify for creating each Order, go to Admin -> Settings -> Notifications, and disable the “Staff order notifications“.

5. Press “Import”
If you don’t want to import those Orders just yet, but want to check how they will look in Matrixify Orders template format, then see the “Optional steps with Dry Run” section.
If you are ready to import those Orders, then just press the “Import” button and the import will start.
If any of the Orders will already exist in your store, they will get updated. Also, if new Line Items for an existing Order will come from the Amazon report file, then those new Line Items will get added to the existing Order.
Handy tips
- The Estimate that’s shown before you press the Import button is a very rough approximation because a lot depends on the details you are importing. When the real import has started and has already imported the first few items, the Estimate will adjust according to your particular import speed, and that will be quite precise.
- You can cancel the Import any time, and see the Import Results as far as it went.
- You don’t have to keep the browser open while it’s importing, because everything happens on our servers.
6. Check Import Results
After the import has finished, you can download the “Import Result” file where you can see exactly what happened to each of the Orders when they were imported.
If there will be any errors during the import, you can read a detailed explanation of that error in the “Import Comment” column of the Import Result file.

Optional steps with Dry Run
You can use the “Dry Run” option to not import just yet, but run it through the conversion process to Matrixify Orders template, and simulate the import without actually importing anything.
Select the “Dry Run” option to generate Excel file
Before pressing the “Import” button, you can scroll down to the “Options” section of the import job and change some options.
Select the “” option.
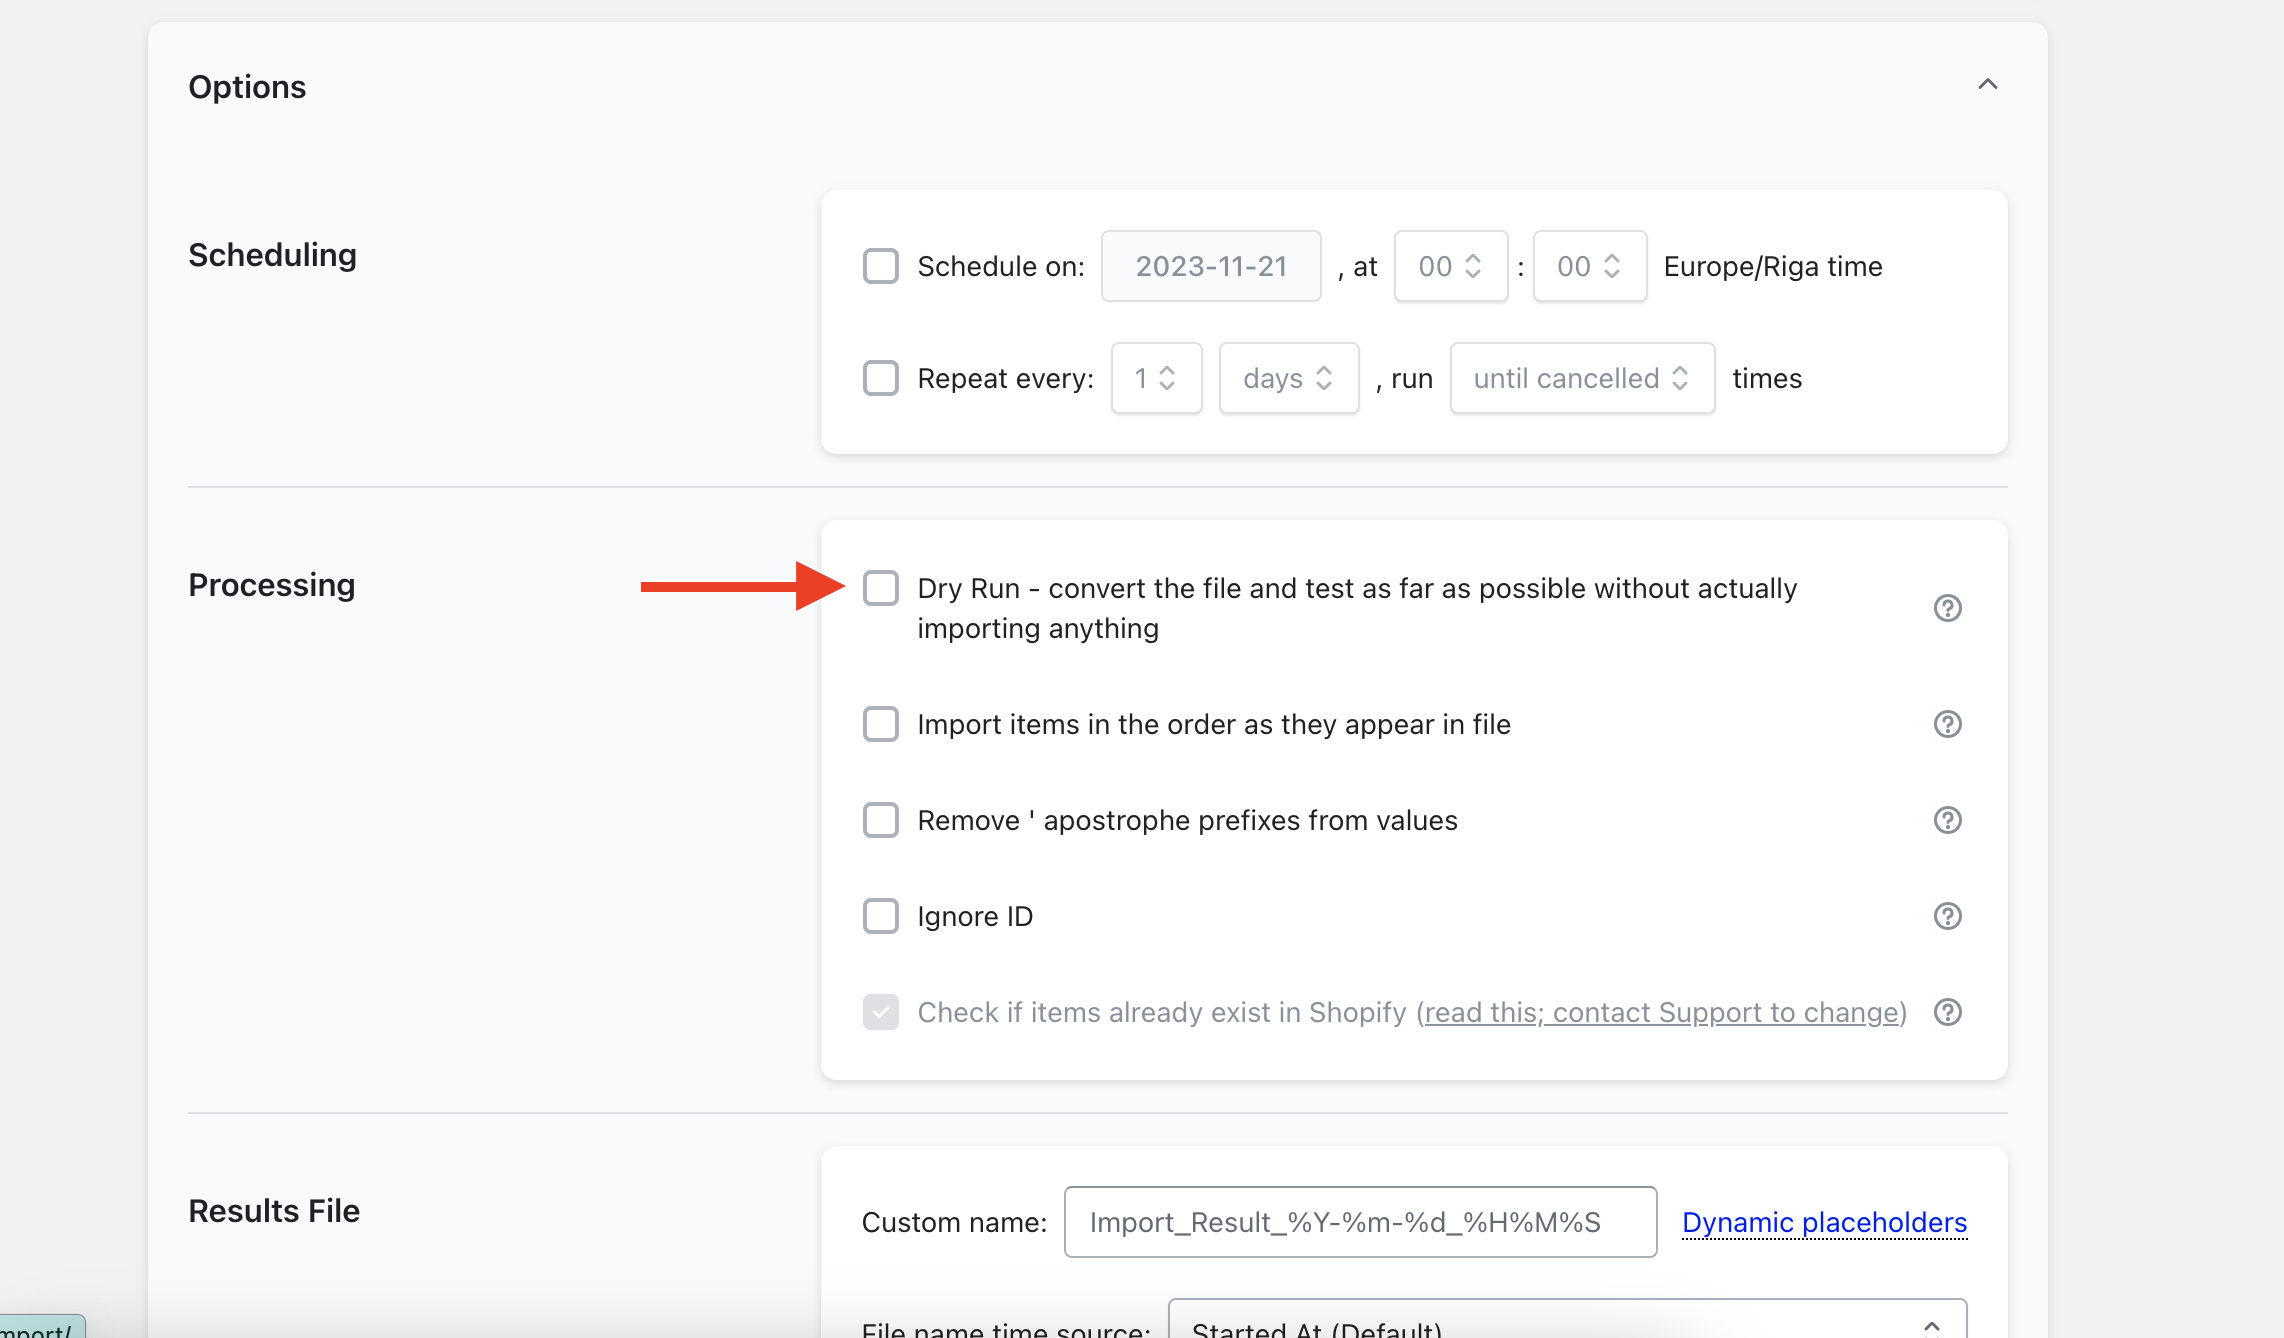
With Dry Run, the app will process the Amazon FBA CSV report file and generate an Matrixify format file.
After selecting that option, press the “Import” button. It will seem like it’s importing, but it will actually not – it will just simulate the import.
Download generated Import Results file and check data
Once the dry-run has completed, which should be relatively quick, you can press on the “Download Import Results file” button to download the generated file.
Now you can check the file to see if the data matches your needs. Do your data cleanup, adjust any data that you need to be different, and basically – do any changes you need to do with it.
Each column from our Orders template is explained in the Orders template documentation page.
Import the updated Excel file
Once you have made all your changes to your Orders import file, you can finally import it.
Head back to the Matrixify app and on the Home page, Import section upload your updated Excel file.
Now you should see that format is “Matrixify”.
Make sure that Order counts are correct and that there are no unexpected warnings showing.
If it all looks correct, then press the “Import” button to start actually importing data into Shopify.
Good to know!
- Install the Matrixify app.
- If you have any questions or issues during the migration do not hesitate to contact Matrixify support.
- If the Amazon FBA file will not have the Customer Last Name, then the app will fall back to the username from the email.
- If the Amazon FBA file will not have Address 1 then the app will fall back to the value “REDACTED”.
- Read the Orders template documentation.
- See other Orders related tutorials on what you can do with Matrixify!


