
Need to migrate your Customers from Lightspeed to Shopify? With the Matrixify app, you can do just that by simply following this tutorial!
Note: This tutorial is for migration from Lightspeed C-Series.
To migrate data from other lightspeed platforms you would need to manually convert your file data to Matrixify template column headers and structure.
Steps in short
- Export Customers from Lightspeed.
- Rename the exported file to contain the words “Lightspeed” and “Customers“, e.g. “lightspeed-customers-export-2019-09-11-11-00-31.csv“.
- Upload the file to the Matrixify app in Shopify.
- Select “Dry-run” to generate Matrixify template Customers file.
- Download generated Import Results file.
- Double-check the data and make corrections if needed.
- Import corrected Excel file.
- Enjoy your migrated Lightspeed Customers in the Shopify.

1. Export Customers from Lightspeed
To export your Lightspeed Customers you will need access to your Lightspeed admin.
In the admin go to Tools -> Export.
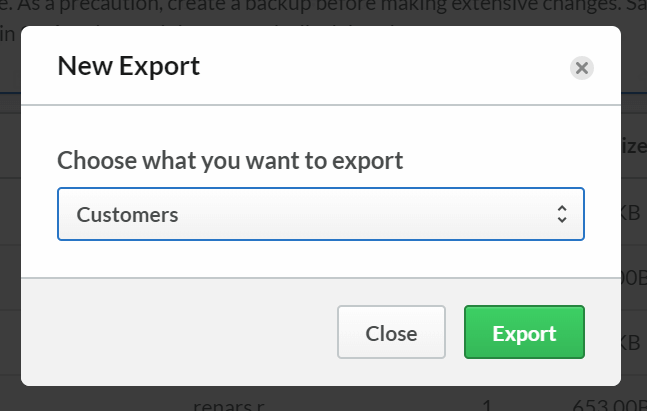
In this page, you can click on the “Add Export” button to create a new Export.
Select “Customers” from the drop-down and press “Export” button.
Once the export is finished you can click on the “Download” button by the export to download the exported file.
2. Rename the exported file
Once you have downloaded the file, you do not need to open and edit it.
Find the file in your computer and rename it to contain words “Lightspeed” and “Customers“.
The simplest way to do so is just to add the word “Lightspeed” at the beginning of the file name, in an example, “lightspeed-customers-export-2019-09-11-11-00-31.csv“.

3. Upload the file in Matrixify
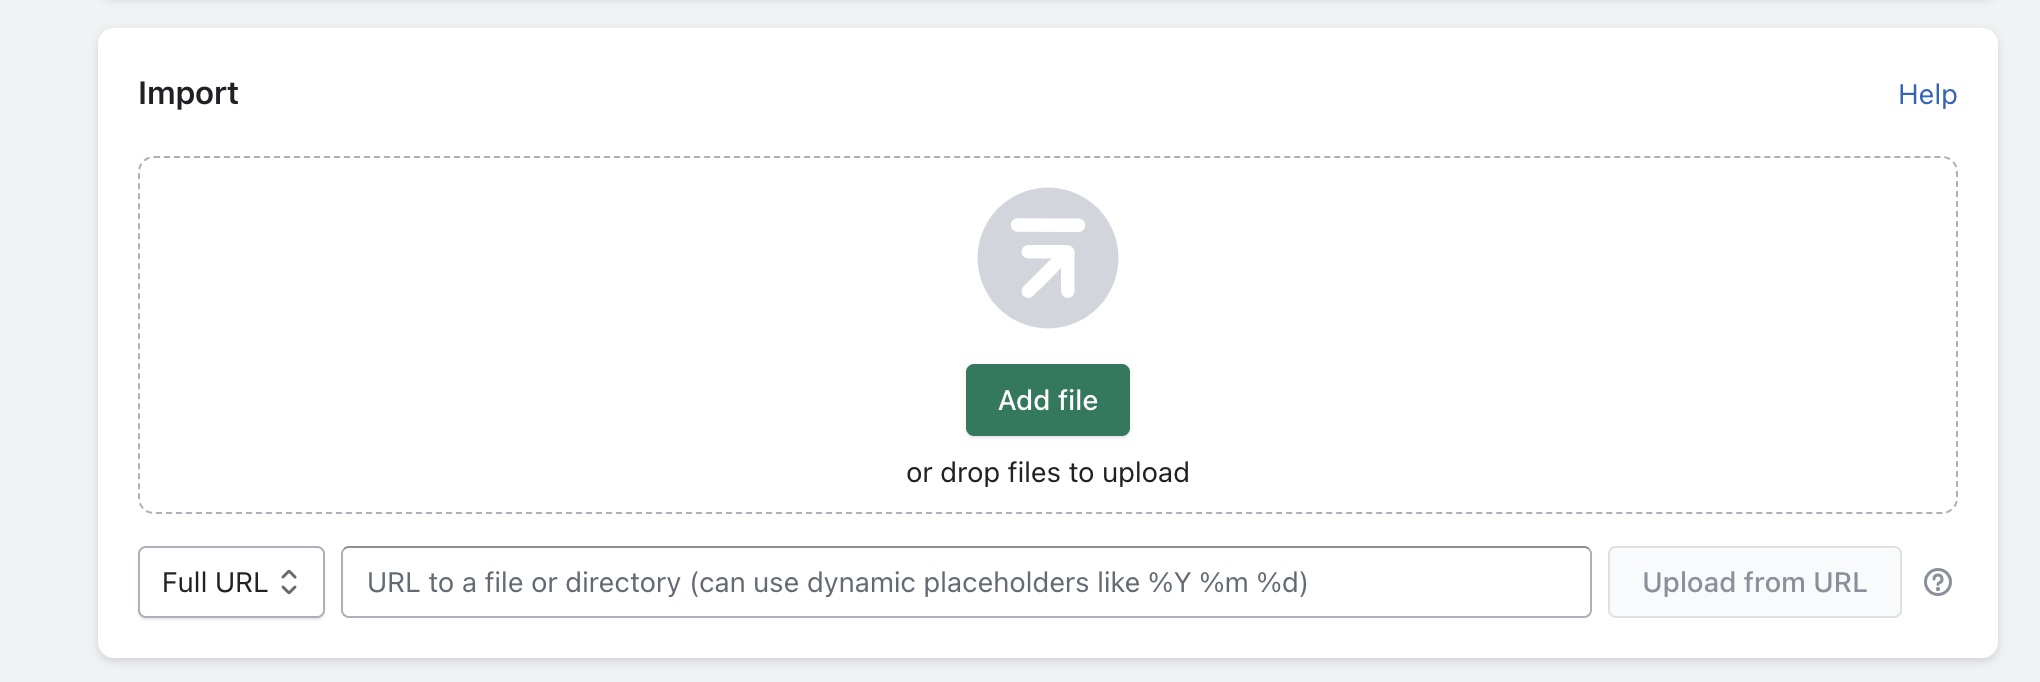
Now you can go into the Matrixify app and upload the file in the Import section of the Matrixify home page.
You can drag and drop the file in this Import section or click on the “Add File” button to upload the file.
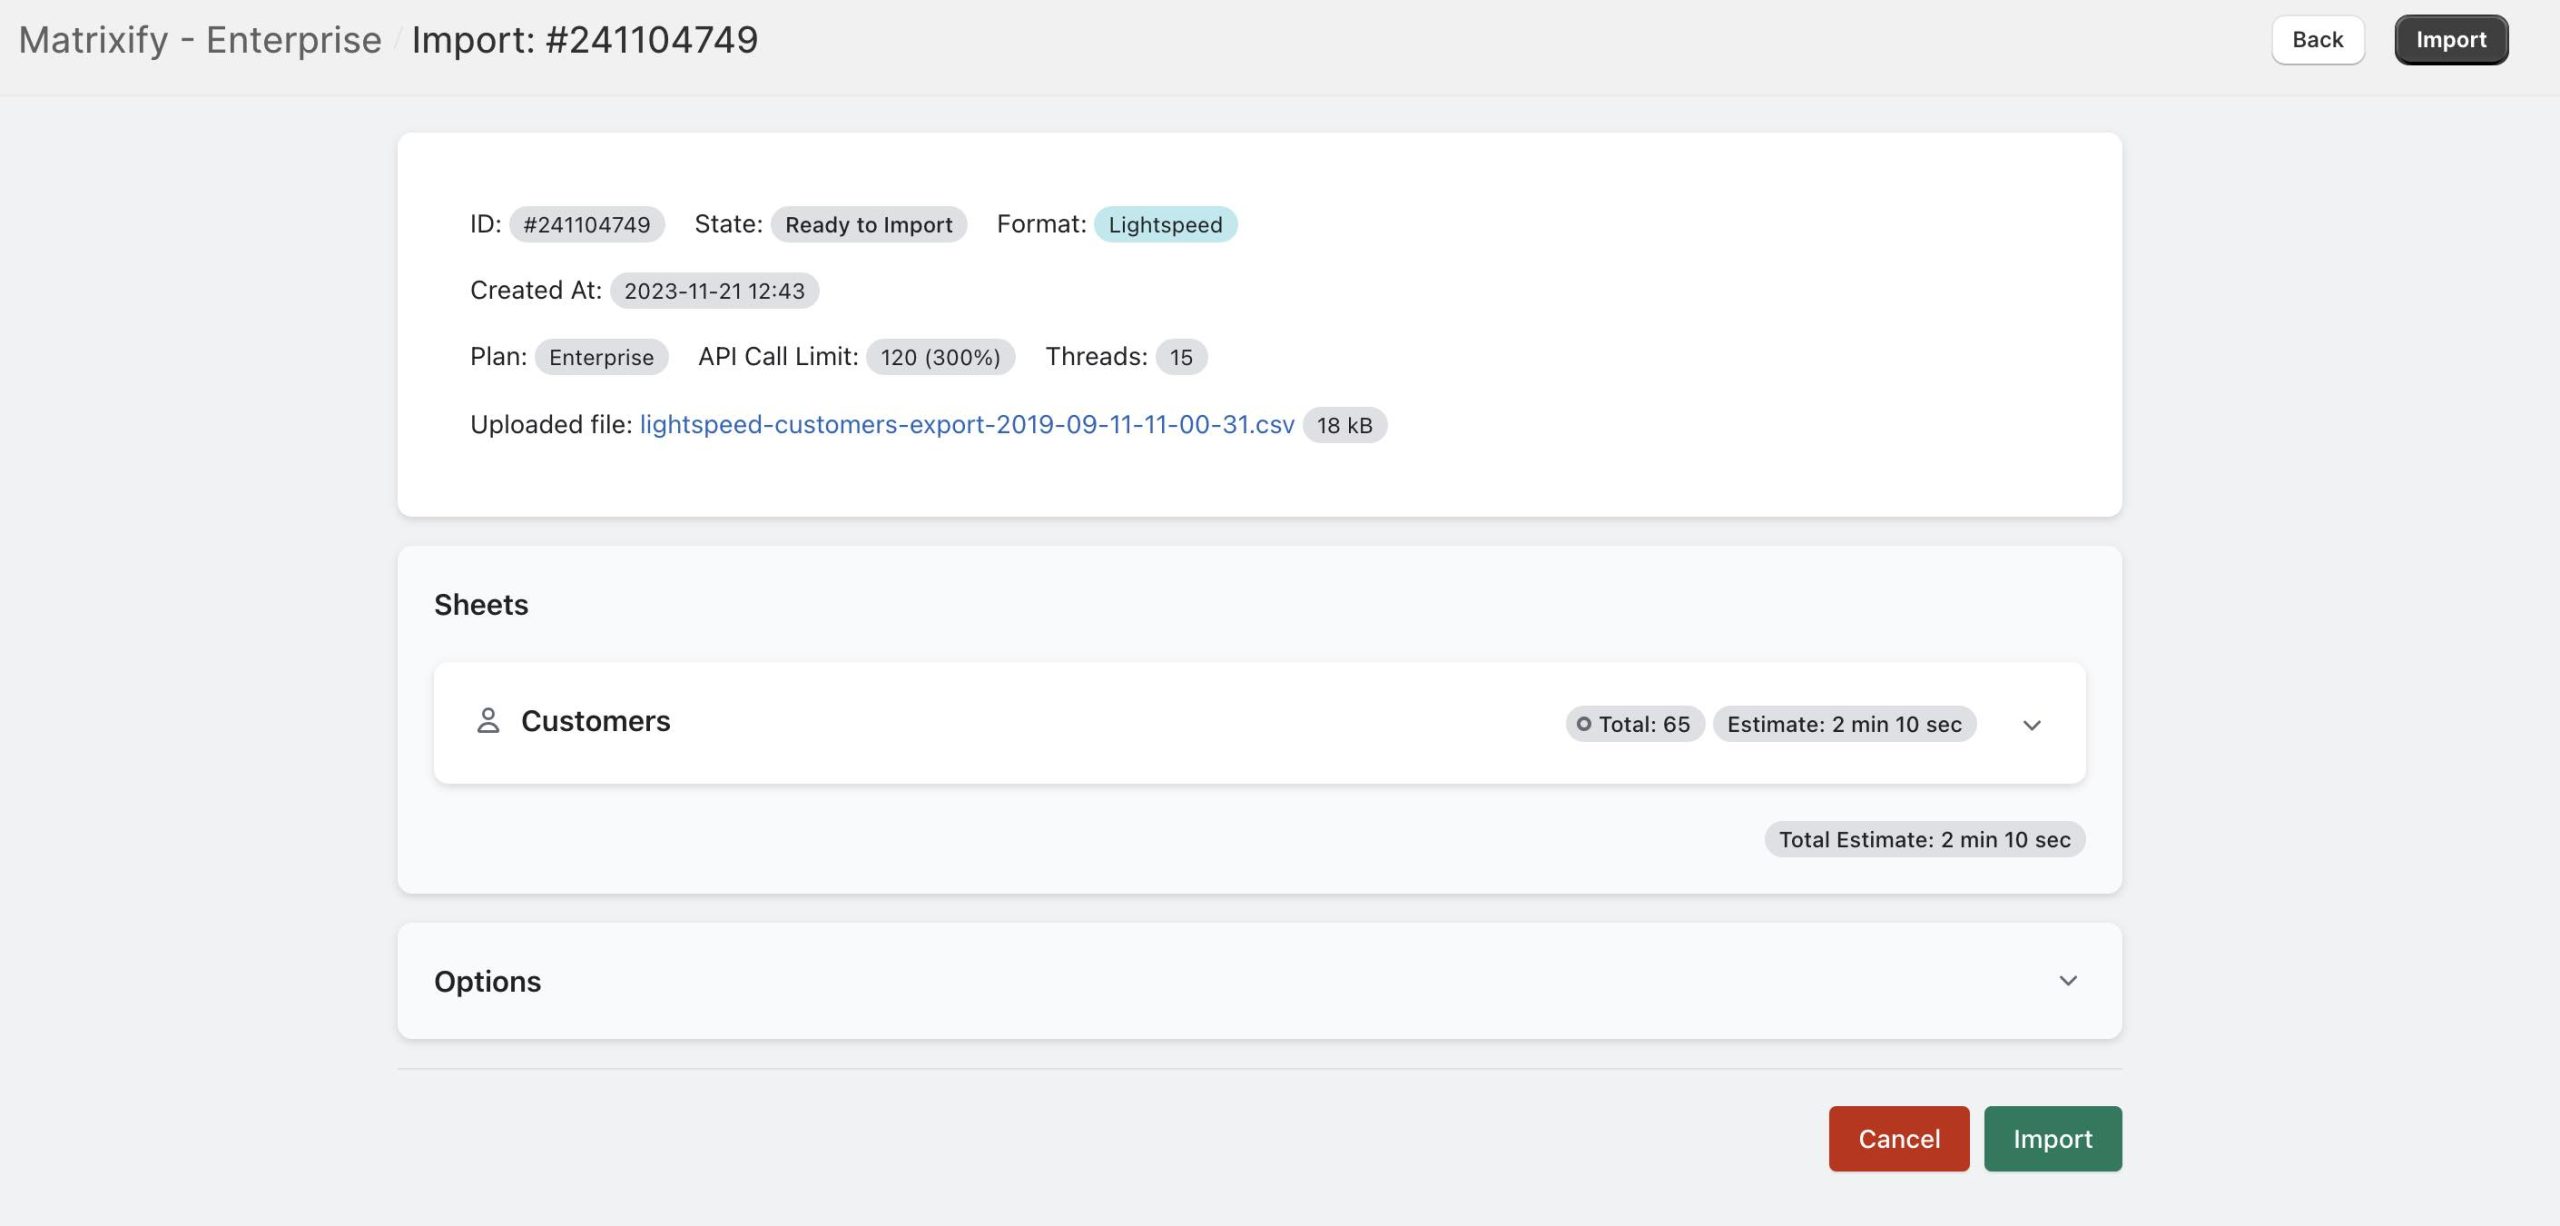
Once the file is uploaded, the app will automatically open a new page with details about the file and options.
Here you need to doublecheck that the app recognized your import as “Lightspeed” format and that you are importing “Customers“.
4. Select “Dry-run” option
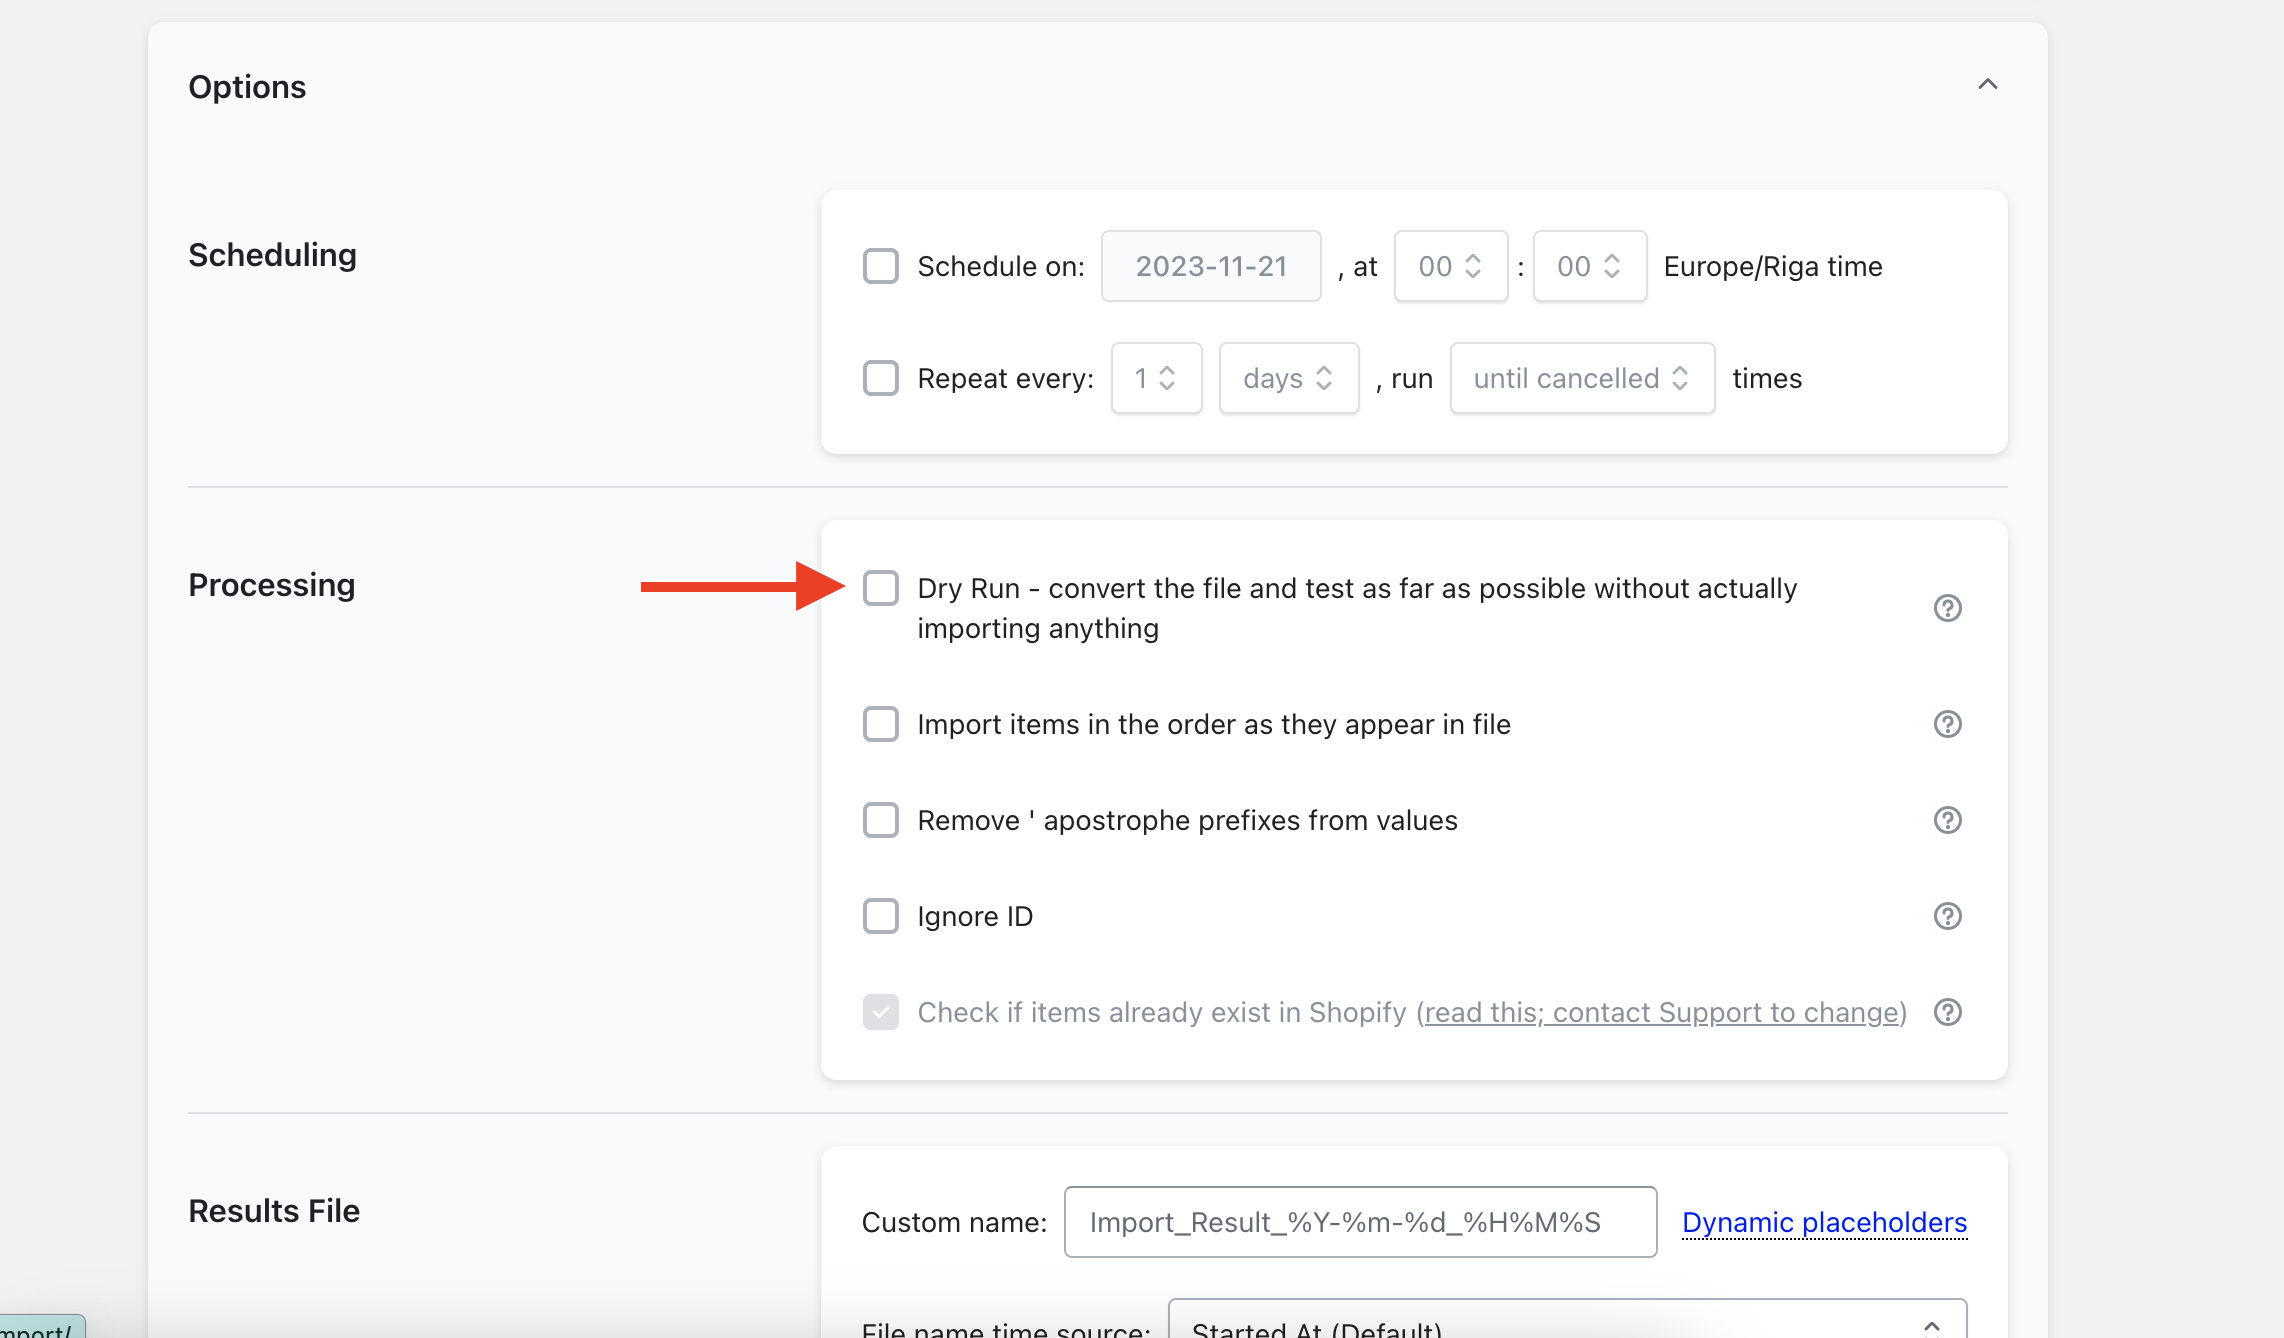
In the “Options” section of the import, you can leave all the default options selected as they are, and select the option “Dry Run – convert the file and test as far as possible without actually importing anything“.
Having this option selected will not import any data into the Shopify just yet – it will run through our data transformation engine to simulate the import, and as a result, you will get the “Import Results” Excel file which is in the Matrixify “Customers” import template format for importing to Shopify.
Press the “Import” button.
While the app is generating the data, you are free to close the app and browser. You can later find this job in “All Jobs” page of the app, and you will also receive an e-mail from Matrixify when the file is converted.
5. Download generated file
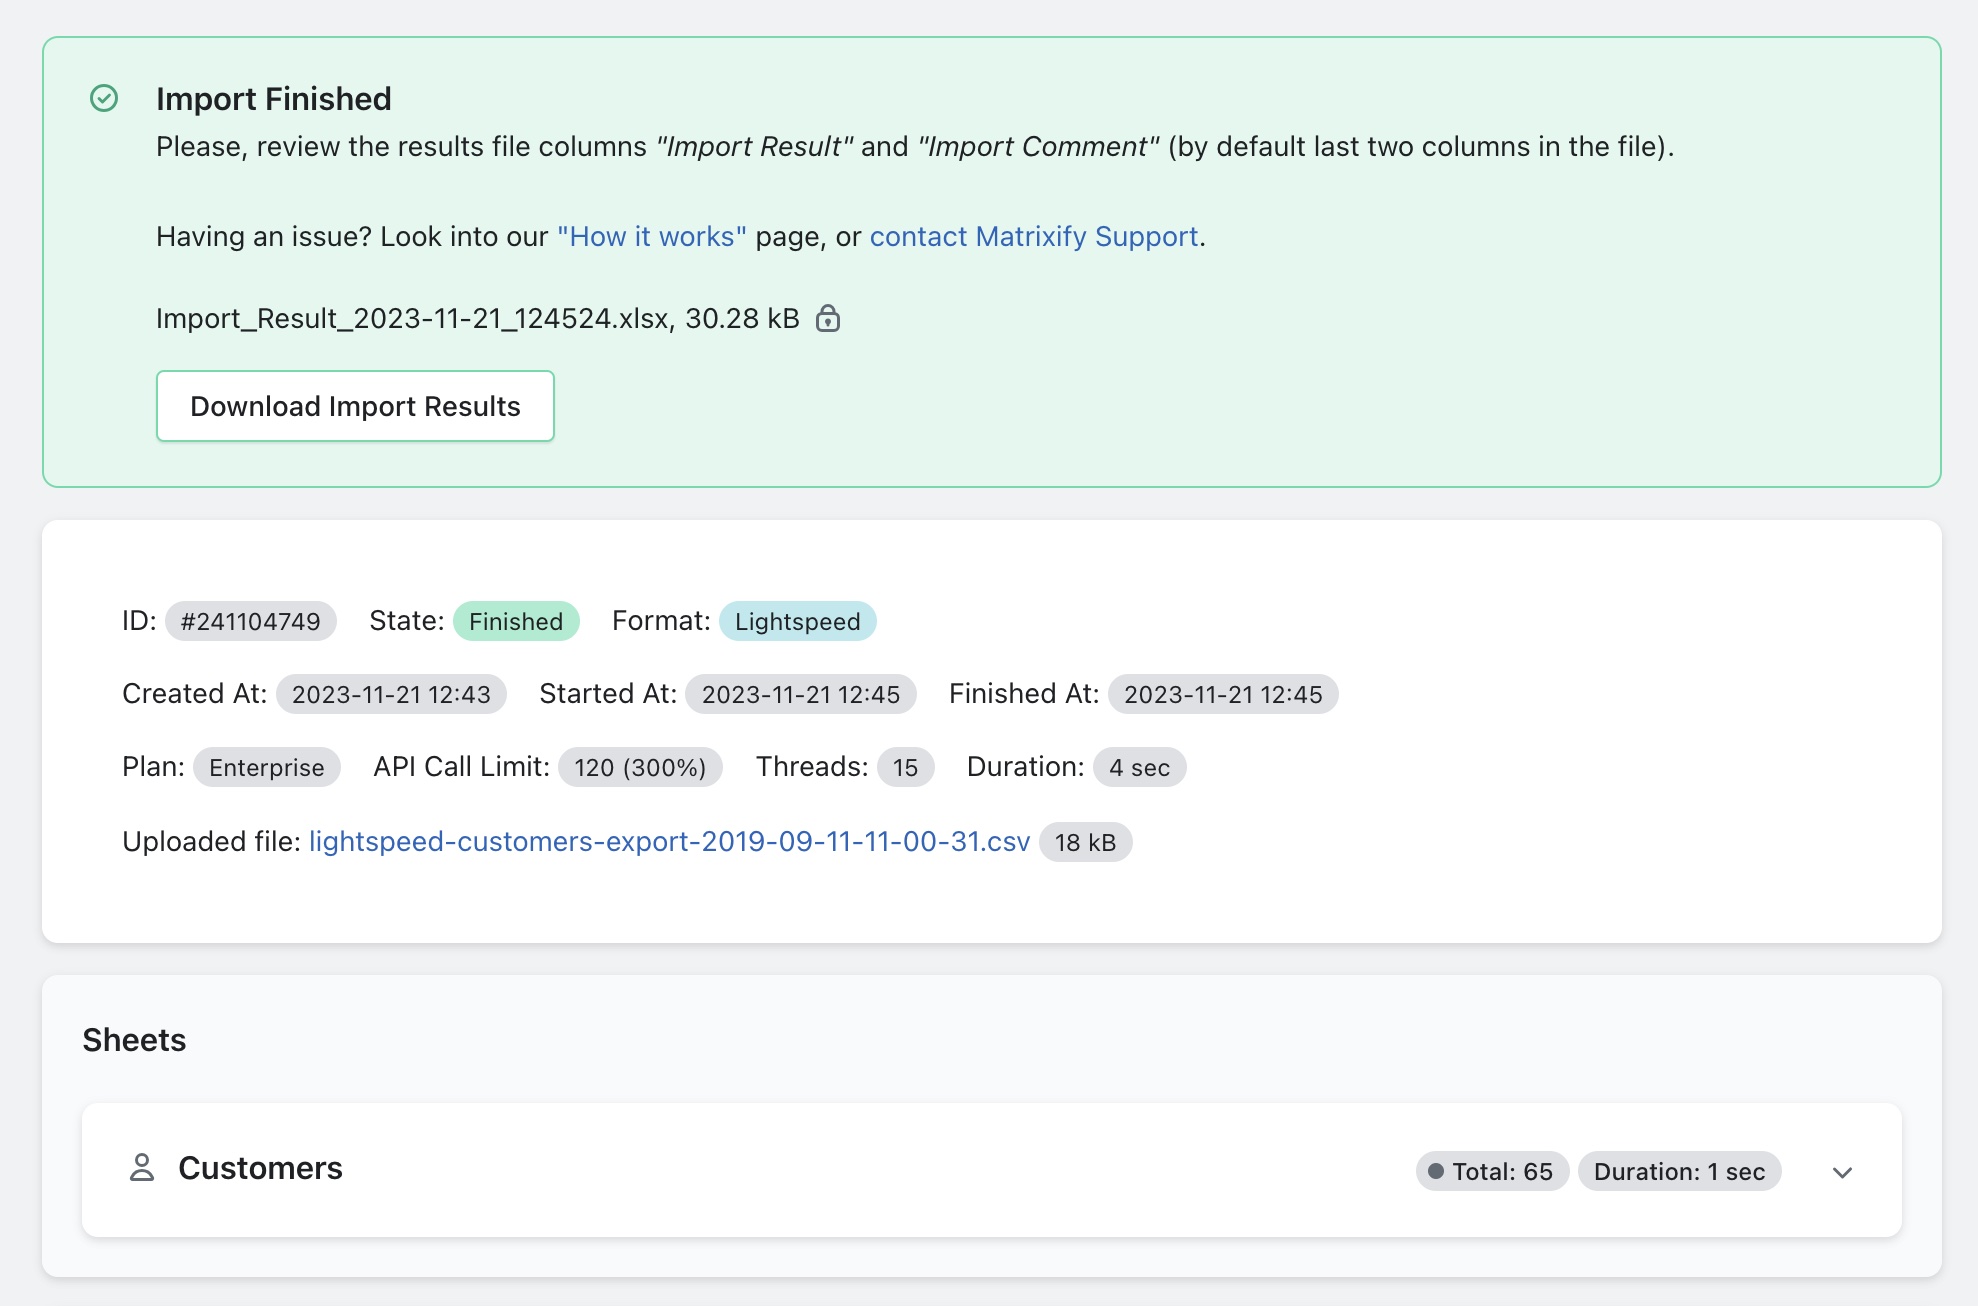
Once the dry-run is finished you will see that its status is showing “Finished” label.
Press the “Download Import Results” button and download the generated file with your customer details.
The file will contain all of the Customer basic data and their listed addresses.
6. Double-check file and make corrections
Open the Matrixify template file where you can check data and approve that everything looks correct before importing.
Each column from the Matrixify template Customers sheet is also described in our Customers documentation page.
This is a great moment when to clean up any old data such as fake accounts, incorrect phones, or other invalid data.
Since the two platforms have various differences then some data does not have a place in the Shopify. To make sure that nothing is lost the Matrixify puts all these Customer fields into the Notes for the Customer, and also in the Shopify Metafields which will be stored for your Customers.
To learn more about Shopify Metafields you can look into Shopify manual on the Metafields and also save our tutorial on how to bulk manage Metafields if you need to edit them later in bulk.

7. Import corrected Excel file
Now you can actually import the data into the Shopify.
Again head into the Matrixify app and upload Excel the file in the “Import” section.
Since you are now uploading Matrixify template file then the app should recognize the file as “Matrixify” format and as “Customers“.
Make sure that you do not have “dry-run” selected this time as you need to actually import the data into the Shopify.
Press the “Import” button to start the import.
Same as with the “Dry-run” import, you can close the app as the import is happening on our servers. You can find the job at any point in the “All Jobs” section of the app.
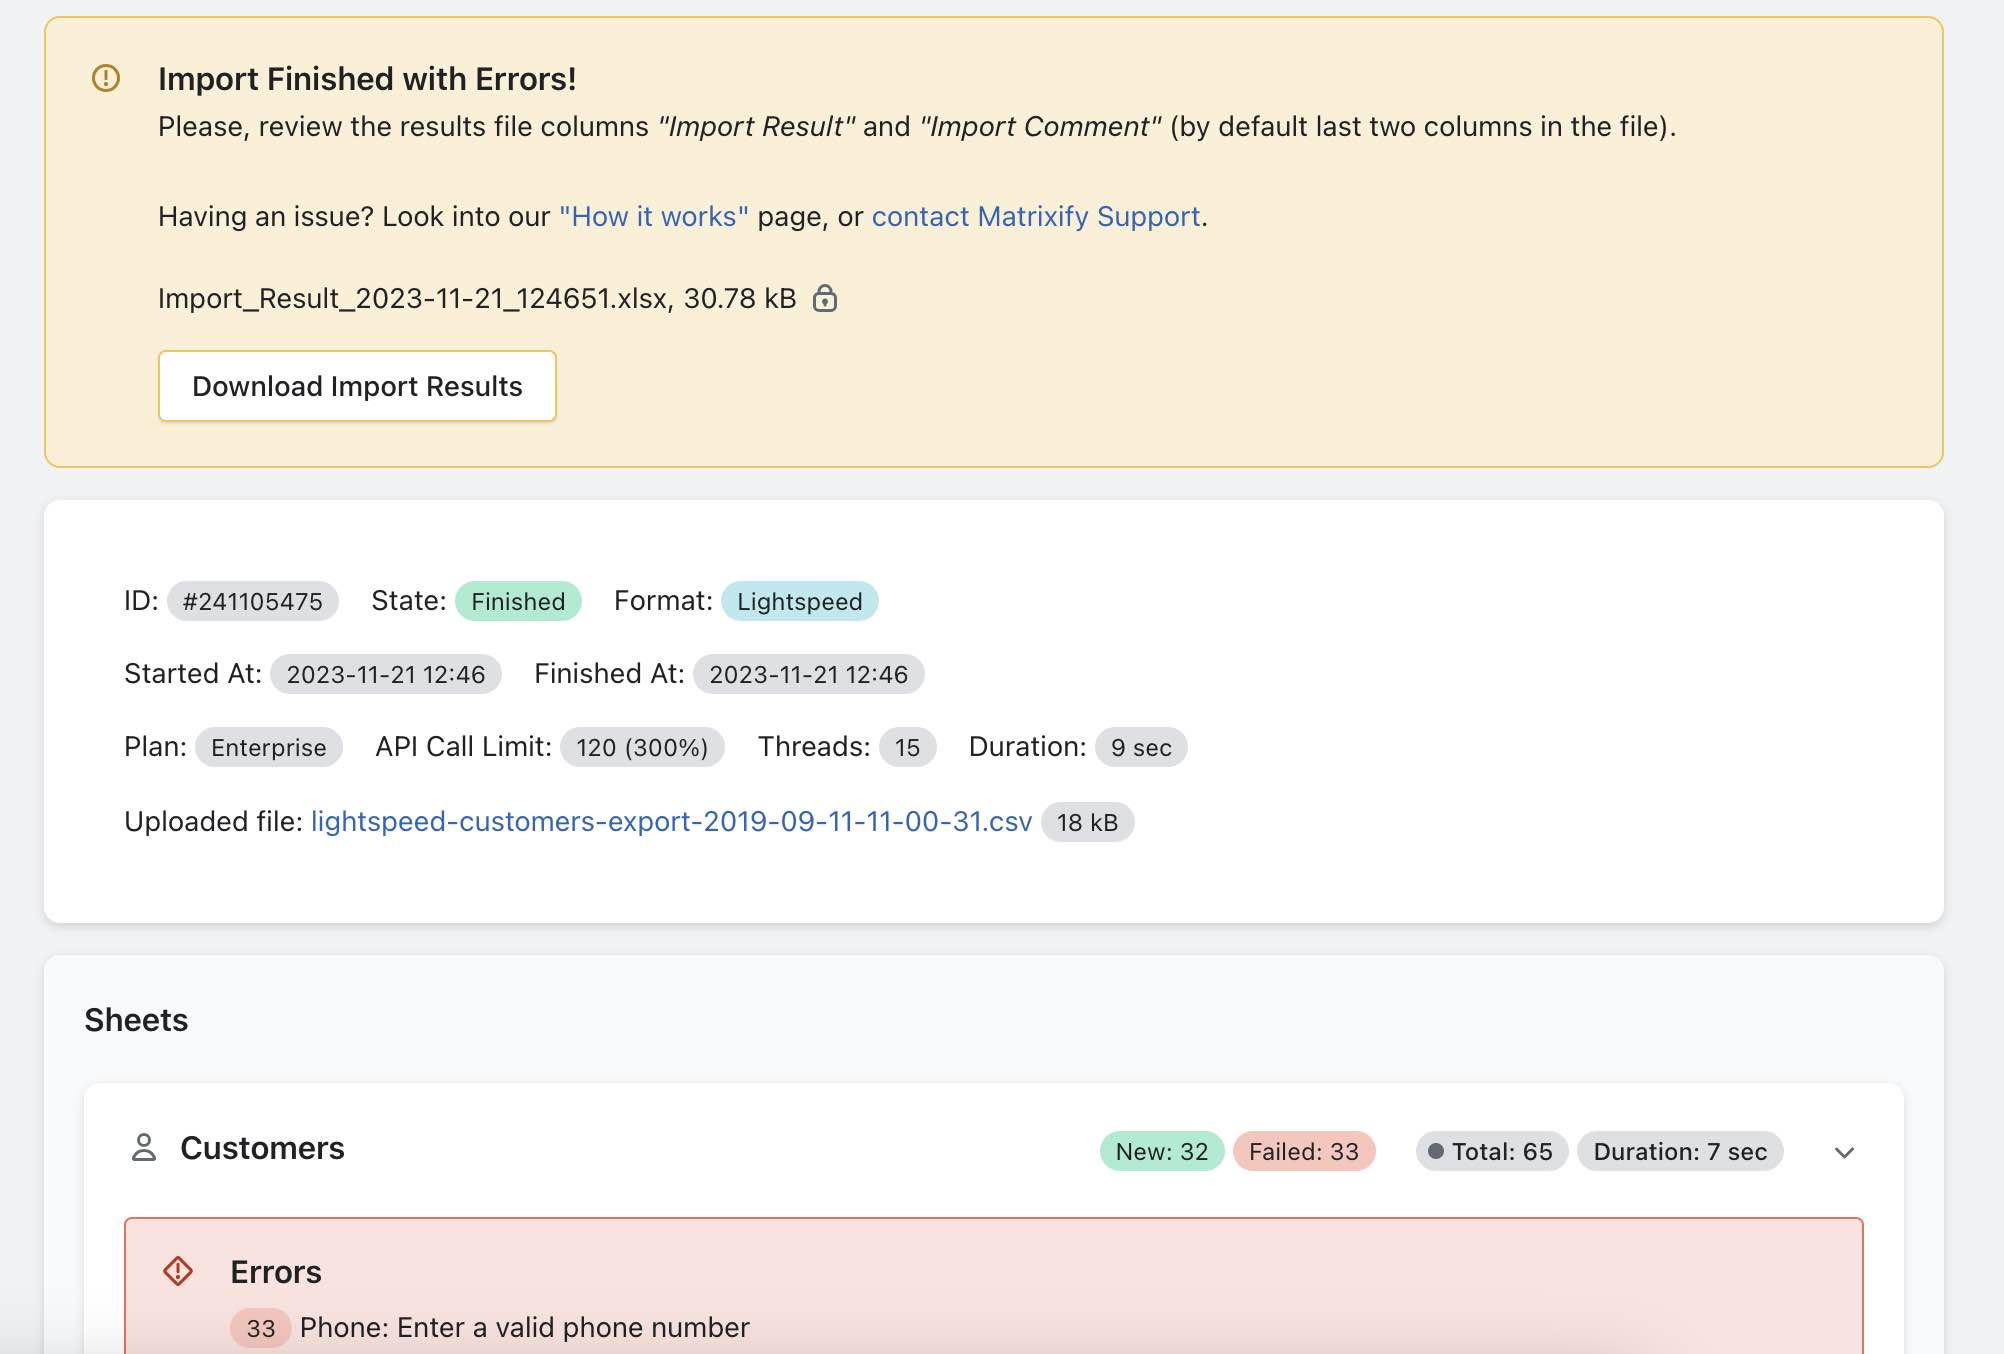
If you see any Failed items, then after the import has finished, you can download the Import Results file and look into the “Import Comment” column. It will tell why a particular Customer has failed. Then you can fix that issue and re-import just those failed and fixed rows again.
8. Enjoy your migrated Customers
After the import is finished you can go into your Shopify admin -> Customers section and check all the migrated data.
Good to know
- This tutorial explains how the migration can be done with the Matrixify app, click here to install the Matrixify app.
- You can skip the whole “Dry run” part, and just import the Customer CSV file directly, without looking at the Matrixify file.
- Check out other Shopify Customer related tutorials. Like, for example, how to activate your migrated customer accounts so that they can log in.
- Learn more about migrations to Shopify and what other types of data Matrixify can migrate to Shopify in bulk.
- Look up other information about migrating data from Lightspeed to Shopify.
- If the import speed is important to you, the higher plan you upgrade to, the quicker the import will be, as for example, Enterprise Plan essentially spins off 10 parallel import processes, achieving the effect as if 10 apps would import your data in parallel.
- If you feel stuck with something, our Support is willing to help you – just reach out to us.


