
In this tutorial, you will learn how to migrate your WooCommerce data products, categories, coupons, customers and orders to Shopify with the Matrixify App. Matrixify makes your store data migration easier and more accurate!
The main difference between Matrixify and other data migration methods is that Matrixify takes the data directly from WooCommerce and WordPress API, which means that there is access to more data and less room for error when handling files in different templates.
Direct connection to the WordPress API and WooCommerce API also allows Matrixify to migrate over any custom data fields to Shopify Metafields, so no information is lost in the migration and you can then use those Metafields in your Shopify theme later.

Note – the video tutorial uses the WooCommerce API method not the WordPress API.
You can migrate any WooCommerce images that are contained in your Product or Collection descriptions, so that all images, including images in the descriptions, are hosted in Shopify, and not on your old WordPress/WooCommerce servers, which you will switch off anyway.
The following tutorial explains how to migrate following data from WordPress and WooCommerce to Shopify:
- Products (including Products from trash in WooCommerce as archived in Shopify)
- Collections (Categories in WooCommerce)
- Redirects (generated from Product, Category, Post and Page links in WordPress to Shopify links)
- Customers (including Store Credit Balance from the Advanced Coupons plugin)
- Orders
- Discounts (Coupons in WooCommerce)
- Blog Posts
- Pages
Steps to migrate your Store from WordPress to Shopify
Step-by-step plan on how to migrate your store from WordPress/WooCommerce to Shopify using the Matrixify app:
- Generate WordPress Application Password for your WP user.
- Construct the WordPress API URL with the credentials you’ve generated.
- Start a new import job from the WooCommerce API URL.
- Check the job details and select the “Dry Run” option. This will allow you to see what data will be imported without actually importing it.
- Download and unzip the generated zip file.
- Upload the images to Shopify Files.
- Review the “Import_Result” Excel file before importing.
- Disable staff order notifications in Shopify.
- Import final Excel file into Matrixify app.
- Enjoy your WooCommerce store data in Shopify.
Now let’s dive into how to do it exactly.
1. Generate WordPress Application Password
Matrixify app uses WordPress API to get your shop data.
The first thing we will need to generate WordPress Application Password for your WordPress user account. Matrixify app will use that Application Password to connect to the WordPress and WooCommerce API to extract the WP site data.
Note – your WordPress user must have the “Administrator” role for our app to be able to access the site data via API.
Go into your WordPress Admin -> Users and open your user. Within the user page, scroll down to the “Application Passwords” section.
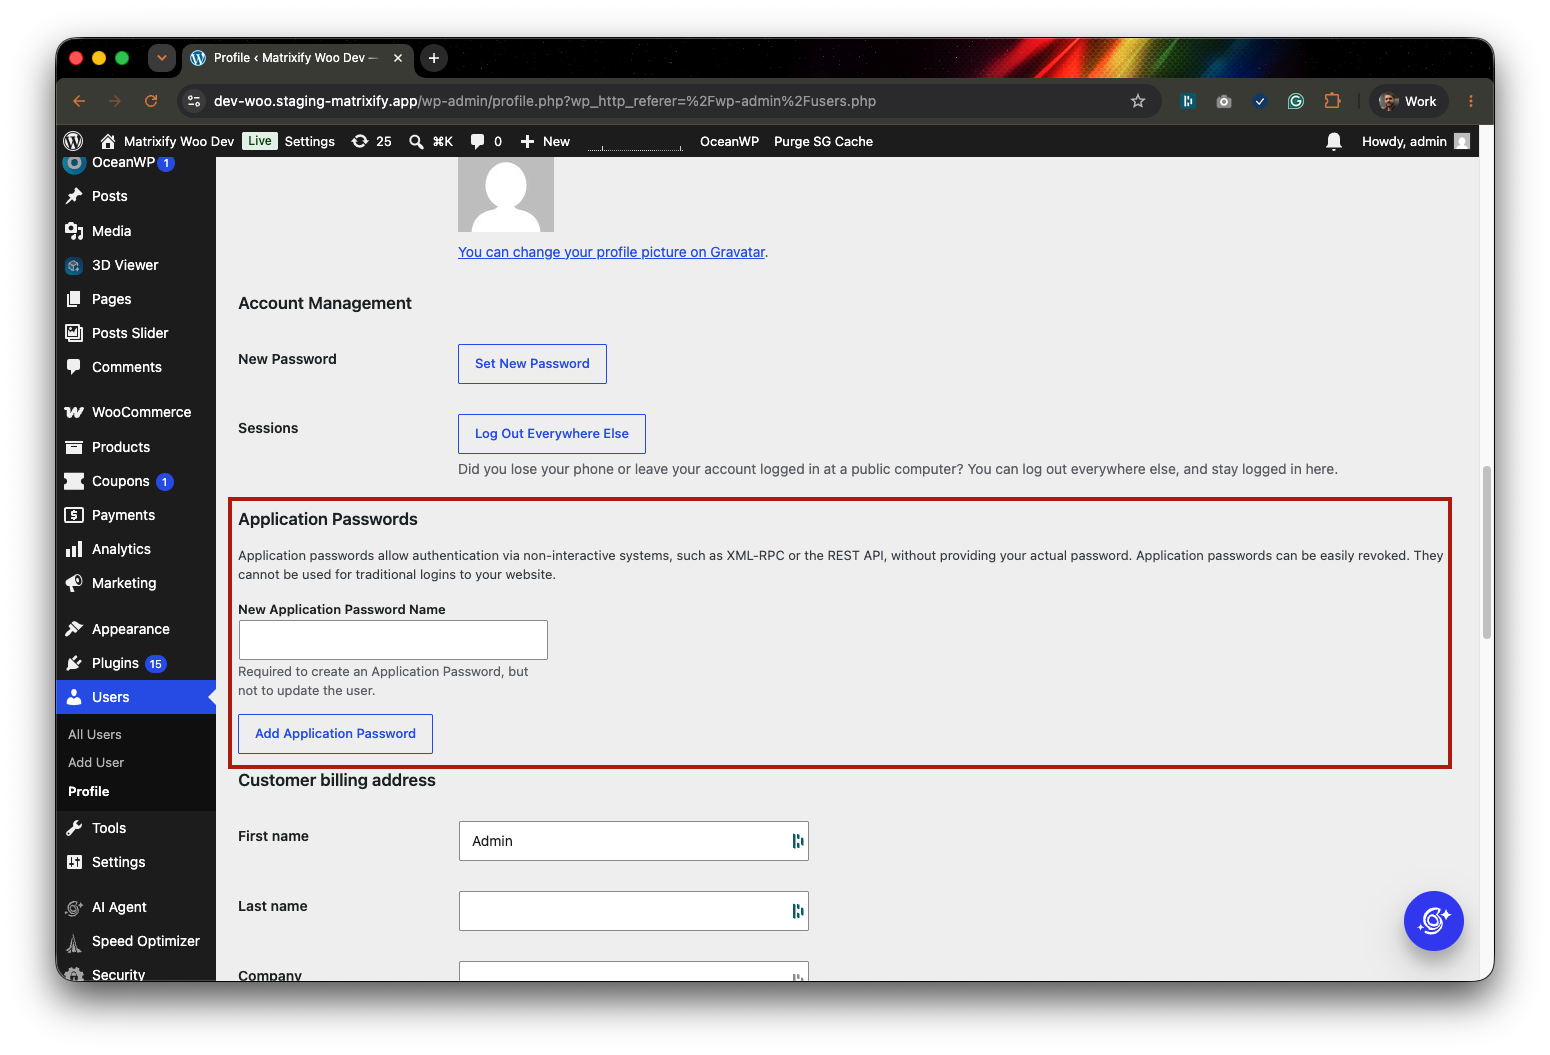
Here you can set the “Application Password Name” to any value such as “Migration,” and press the “Add Application Password” button to generate the password.
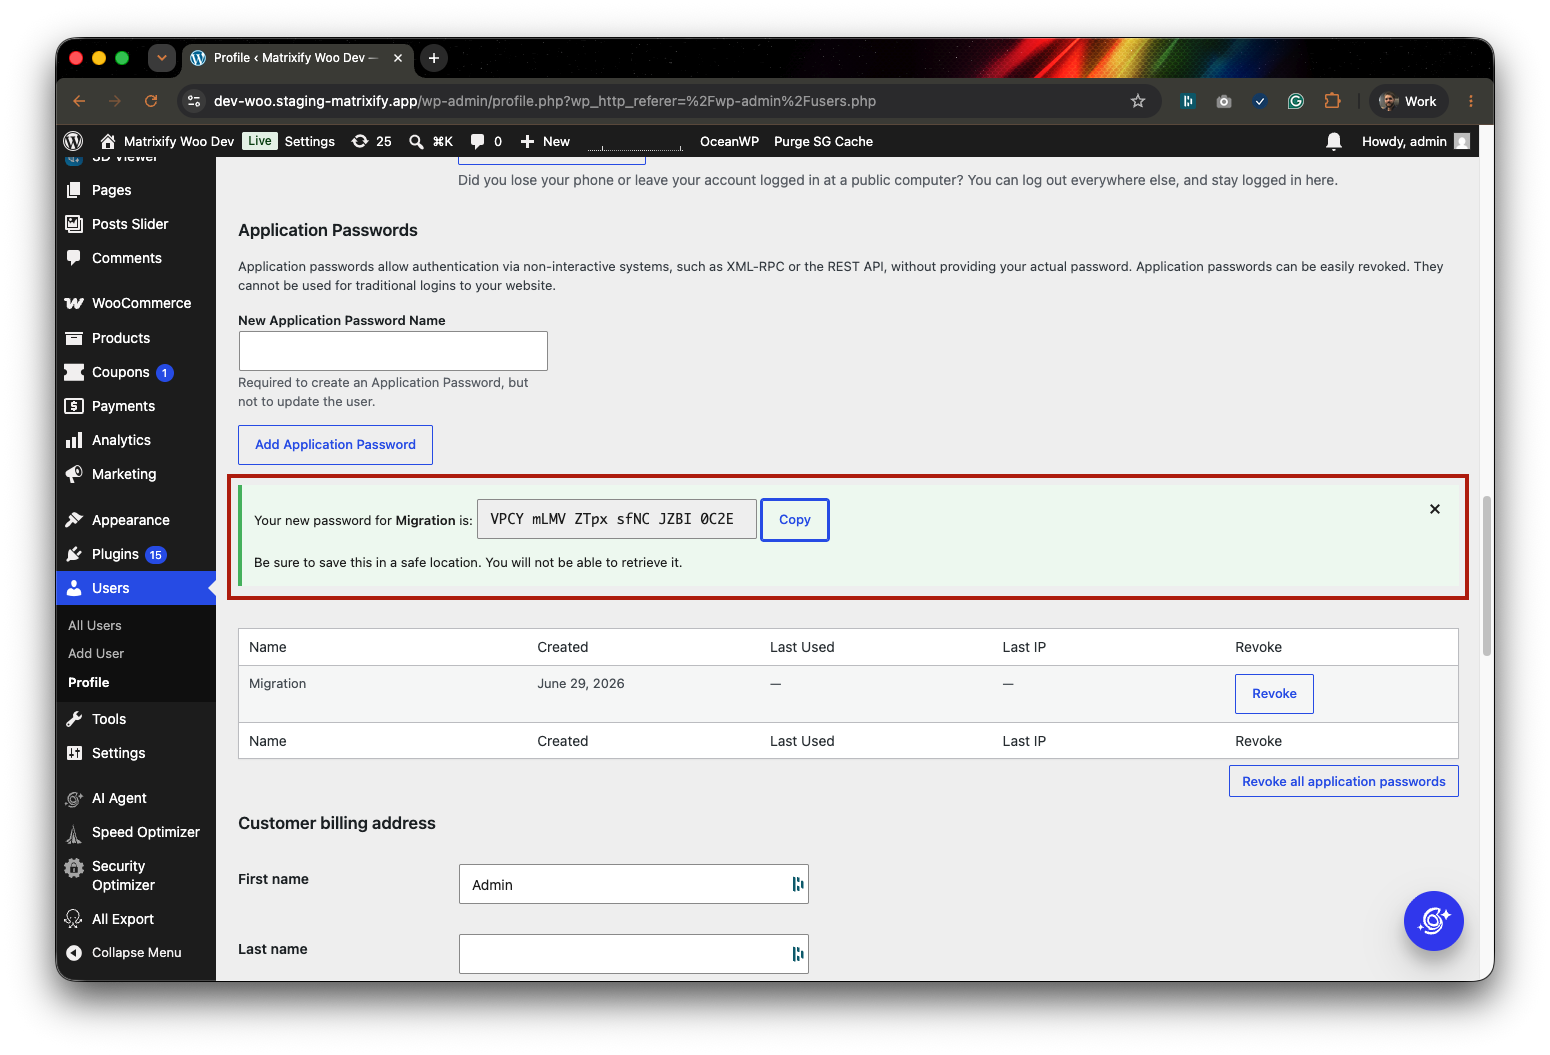
A green banner will show up with your generated password. Copy this password and use it in the next step.
2. Construct the WordPress API URL with credentials
In the Matrixify app, we will need to provide a URL with your WordPress site API credentials from which the app will take your store data.
The URL is constructed in the following template:
https://<Username>:<Application Password>@<WordPress server>
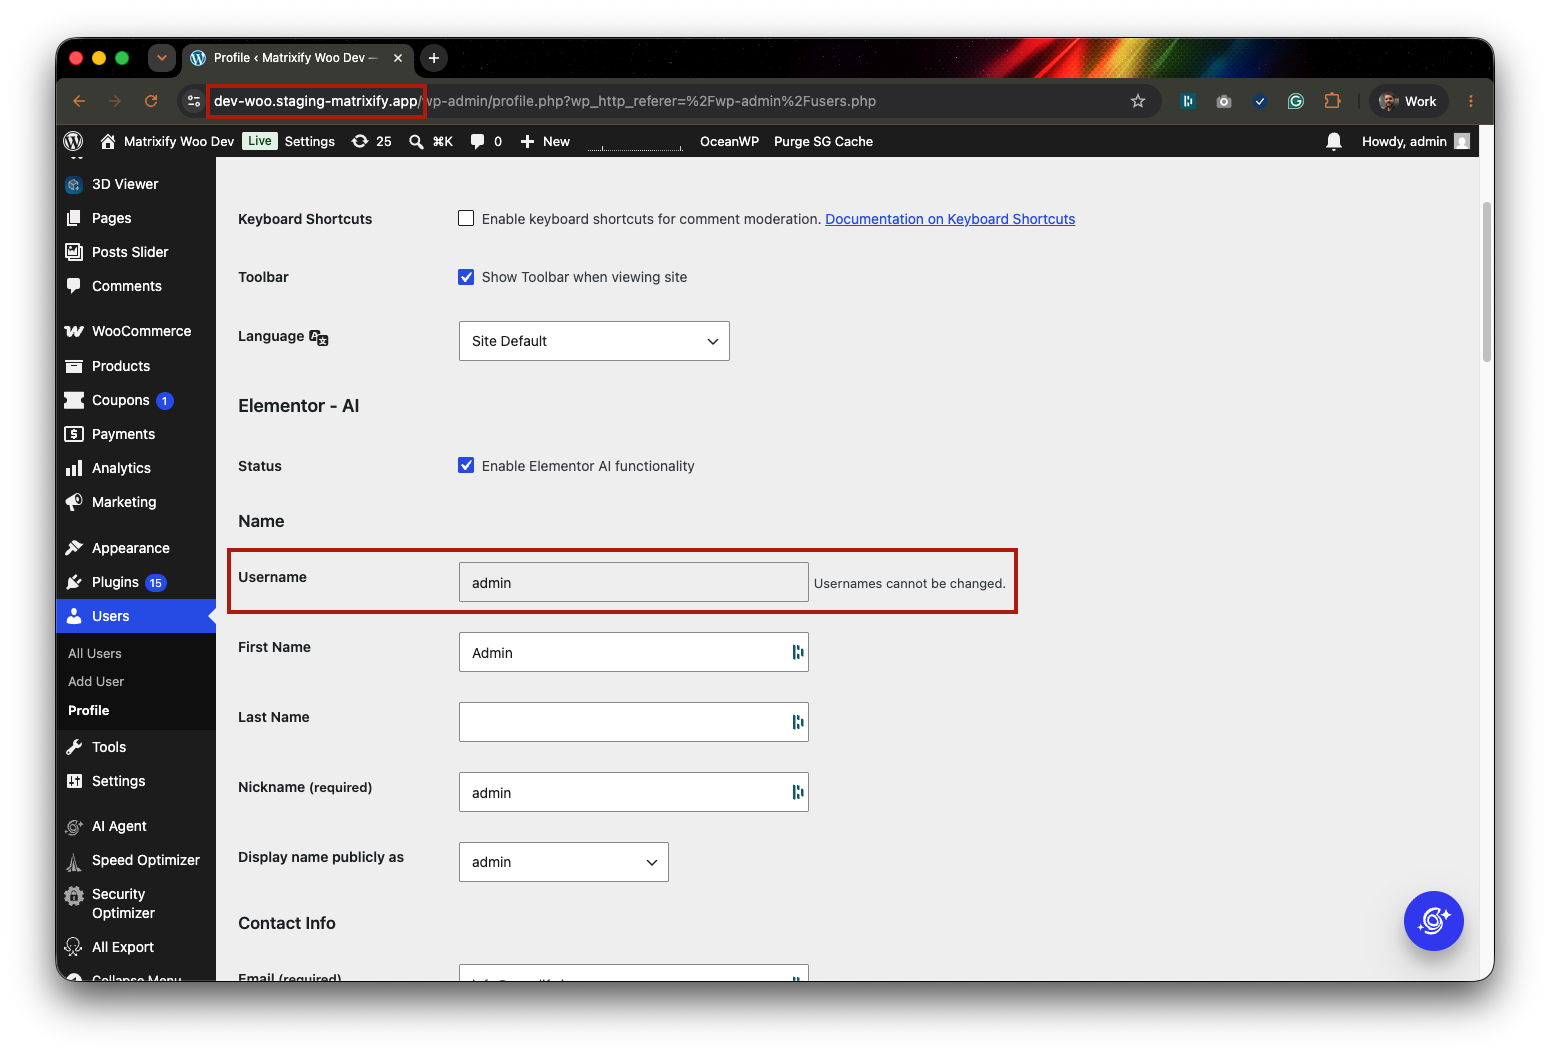
You can find your WordPress username in your users admin page, and WordPress server from the admin browser URL:
In my example, I have the following credentials:
- Username:
admin - Application Password:
VPCY mLMV ZTpx sfNC JZBI 0C2E - WordPress Server:
dev-woo.staging-matrixify.app
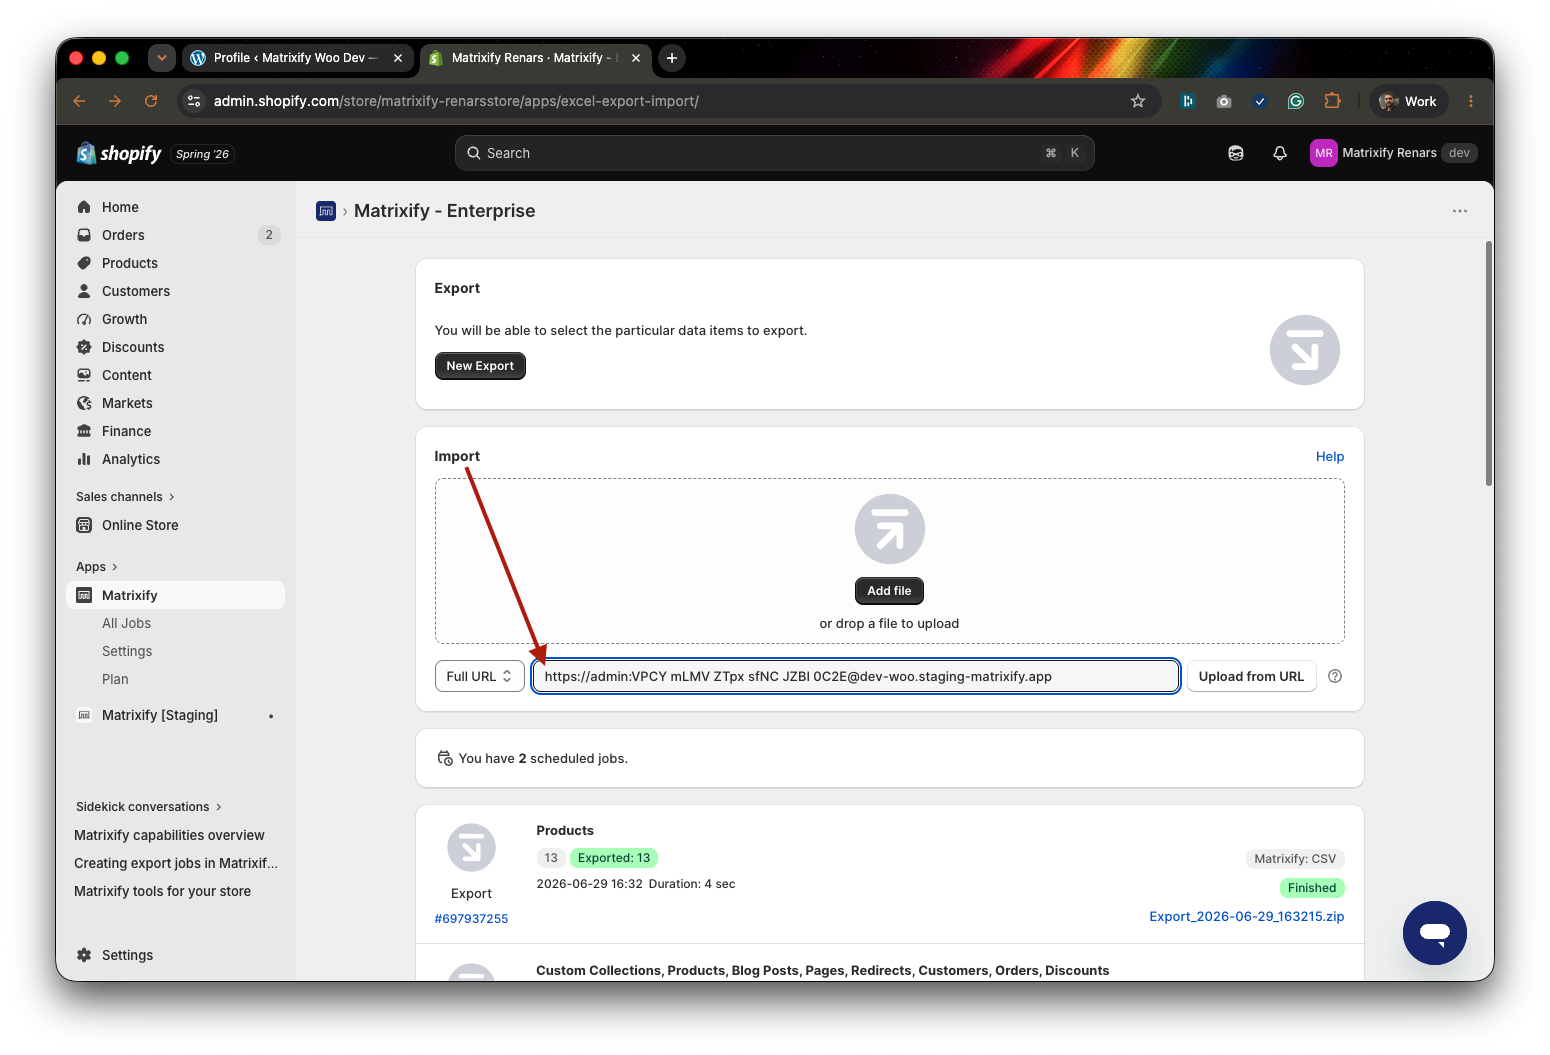
So the URL for the Matrixify would be:
https://admin:VPCY mLMV ZTpx sfNC JZBI [email protected]
Additional URL attributes to limit migrated data
You can also use additional URL parameters to limit the data you migrate from your WooCommerce store to Shopify using the Matrixify app.
Whether you’re looking to migrate only specific entities, or you want to limit the data based on a certain date range, you can construct your WooCommerce API URL with the necessary parameters.
To migrate only a specific entity
If you do not wish to migrate everything, you can add ?only= at the end of the URL to specify what you wish to migrate.
For example, to migrate only Customers and Products add ?only=customers,products at the end of your URL.
Available values are:
productscategoriescustomersorderscoupons
You will also be able to unselect and select entities to migrate further when creating an import in the Matrixify app.
Migrate specific Orders
For Orders, you can also add the following parameters:
order_status– can be set to the following values as supported by WooCommerce API:pendingprocessingon-holdcompletedcancelledrefundedfailedtrash
orders_created_since– on or after (>=) specific date and timeorders_created_before– before (<) specific date and timeorders_updated_since– on or after (>=) specific date and timeorders_updated_before– before (<) specific date and time
Date attributes need to be in ISO8601 format, in your WooCommerce store time zone.
For example, you can set parameters like this:
?only=orders&orders_created_since=2020-01-26T00:00:00&orders_created_before=2021-01-29T00:00:00&order_status=completed
This export will migrate only completed Orders, created at or after 2020-01-01 00:00 and before 2021-01-01 00:00 (from 2020 year).
You can also use dynamic placeholders for date and time parameters, for example, orders_created_since=%Y-%m-%dT%H:%M:%S.
You can also include other entities in the same constructed URL, but only Orders will be filtered with these order parameters.
Migrate specific Customers
For, customers you can filter customers by their role and created/updated dates with the following parameters:
customer_role– possible values (if you do not have this parameter specified the app will assume the role asall):alladministratoreditorauthorcontributorsubscribercustomershop_manager
customers_created_since– on or after (>=) specific date and timecustomers_created_before– before (<) specific date and timecustomers_updated_since– on or after (>=) specific date and timecustomers_updated_before– before (<) specific date and time
Date attributes need to be in ISO8601 format, in your WooCommerce store time zone.
For example, you can set parameters like this:
?only=customers&customer_role=subscriber&customers_updated_since=2023-01-01T00:00:00
This example would migrate only customers that have roles set as subscribers and have been last updated since the start of 2023.
You can also use dynamic placeholders for date and time parameters, for example, customers_created_since=%Y-%m-%dT%H:%M:%S.
Migrate specific Products
Same as for Orders and Customers, you can use various filters for Products to limit what products are migrated.
By using these filters you can migration only some products that you need to ensure to exclude products that you do not wish to migrate.
product_status– possible values (you can also list multiple statuses separated by a comma):draftpendingprivatepublish
products_created_since– on or after (>=) specific date and timeproducts_created_before– before (<) specific date and timeproducts_updated_since– on or after (>=) specific date and timeproducts_updated_before– before (<) specific date and time
Date attributes need to be in ISO8601 format, in your WooCommerce store time zone.
For example, you can set parameters like this:
?only=products&product_status=pending,publish&products_updated_since=2023-01-27T00:00:00
This example would migrate only Products with pending or publish status that have been last updated since the start of 2023.
You can also use dynamic placeholders for date and time parameters, for example, products_created_since=%Y-%m-%dT%H:%M:%S.
Note that, following this tutorial you will generate Matrixify template Excel file with your Products data where you will be able to further remove rows of Products that you do not wish to migrate.
Combining URL attributes
While the URL parameters can be used separately to migrate only specific data, they also provide great ability to just limit what data is being migrated.
This is important if you either do not need to migrate old data from the store or have already done the whole migration previously but now need to migrate over the rest of the data that was changed in WooCommerce after the big migration.
The simplest way to achieve this in both cases is to add updated since URL parameters:
?products_updated_since=2023-10-28T00:00:00&orders_updated_since=2023-10-28T00:00:00&customers_updated_since=2023-10-28T00:00:00
A full example would be:
https://admin:VPCY mLMV ZTpx sfNC JZBI [email protected]?products_updated_since=2023-10-28T00:00:00&orders_updated_since=2023-10-28T00:00:00&customers_updated_since=2023-10-28T00:00:00
In this example, the app would migrate all entities – products, customers, orders, categories, and coupons, but only recently updated (since 2023, October 1) products, customers, and orders will be migrated over thus limiting the amount of data migrated.
If you need help constructing the URL that would best fit your specific use case, feel free to ask our support for assistance.
3. Start a new Import job from the WordPress API URL
Now that we have the URL constructed, we can go into the Matrixify app. In the Import section you can paste your URL and press the “Upload from URL” button.
This will open a new import page where you can inspect that everything looks correct.
If app returns error “URL does not exist” it could mean that your Cloudflare Web Application Firewall (WAF) is blocking the connection from our server IP address.
Make sure that the Cloudflare WAF has Matrixify IP address 54.218.250.7 whitelisted to allow connections to your WordPress or WooCommerce APIs.
4. Check the job details and select the “Dry Run” option
In the new import page, we can see details about the import job that we are about to run.
You can see what data the app will import and make sure that item counts look correct.
Do note that WooCommerce API for Customers does not return Customers that created orders as guests without creating an account in your store, so the Customer count could be less than what you see in your WooCommerce admin.
But don’t worry – those Customers will get created with their basic details and addresses from the Order data.
The “Format” should say “WordPress / WooCommerce API” – that way you know that it is recognized and connected to your WooCommerce API.

Then scroll down to the “Options” and select the “Dry Run” option. This will only convert the data from your WordPress shop to Matrixify template, without importing it just yet. It will give you a chance to then take a look at the converted data – check that everything is as you need, clean up your data before importing, and make any needed adjustments.
Doing a Dry Run is an optional thing – technically you could just run the Import without the Dry Run, and then look at the imported data directly in your Shopify Admin.
You do not need to change any other options – the default ones should work fine.
Check out Matrixify Import Options documentation to see what each option means.
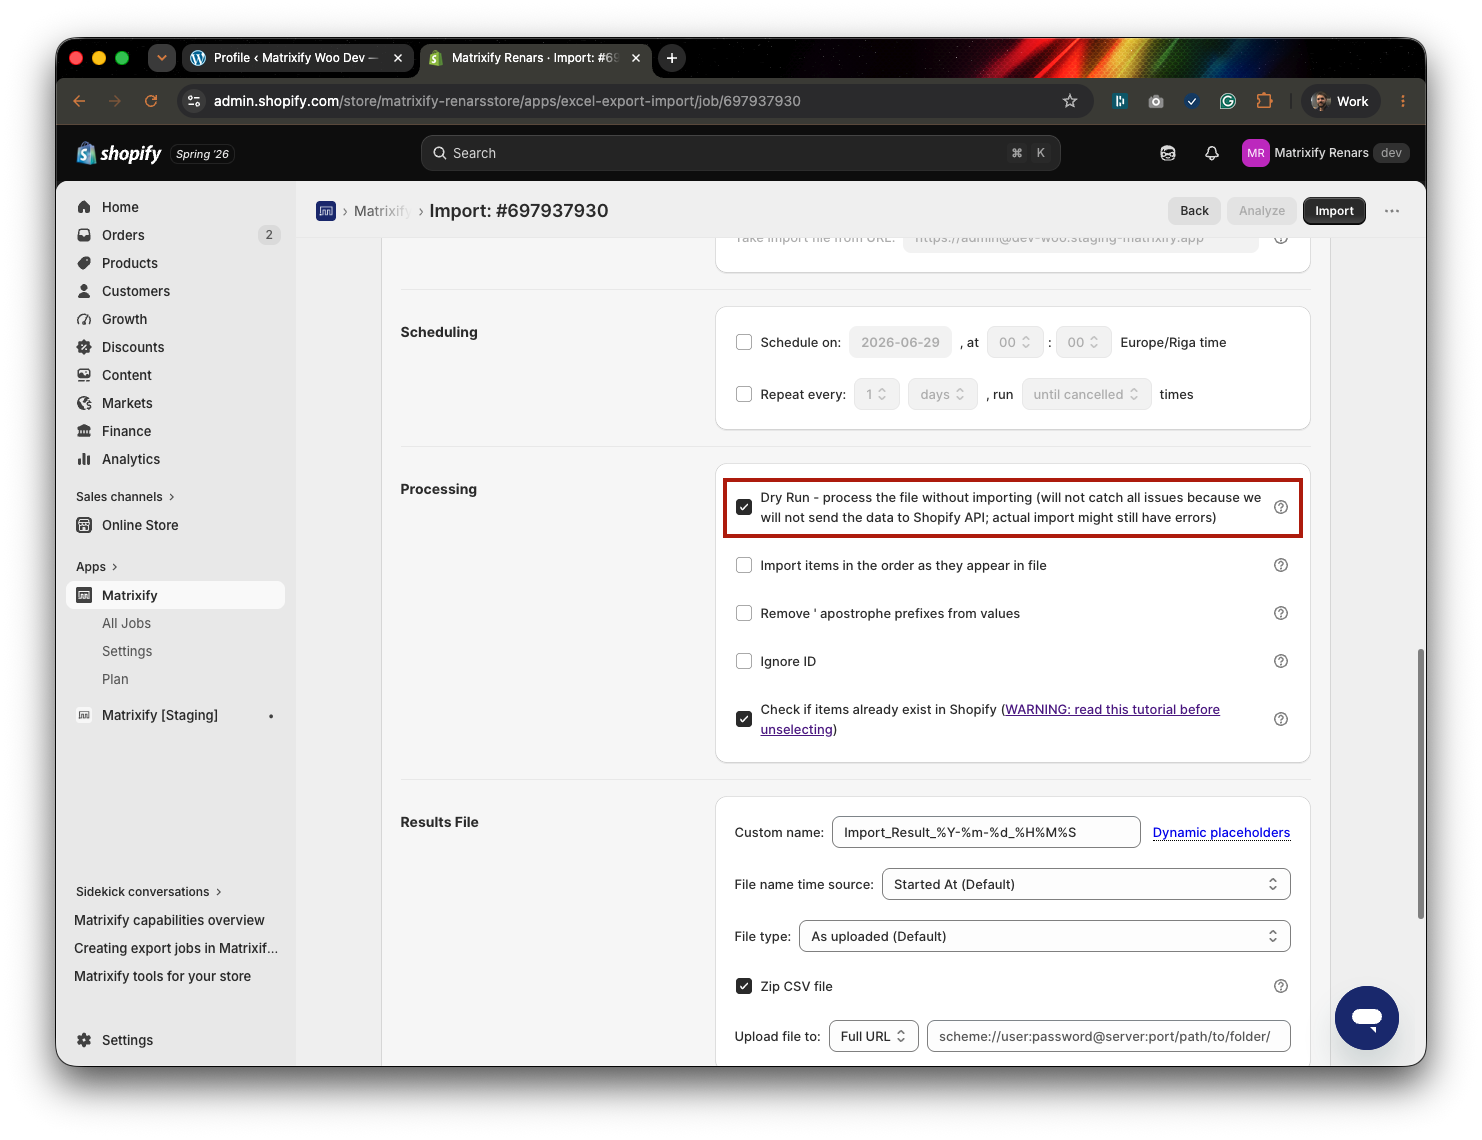
Press the “Import” button at the top or bottom of the page to start the Dry Run import.
Dry Run import should be quick, but if you have a lot of data and it takes a while, then you should know that you don’t have to keep the Matrixify app open – you can close the browser, as it will continue working on our servers.
Once the conversion is finished, you will get an e-mail about it. Or you can just come back later and look into the recent jobs to see how it goes and if it’s finished already.
5. Download and unzip the generated zip file
Once the Dry Run (or import) is finished, you can press the “Download Import Results” button to download the Matrixify-generated zip file.
Unzip that downloaded file. Inside you will find the folder “Images” and Excel file “Import_Result.xlsx“.
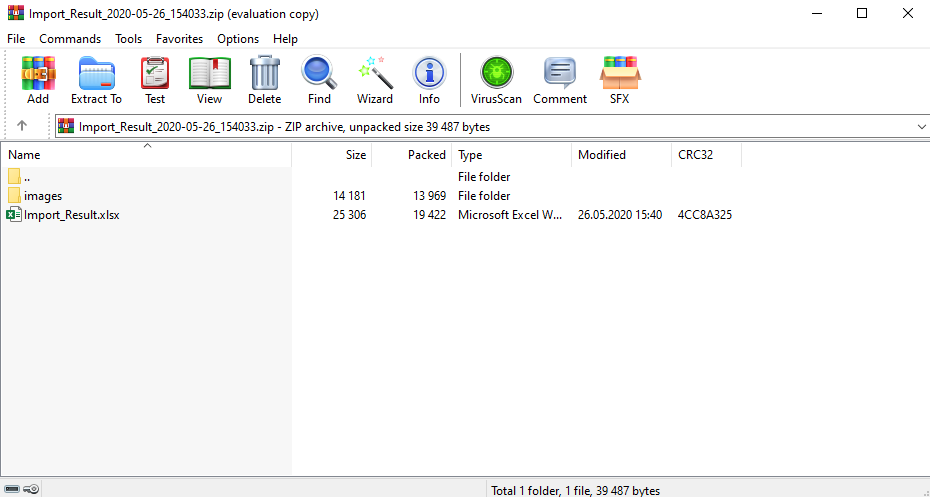
In the “Images” folder app will return images as actual files that are listed in the Product or Collection Body HTML code.
In many migrations, there might not be images within the HTML code, in that case, the “Images” folder will not be returned.
Actual Product images and Collection featured images are not returned in the folder as they will be downloaded by Shopify from the image links listed in the Excel file.
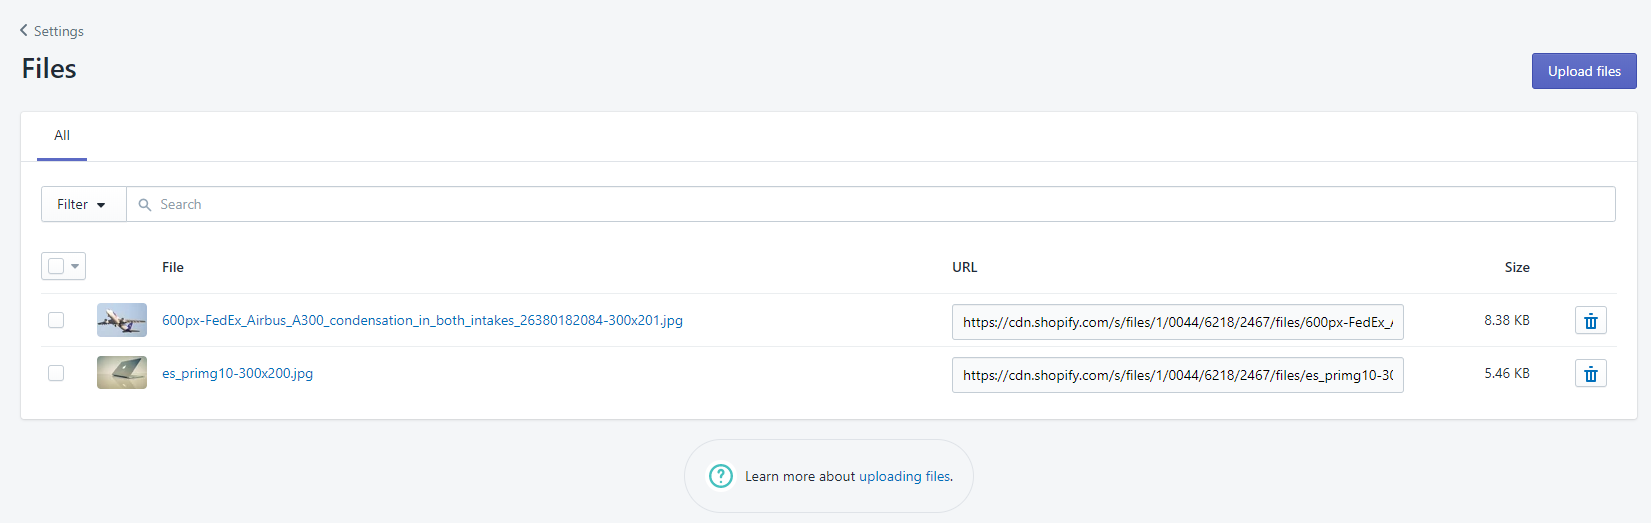
6. Upload the images to Shopify Files
In the “Images” folder, you can find all image files that are used in the Product and Collection (Category) descriptions.

Since you are most likely going to switch off your old WordPress / WooCommerce hosting, you are going to need to host those images elsewhere. Shopify can host your images on their servers, and we strongly suggest using that opportunity.
When converting data from WooCommerce with the Matrixify app, the image links in your Product and Collection descriptions are changed to the locations where Shopify will host those images. So all you need to do is to upload those images to Shopify so that those new links start to work.
Head into your Shopify Admin Files section by going to Shopify Admin -> Content -> Files and pressing the “Upload” button to upload your files.
Navigate to your unzipped images folder and select to upload all those images.
This can be done by pressing the Ctrl+A (or Cmd+A on a Mac) buttons on your keyboard.
It is important not to change the names of the images as then the uploaded image link will not match the one in your migrated descriptions.
If the Matrixify has guessed the new image links correctly, then they will show up in descriptions. If you have any broken image links after the migration, please, contact Matrixify Support so that we can fix it for you.
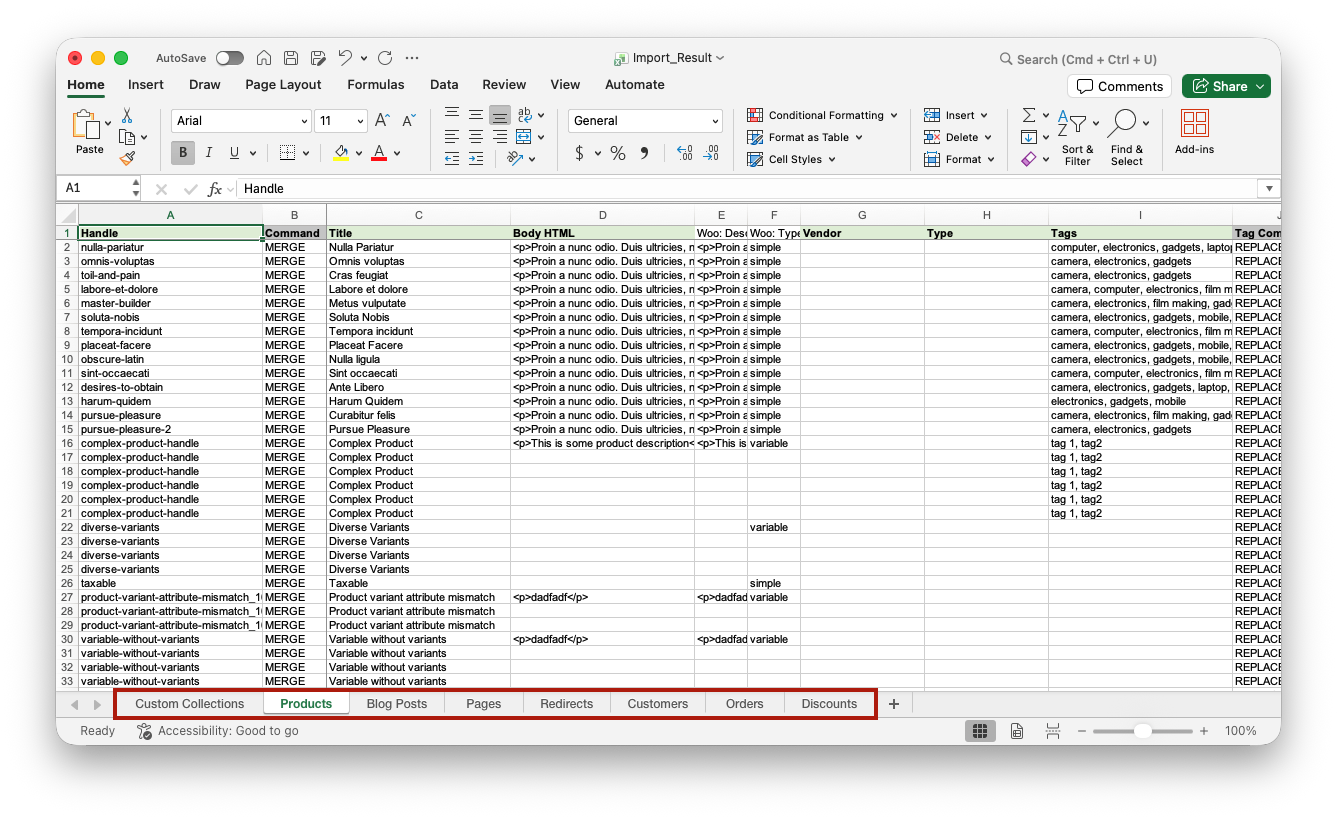
7. Review the “Import_Result” Excel file before importing
Once your images are uploaded to the Shopify Files section, we can take a look at the Matrixify-generated Excel file with your WordPress store data.
This is a great moment to fix and clean up any data that you want to make better now that you are moving to Shopify. Quite often legacy systems have some degree of a mess in the data – partial phone numbers, misspelled words, uneven variant option names, and so on. Or maybe there is something you don’t need to migrate, then you can simply remove that data from the import file.
All fields that do not have a specific place in the Shopify will be set as Metafields in the generated file. You can look into Shopify manual on the Metafields and also make a note of our tutorial on how to bulk manage Metafields if you need to edit them later in bulk.
Matrixify app will also add original WordPress/WooCommerce IDs in the Metafield column Metafield: woo.id.
The original ID metafield will be added for all data entities in the file, so each generated sheet will have this Metafield set.
The “Import_Results” file will contain multiple sheets/tabs for each entity:
8. Disable staff order notifications in Shopify
If you are migrating WooCommerce Orders and you as the store owner don’t want to receive e-mail notifications from Shopify for creating each Order, go to Admin -> Settings -> Notifications -> Staff Notifications, and disable the “New order“ notifications.
9. Import final Excel file into the Matrixify app
Once you have made sure that data in the Excel file looks correct, you can again go into the Matrixify app, and upload that Excel file into the Import section.
When the file is uploaded and analyzed, make sure that the app recognizes each sheet from the file.
Since you are now uploading the Matrixify template file then you will also see that format is “Matrixify“.
This time you do not need to select the “Dry Run” option as now you need to actually import the store data from the file.
If all details look correct, you can just start the import by pressing the “Import” button.
10. Enjoy your WordPress Store Data in Shopify
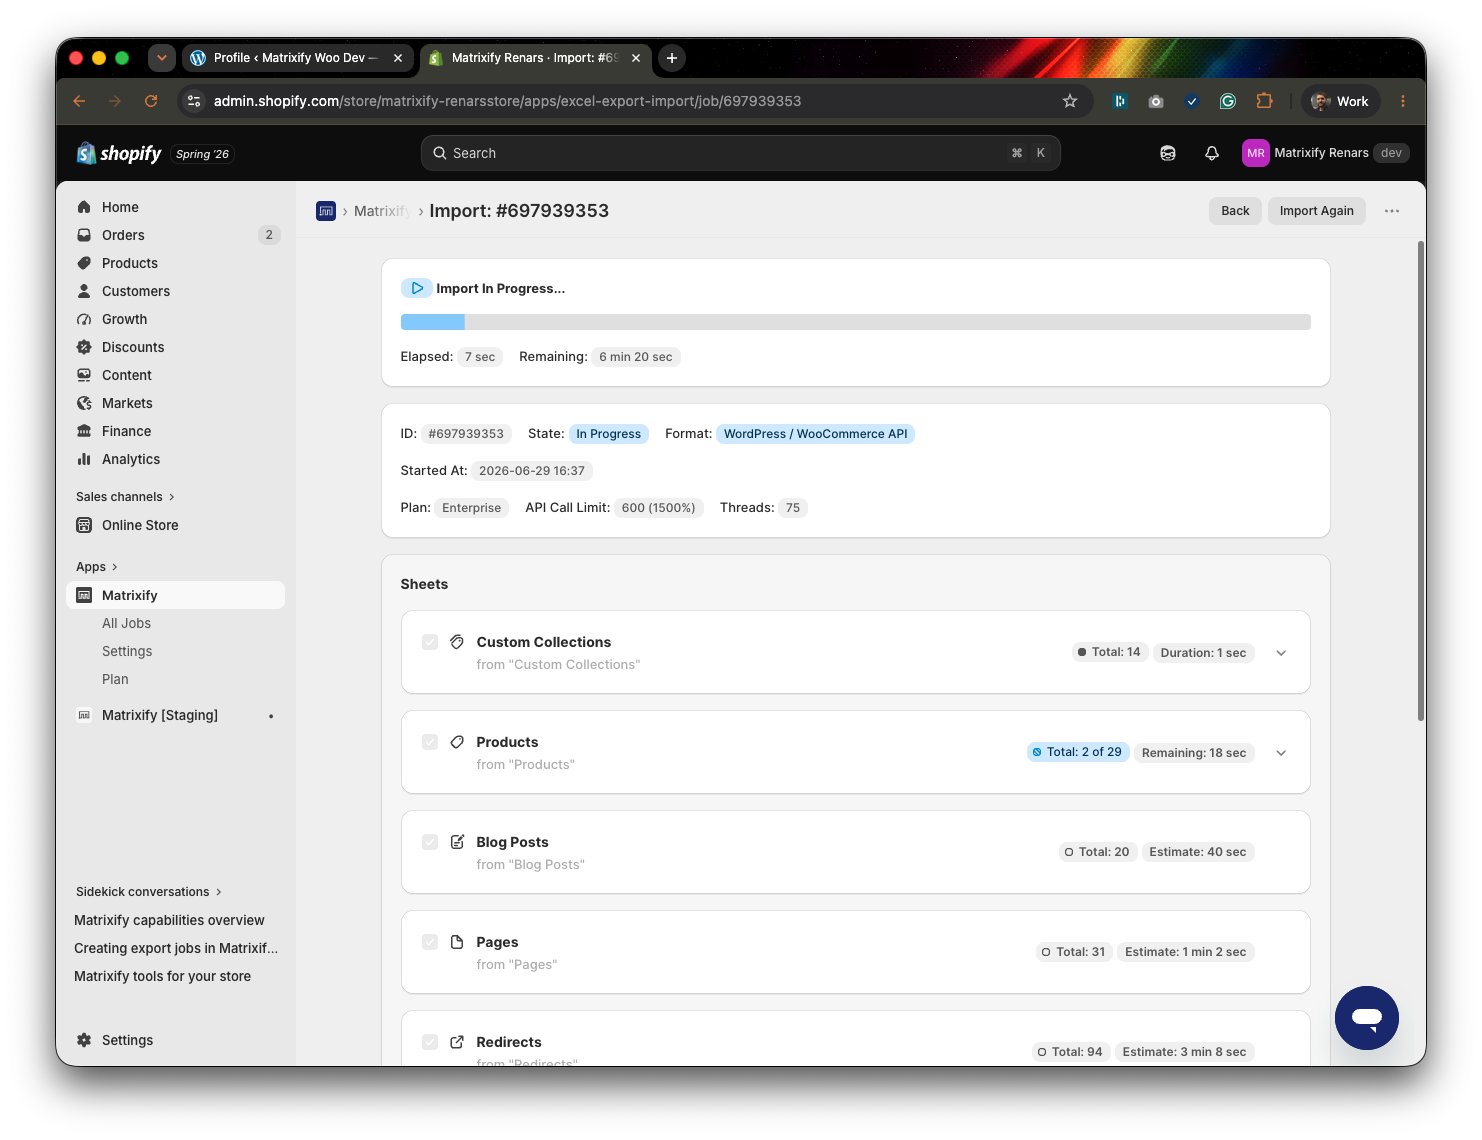
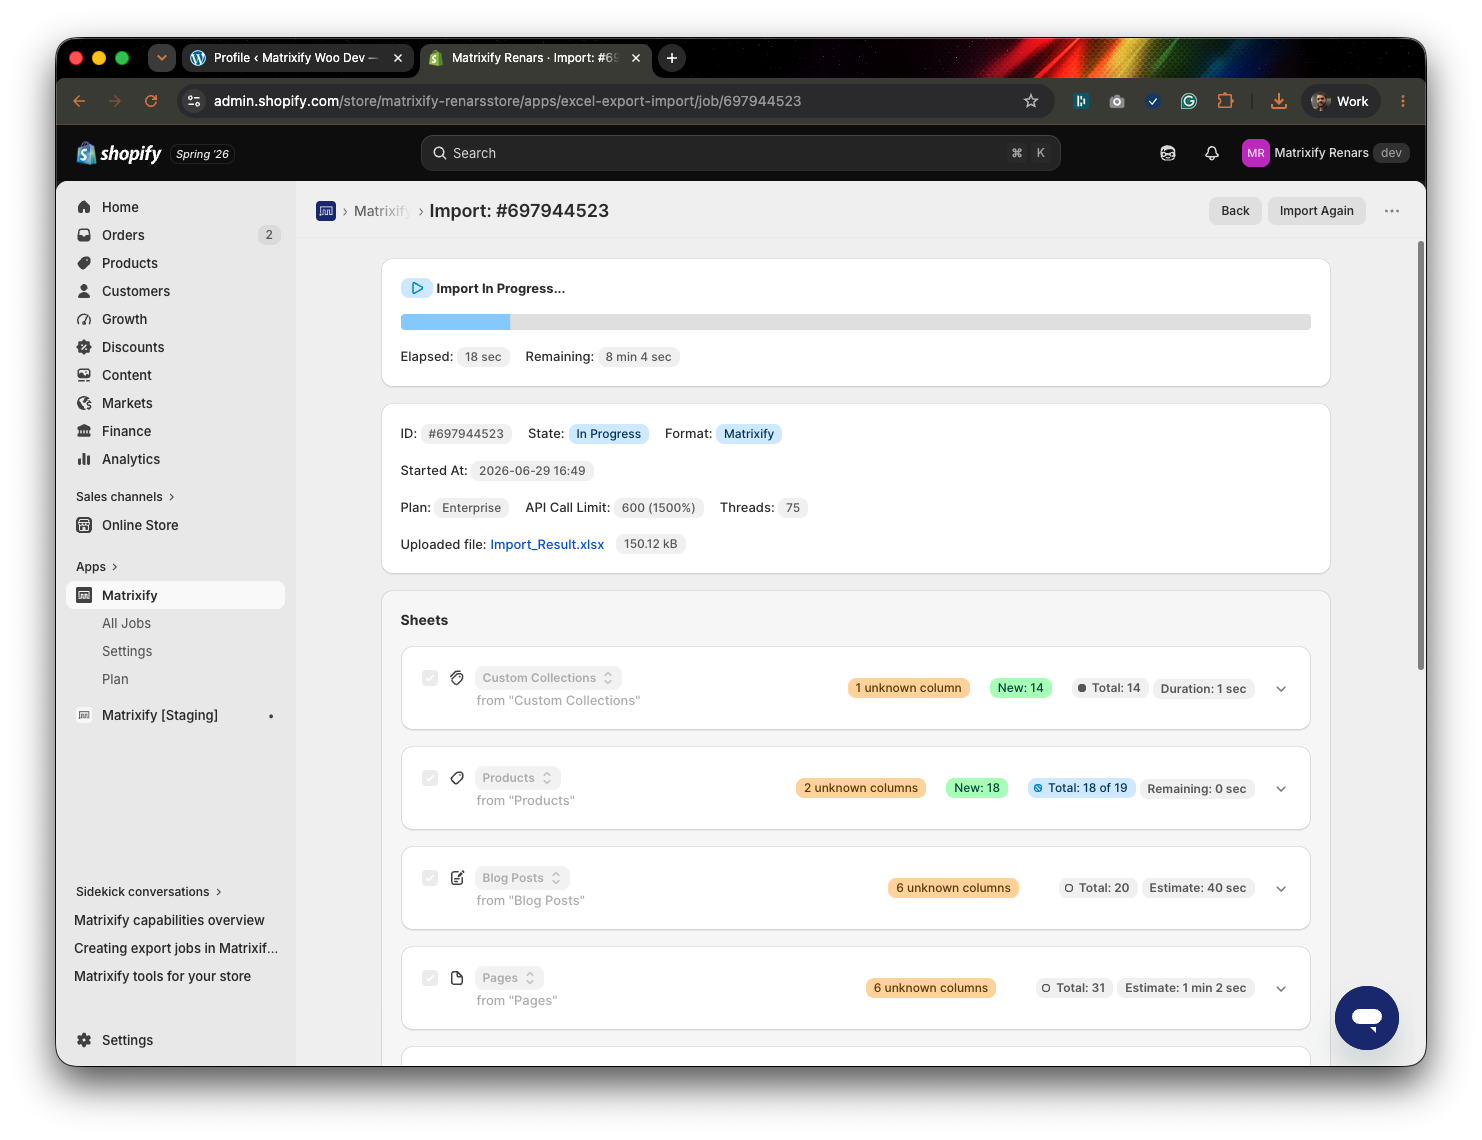
While the import is running, you will see how many items are created and other details about the import.
Same as with the Dry Run previously, you can close the app while the job is running and come back later to check the results.
Once the import finishes you will see that it has a green “Finished” label.
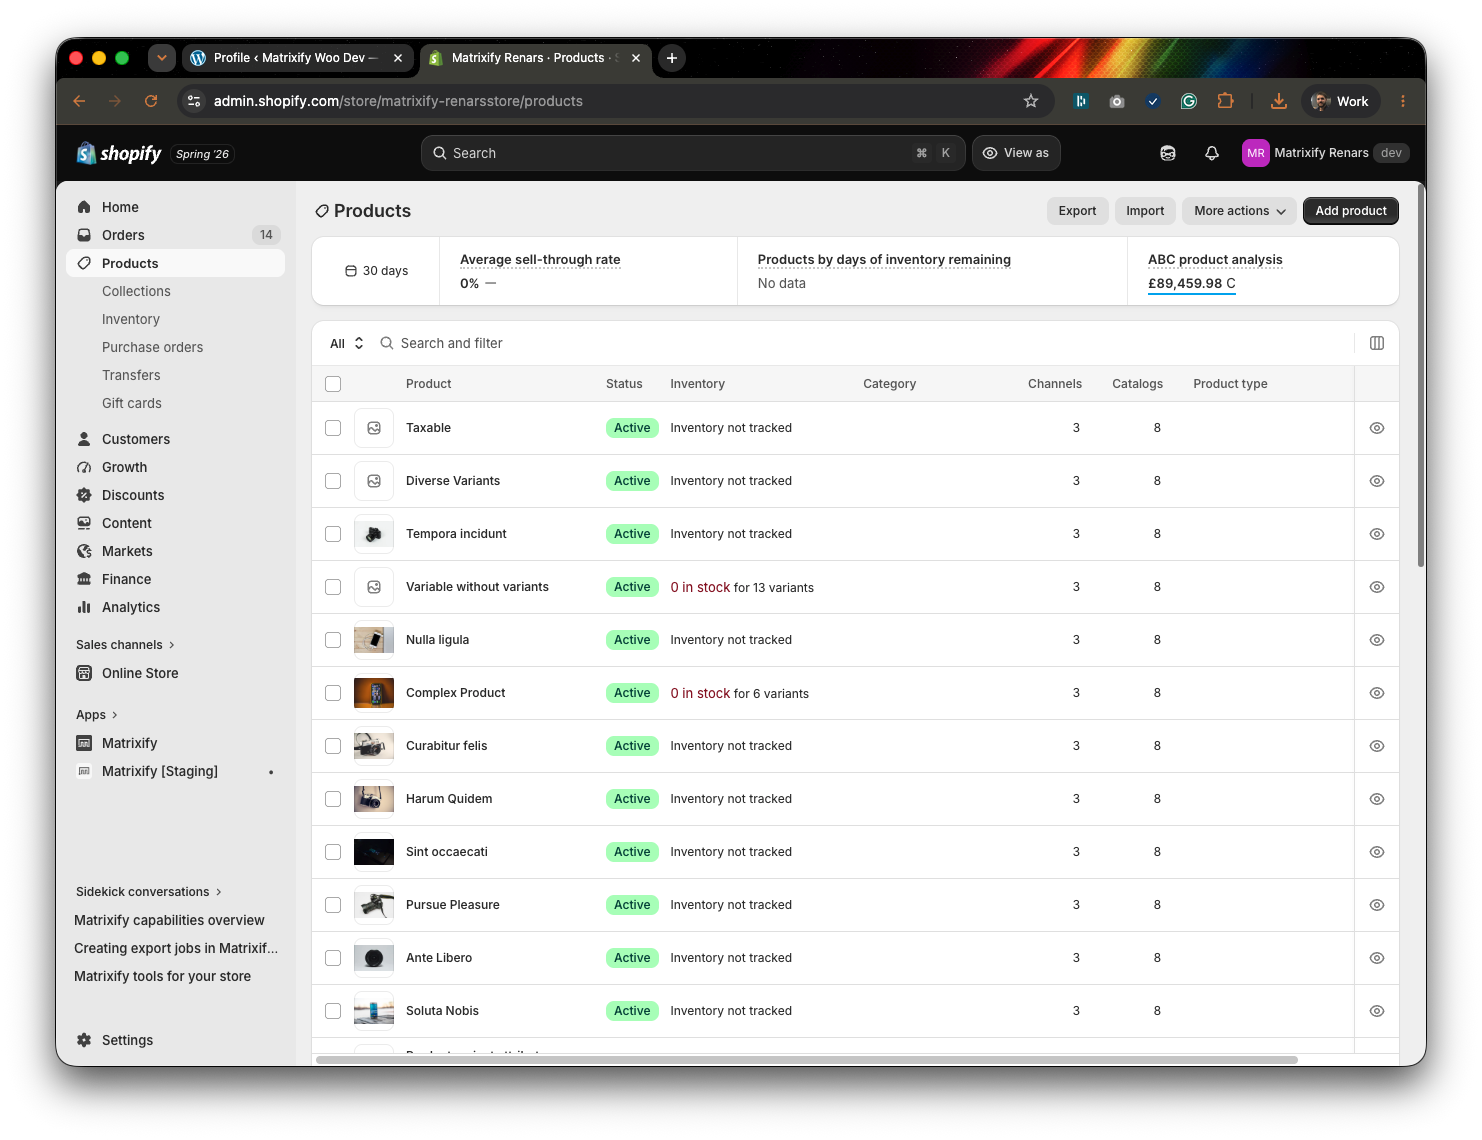
Then you can go into your Shopify Admin and check your migrated WordPress data in Shopify.
Good to know
- To migrate data using the WooCommerce API, you must have a minimum WooCommerce API version 3 (WooCommerce version 3.5).
- To migrate data using the WordPress API, you must have a minimum WordPress version 5.6 (released 2020).
- You can skip the Dry Run step and the whole reviewing of the converted Import Result file, and import the data without the Dry Run option – it will do the import straight away, and it will still generate the converted Import Result file with the images folder. Remember to upload images to the Shopify Files section.
- If you see that some items in the import are showing as Failed, don’t worry – you can download the “Import Results” file of that import, and at the “Import Comment” column in each sheet, you can see the reasons for those items that failed. Then you can resolve those issues, and re-import just the Failed rows.
- If the import speed is important to you, the higher plan you upgrade to, the quicker the import will be, as for example, Enterprise Plan essentially spins off 10 parallel import processes, achieving the effect as if 10 apps would import your data in parallel.
- You can also migrate your WordPress Blog Posts and Pages to Shopify using the WP AllExport plugin by following this tutorial.
- Learn more about migrations to Shopify and what other types of data Matrixify can migrate to Shopify in bulk.
- If you feel stuck with something, our Support is willing to help you – just reach out to us.
Migrate using WooCommerce API credentials
An alternative option for step #1 is using WooCommerce API credentials instead of the WordPress API.
A downside for the WooCommerce API approach is that only public Blog Post and Page data will be migrated.
The WordPress API will be able to migrate also deleted, draft and other status post and pages, as well as other post and page details that are not available publicly on the site.
All other WooCommerce data will be migrated the same way in full detail.
To migrate data using WooCommerce API credentials, go to your WordPress Admin -> WooCommerce -> Settings -> Advanced -> Rest API section add and generate a new key, which will provide you with two fields “Consumer Key” and “Consumer Secret”.
With those credentials, create a WooCommerce API credentials URL in the following template:
https://<Consumer Key>:<Consumer Secret>@<server>
For example, if we have the following credentials:
- Consumer Key:
ck_00a000000a0a00a0000000000a0aaa0a0a0aaa00 - Consumer Secret:
cs_1bb111b11111b1b11b1111111111b11bb1b1bbb1 - Server:
your-woo-domain.com
So the URL for the Matrixify would be:
https://ck_00a000000a0a00a0000000000a0aaa0a0a0aaa00:[email protected].
Same as for the WordPress API URL, you can also use additional URL attributes and parameters to filter and limit the migrated data from within the URL.
To migrate data using the WooCommerce API, you must have WooCommerce API version 3 (WooCommerce version 3.5)
To check what WooCommerce API version your WooCommerce store has you need to open this page in your store: https://<server>/wp-json/wc/v3/
Replace <server> with your stores domain.
This page should open JSON file that looks like a page with a lot of text.
If this page opens an error message then please ask your WooCommerce administrator to configure WooCommerce API on version 3.


