
This is the continuation of the tutorial “How to migrate customers to your new Shopify store and activate their new accounts?“, if you want to send out invitations to your newly migrated customers in bulk, and you want to use your own template with MailChimp, instead of Shopify built-in template from Admin.
Here I assume that you have already imported your new customers into the Shopify. If you haven’t migrated them yet, then go on and import them using the above mentioned tutorial.
The steps will be:
- Look at the default manual way to send invitation to new customer by one customer at a time from Shopify Admin.
- Export unactivated customers from Shopify by generating Activation URLs in the Excel with Bulk Import Export with Excel app.
- Import list of customers with their activation URLs to MailChimp (or any other mass mailing service).
- Send out e-mail campaign to new customers from MailChimp with nice invitation to activate their accounts.
It may look complicated, but trust me, when you will do it once, and understand the system, this will take you not more then 15 minutes to set up everything.
1. How to send invitations from Shopify Admin
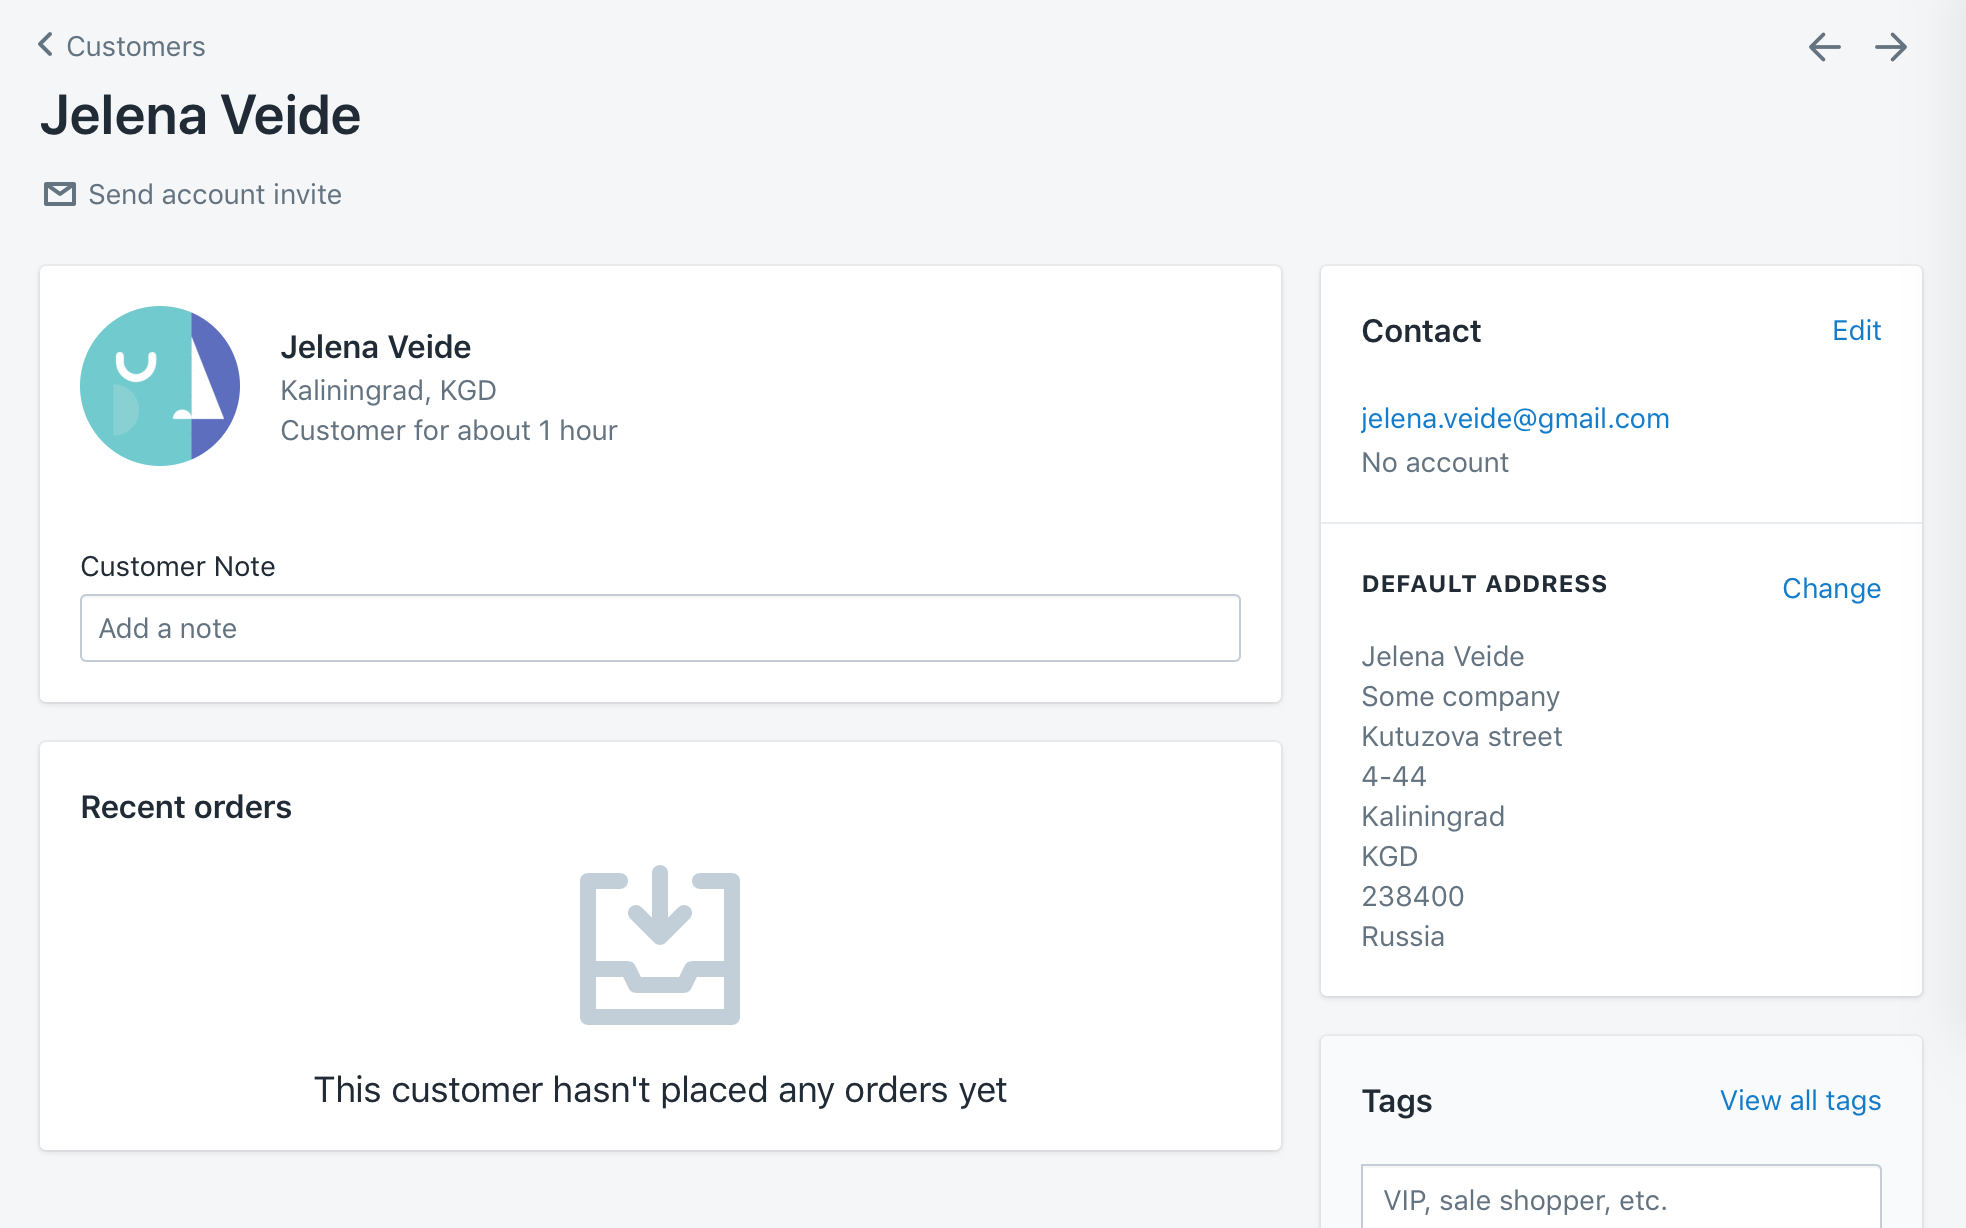
Shopify provides the functionality to send account invite for non-active customers. Open any customer data we just imported and see Send account invite right under the customer name:
Click on Send account invite and you will get the form for email:
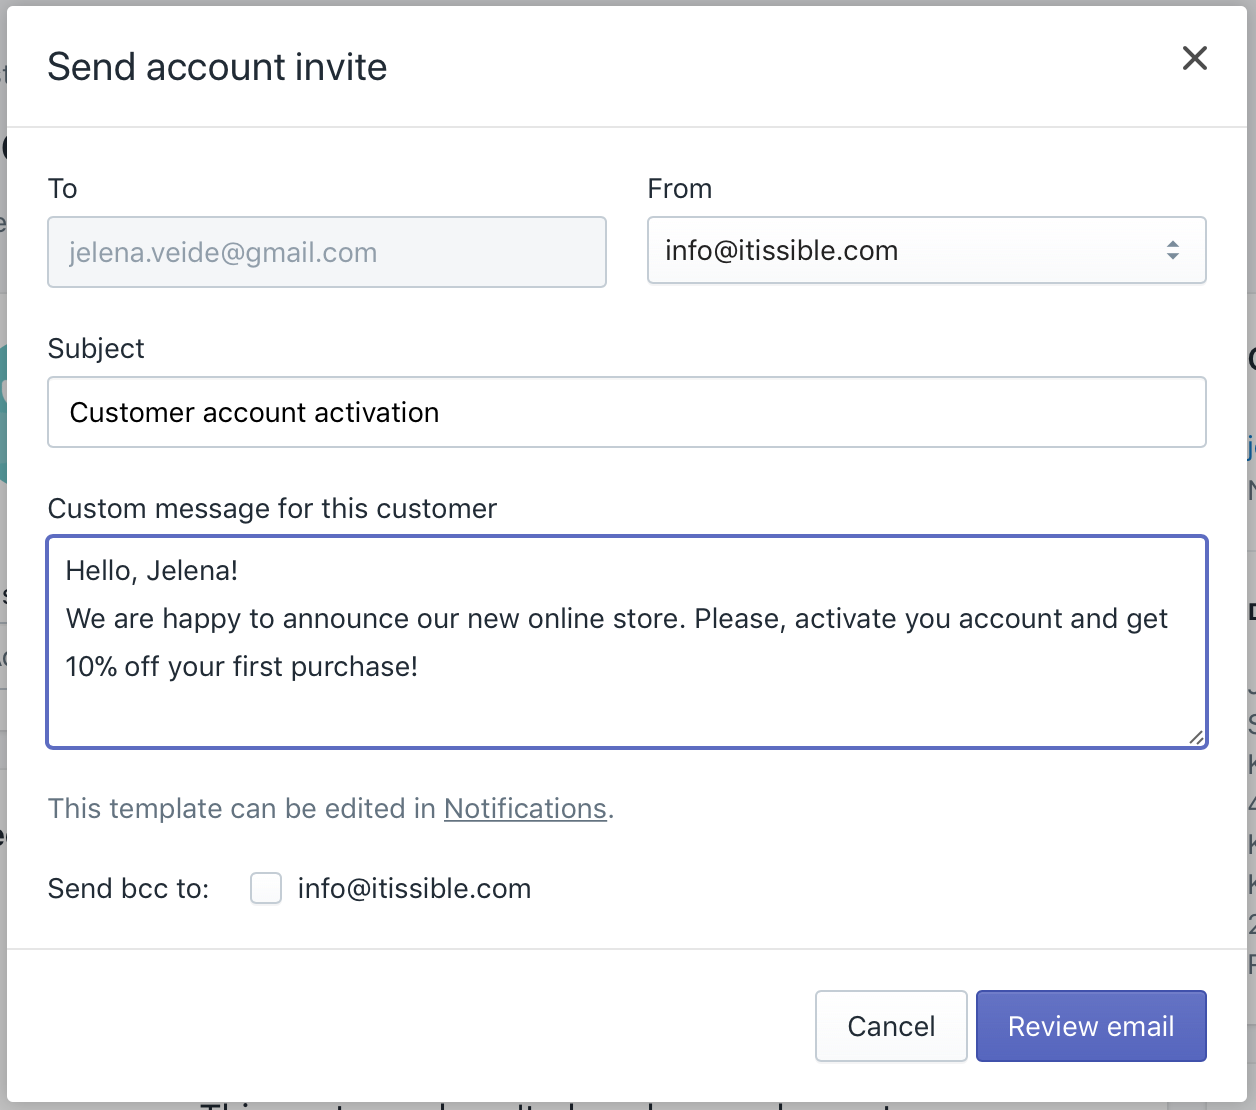
I filled it in with information I want to provide to the customer. Click on Review email:

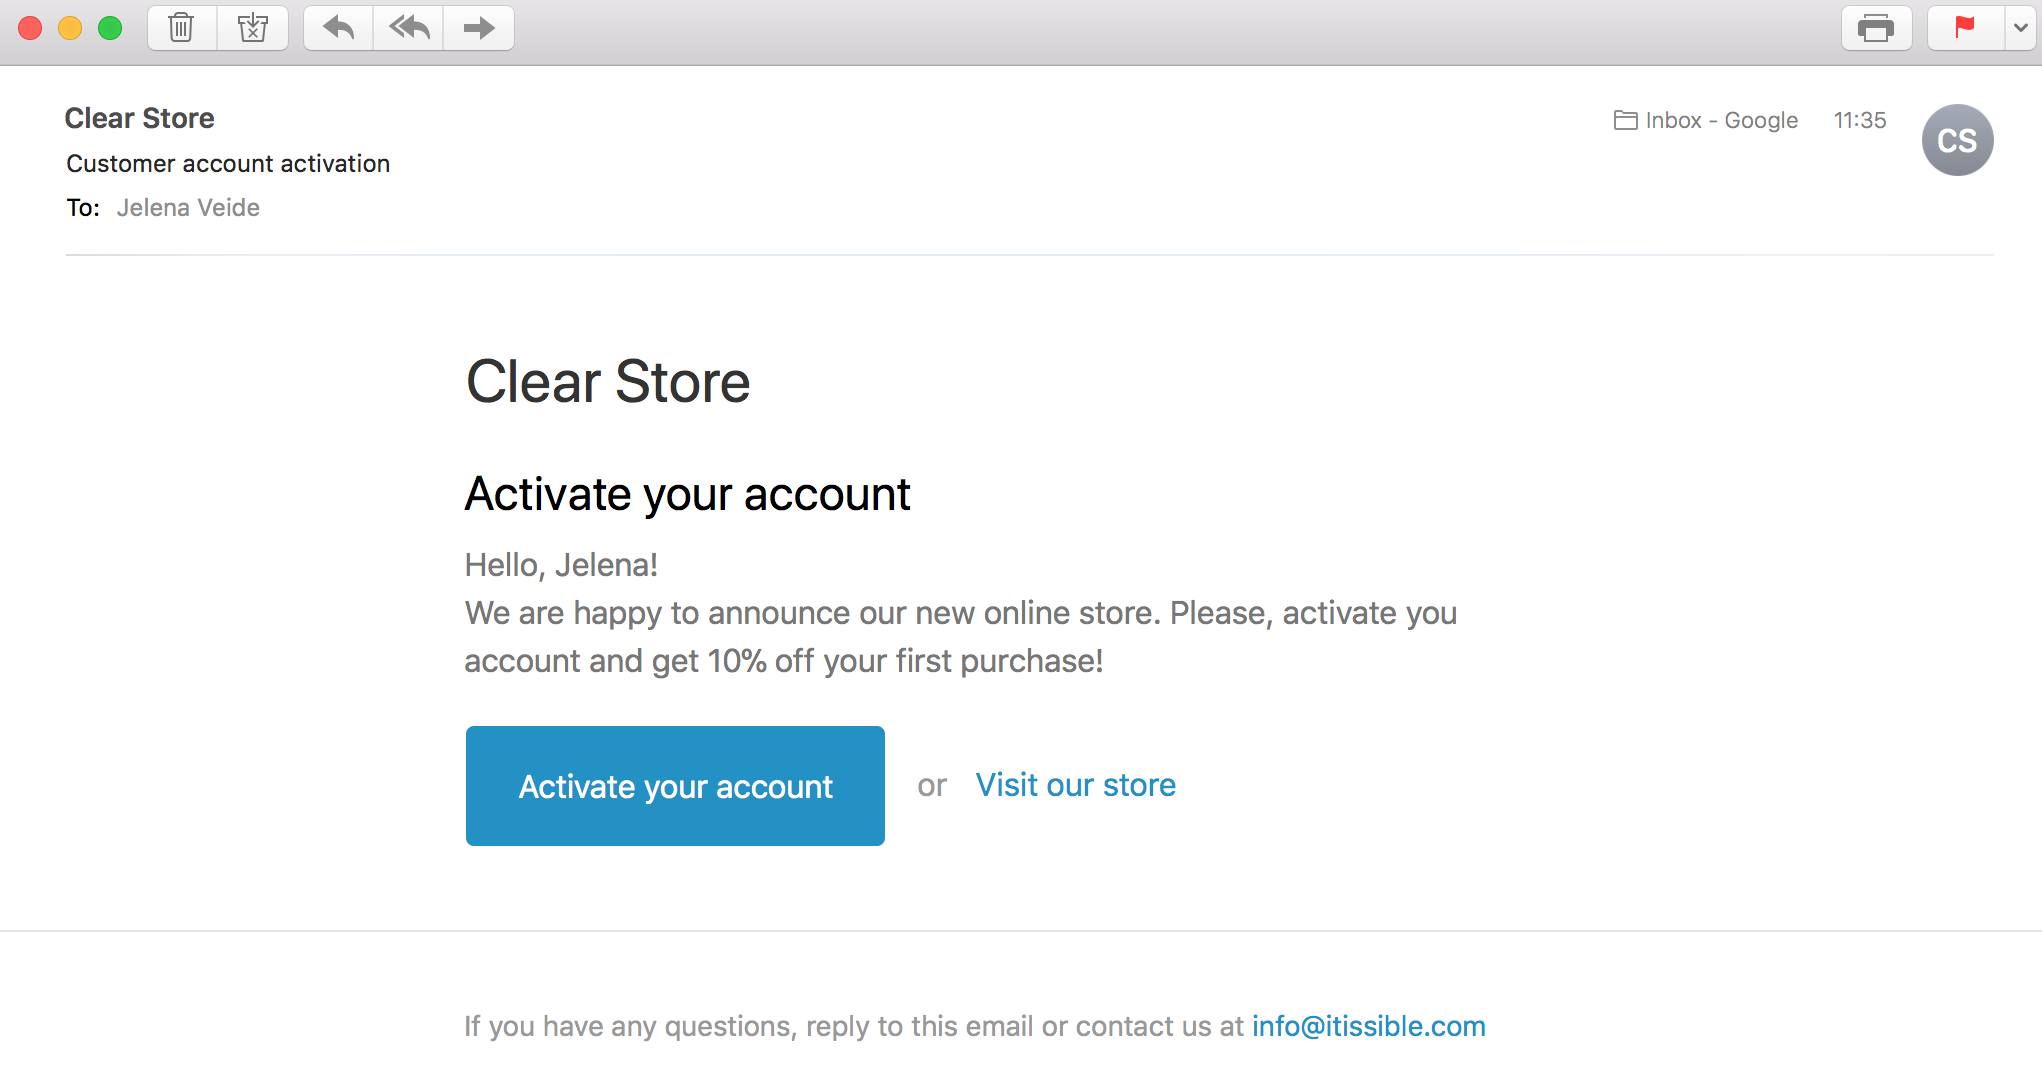
Click Send notification and you will get the email with activation link. You can test this and activate account.
Clicking on Activate your account will bring you to the Activation page: 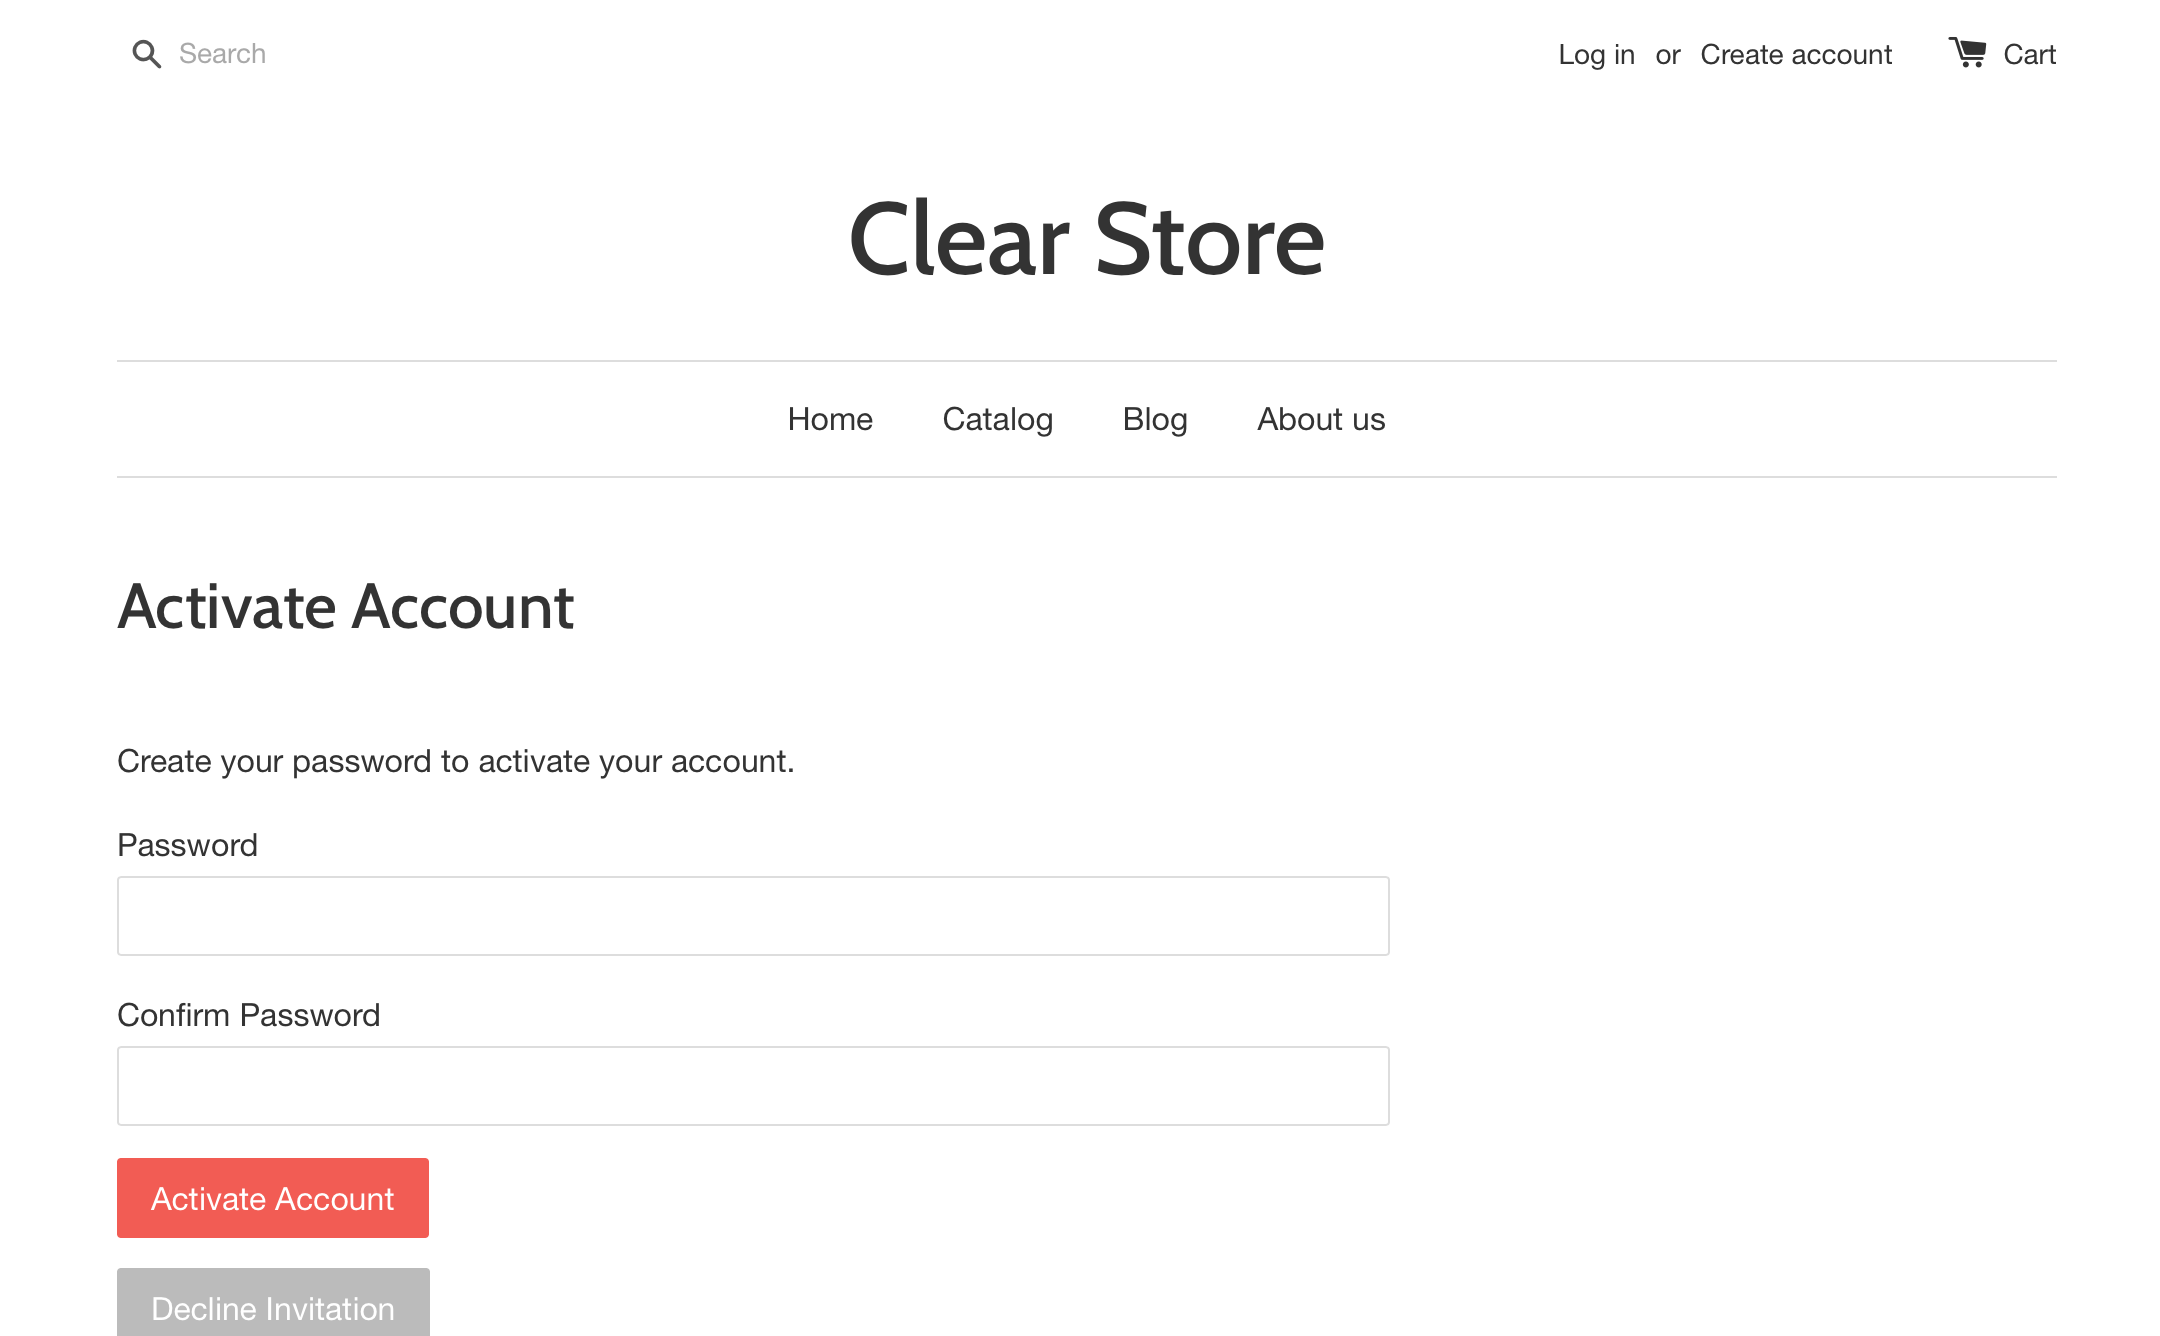
Doing like that you can send Activation email to one customer at a time. And if you have 100 or 1000, or even more customers?
2. Export customers from Shopify with Activation links
We will save time and send activation emails to them all at once.
We need to get Activation URLs for all customers for that.
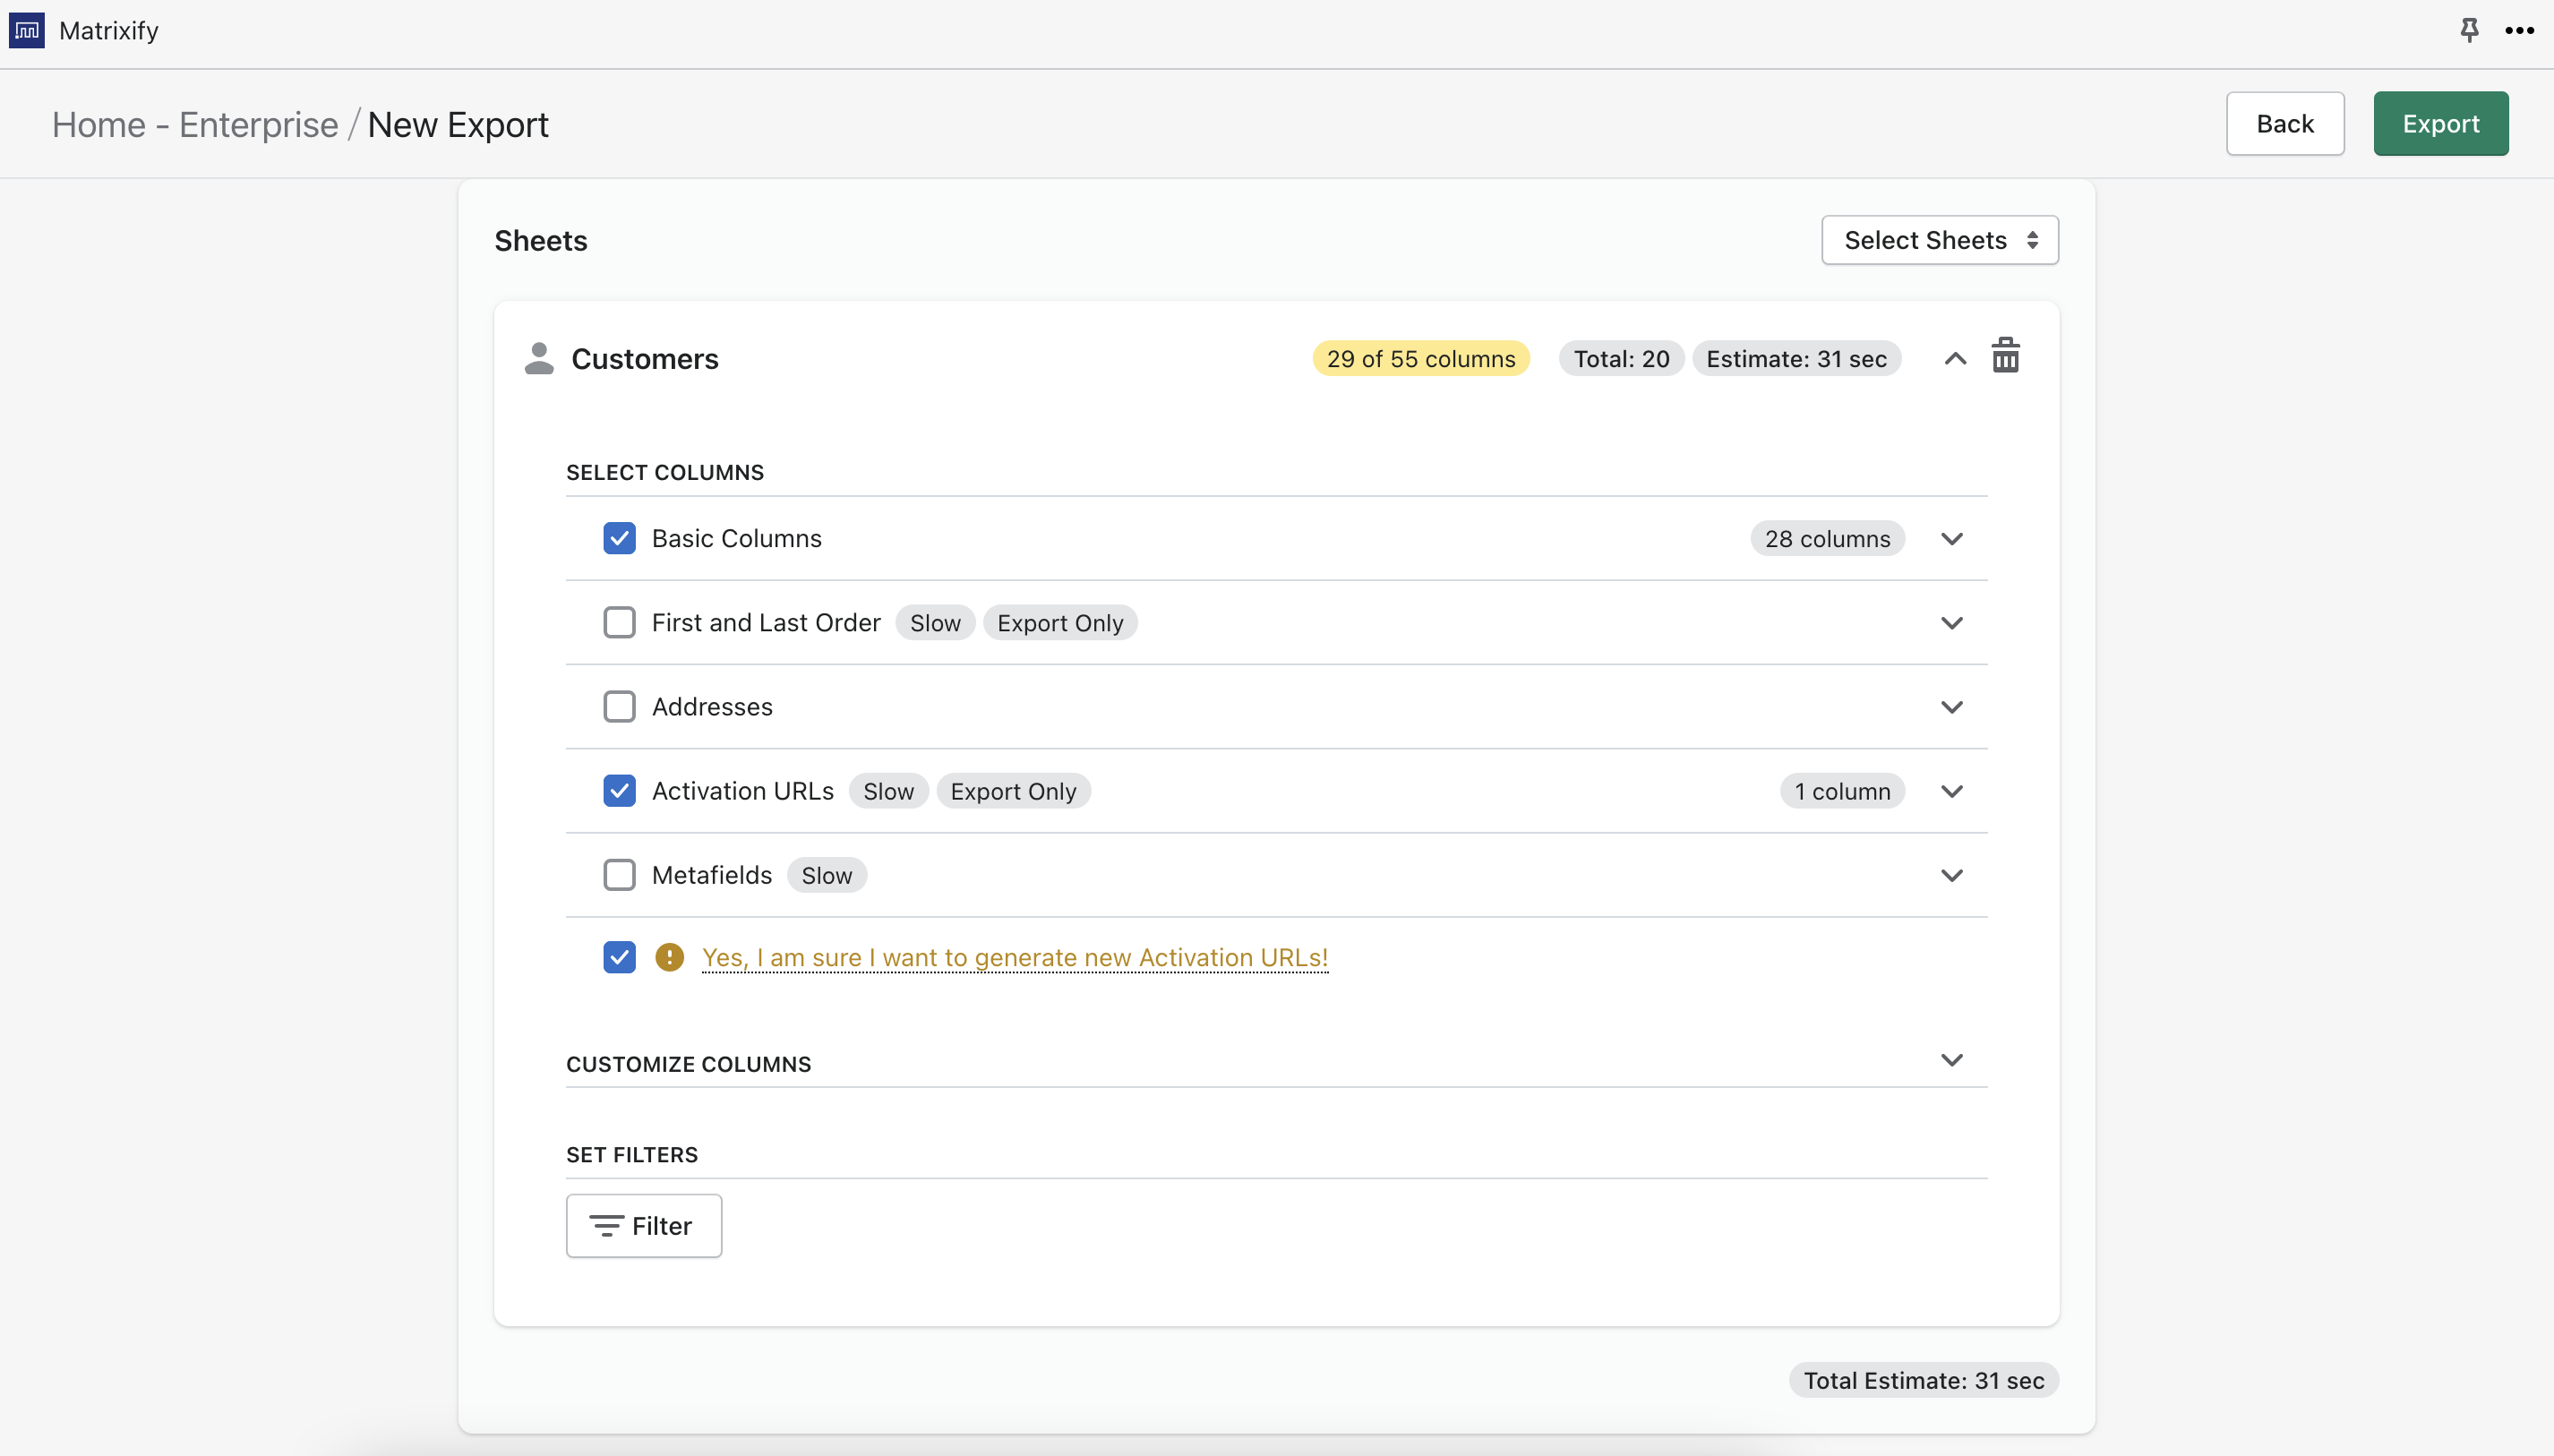
To get this data, we need to Export Customers with the Matrixify app. Create a new Export by clicking the “New Export” button. On the Export page, click the “Select Sheets” drop-down and check the checkbox for “Customers”. Then select “Basic Columns” and “Activation URLs”. Make sure to also check the checkbox “Yes, I am sure I want to generate new Activation URLs!”. Your Export should look something like this:
You will get Activation URLs in the Export file.
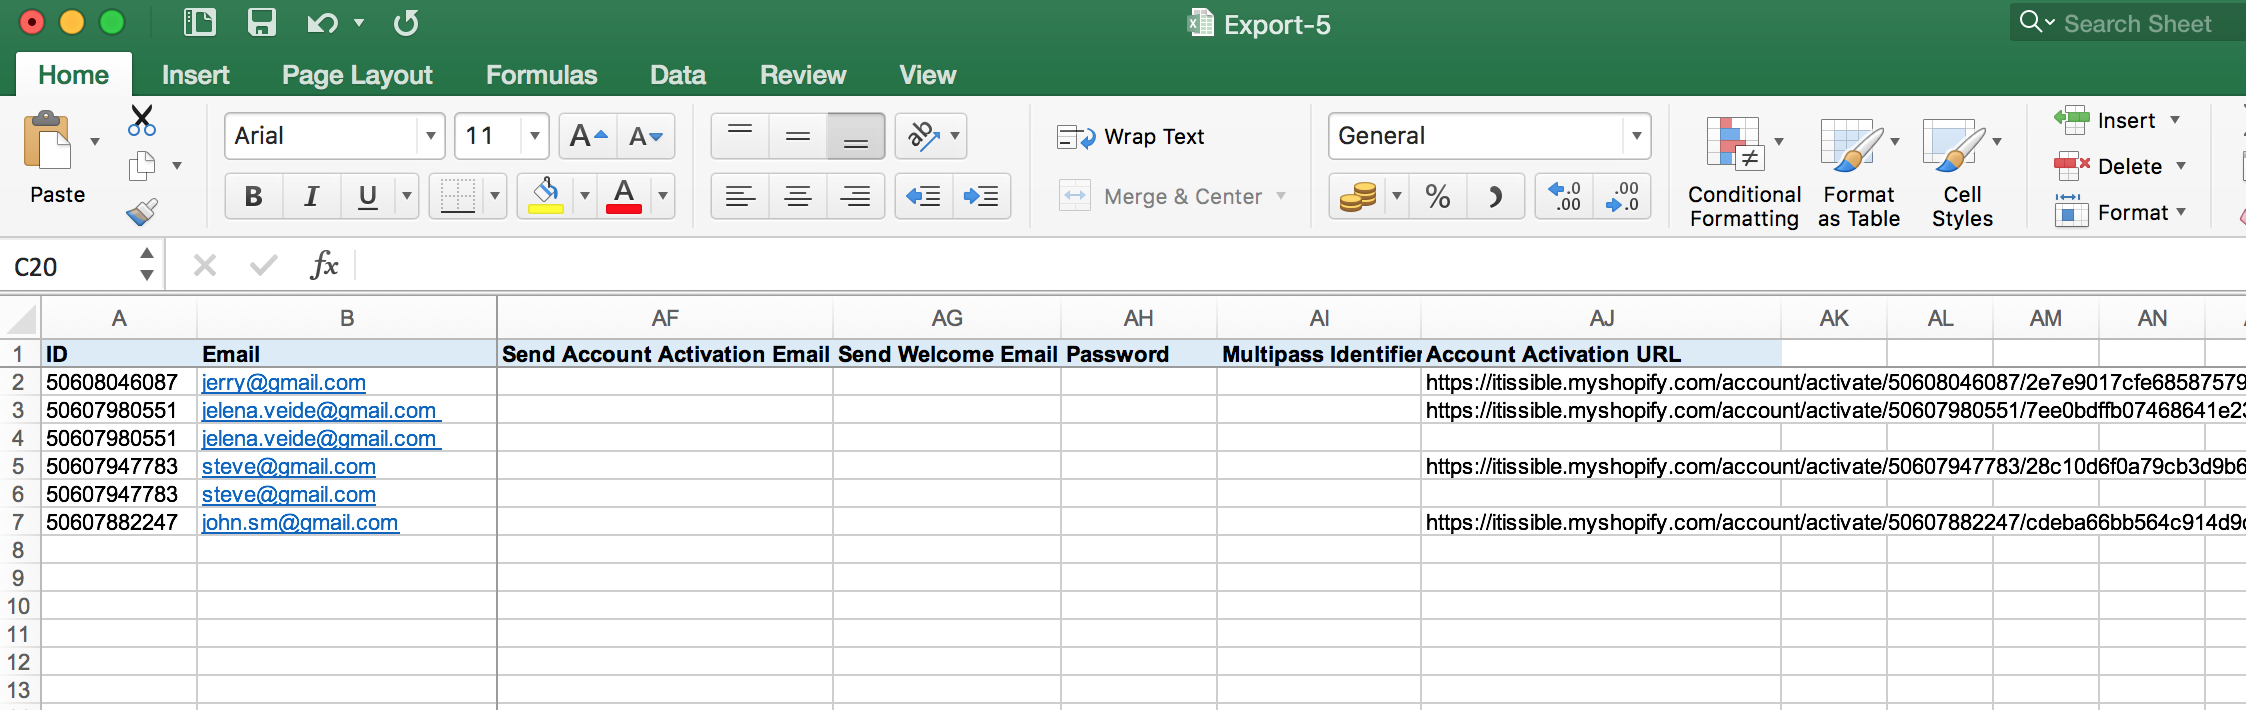
There are a lot of columns, but we will need only 4 of them Email, First Name, Last Name and Activation Account URL. So, I will delete all other columns:
Create a list of customers in MailChimp
There is a service MailChimp, that allows to send notifications, campaigns, newsletters etc. to lists of customers. As we want to send Account activation emails to several customers at a time, let’s first create the list of customers.
Login (or register) into MailChimp service.
Click on Lists -> [Create List] and fill in list data. I called my list “Migrated customers”: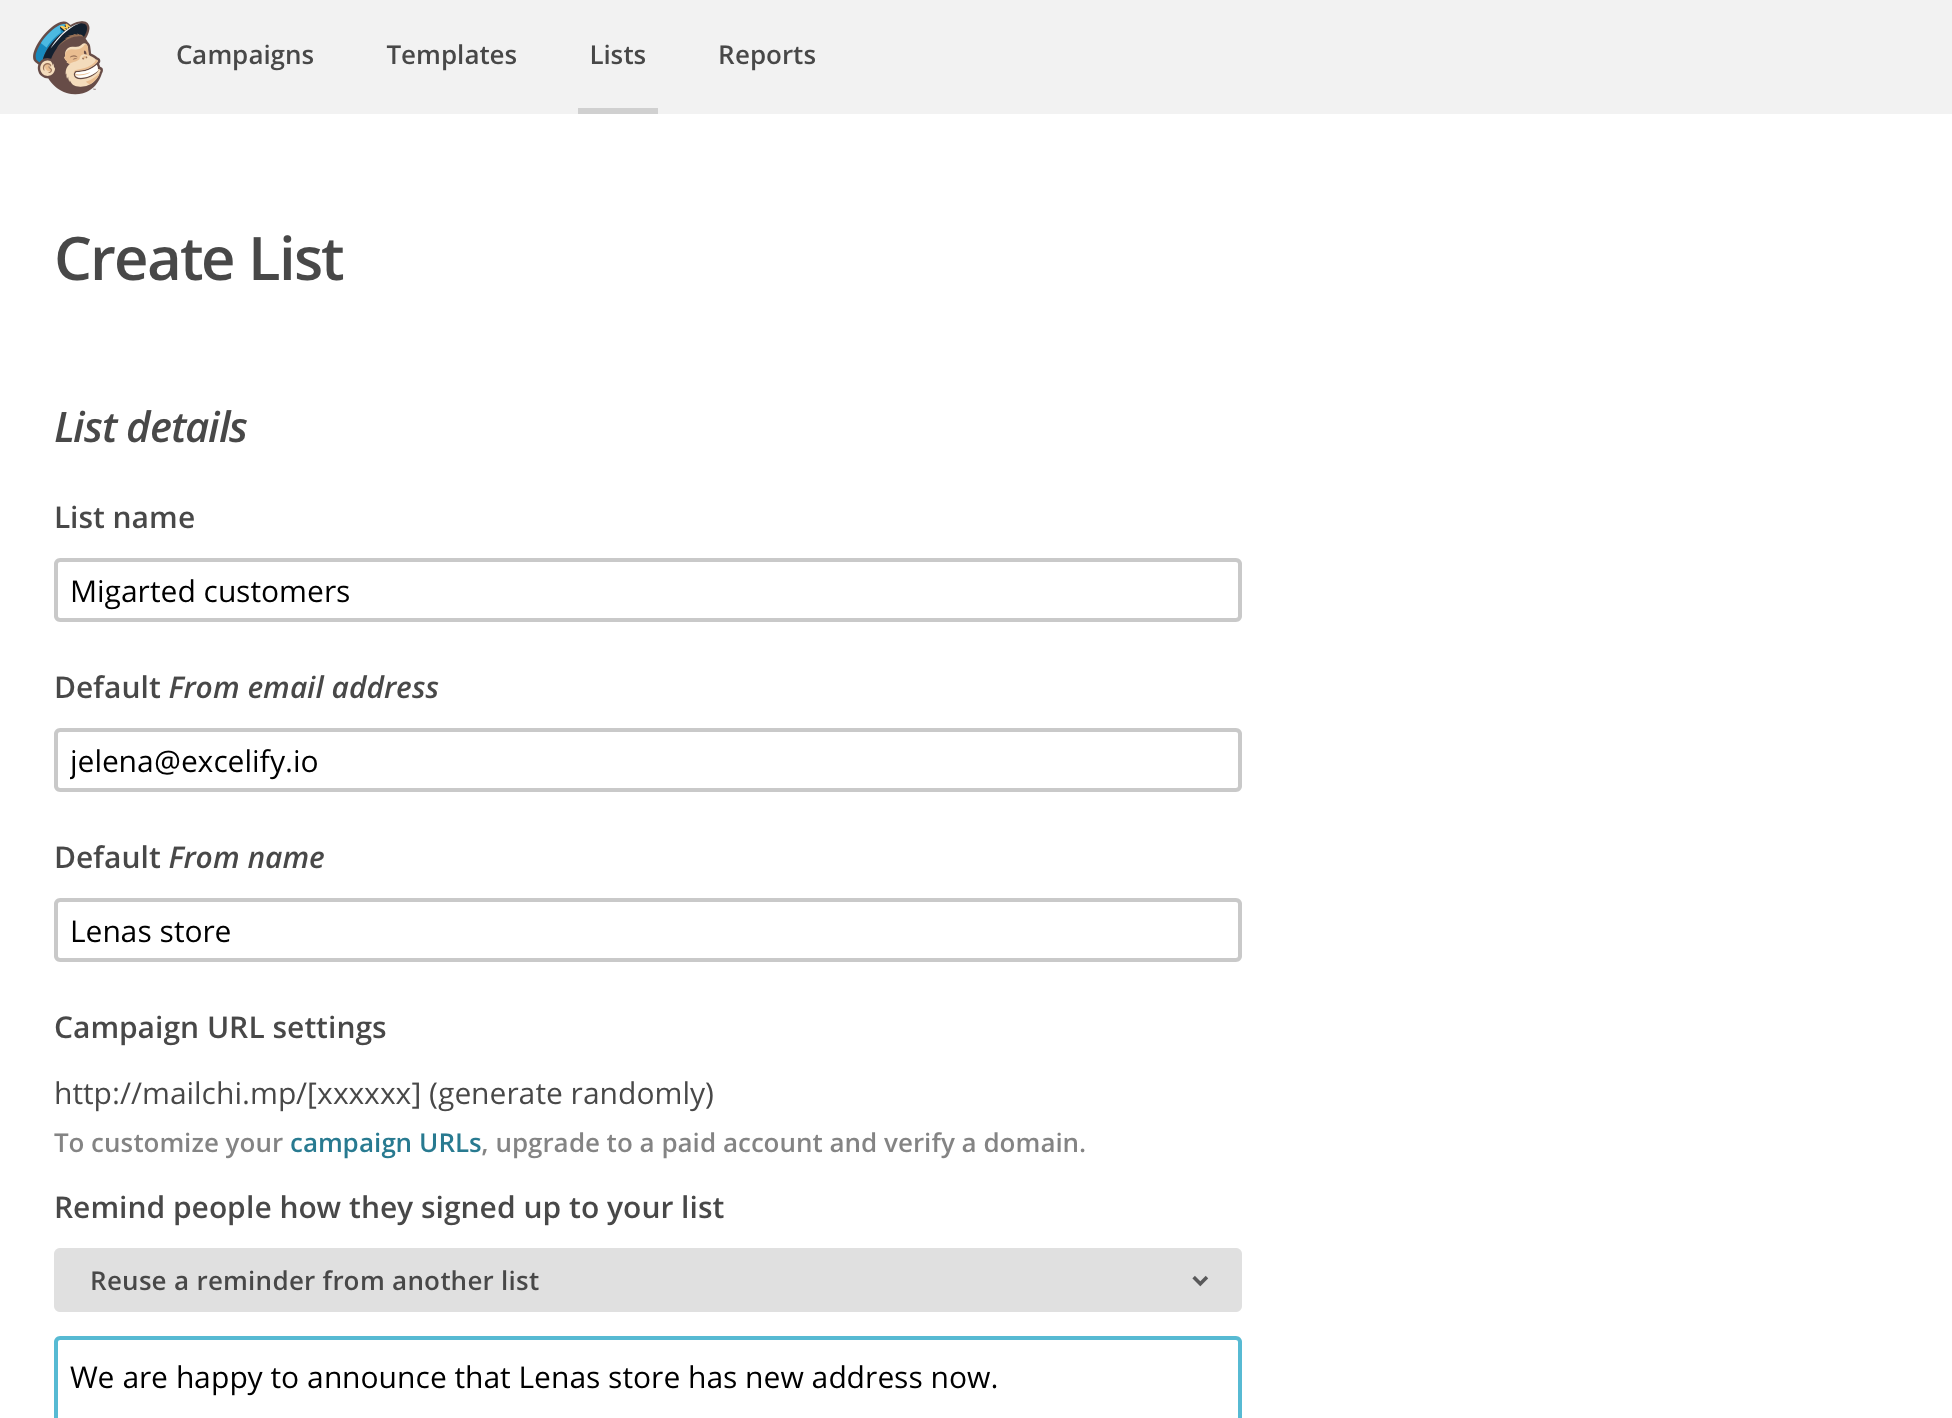
Click Save.
Of course, we will not add customers to the list manually 🙂 We will import the data from the Excel we exported from the Shopify earlier (the one with Activation URLs). Click Imports subscribers: 
Will import from xlsx file: 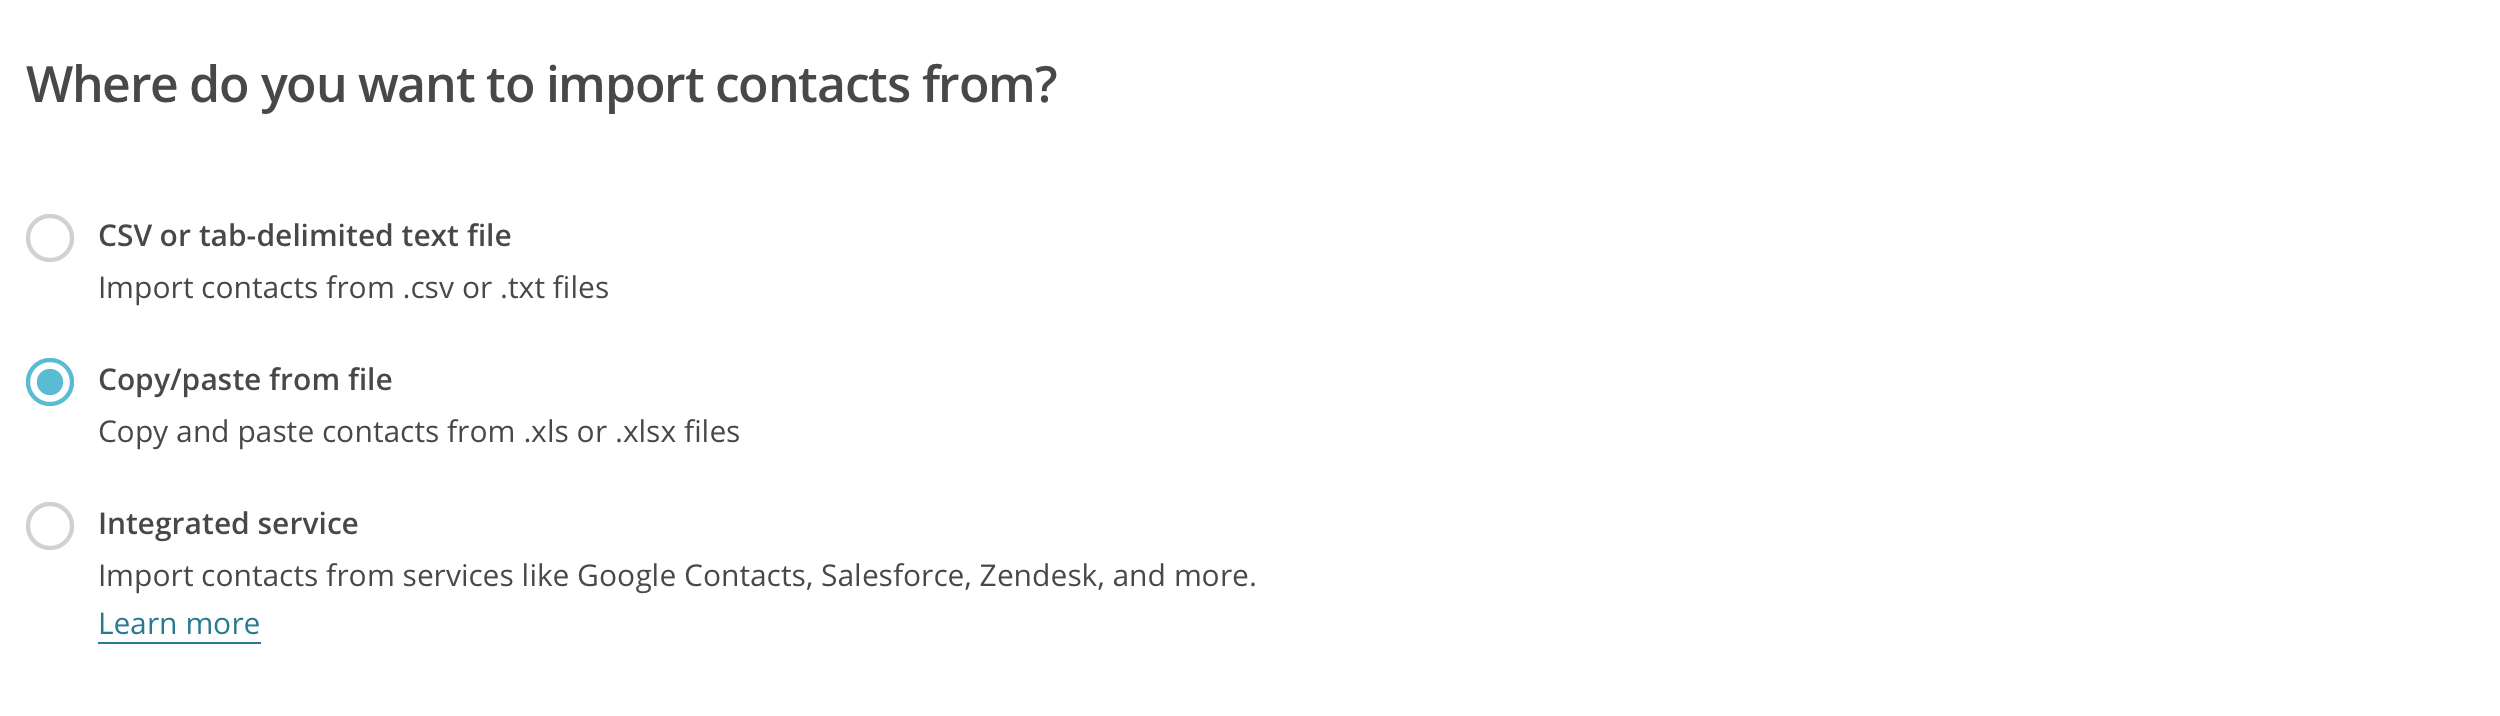 There are 3 mandatory fields: Email Address, First Name, Last Name. We will need one more field: Activation URL (as we need to invite customers to activate their accounts in our new shop).
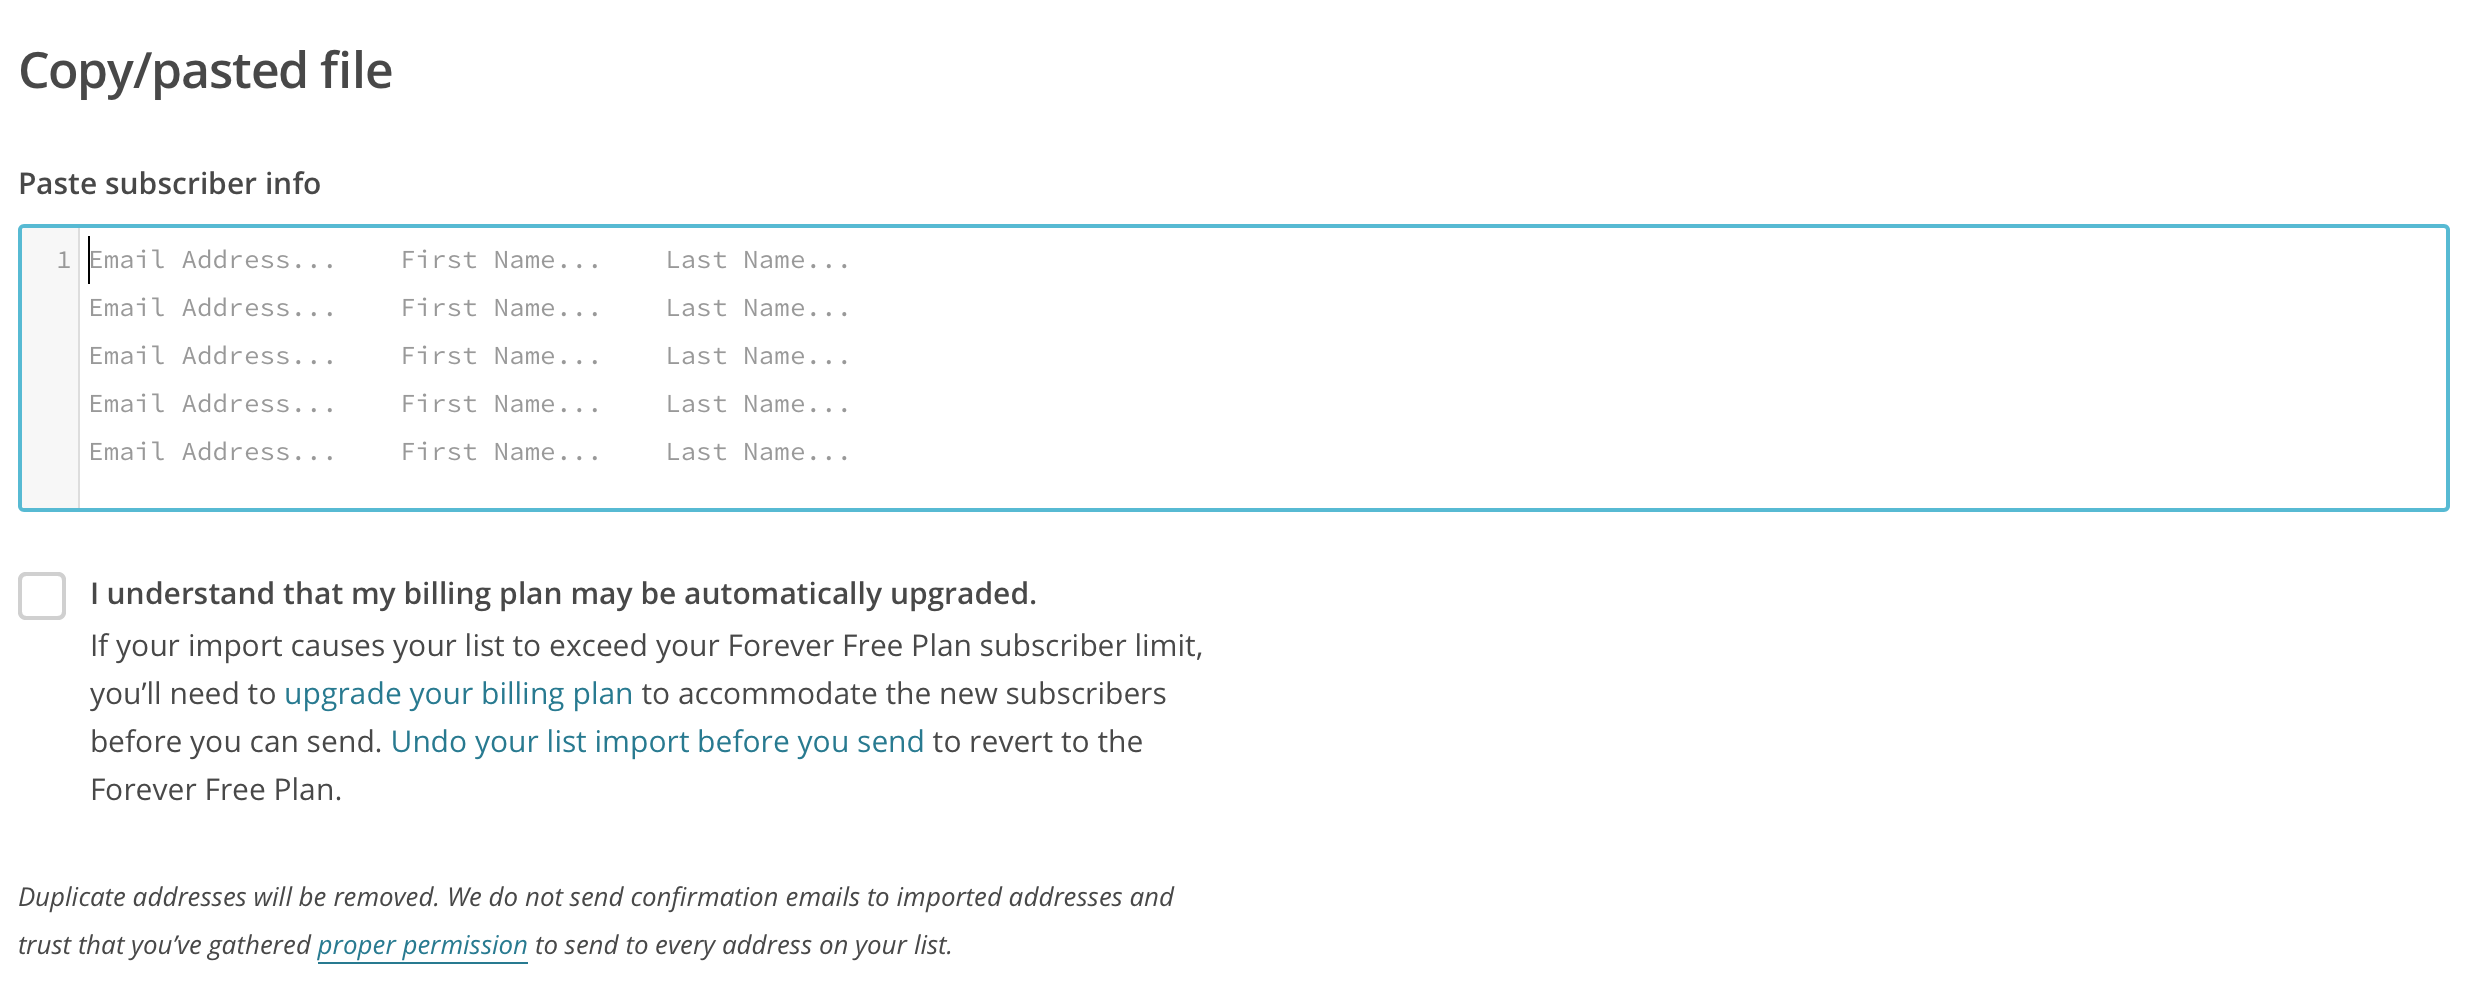
Now we need to open the exported Excel, copy all data and paste it to the MailChimp form: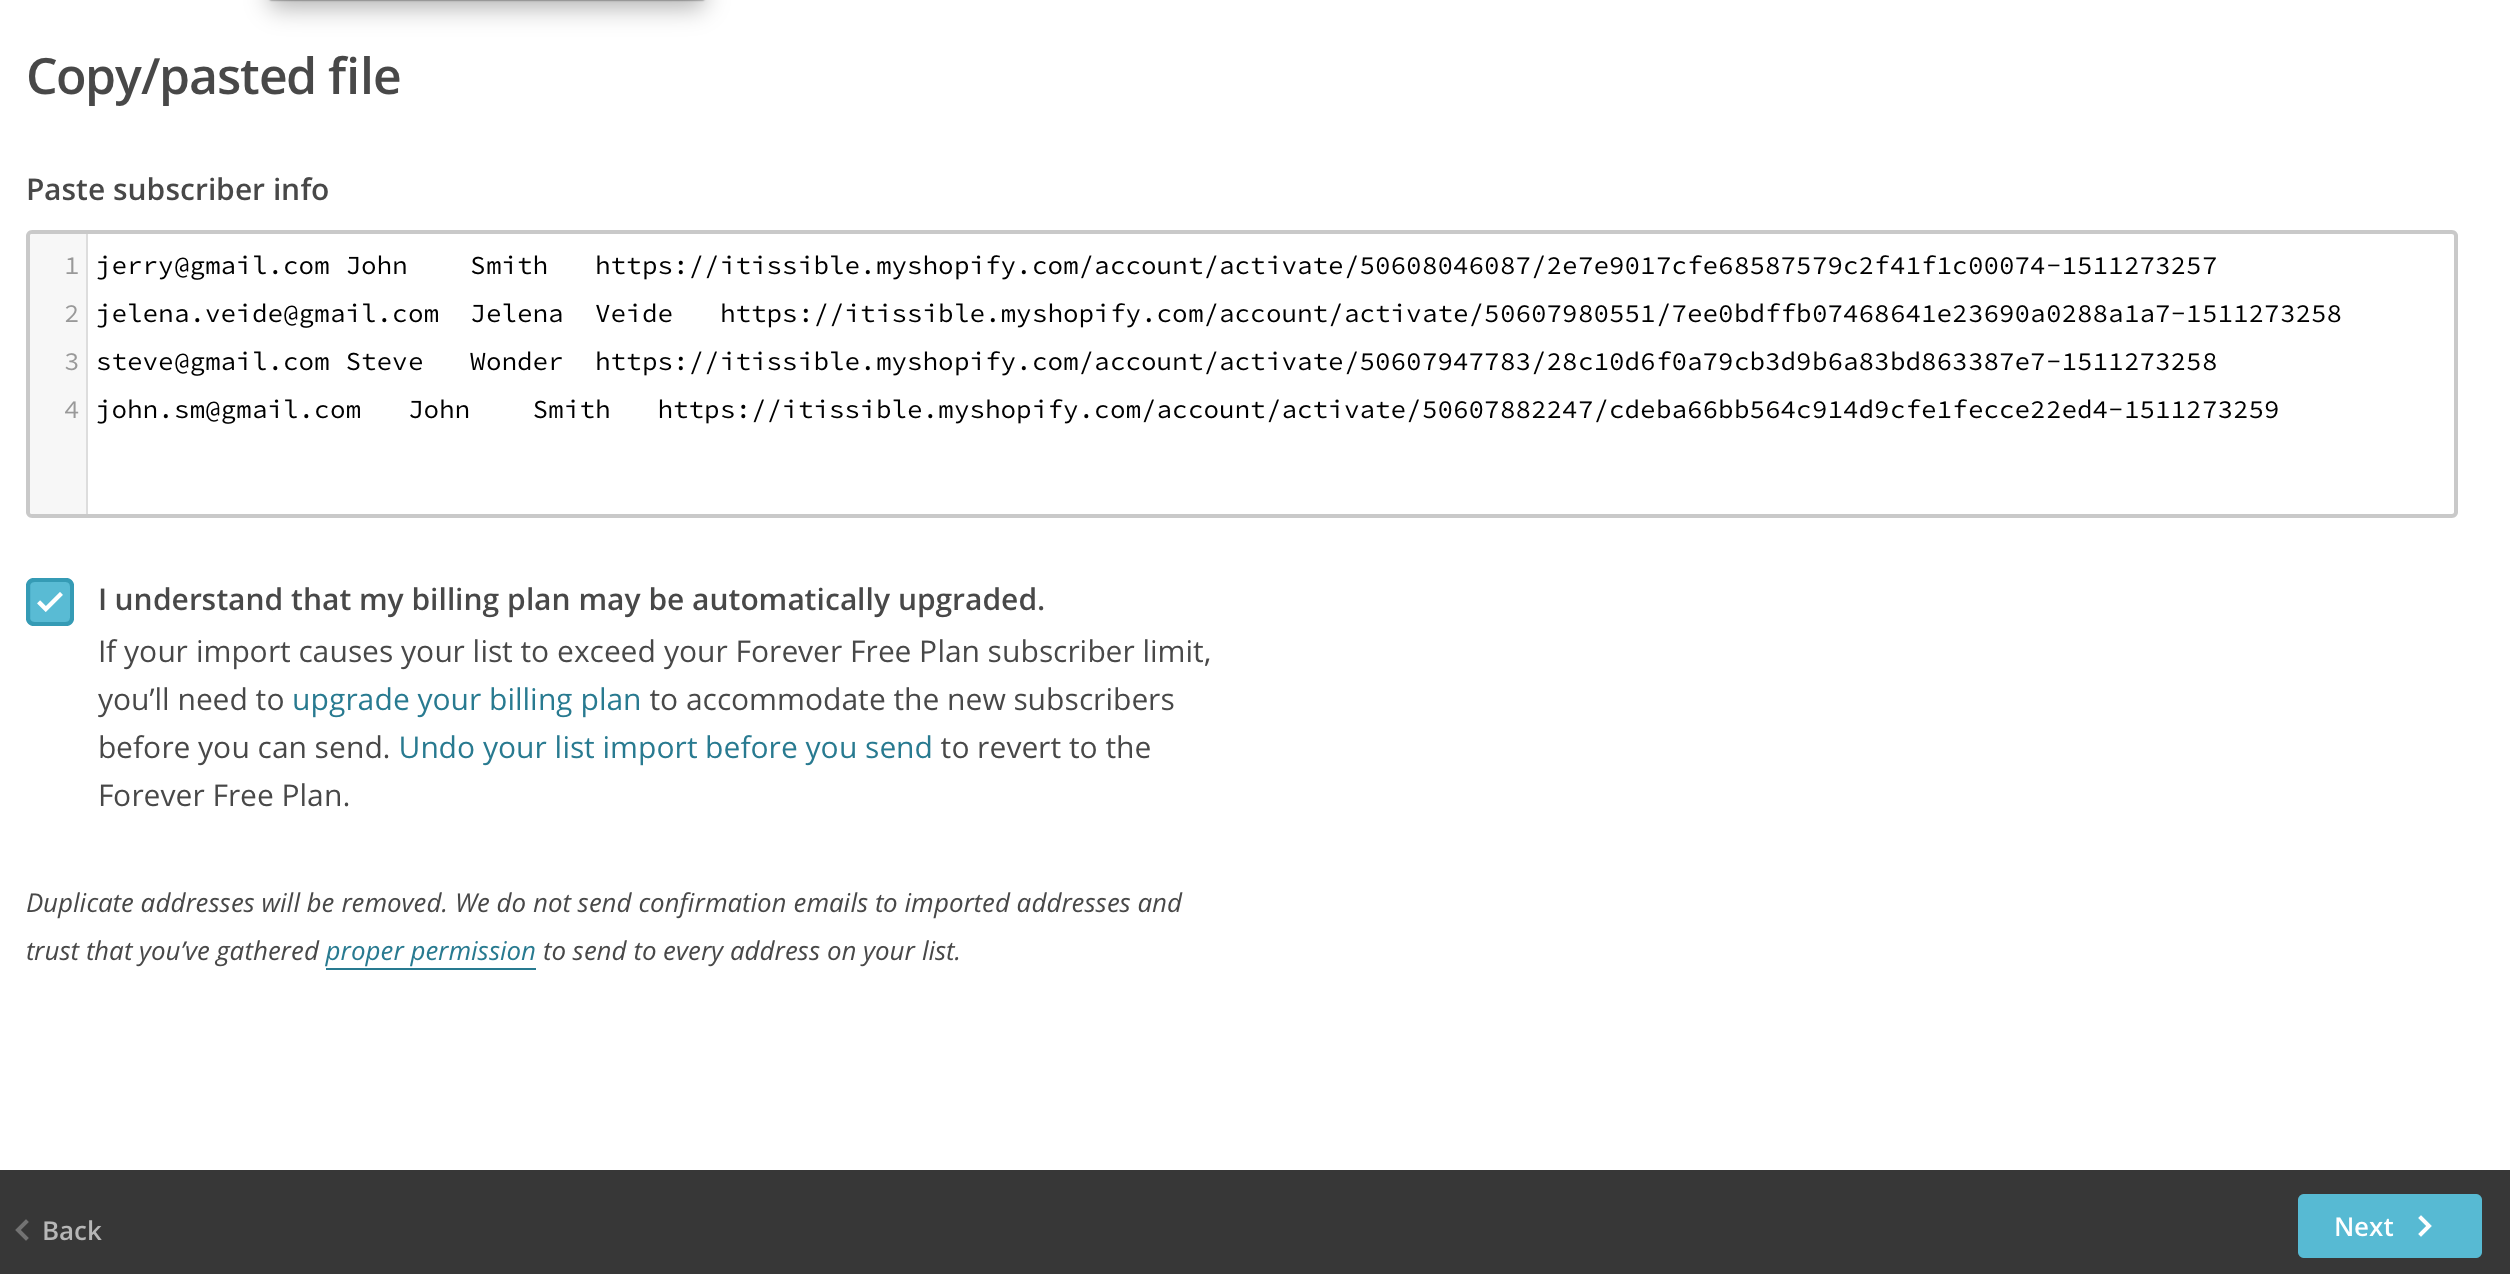
Press Next.
Now we need to help MailChimp to understand what data about customers we want to import.
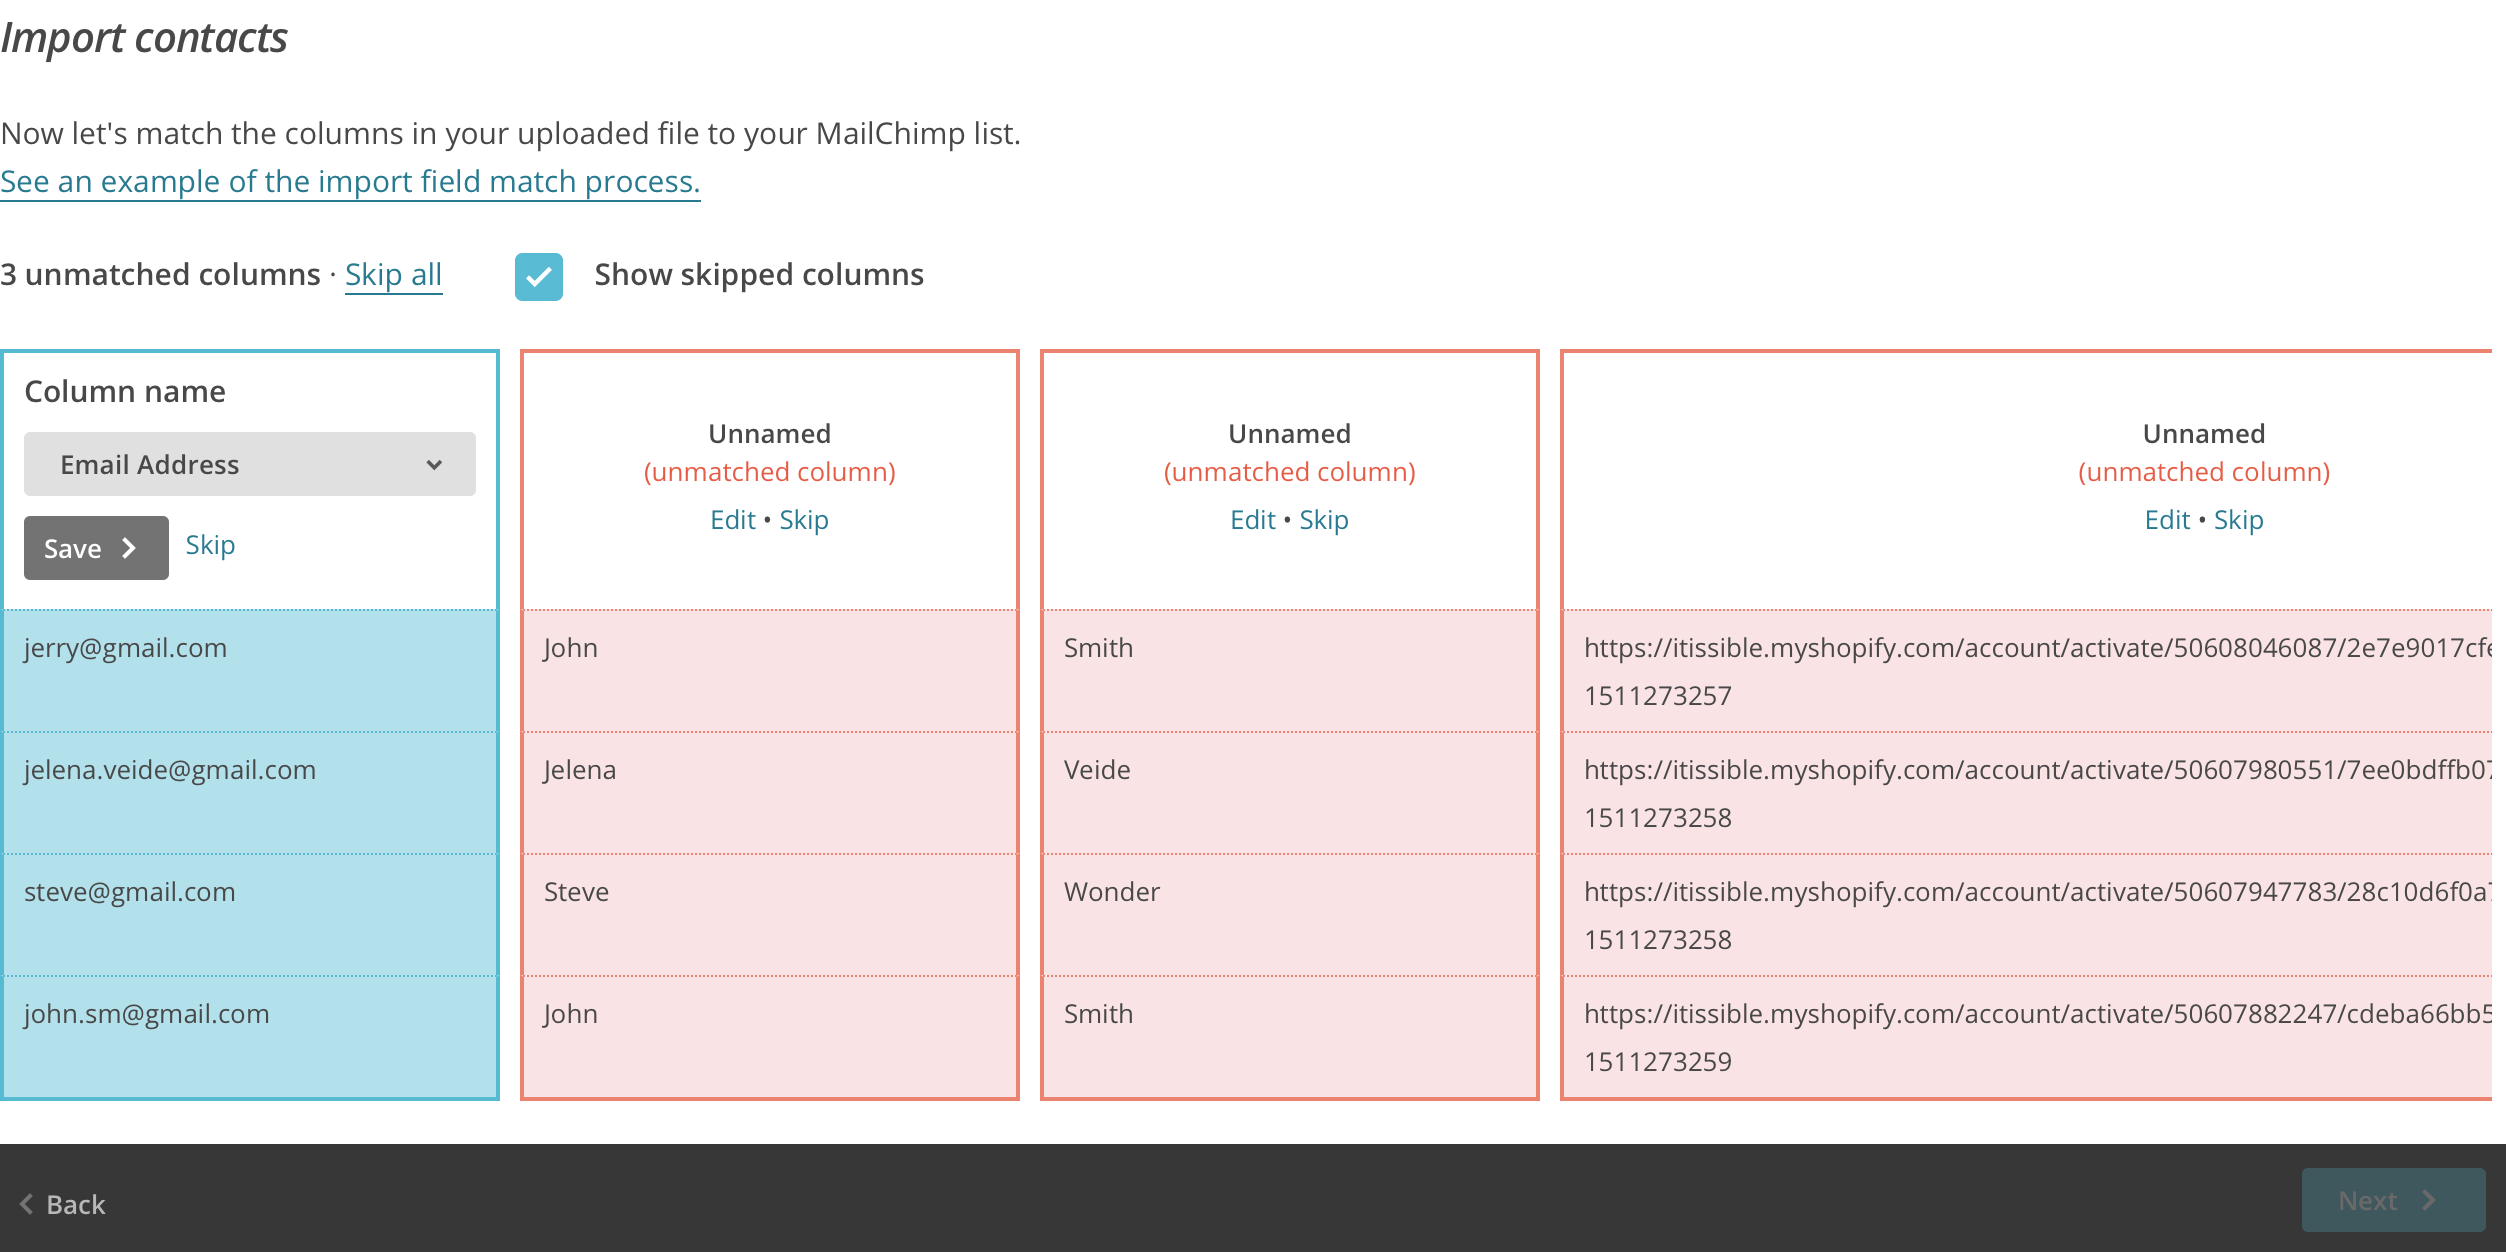
In the column names select appropriate title and press Save. Do it for Email Address, First Name and Last Name columns. For Activation URL column you need to add New column name. I will call it Activation URL.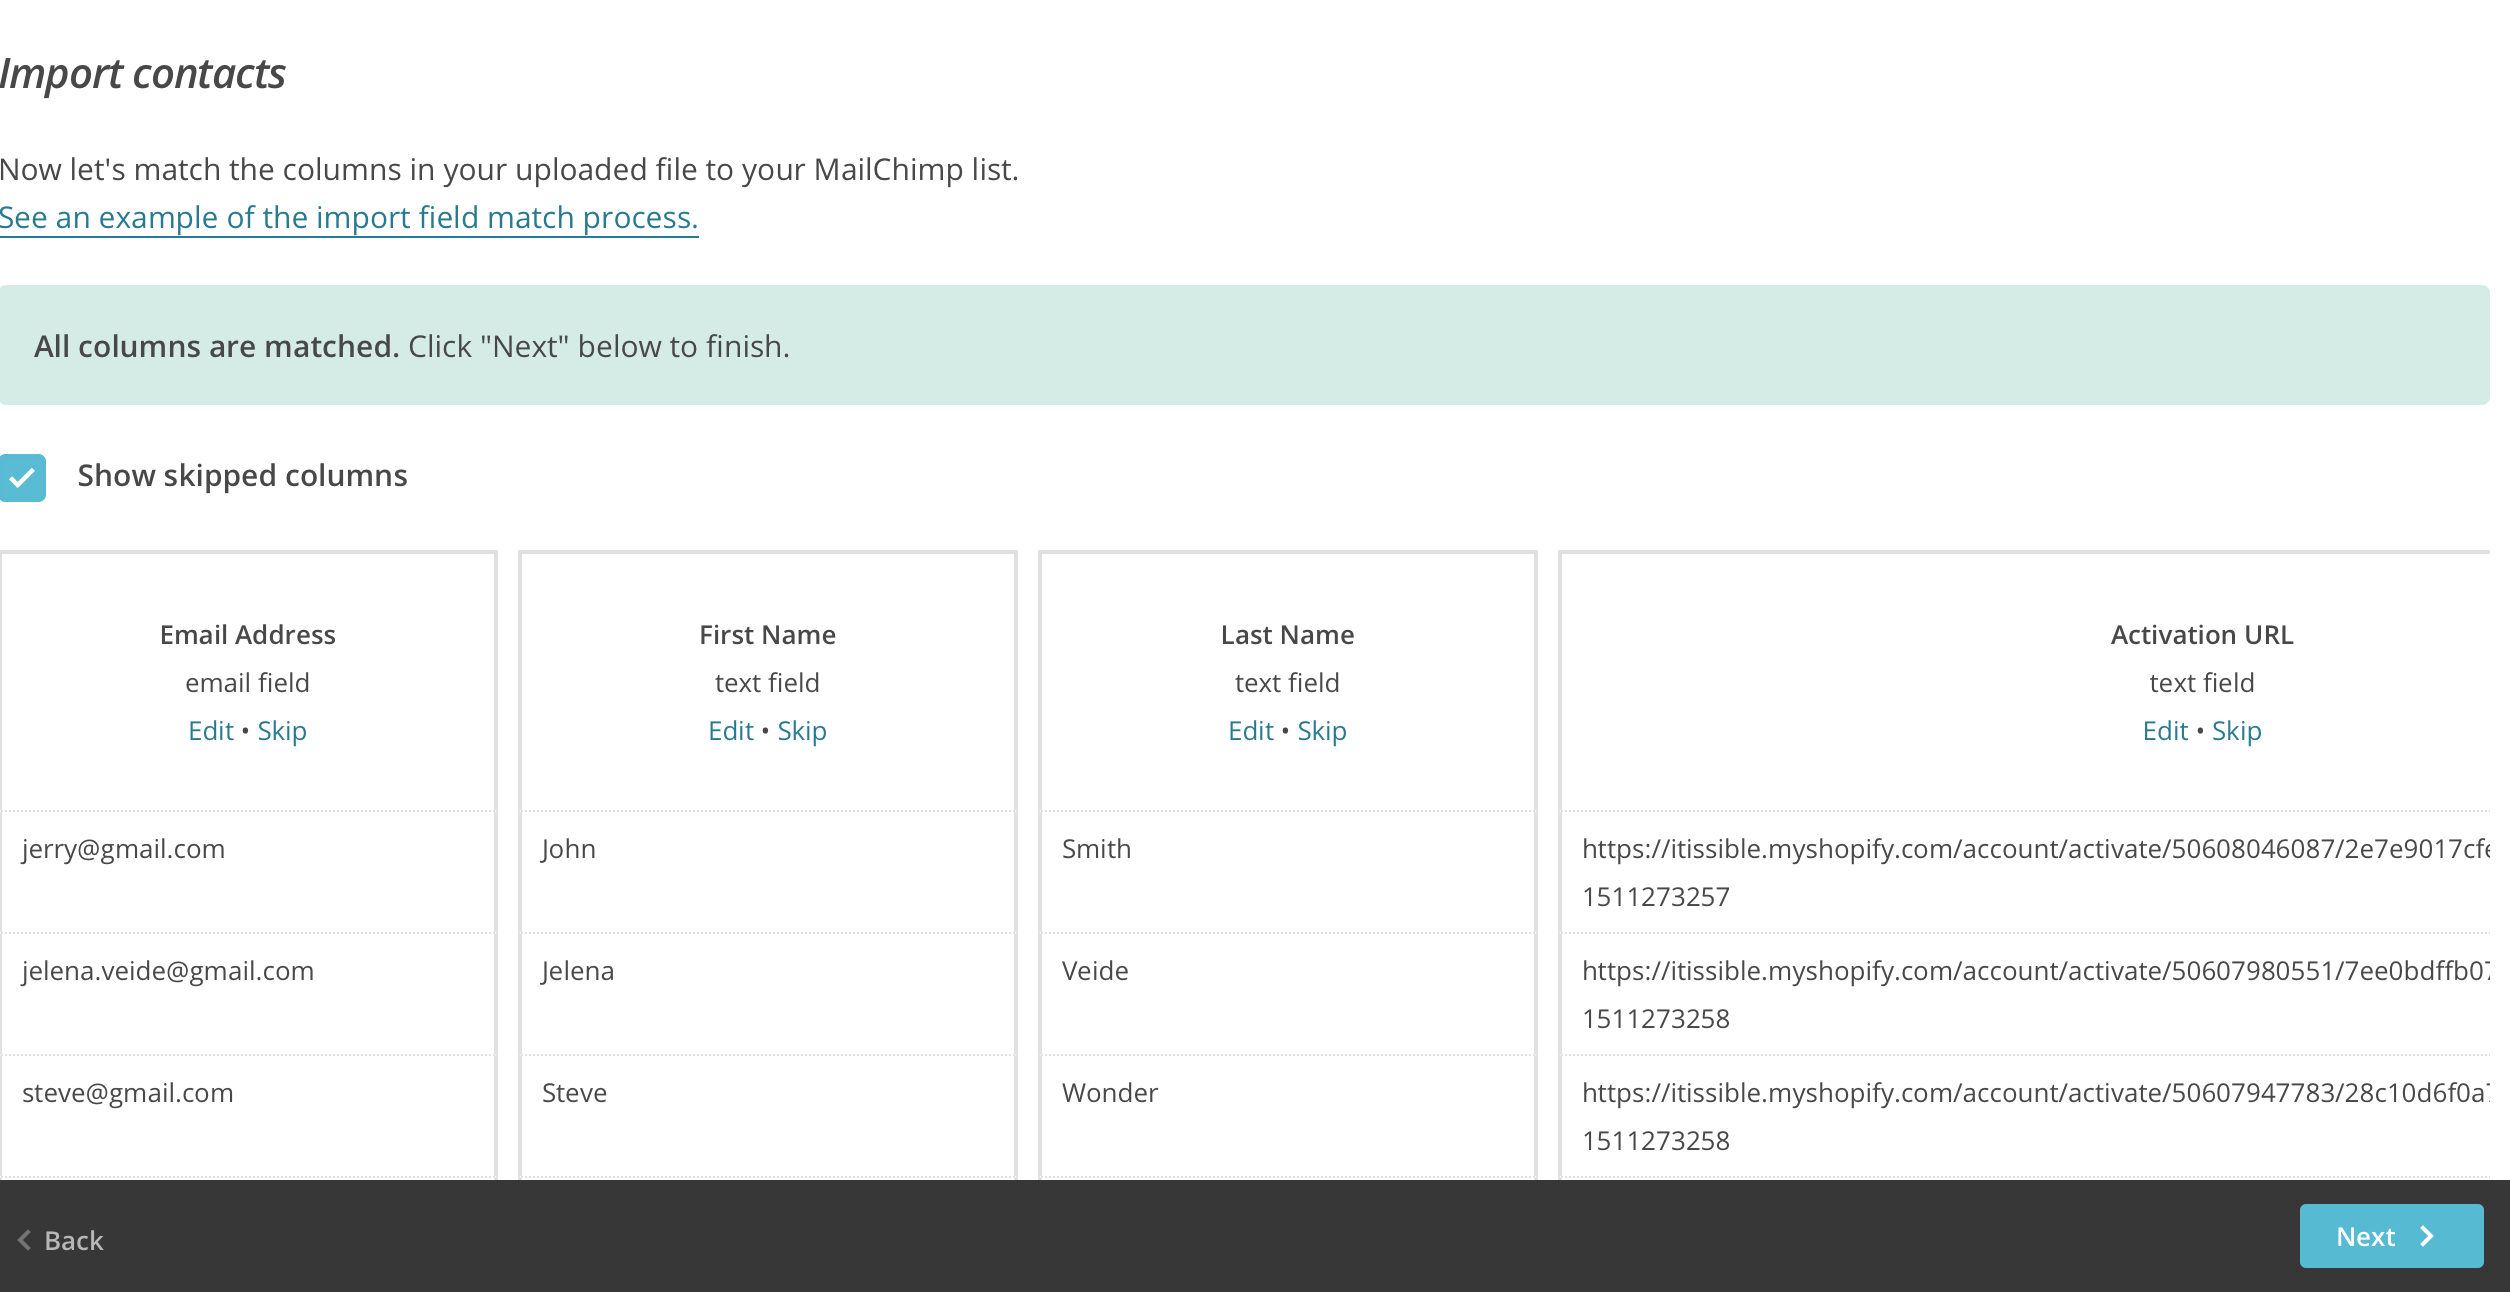
Press Next.
Import contacts
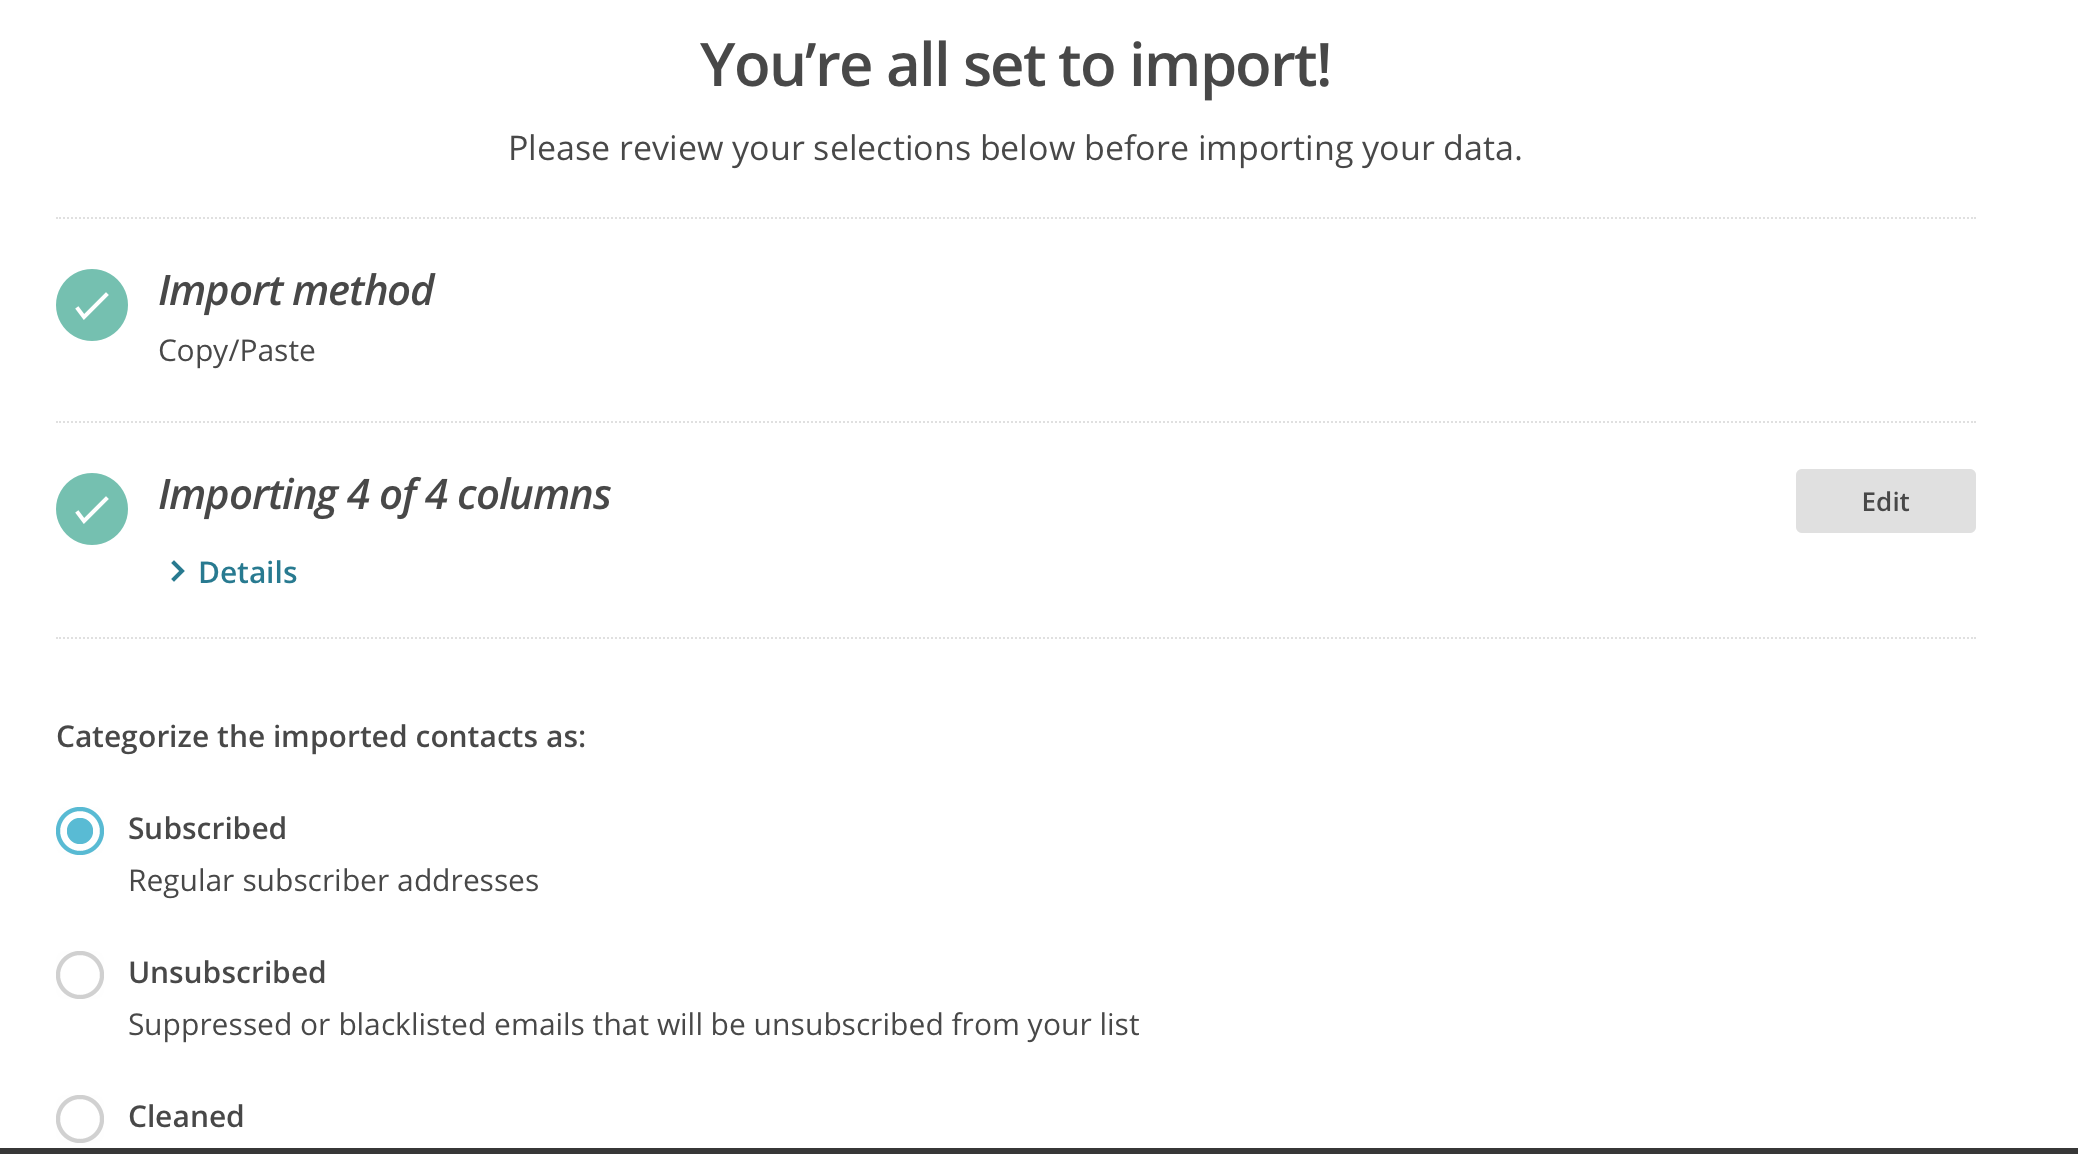
Now we have all customers’ data imported: 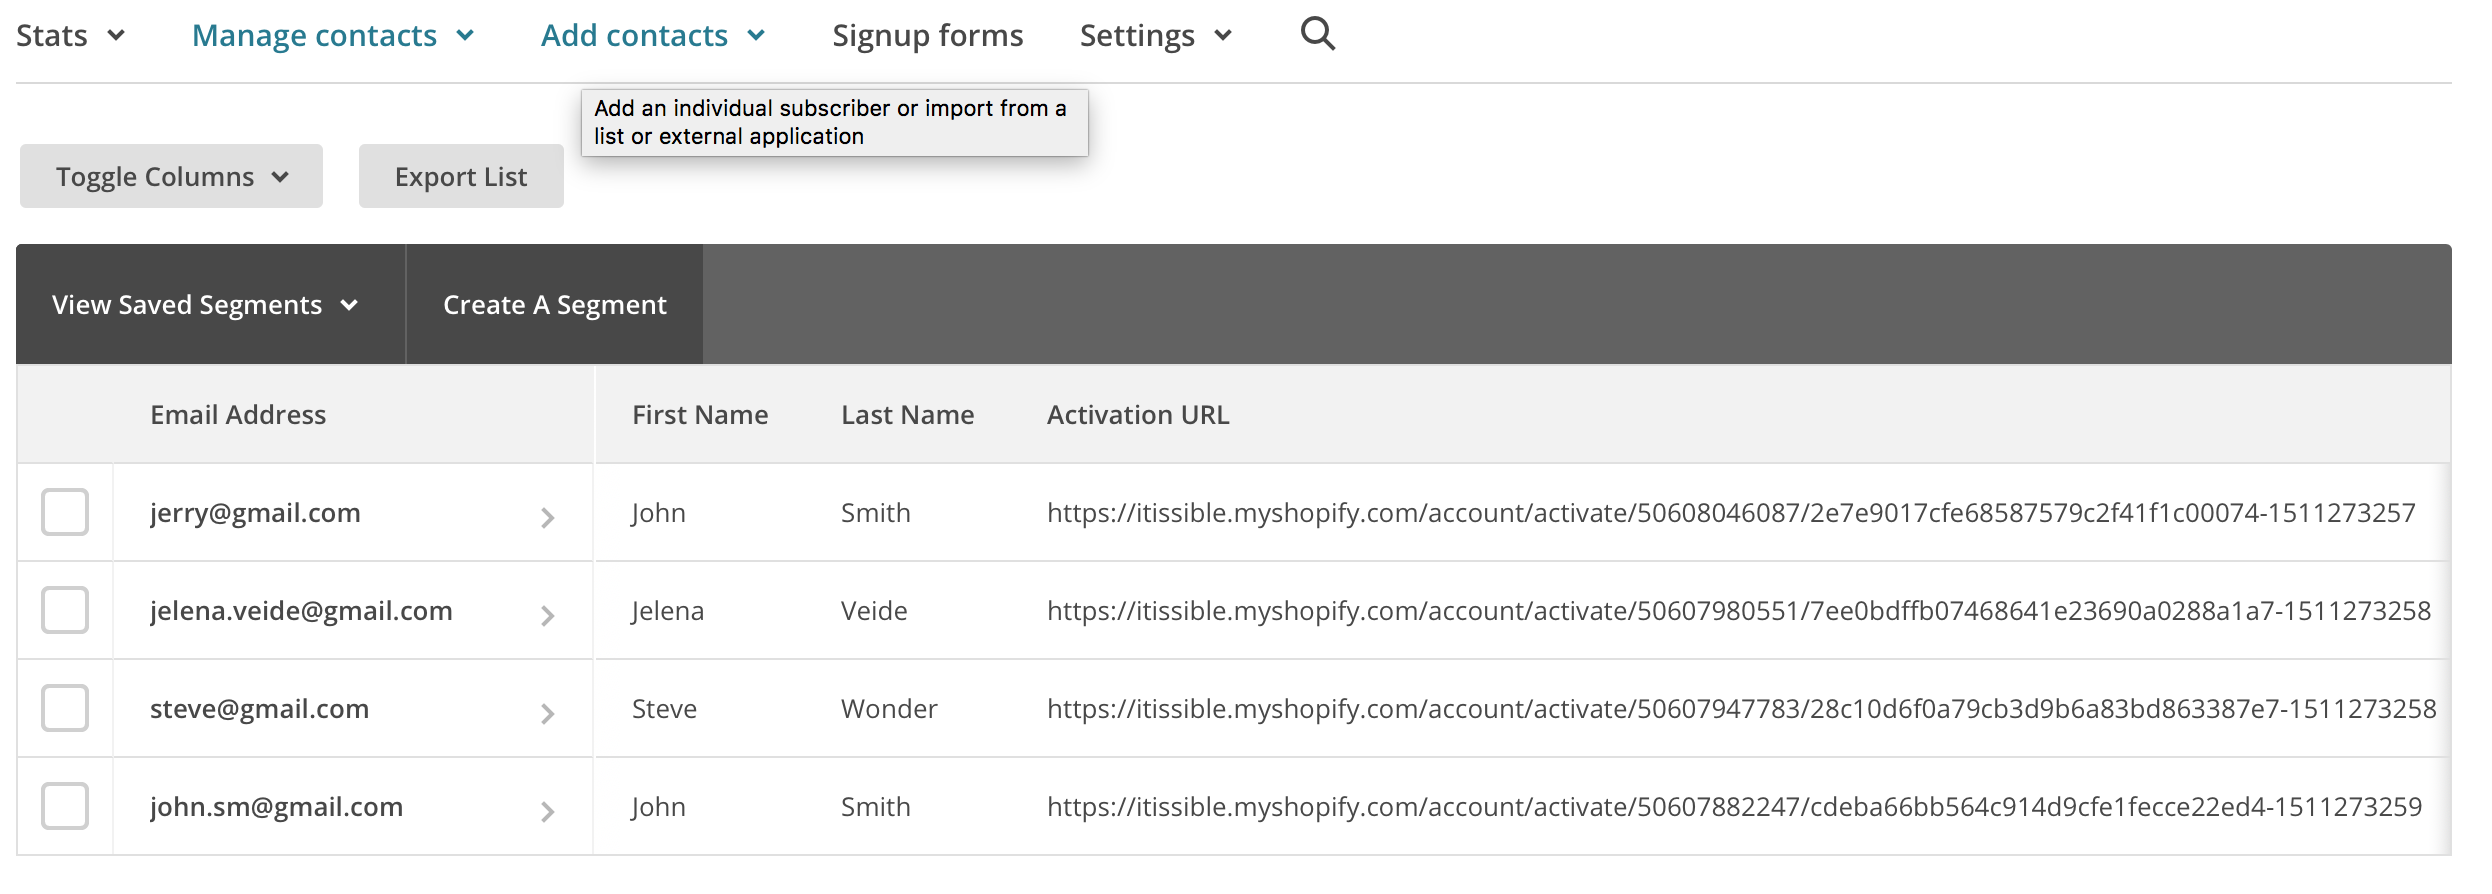
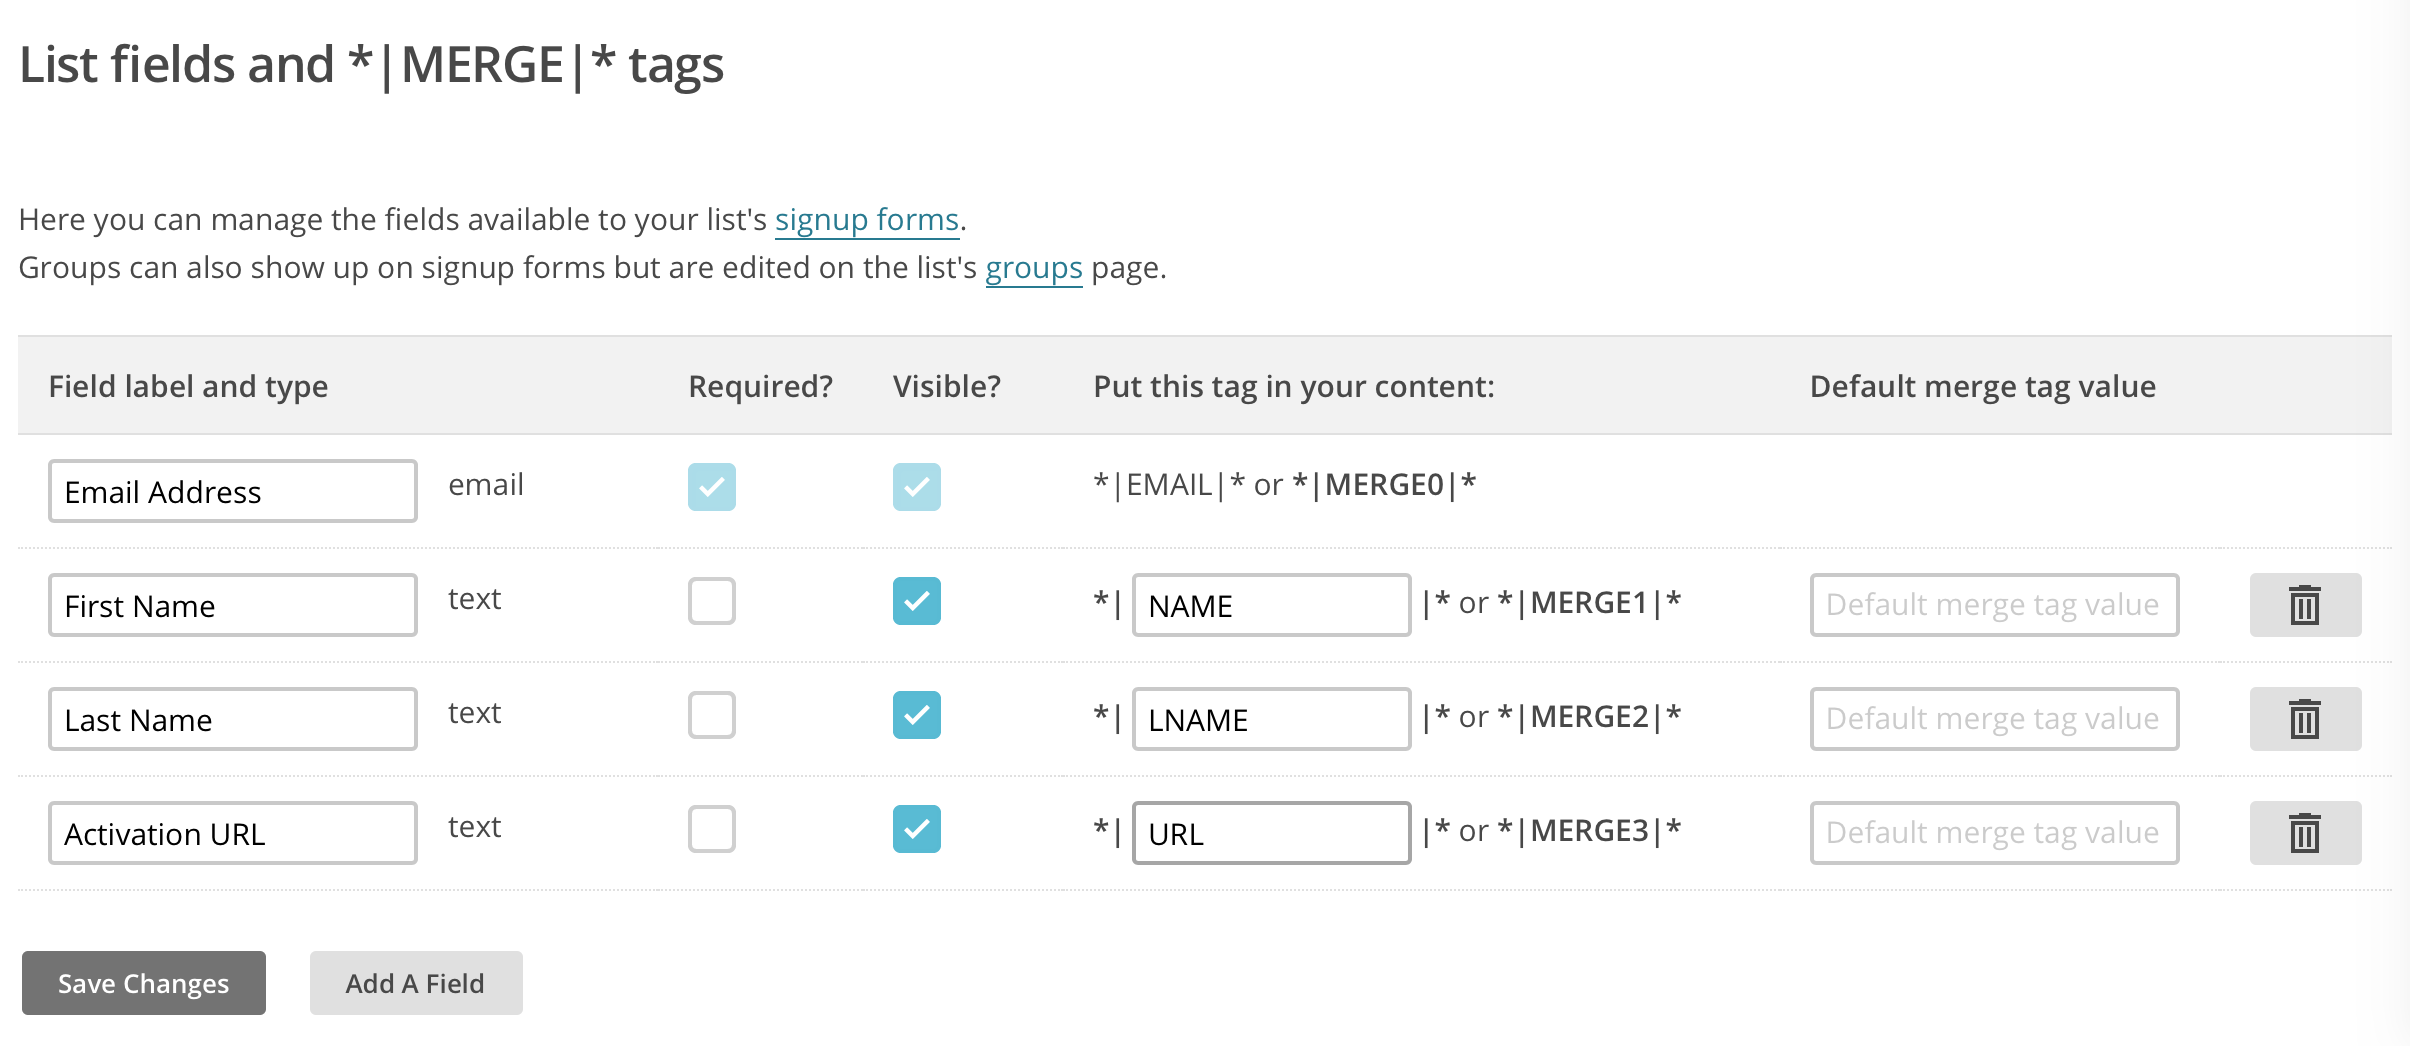
We will do one more thing. Go to the Lists. Open Migrated Customers list. Click Settings -> List fields and *| MERGE |* tags
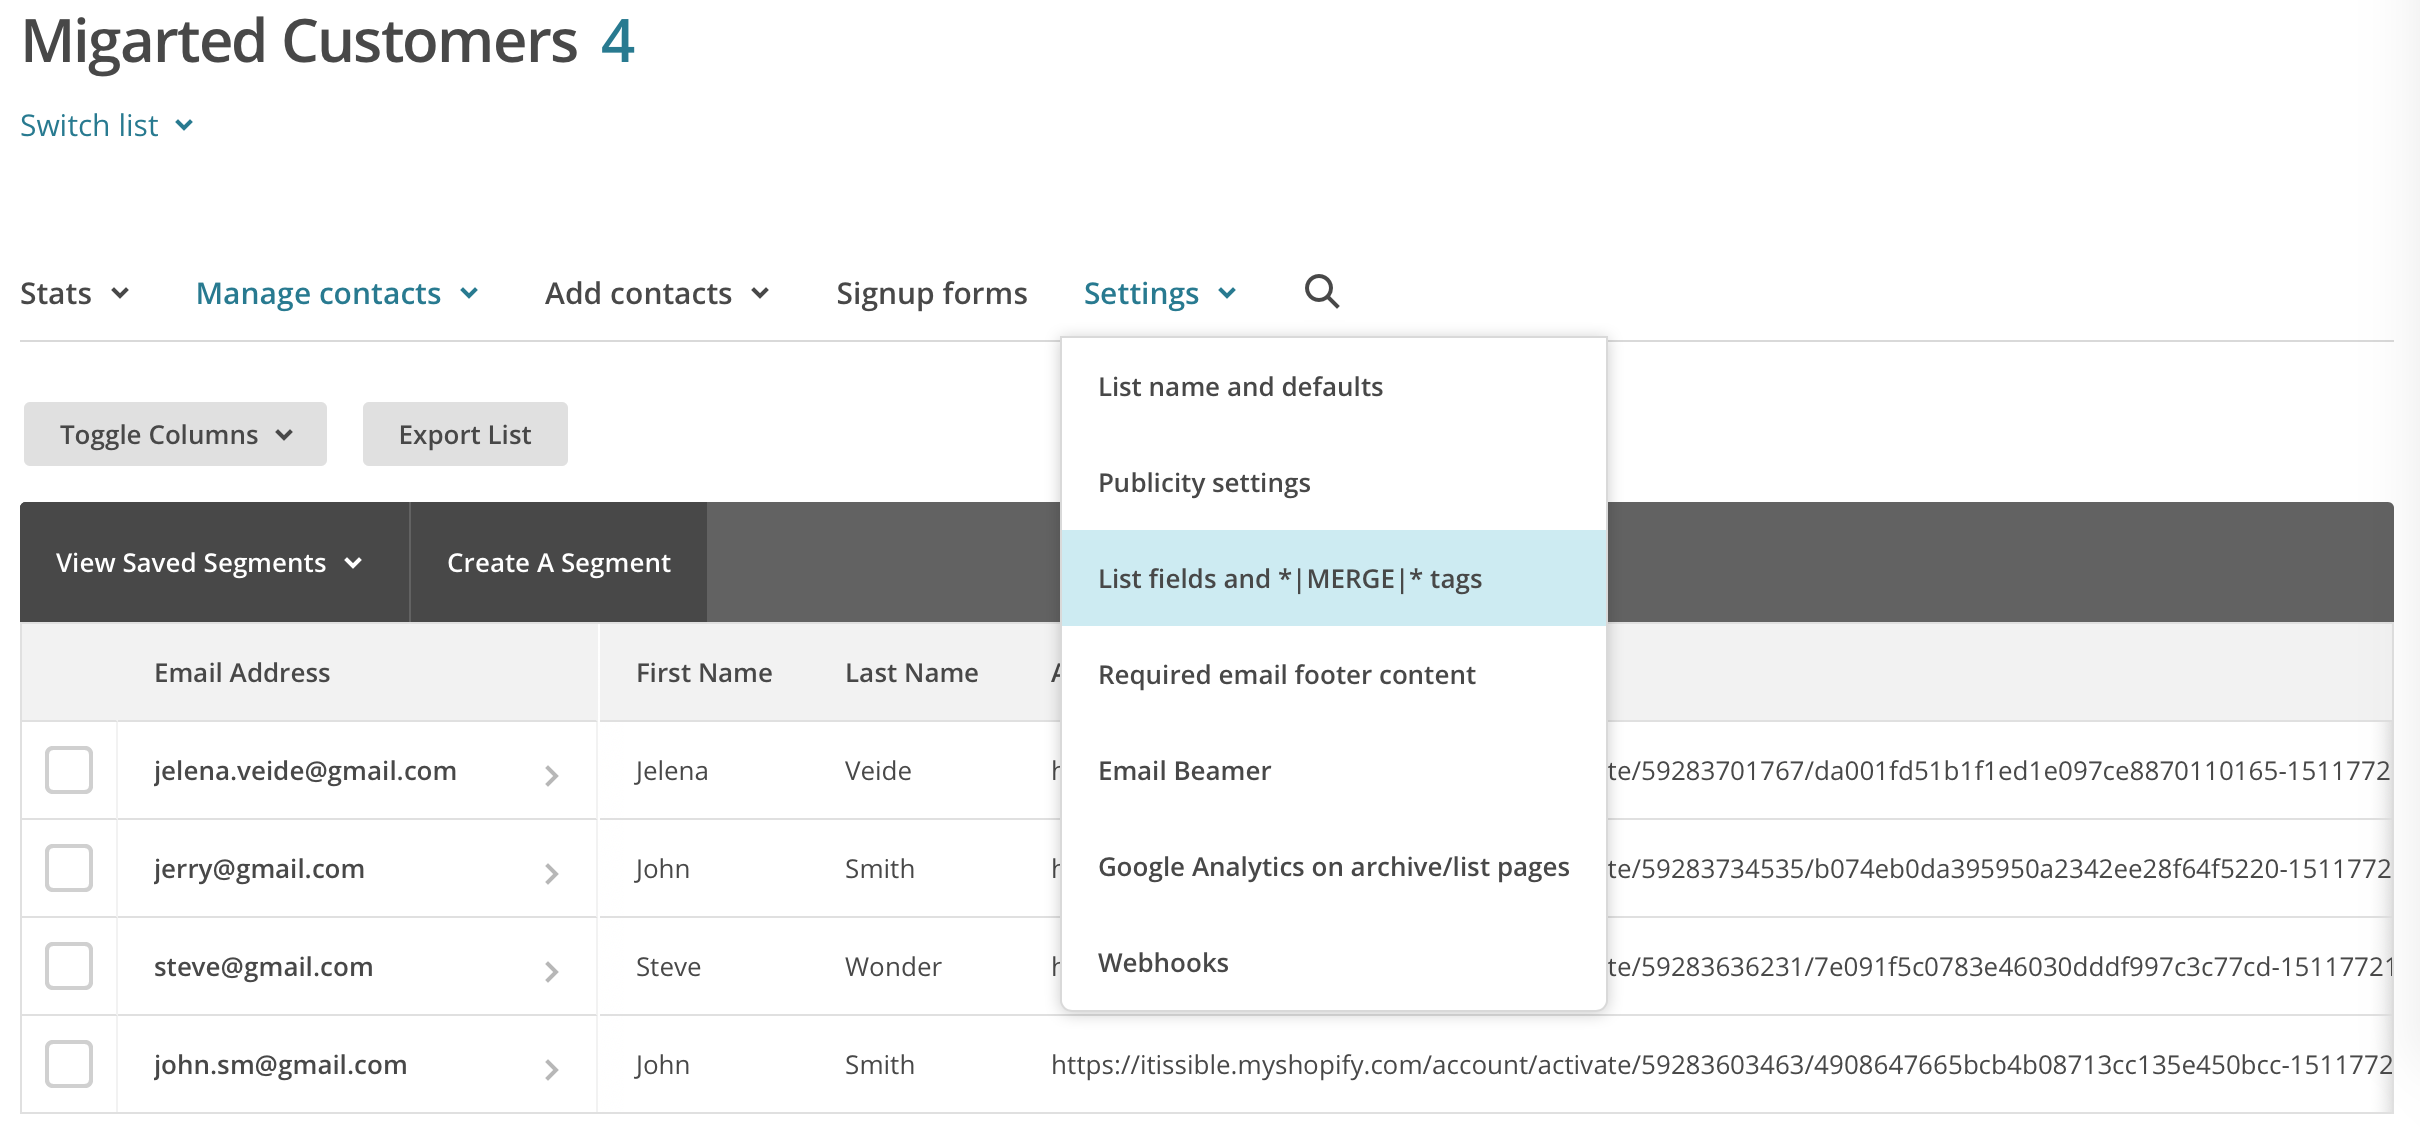
Here we will change tags for the First name field and for the Activation URL field. Set NAME and URL accordingly. Press Save Changes. We will need this when creating Activation email.
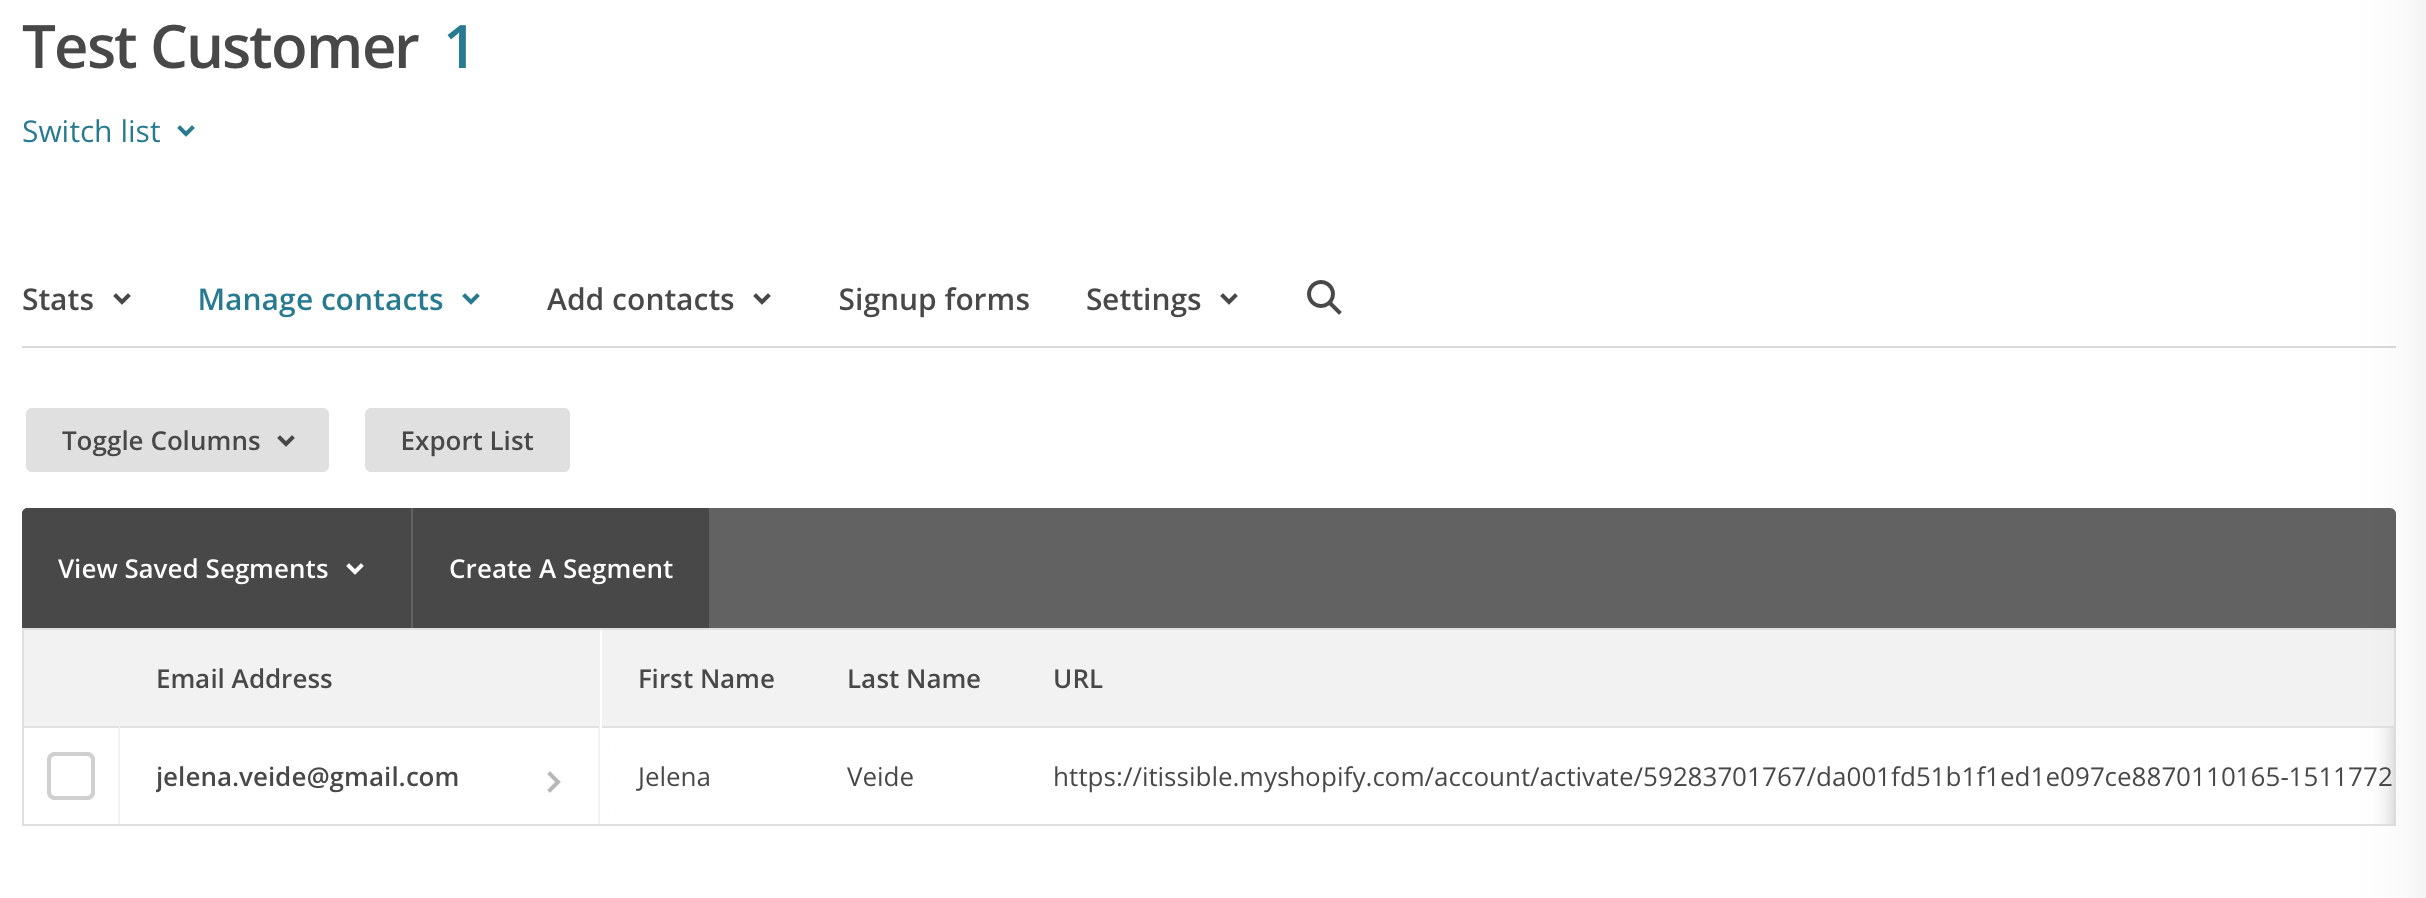
For the testing purposes I will create one more List and call it Test Customer. This list will contain only one customer with my own email. I will copy real Activation URL (from the Excel) and also add field tags as in the previous step. With this list I will test, if email is sent as I wanted it to be and if Activation URL is working correctly.
Create the campaign in MailChimp
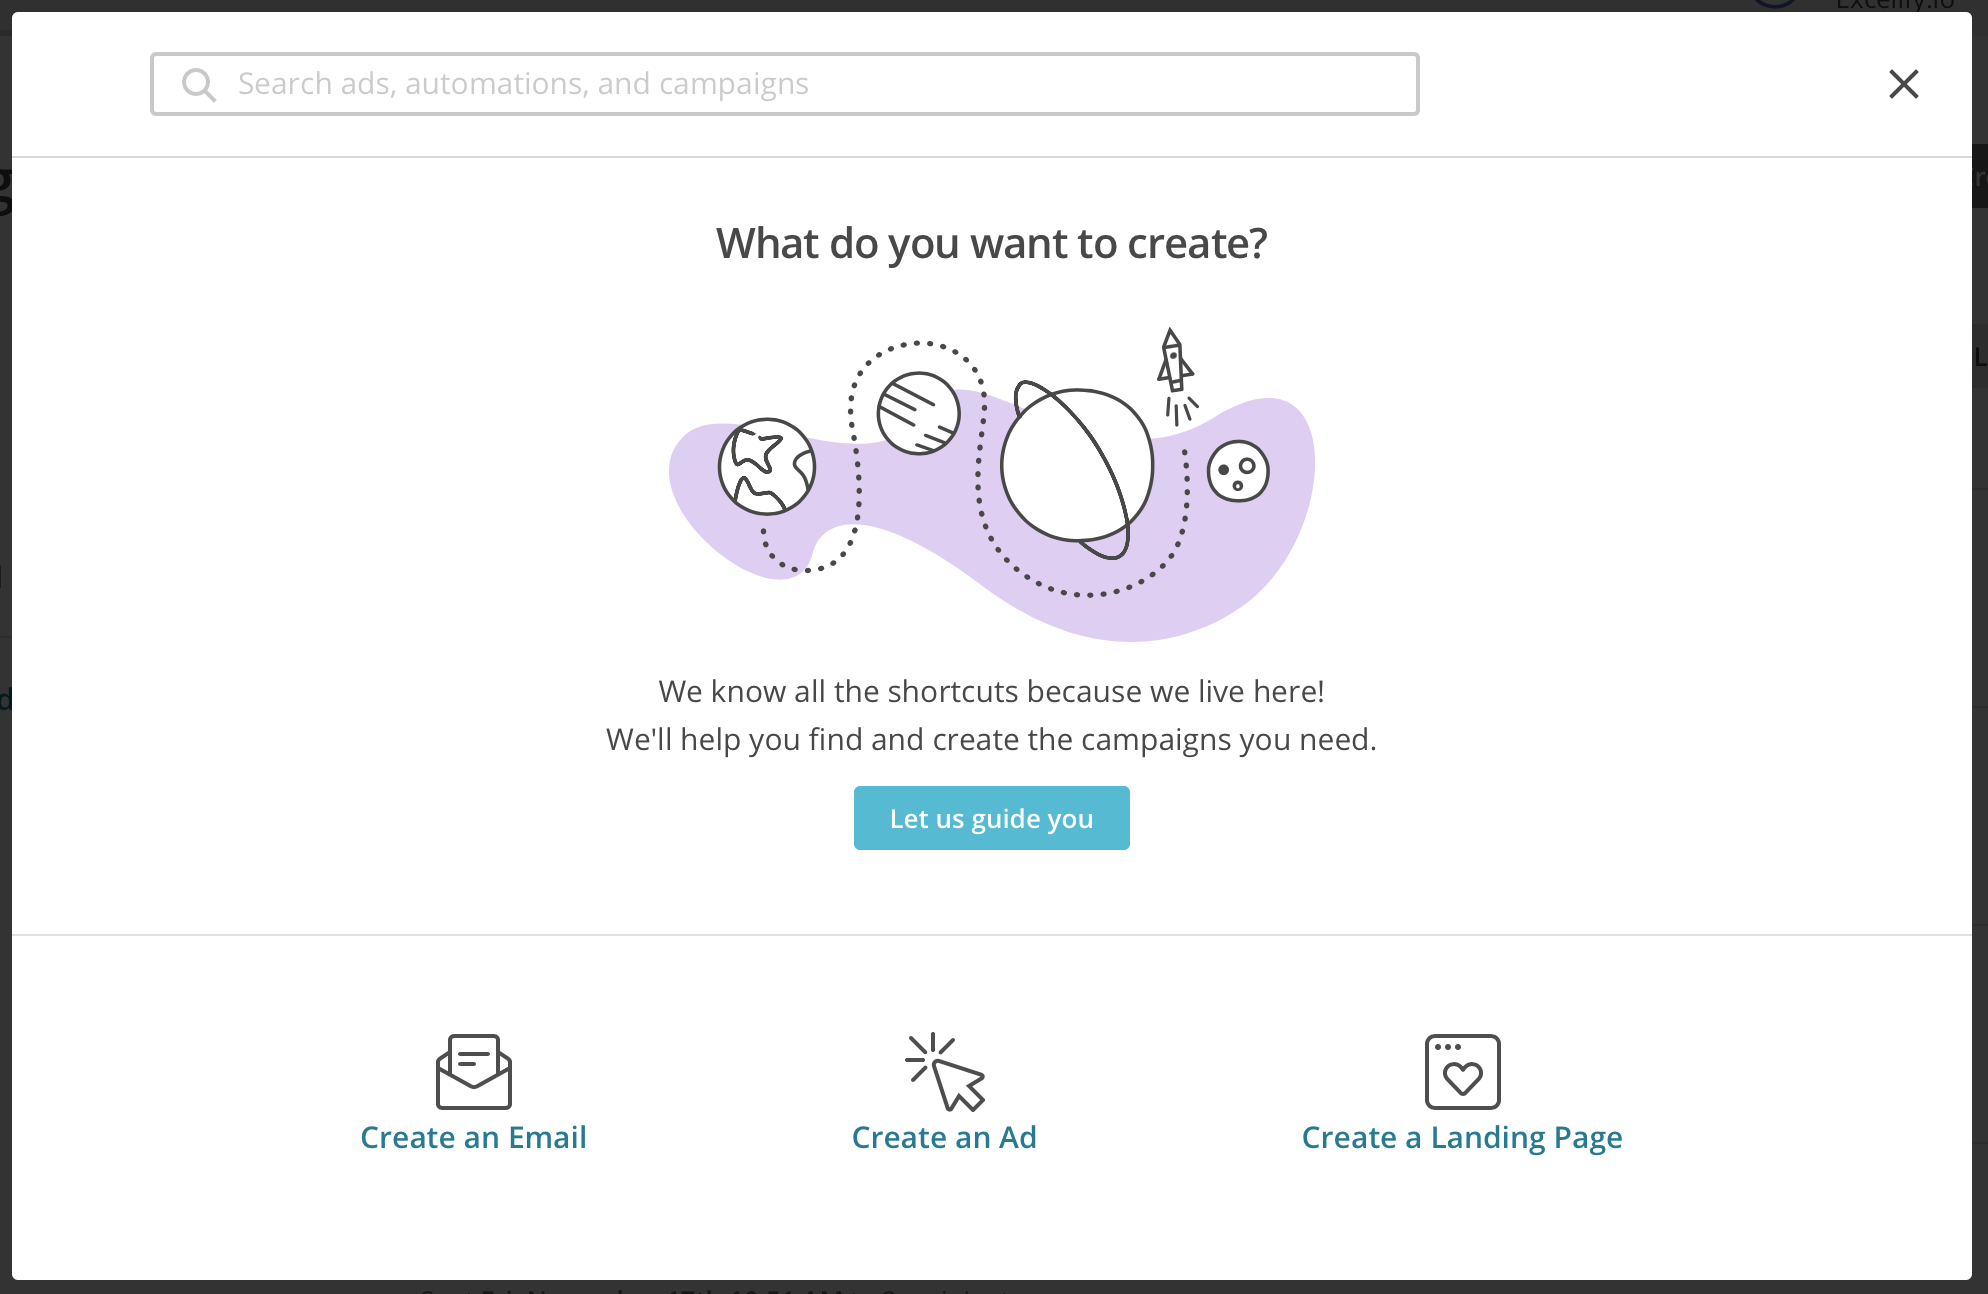
Now we need to create a New campaign in the MailChimp with what we will send the information to our customers and invite them to activate accounts. Click Campaigns -> [Create Campaign]
Choose Create an Email (as we will send the Campaign via email).
Name your campaign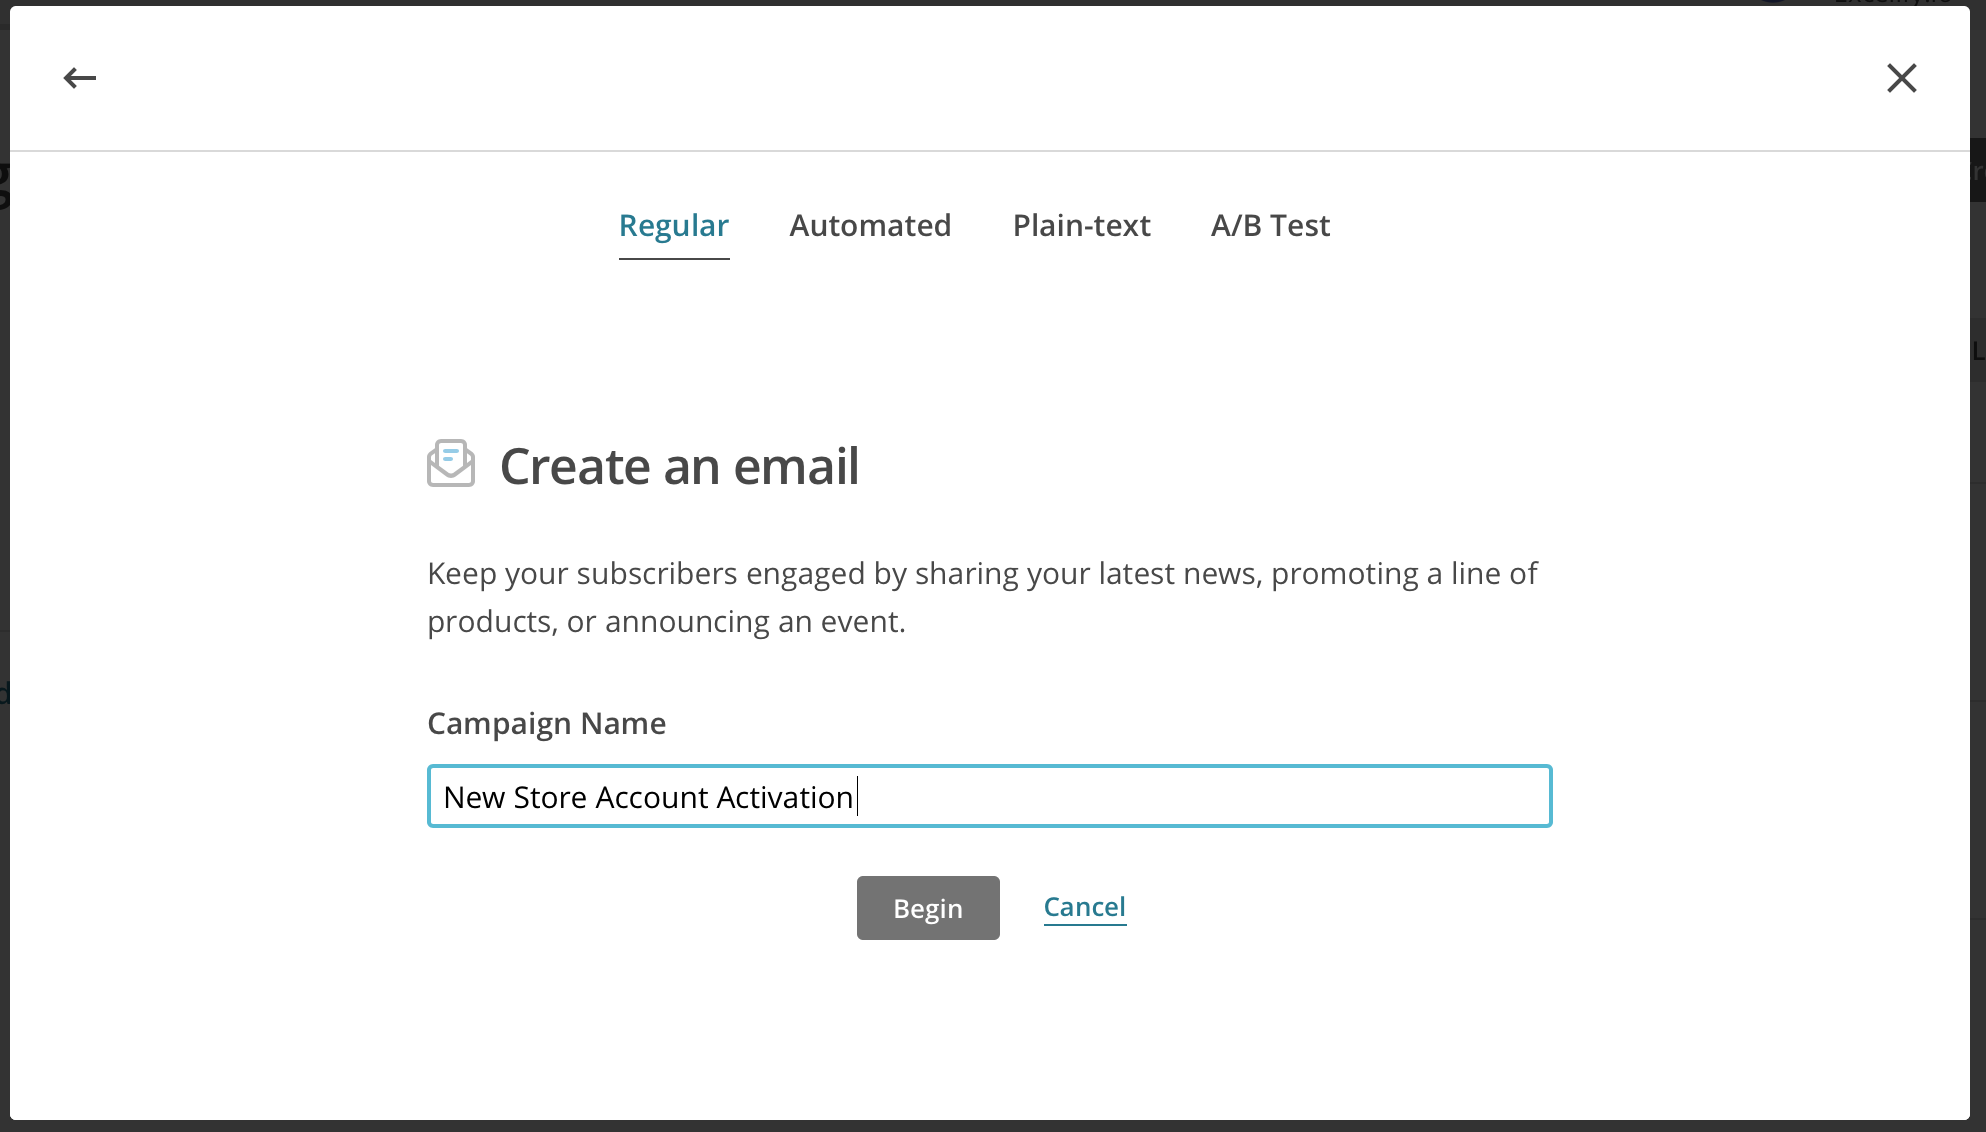
Choose the list of customers – Migrated customers 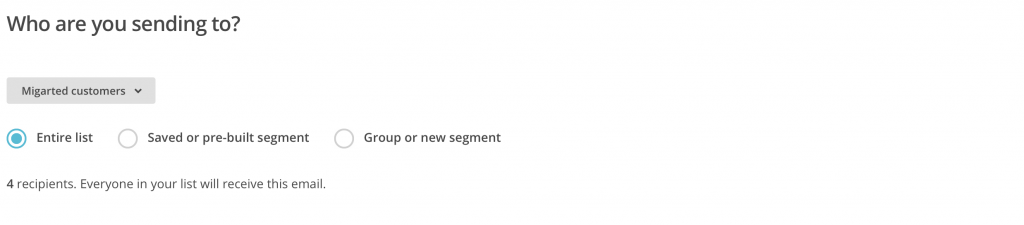 Fill in Campaign info:
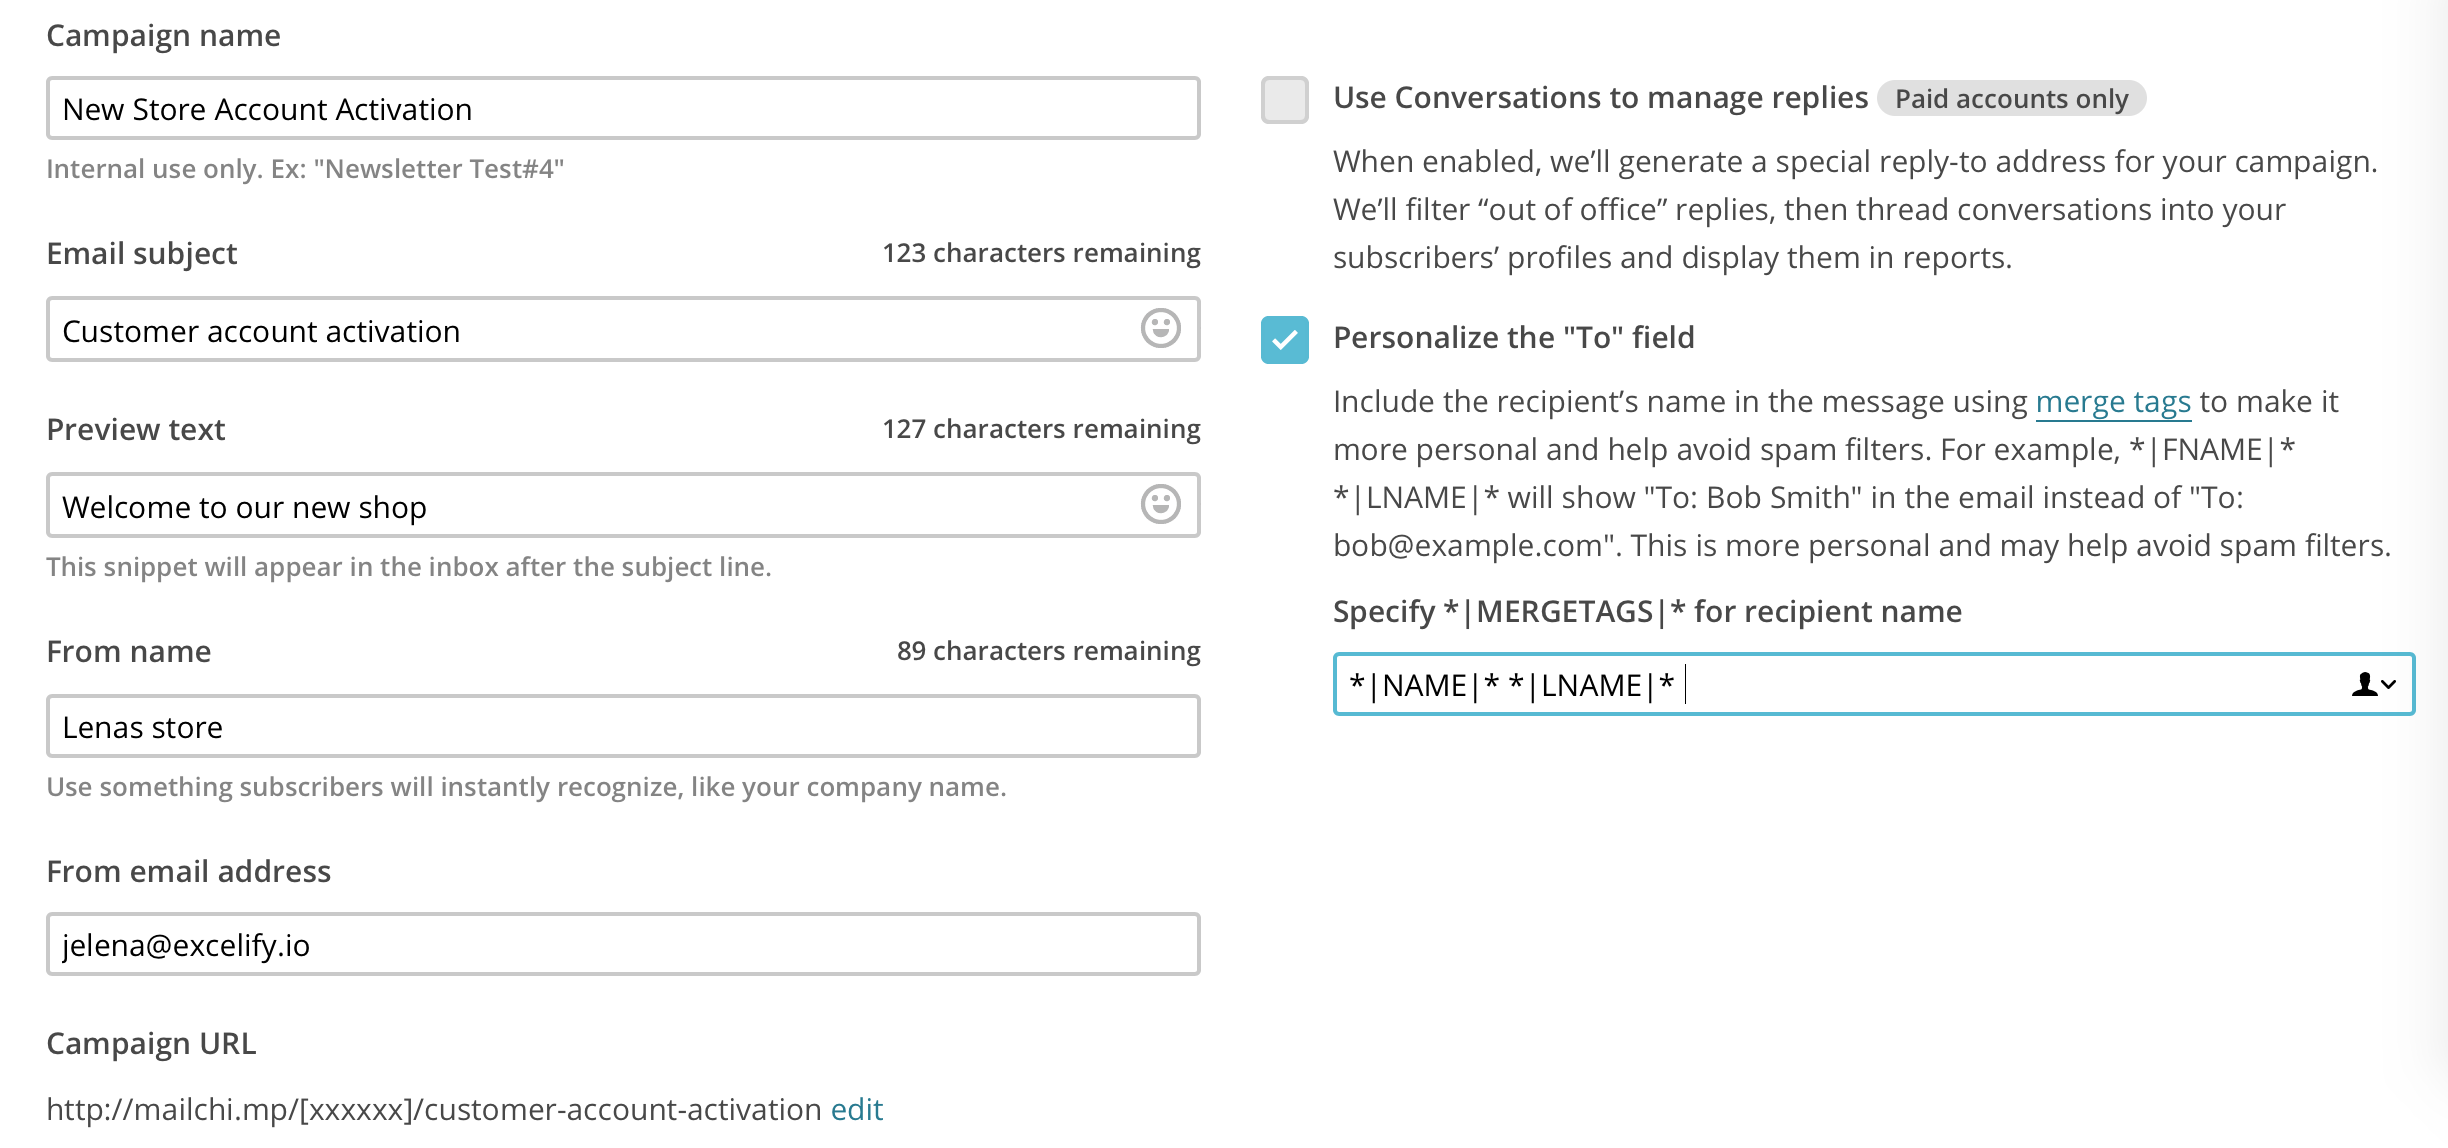
Pay attention to the checkbox Personalize the ‘To” field. I Check it and put field tag *|NAME|* *|LNAME|* in recipient name. Remember, we added these tags earlier, when creating the list? So, now each customer will get the personalized email, with his/her First name and Last name as the recipient.
Click Next.
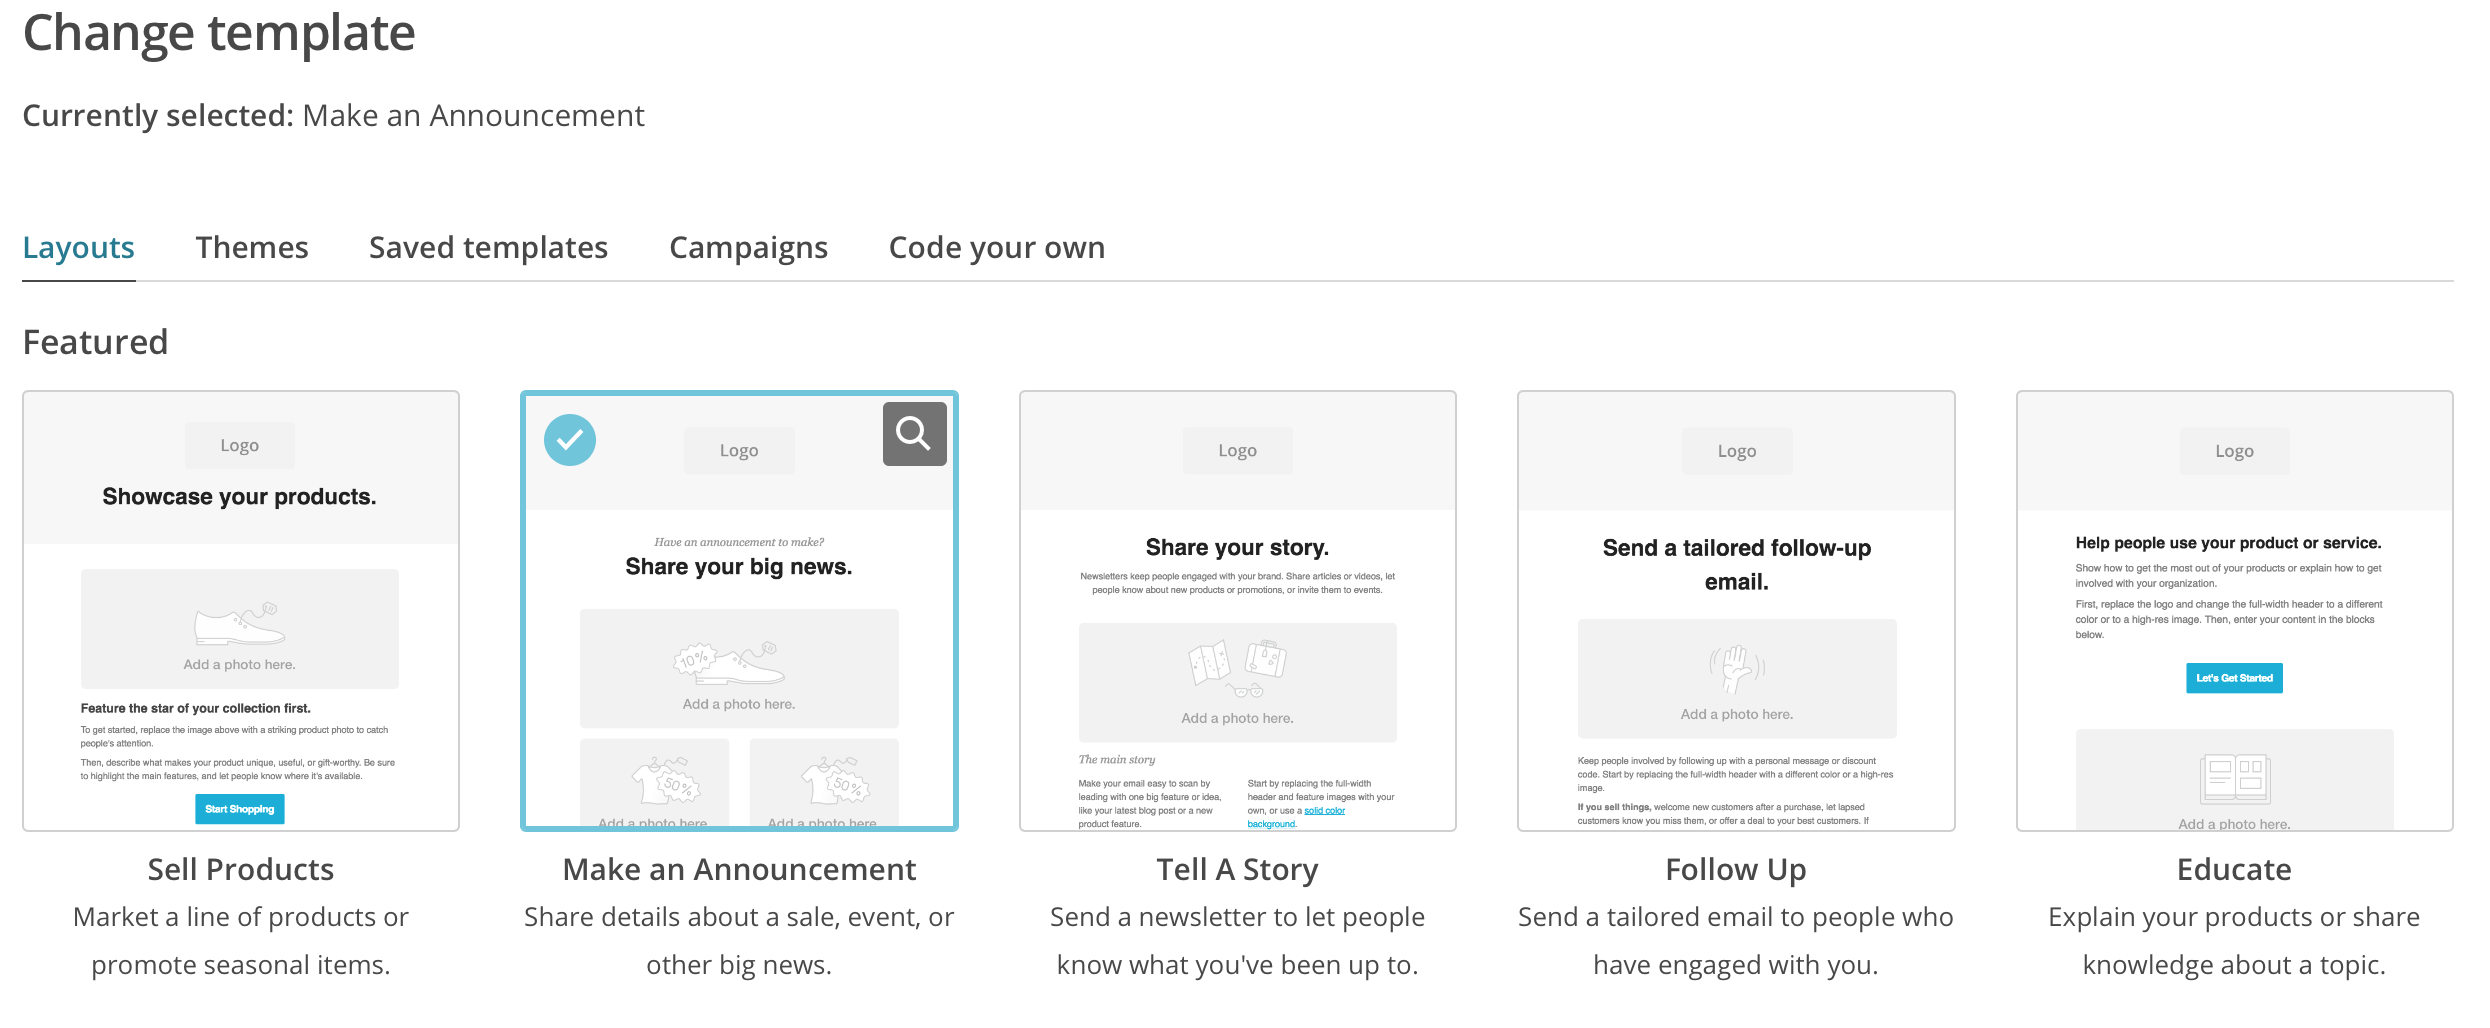
MailChimp provides a lot of templates for email campaigns. I will choose “Make an Announcement” template
There will be prepared boxes that you need to modify and deleted what you do not need. Imagine how do you want the email to look like. Do you need any images? What text will you put there and attract your customer and make him/her interested to activate account.
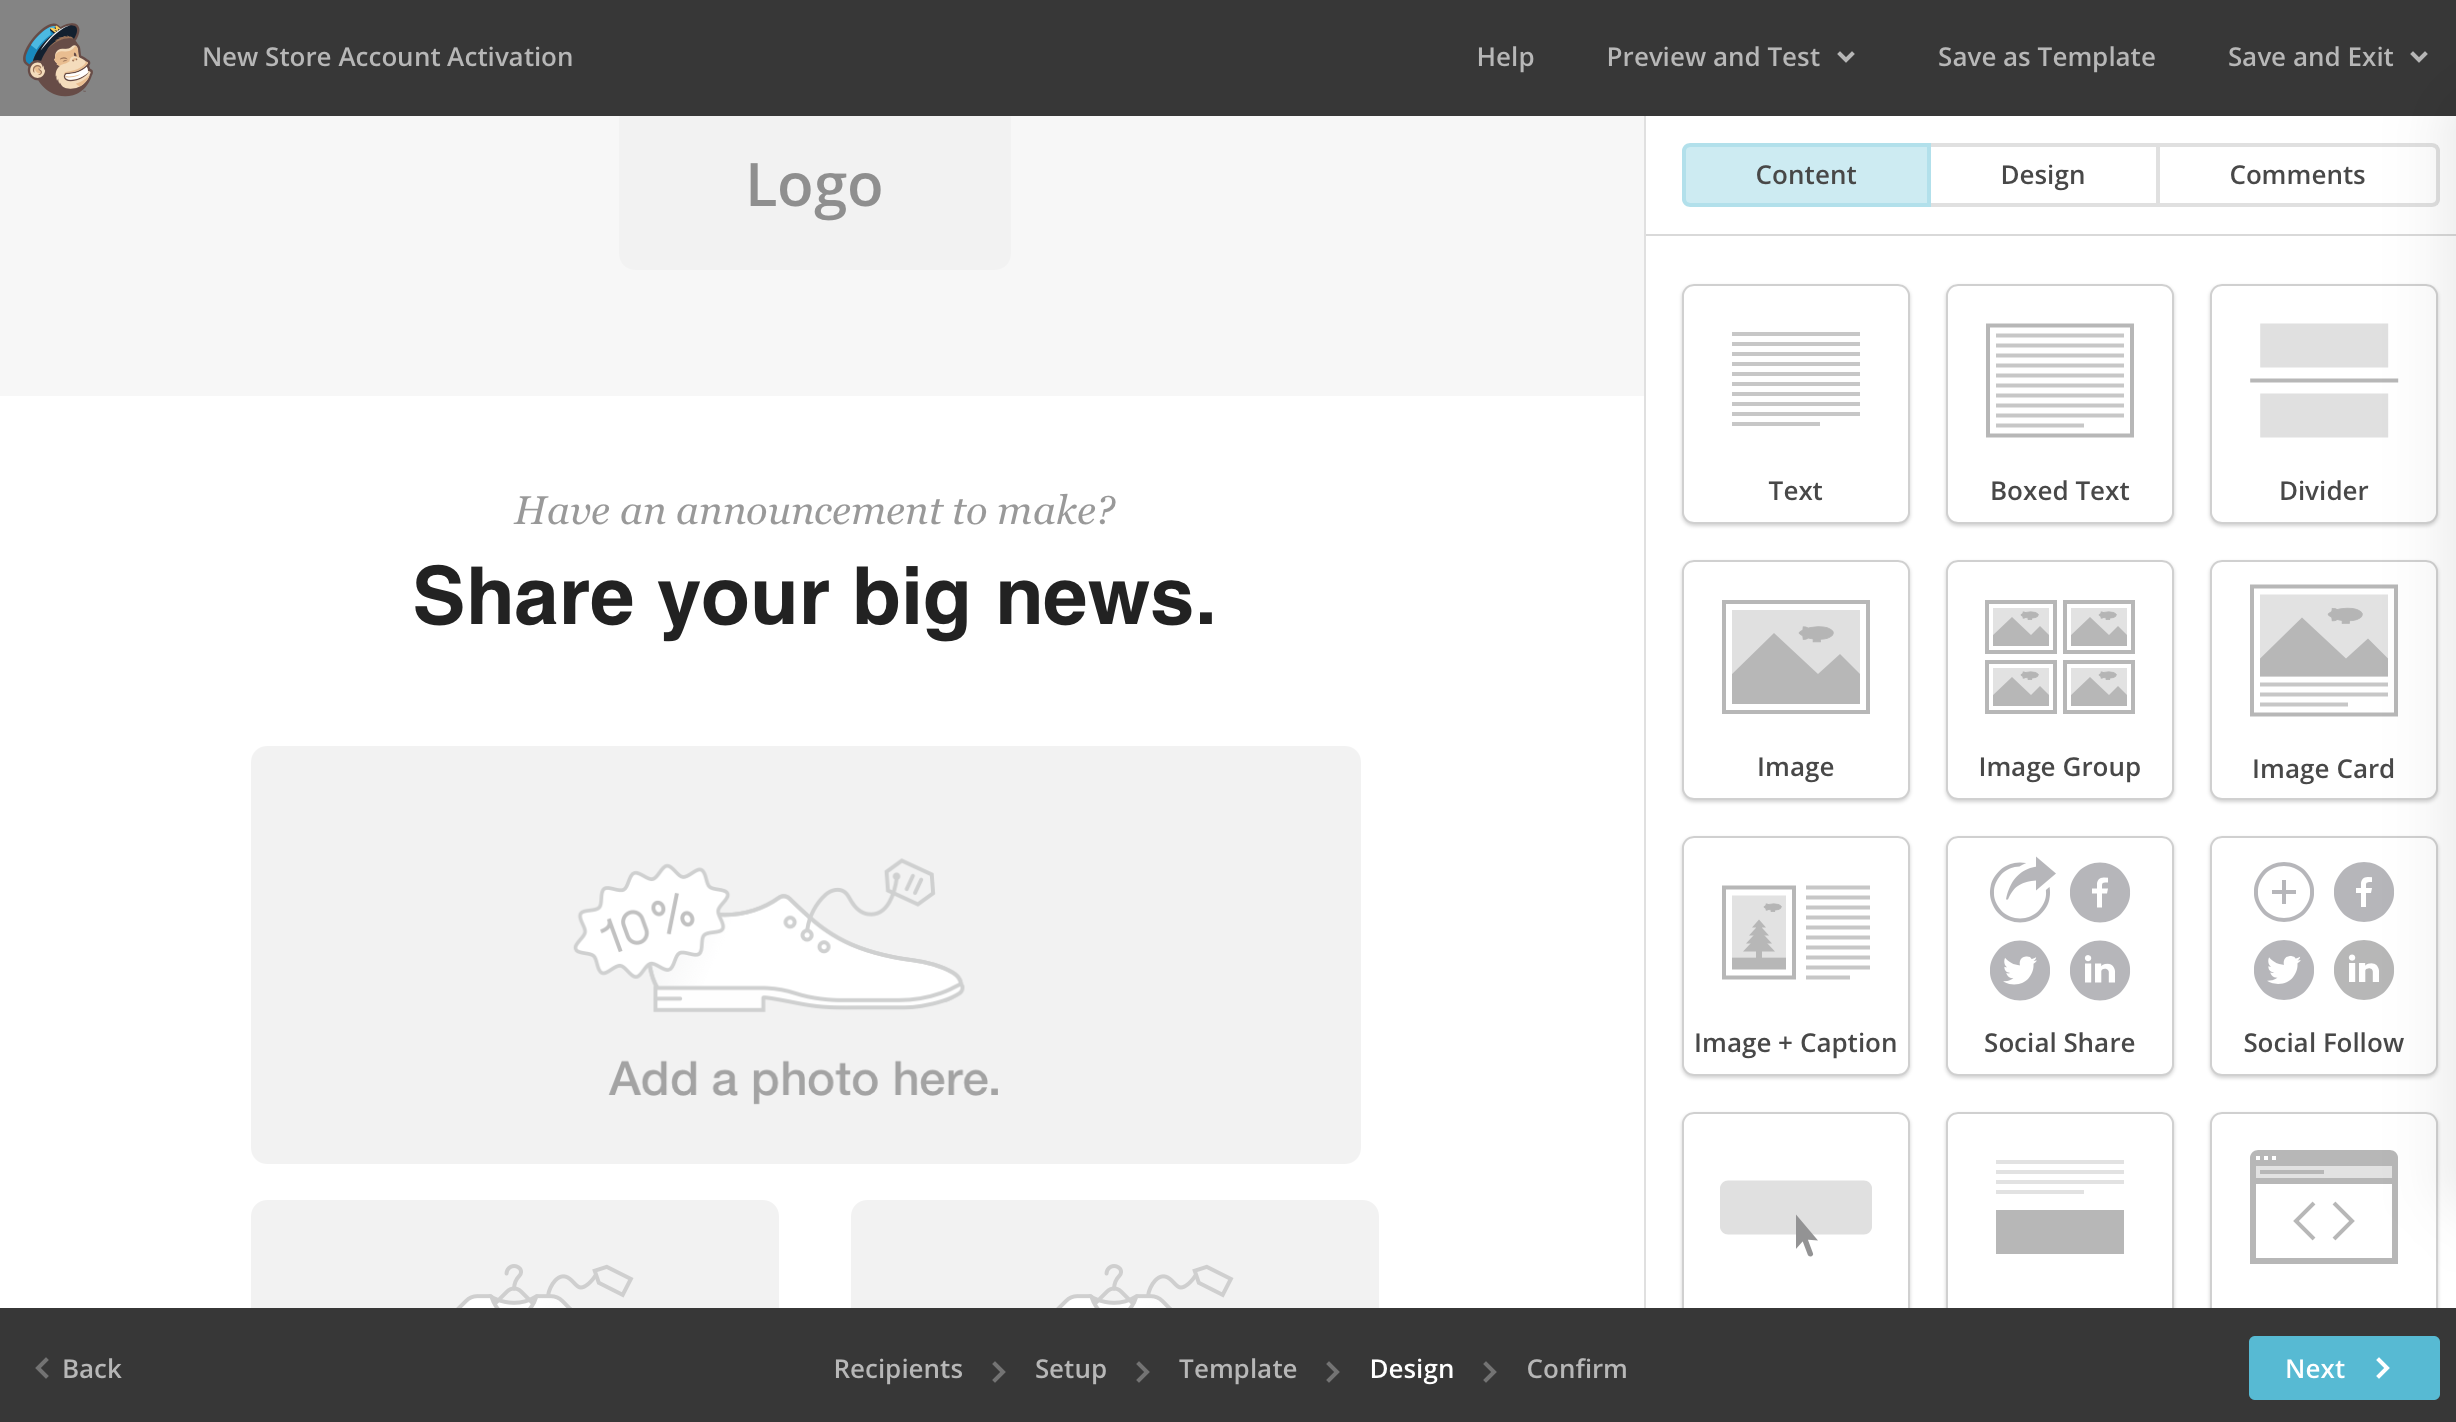
When you have approximate idea, click on the appropriate box and modify it.
I have added the Logo. Then I edited the box with the text. 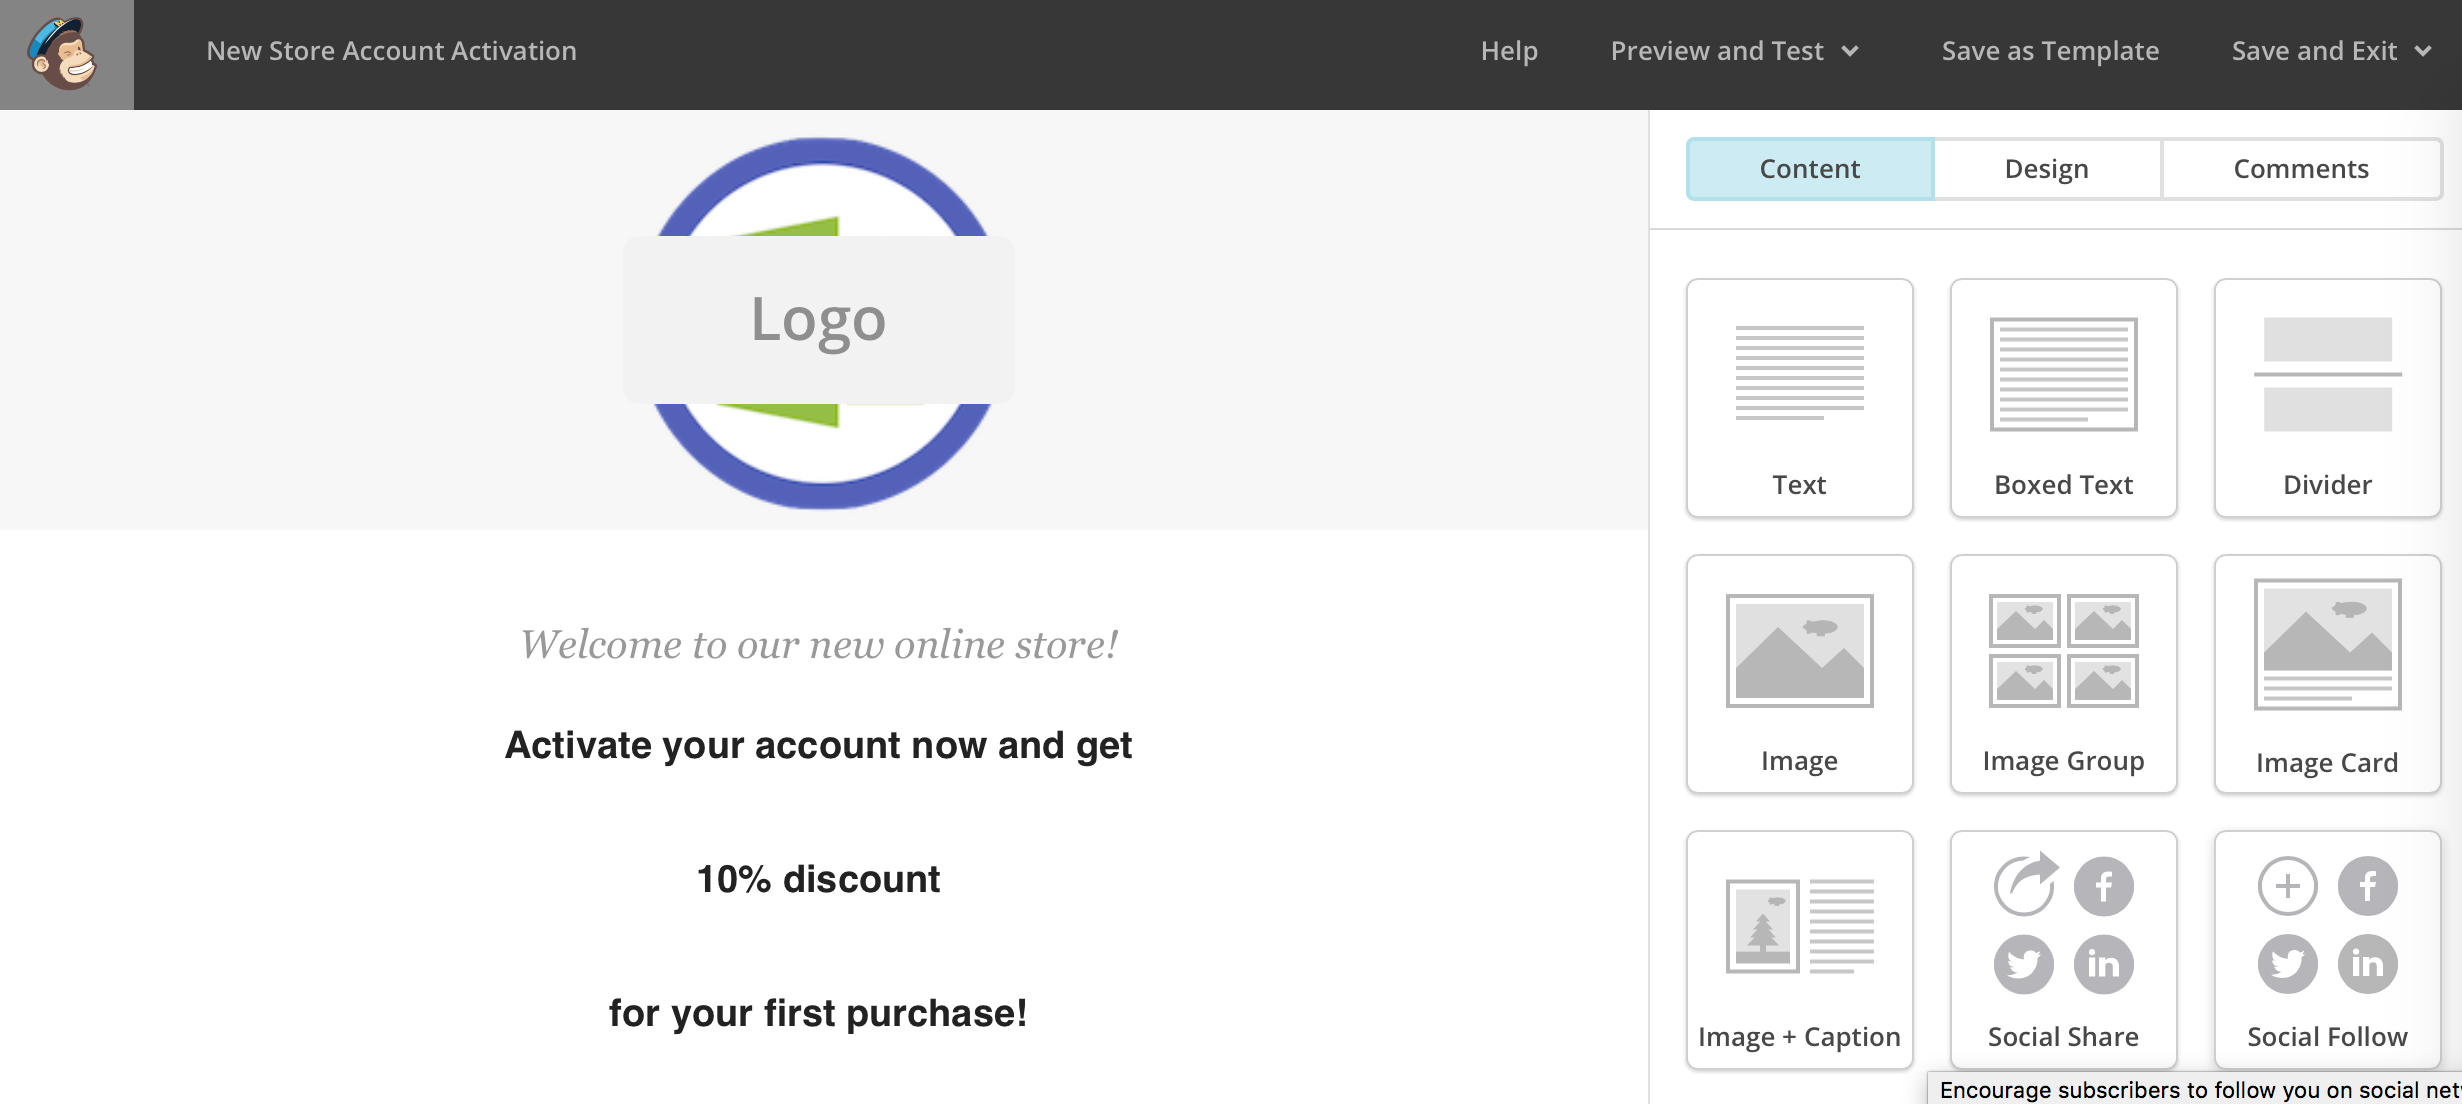
I deleted boxes with images and all other except the button.
I edited the button as follow: 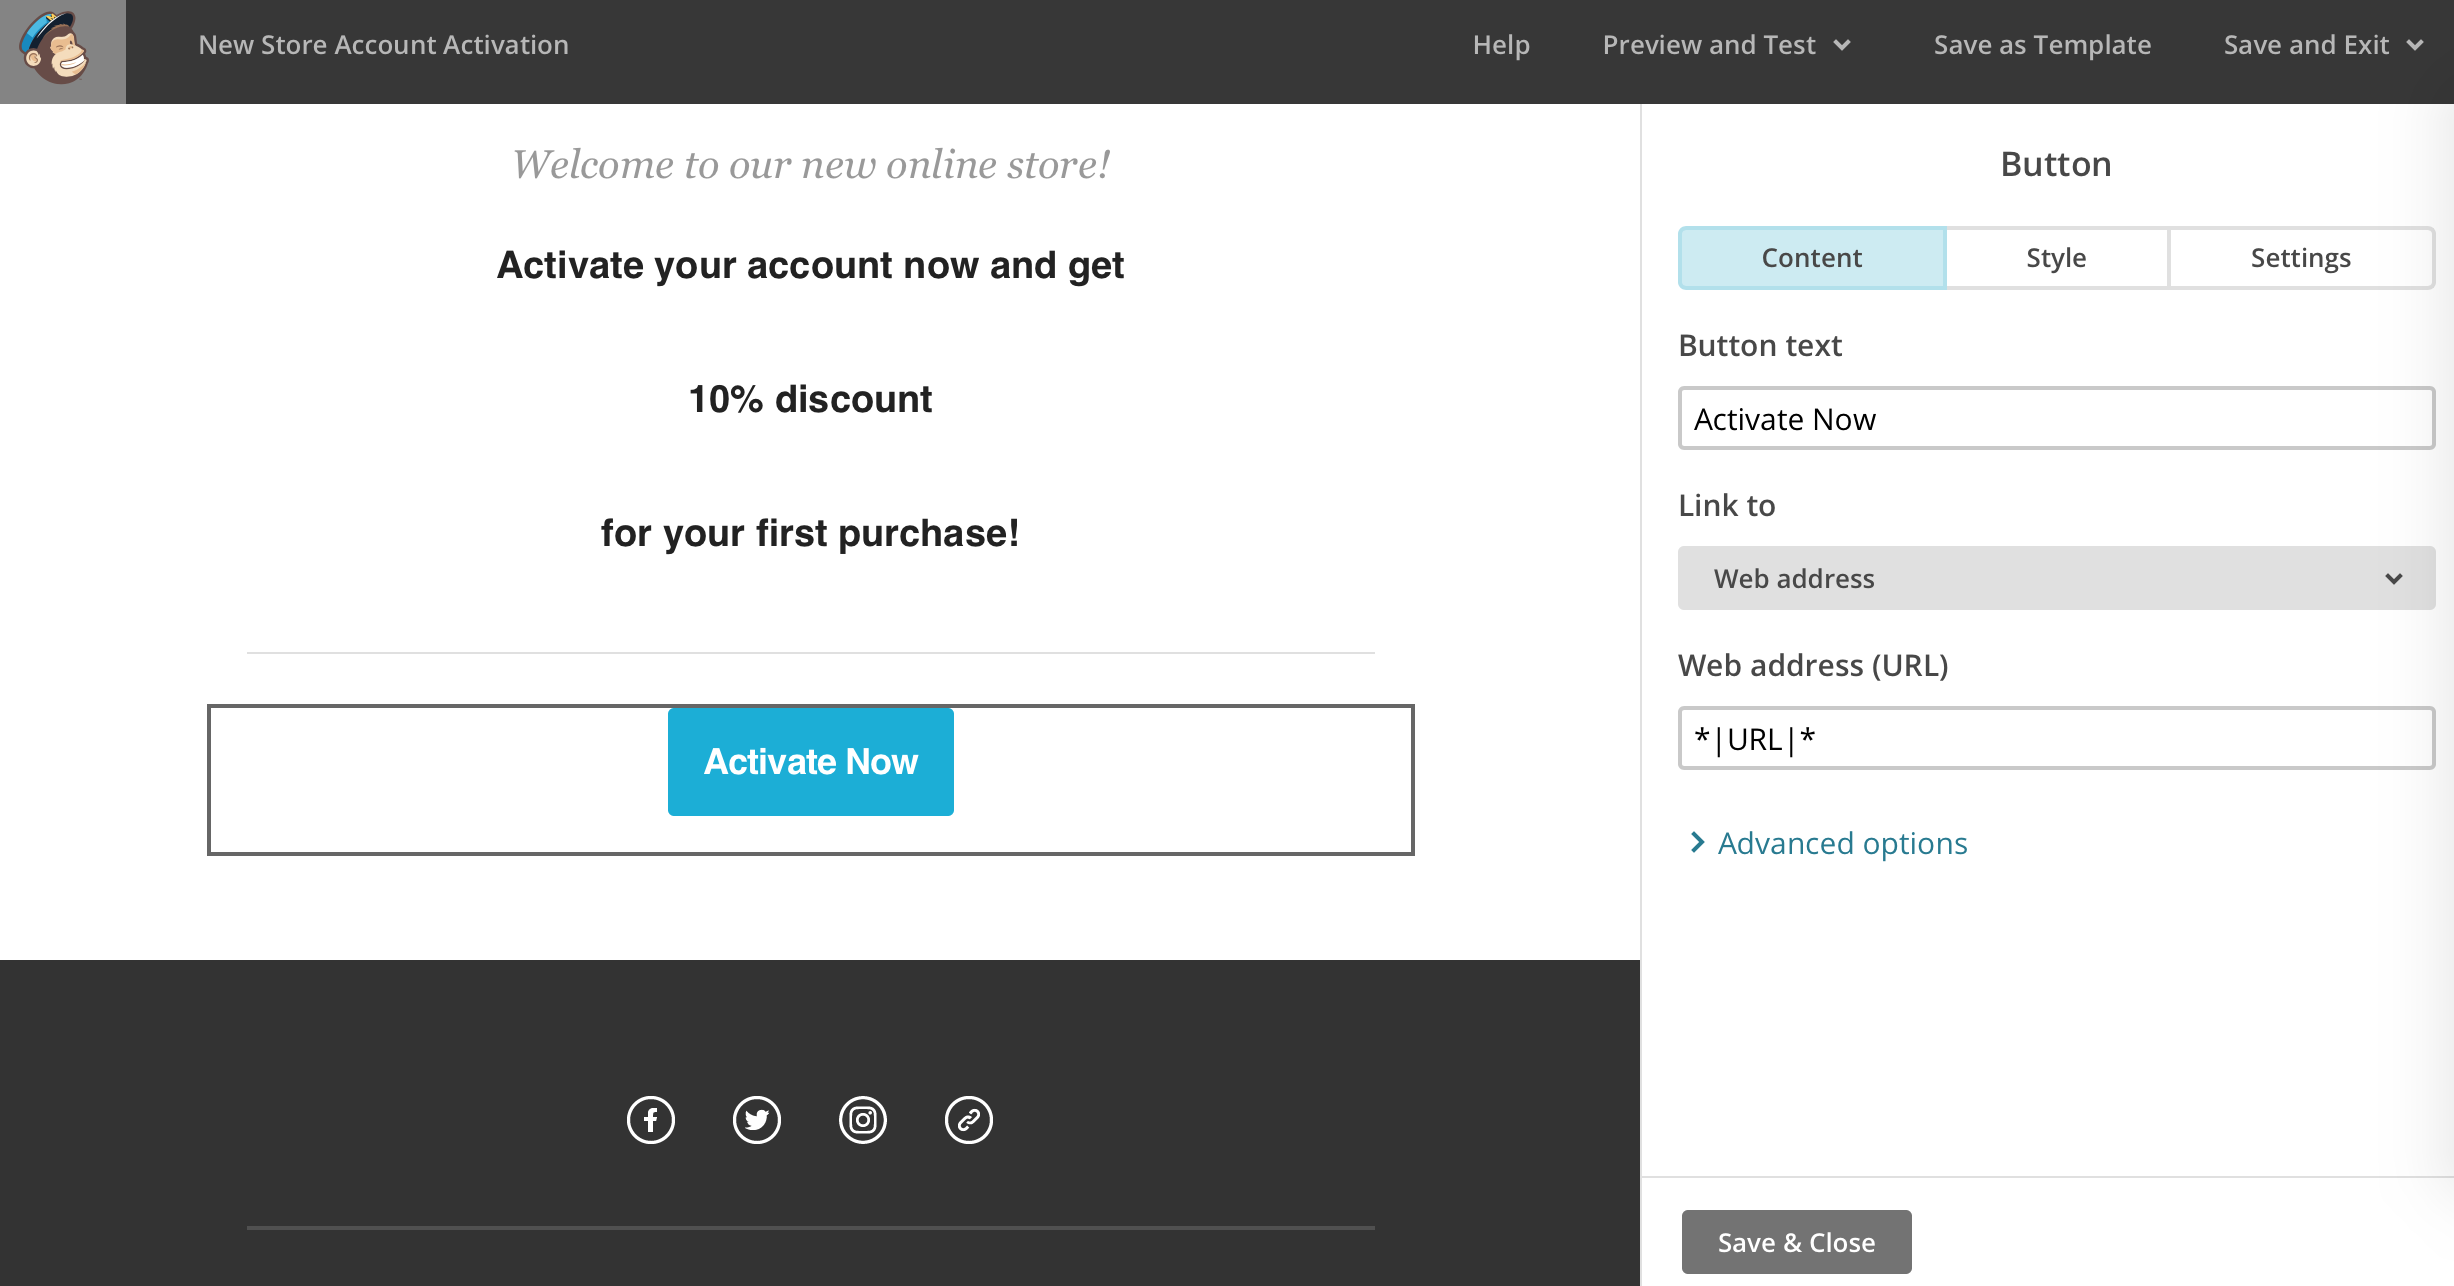
In the Web address (URL) field I put URL tag that we added, when creating the list. This button will take each customer to his/her own Account activation page, as it will take his/her particular Activation URL from the list.
Press Save and Close.
Test and send the e-mails to all customers
Now we can test it with test email. Go Preview and Test -> Send a test email.
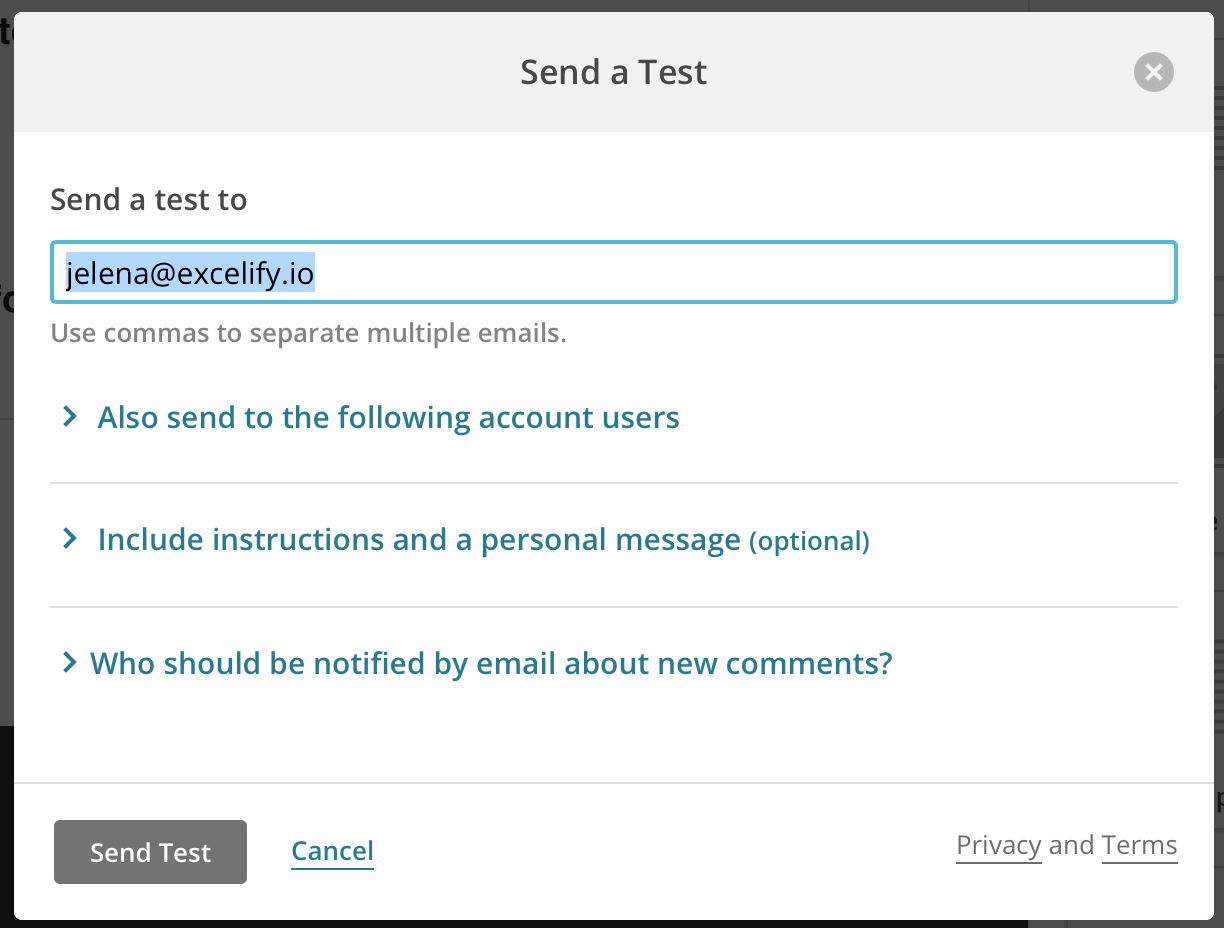
Provide the email, where you want to send test and click [Send Test].
Here is mine 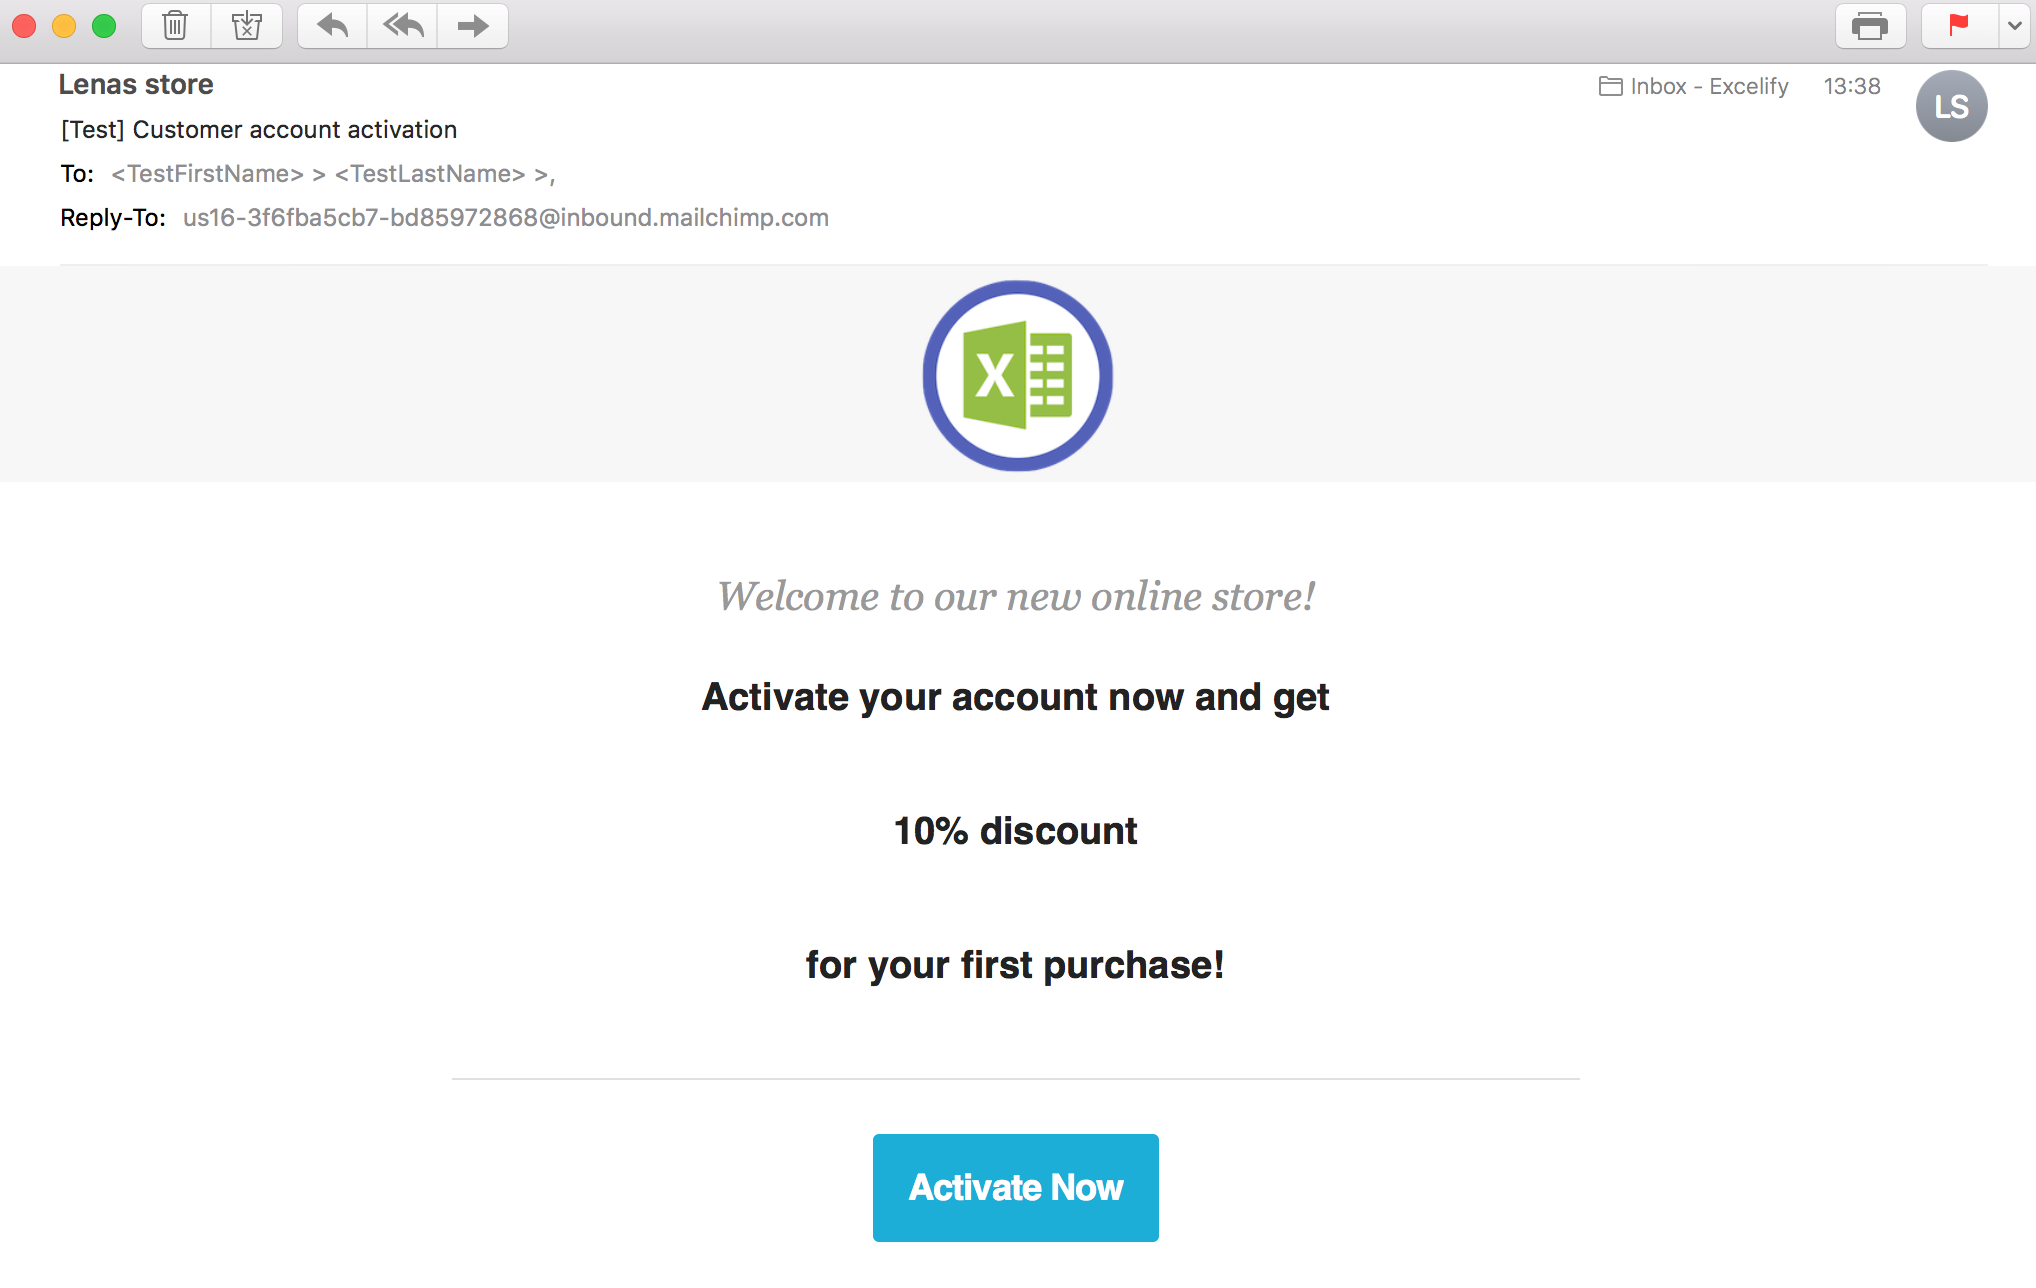
Looks good to me. Activation button will not work here, as this is just a test. But I would like to test, if the button will work in the real email, so I will send this Campaign to my Test Customer list (remember, I have created one?)
I will click Next 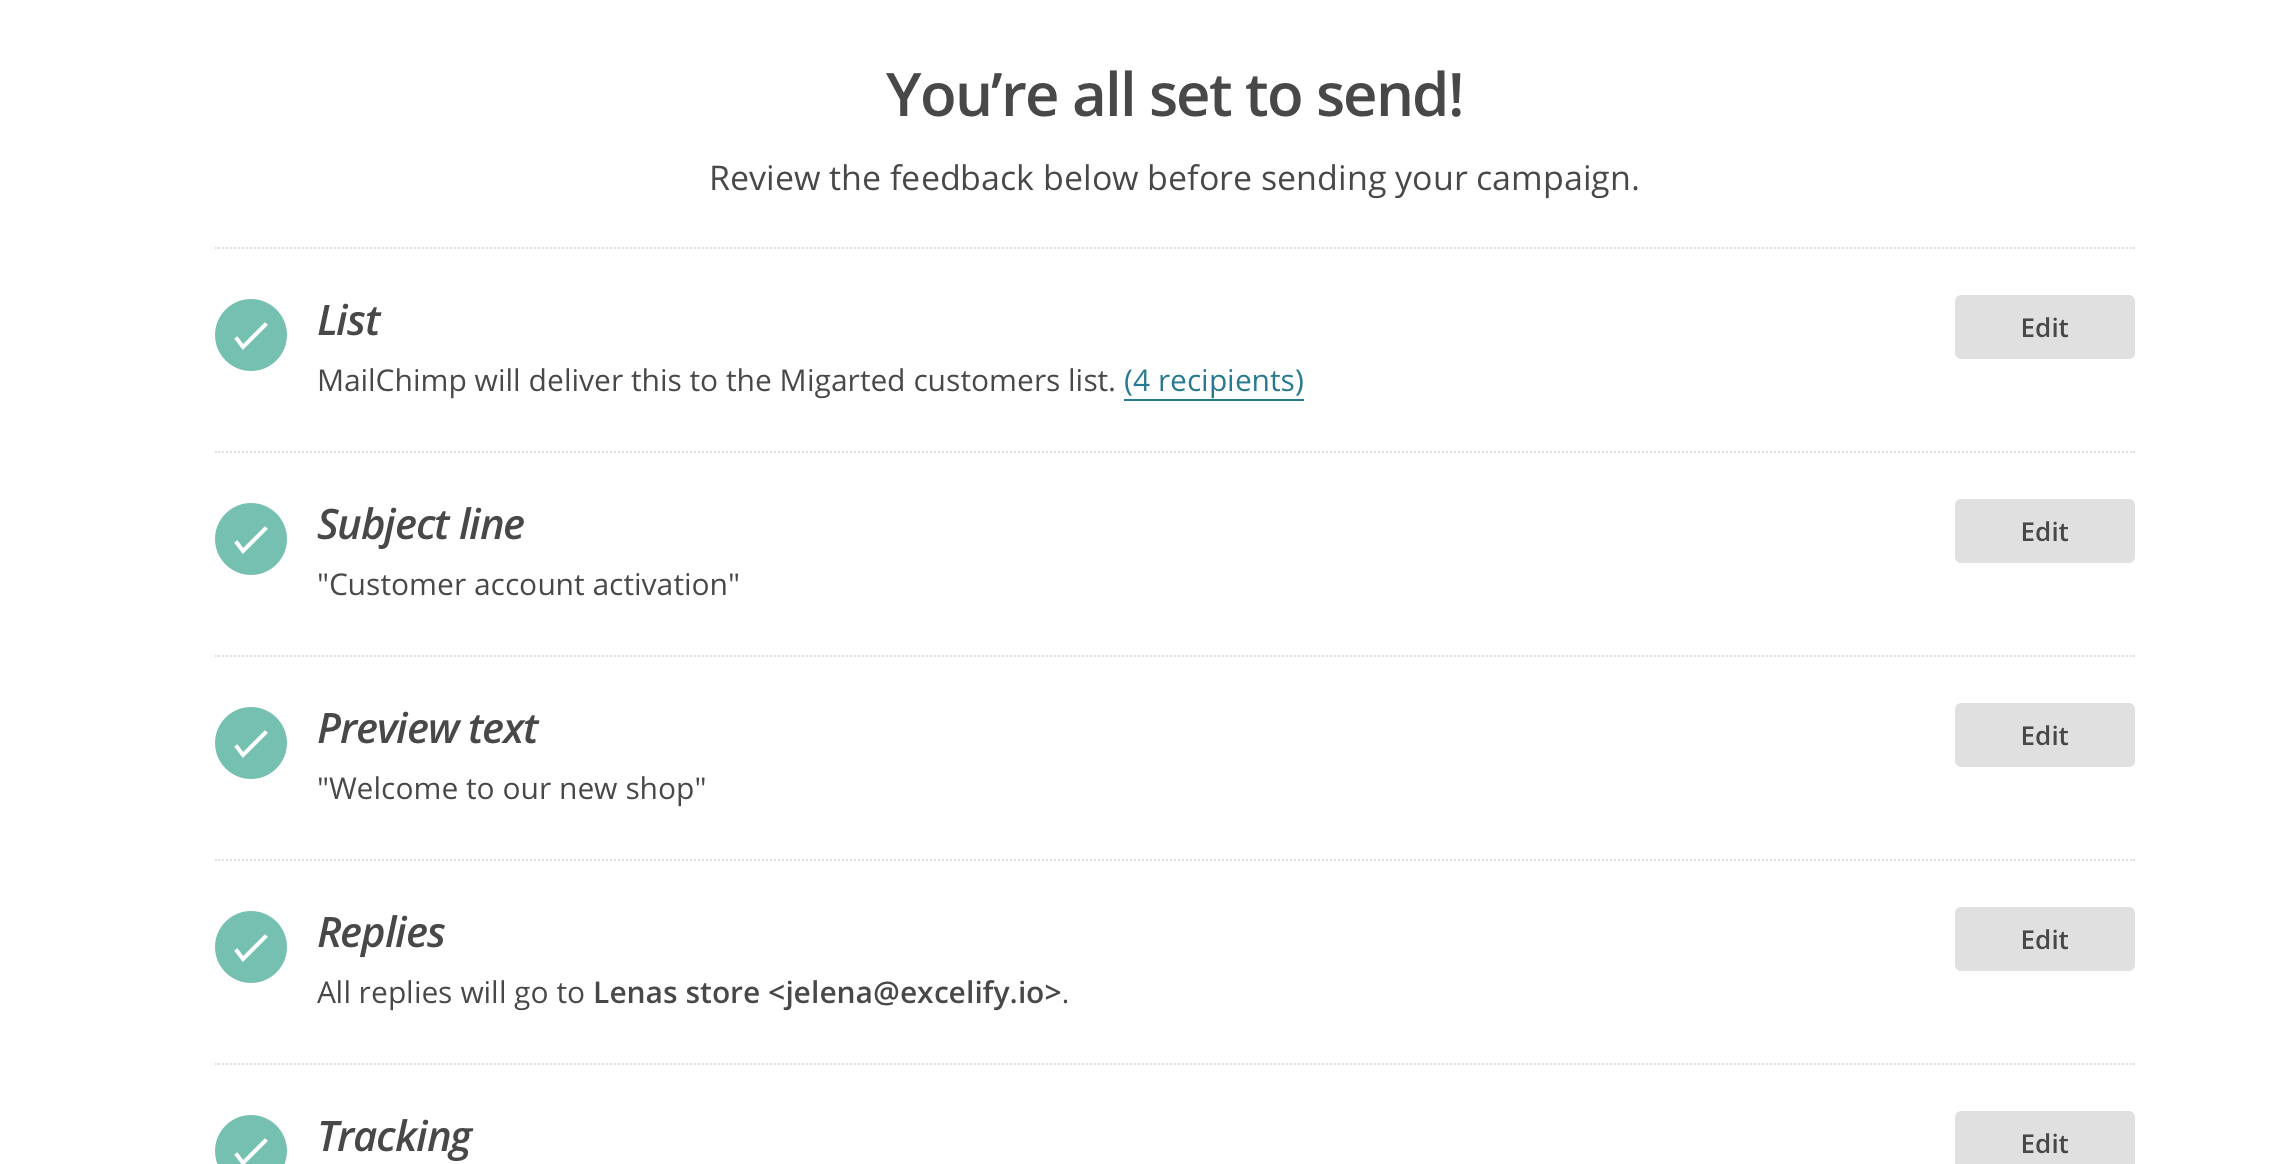
Here I will change the list. Click on [Edit] for the List and choose Test Customer list 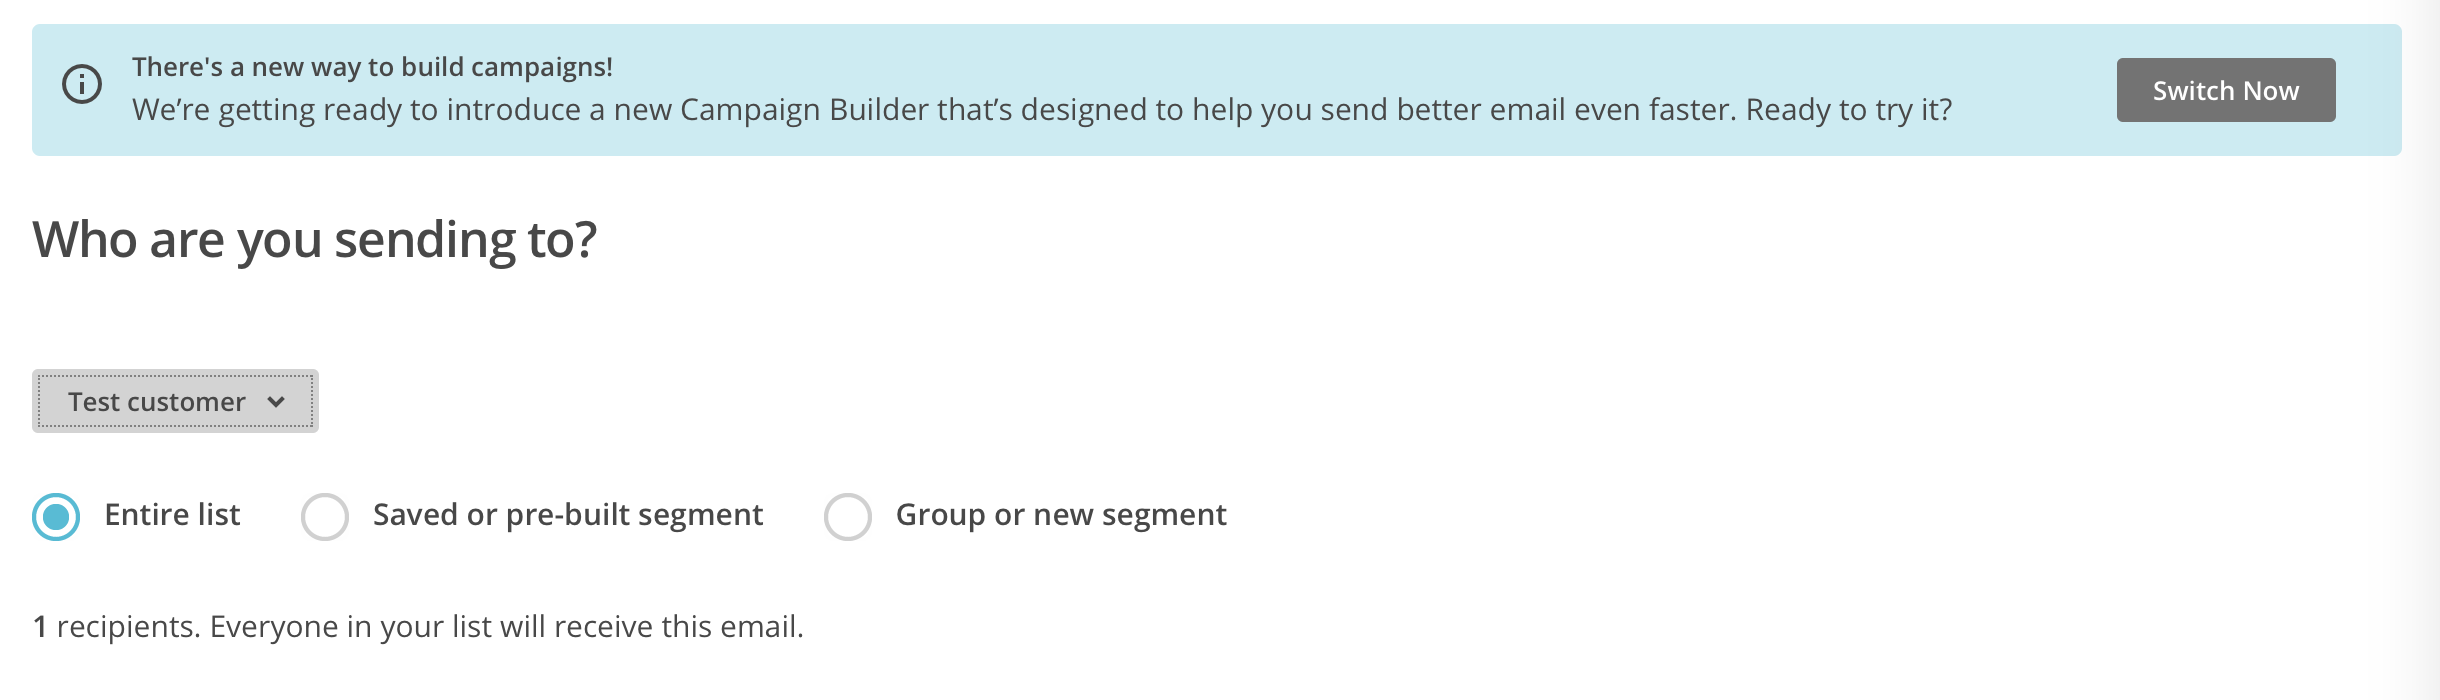
Click Next -> Next -> Next. And then click Send!
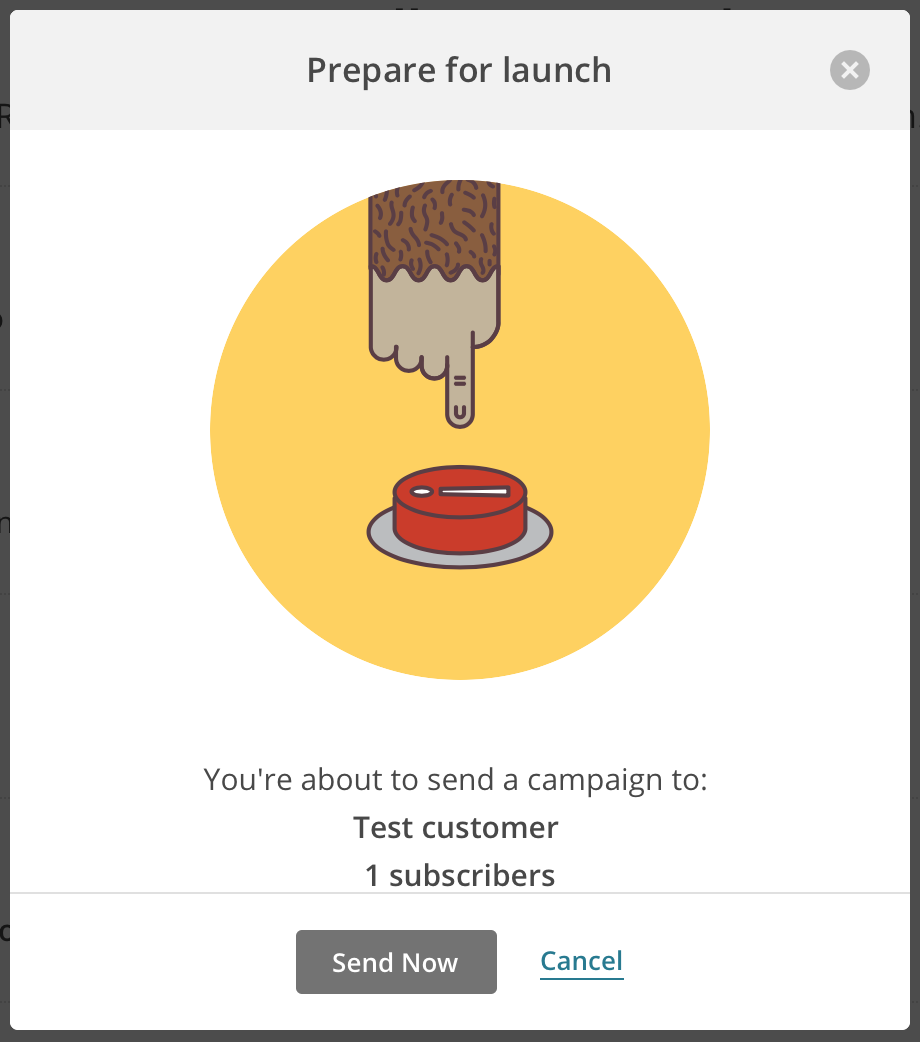
Click Send Now!
And now wait for the email 🙂
I have got mine 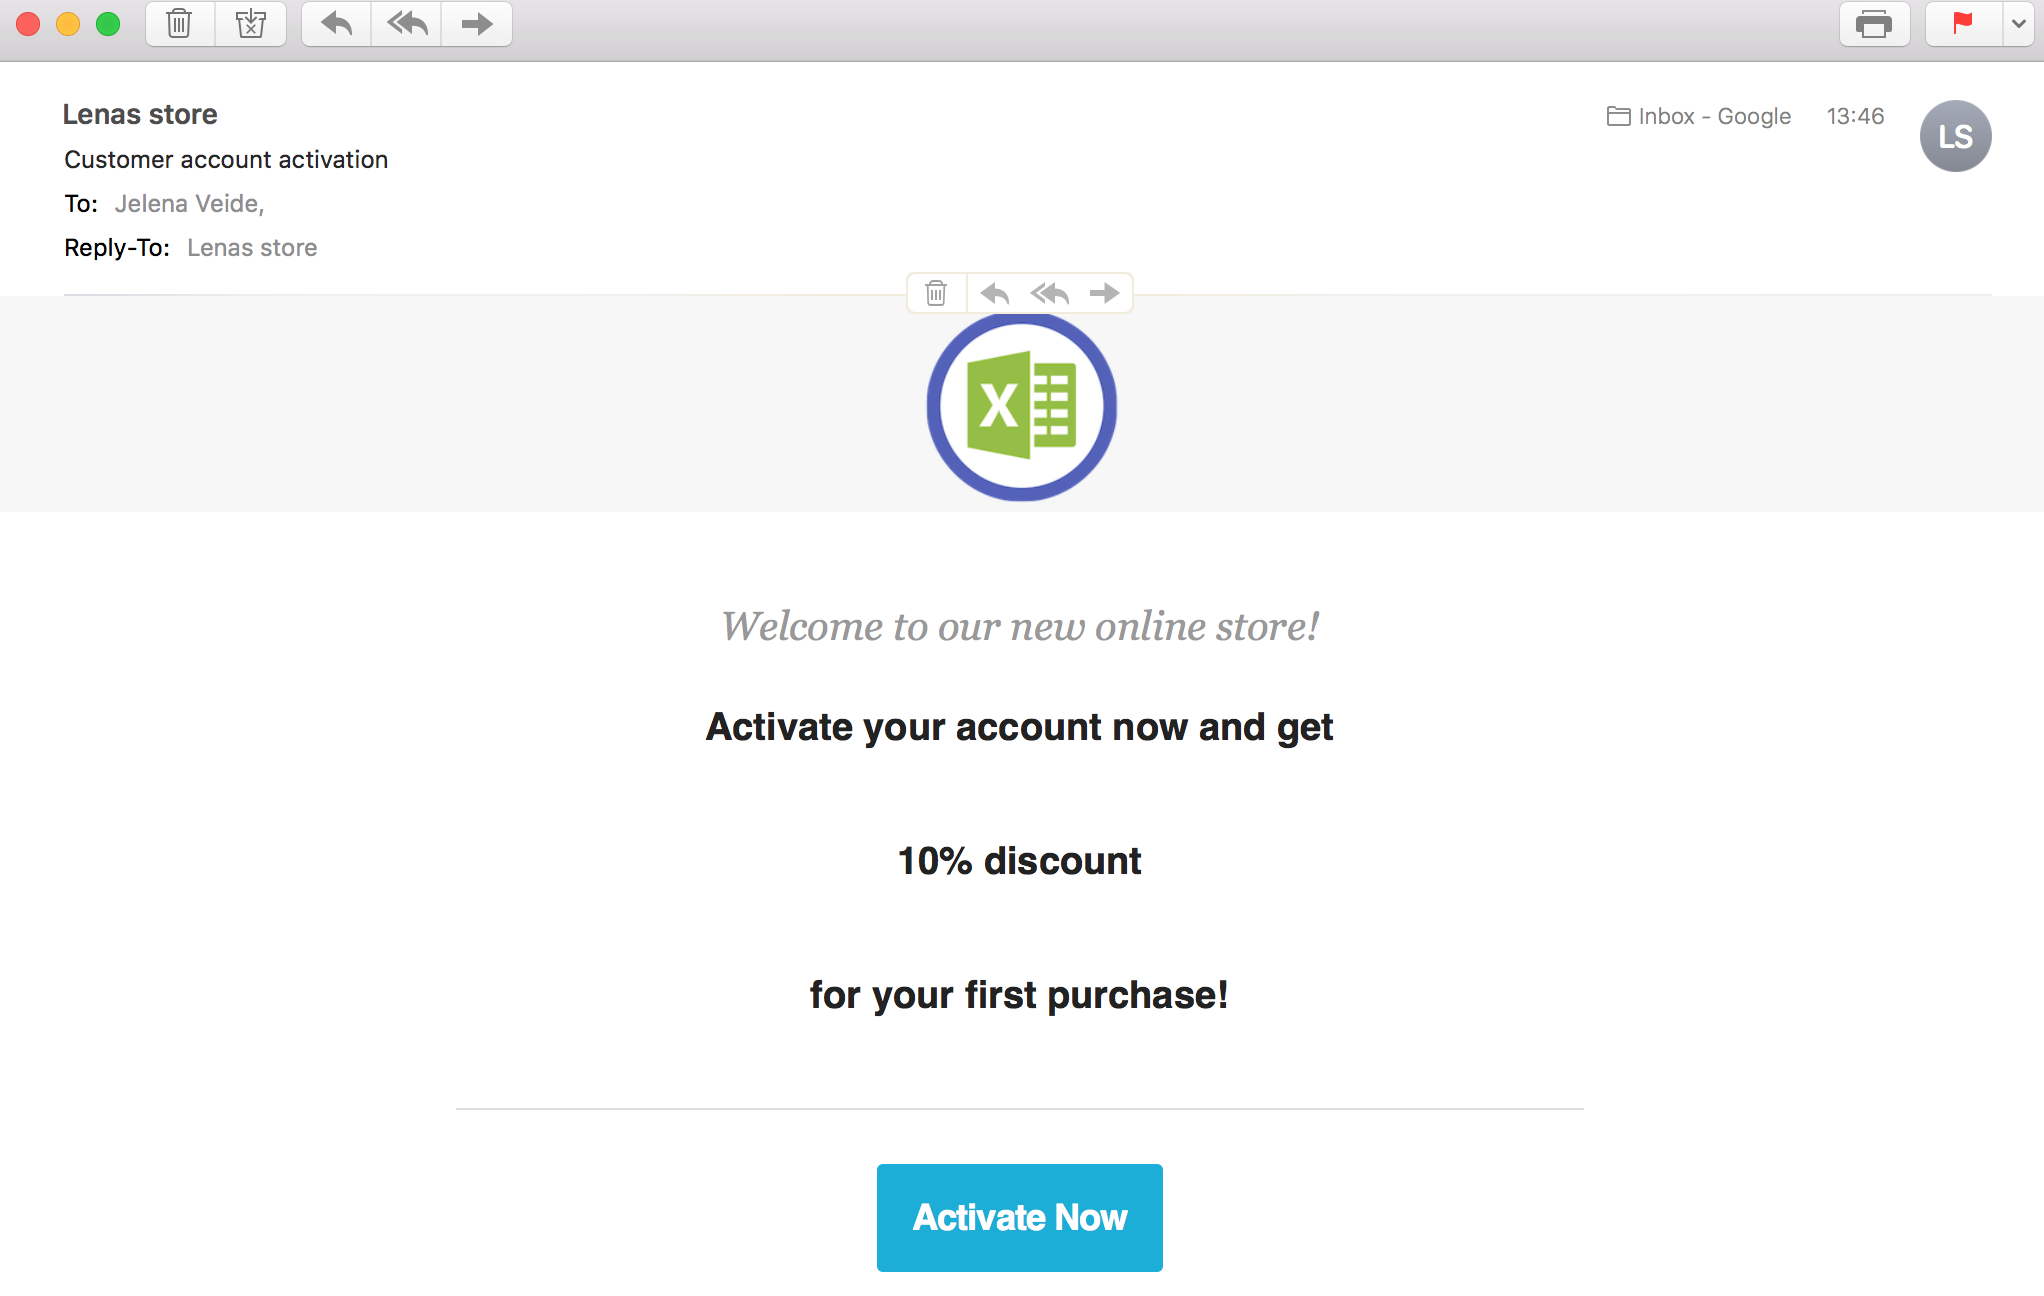
Now I see there Name and Last name. And [Activate Now] button will take me to the Activate Account page 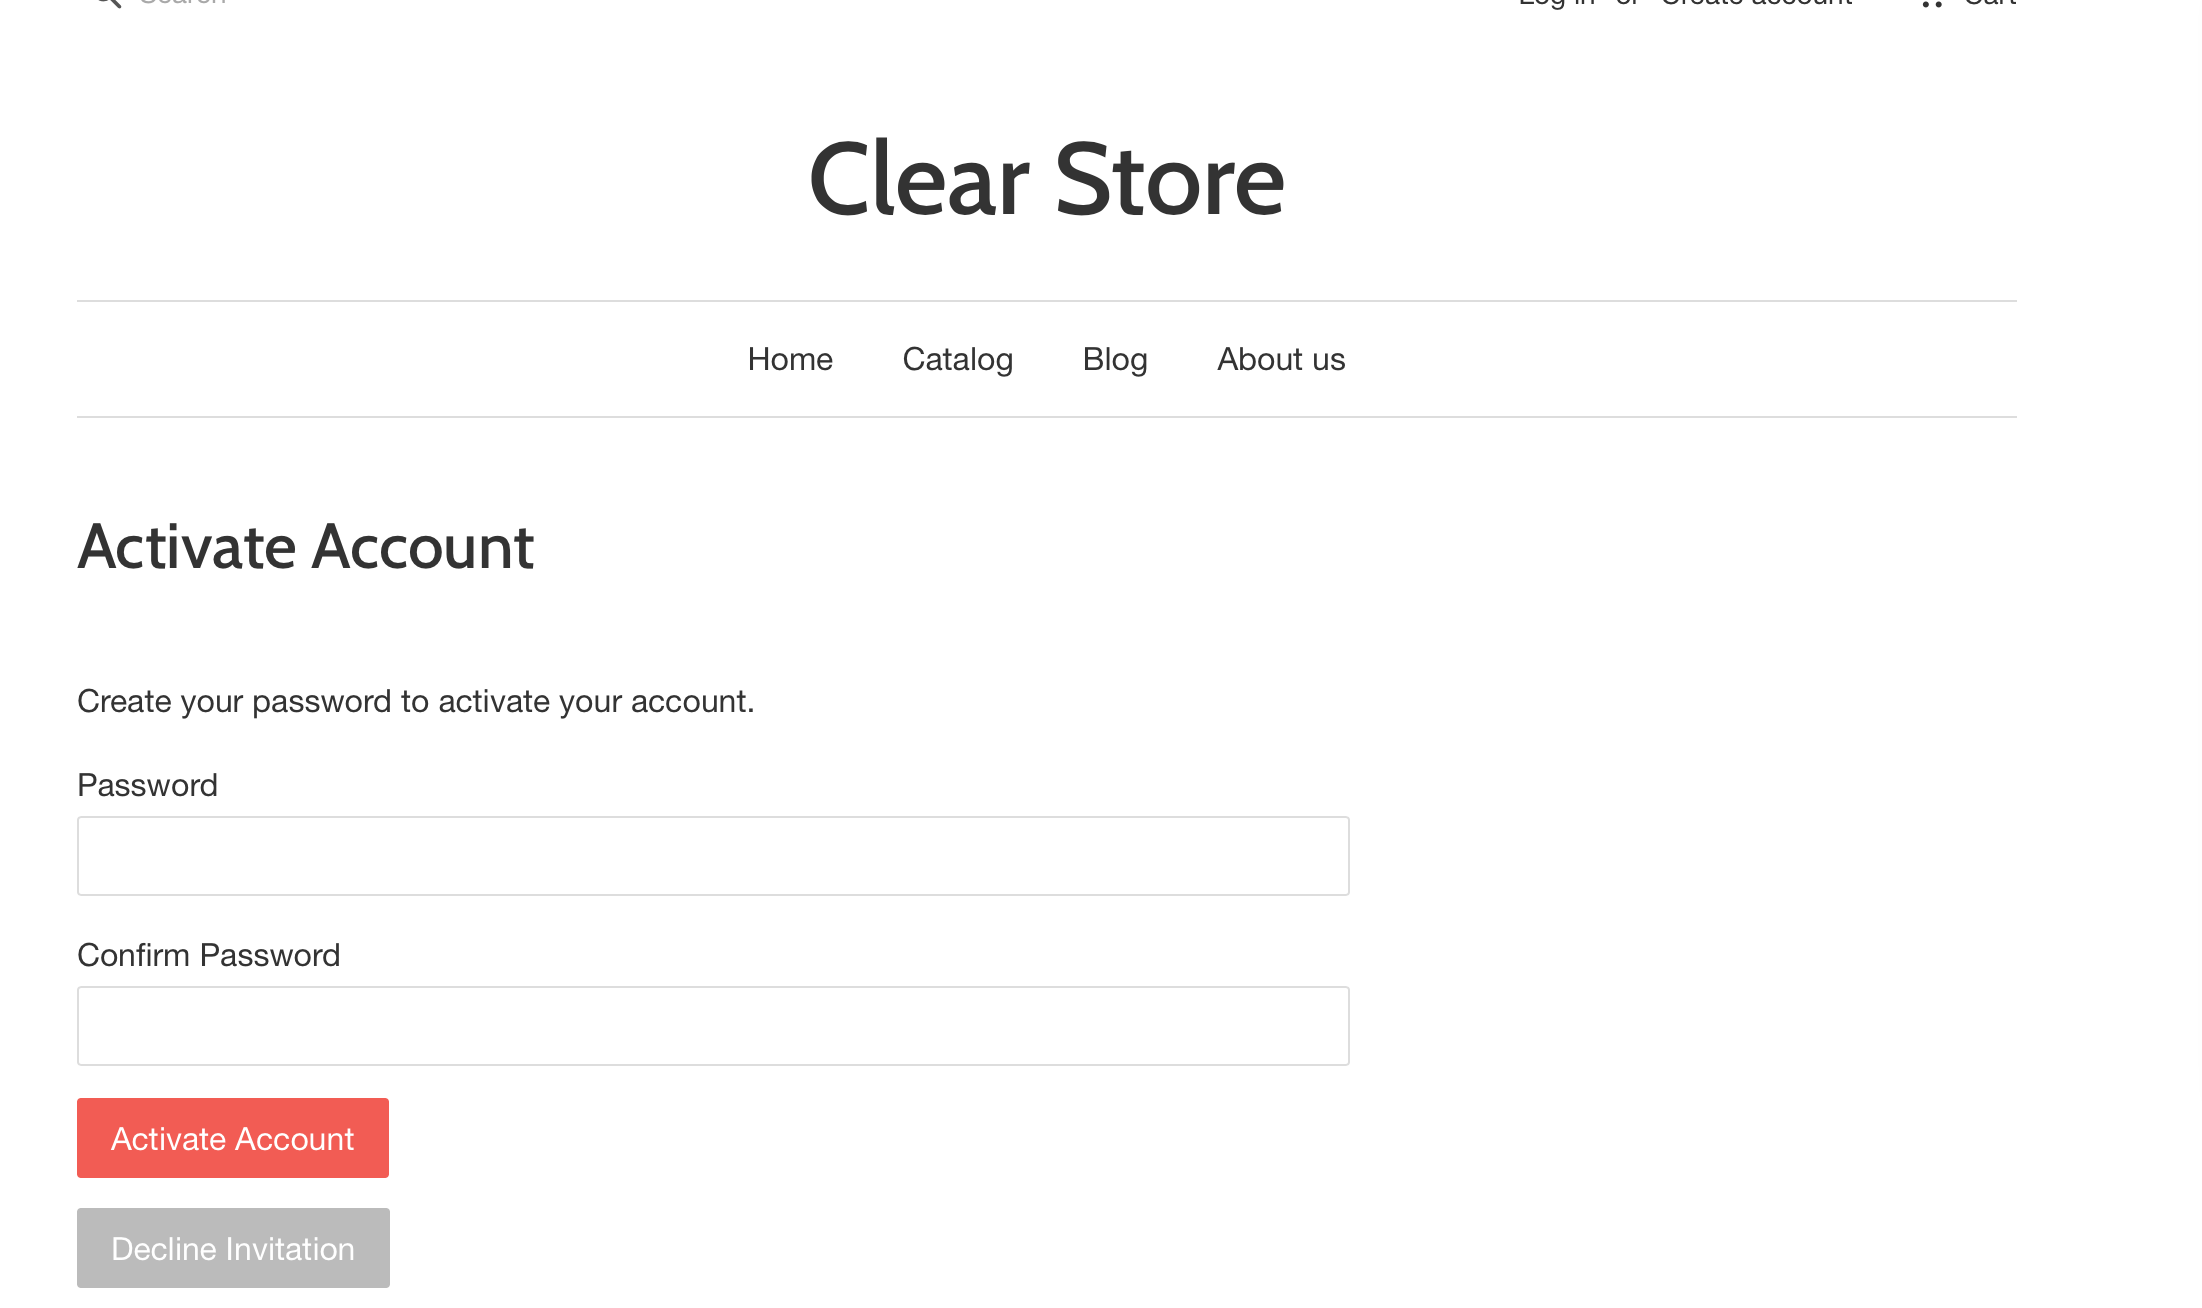
Now we should send Activation emails to the real customers.
Go Campaigns. For the New Store Account Activation campaign choose Replicate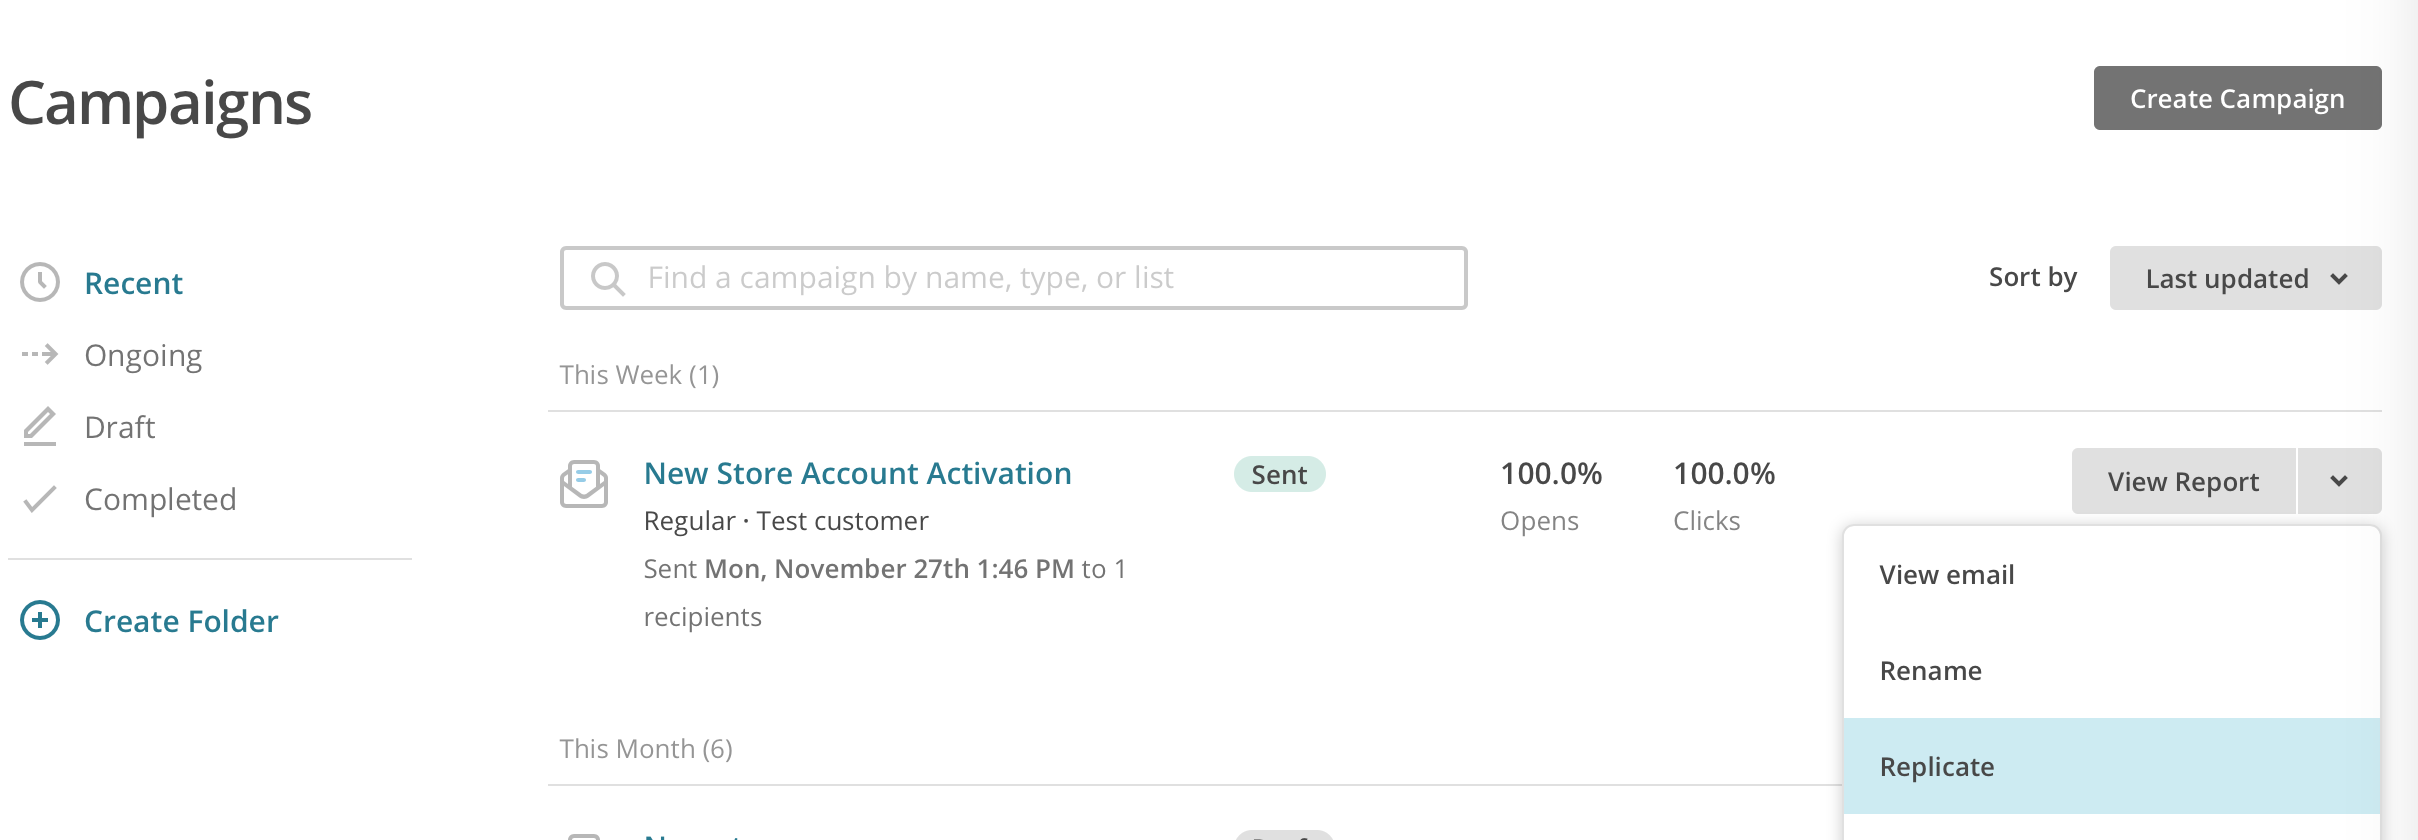
Choose Migrated Customers list 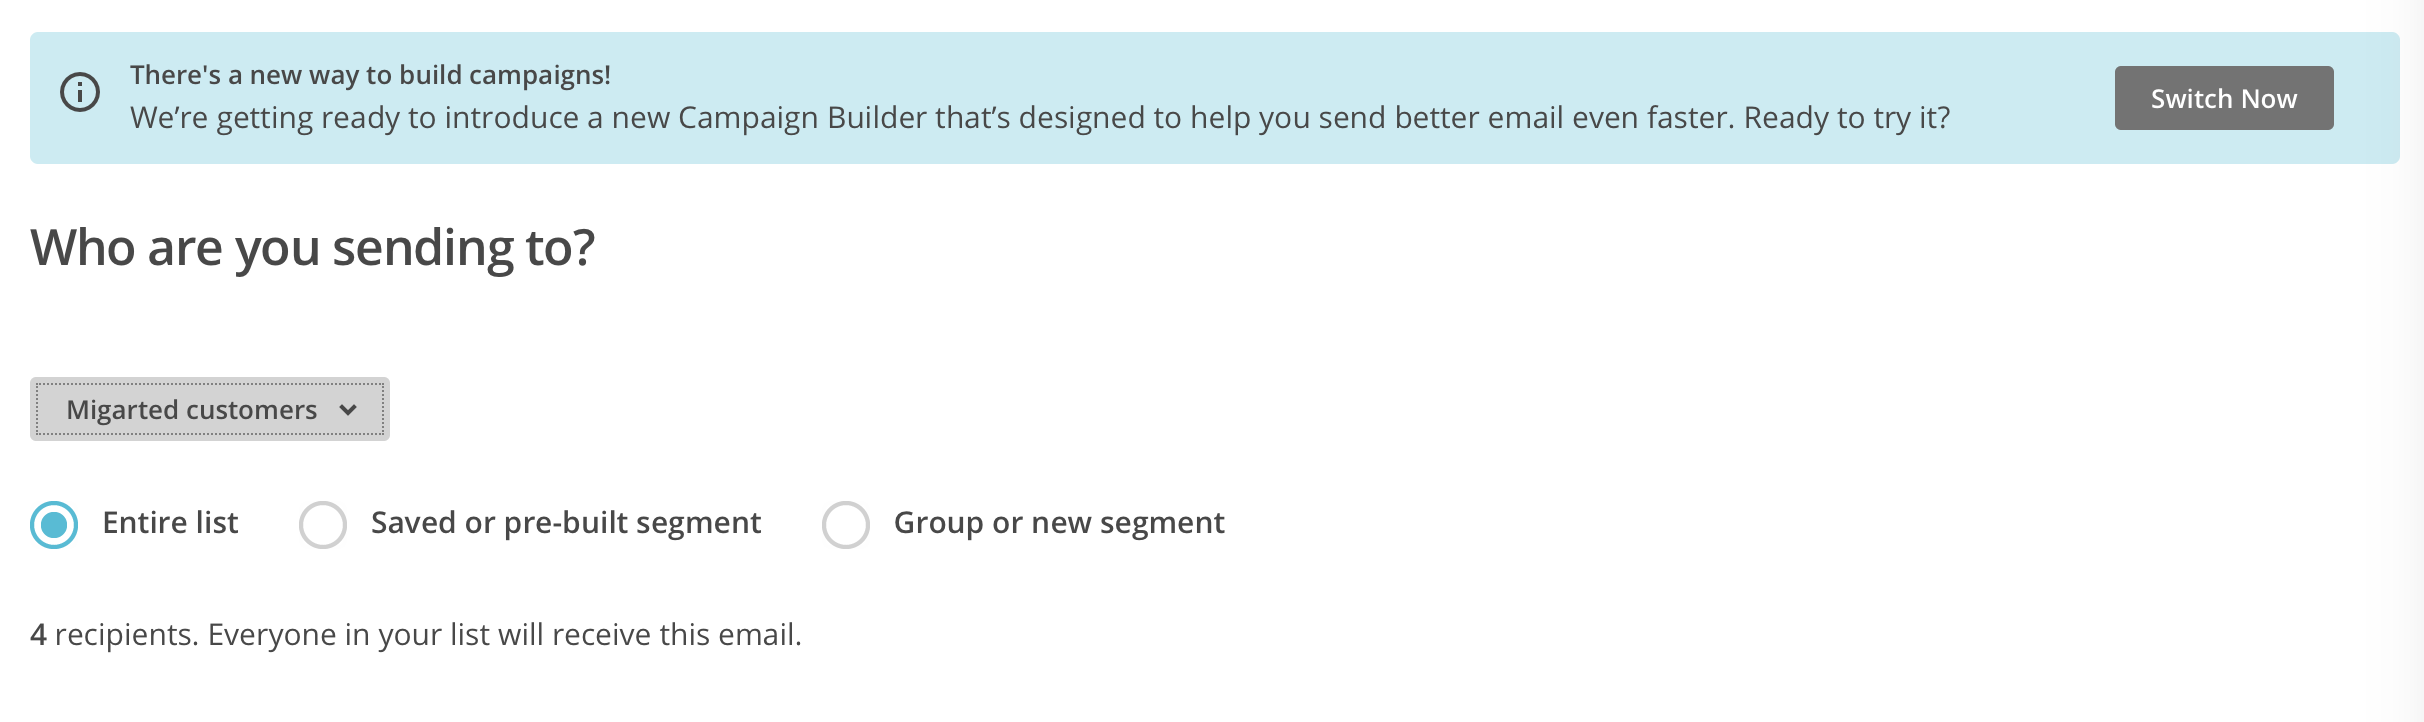
Click Next, Next, Send.
You will be asked again if you want to send. There should be 4 subscribers (in my case). Click [Send Now].
And we are done!


