
When you are migrating your store to Shopify, you definitely want to take your customers with you.
Since no platform allows exporting actual Customer passwords, after the migration your Customer accounts will not be active. So you will need to migrate them and invite each customer to activate their accounts.
This is how you do it with Matrixify app:
- Export list of customer from your current platform
- Prepare data in Excel for import
- Import customers with the app (with sending activation emails)
- Alternative ways to send Activation emails:
- Manually form the Shopify Admin
- Later with the app.
1. Export list of customer from your current platform
If you are migrating customers from your old Shopify store to new Shopify store, then you just use this same app in both stores: export from old, and import into a new one.
If you migrate your customers from another platform, they still should have the capability to export customers to some file. Exported file will be different for each platform, but usually there are such fields as: email, first name, last name, phone number, company name, address, shipping address, billing address, etc.
For example, let’s take this export from WooCommerce:
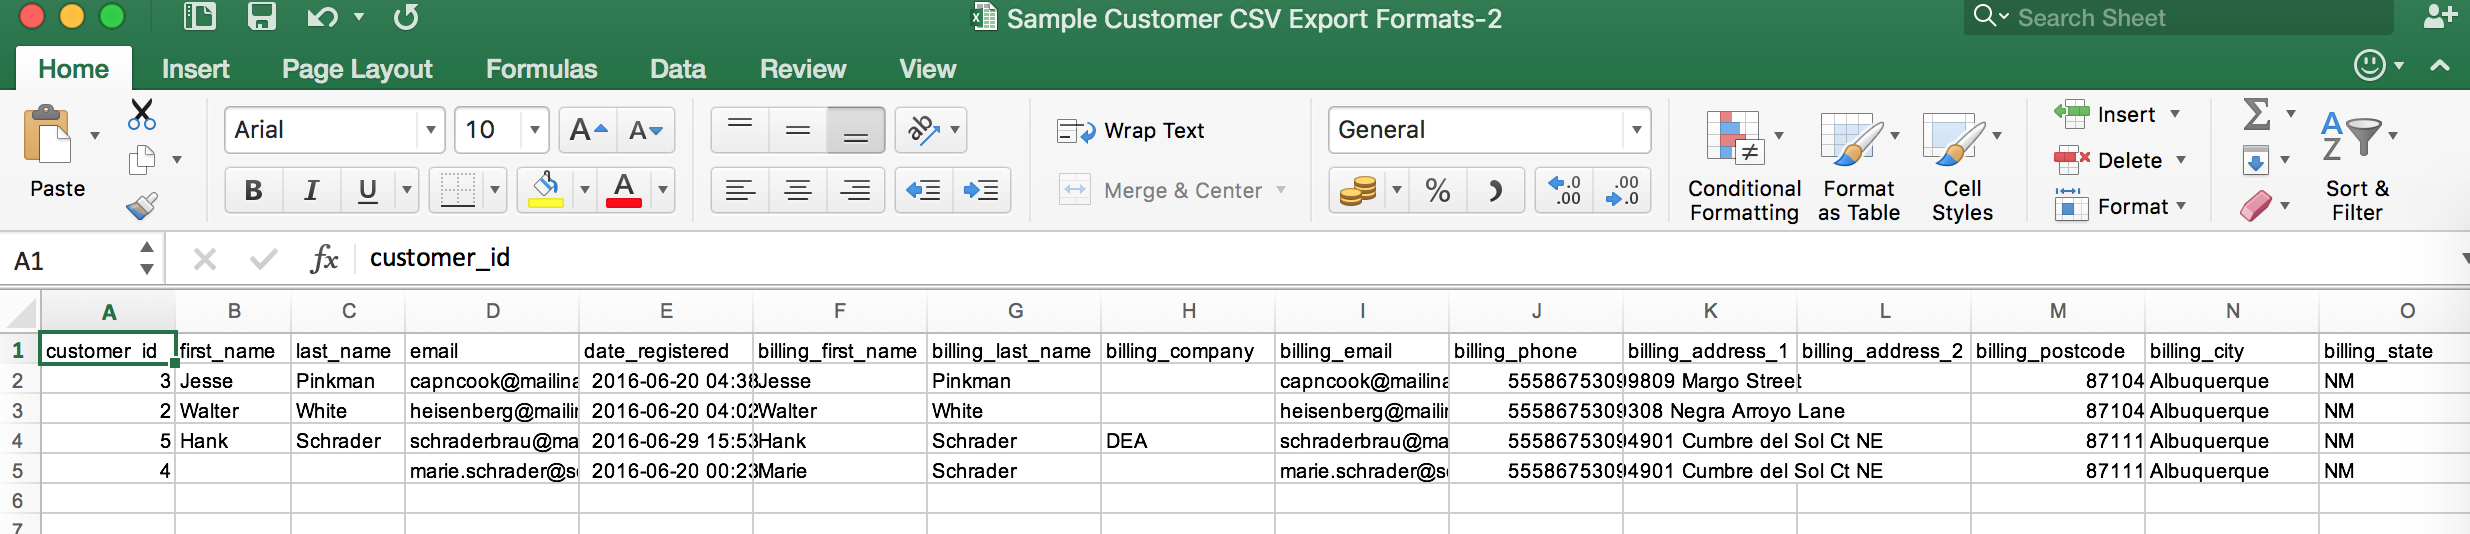
I will replace last customer with my own for testing purposes.
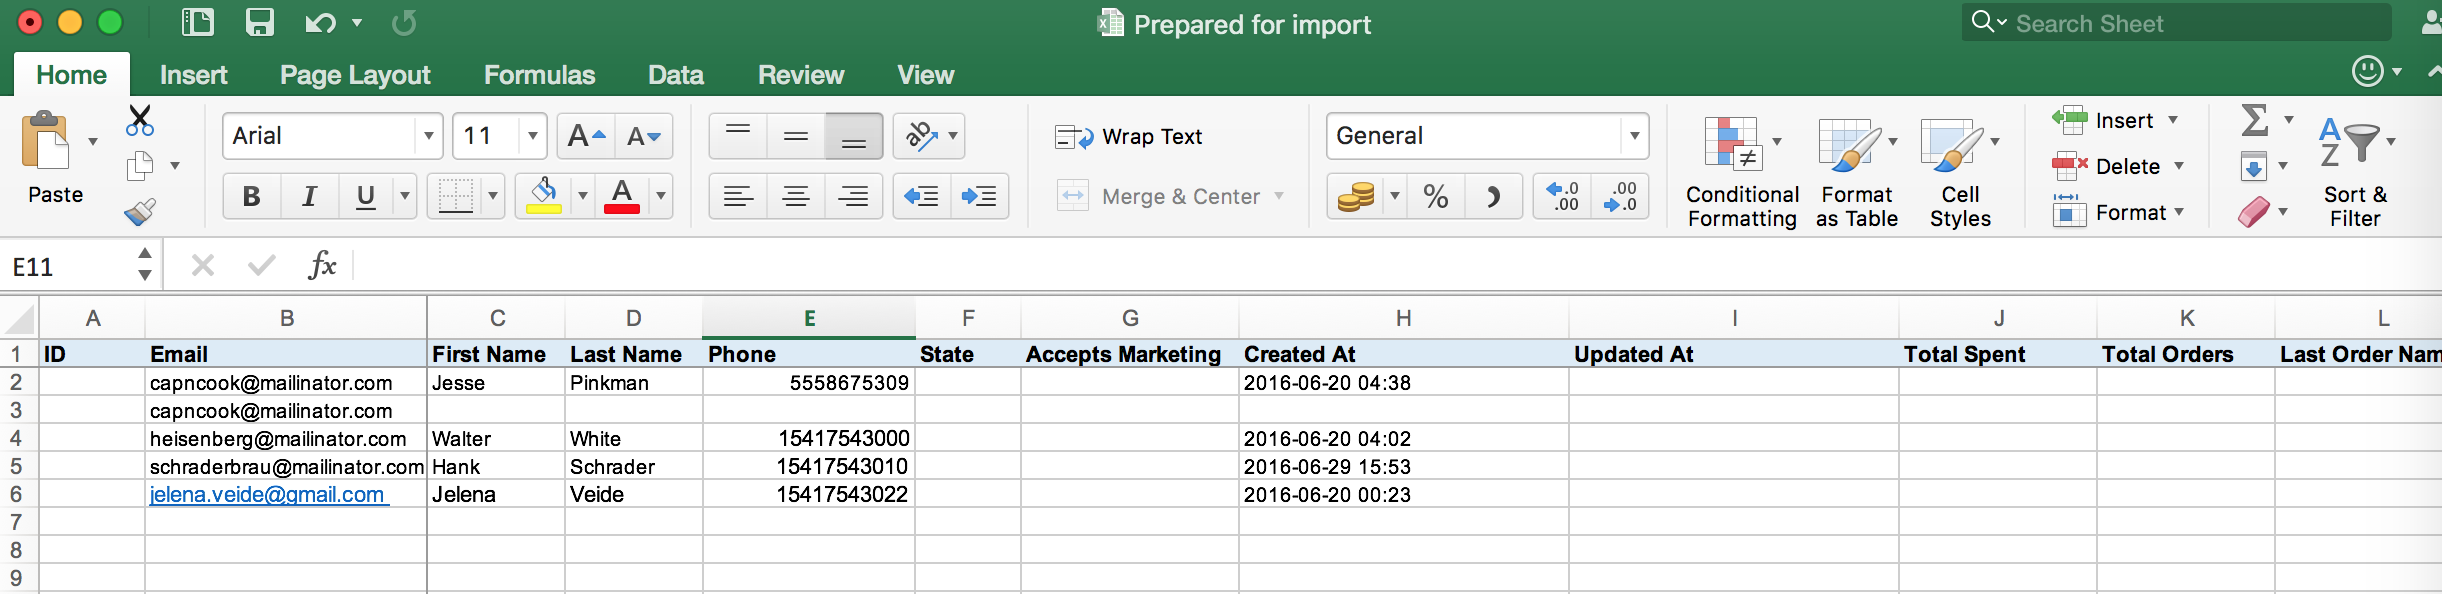
2. Prepare data in Excel for import
Prepare data file for the import. App needs particular format for importing customers’ data. It can be found in the template. You need to transfer data from your export file into import file or edit exported file to mach that template.
- Columns ID, State, Accepts Marketing, Updated At, Total Spent, Total Orders, Last Order Name, Note, Verified Email, Tax Exempt, Tags, Address ID can be left blank or deleted to make things more simple.
- All other columns I fill in with the copied data from the sample file. In this Sample file all customers have the same Phone number. Shopify will, not allow to import them like that. Each customer should have unique phone number.
- If you have several addresses for one customer, for example, shipping address and billing address, you should provide them in different rows. Add another row and fill in Email column with the customers email, and second (third, forth, etc.) address. In my example, first customer has different Billing and Shipping addresses, so, I added another row with the same email and fill in only address columns.
- Address Is Default should be filled with TRUE, if there is more then 1 address for the customer. One of the addresses will be default. In my example, second address for the first customer will have empty value in this column, as this will be additional address.
- Created At can be filled with date_registered or left empty.
- When data is ready, I named the the sheet “Customers”.
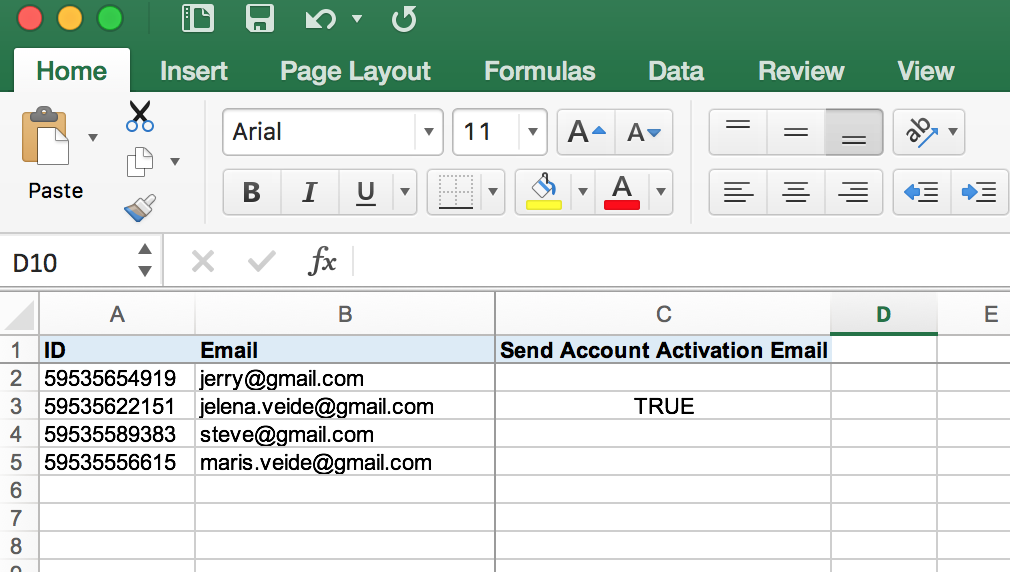
This is very easy yo invite you migrated customers to activate their account. To do that, just put value TRUE in the column Send Account Activation Email. Email will be sent during the import. You also can do it later, if you want.
- Here is example of my file:

- I will invite only one customer to activate account:

- Save your file. If using a CSV file then make sure that filename contains word
customersand if using an XLSX file then the sheet/tab name needs to becustomers. This is needed so that the app can properly recognize the import as Products!

3. Import customers with the app
Now we just upload and import prepared file with Bulk Import Export with Excel app.

Then go to Customers and check.
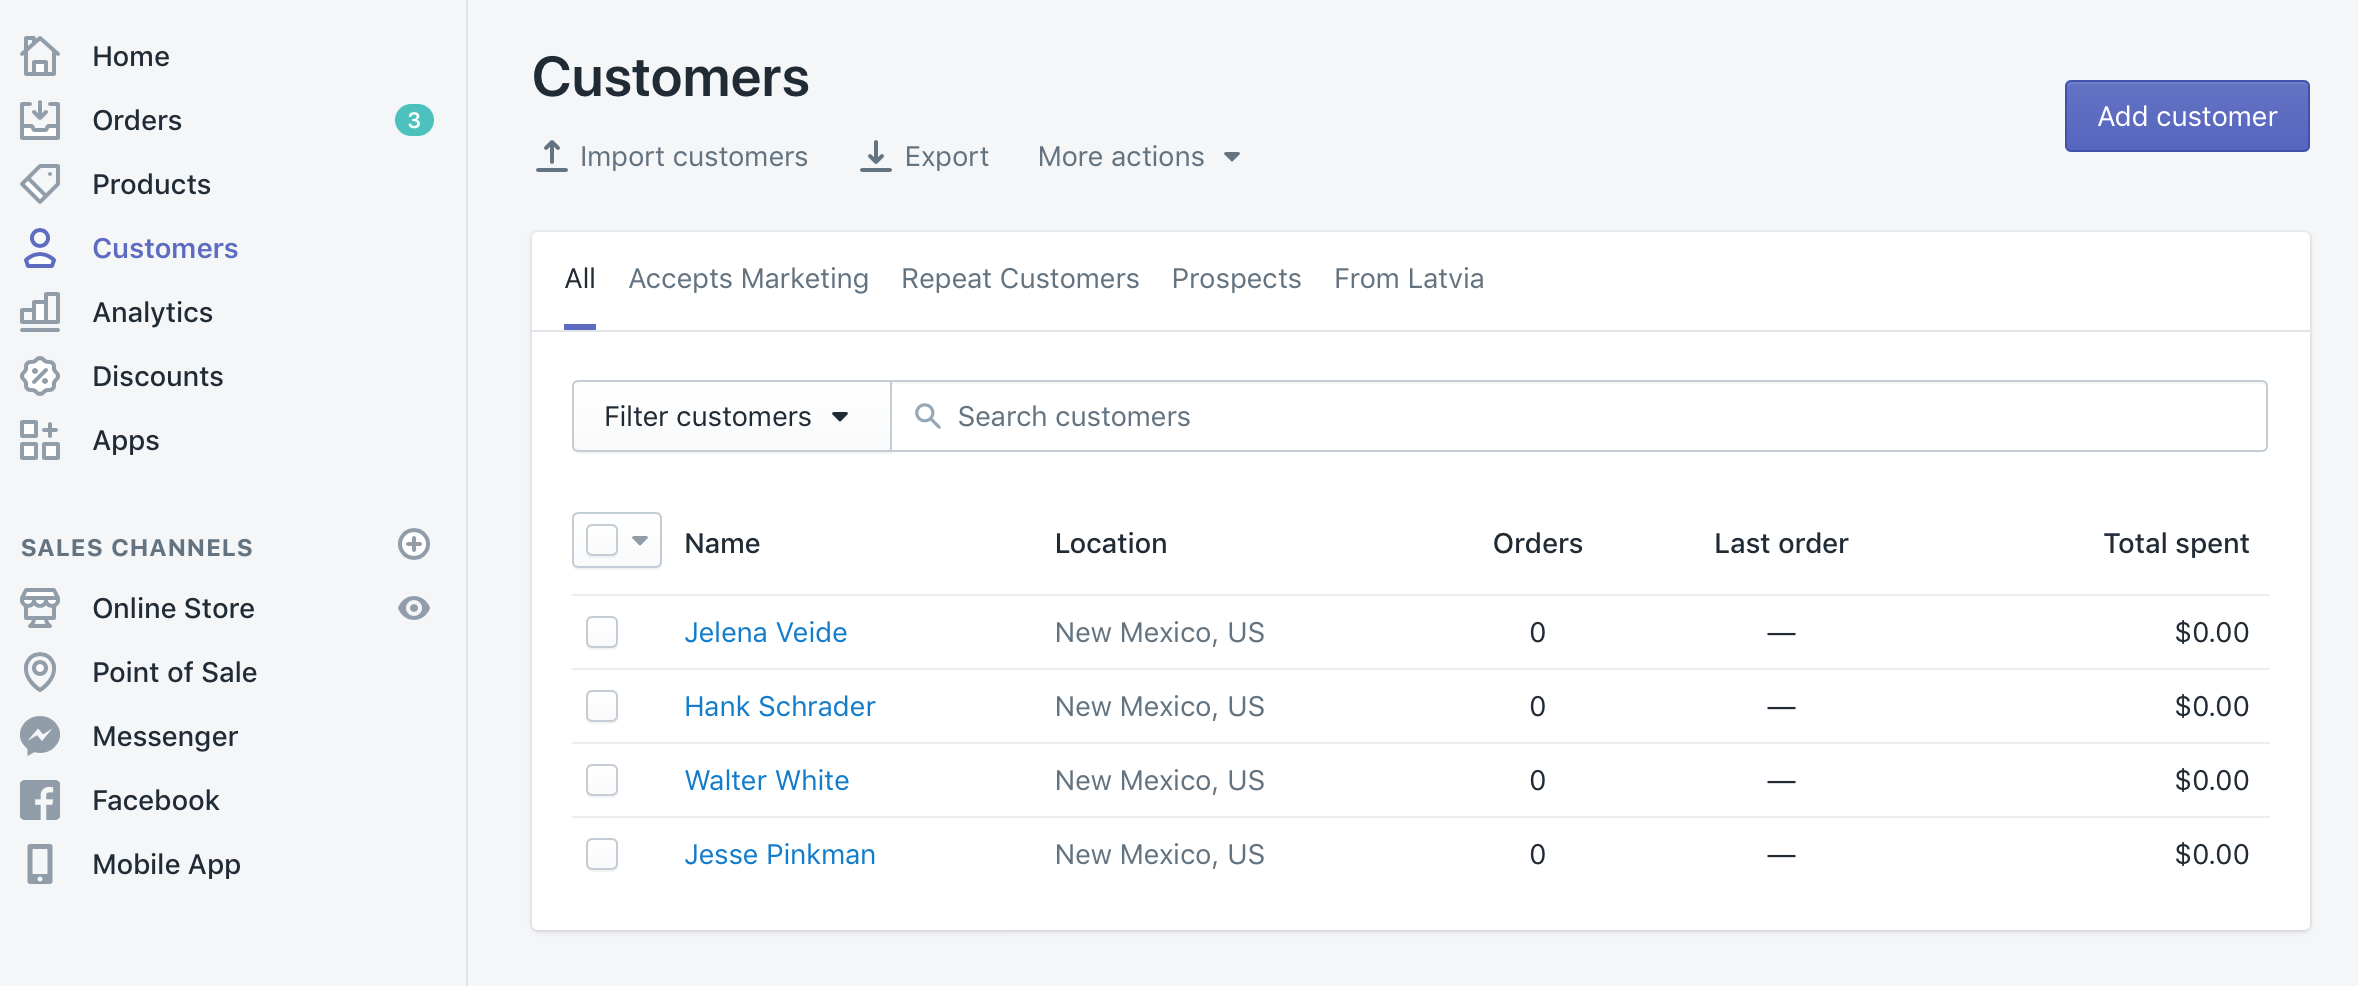
Yuhuuu! Customers are imported!!!
And I have received Account activation invite.
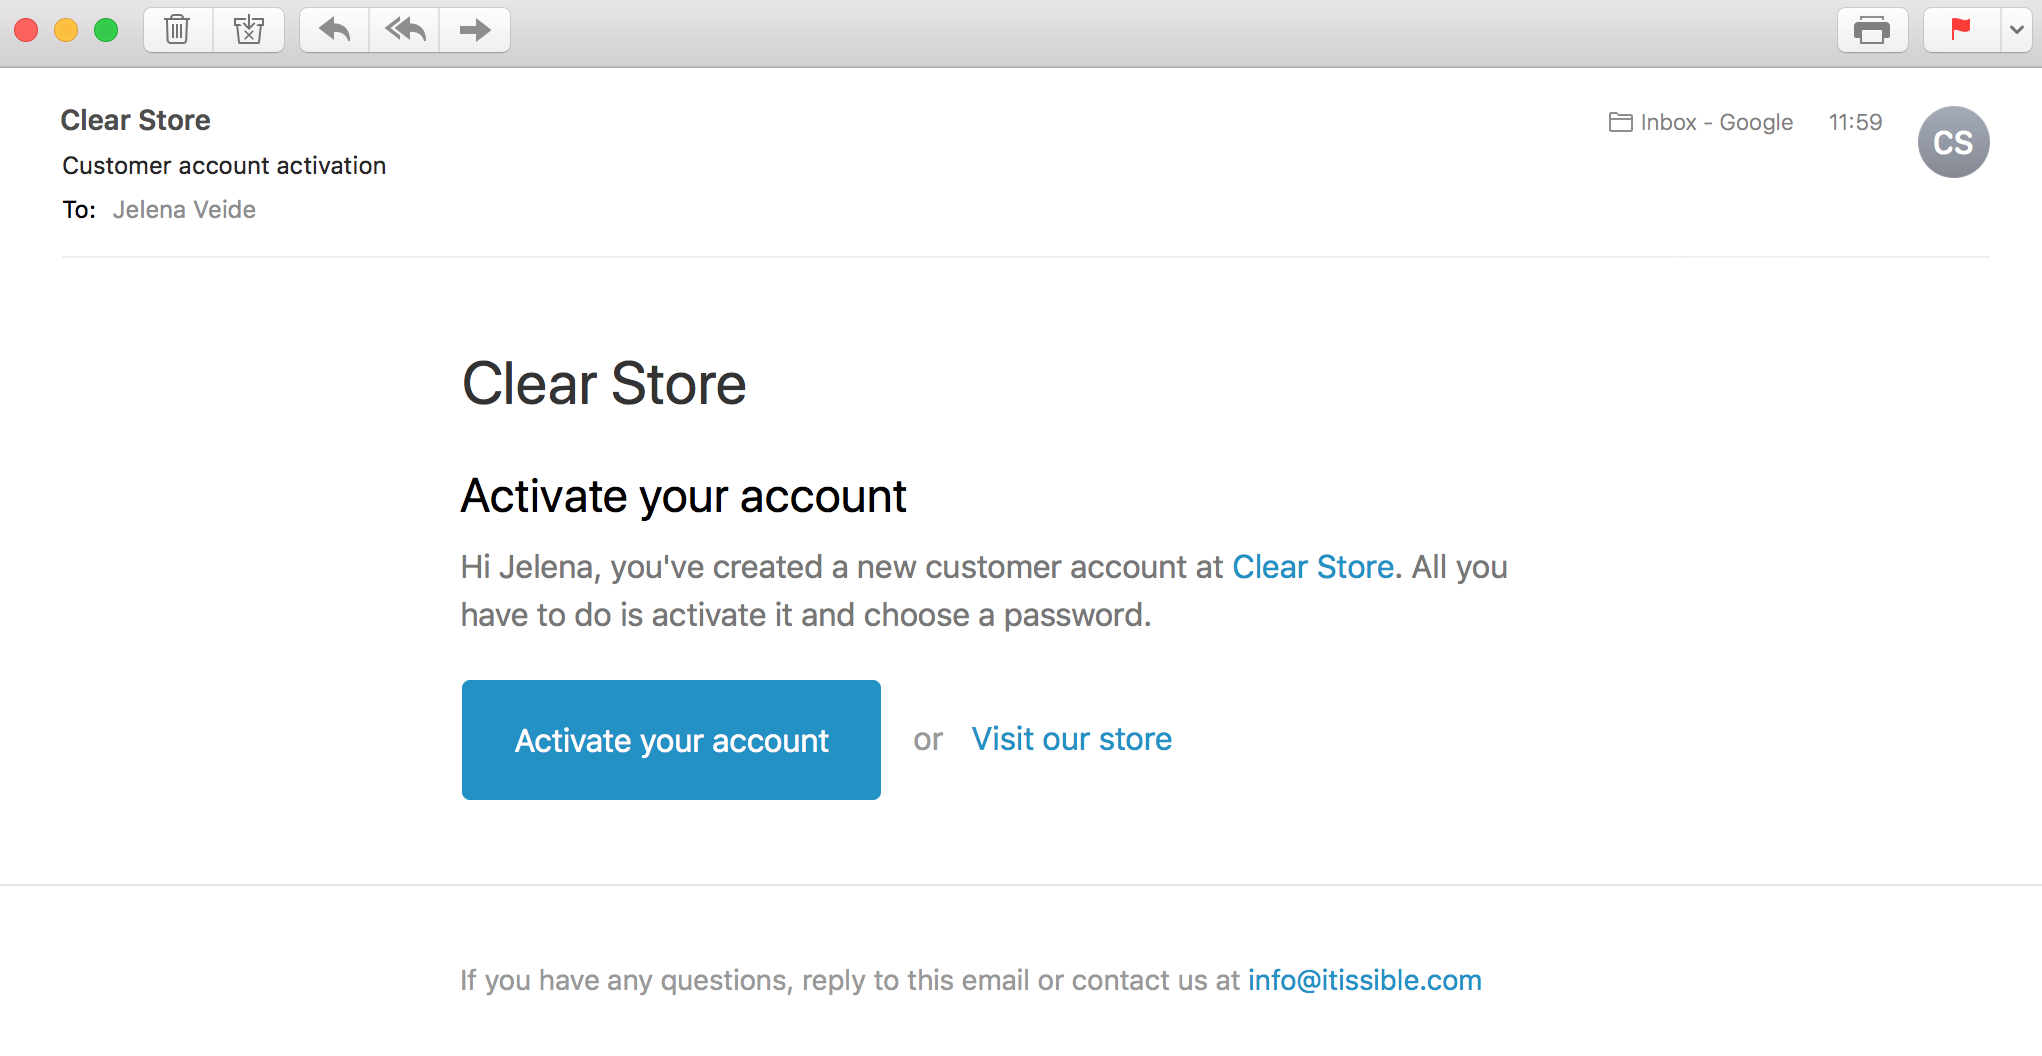
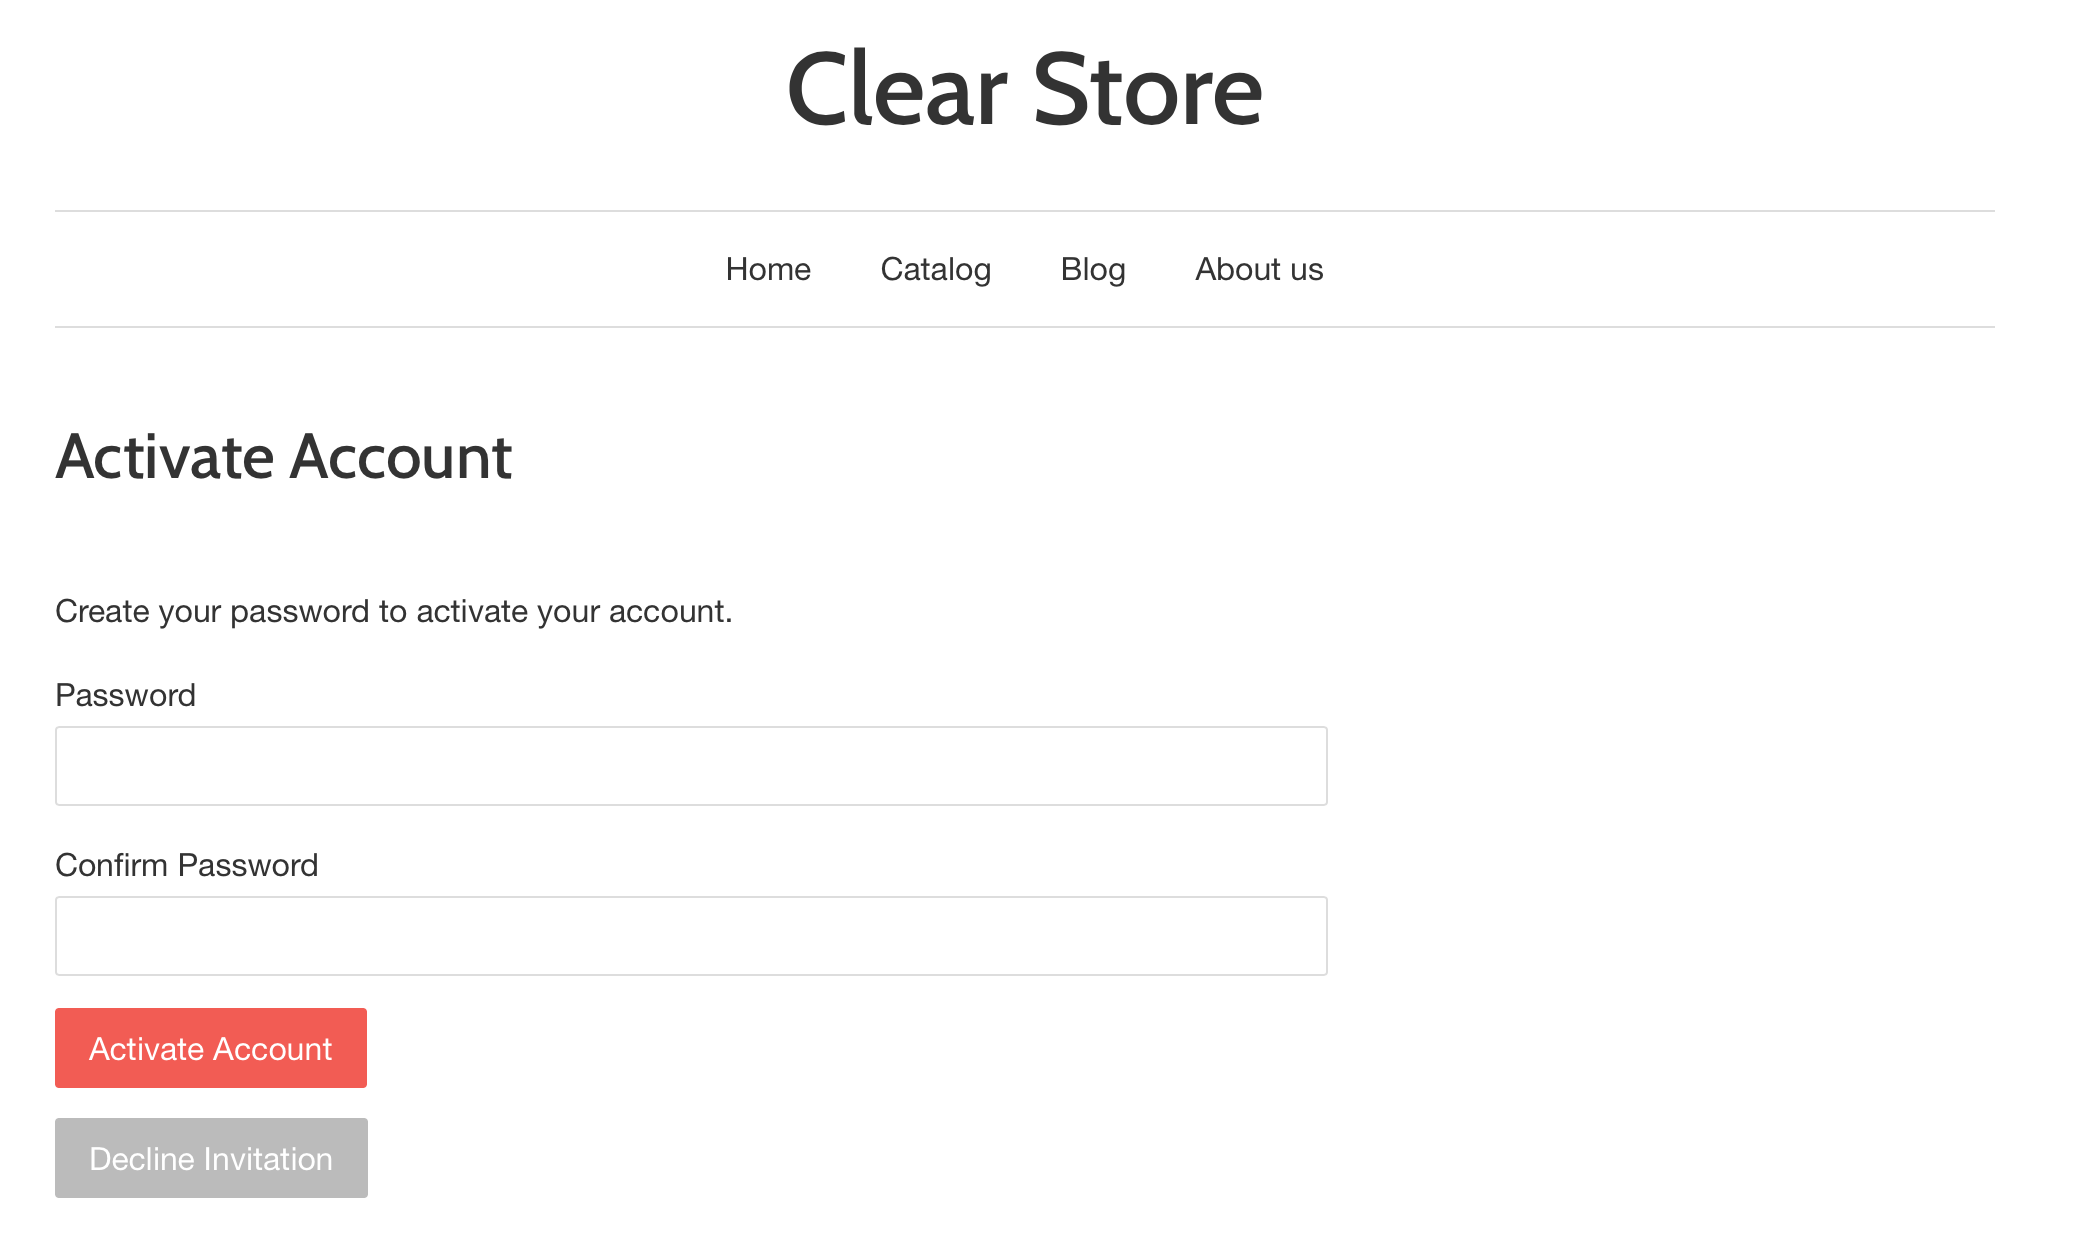
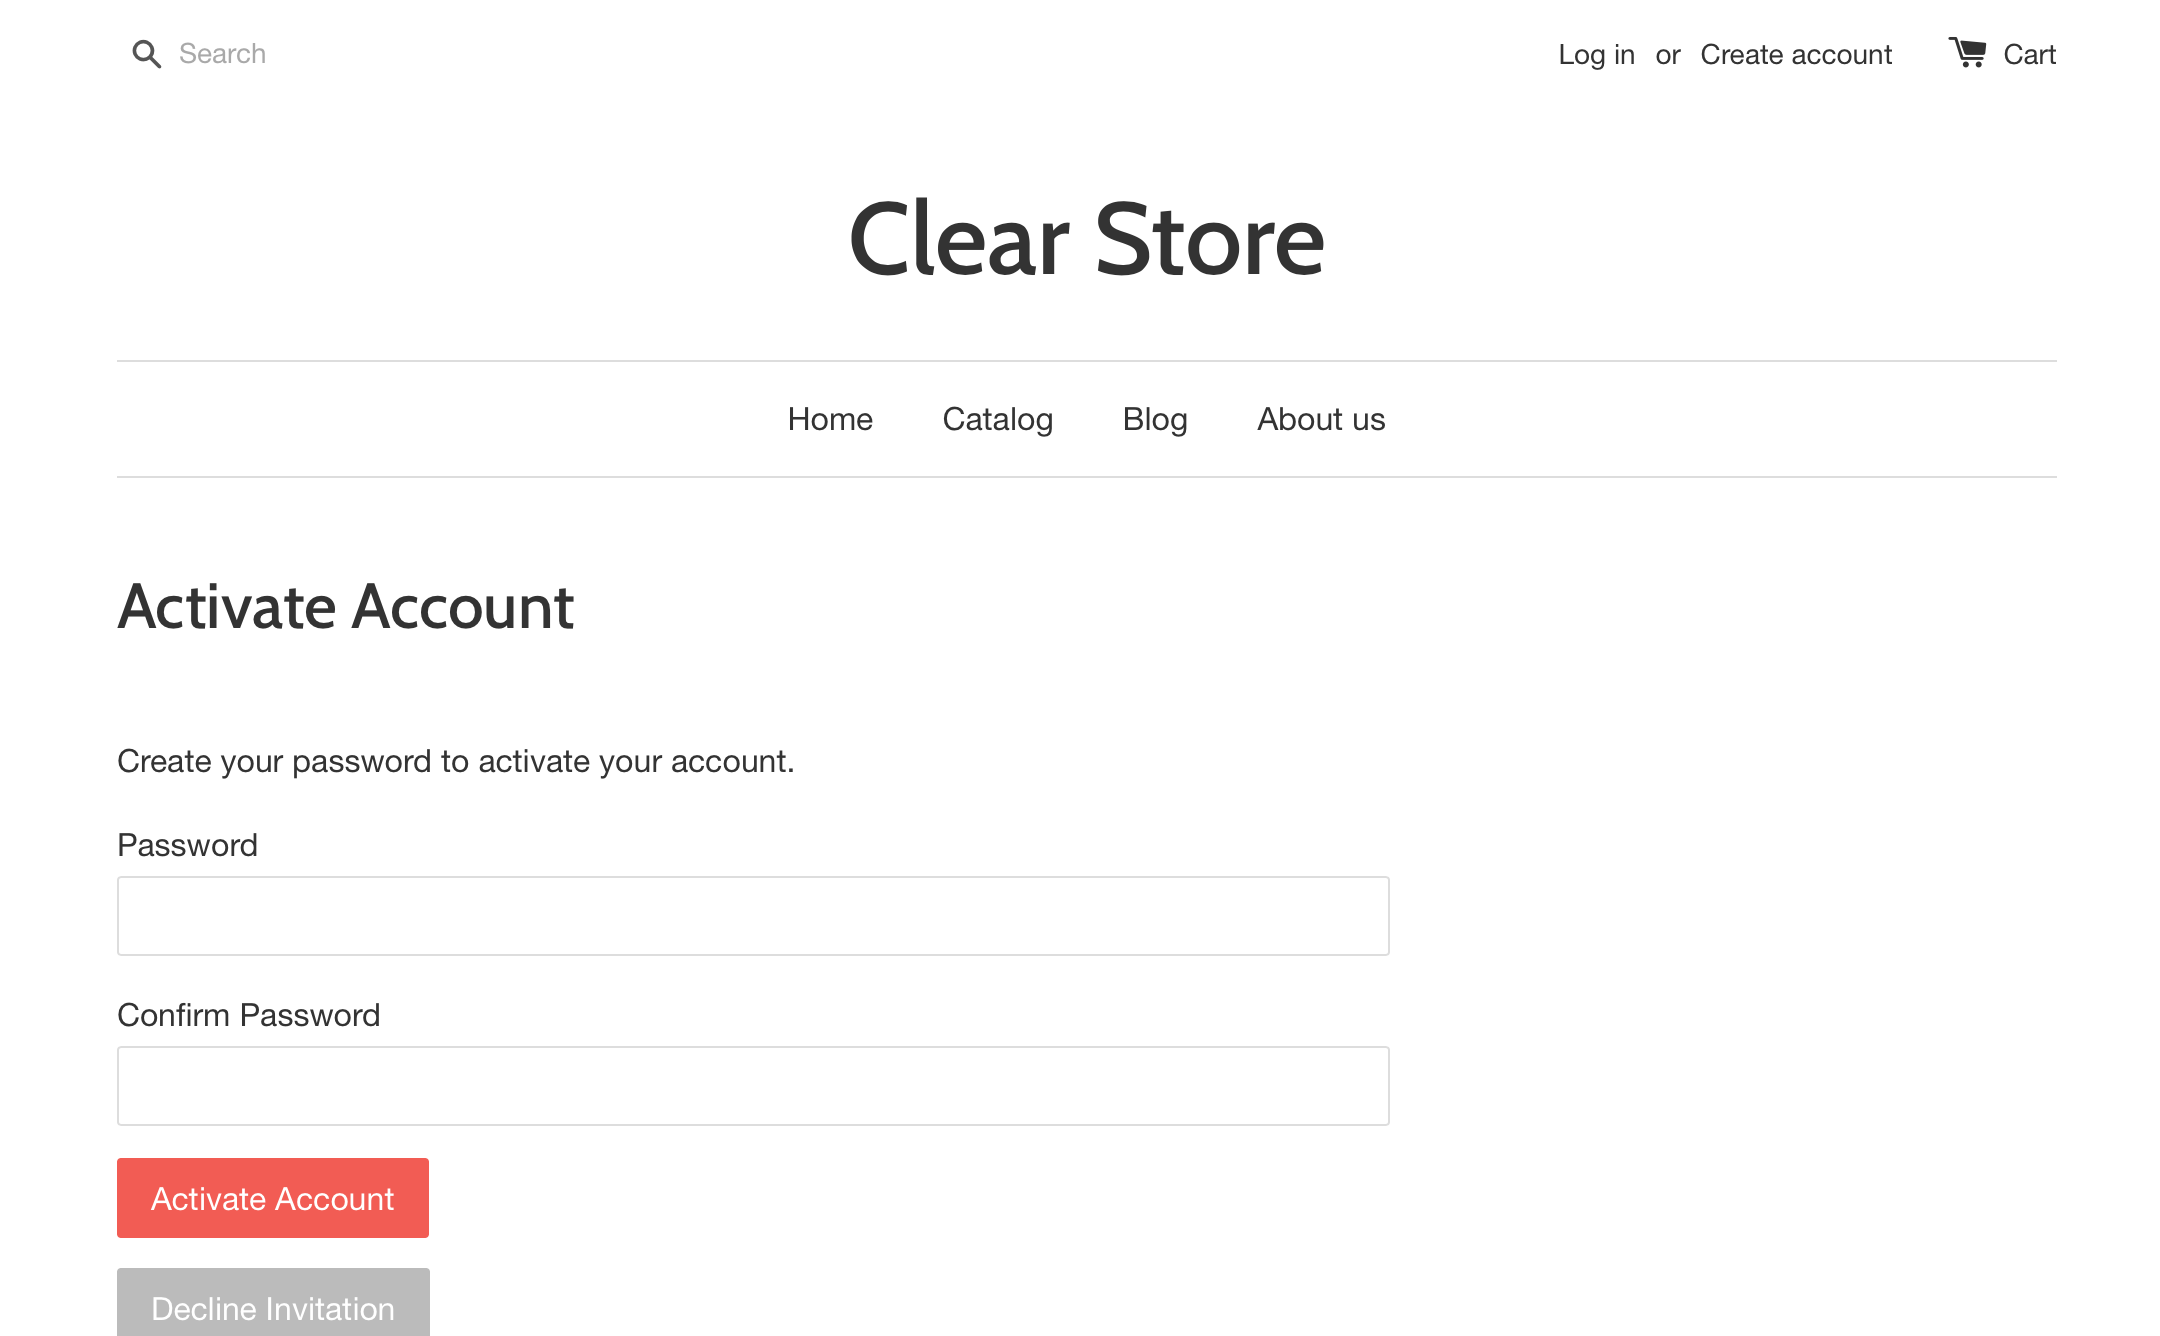
By clicking on the Activate your account customer will get to Account activation page, where he/she can create the password and activate the account.
4. Alternative ways to send Activation emails
Manually from the Shopify Admin
If you do not have very many customers or you really want to invite them manually, Shopify provides the functionality to send Account invites from the Admin.
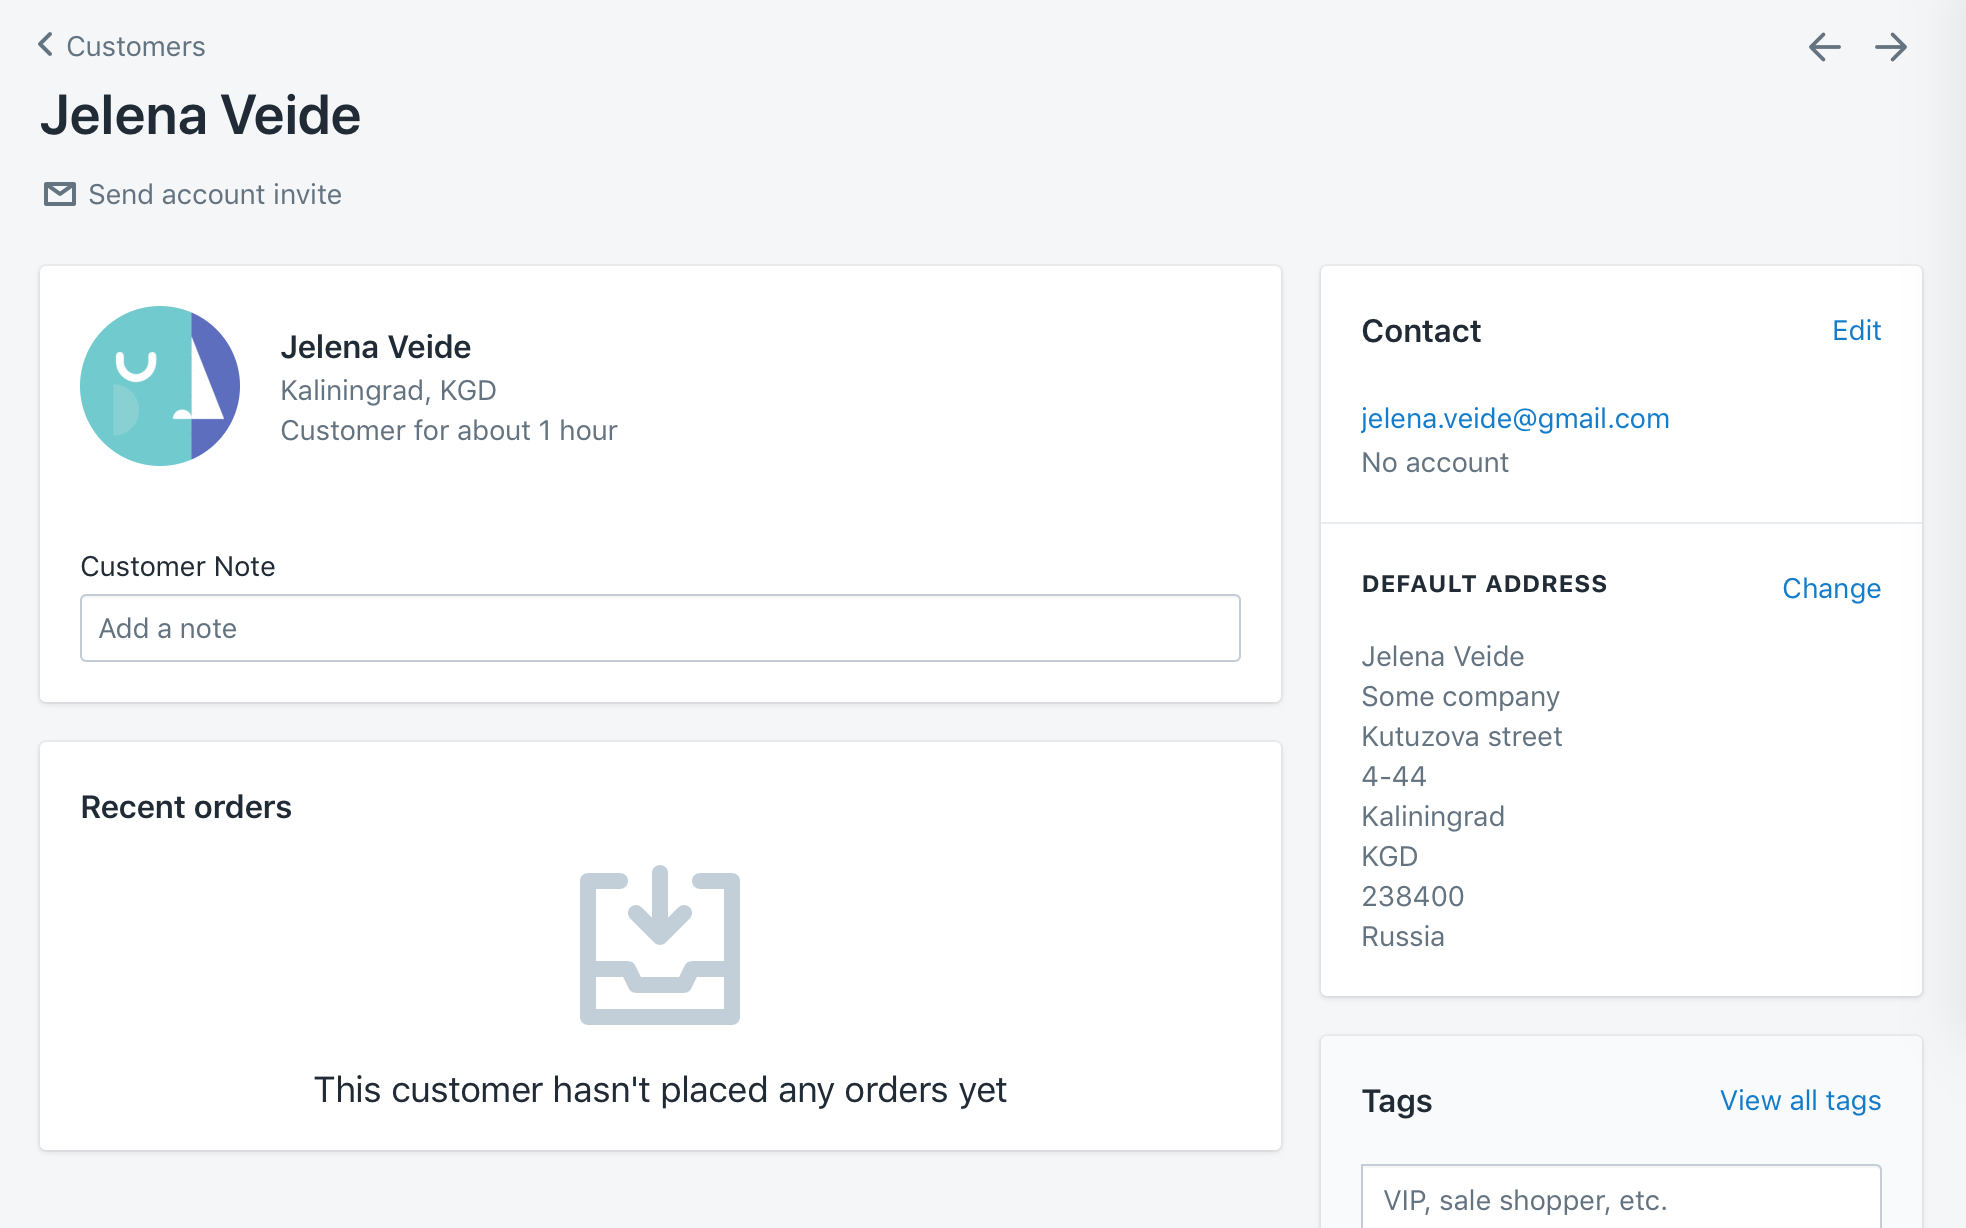
To do that, open the data of the customer you want to invite. Under his/her name you will see the link: Send account invite:
Click on Send account invite and you will get the form for email: 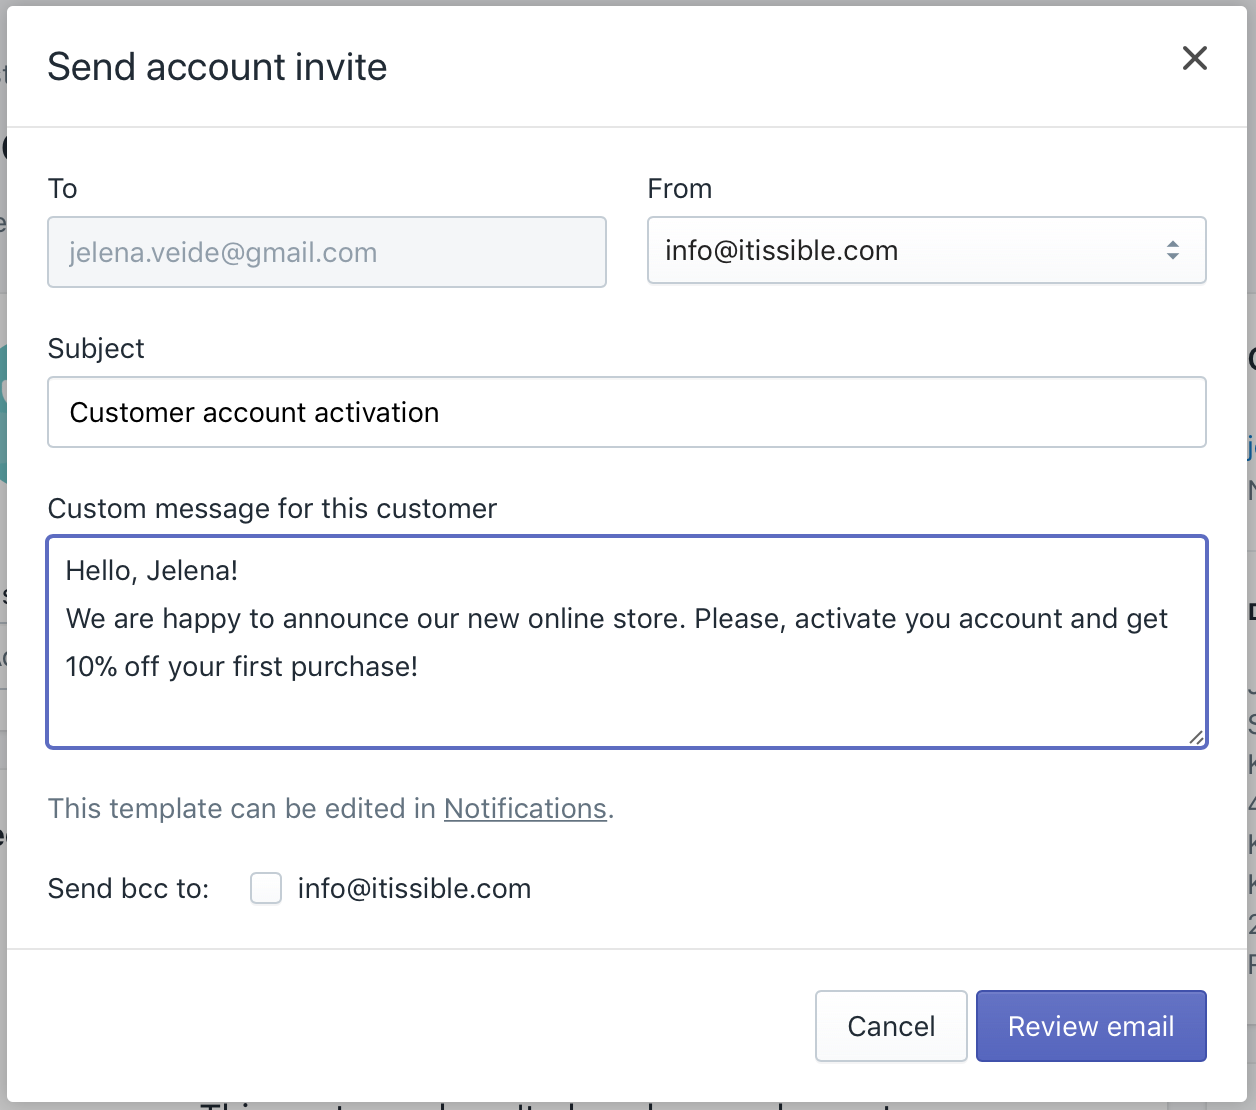
I filled it in with information I want to provide to the customer. Click on Review email: 
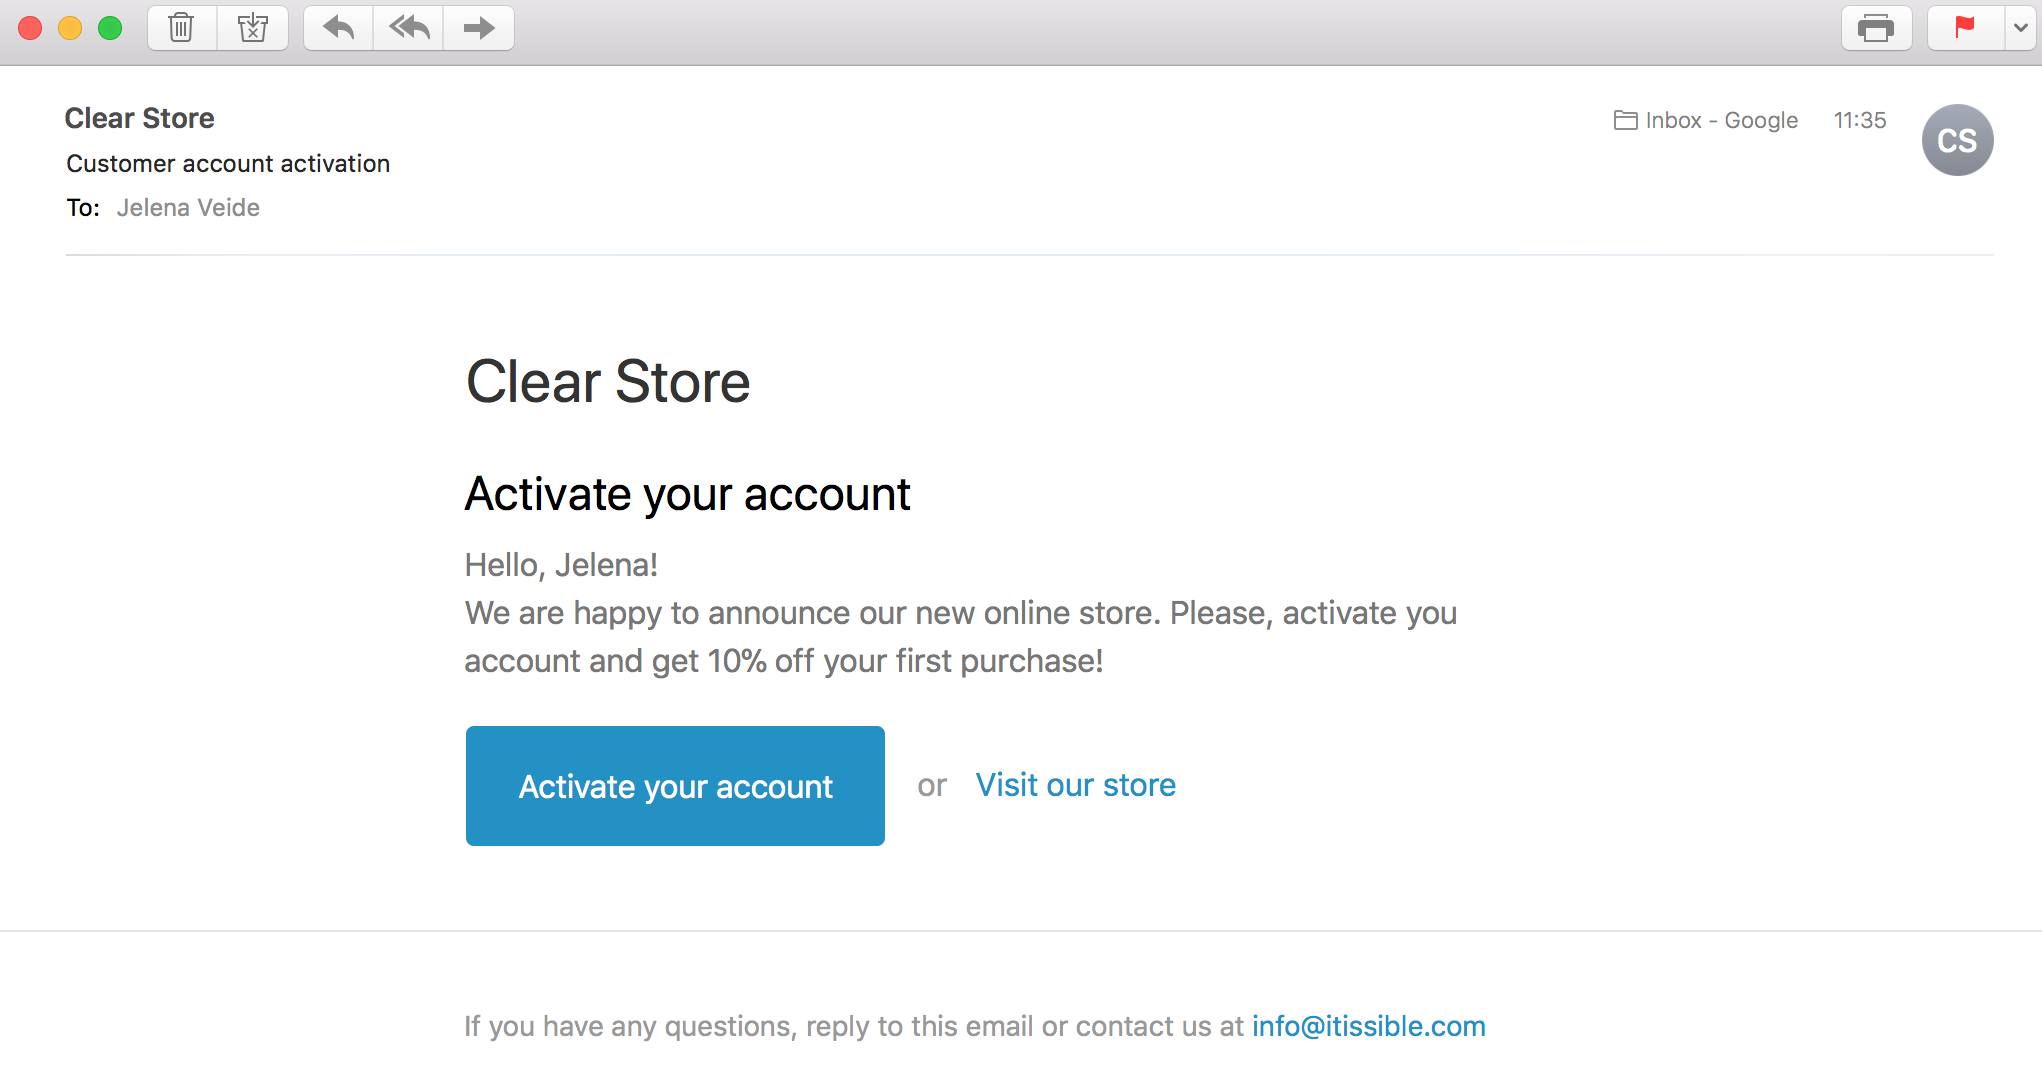
Click Send notification and you will get the email with activation link. You can test this and activate the account.
Clicking on Activate your account will bring you to the Activation page:
Doing like that you can send an Activation email to one customer at a time. And if you have 100 or 1000, or even more customers?
Send activation invites with the app
If you do not want to send Activation emails during the initial import, you can do it later with the app in bulk.
Just export your customers with Bulk Import Export with Excel app with only Basic Columns selected.
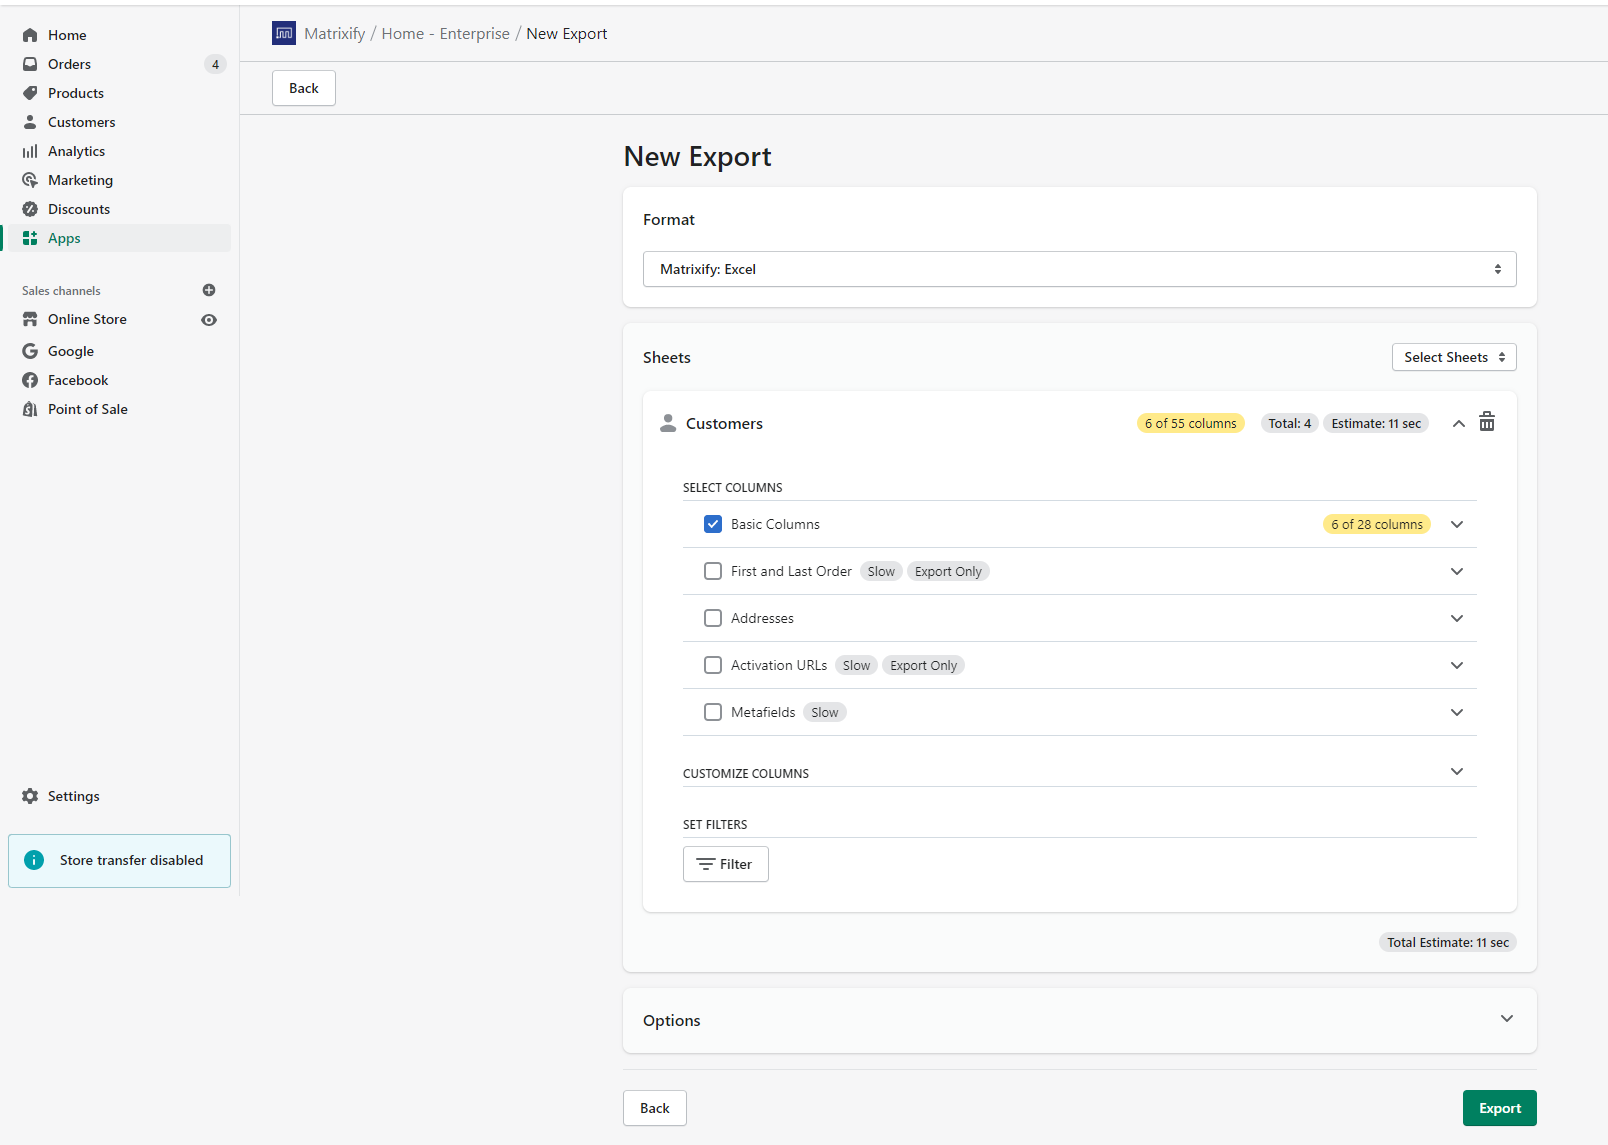
Download exported file and edit it.
Basically, you need just 2 columns here: ID and Send Account Activation Email. I just want to make it more visually understandable, so I keep Email as well. You also can keep only those customers that you want to send Activation Emails to. Again, I keep all customers just to make it simple, but it makes sense to send those e-mails only to those Customers that have State column value “disabled” – because those are the ones that are not yet activated.
Import the file.
As soon as data is imported, customers will get Account Activation emails.
What’s next?
If you want to know, how to send account activation invitations with MailChimp (or another mass-mailing platform you use), read this tutorial: Send activation invitations with MailChimp to your newly migrated Shopify customers.


