
With Matrixify you can securely save your FTP/SFTP servers and their users so you do not need to fill in all details for each import and export, only specify the path to file/folder.
To save your servers, head into Matrixify app -> Settings in your store.
Find Settings section Shopify Side menu for Matrixify app:
Scroll down to the “Servers” section of the page.
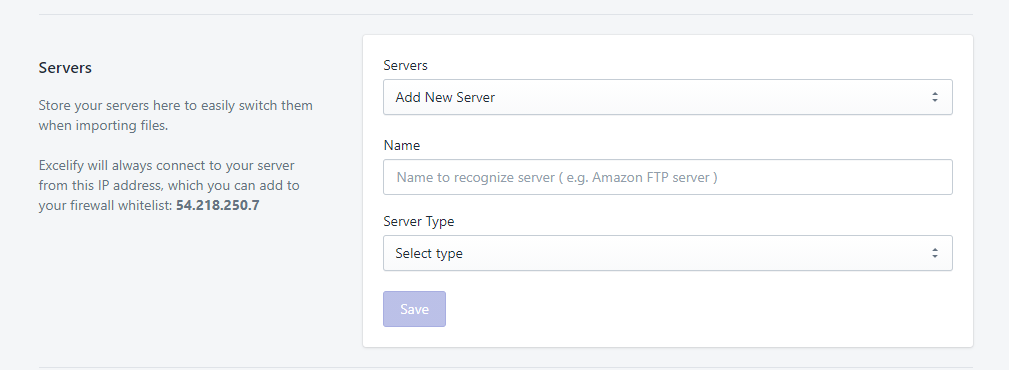
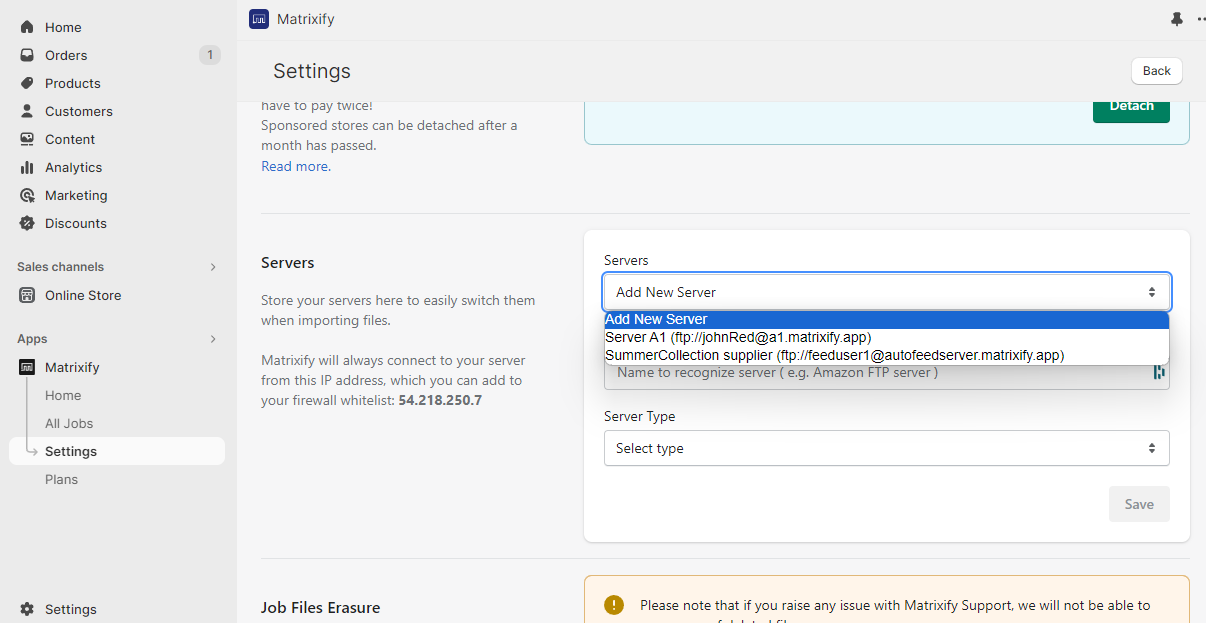
Servers – In this first drop-down you can select and edit existing servers or select “Add New Server” to create and save a new server.
Name – Give a name for each server so that you can recognize it when creating an import or export job. For example, if you have one server but with multiple users, then set up multiple servers with a different Name so that each user can select a server that has correct user credentials stored.
Server Type – Select what type of server this is, for example, FTP or SFTP. Each server type might have different fields needed to save the server.
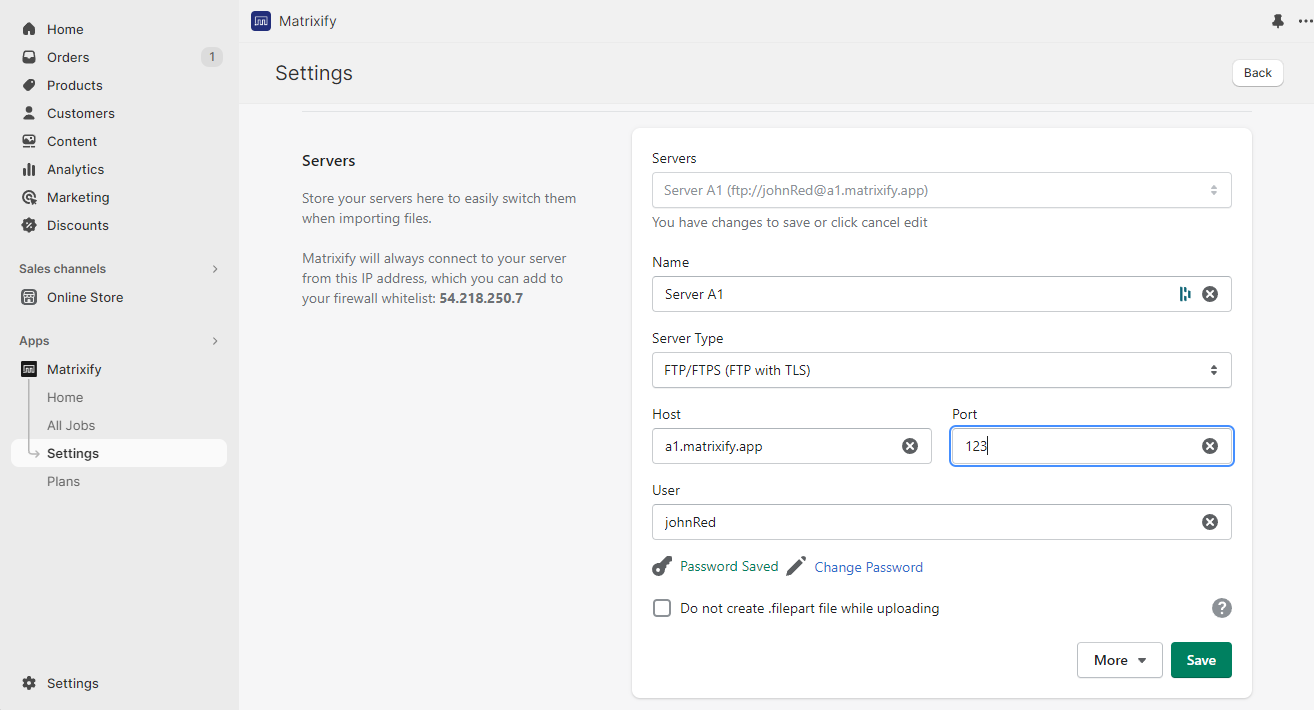
FTP
When creating an FTP server connection, you would need to fill in the following details:
- Host – your servers address, for example, “ftp.my-data-server.com“
- Port – If using default port “21” then can be left empty, or you can specify a port number if needed
- User – username
- Password – password of that user
Matrixify also supports FTP over TLS – when import or export job runs at first we try to connect using TLS encryption. If it doesn’t succeed, then we try without the TLS.
SFTP
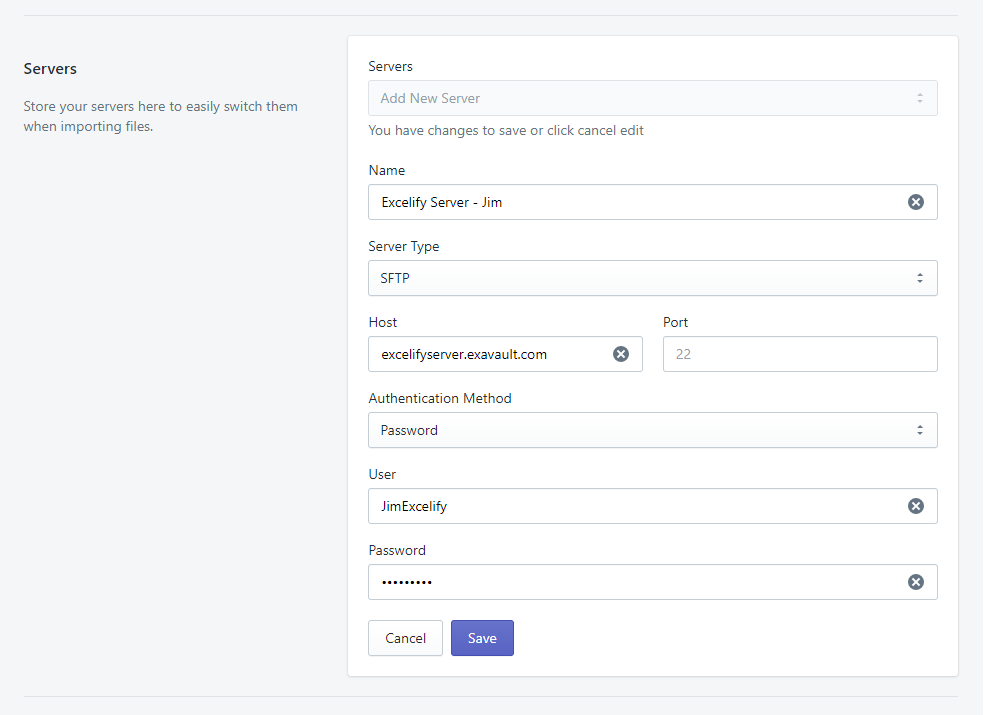
When setting up an SFTP server connection, you would need to fill in the following details:
- Host – your servers address, for example, “ftp.my-data-server.com“
- Port – If using default port “22” then can be left empty, or you can specify a port number if needed
- Authentication Method – You can select if the user will connect via “Password” or “Private Key“
Password
If using the password authentication method, then you need to specify the username in the “User” field and users password in “Password”
Private Key
You can also set up an SFTP server where the user uses a Private Key authentication.
In this authentication method, you need to specify the username in the “User” field.
Copy your user’s private key in the “Private Key” field so that the app can read and write files to the SFTP server.
Your Private Key is saved with us in an encrypted format.

Updating server details
You can also update your server details if they happen to change.
In the same Settings page, from the servers dropdown select the server for which you wish to update connection details.
Change the fields that you need and press the Save button to save your changes.
You can also update these details while your import/export jobs are running.
When Matrixify needs to connect to the server, it will dynamically take connection details from what is saved in the app settings.
Matrixify IP address for firewall whitelisting
The Matrixify app will always connect to your server from the IP address 54.218.250.7, which you can add to your firewall whitelist.
Good to know!
- Check out the Matrixify tutorials on how to import/export from your servers.
- You can always edit saved server details by going into Matrixify Settings -> Server section and selecting the server to edit.
- When generating your Private Key, for it to work in the app, it needs to be generated without a passphrase.
- By default – when uploading data to your server, app will first upload the file with an
.filepartextension and once upload is finished rename the file to the correct extension. This is needed so that file is not being taken and processed by your server-side scripts before the upload has finished. When setting up server, you can select checkboxDo not create .filepart file while uploadingto disable this feature and upload directly with the correct extension.


