
The ability to export Shopify data to an SFTP server is crucial to a lot of stores. Using servers helps with automation tasks, synchronization between internal and external third-party systems, and many more.
Let’s look into how to set up automatic export from your Shopify store to the SFTP server.

Note – video content might be outdated and show a different approach to the one explained in the more up-to-date tutorial below.
Both approaches should still work in the app.
This is how to Export from Shopify to an SFTP server
- Set up your server in Matrixify app settings.
- Create new export in the app and select what to export.
- Apply export Options to automatically repeat export and upload to SFTP server.
- Start your export and enjoy!
1. Set up your server in Matrixify
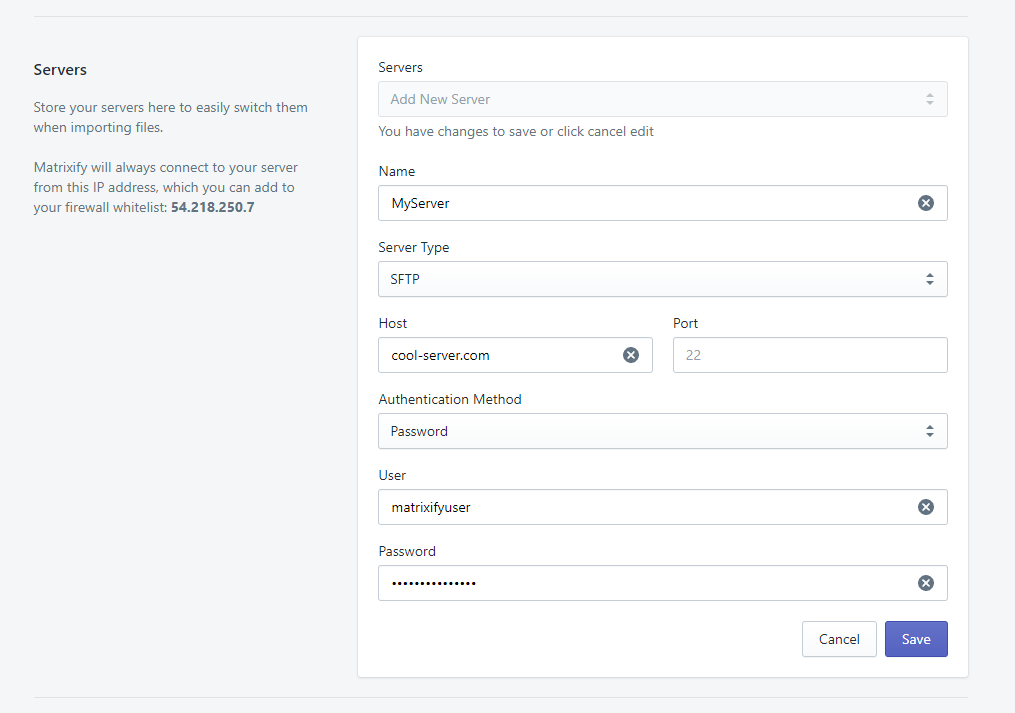
Open the Matrixify app and head to the Settings page.
On this page, you can find the section “Servers” and there you can create a new server to save your user credentials. You can use two authentication methods – password and private key.
Find more details about how to set up a server in Matrixify “Set up Servers for importing files to Shopify” tutorial.
2. Create new export in the app
Once you have your server setup saved you can start setting up your export.
Go to the Matrixify app Home page and in the “Export” section create new export.
First, you will need to select export format and data to export, see our “How it works” page for more details on setting up what to export.
3. Apply export Options to upload to SFTP server
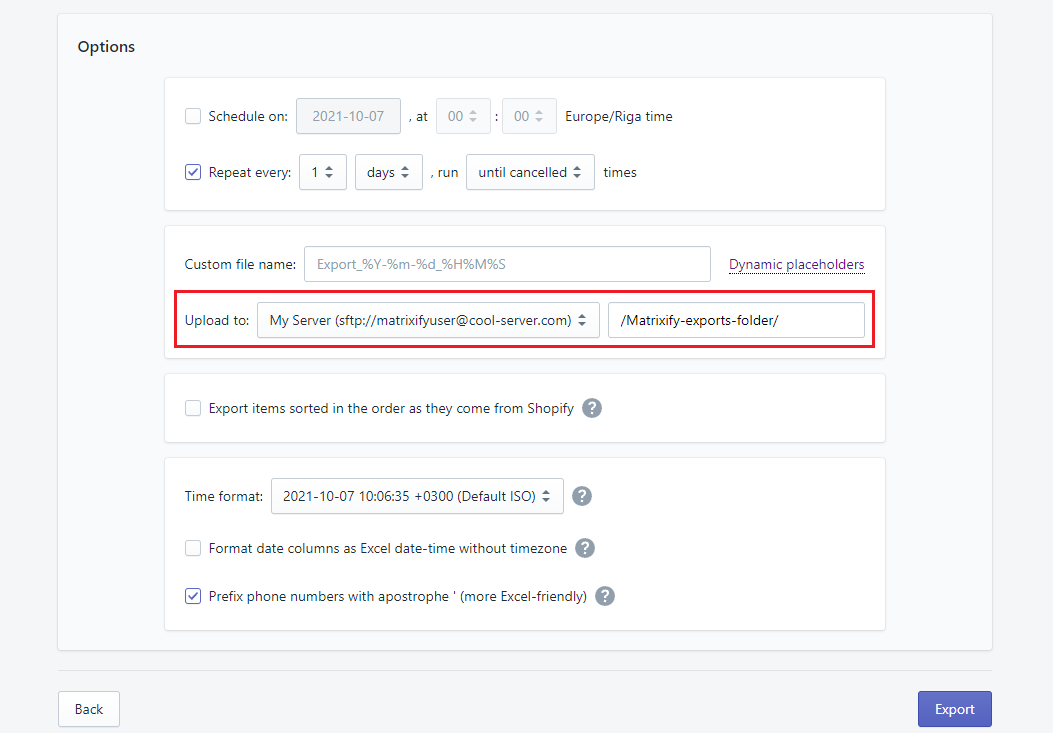
Once you have selected what to export, in the export options you can set up how your export should work.
With Repeat every: and Schedule on: options you can set up when the job should first export and how often after that it should repeat.
If you wish for the first export to run immediately, but repeat every specific amount of time, do not select the Schedule on: option.
In the Upload to: option drop-down selects the server that you have set up in the app.
In the path, field enter the folder to which the app should upload data.
If the server is not set up in the app settings
You can also select to upload to “Full URL” and enter the full SFTP URL.
The URL should contain user credentials and the full path to the file in the following format:
sftp://user:password@server:port/path/to/directory/
For example:
sftp://matrixifyuser:pass12345@cool-server:22/Matrixify-exports-folder/
Read our “How it works” page for more details about export options.
4. Start your export and enjoy!
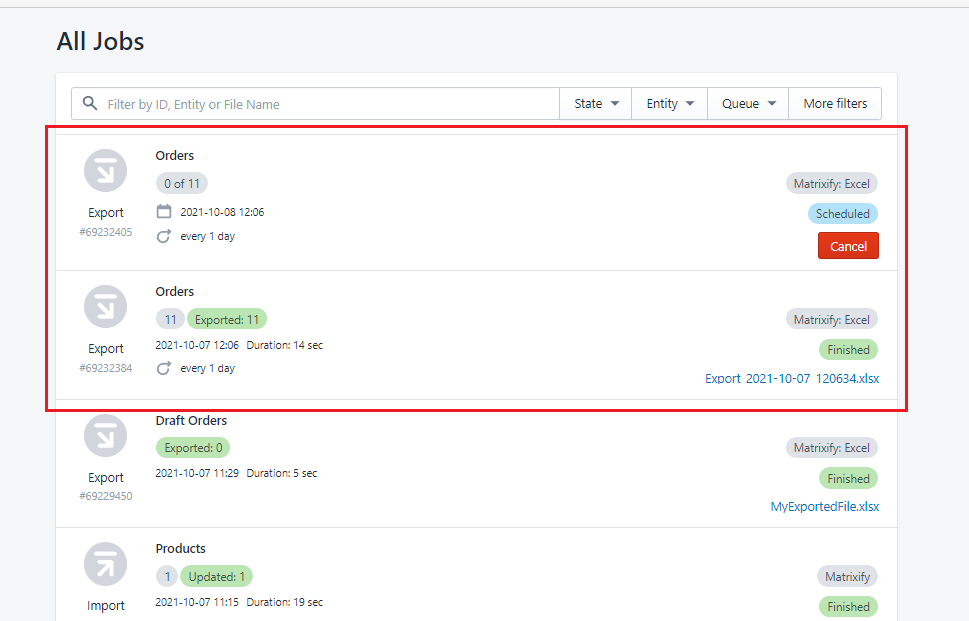
When everything is set up, click on the “Export” button in the app to start the export.
Once the export finishes, you should see the file uploaded to your SFTP server in your specified folder.
In the apps All Jobs page you can see all your past, running, and scheduled import and export jobs.
Good to know
- If the user is e-mail address then replace the “@” symbol with “%40”.
- If the password contains # or @ symbol then please create such password which doesn’t contain those symbols as those are special characters for the URL and will cause confusions.
- You can import any of the file formats which are supported by Matrixify.
- See this tutorial on how to import from an SFTP server to Shopify.
- See other SFTP related tutorials.


