
In this tutorial, we’ll be exploring the process of using the Matrixify app to group and merge multiple products into a single product listing with multiple variants.
Using the Matrixify app, this process becomes much simpler and more efficient. Each grouped product will have variants with its own SKU, Barcode, image, quantity and so on.
That way you as a Merchant can improve the buying experience for your Customers if you have many similar products that differ just by some attributes or options, like Color or Size.
So, let’s dive in and start grouping your products into products with variants!

Steps to group Products into Products with Variants in bulk
- Export Products using Matrixify.
- Add data to Variant columns.
- Mark existing Products with the Tag “old”.
- Import updated file into Shopify using Matrixify.
- Delete the old Products.
1. Export products using Matrixify
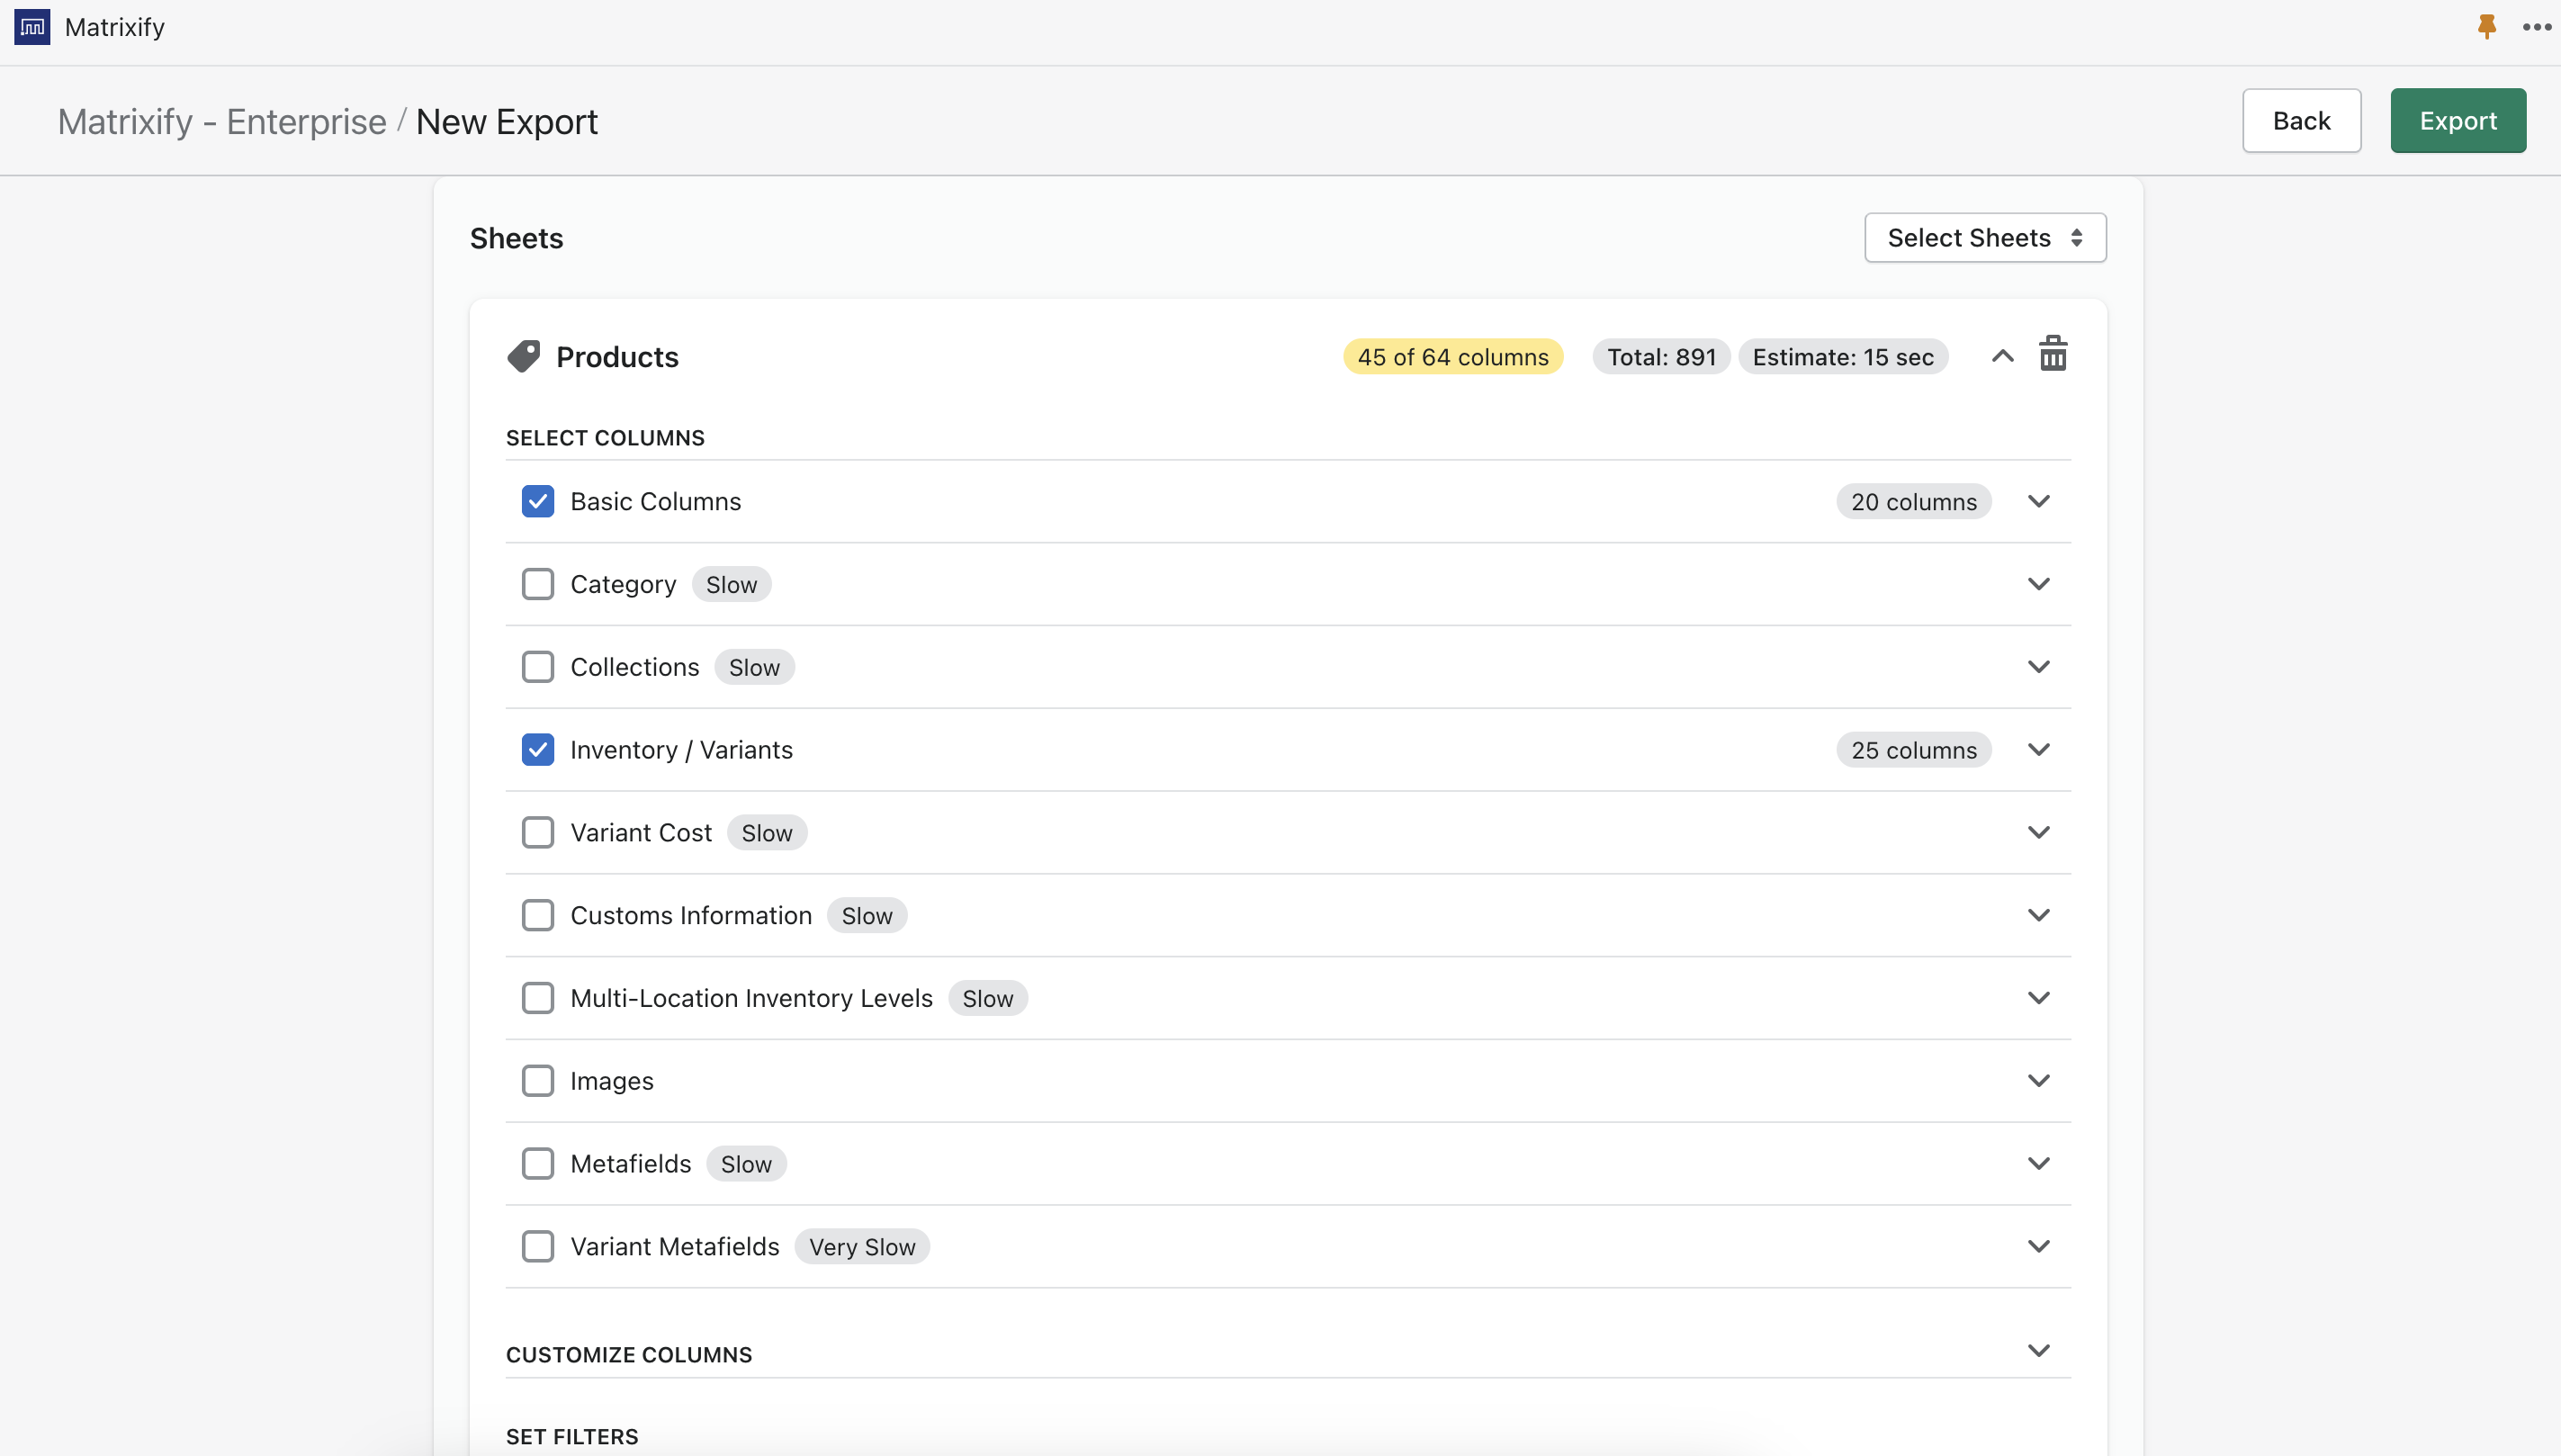
Go into the Matrixify app, create a new Export and select to Export “Products” from the “Select Sheets” drop-down.
You do not have to export every column , you only need to export “Basic Columns” and “Inventory/Variants”. Your New Export set-up should look like this:
If you do not need to group all Products in your store you can apply filters to Export only the Products that you need. You can set filters by pressing the “Filter” button when creating your export. Read more about Filters in Matrixify “How it works” page.
Once you have selected the checkboxes, you must then move to the “Customise Columns” section to select only the columns required:
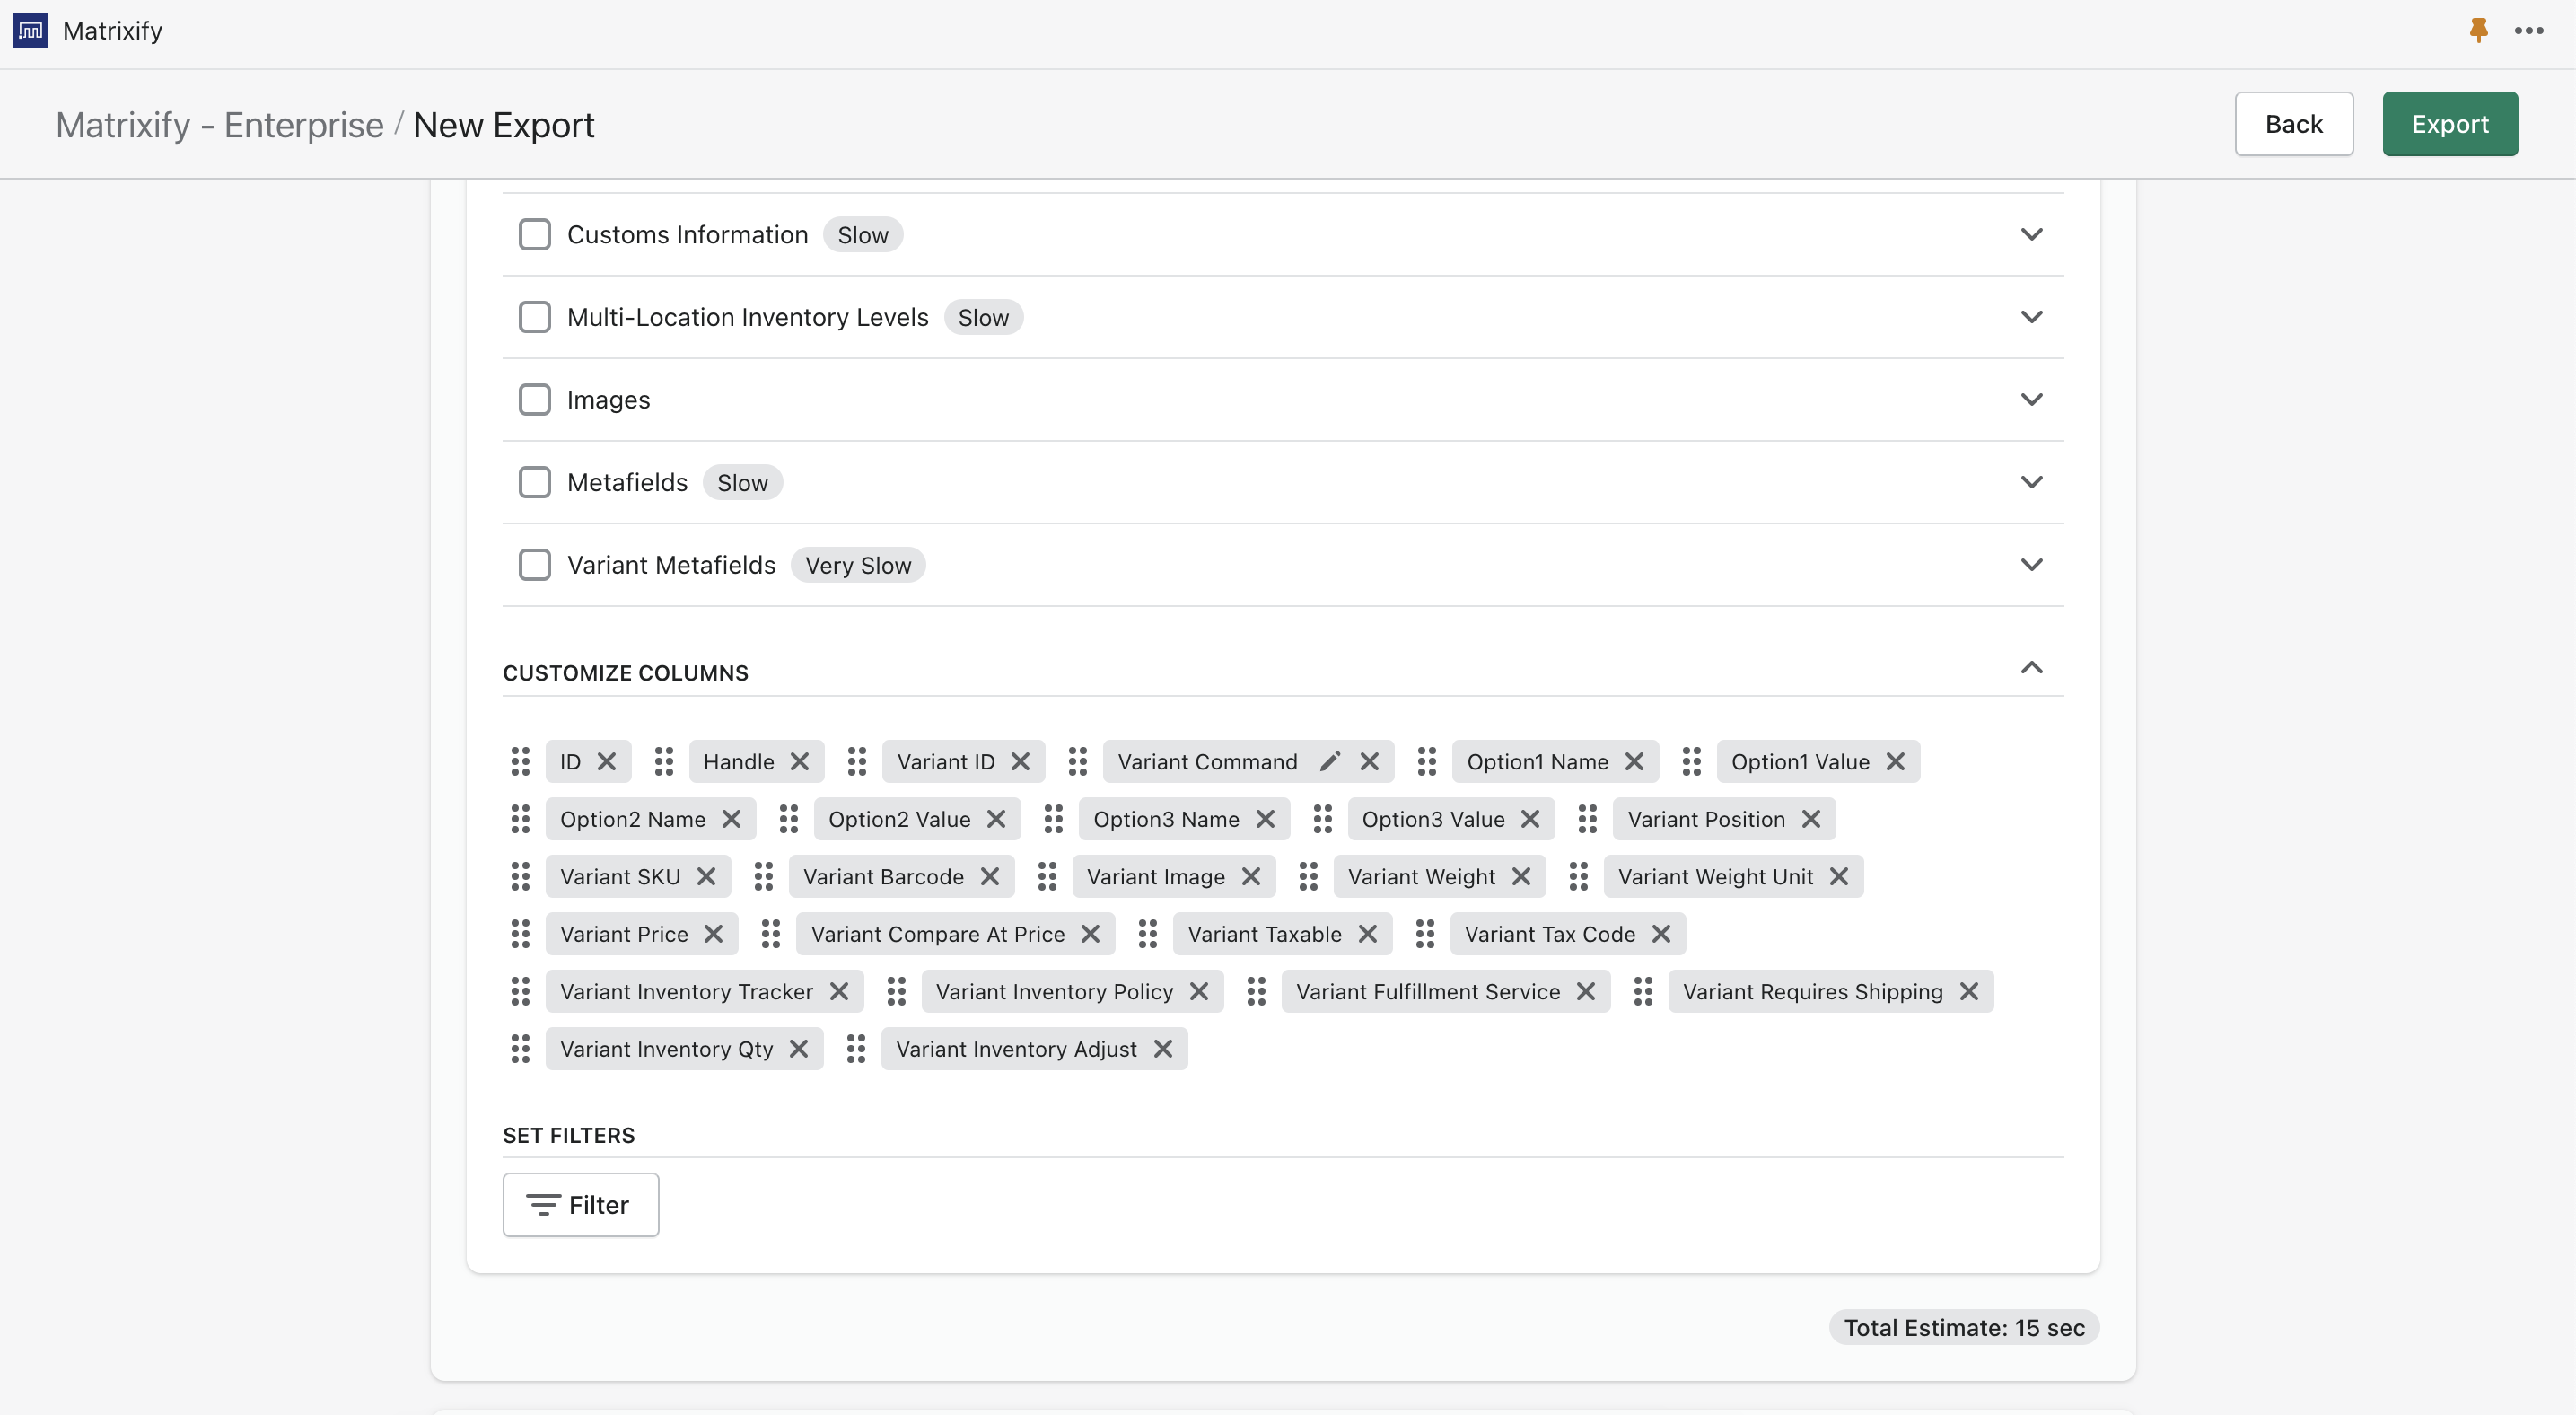
Generally these are the only columns required to group Products. Of course you can add any other column that you may need in order to identify the the Products you would like to group together!
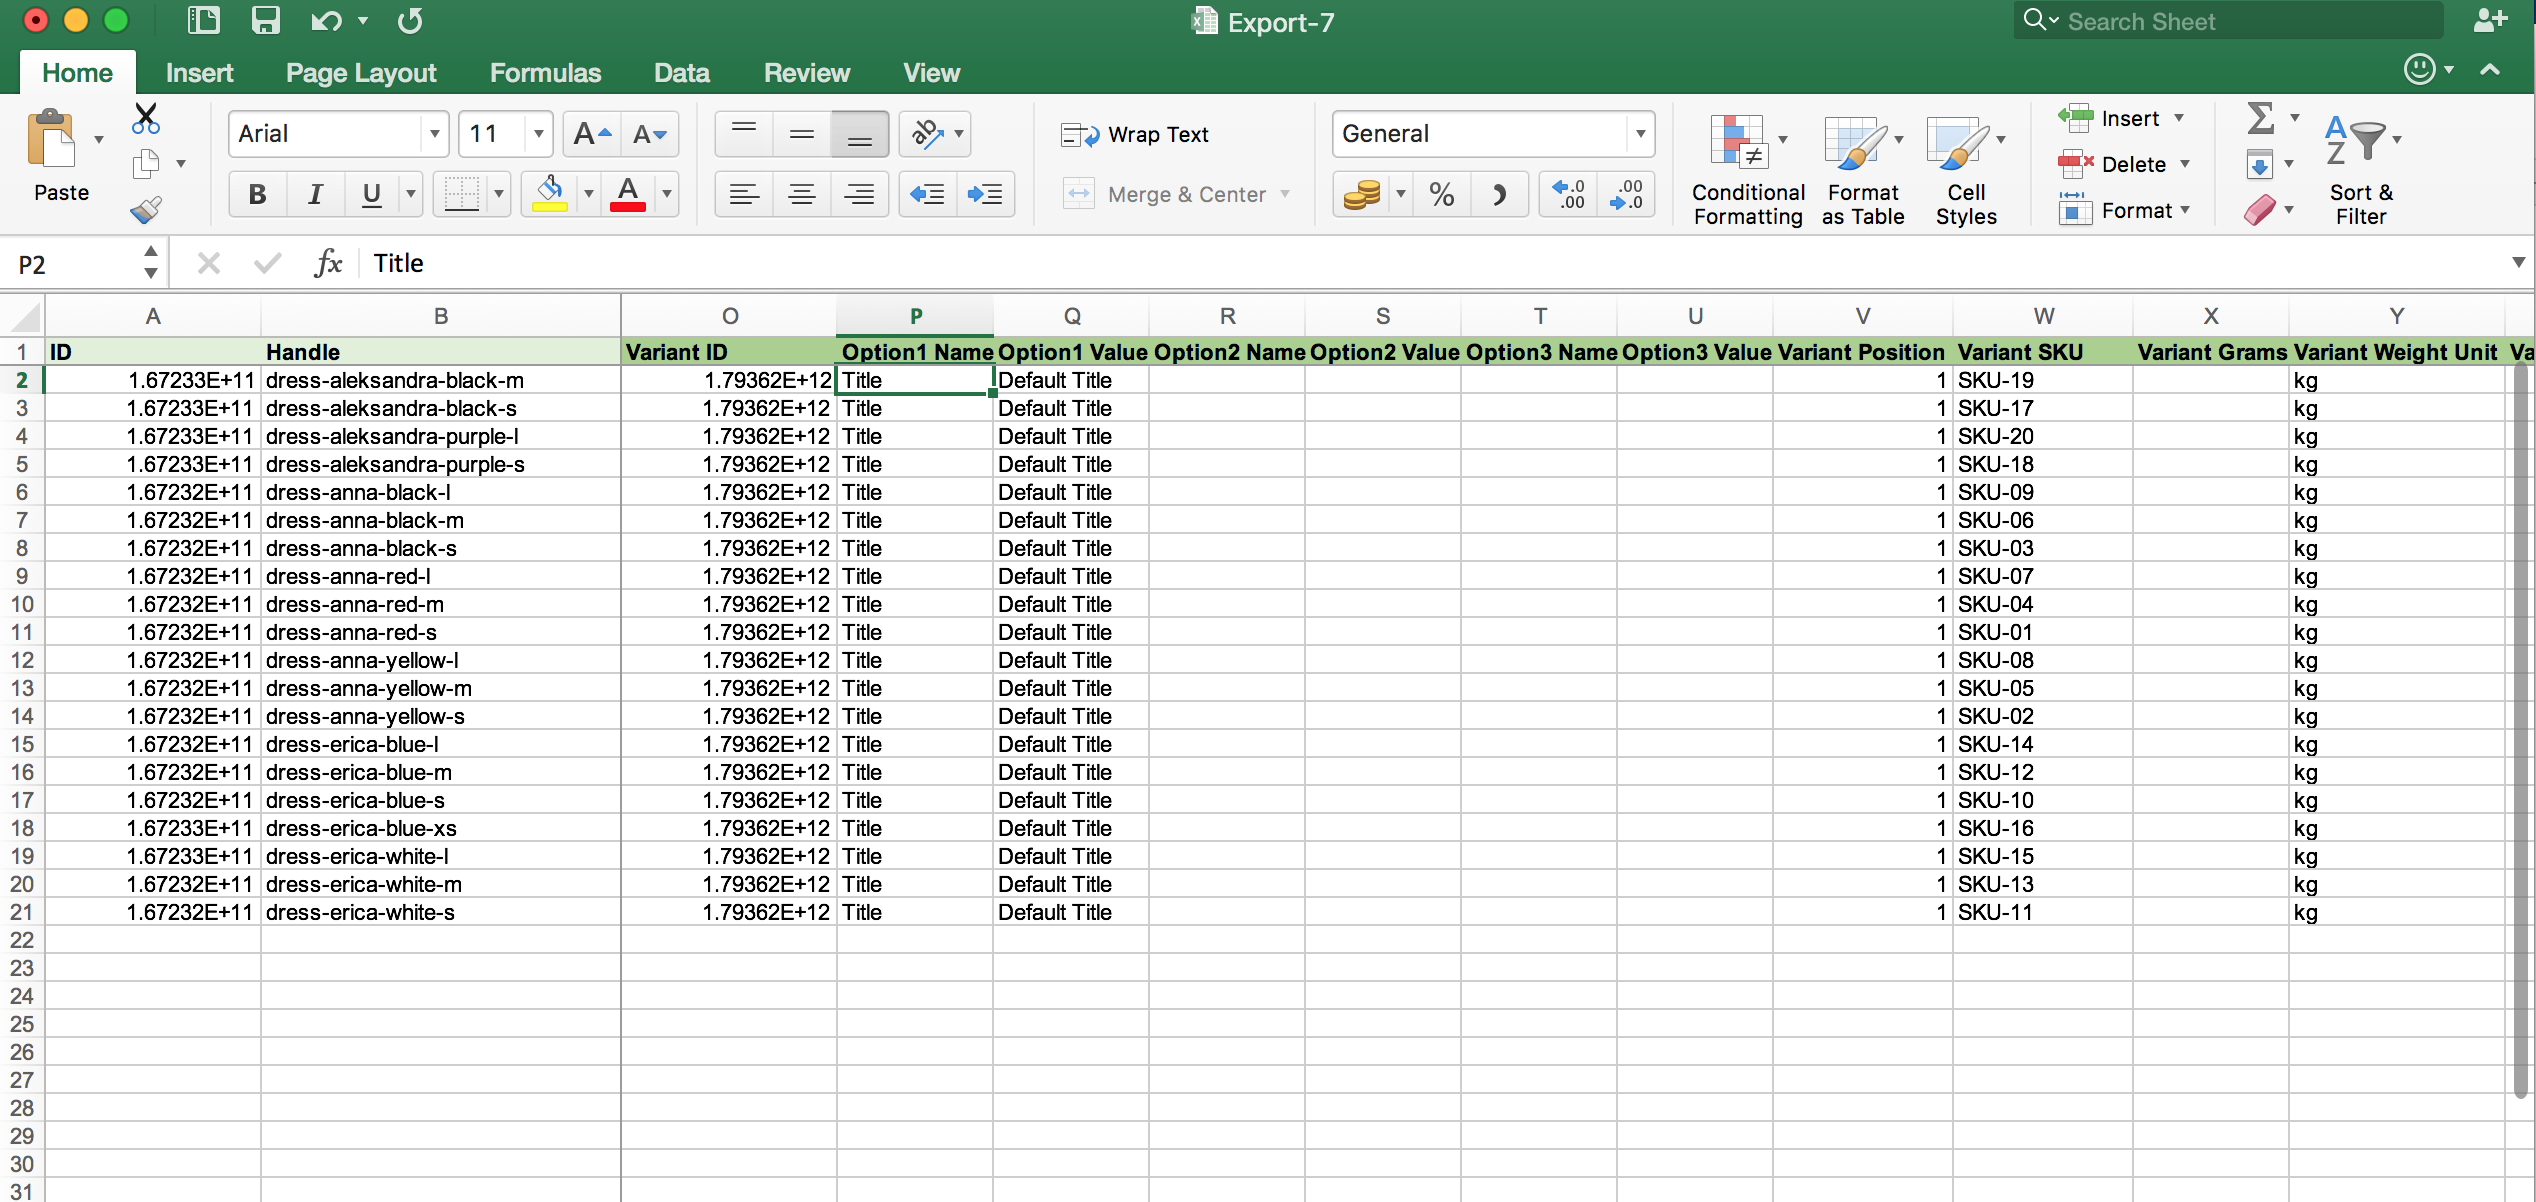
Once your Export set-up is ready, you can go ahead and press the “Export” button. Download the Exported file and it should look something like this:
2. Add data to variant columns
In this tutorial we will add all products as new, but with variants, and then remove the old products, which were without variants. We will be taking this approach because this will act as a safety net in case something will go wrong (we will add the tag “new” for all newly imported products which can be deleted easily, if imported incorrectly) and this will also allow us to save the Images for the Products.
If we delete the old products first, then Shopify will also delete also attached images, and it will not be able to import them again. That is why we first need to import new Products, and then we are safe to delete the old Products.
So, to prepare the import file we need to update following columns:
- Product ID – remove all data, so that it knows to create new Products with this import.
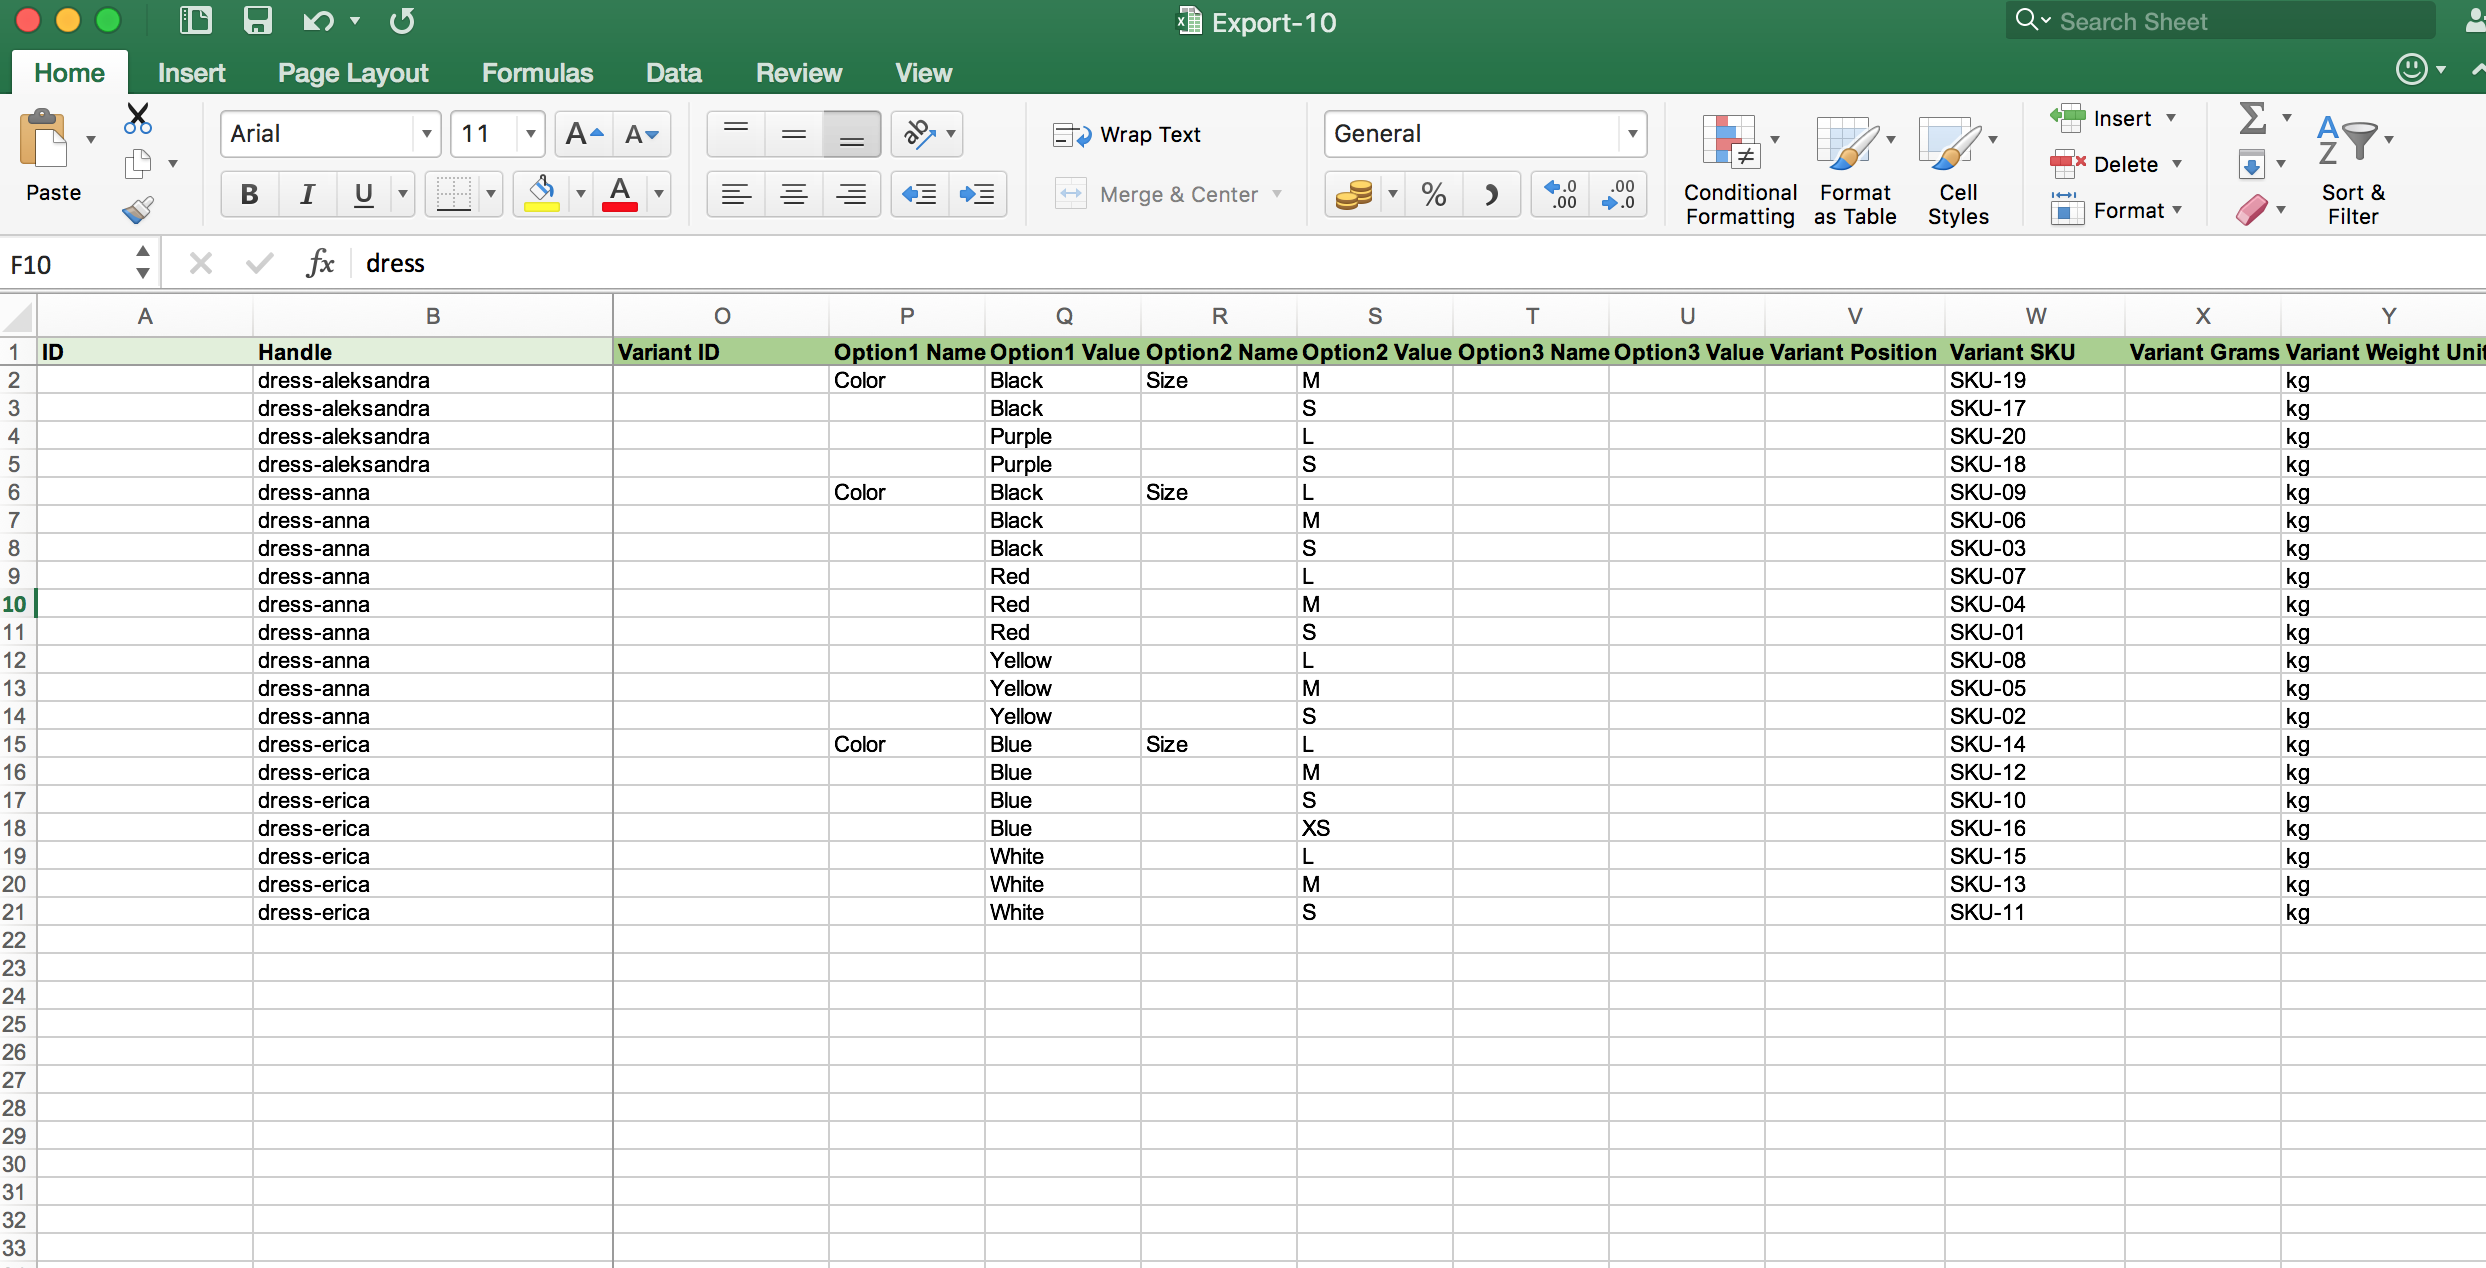
- Handle – set a new handle for each product. For example, if the handle was: dress-anna-red-s, now it will now only be dress-anna. This handle will be set for each variant of the Dress Anna product. You can use formulas or play with Excel (if creating your Import file in Excel) “split data” features to split your old handle into portions and then combine back as you need.
- Title – set appropriate Title (if there was a colour or size, now you can remove this data from the Title). You can also do that with formulas in Excel.
- Tags – add a tag for every row, that is absolutely new and use can use later to distinguish newly added products with variants. We used the tag “new”. Tags will get imported from all the rows.
- Variant ID – remove all data, so that it knows that those are new Variants.
- Option1 Name – set name for the first Variant option. In our case this is “Color”. Set this for only the first row of the product (no need to copy it for the each Variant.
- Option1 Value – set values for the
Option1 Valuecolumn. In my case these will be Variant colours: Black, Red, Blue, etc. - Option2 Name – If you have more than 1 option for the Variant, like Colour and Size, set the 2nd option Name here. In our case: Size.
- Option2 Value – Set sizes, L, M, S, XS.
- Variant Image – if your old Products had just one image per Product, copy the
Image Srccolumn data here – then it will assign that same image to variant image. - Image Src – Keep the values as they are, with whatever images you have for your Products.
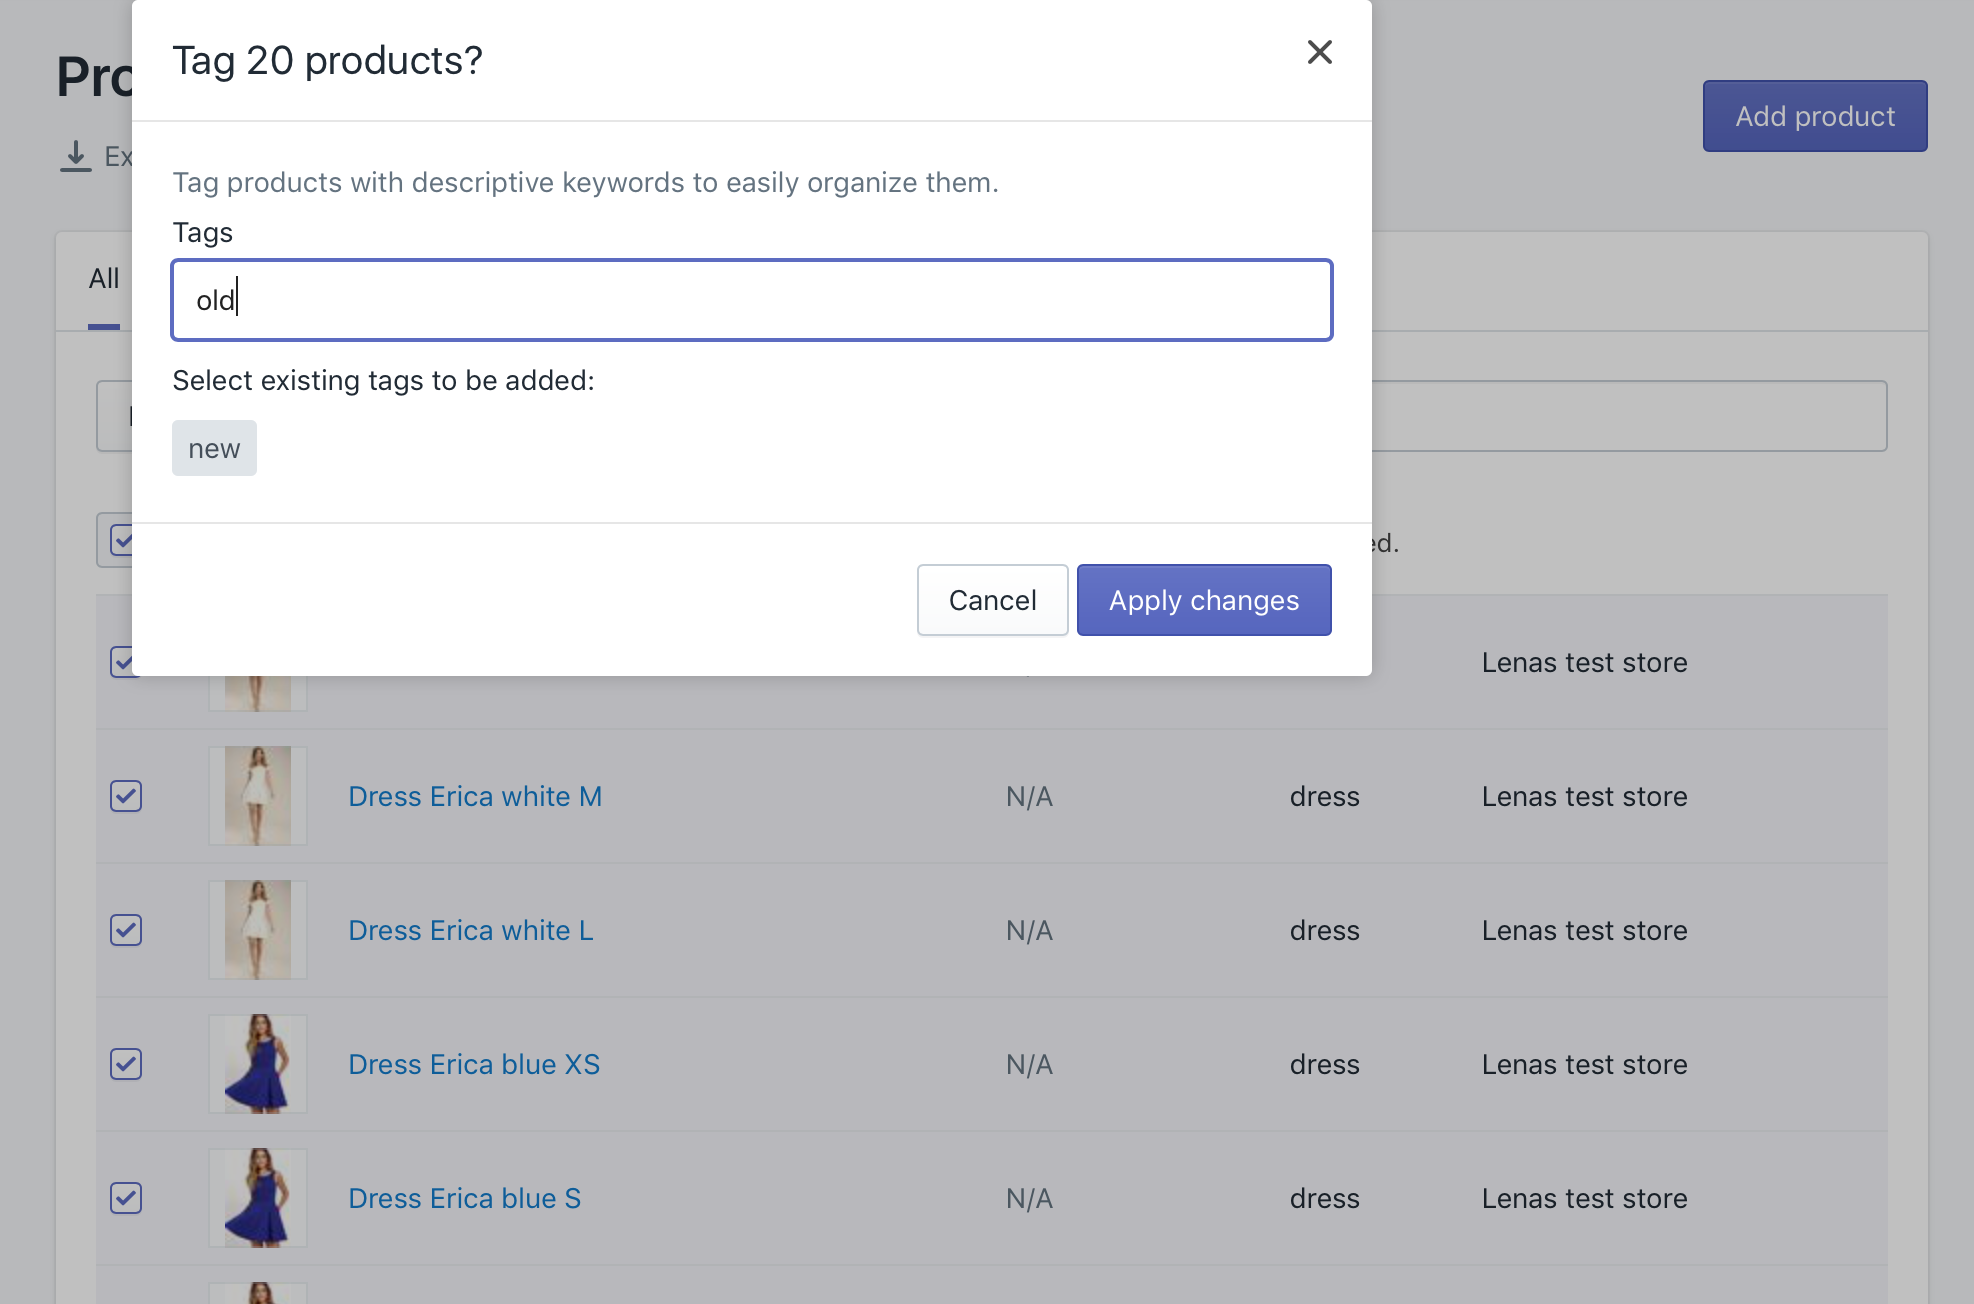
3. Mark existing Products with the Tag “old”
Set a tag for all existing products, so that you can filter them later. We added tag “old” for all existing products before importing the new ones, as we will delete old products after the import:
4.Import updated file into Shopify using Matrixify
Now you can save your updated file and Import it back into Shopify using Matrixify!
Go back into the Matrixify app and in the Home page Import section, you can upload the file.
First, the file will be analyzed by the app. Once the file is analyzed you need to check that the app has recognized the file correctly and that the item count in the file looks correct.
You do not need to adjust any Import Options, default ones will work fine.

Then press the “Import” button in the top right-hand corner and the file will start Importing. Once the import has started, you can follow its progress in the app. You can close the app while the import is running as it is happening on our servers.
If you change your mind about something, you can press the “Cancel” button to cancel the import job, and start over (any Products created thus far will already be in your store). When canceling the import job, Matrixify generates the Import Results file for you anyway for the items that were imported before canceling.
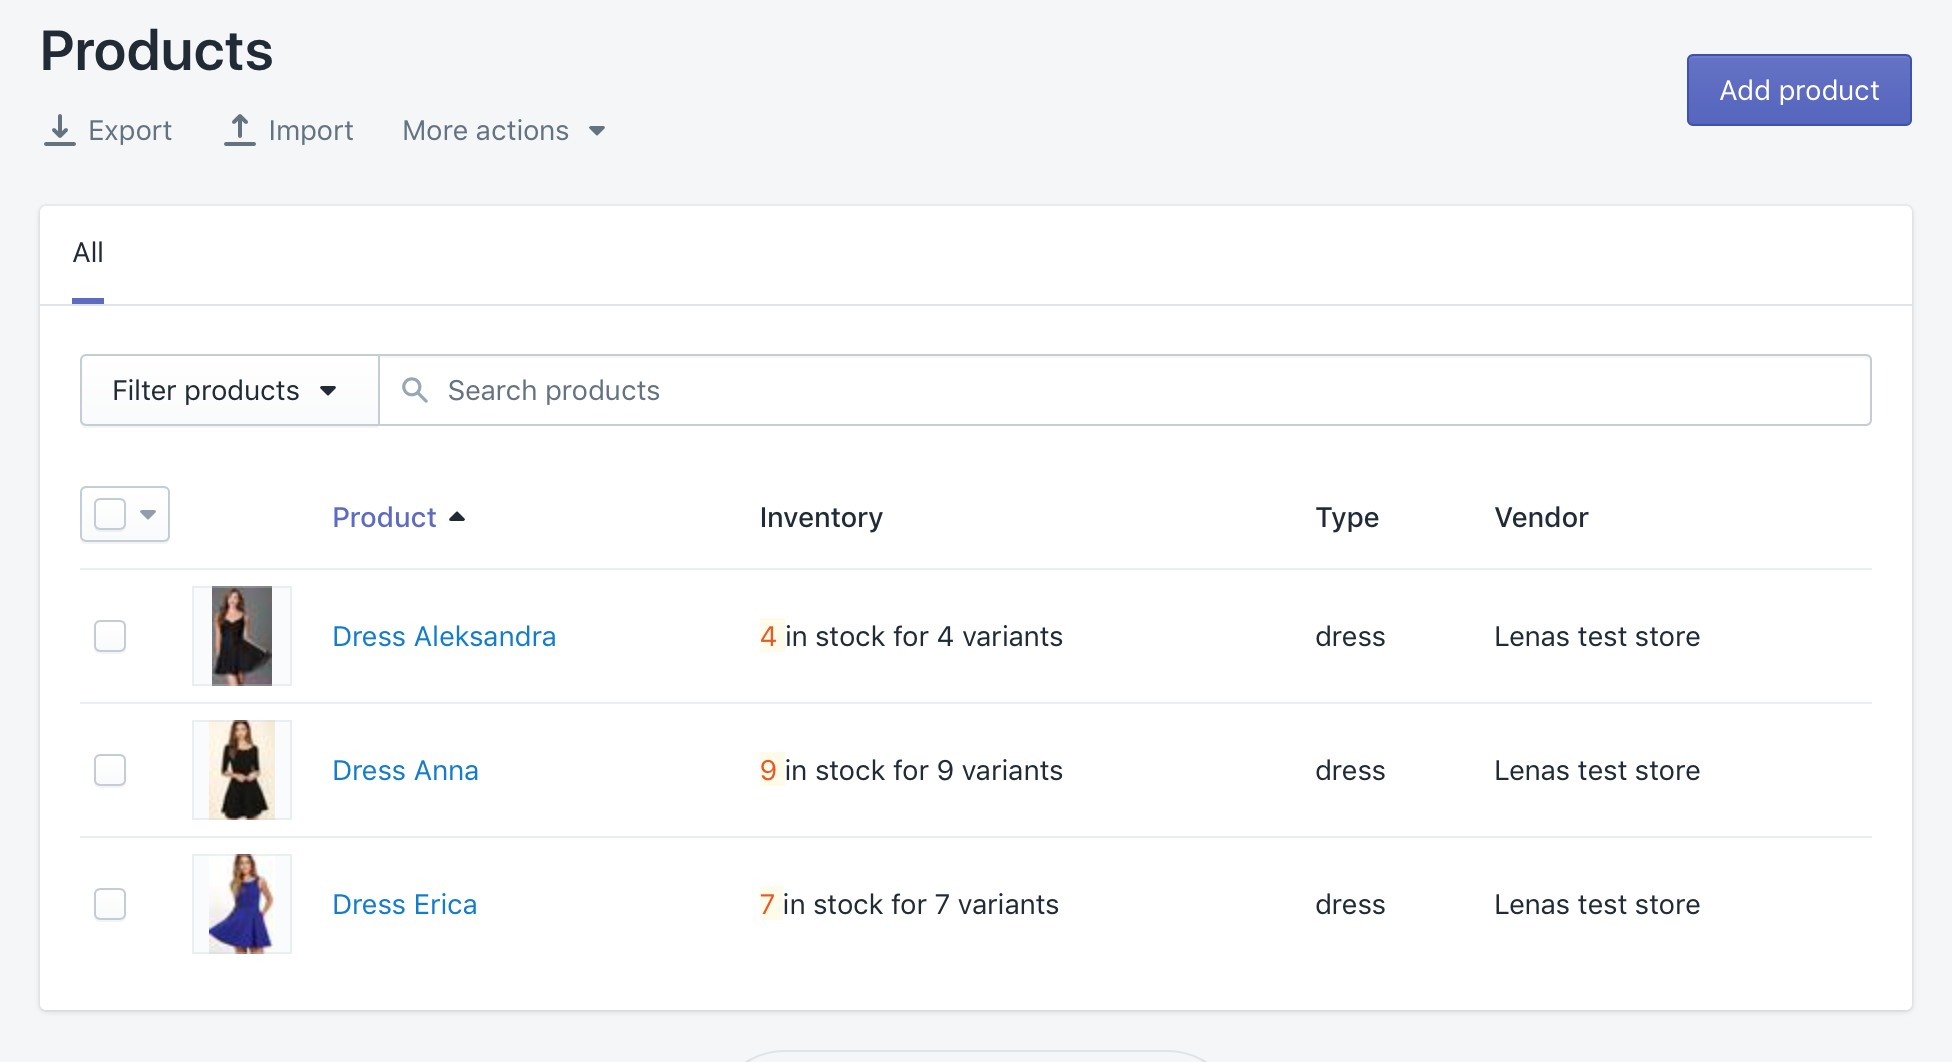
You can see the newly created Products in Shopify Admin! 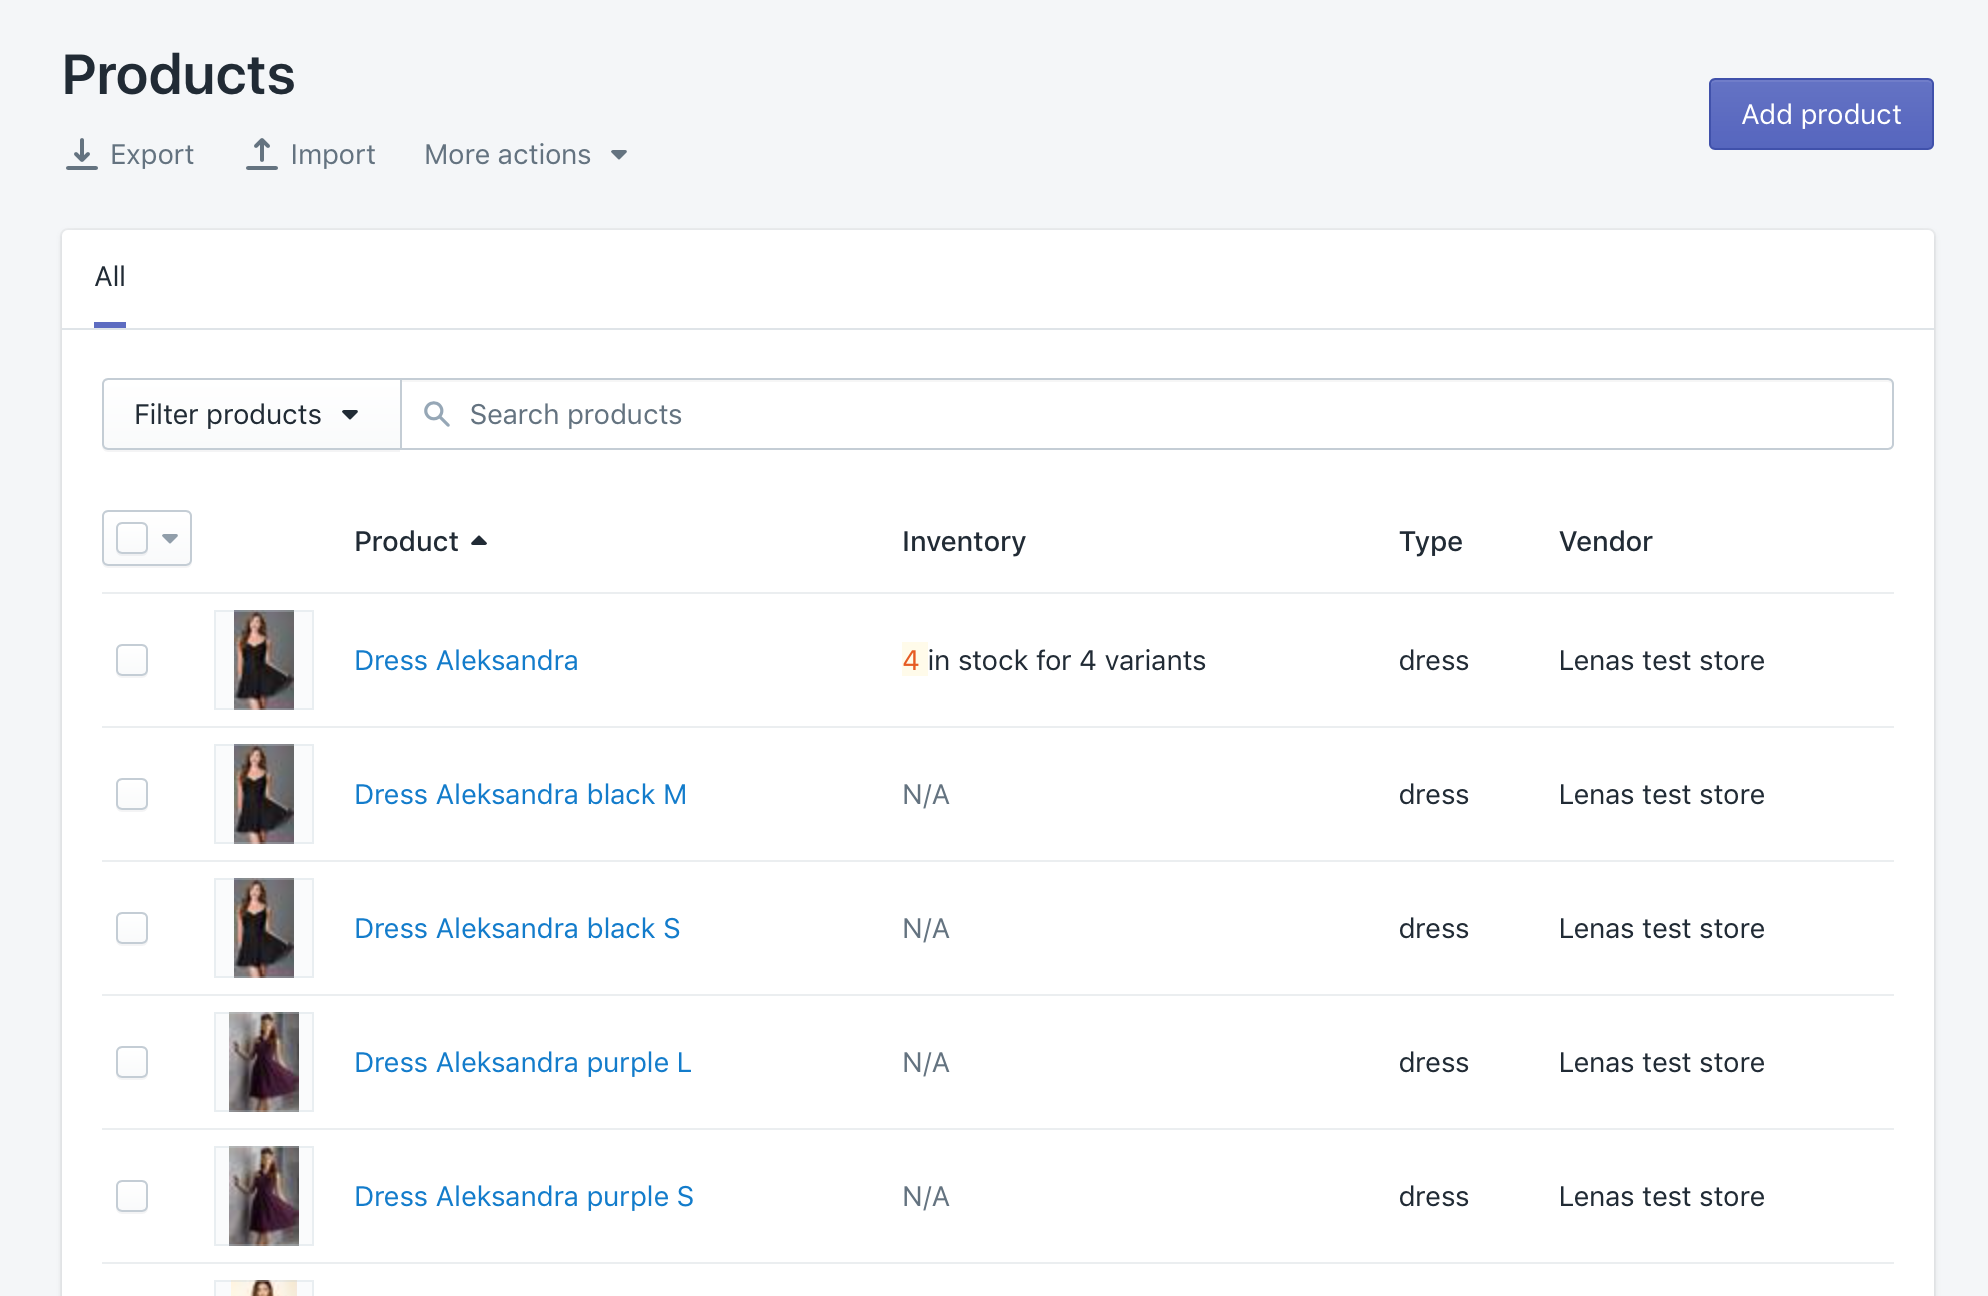
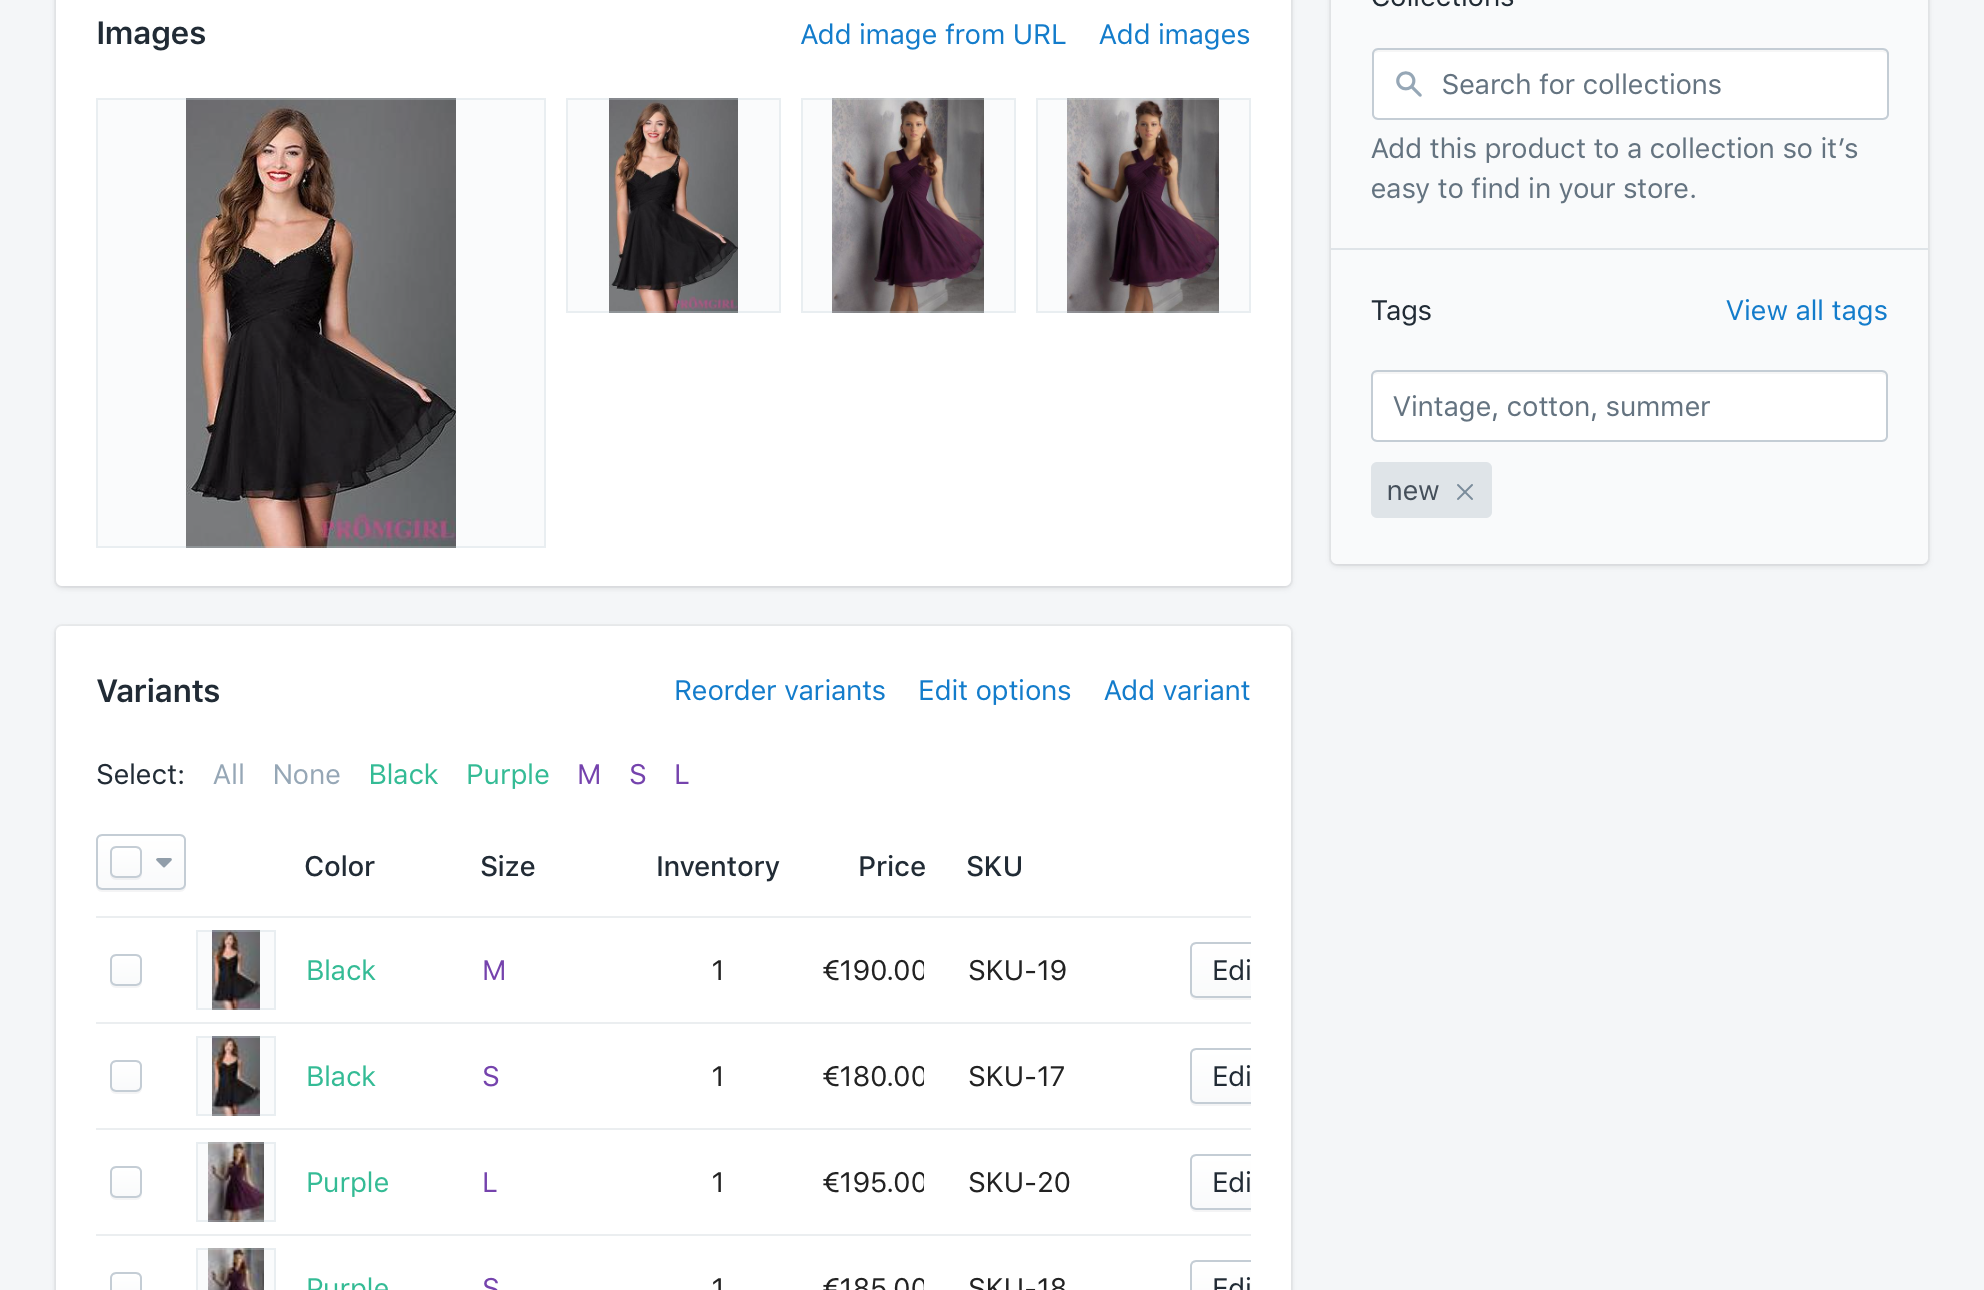
You will be able to see the old products without variants and the newly created products, but with variants.
5. Delete the old products
We can now go ahead and delete the old products, by filtering them in Admin by the tag “old”, and using the “bulk delete” feature in Shopify Admin. If you do not want to delete the Products through Shopify Admin, we also offer a great tutorial on how you can bulk delete your Products with the Matrixify app as well: How to bulk delete Products.
Good To Know
- It is important, that you firstly add the new Products with variants and only then delete the old Products without variants, to keep all you images.
- Set a unique tag for new products to distinguish them from the old ones, in case something goes wrong.
- Delete old products only after you are sure that all new Products and imported correctly!
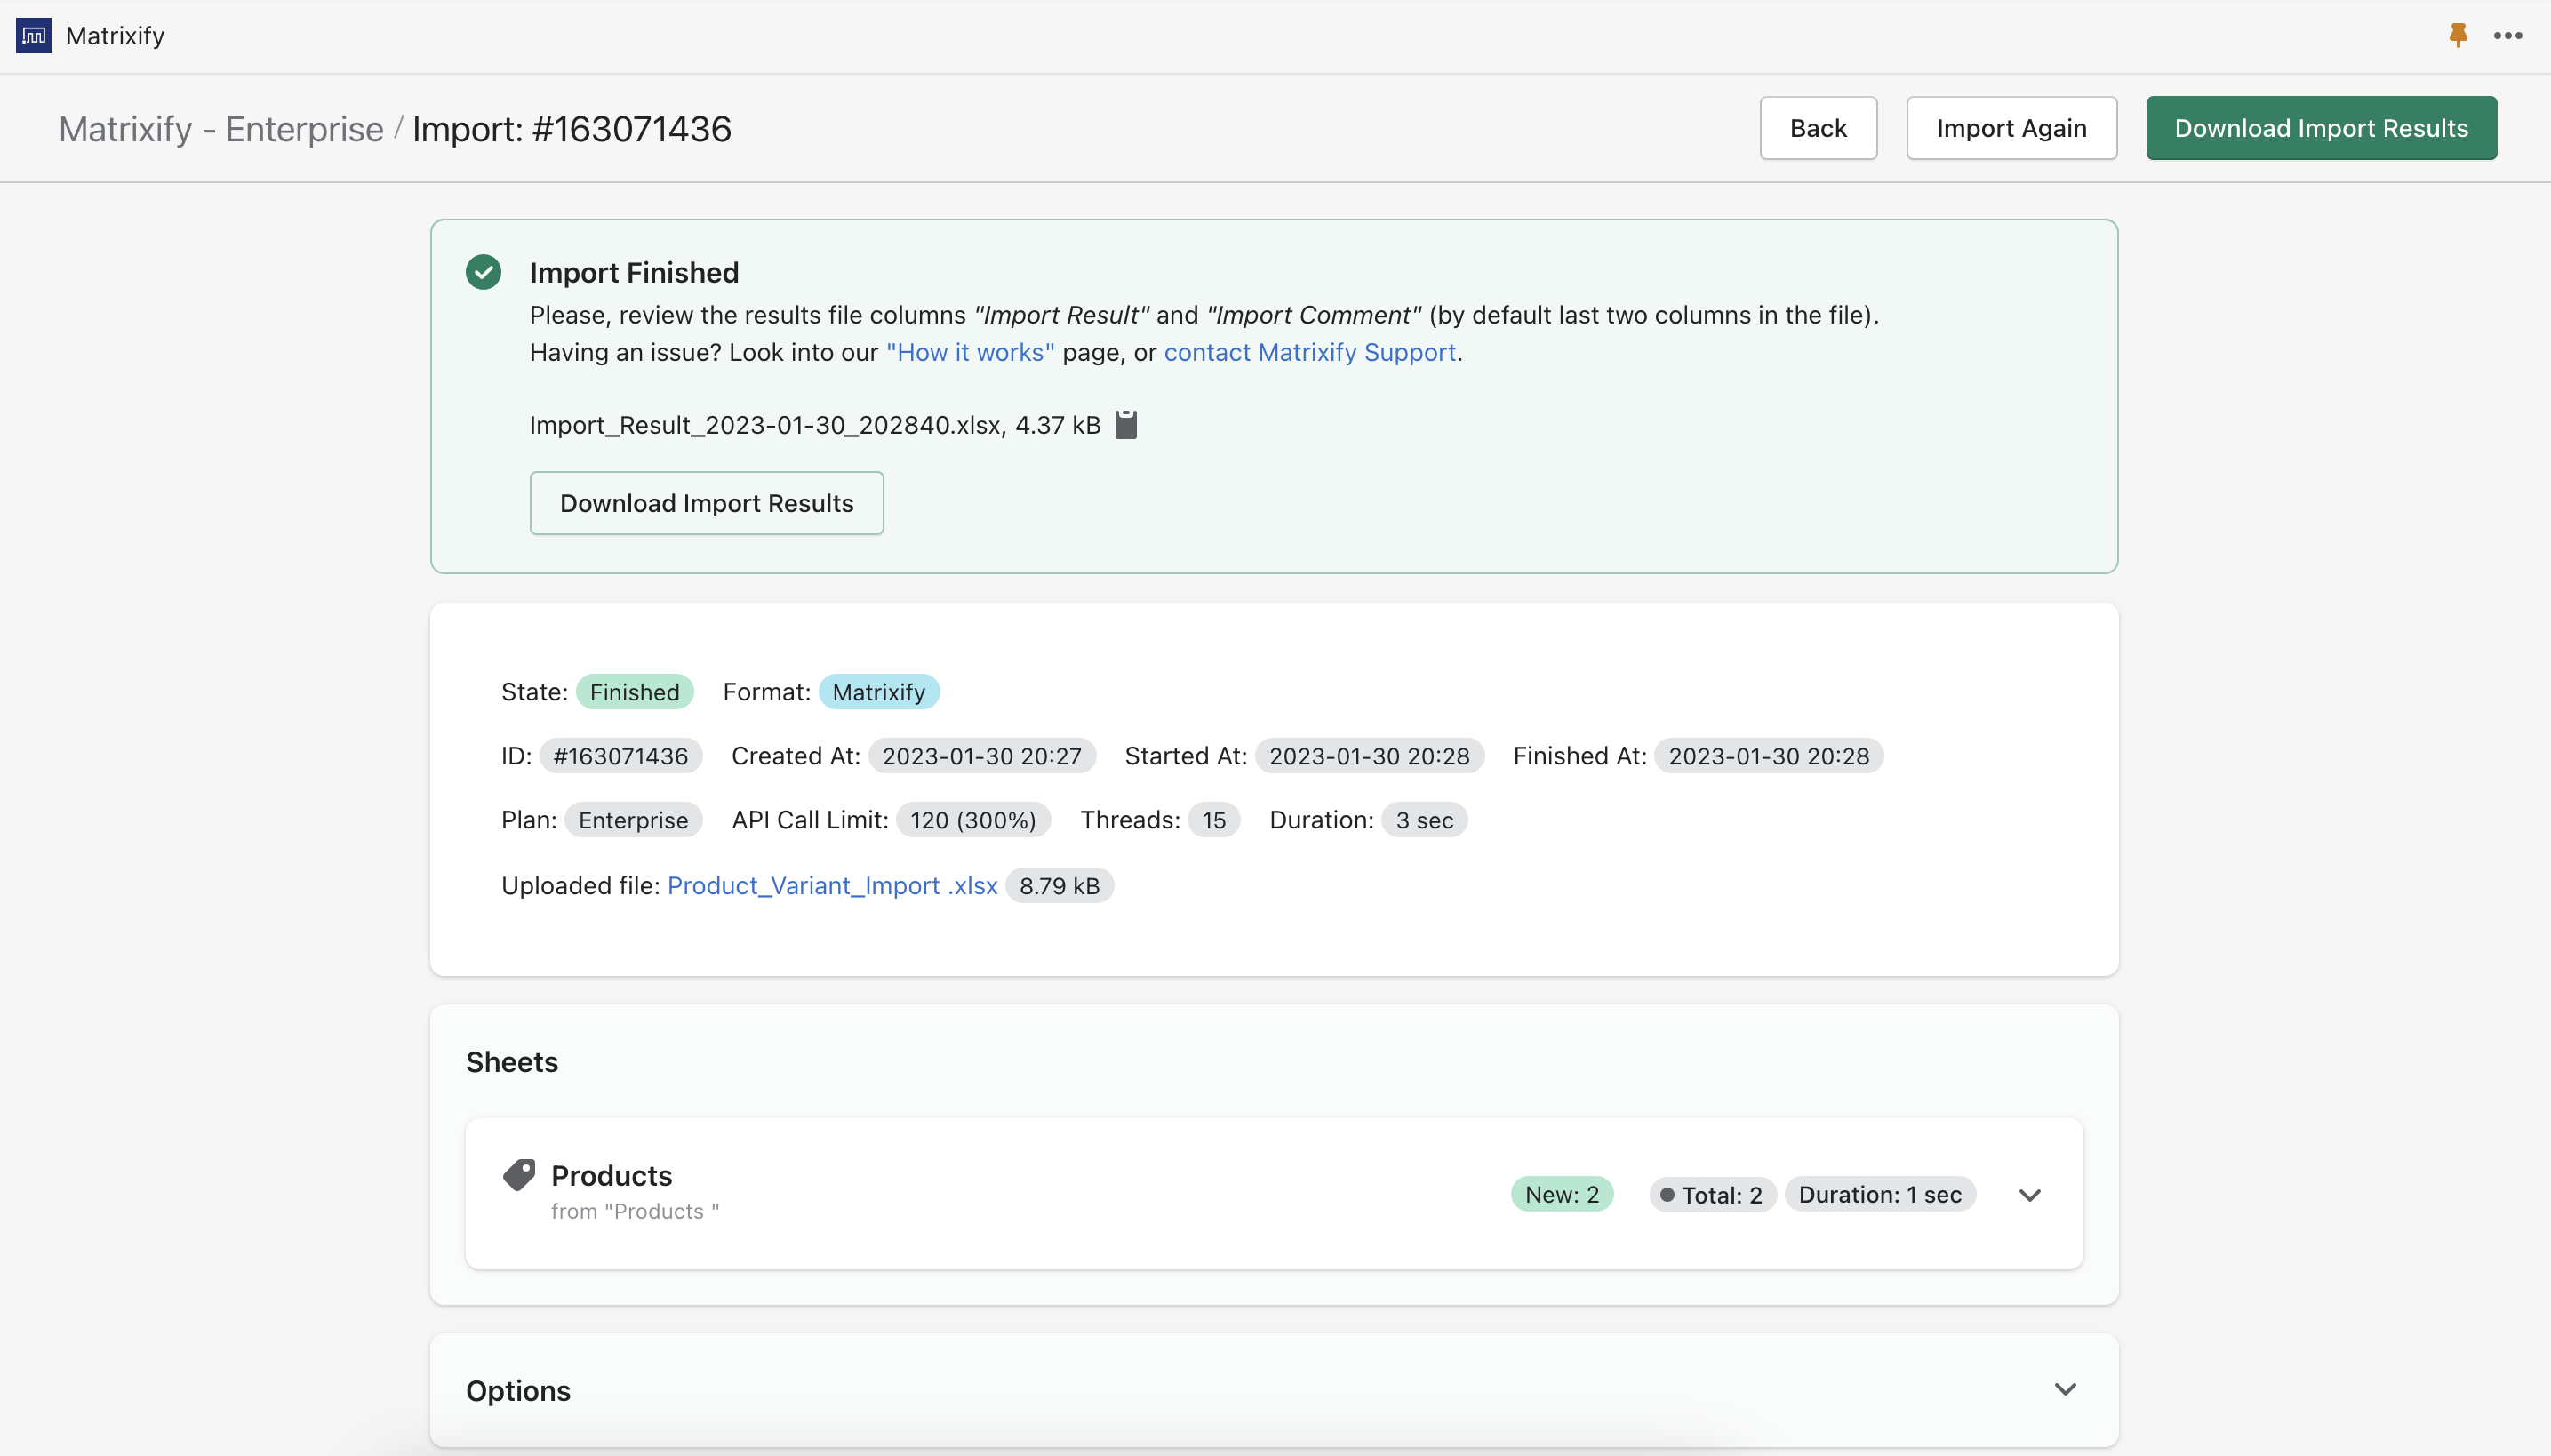
- After import is complete, you can download the “Import Results” file, where the last 2 columns (Import Result and Import Comment) will show you the result for each row. This is helpful, when something failed in the import – you will see the failure reason there.
- Check out our other Product tutorials.
- Read the detailed Column Descriptions of all columns (fields) that you can export and import.
- If you have any questions, don’t hesitate to reach out to our support!


