
Managing the Navigation Menu in your Shopify store can be tedious, especially when dealing with a large number of Menu Items. This tutorial will guide you through the process of how to efficiently rearrange and update Shopify Menu Item positions in bulk using the power of the Matrixify app.

Steps in short
- Export your Shopify Online Store Navigation Menus to a spreadsheet file with the Matrixify app.
- In the exported file, update values in the “Menu Item: Position” column to set your new Menu Item positions.
- Save and import your file with the Matrixify app to bulk update Menu Item positions.
1. Export Shopify Navigation Menus
The first step in bulk updating Shopify Menu Item positions with the Matrixify app is to export your existing Navigation Menus.
Head into the Matrixify app and create a new Export.
In the New Export page select to export the “Menus” sheet.
If updating only the Menu Item positions you do not need to export all possible Menu columns. For this task, you would need only the following columns selected for an export.
Under Basic Columns column group select:
IDHandle
These columns will be needed for the Matrixify app to identify the Navigation Menu.
Under Menu Items column group select:
Menu Item: IDMenu Item: TitleMenu Item: Parent IDMenu Item: Parent TitleMenu Item: Position
Here you need to export columns to identify the Menu Item, what parent the Menu Item is linked to, as well as the Menu Item Position within its parent.
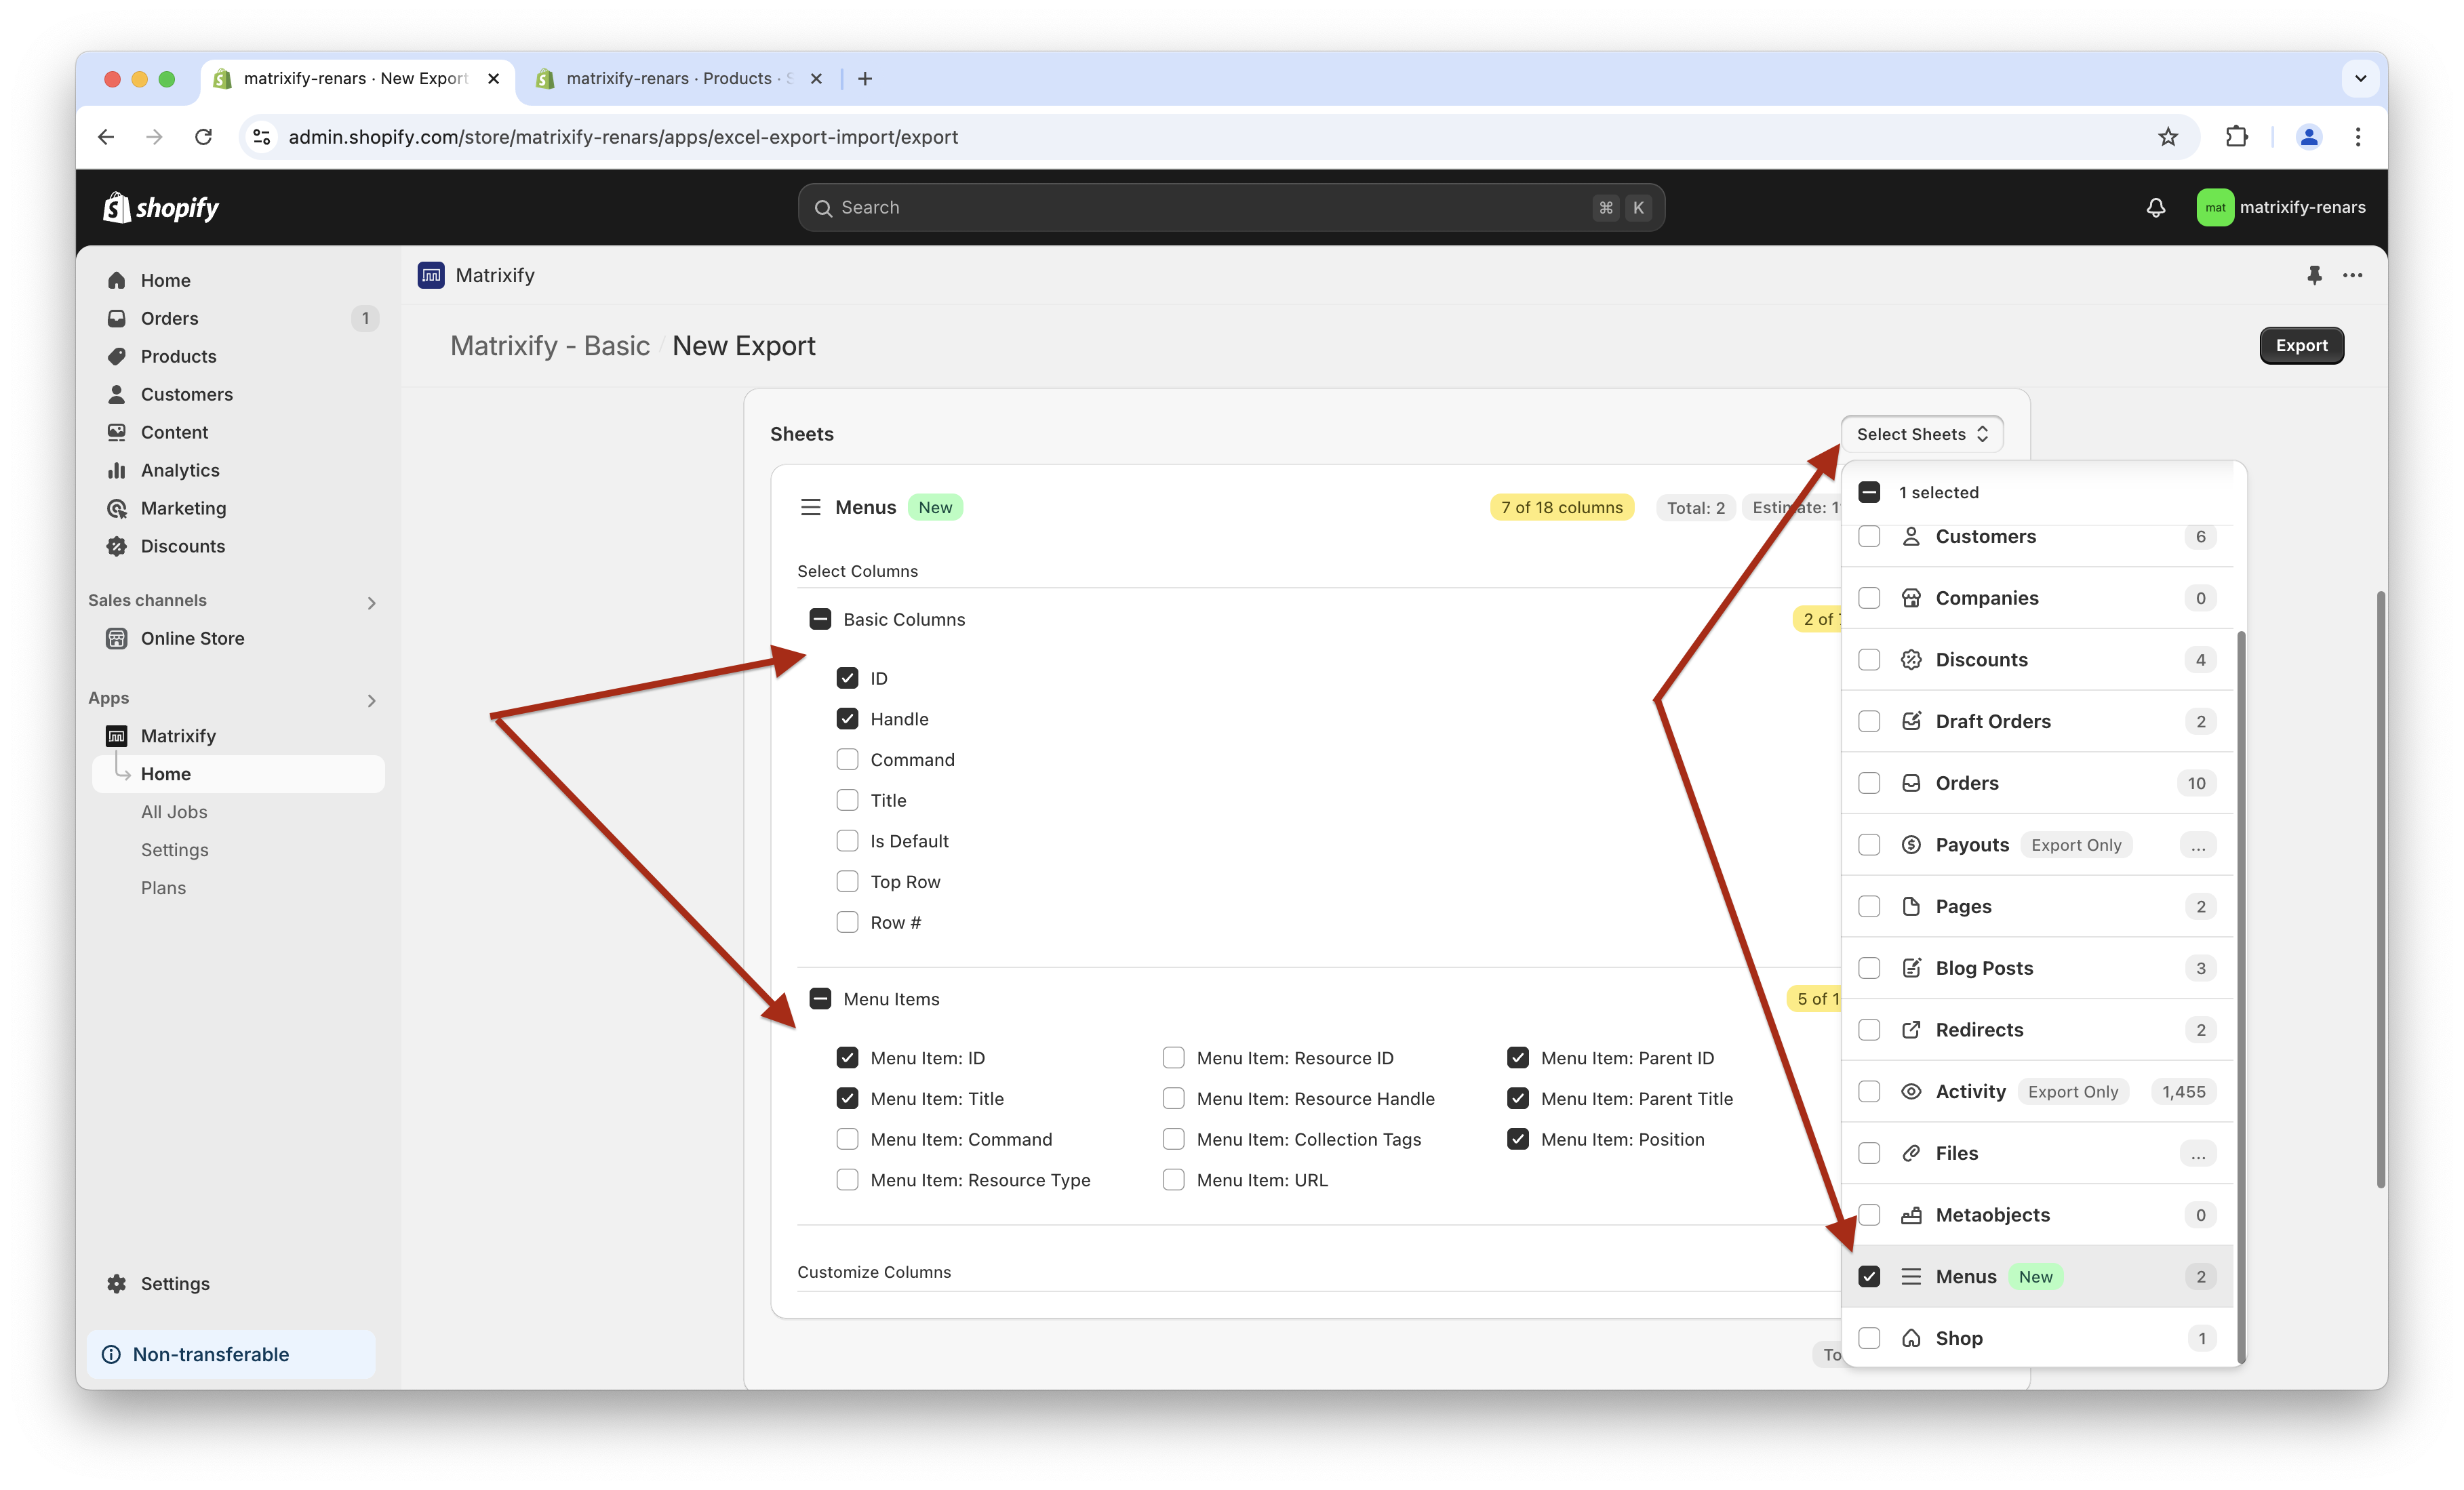
Export Options do not need to be adjusted and can remain as they are by default.
When the export has been configured, press the “Export” button to start the export.
2. Change and update Shopify Menu Item positions in the exported file
Once the export has finished, you can download the exported file by pressing the “Download Exported File” button.
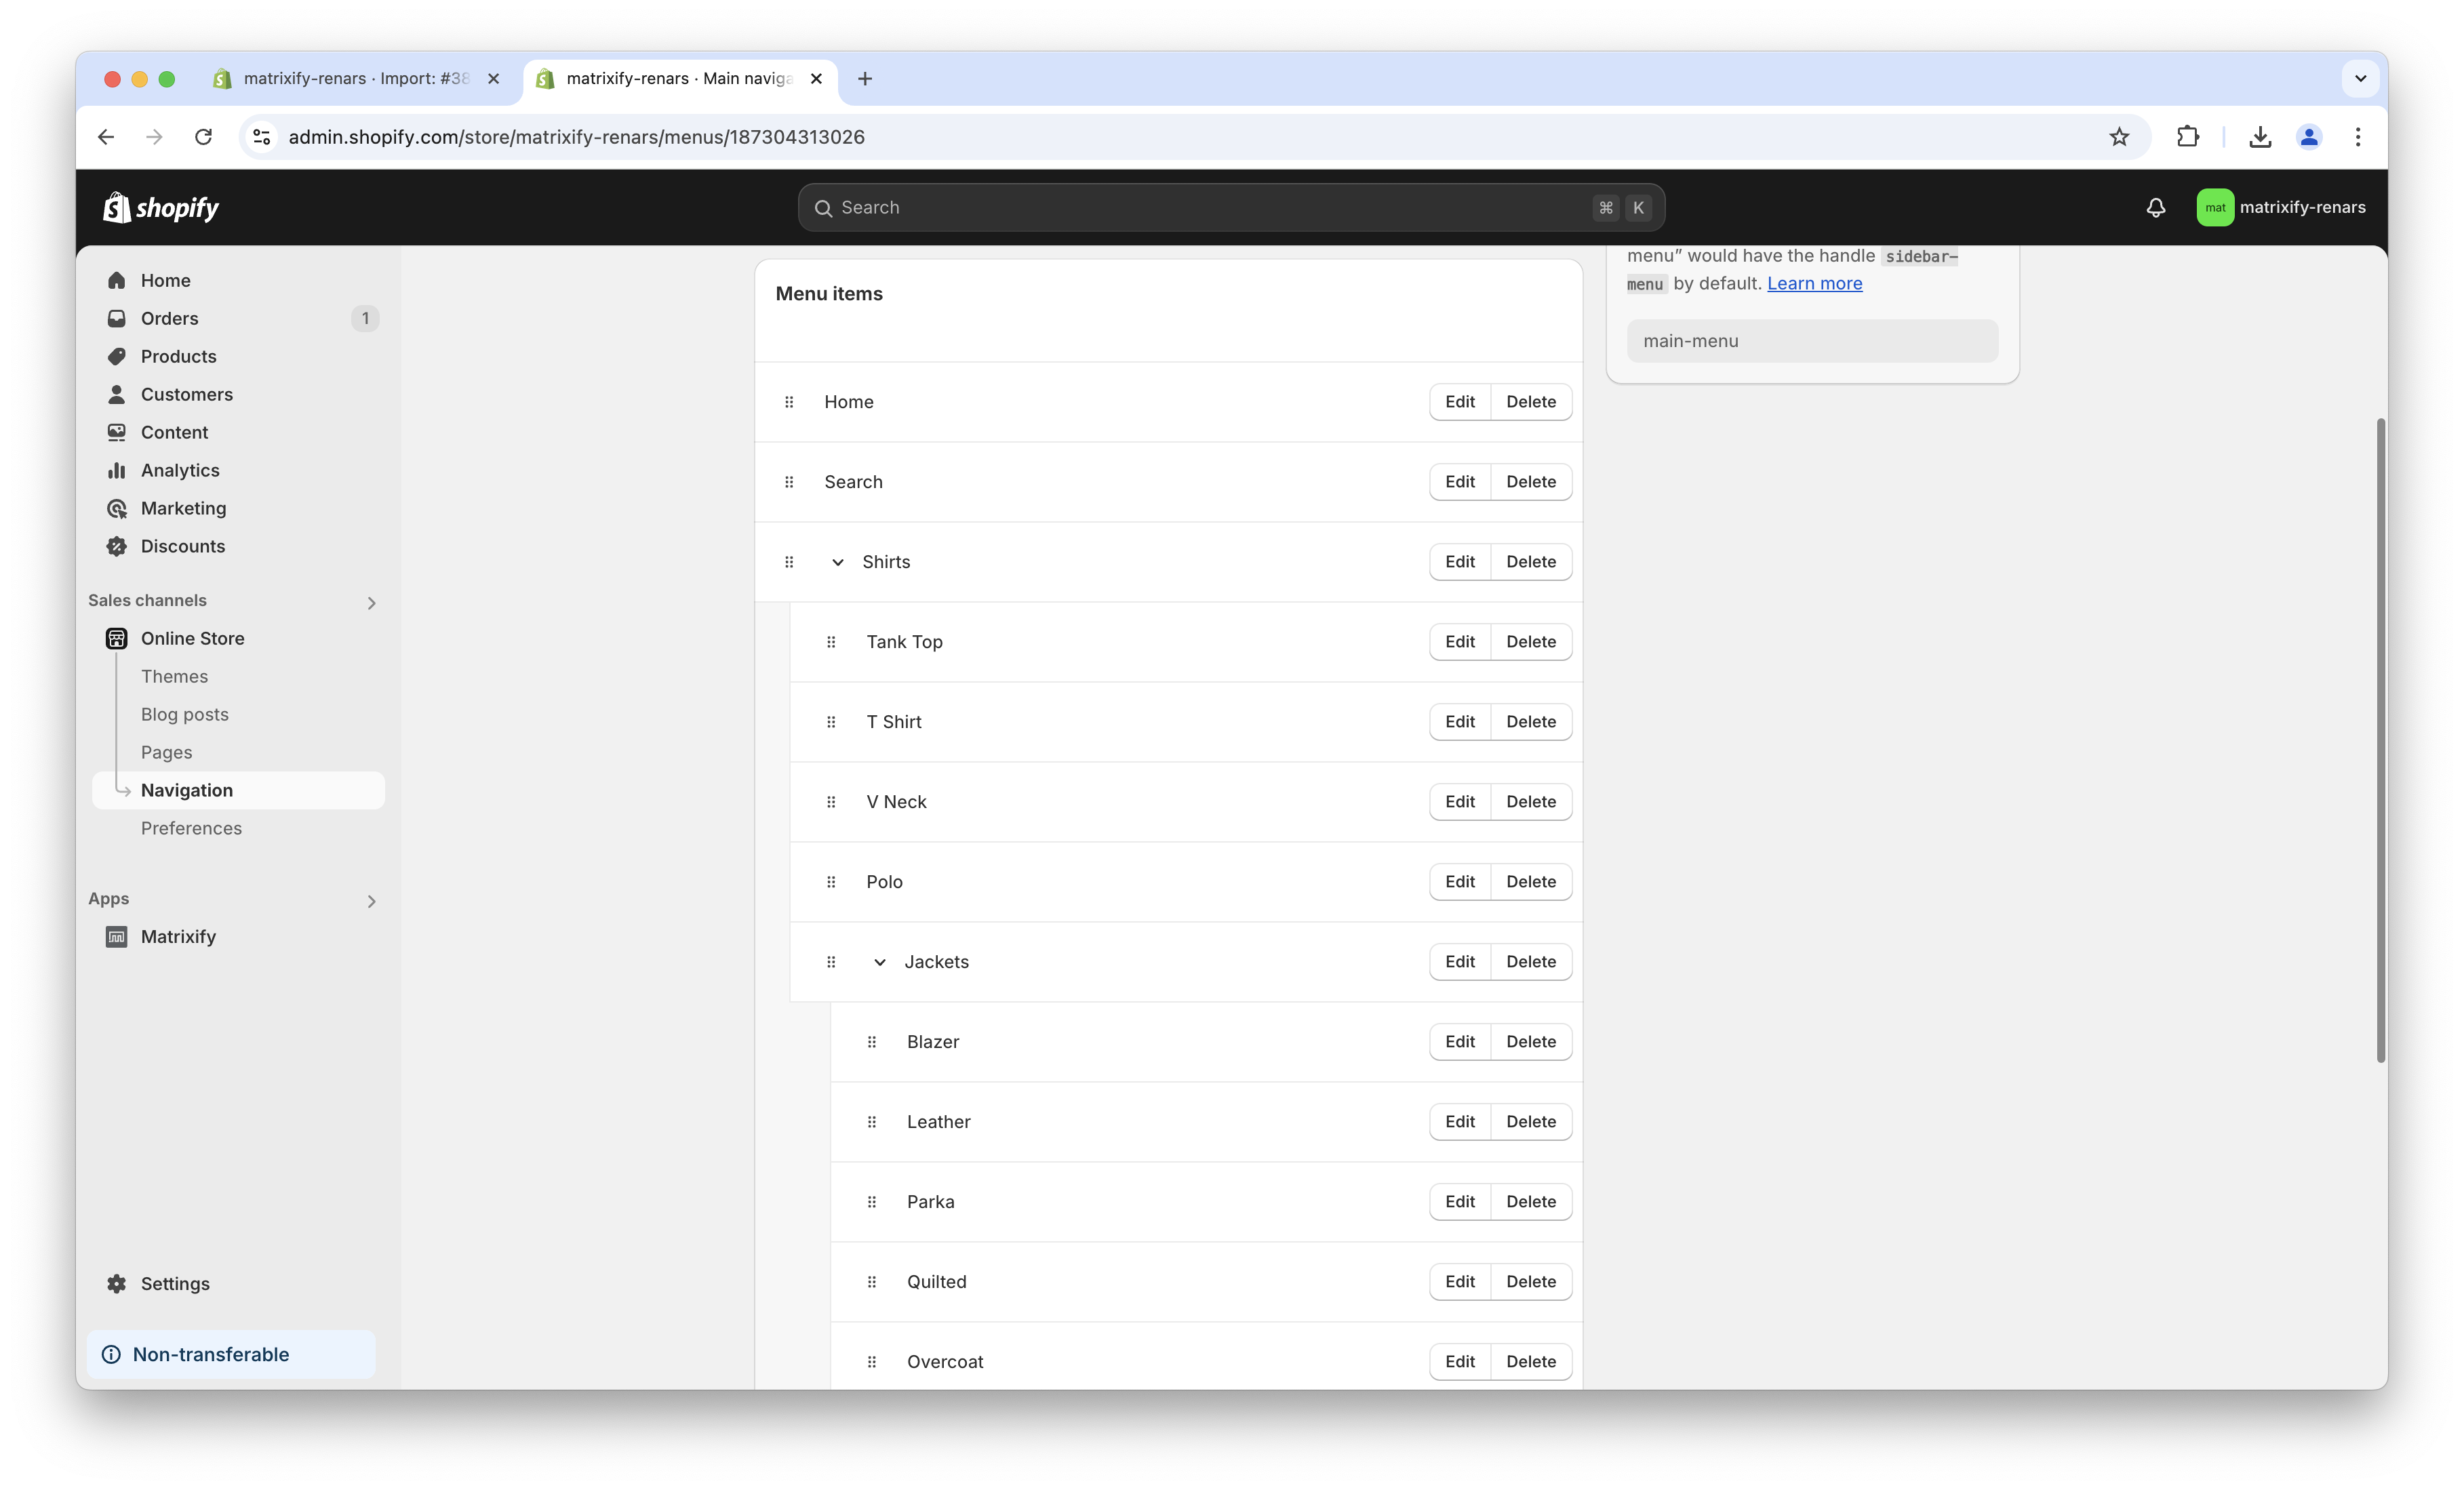
The exported spreadsheet file will have multiple rows for each Navigation Menu.
A single row in the file represents one menu item, for example, if the Menu contains 5 menu items, it will have 5 rows in the file.
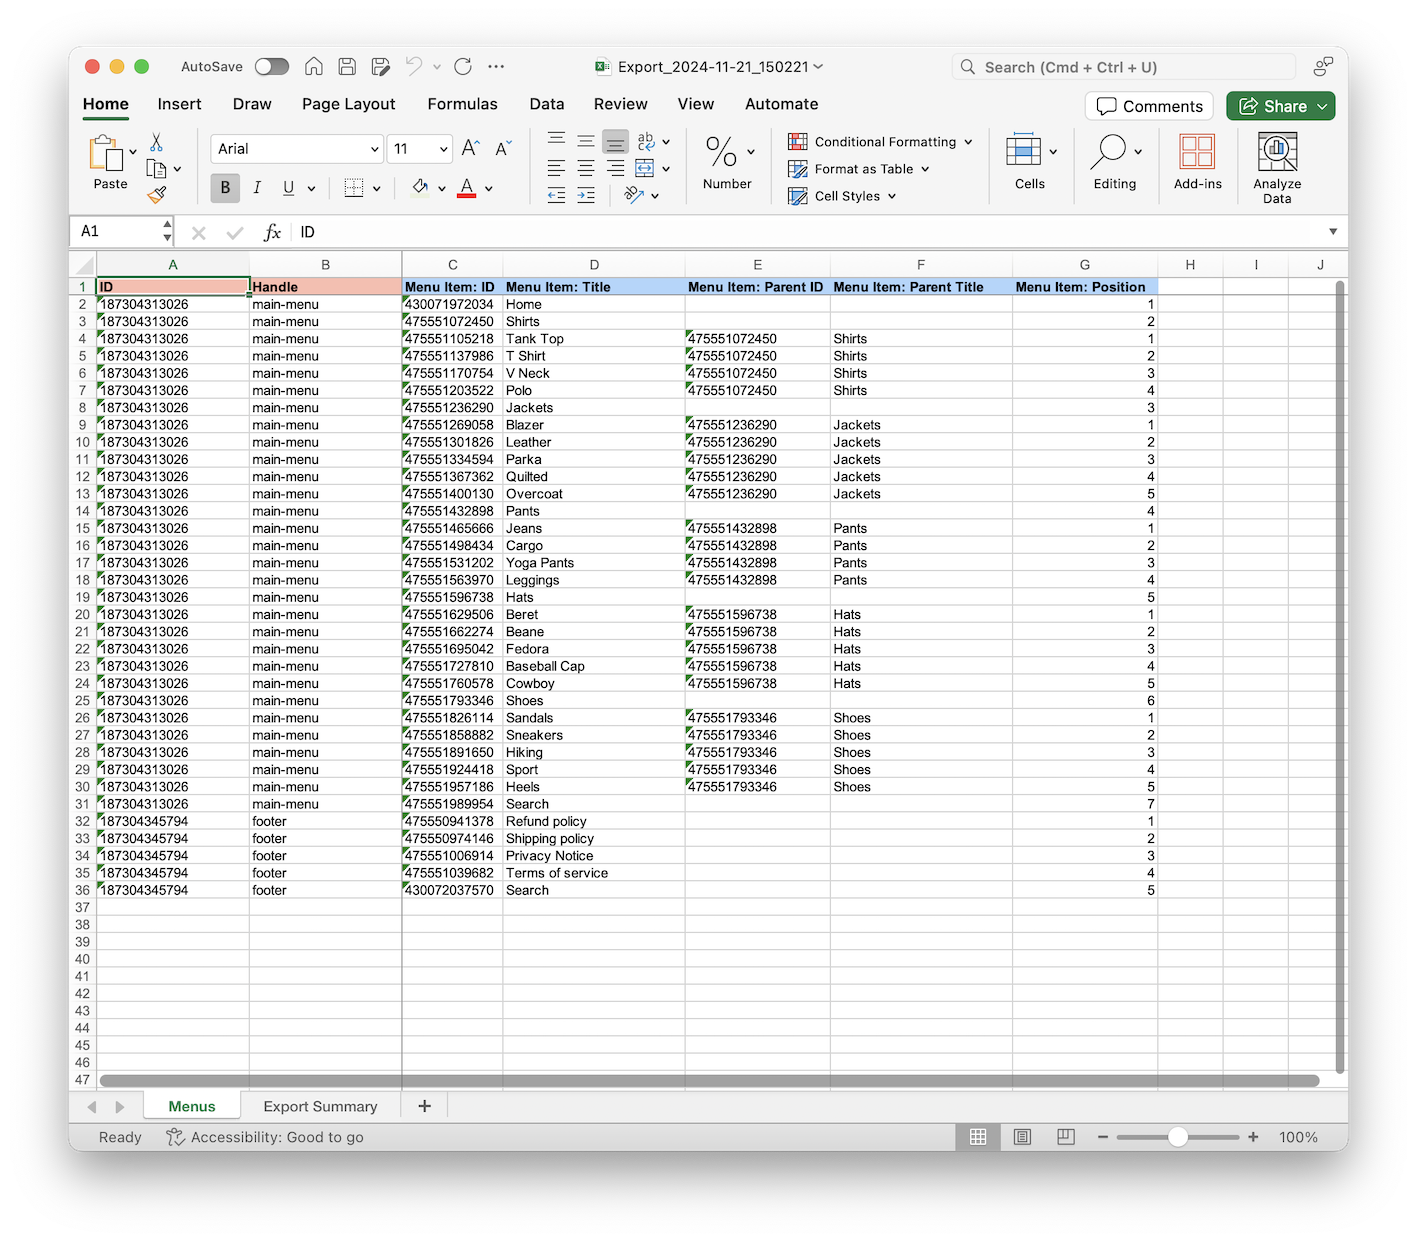
In the exported file you can see how the Menu Item: Position shows the specific Menu Items position in its parent.
This makes up the whole menu hierarchy. As a visual example, in the below screenshot, I have colored the top-level Menu items in blue to better show their sorting, and separating from their sub-menu items.

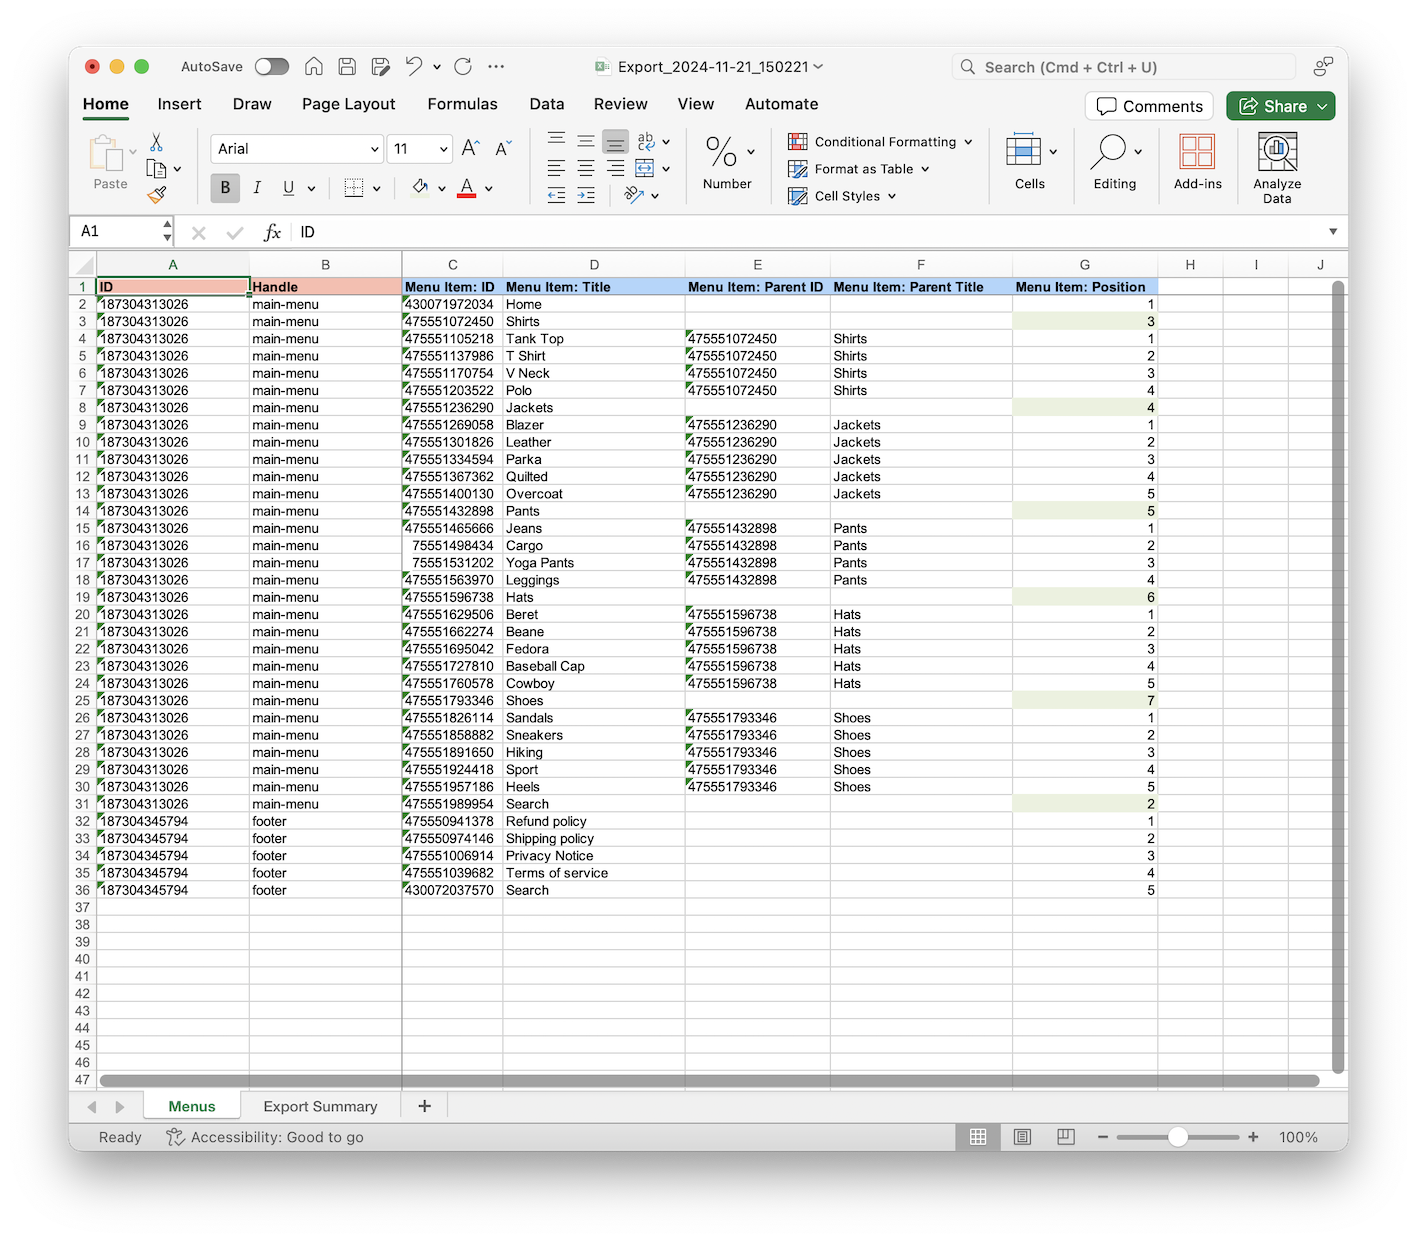
Change Menu Item position within the same hierarchy level
When you need to only rearrange the Menu Items within the same parent, you can only focus on the Menu Item: Position column by adjusting the numbers.
For example, currently, I have the “Search” Menu Item at the top level in 7th position. To move it to the 2nd position, update Menu Item: Position from 7 to 2 and update other Menu Items to have sequential position numbers.
You do not need to move the Menu Item to a different row in the spreadsheet file to change its position. When importing, only the cell values will determine what parent and position the Menu Item has.
Move Menu Item to different parent Menu Item
To change the Menu Item to a different parent Menu Item, you would need to update the values in Menu Item: Parent ID and Menu Item: Parent Title columns indicating what is the new parent for the Menu Item.
You can even do this in bulk if the Menu Item has other Menu Items linked to it.
For my example, I will move “Jackets” Menu Item to be the last item in the “Shirts” Menu Item.
For this, I will copy the “Shirts” Menu Item ID and Title as the Parent ID and Parent Title for the “Jackets”, and will set the position number as last in the “Shirts” menu item.
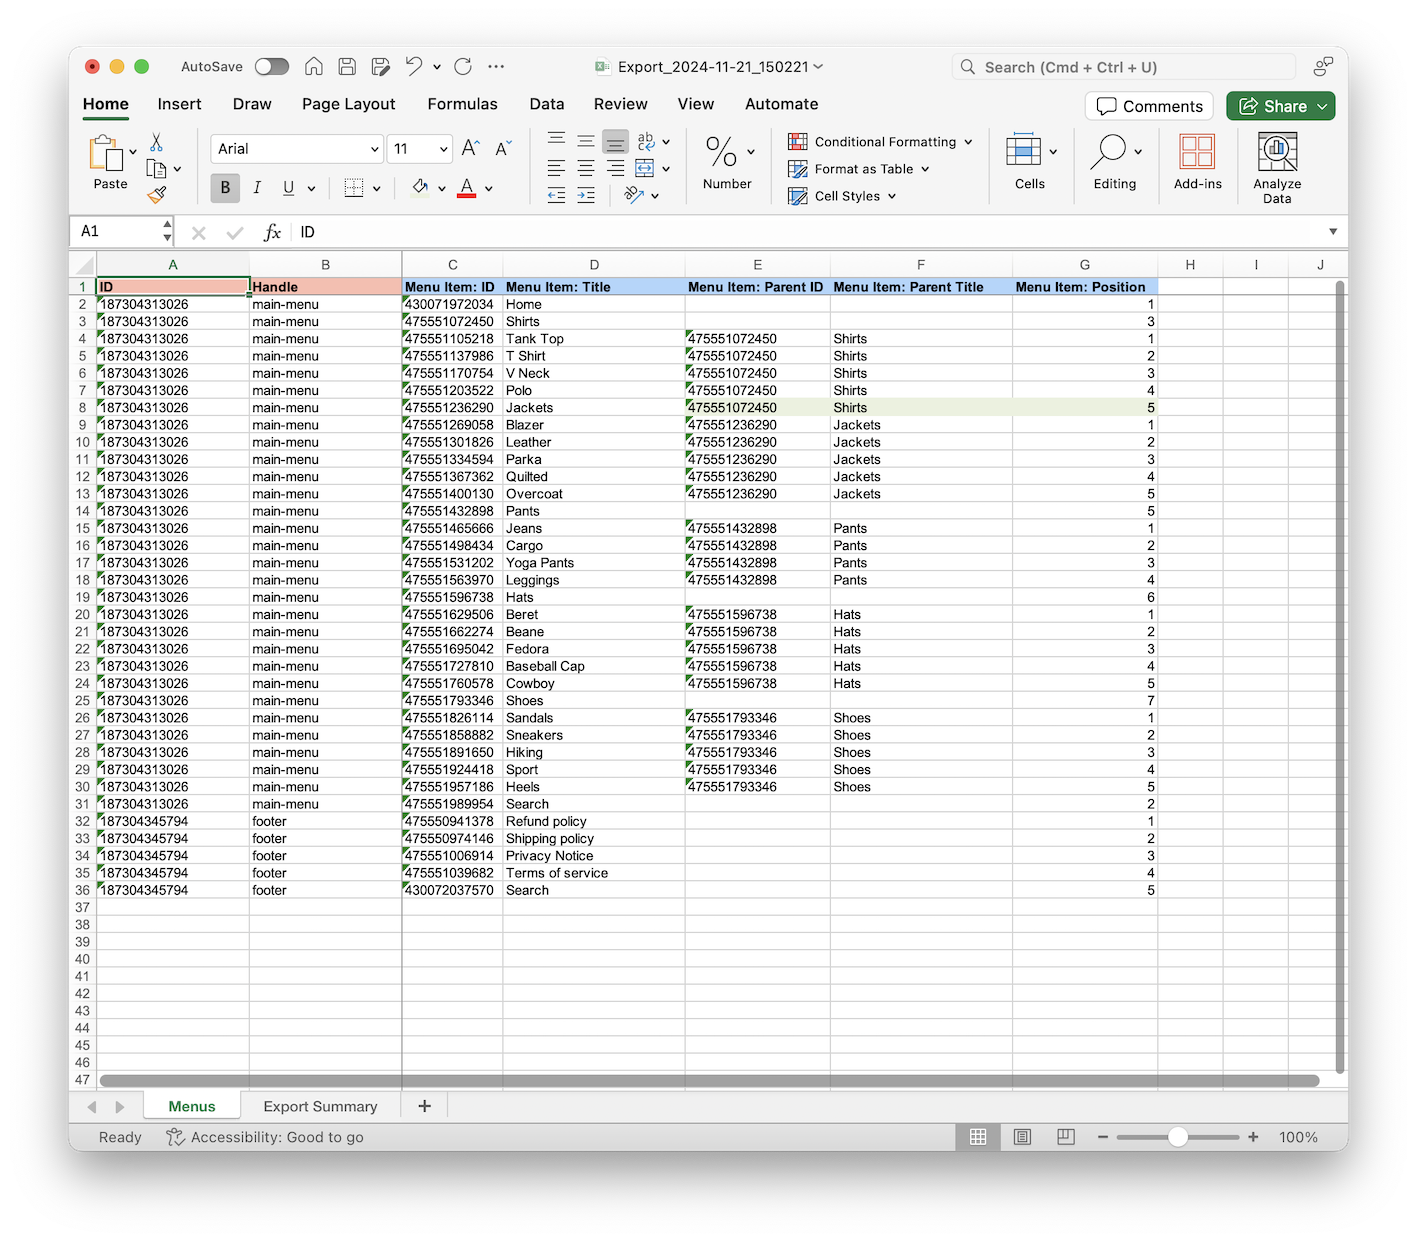
You can do this also in a bigger scale for very large and complex Menus to create your own menu item hierarchy, in bulk change the Menu Item parents, and adjust the general sorting of Menu Items within their parents.
3. Save and import Shopify Menu Items
Once you’ve finished editing the exported file to update the positions of your Shopify menu items, the next step is to save the file and import it back into Shopify using the Matrixify app.
Head back into the Matrixify app, in the “Home” page locate the Import section where you can upload your file.
Once uploaded the app will Analyze the file. Confirm that all counts and details look correct and press the “Import” button to start the import job and bulk update your Menu Item positions and sorting.
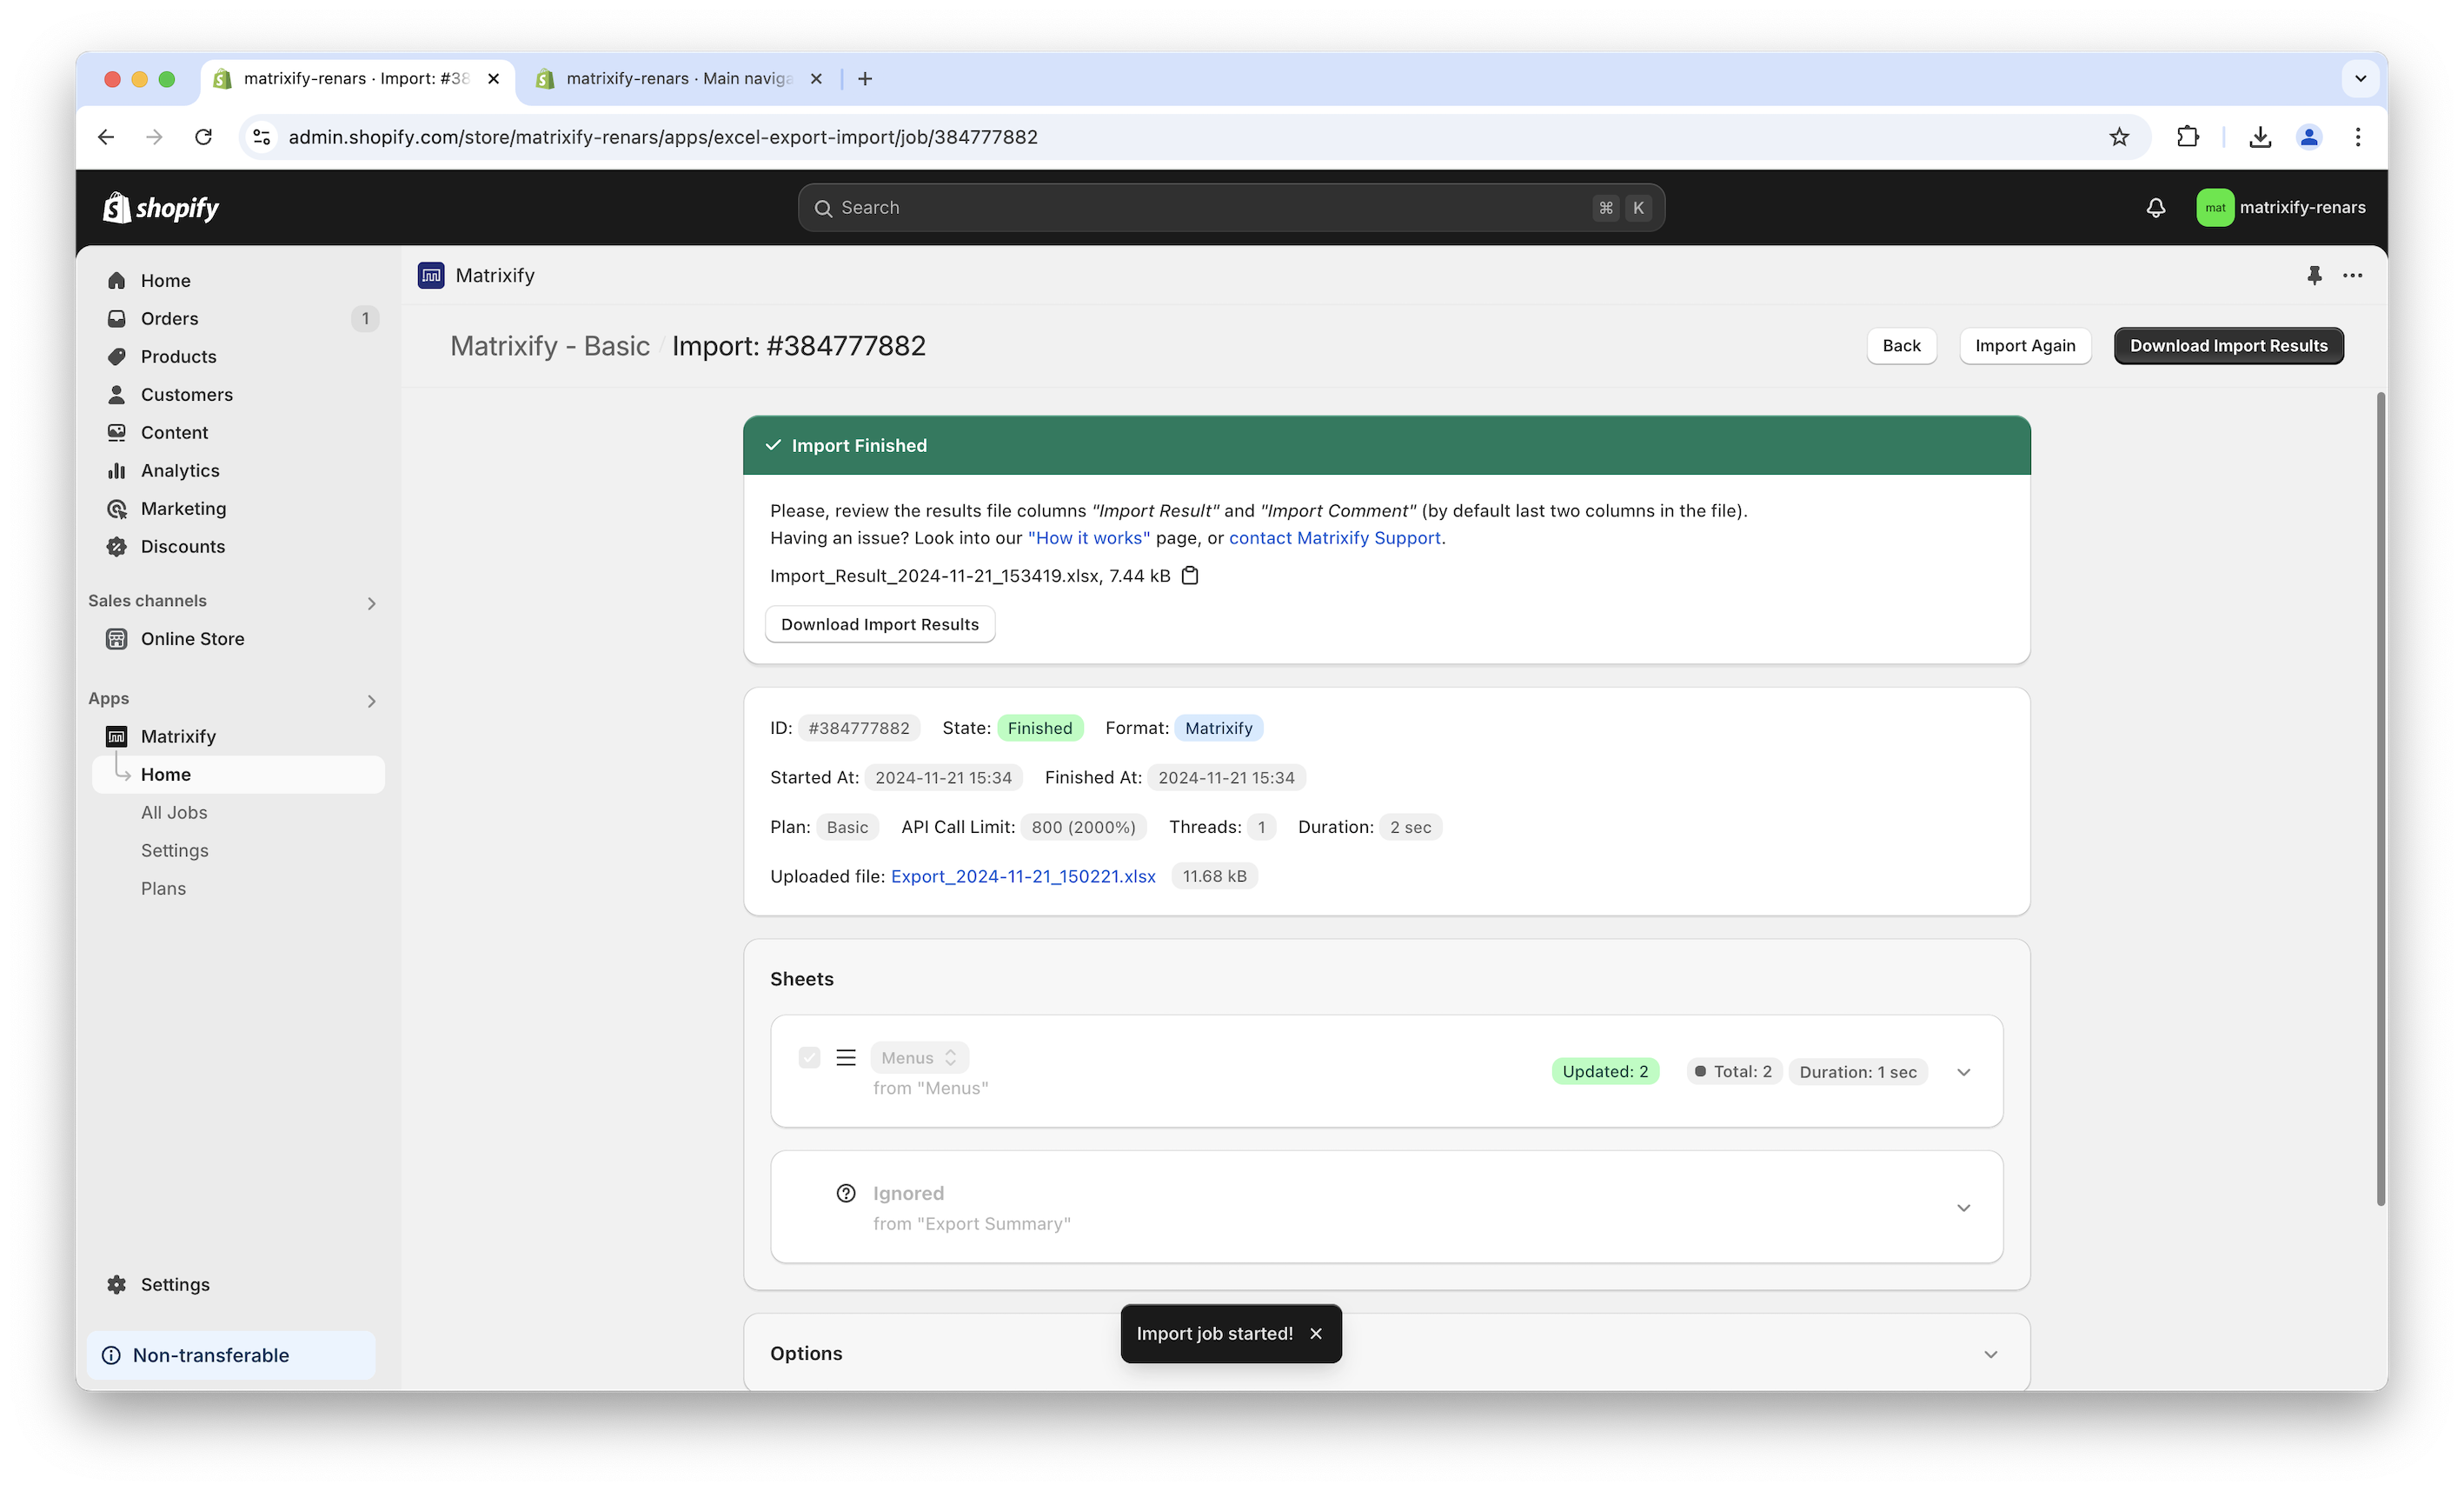
Once the import has finished, you can see all your updated Shopify Menu hierarchy and Menu Item positions.
Good to know
- Matrixify app plan limits are for whole Navigation Menus regardless of how many menu items they contain. For example, with the Matrixify Demo plan you can export and import up to 2 Menus at a time with all the Menu items within those Menus. See the Matrixify Pricing page for each subscription plan’s limits and pricing.
- With the Matrixify app you can also bulk import and create new Shopify Navigation Menus.
- Read other tutorials on how to use Matrixify to bulk manage your Shopify Navigation Menus.
- Read Shopify Manuals on how to manage Navigation Menus in your Shopify Online Store.


