
Adding products to the Shopify Custom Collections can be a challenge and time consuming, that is why Matrixify has developed a tool to do it quickly and simply!
Should I use Shopify Smart Collections or Custom Collections?
Shopify Custom Collections are most frequently used (also known as Manual Collections), although there are also Smart Collections (also known as Automated Collections).
It is a better practice to use Smart Collections for grouping Products, as it is more dynamic and you don’t need to attach each product manually. But if defining rules for Smart Collection seem too complicated, or you need to have more than 5000 collections, then Custom Collections are a way to go. Shopify has a limit of 5000 Smart Collections, but no limit on Custom Collections.
In a Custom Collection, products are added manually by Product ID or Product Handle. Typically there are two cases –
- You want to create a new Custom Collection and add products.
- Edit what products are linked to existing custom collections.
1. Create new Shopify Custom Collection and add Products to it
With Matrixify it is not only possible to add Products to a Custom Collection but it is also possible to create a new Custom Collection to which you can add Products to. In this first part of the tutorial we will look at creating a new Custom Collection and how to add Products to it.
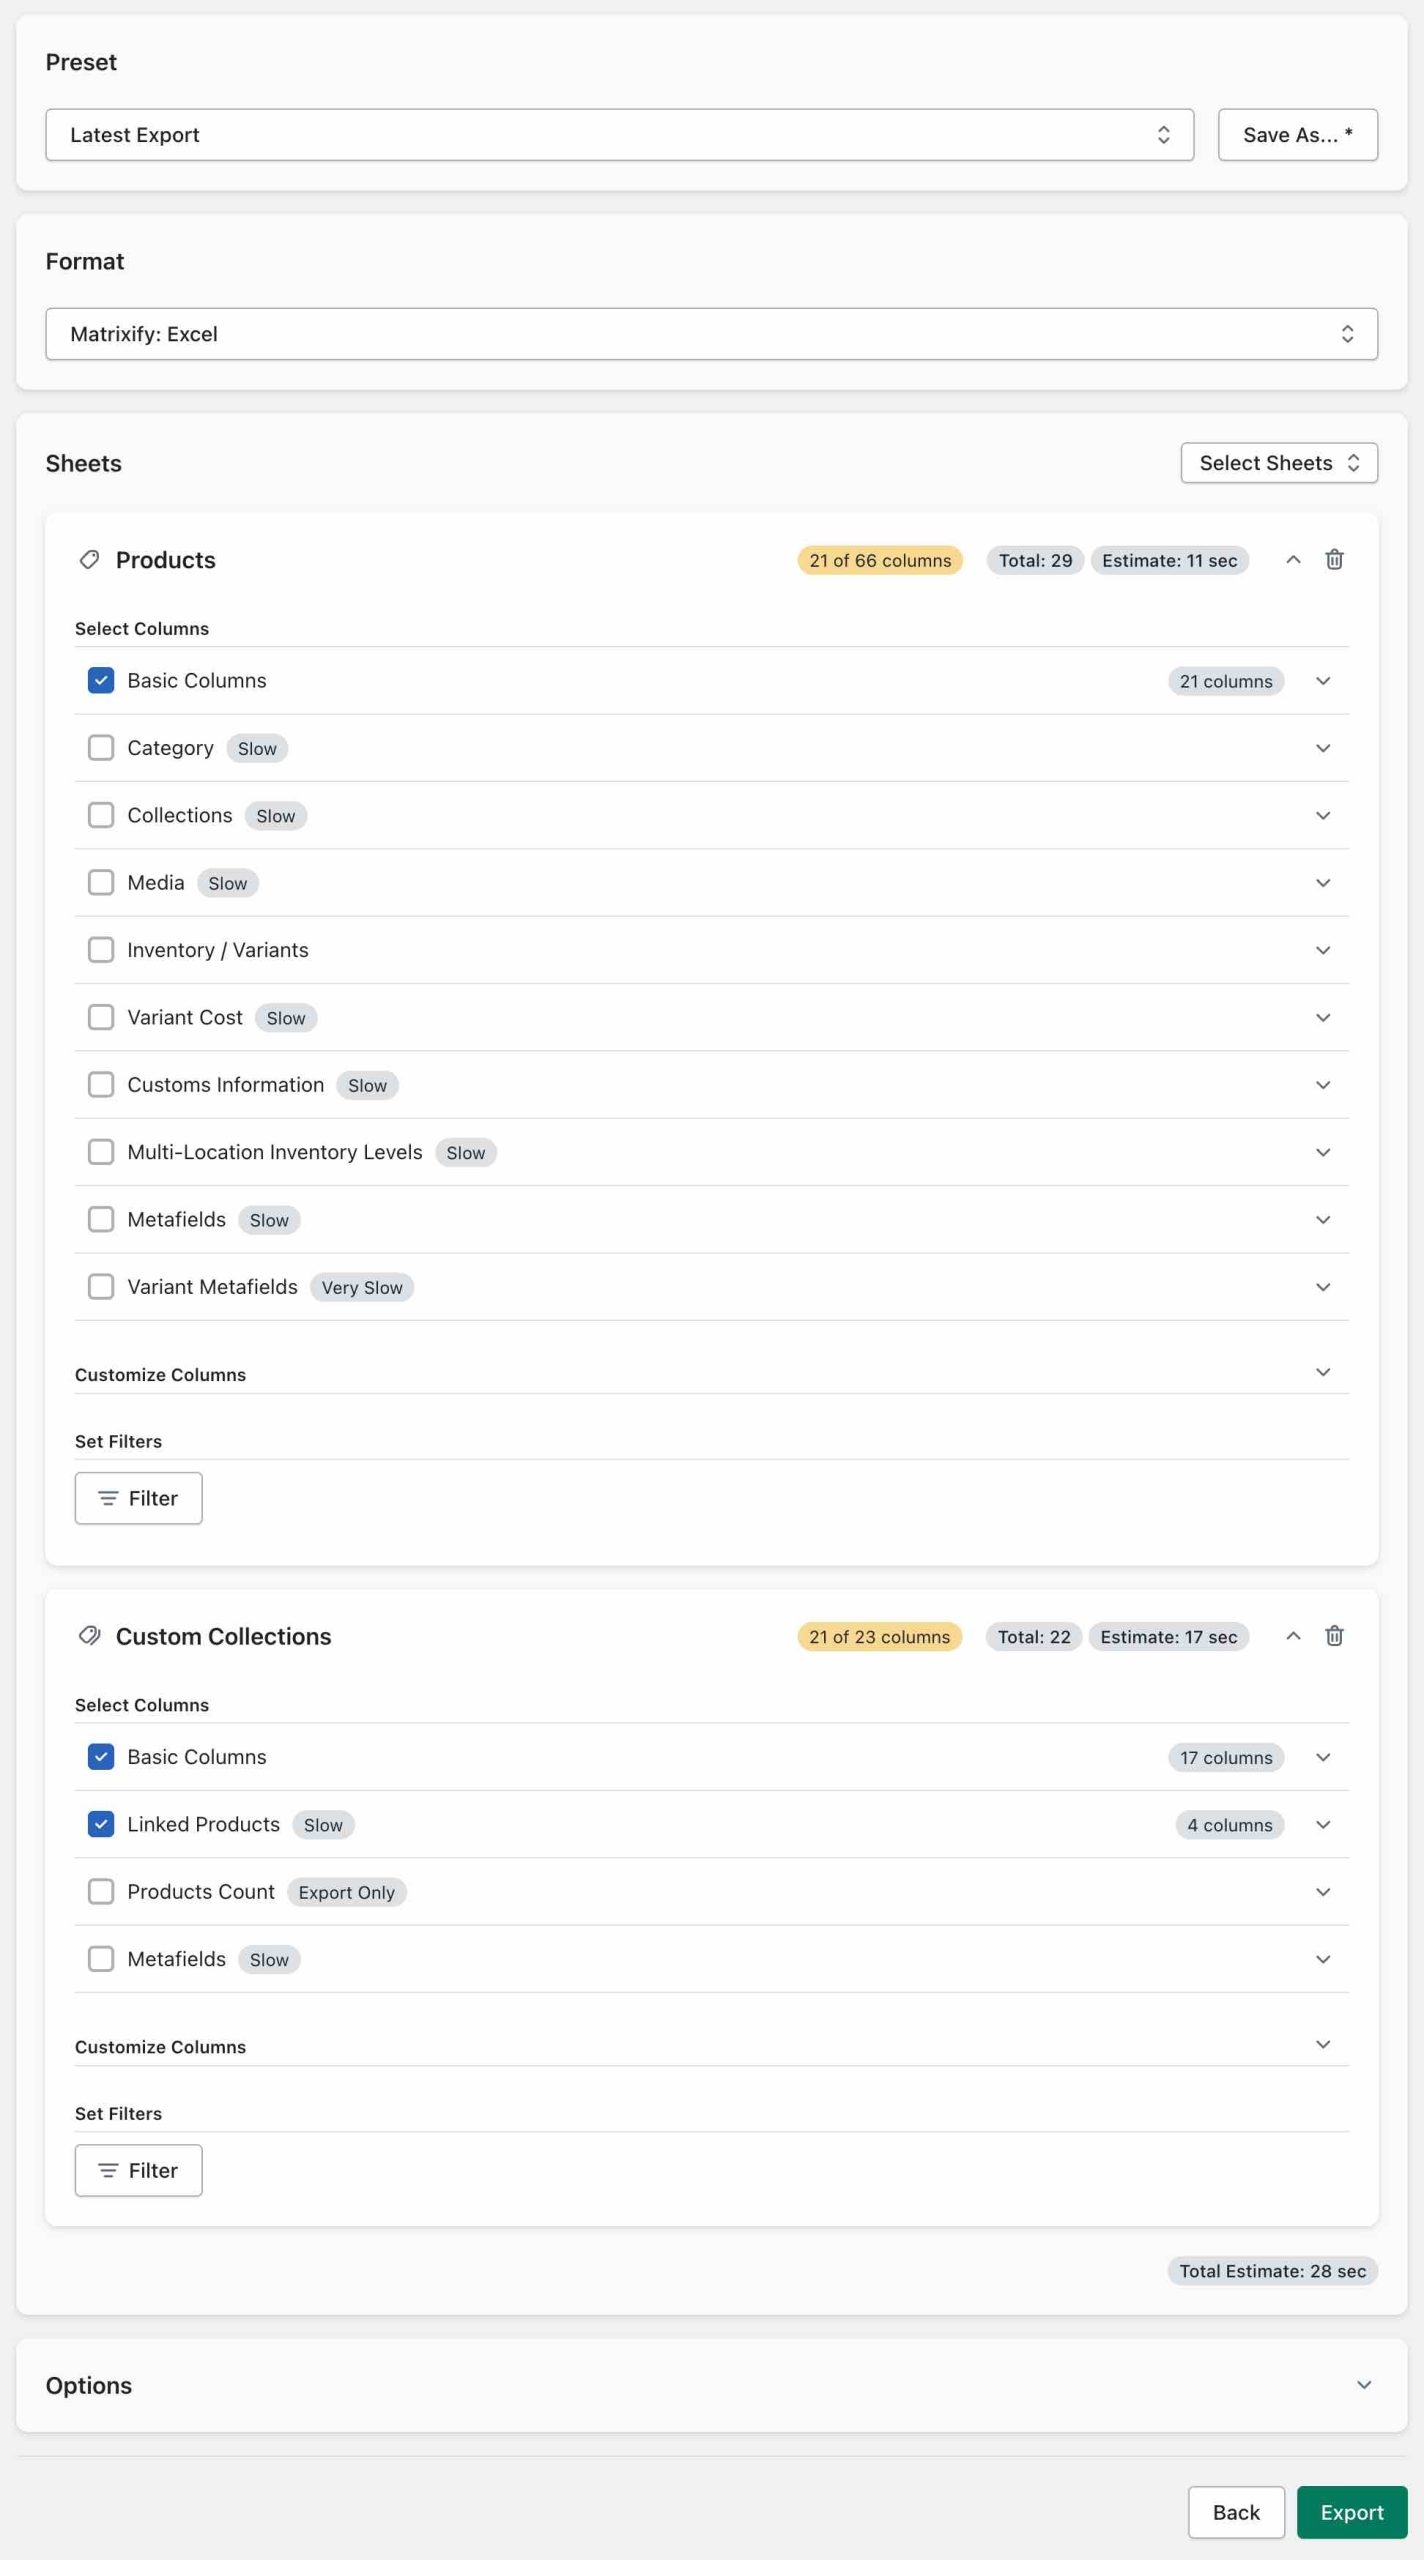
Export Products from Shopify using Matrixify
To create new Custom Collections with products, you need to know Product IDs or Product Handles for those products you want to add. Let’s get this data by exporting products with the Matrixify app. You only need to select to Export the Basic Columns column group for Products:

When Products are exported, open the exported Excel file:
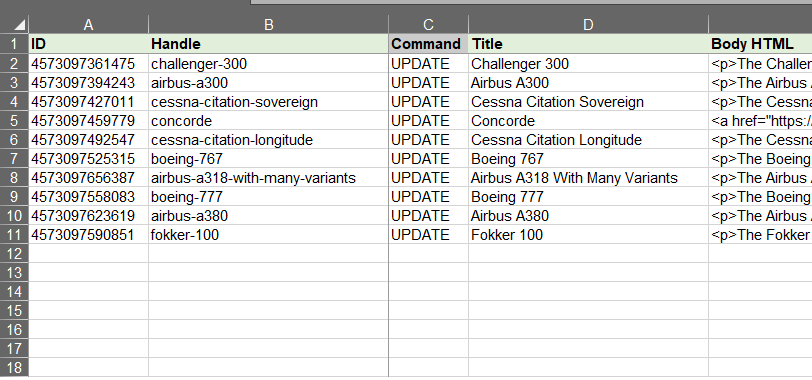
Edit exported file
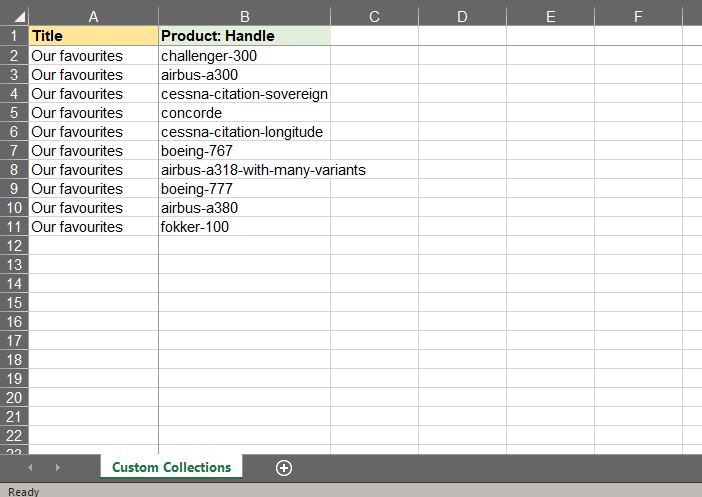
As a bare minimum, you need only 2 columns in the Excel:
Title– Custom Collection title. Title is mandatory in Shopify to create a new Custom Collection.Product: Handle– Handles of the products we want to add to this collection
You can also add other fields to the Custom Collections import file. Find all possible fields in our Custom Collection documentation page.
You will have as many rows, as many Products you want to include into this Collection. It is important to provide Title on each row, as this will tell the app that the Product will be included in this Collection. You must take the Product: Handle column values from the exported Product file by renaming the Handle column to Product: Handle.
Remember to call this Excel Sheet/Tab: Custom Collections.
Import edited Custom Collections file
Once you have saved your edited Exported file, you can then head to the Matrixify app and Import the file.
In the Home page of the app you can upload your file to the Import section by clicking “Add file” or dropping the files in the section to upload.
Once your file has been uploaded, the Matrixify app will analyze the file. Make sure the file is recognised as Custom Collections and that the count is correct. If all looks as it should, then you can go ahead and press the “Import” button.
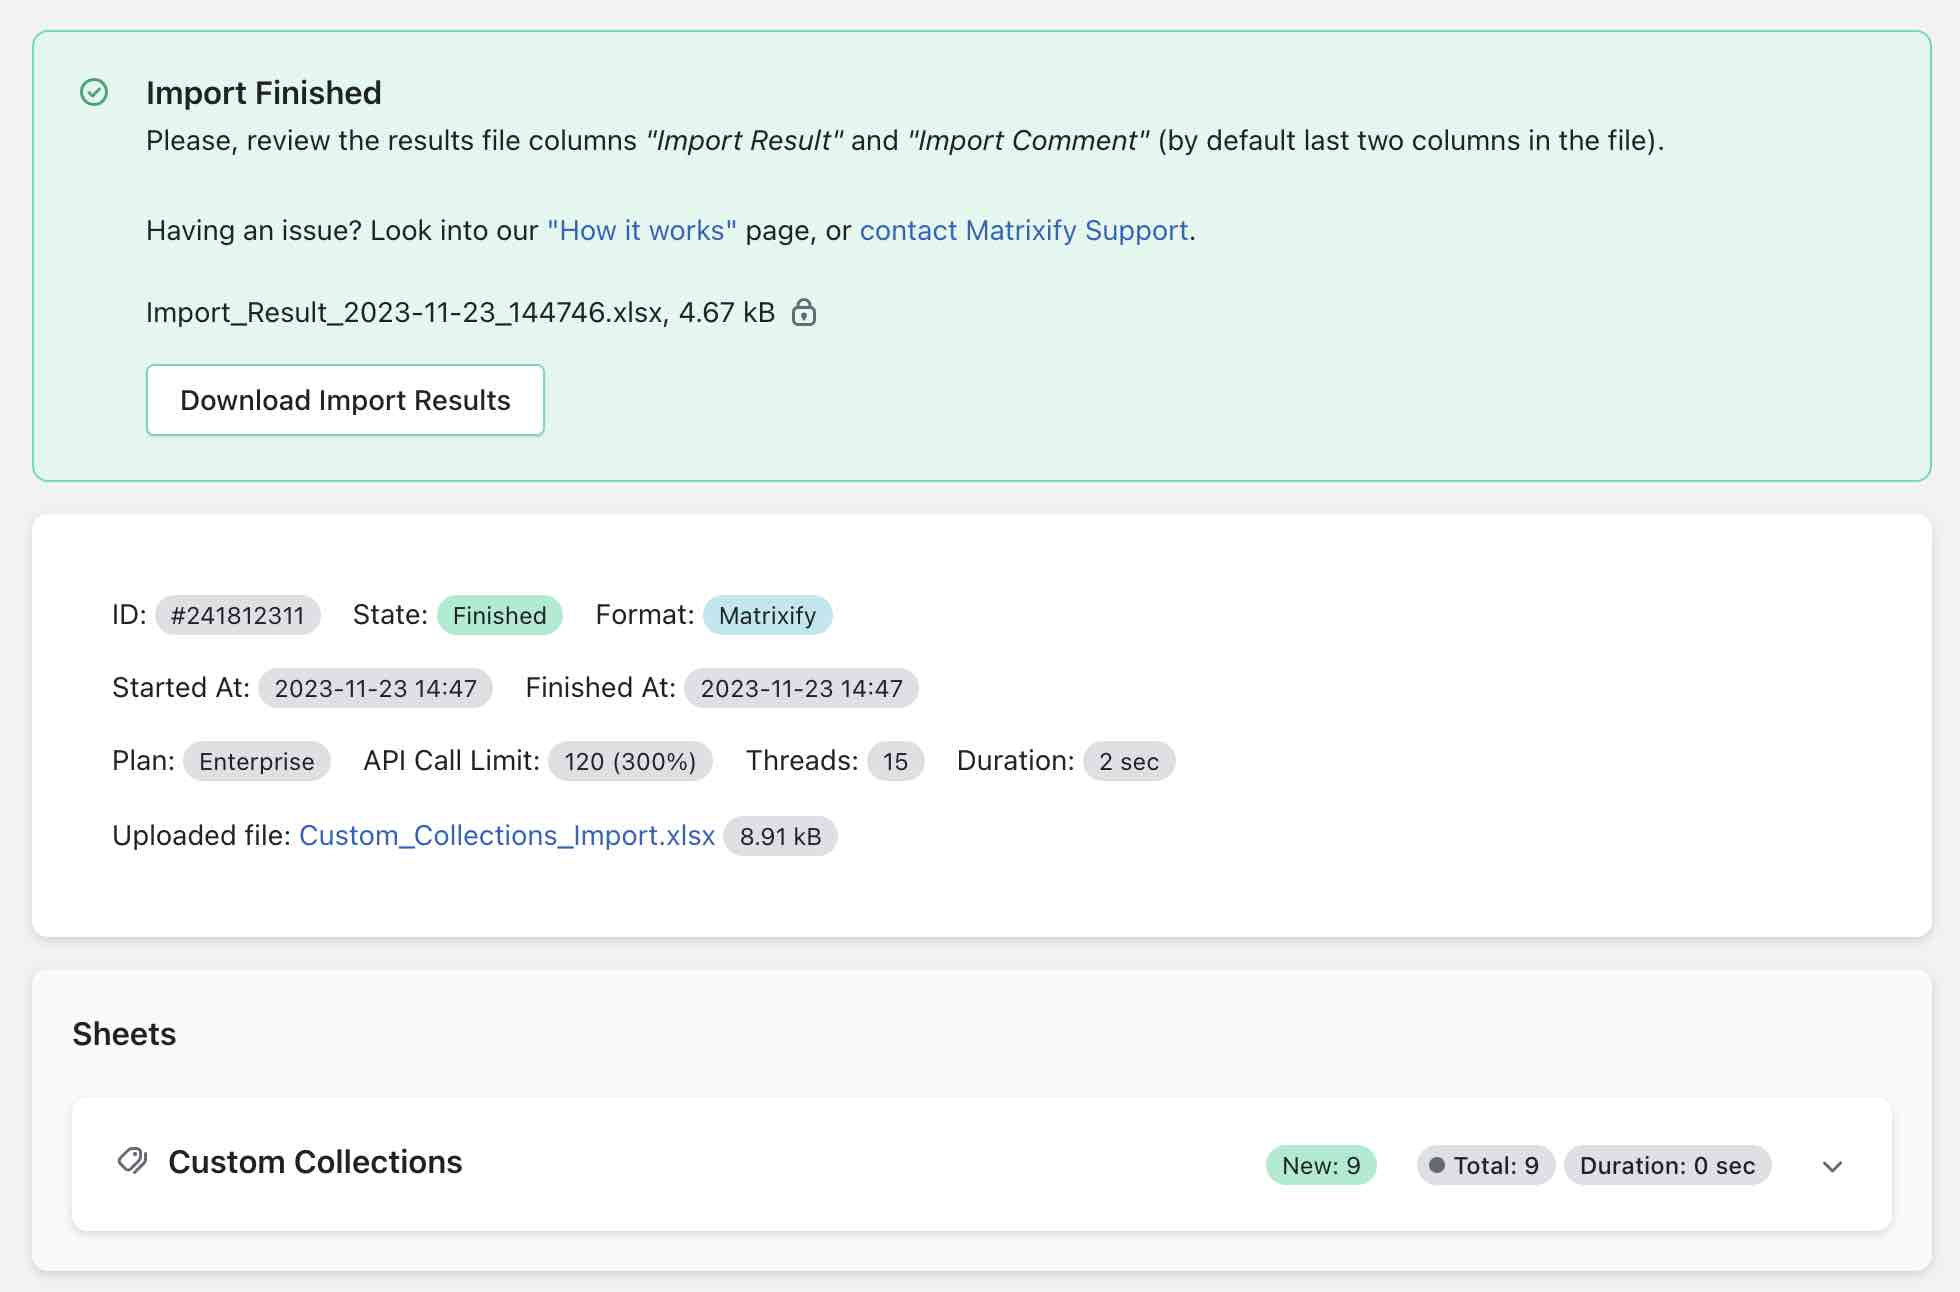
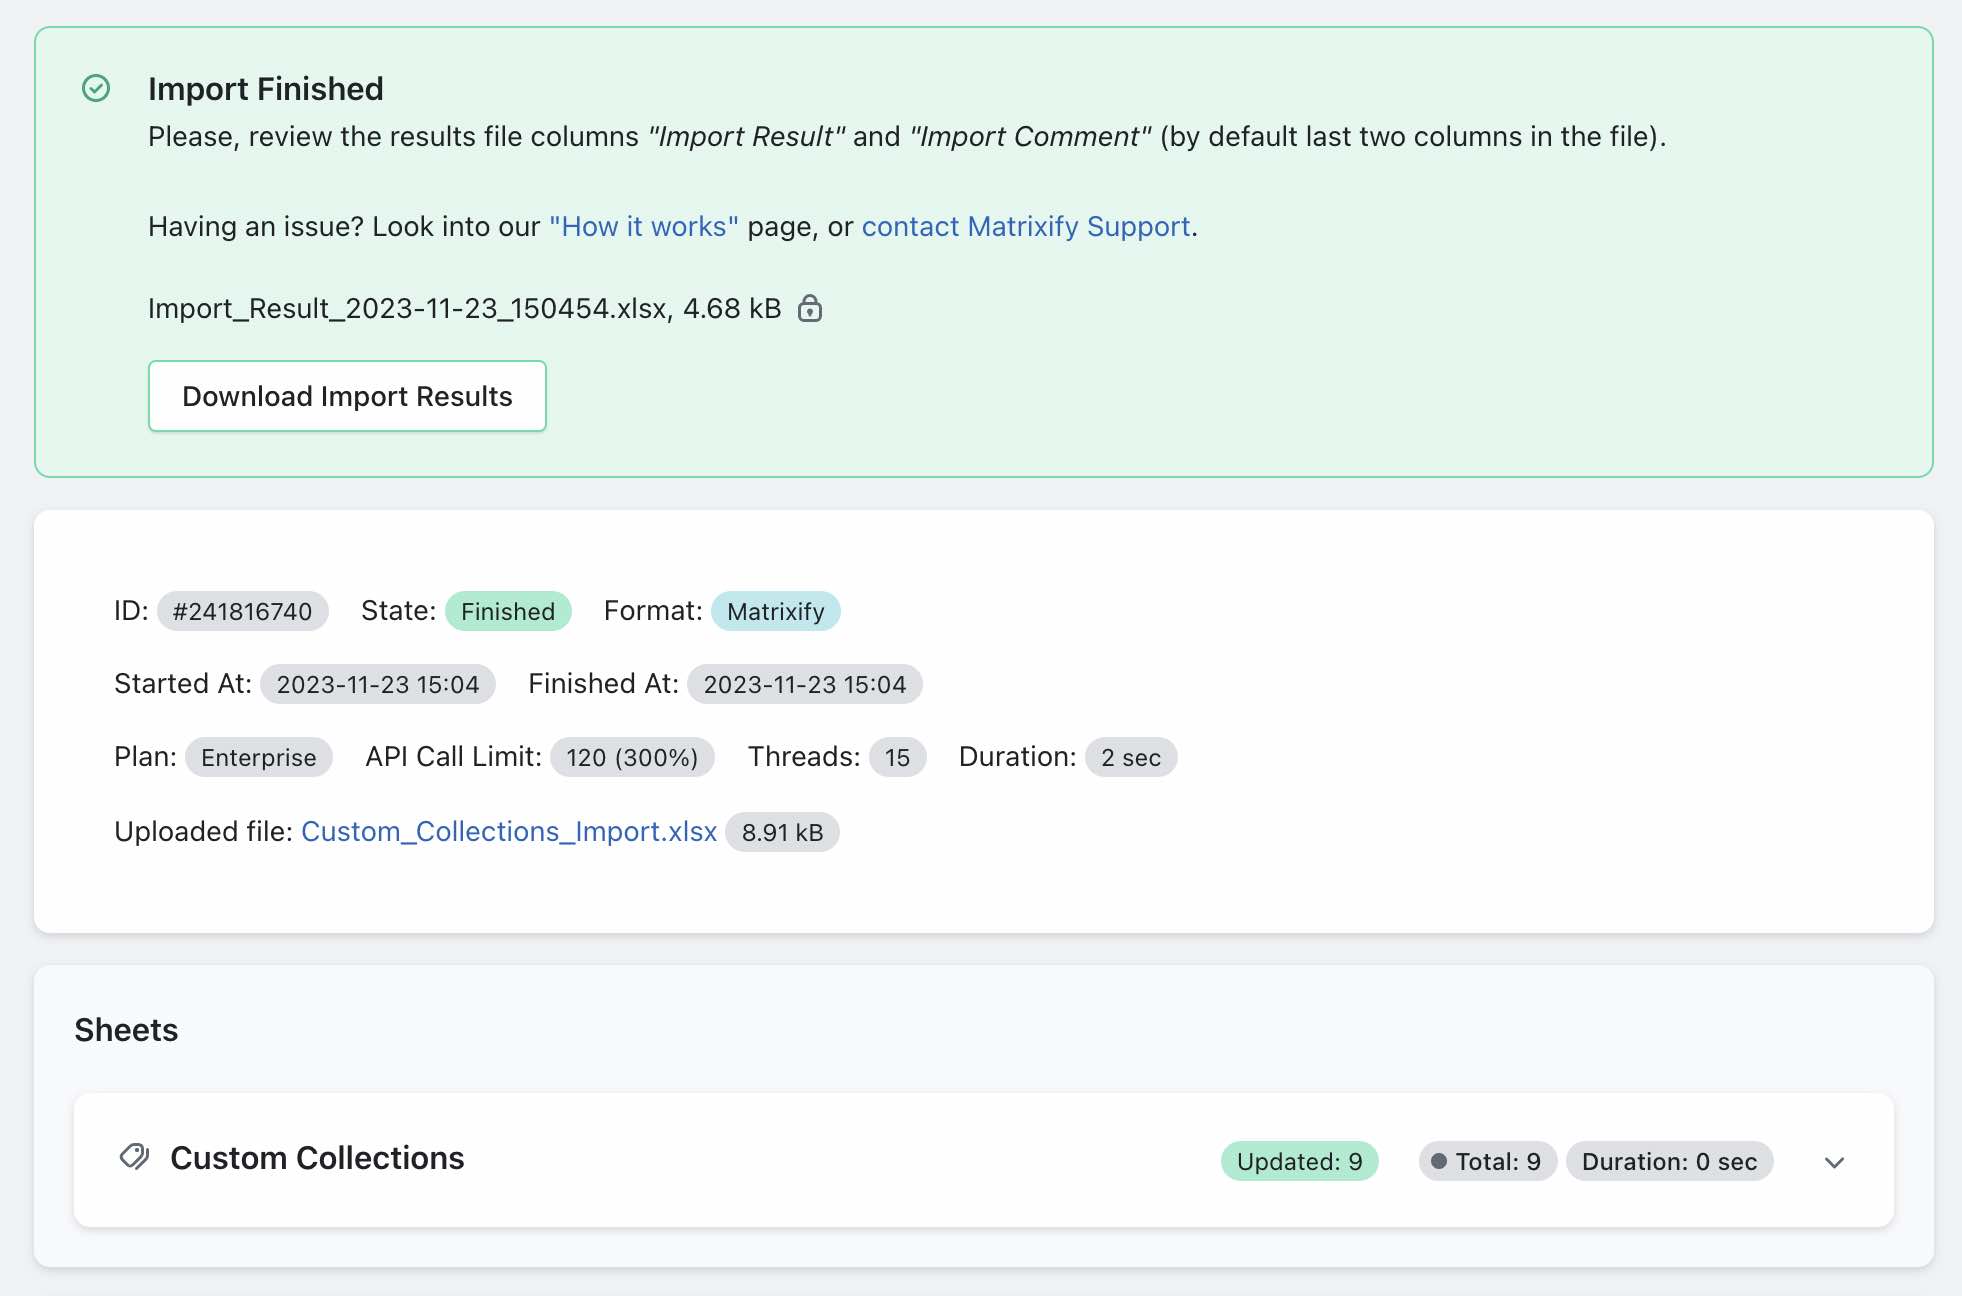
Once the Import has completed, you can navigate to your Shopify Admin -> Collections to view your newly Imported Custom Collections with Products added to them!
2. Update existing Shopify Custom Collection by adding, removing, or replacing Products in collection
Firstly, we need to Export Products and Custom Collections with Linked Products with the app. It is good to export both because then you will have them both in the same file, and in Custom Collections sheet/tab you will see also Product: Handle values for existing products, not just the Product: ID values. In the Products sheet/tab you will be able to see the Product Handle and ID columns.
Download the exported Excel file and open it.
In the file, you will see two sheets “Products” and “Custom Collections”.
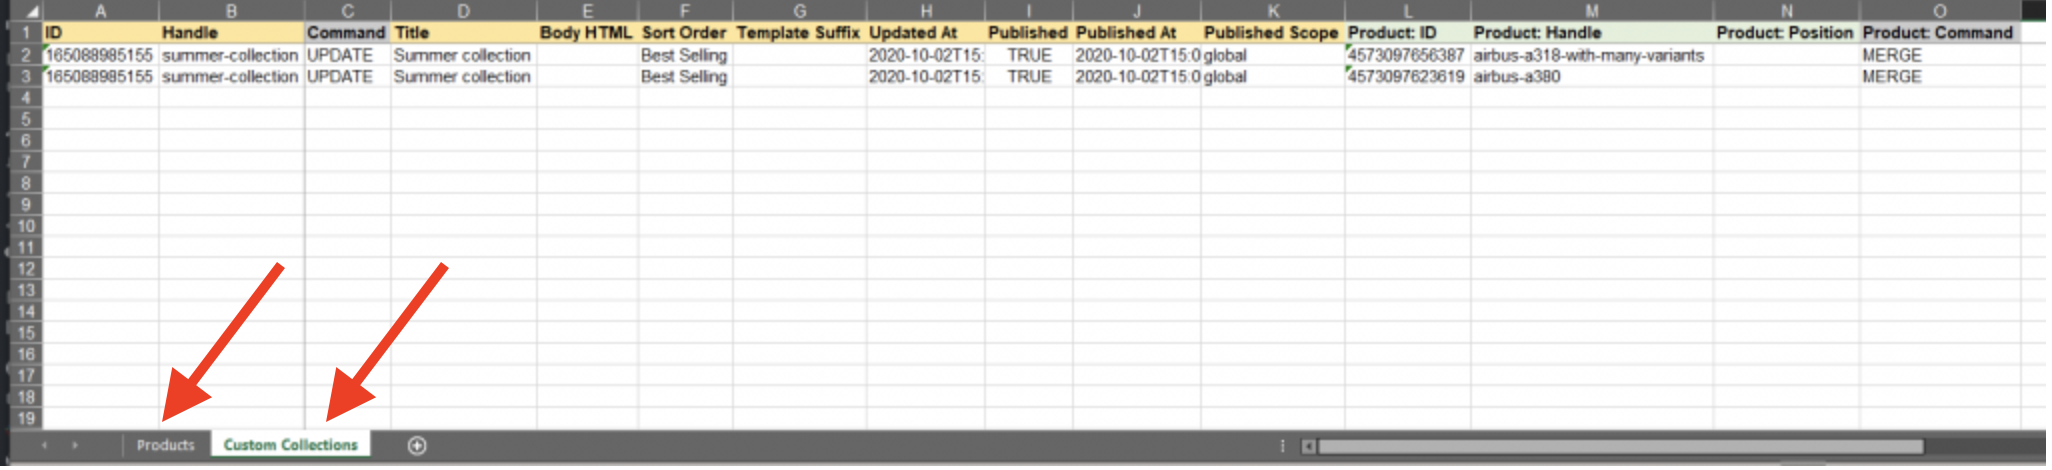
Removing products from existing Custom Collection
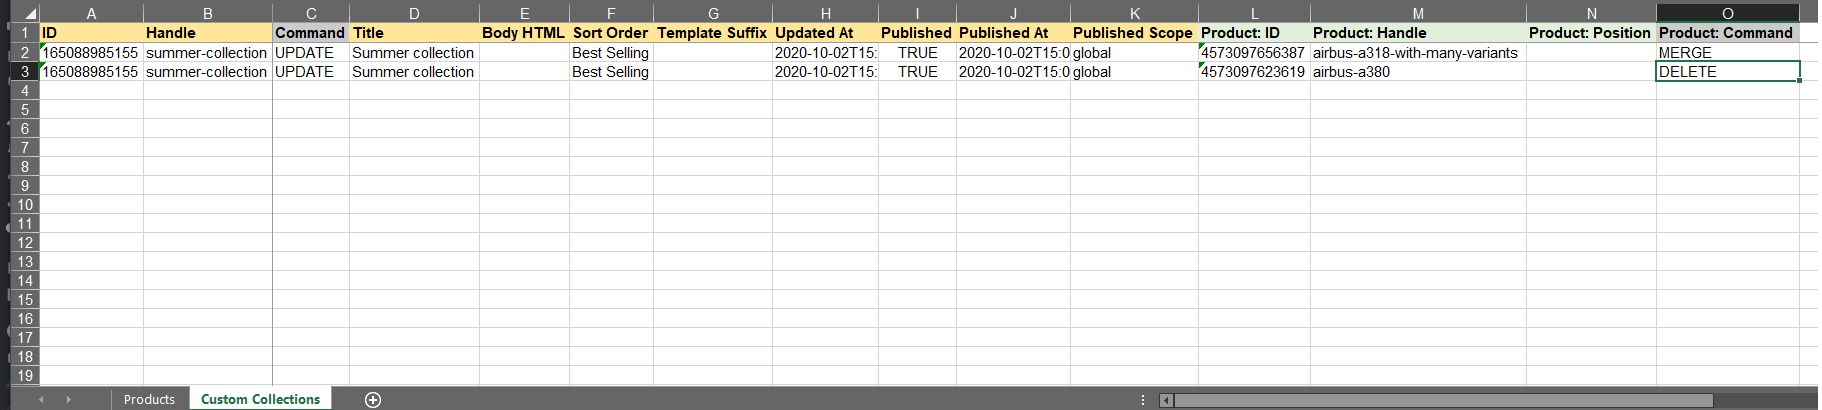
There are 2 products in the Collection “Summer collection”. In this case we will remove one of the Products from the collection.
This is done by using the Product: Command column with value DELETE.
The app will remove that product from the Custom Collection. Make sure you change the value in the Product: Command column and not the Command column!
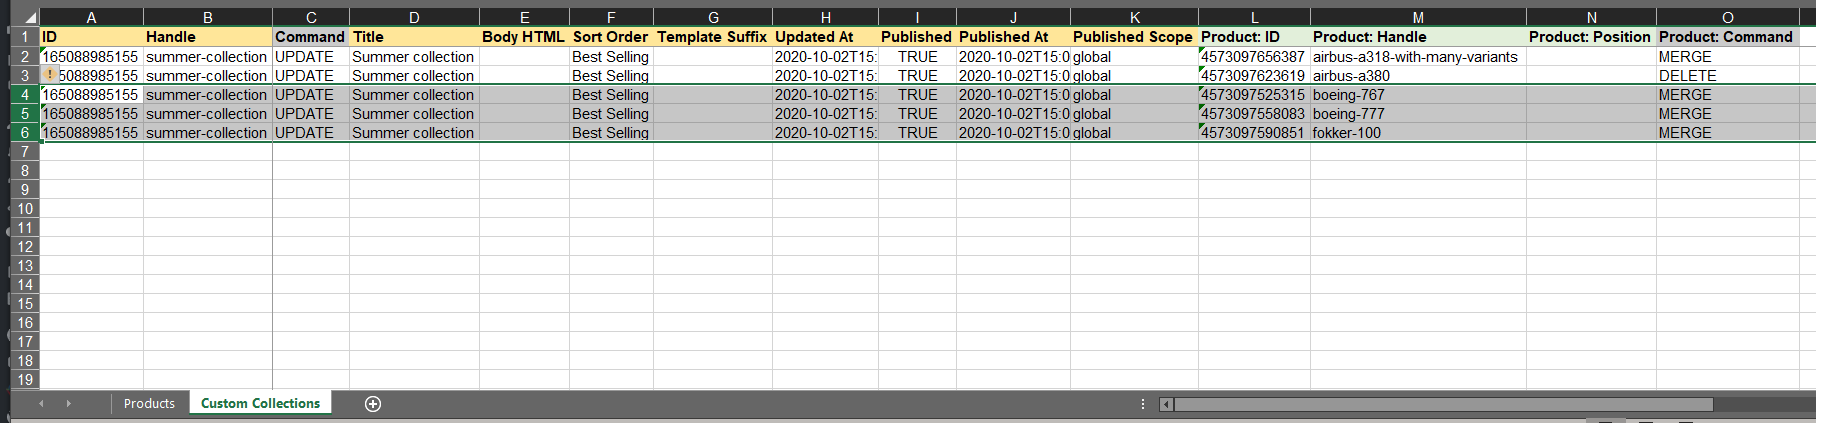
Adding products to the existing Custom Collection
Here, we will add 3 more products to this collection. First we must find their handles in the Products sheet and add 3 more lines for collection with the same ID and Handle values, so that app knows that those lines belong to the same Shopify Custom Collection.
To make it easier, you can just copy the previous row – to mark the spot for the additional product in that manual collection.
You need to make sure that the Product: Command column has the value MERGE.
This will tell the app to add products from those rows to the collection. Make sure you change the value in the Product: Command column and not the Command column!
It is also possible to add Products to a Custom Collection when Importing only Products. Here is a tutorial on how you can Import Shopify Products and include them in Collections from the same file.
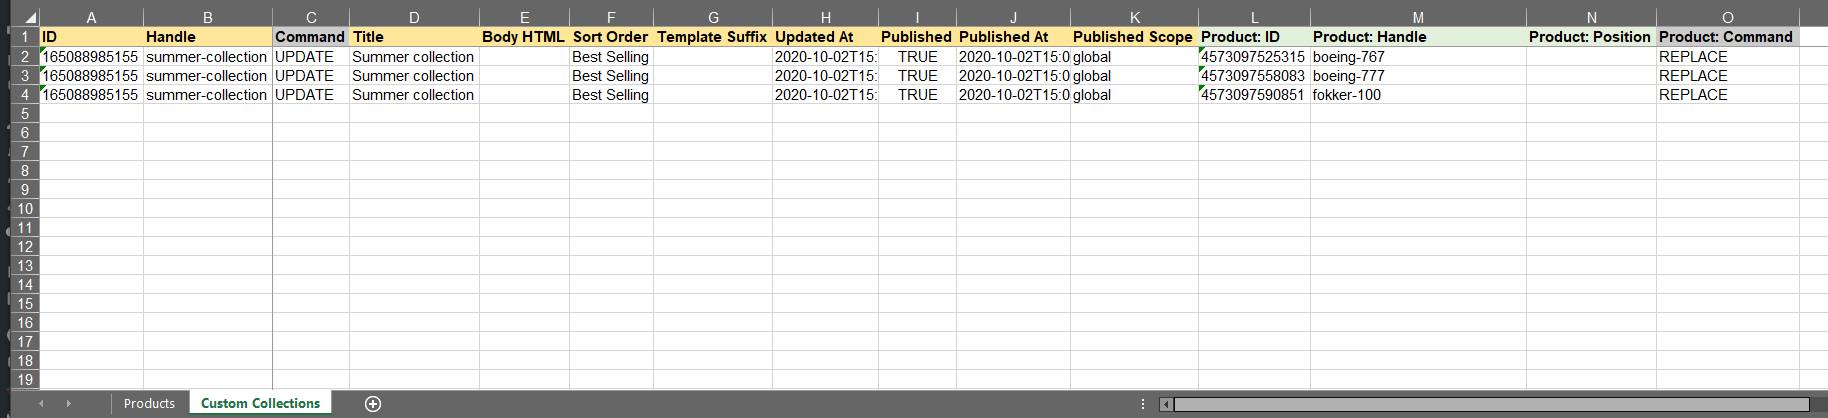
Replacing existing products with ones from the file
If you wish to replace all existing products in a collection with the ones from your file, then you only need to list the new Products.
Let us assume that we want our collection to only have the 3 new Products.
We would add 3 new rows as in the previous step but then delete the two existing ones.
In this case, it is important to set the Product: Command column to REPLACE.
Then the app will replace all existing products in the Custom Collection with the ones listed in the file. Make sure you change the value in the Product: Command column and not the Command column!
Importing your update
Now we can delete the Products sheet/tab from this file because we don’t want to import products – we want to import just Custom Collections. Save the file and import it into your Shopify store with the app.
Good to know:
- You can also add Products to Custom Collections from “Products” sheet by following this tutorial.
- Read full description of all columns for exporting and importing Shopify Custom Collections.
- Read other tutorials about bulk managing Collections in your store.
- Convert Shopify Automated Collections to Manual in bulk.
- How to bulk delete Shopify Collections.


