Sell and upload your Products in bulk to Google Shopping by creating automated data upload from Shopify to Google Merchant Center account by using Matrixify Google Shopping Data Feed export.
Steps, in short, to automatically upload data to Google Shopping
- Enable public downloads in the Matrixify settings.
- Create new export in the Matrixify app.
- Start the export and copy exported files link.
- Setup import in the Google Merchant Center.
1. Enable public downloads in the Matrixify app
For Google Merchant Center to be able to automatically take Matrixify data, you first need to make sure that your exported files link is public.
Head into the Matrixify app settings and in section “Security” enable the option “Allow downloading your files by external services.”

2. Create export in the Matrixify app
Now to upload Products from Shopify to Google Merchant Center we need to create automated and repeated export in the Matrixify app.
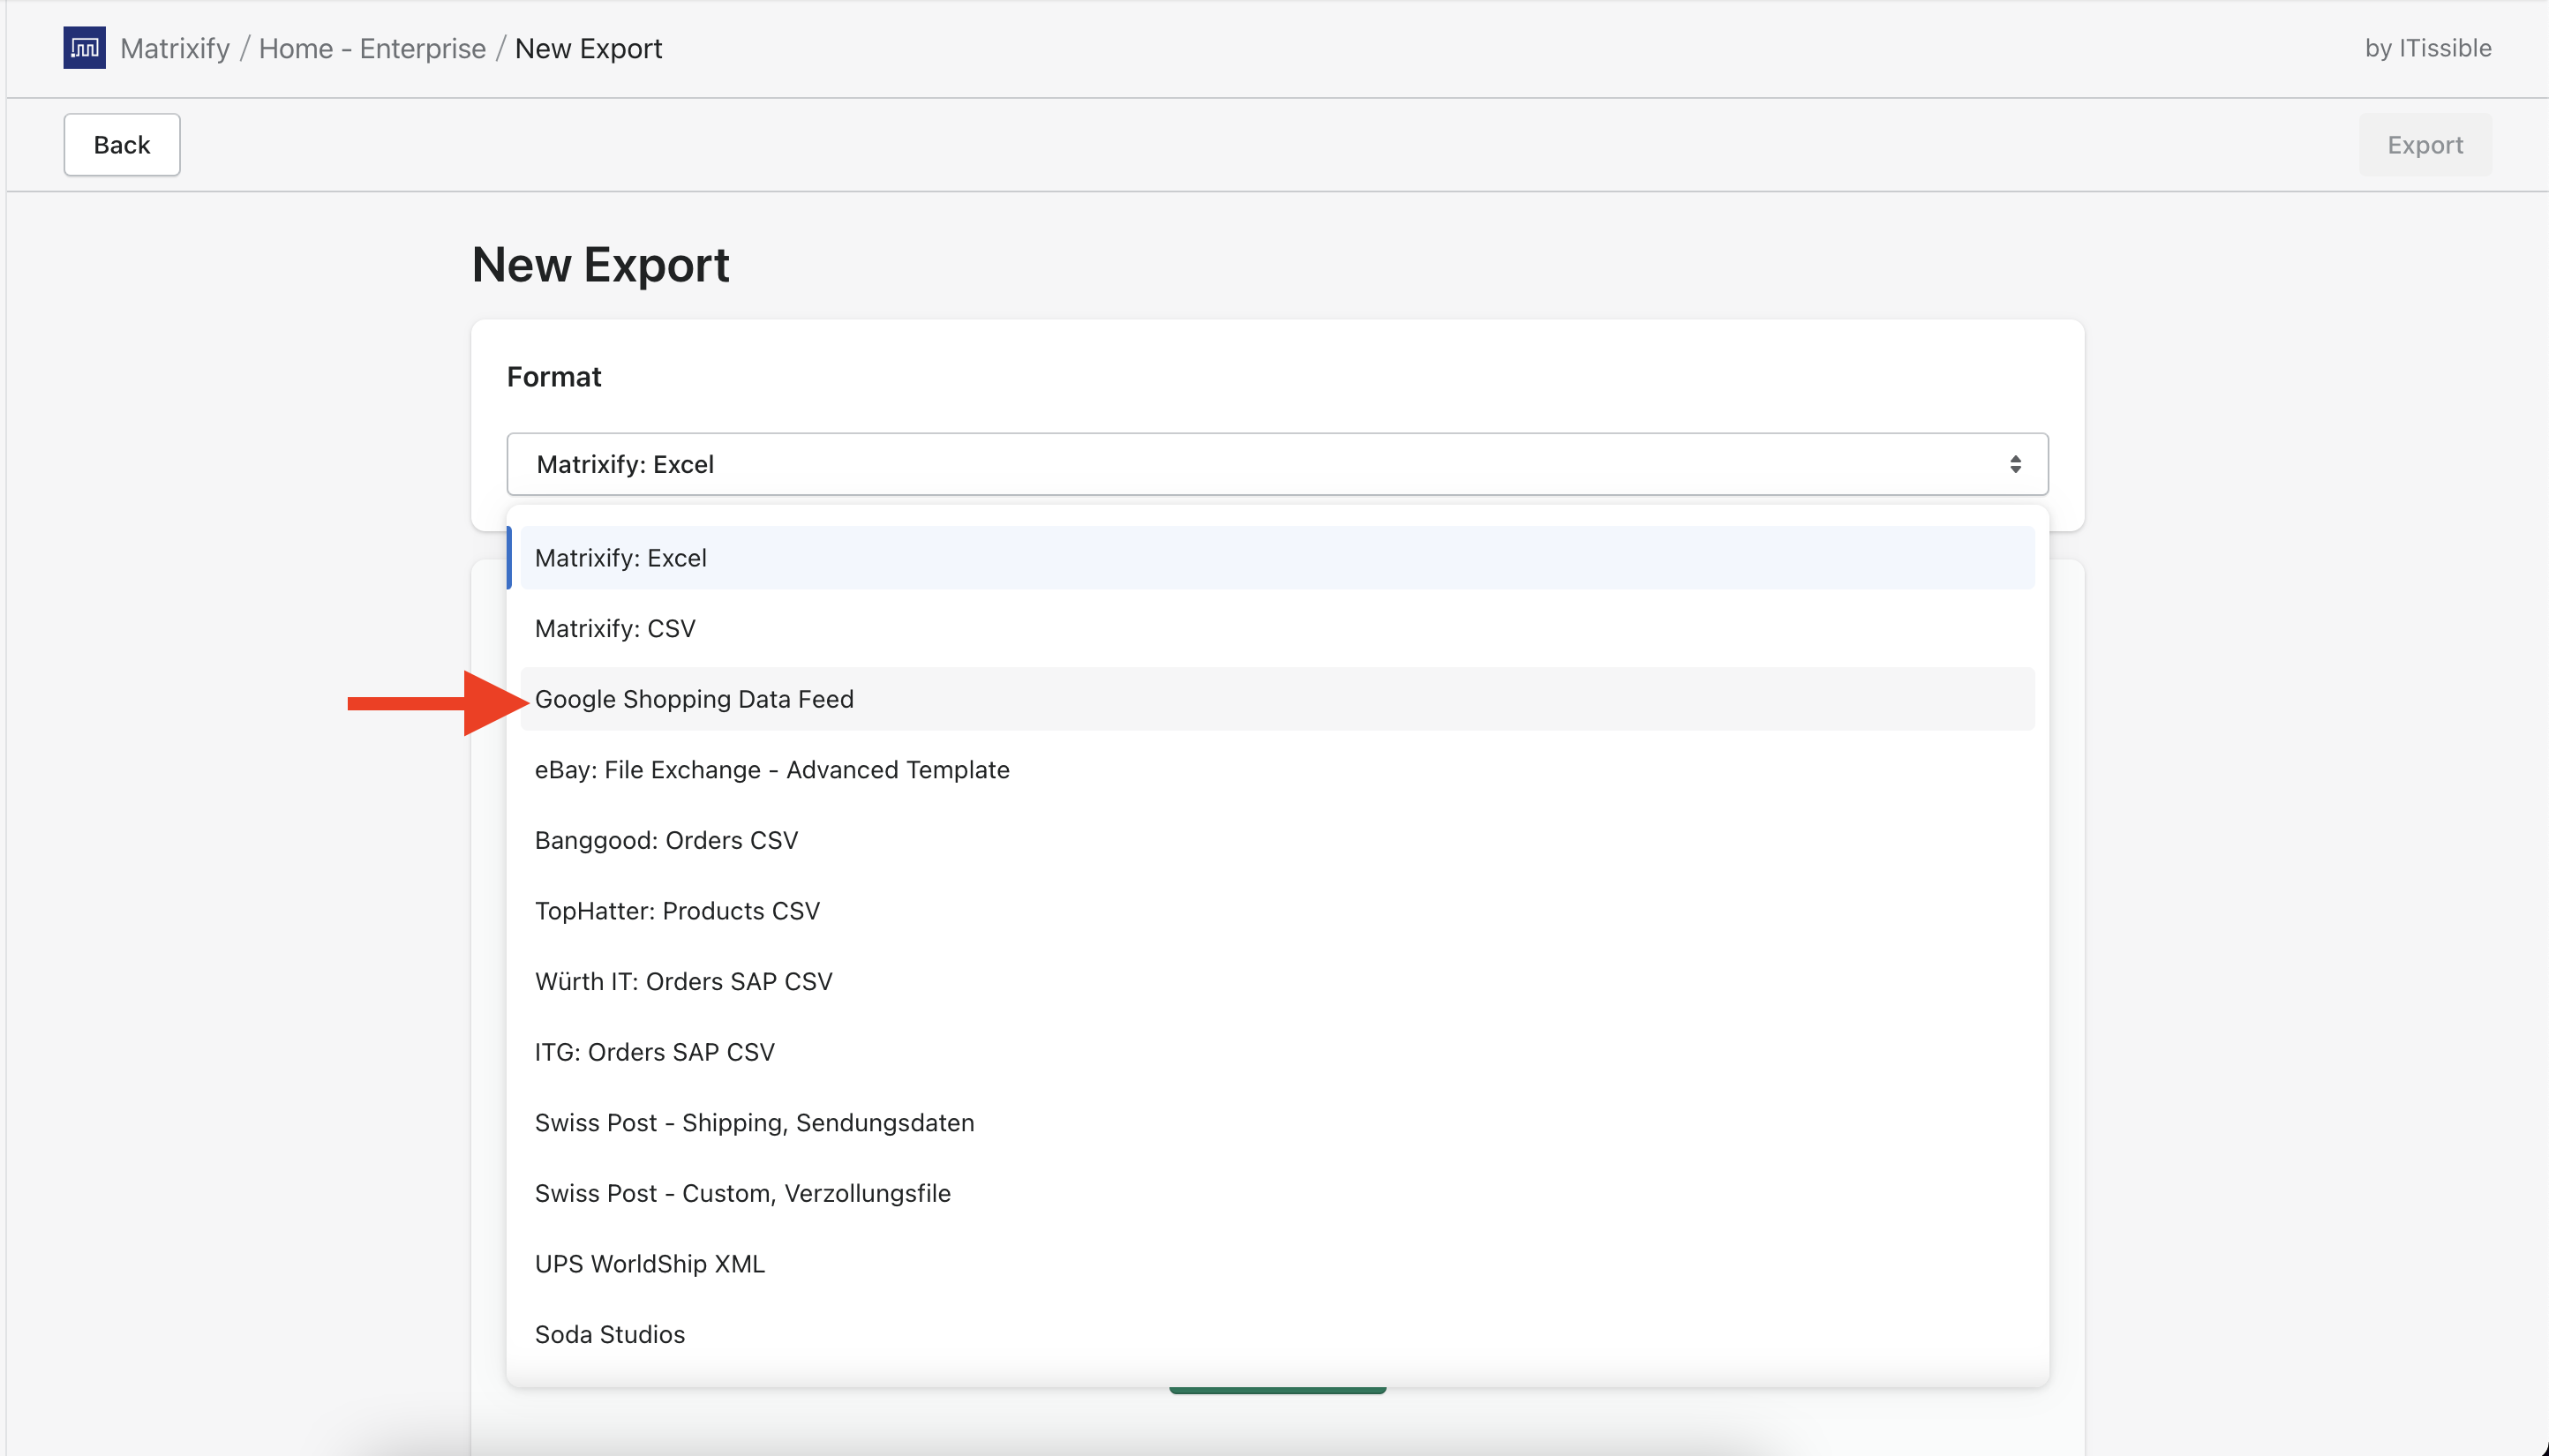
In the app’s Home page “Export” section, click the “New Export” button to a create new export.
2.1. Select export format
First on the new export page select export format Google Shopping Data Feed.
This will make sure that the app exports data to the correct tab limited file that the Google Merchant center requires for upload.
2.2. Select data to export
Now that we have selected the format, the app will automatically select Products to be exported.
Under Products, there will be multiple checkboxes.
To make sure that app takes also data from fields that the Google Shopping app uses in Shopify, select Metafields under Products.
If you wish for Matrixify to take Google Category from the Shopify Category, then also select the Category checkbox. If it’s not selected then the app will try to take the Google Product category from other fields.
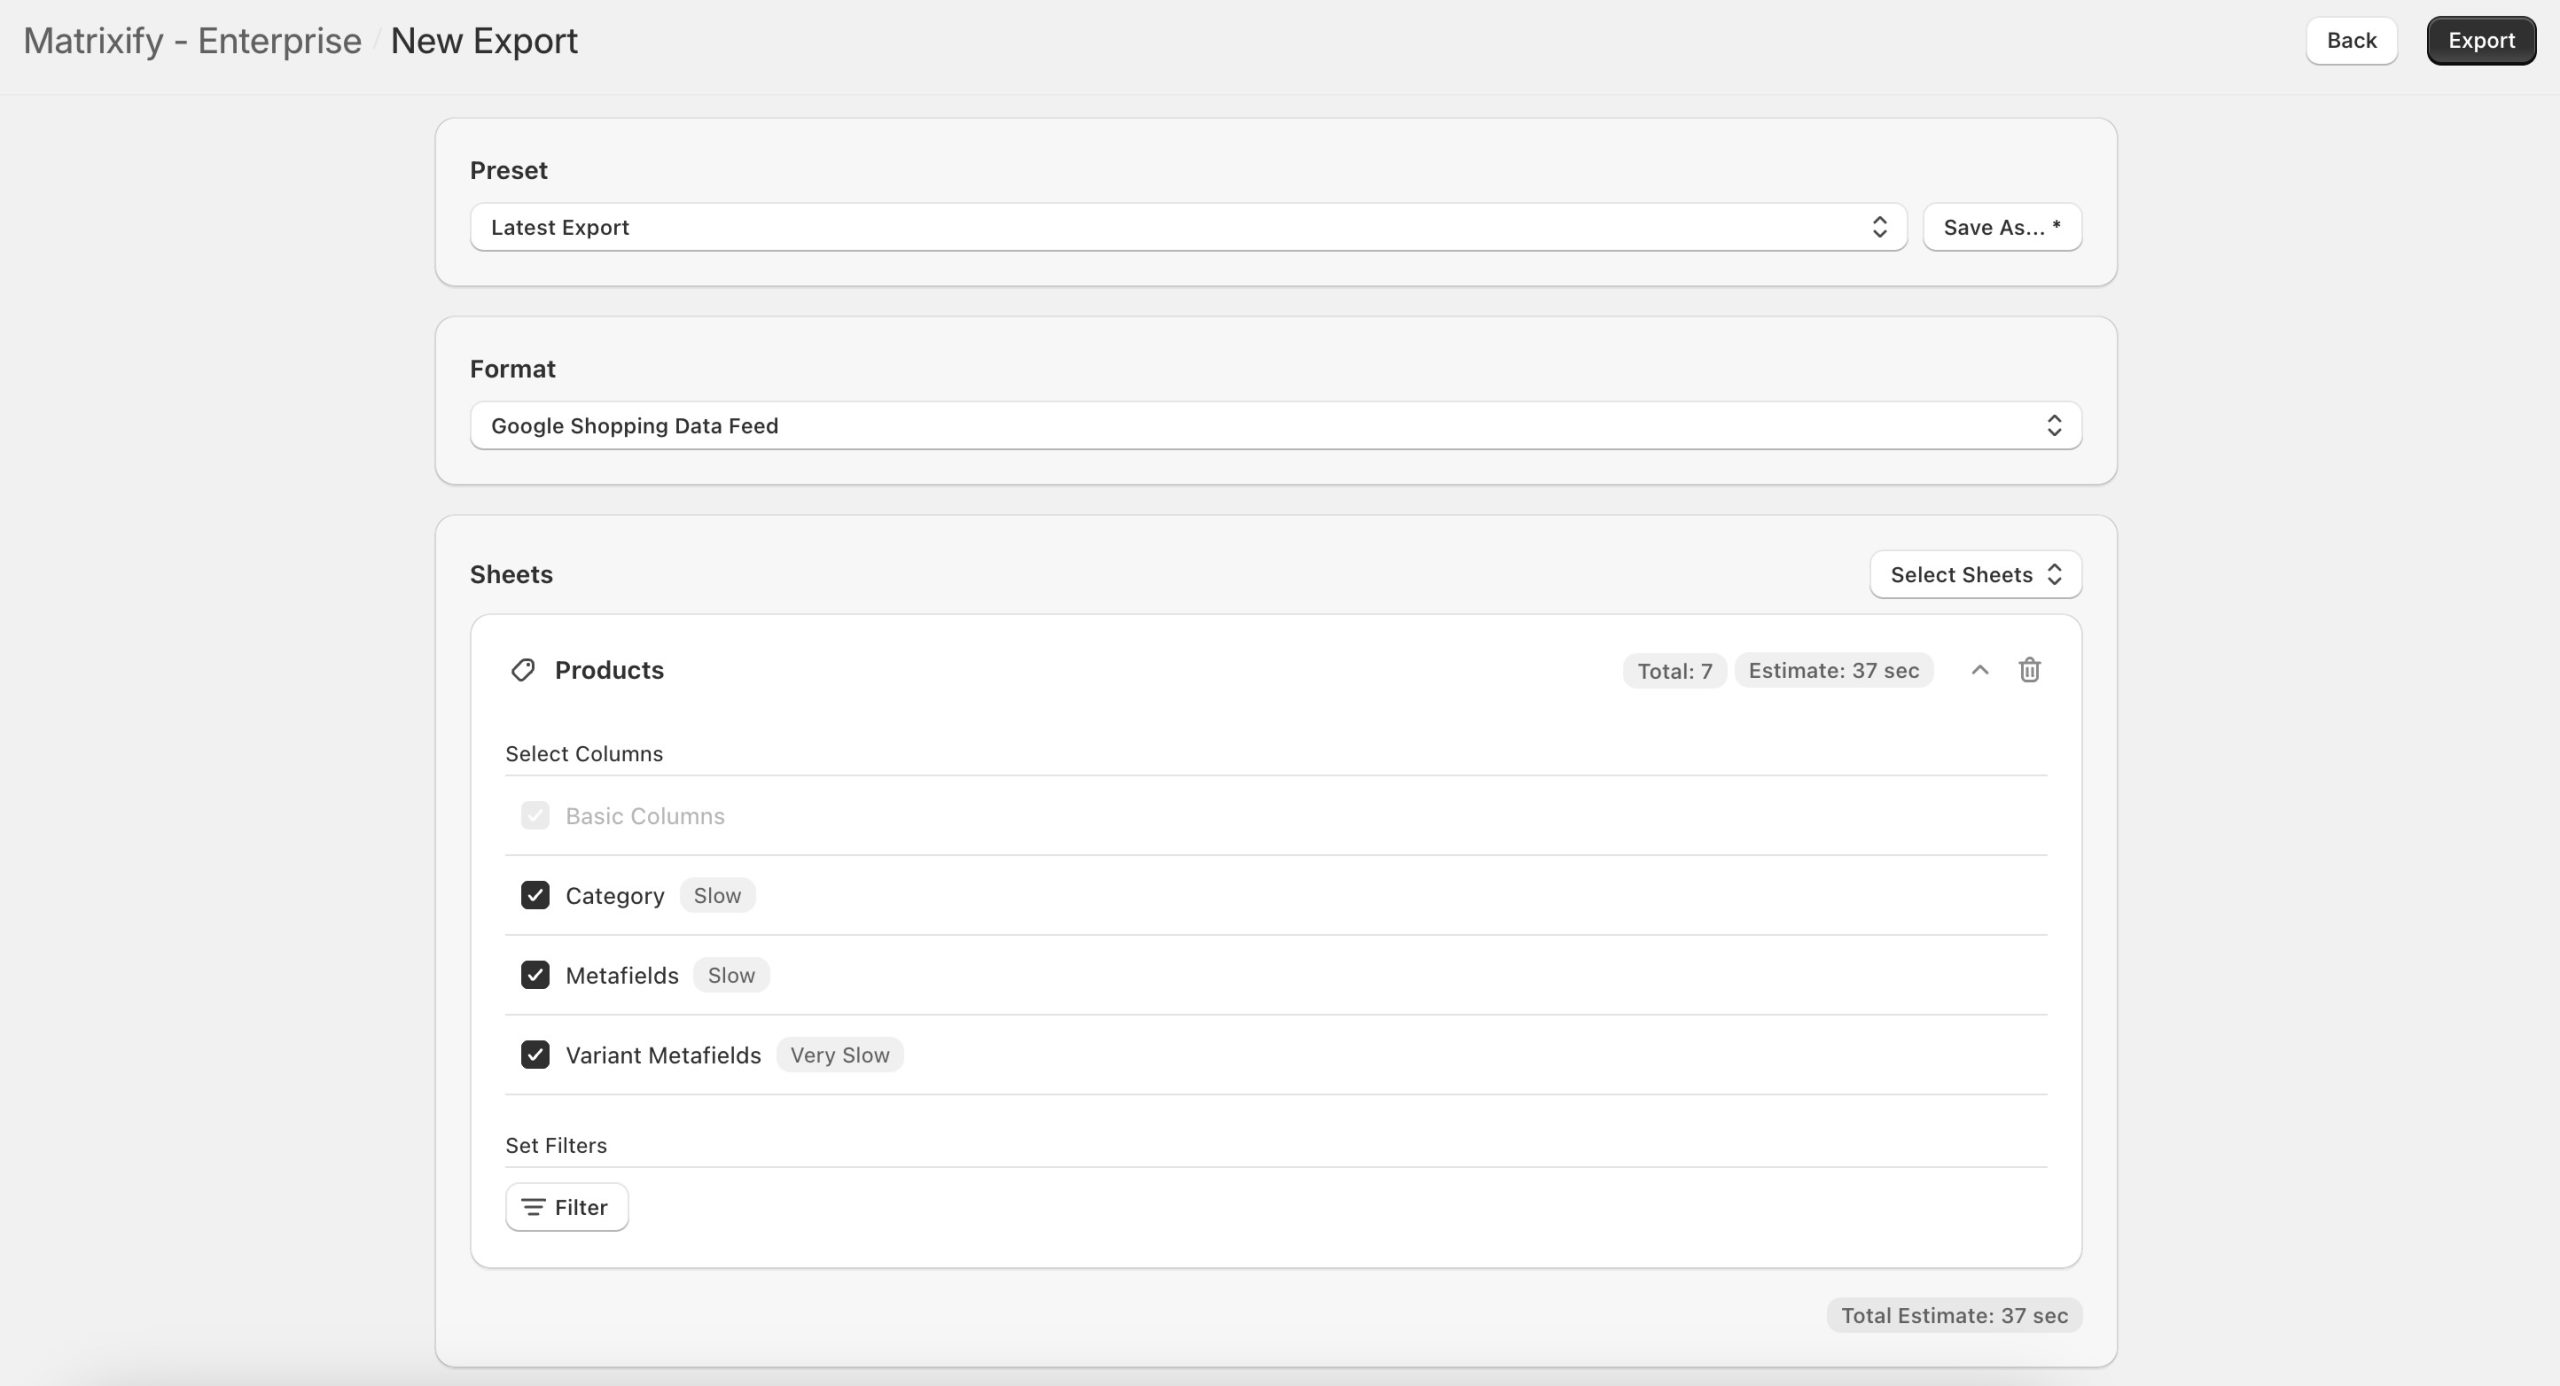
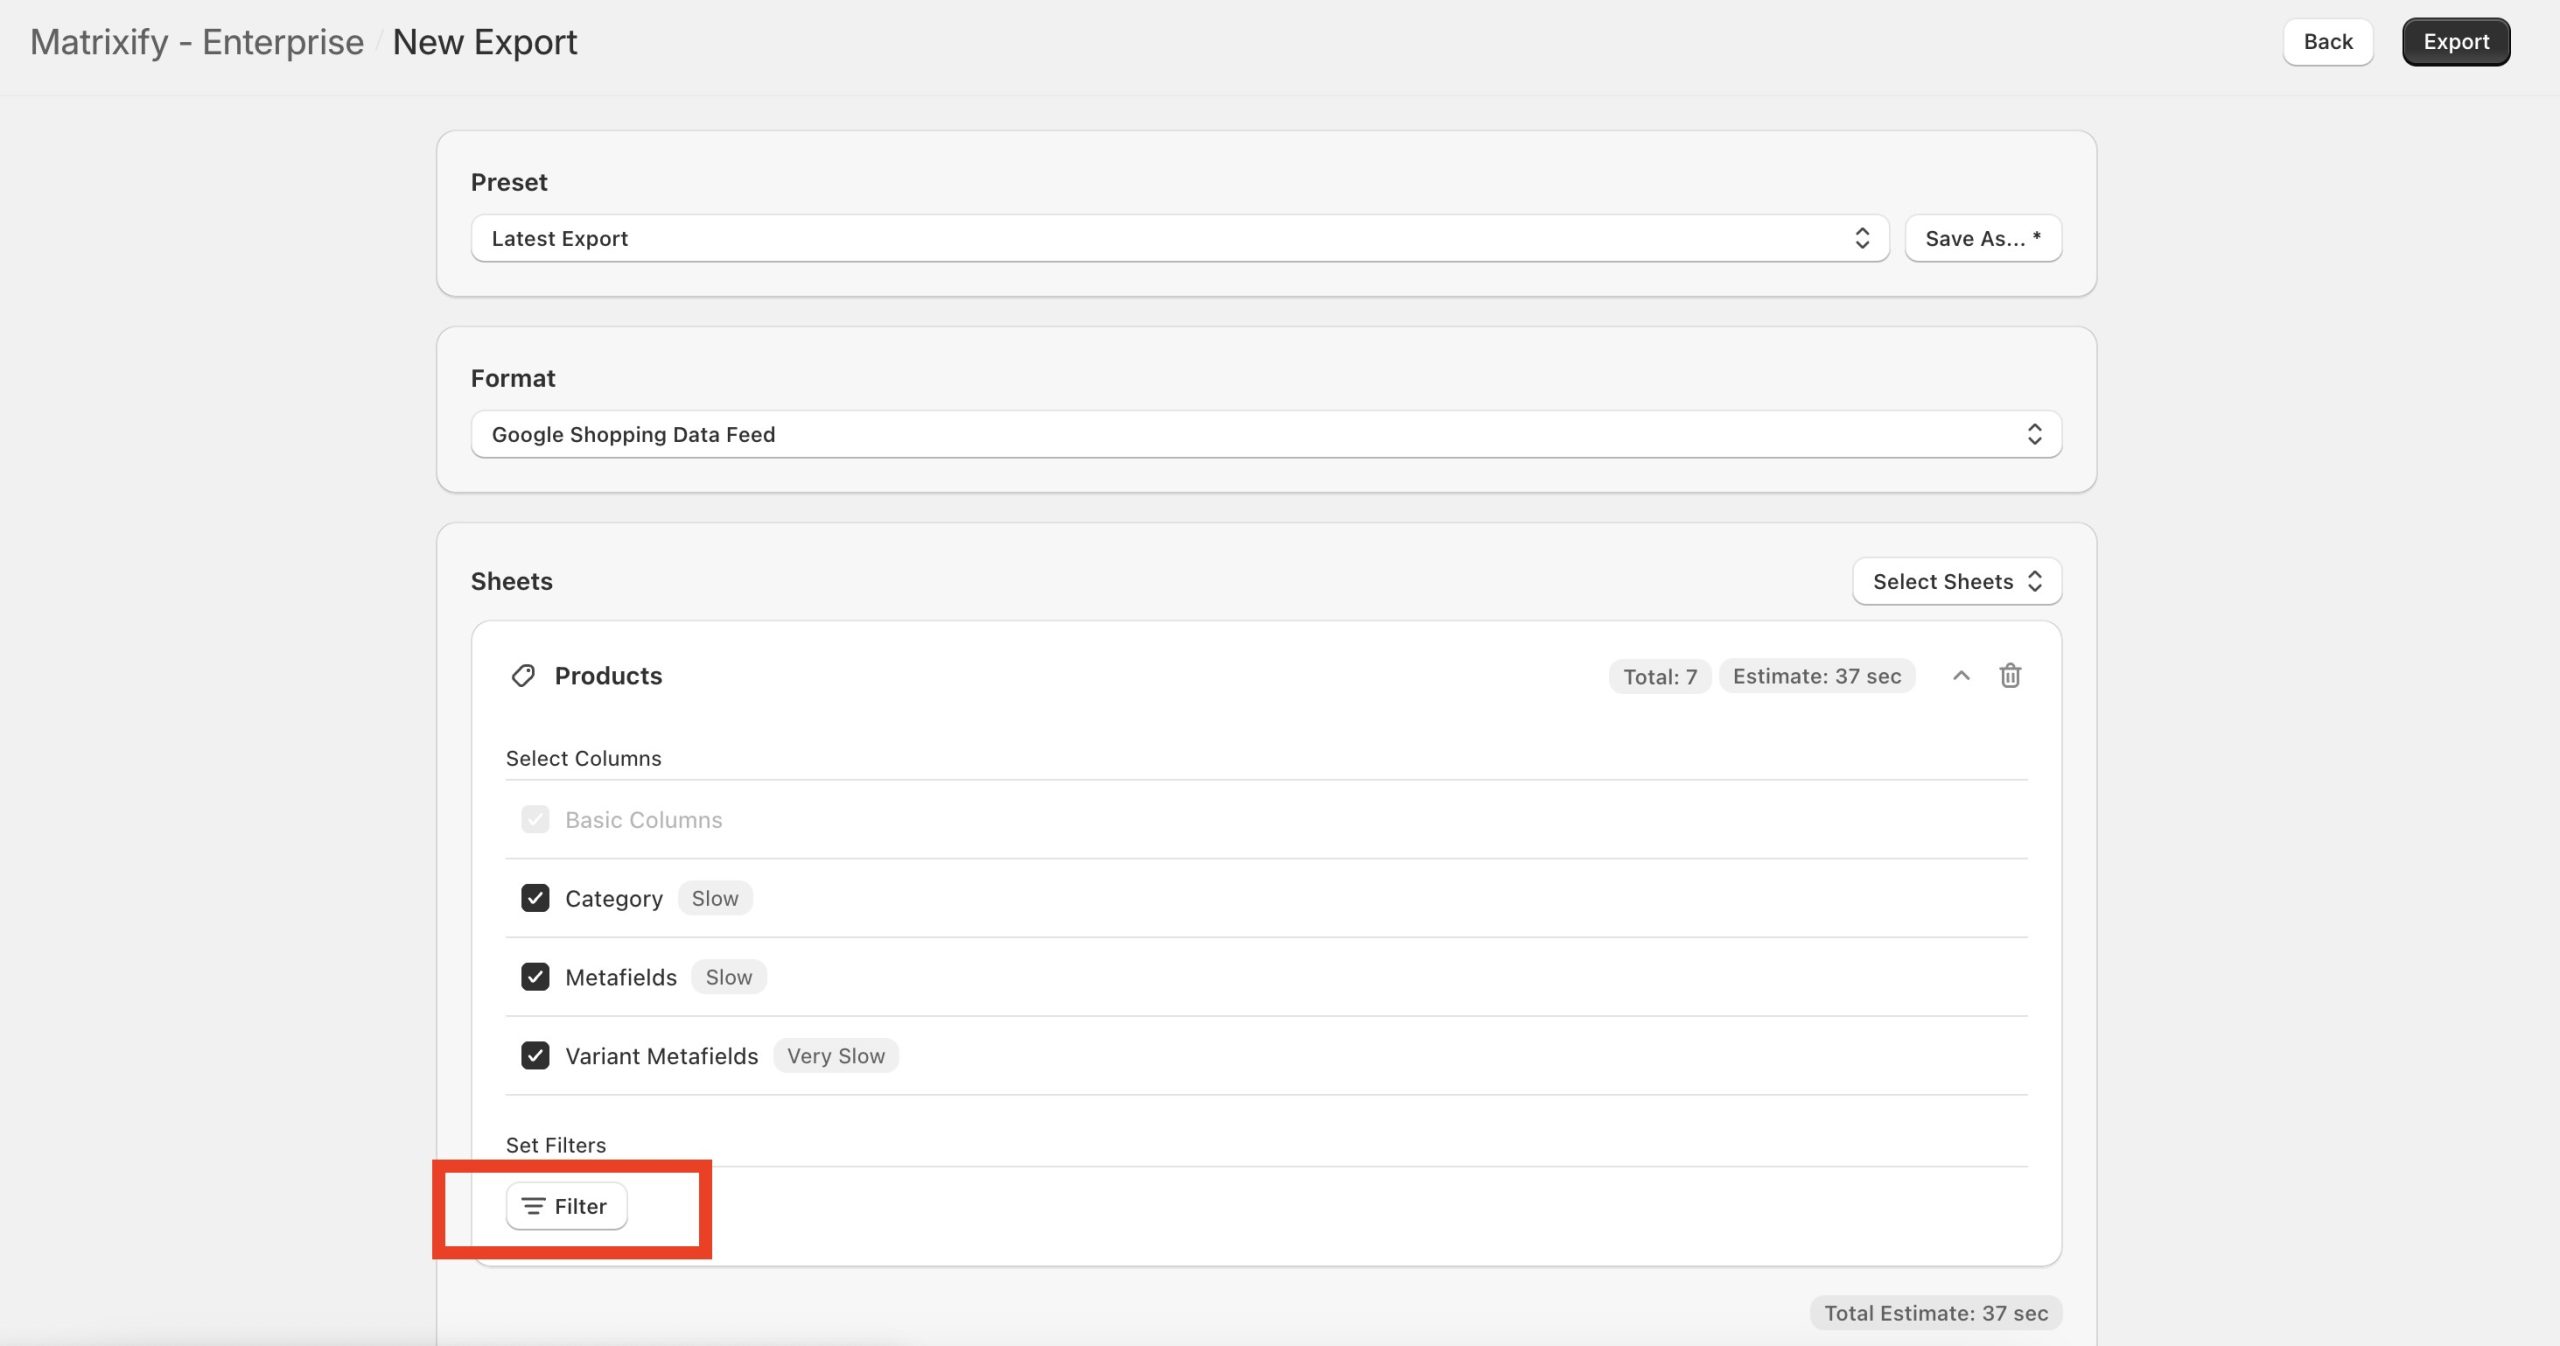
2.3. Apply export filters if needed
If you do not wish to automatically sync all Products from Shopify to your Google Merchant Center, then you can apply filters to your export.
Click on the “Filters” button where you can apply various Filters to your Products export and the app will only export Products that match all applied filters.
See our Export Filters documentation to learn what filters you can apply.
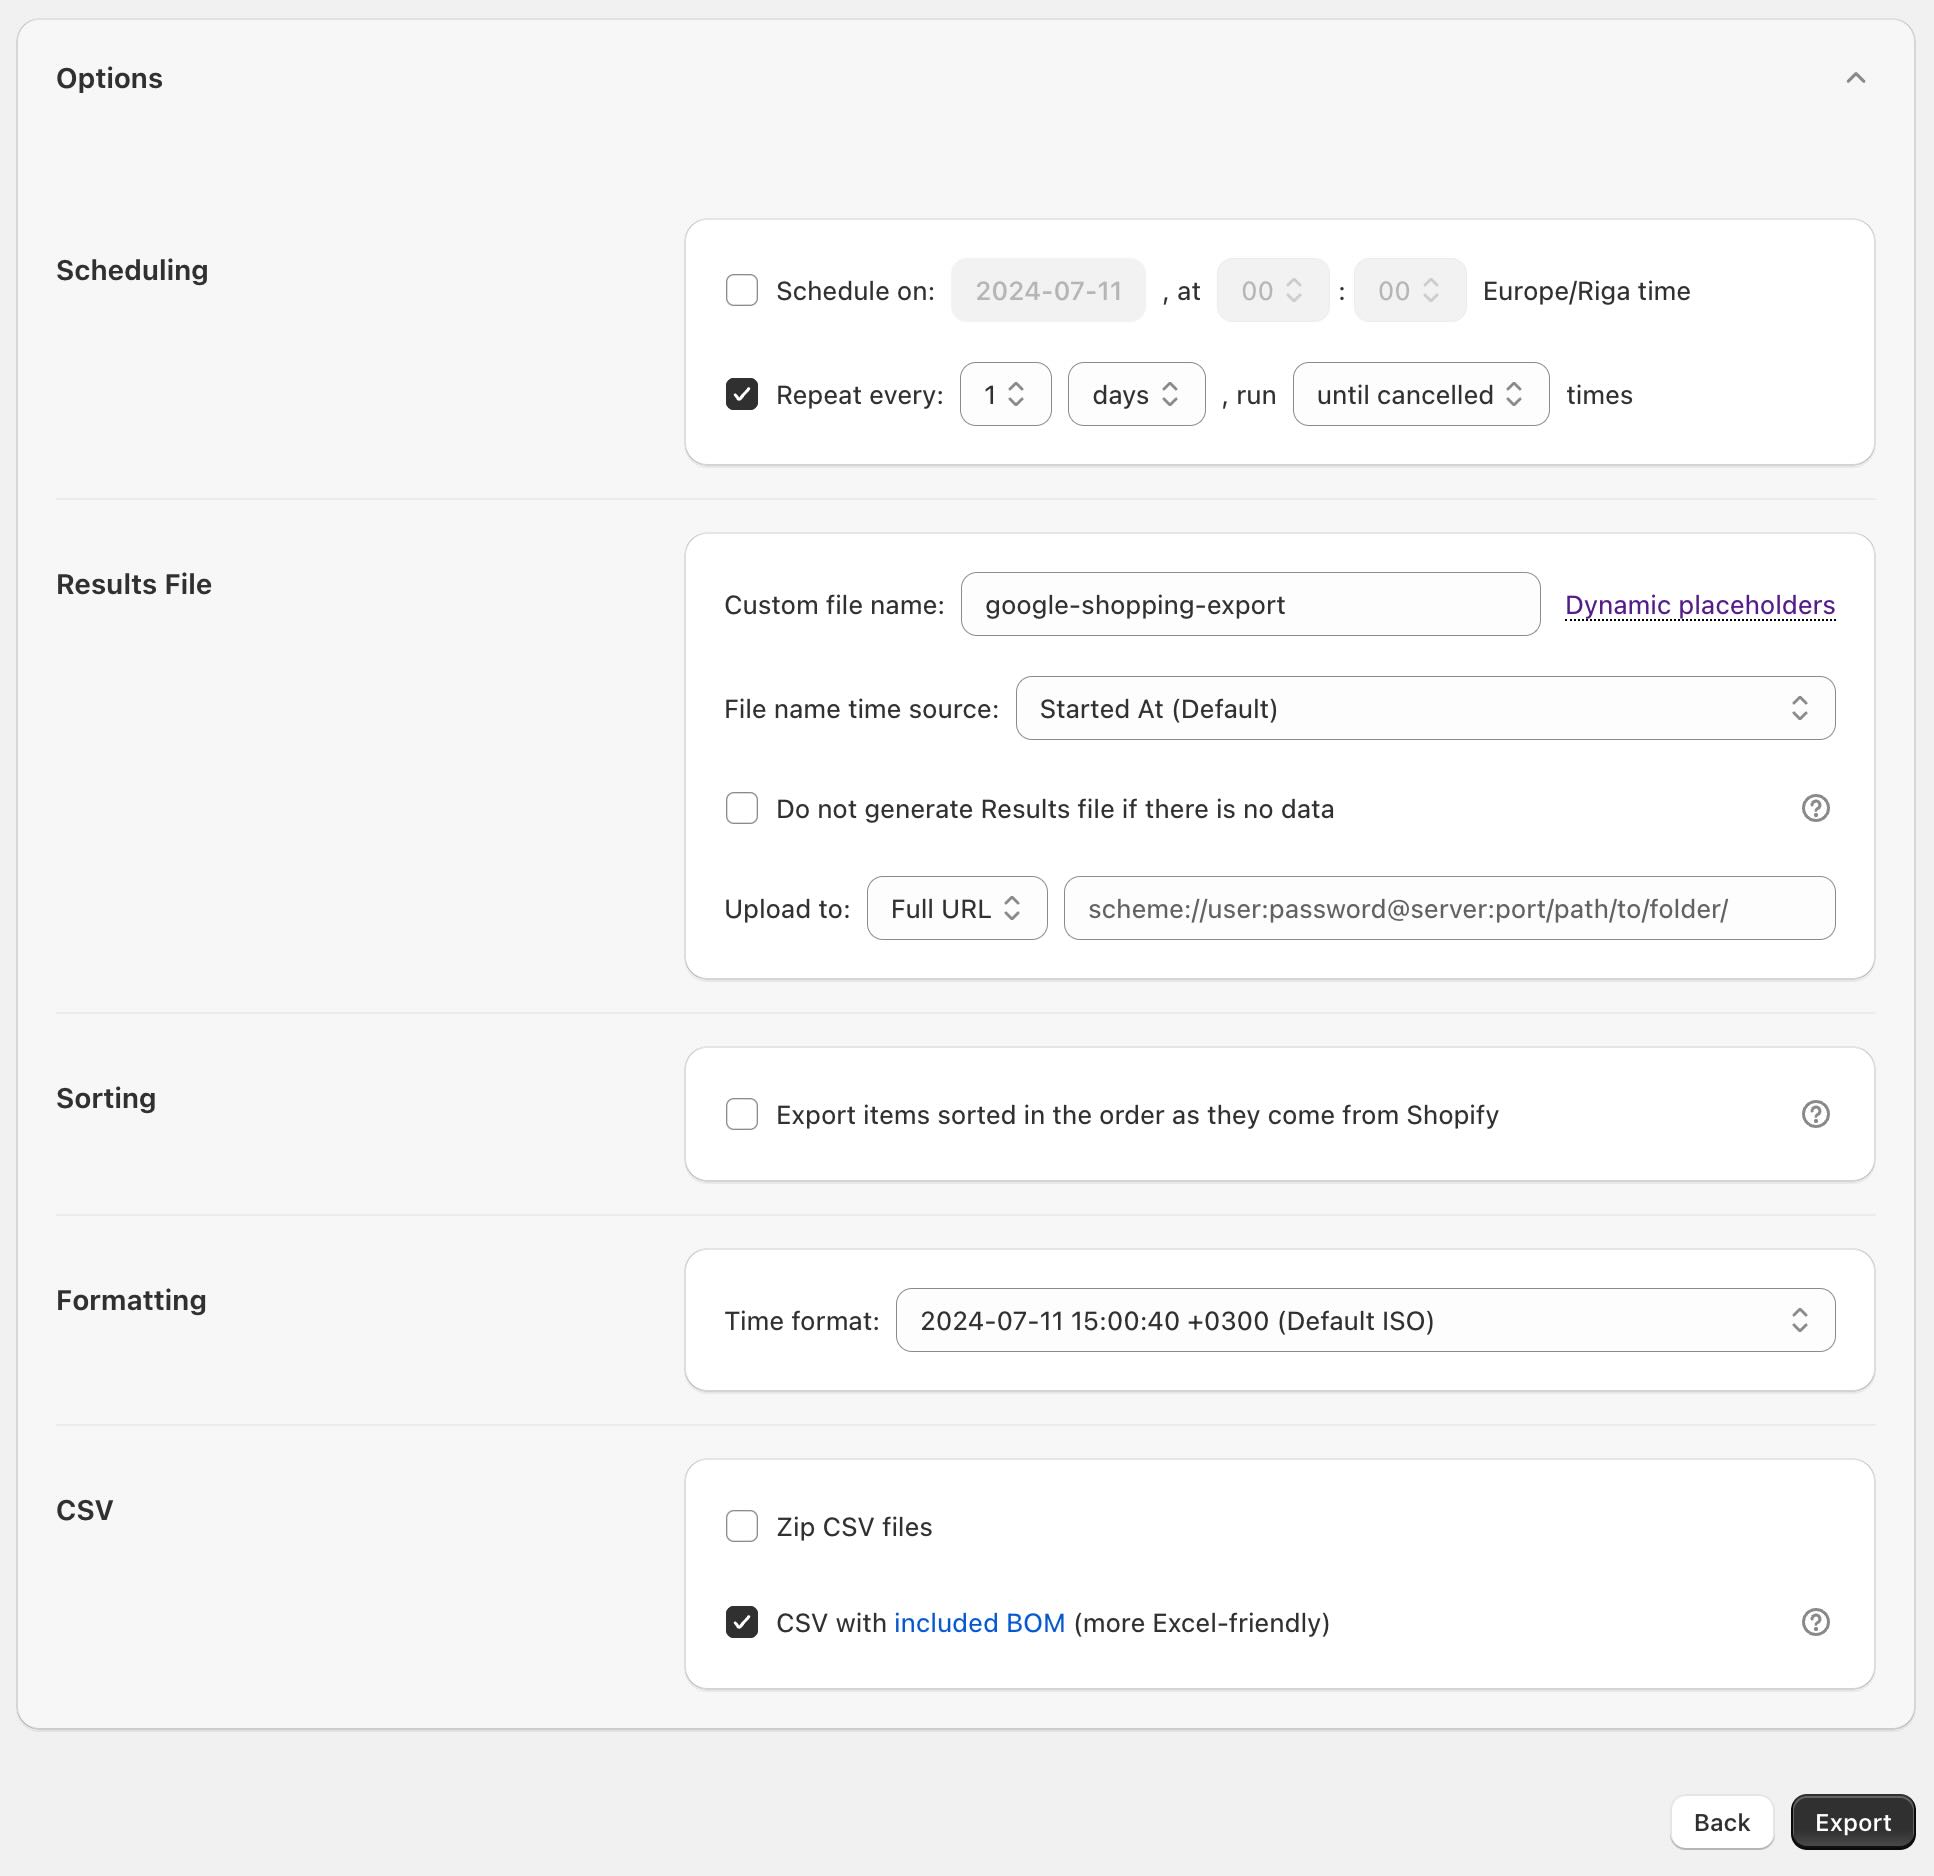
2.4. Apply export options
After selecting what to export, scroll down to the next section which will be export options.
Here you can apply various options to your export, such as how often to export data.
Let’s apply the option to repeat the export every 1 day so that we can also set up data to be uploaded automatically to your Google Merchant Center every day.
You also need to apply the Custom File Name option to ensure that exported files URL is always the same. Apply any name that does not have dynamic placeholders such as – “google-shopping-export“.
3. Start the export and copy exported files link
Once the export is set up, click on the “Export” button to start your exported job and wait for the first job to finish.
After it is finished, click on the Copy download URL button to copy the link.
This will be the link that is used in the Google Merchant Center to set up an automated import of data, but first we will need to adjust it a little bit.
Paste the URL into some text editor.
The link by default targets specific export jobs, but we need for the link to always return the newest export with that file name, so we can remove query parameters that are present in the copied link.
Before:
https://app.matrixify.app/files/matrixify-store/12345d7a4e62f6b7911234551fdqwer8d/google-shopping-export.txt?job=69259222&kind=exported
After:
https://app.matrixify.app/files/matrixify-store/12345d7a4e62f6b7911234551fdqwer8d/google-shopping-export.txt
4. Setup import in the Google Merchant Center
Now you can copy the adjusted URL and head to your Google Merchant Center to upload product feed to Google Merchant Center
Here on the Google Merchants Help page, you can see a detailed explanation on how to set up automated feed import in Google Merchant Center.
Steps in short:
- Sign in to your Merchant Center account.
- Select Products from the navigation menu, then click Feeds.
- Click the name of the feed you’d like to schedule.
- Click Settings on the subpage menu on the left, and select the type of schedule from the drop-down menu beside Fetch schedule.
- Schedule the desired frequency, timing, and location of your feed.
- Click Update schedule to save your changes or Update and fetch now to trigger an immediate fetch and upload of the file from the URL specified.
Good to know!
- If you need to adjust exported data, see our Google Shopping Data Feed documentation to learn from what Shopify fields we write data into what Google Shopping template fields so you can adjust them in Shopify.


