When you bulk import images or other media files to Shopify for Products or Collections, you need to provide media URL in the “Image Src” column.
But what if you have those files only on your computer? Then they don’t have URL because URL is only for files that are hosted online.
So, if you’re looking for an easier way to bulk upload images and other media to Shopify, look no further!
This step-by-step guide will outline the process required to host your files online in a way that they can be quickly and easily be imported into Shopify using the Matrixify App.
What media file types can be imported?
With the Matrixify app you can bulk import all Media file types that Shopify supports, including images, videos and 3d models.
See a full list of supported file types and sizes in the Matrixify Products documentation.
Use Shopify Files for media hosting
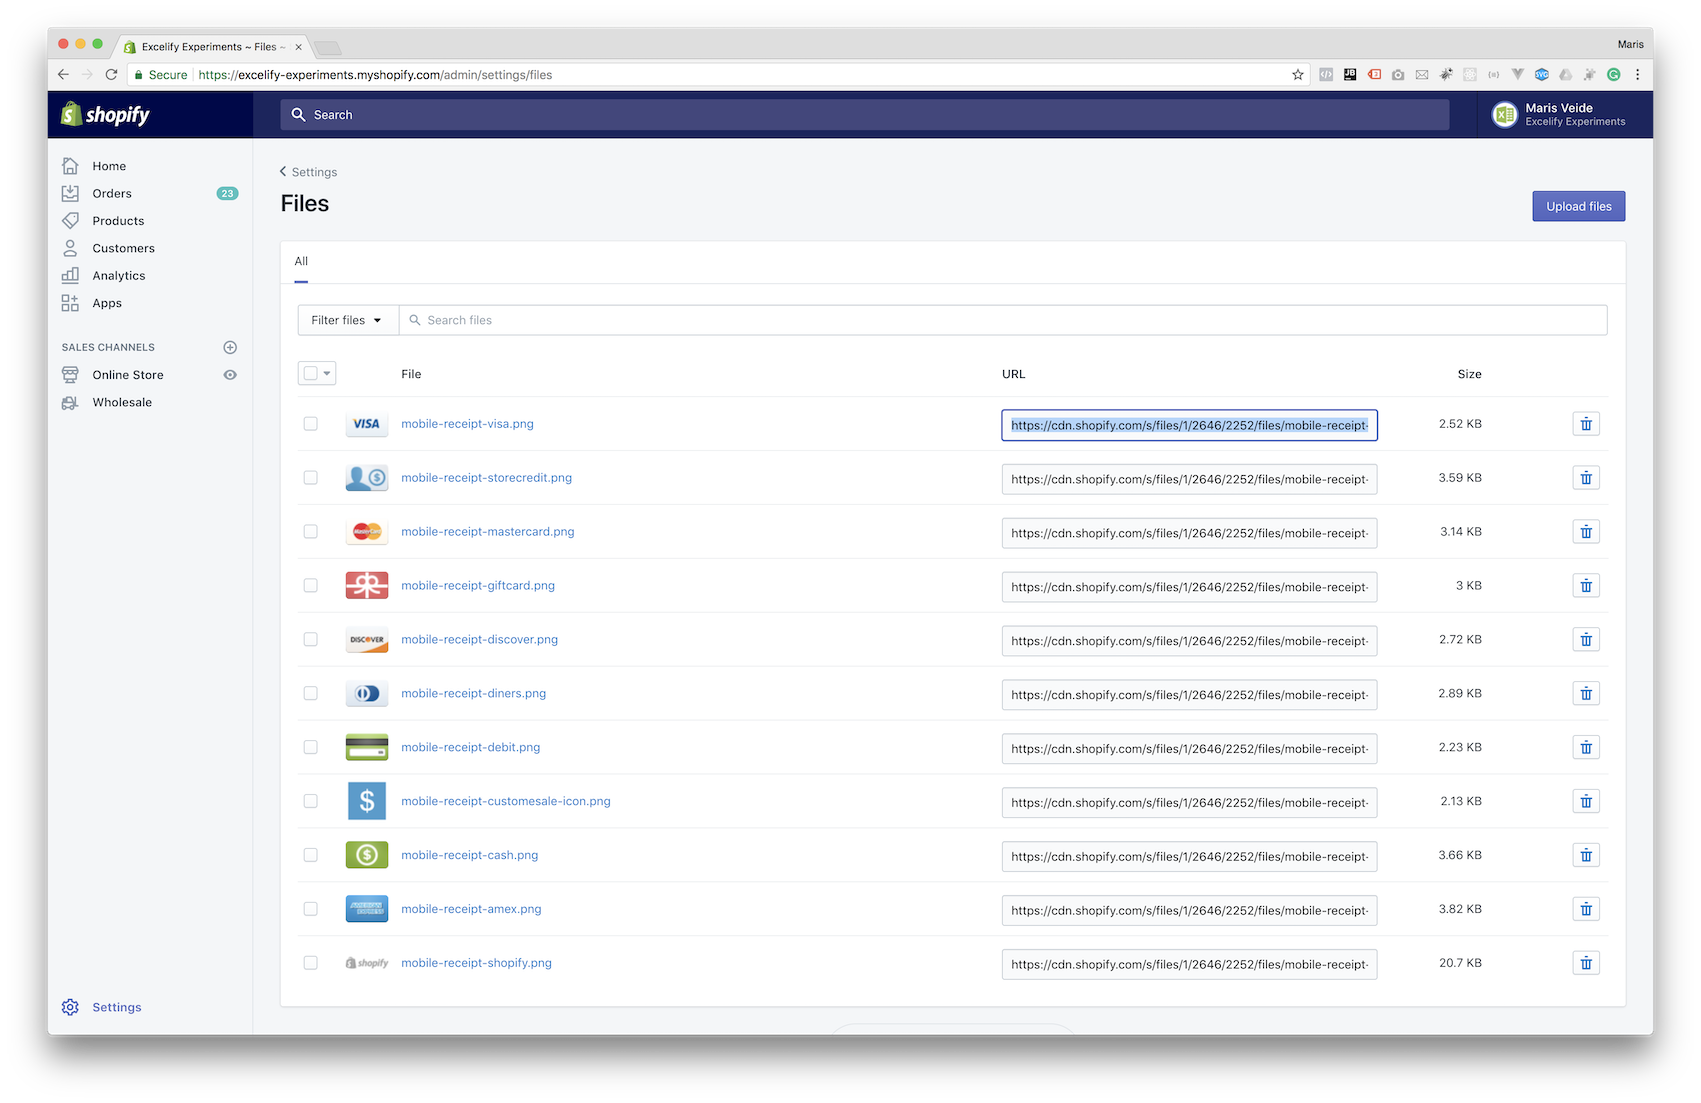
The default way of getting media files uploaded to Shopify is through the Shopify Admin: “Settings -> Files” section. And then copy-paste each URL to your import file.
While this may work for 100 images, it’s not too easy when you have a lot more, even thousands of media files.
Use Amazon S3 bucket for file hosting
A great bulk way of uploading media files to Shopify is using Amazon S3 bucket.
Amazon S3 option for a lot of files would be an additional cost, but you can also use their Free tier. It offers 5GB of hosting space (other limitations might apply).
How to set up an Amazon S3 bucket and get credentials
We suggest following Amazon tutorials and manuals on how to set up your S3 server as their UI and account creation methods are subject to change without our notice.
We have here found a great manual on how to set up your own Amazon S3 bucket.
Once you need the S3 credentials, here is a great page on how to get Amazon S3 Access Keys.
When you have set up your S3 server and got the credentials at hand, you can look into how to use CrossFTP to connect to your S3 bucket and upload your files to it.
Connect to your Amazon S3 bucket and upload files to it
1. Install the CrossFTP application, free version, to your desktop: http://www.crossftp.com/download.htm
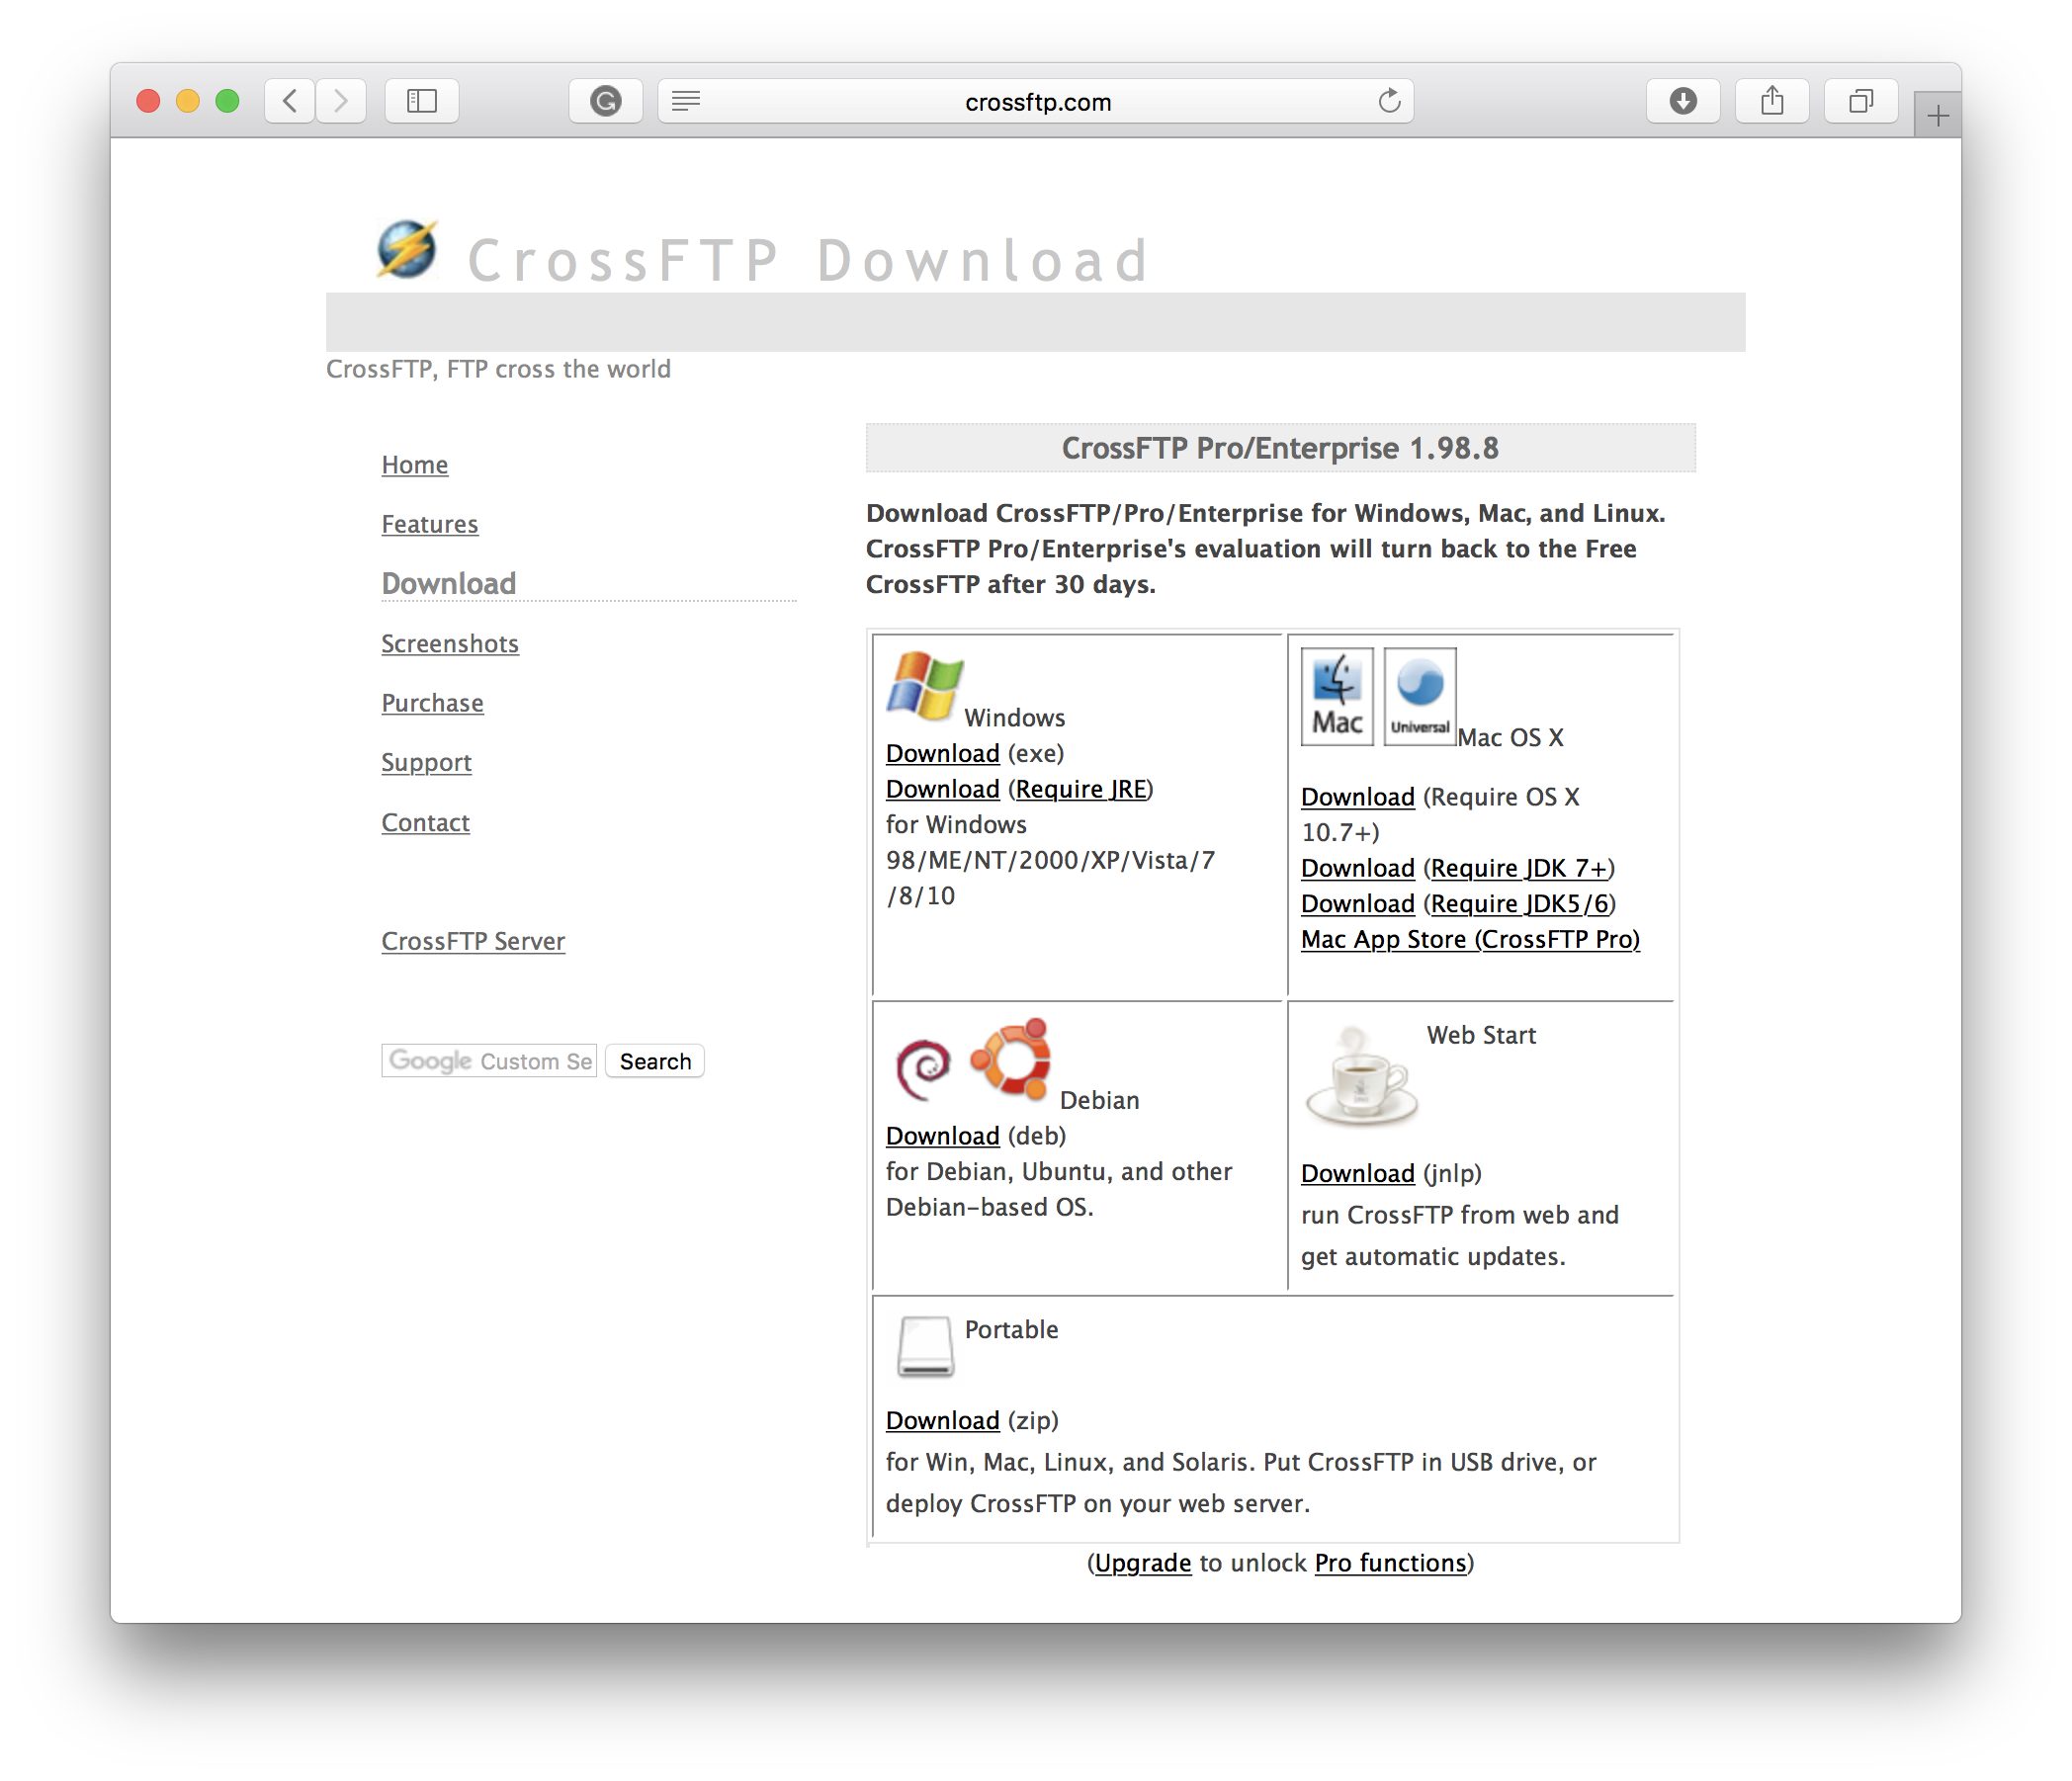 You have a few options how to download the CrossFTP app.
The default way is to download the version that matches your operating system – Windows, MacOS, or Linux.
If you are having the computer that doesn’t allow installing new apps from the internet, you can use the Web Start to launch the CrossFTP directly from the web browser. Or you can download the Portable version to still have it on your computer, but it will not require installing.
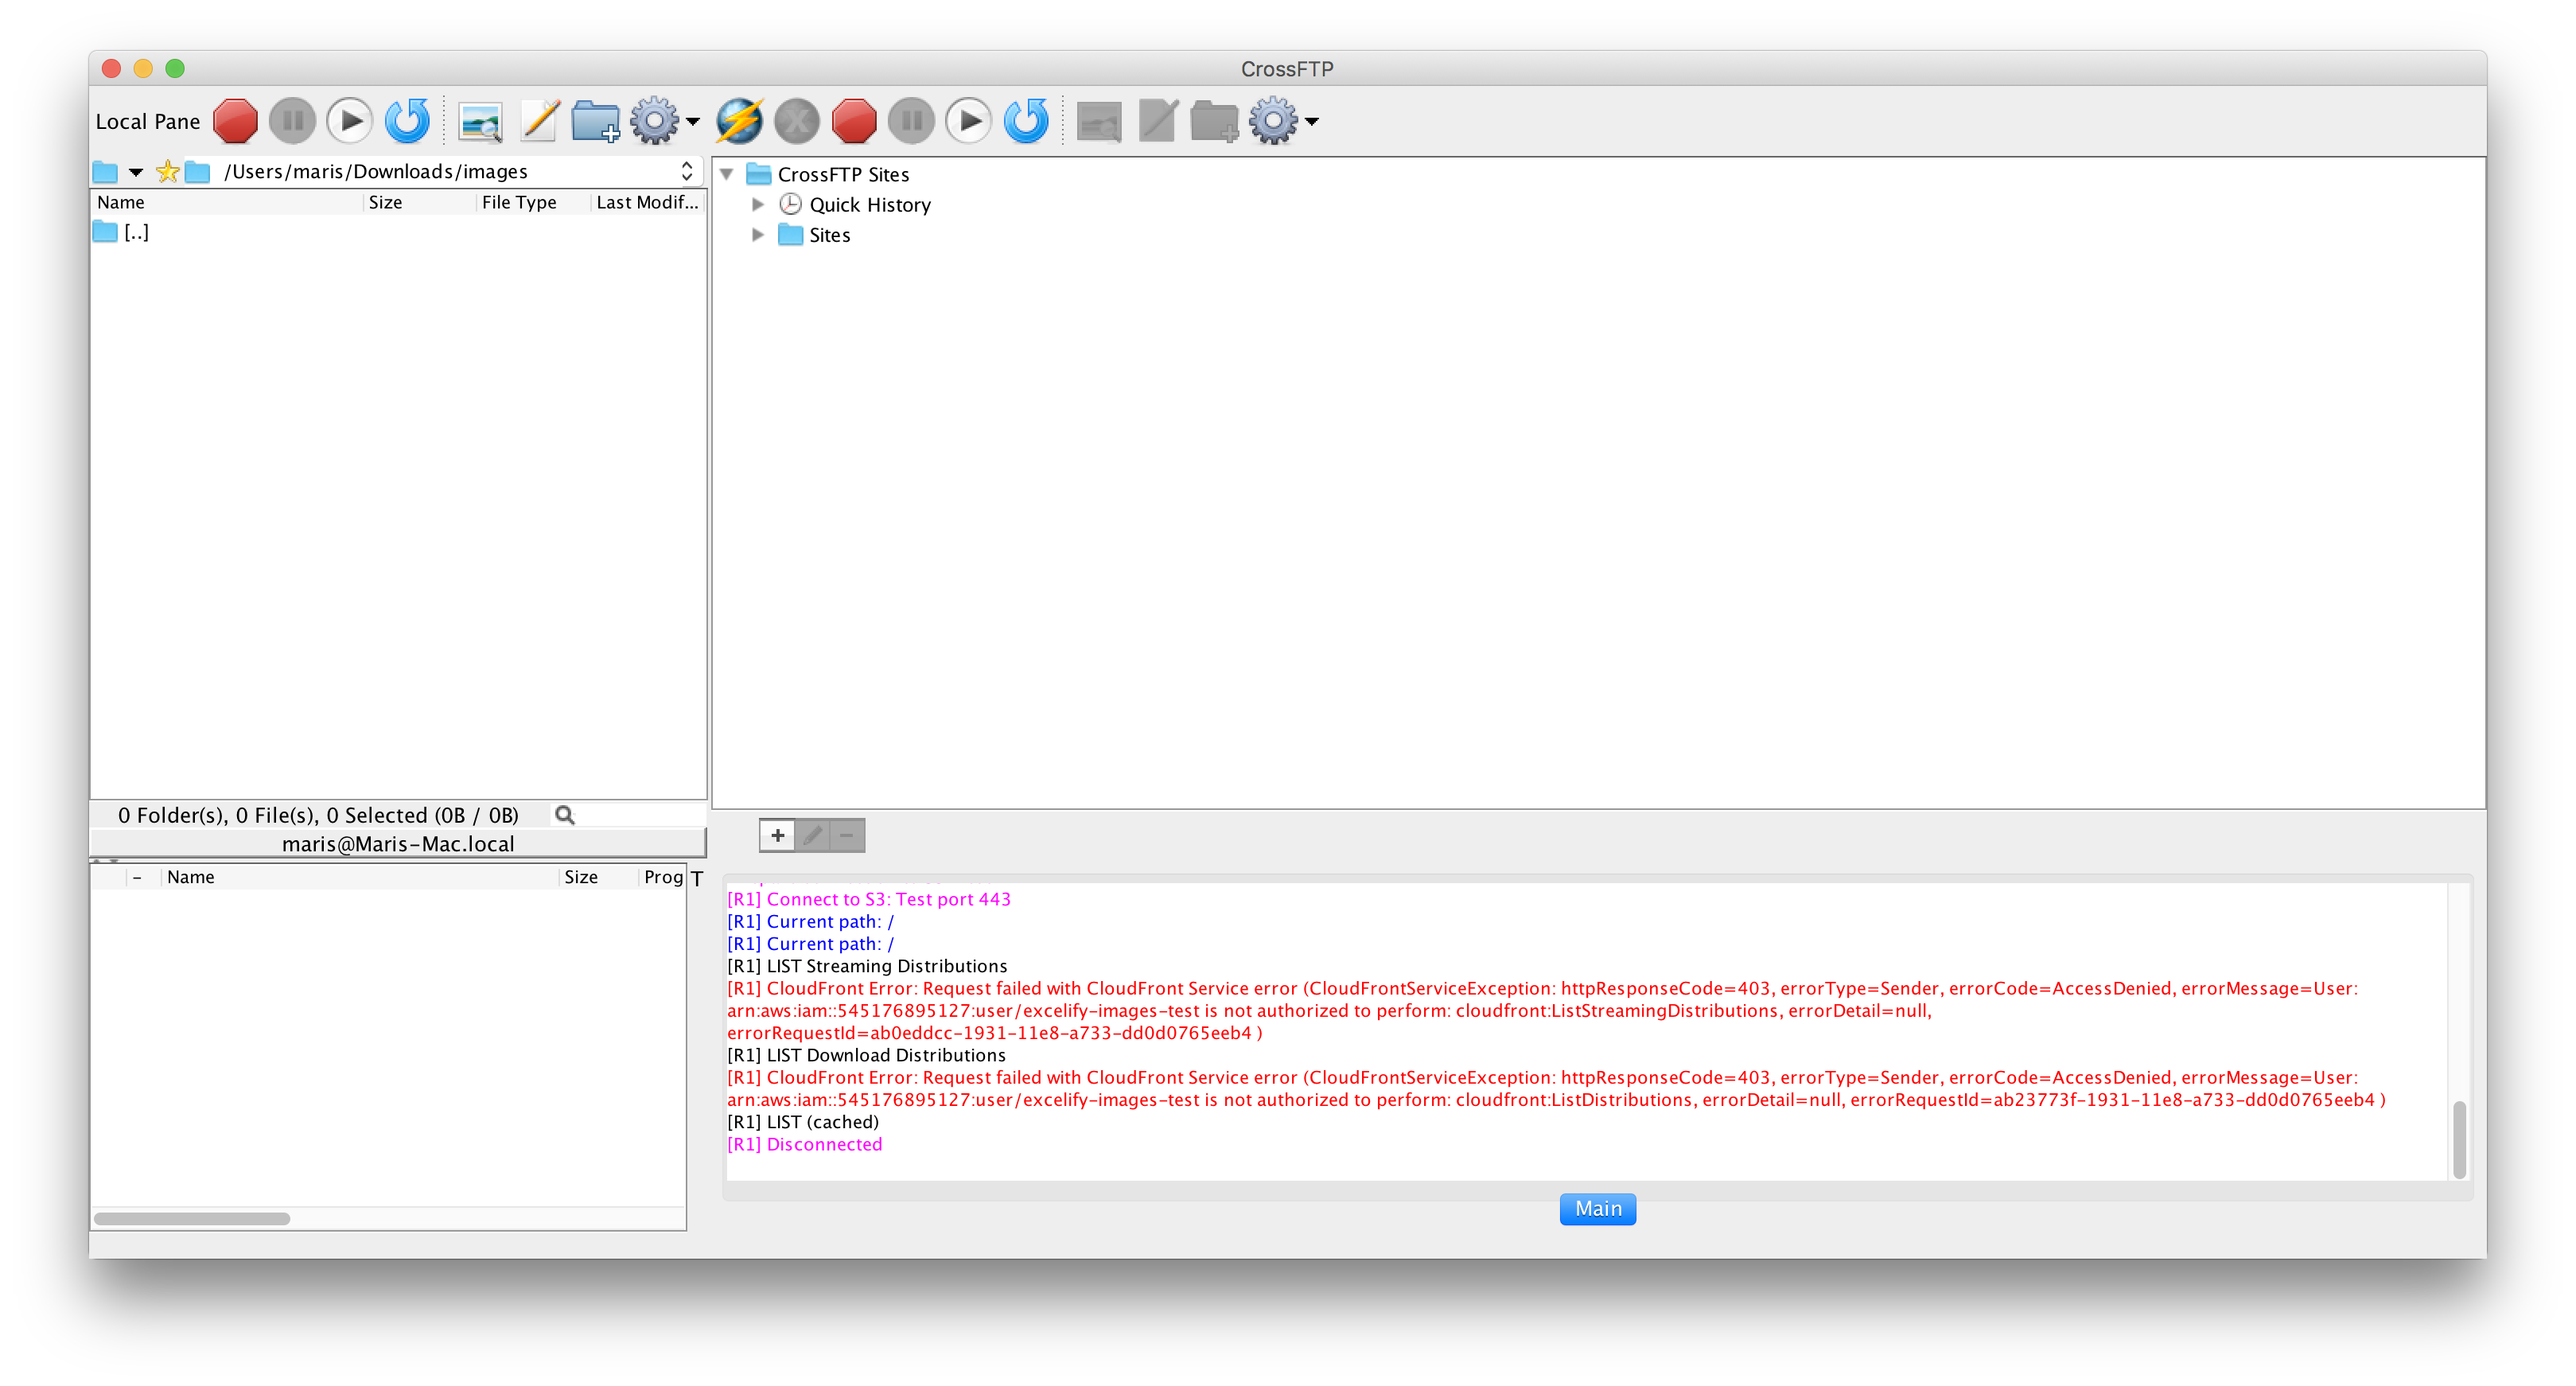
2. Open CrossFTP
When opened for the first time, CrossFTP will look like this:
3. Open “Site Manager” under File -> Connect
To open the Site Manager, click File, and then Connect.
The Site Manager will open with a new clean form to enter the connection details. Fill those fields one by one, with your Amazon S3 credentials, so that you end up with a filled form like this:
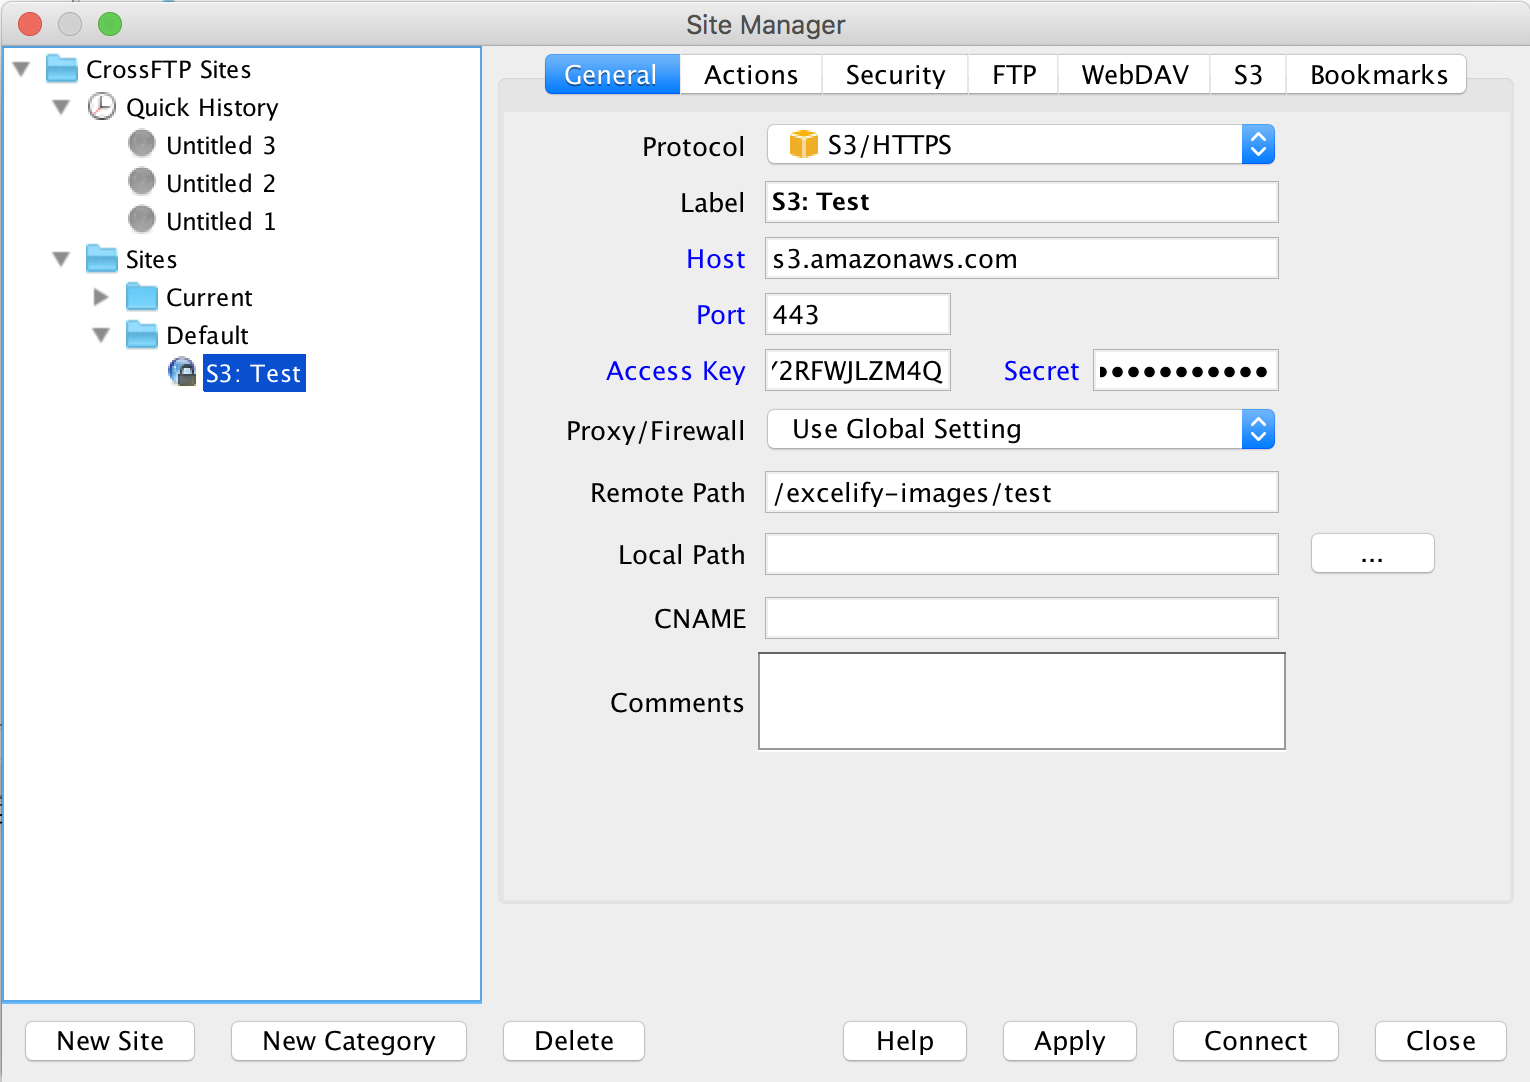
After you will enter and Apply to save your connection details, those will be saved and you will not have to enter them again.
If you are having trouble finding and setting up a connection to your Amazon S3 server, feel free to reach out to our support and we will try to help!
4. Press “Apply” and “Connect”
You will now be connected to your image server. It will look like this: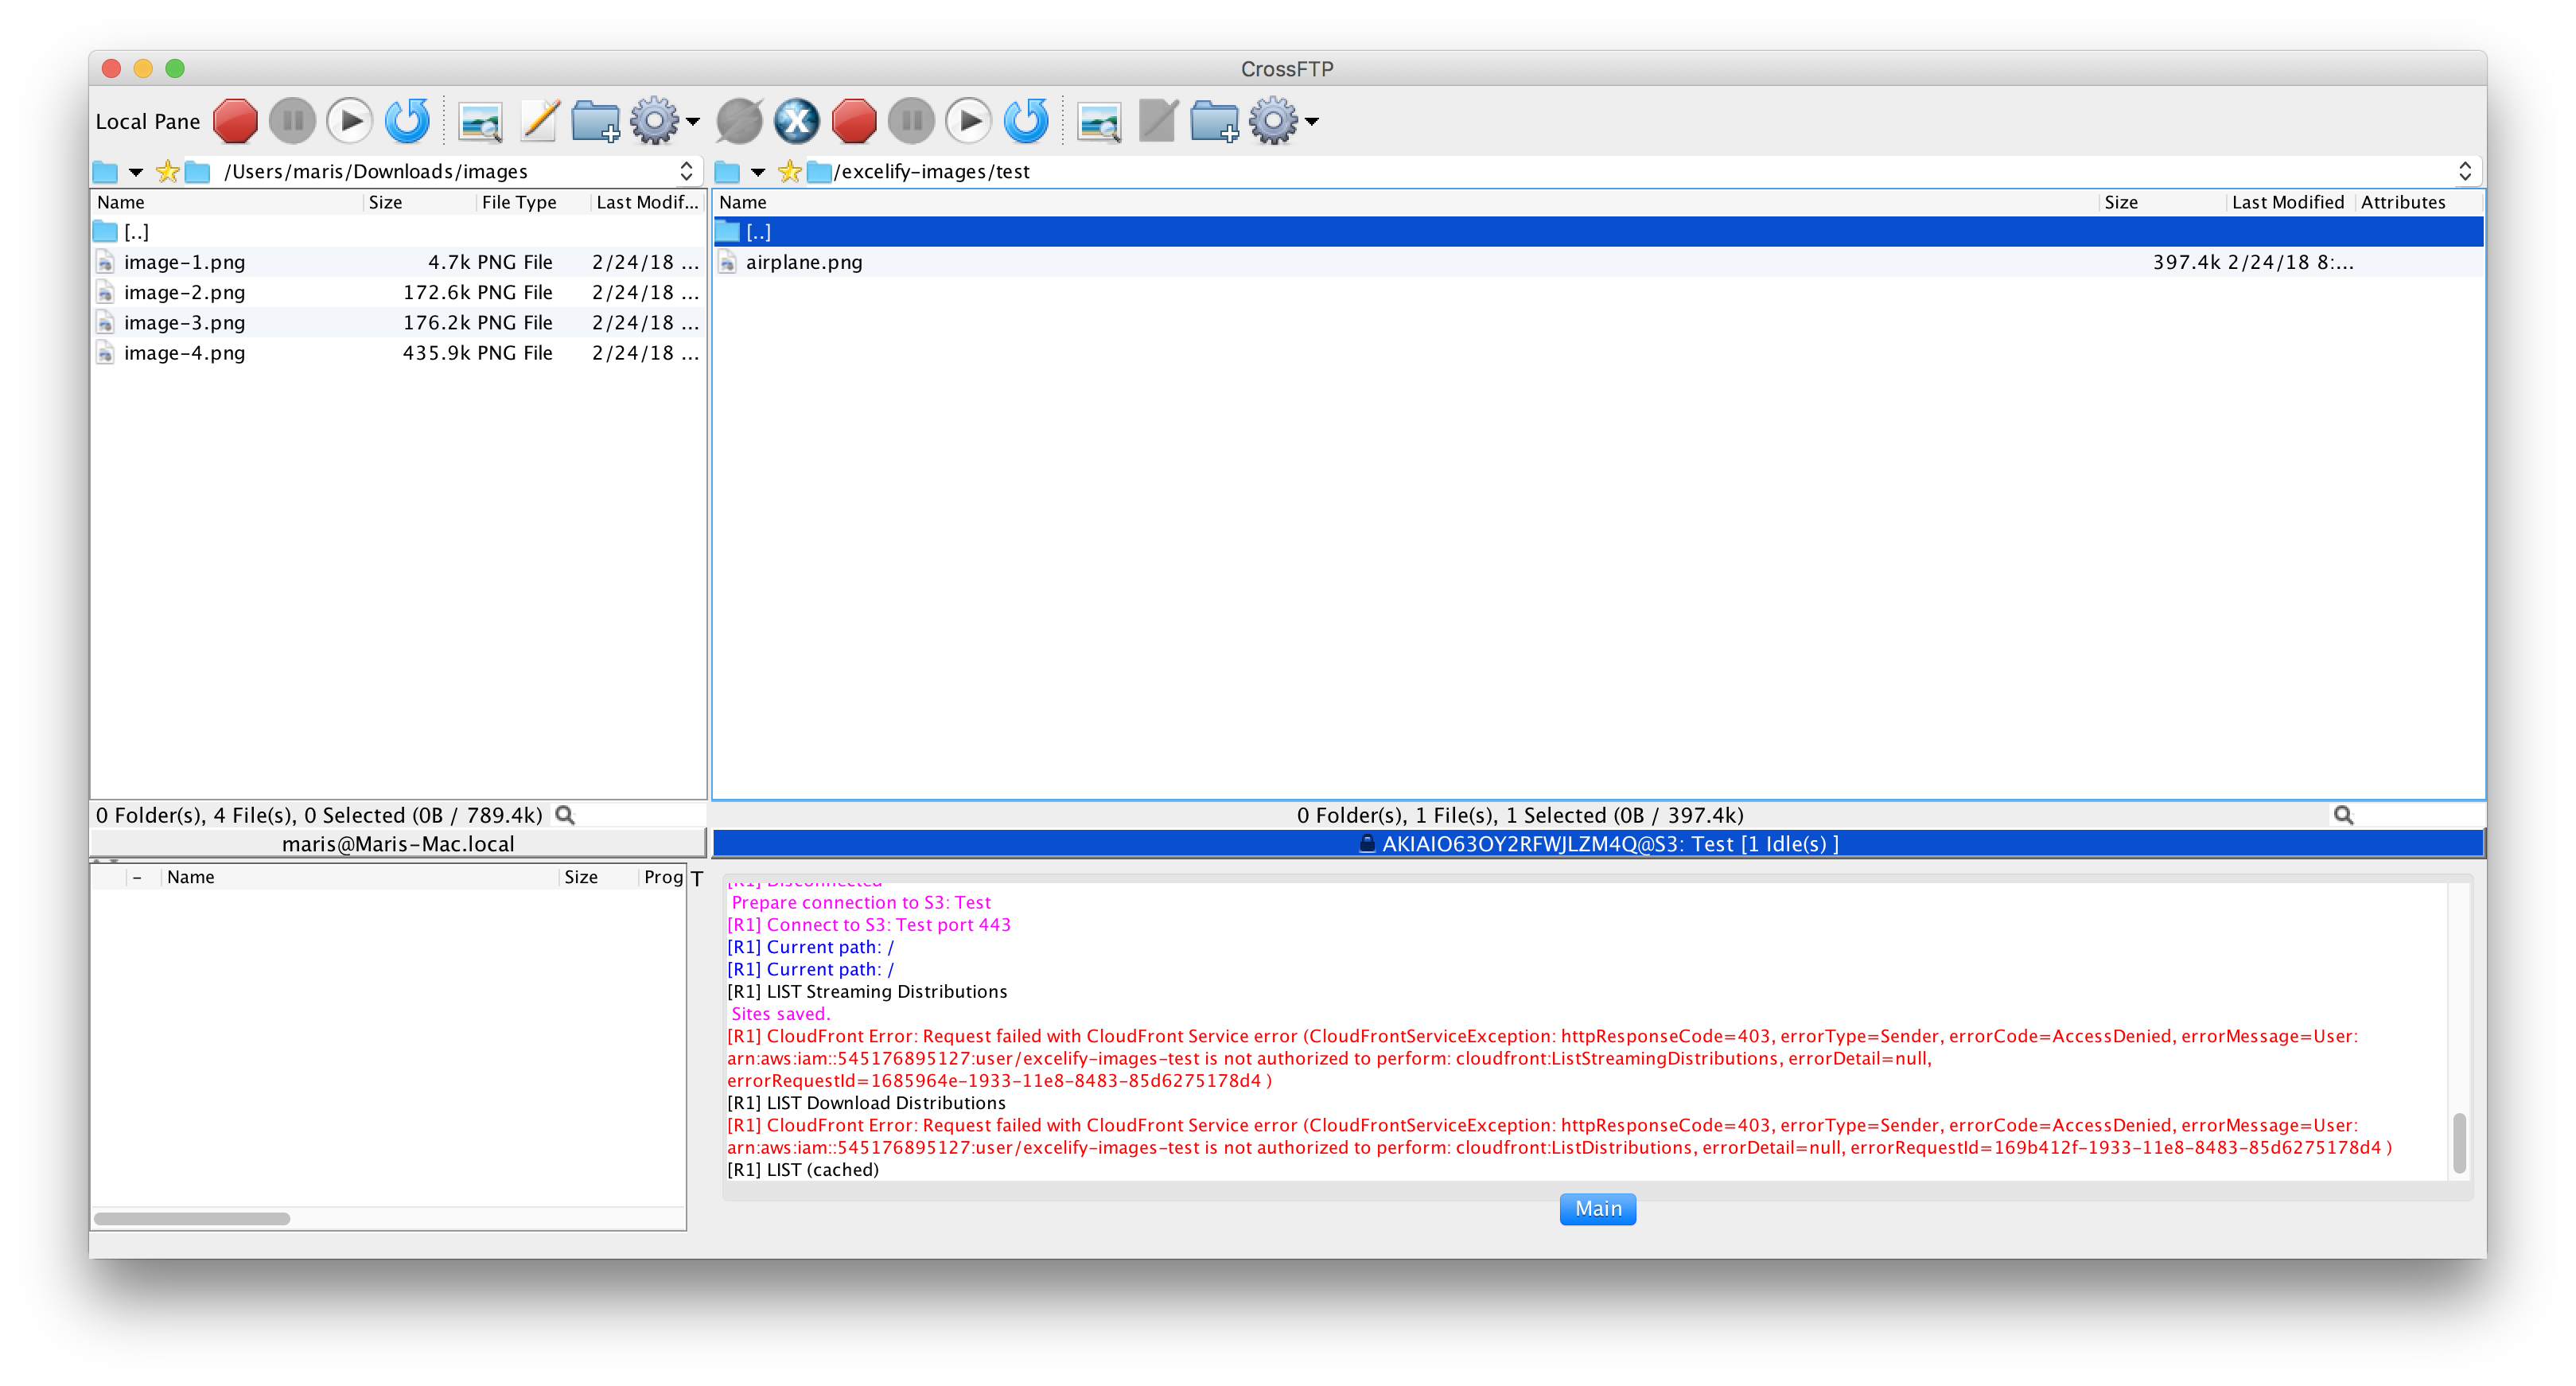
On the left side, you see files and directories on your computer.
On the right side, you see the files and directories on the image server.
Now you can drag & drop files and folders from your computer (left side) to the image server (right side), and it will start uploading them. The upload should be very fast – it can upload at about 5’000 typical images per hour.
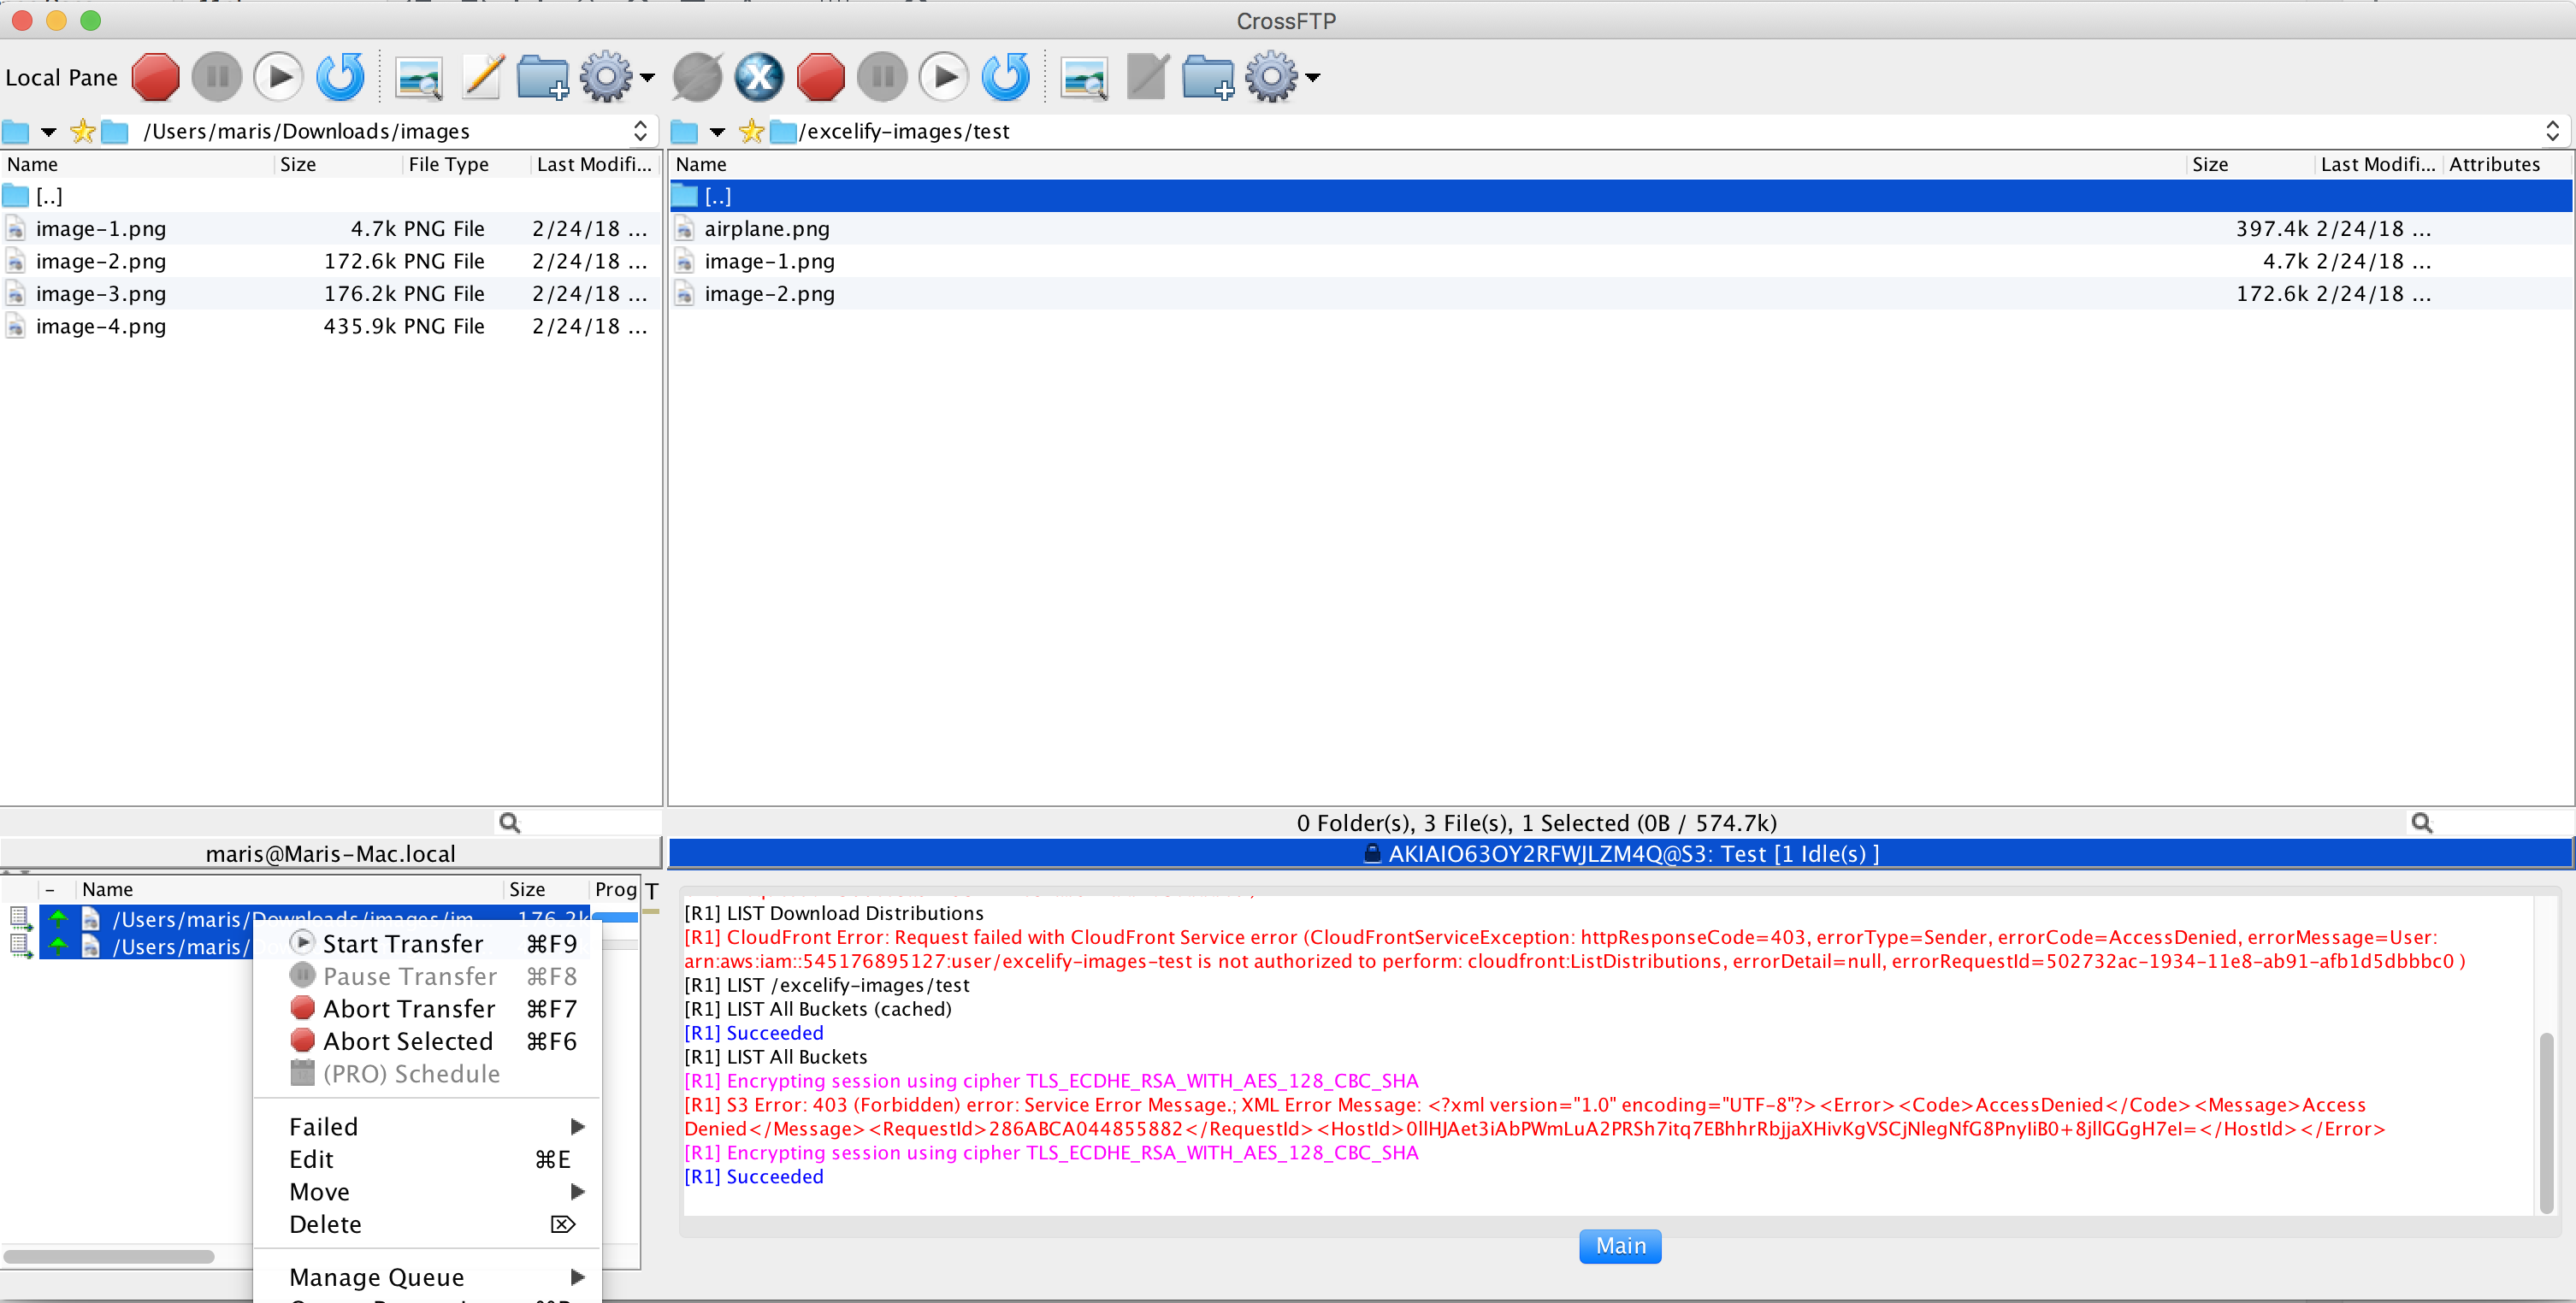
When uploading files, you will see the upload queue in the left bottom section of the app – like this:
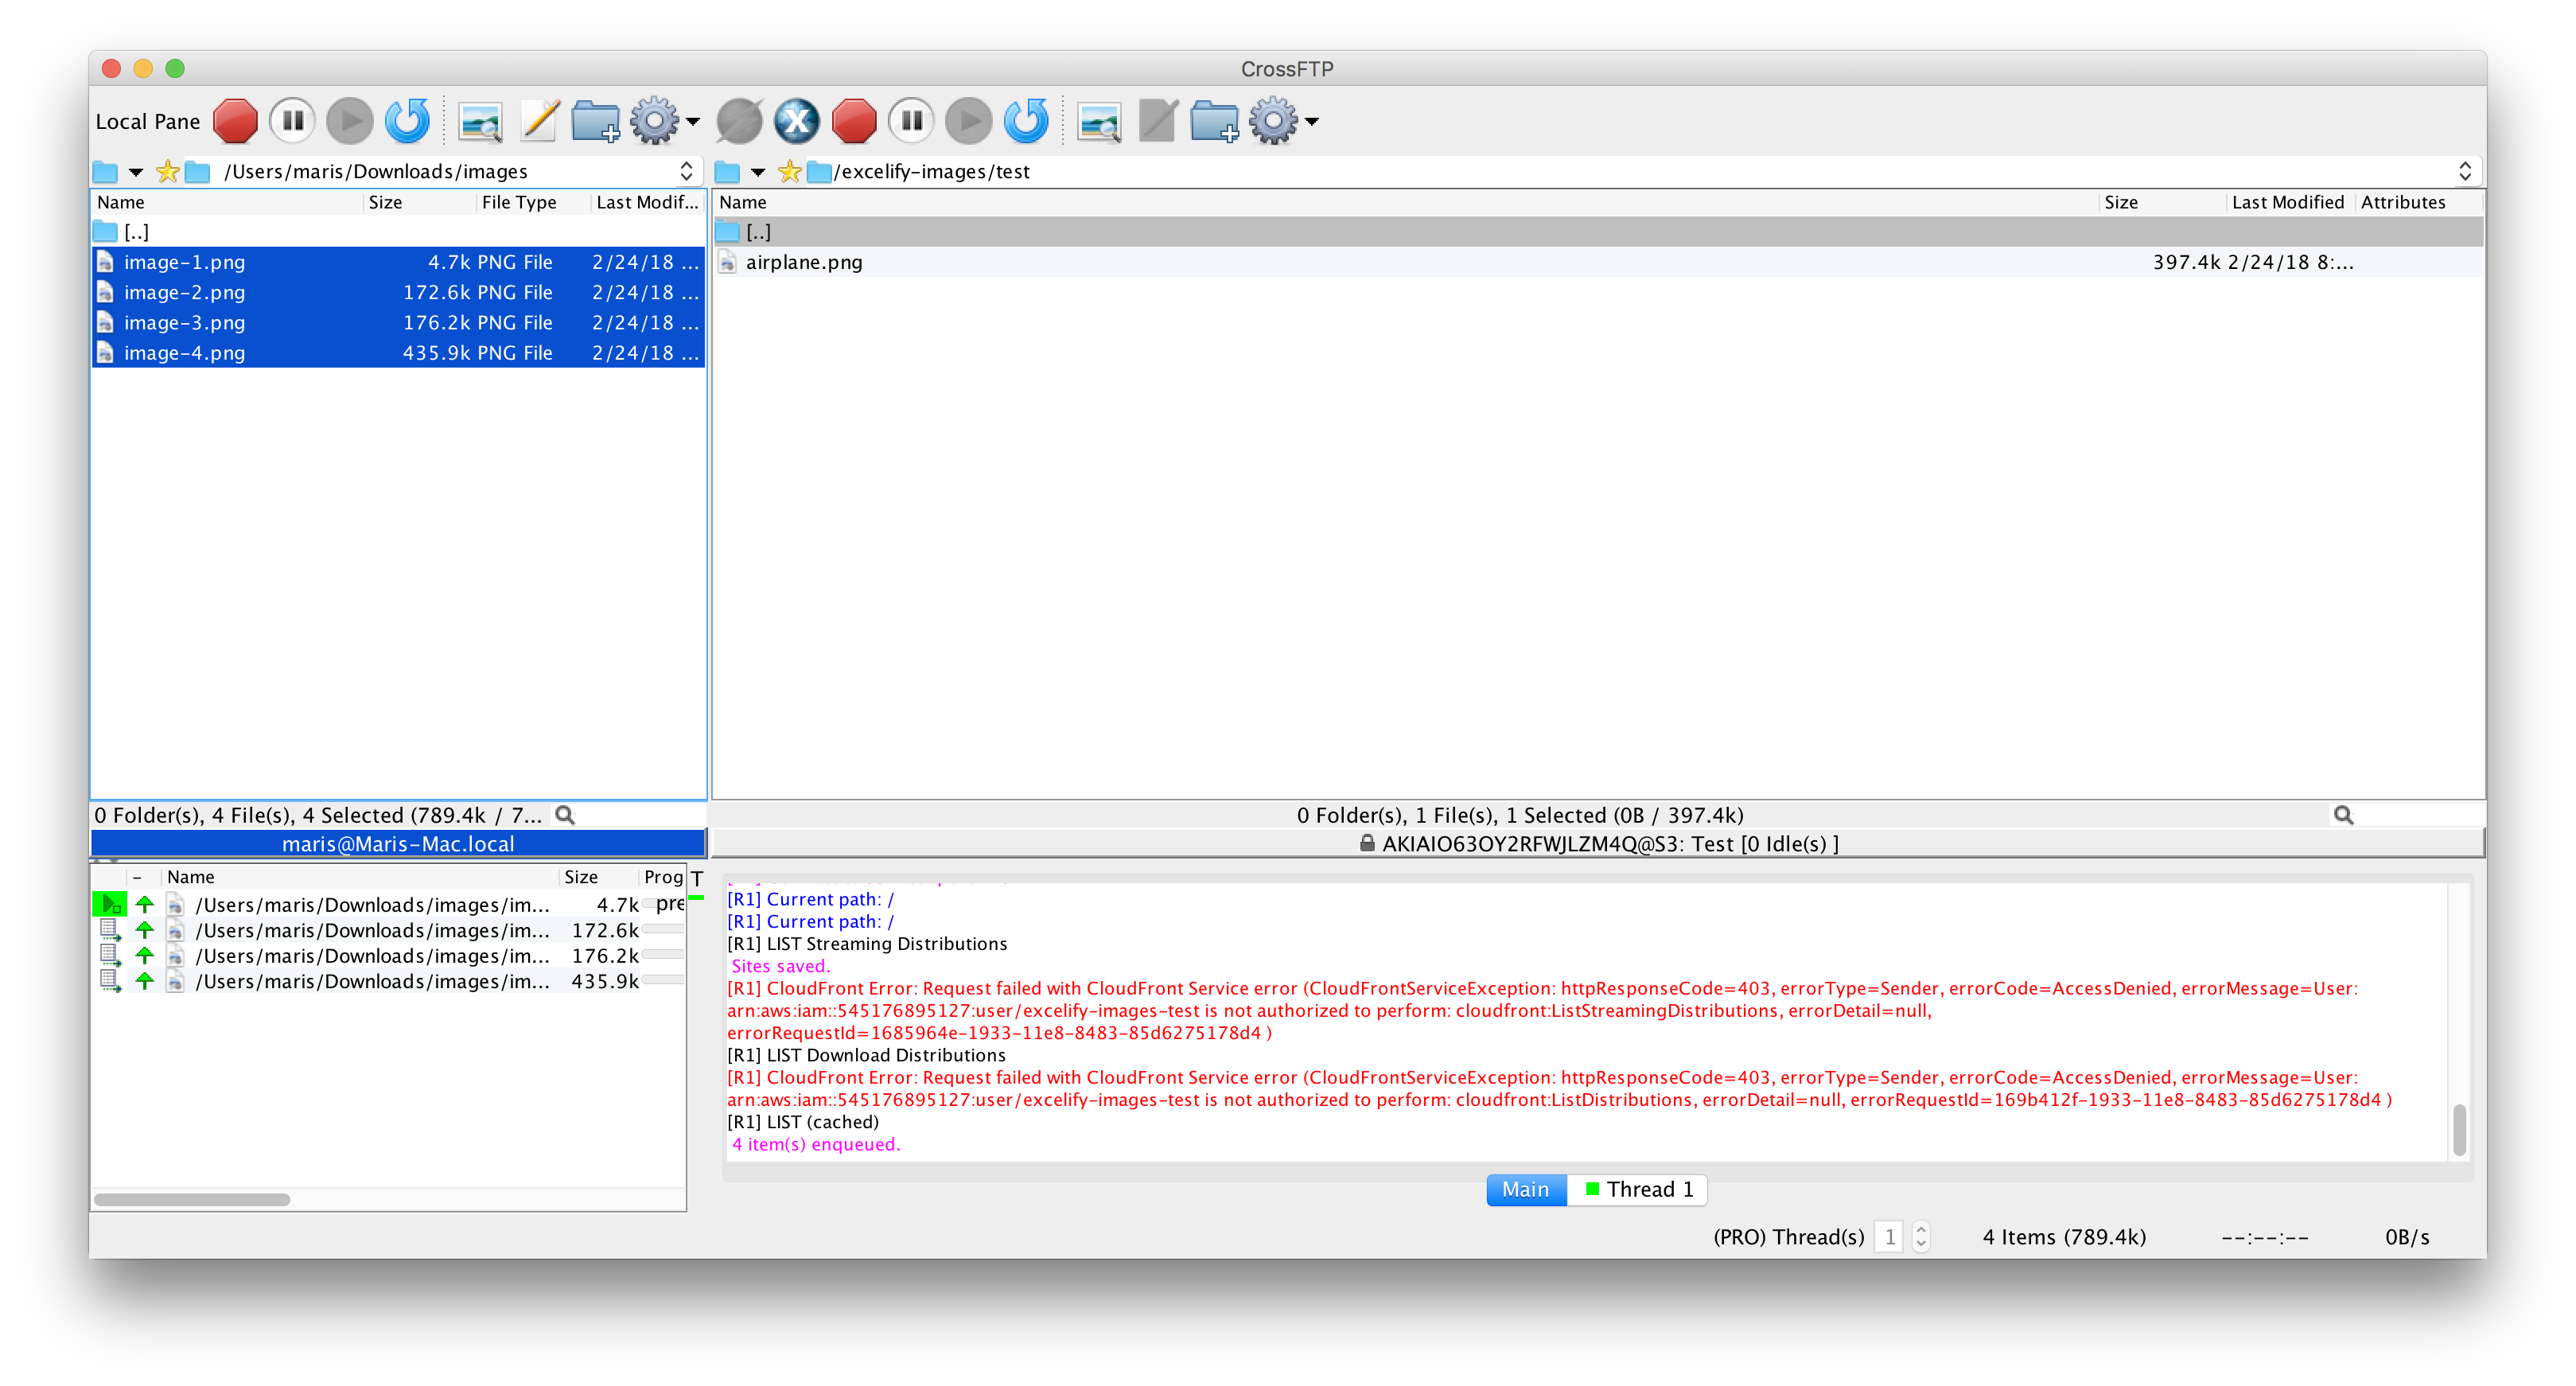 While file uploading is in progress, you can press the Refresh icon on the top to see what has already been uploaded. In the status bar at the middle of the window, you can see the count of files that are already uploaded. That way you can get a clue of how far the overall upload is progressed.
How to get URLs for uploaded files?
Ideally, before uploading, you want to name your files in such a way that you can calculate their names from the product data you have.
One way is to give file names to match the SKU number. For example, if your Variant SKU for a product is ABC-123, then you want your file to be named like ABC-123.jpg.
Another way is to give file names to match the Handle of the Product or Collection. For example, if your Handle is tshirt-red-slim-fit, then your file name should be tshirt-red-shim-fit.jpg.
That way you will be able to guess the media file URLs by knowing your SKU or Handles. Then you can use the Excel formula to concatenate the pieces to make up your URL.
Guess the file URL from SKU
If you have “Variant SKU” in the Excel column A, then the formula to calculate the file link for Product “Image Src” column is:
="https://s3-us-west-2.amazonaws.com/excelify-images/<your-store-folder>/"&A2&".jpg"
Notice the <your-store-folder> part of the formula – you need to replace that with your store folder, which is the folder name that comes after the /excelify-images folder or the name of the path to the folder where your files are in your bucket (you may have something other than “excelify-images”).
Many media files per SKU or Product
Sometimes you need to have more than one file per SKU or per product.
You can then name your files by adding numbers to the end.
For example, if your SKU is ABC-123, then you can create media files with names ABC-123-1.jpg, ABC-123-2.jpg, ABC-123-3.jpg, and so on.
Then your formula for the Product “Image Src” column will be like this:
="https://s3-us-west-2.amazonaws.com/excelify-images/<your-store-folder>/"&A2&"-1.jpg ; "&
"https://s3-us-west-2.amazonaws.com/excelify-images/<your-store-folder>/"&A2&"-2.jpg ; "&
"https://s3-us-west-2.amazonaws.com/excelify-images/<your-store-folder>/"&A2&"-3.jpg"
Again, you need to replace the <your-store-folder> with your store folder.
Notice that now in the Image Src cell you will have three images, separated by ; (semicolon). That import will work because the app allows you to import several media files from the same row. For more details about that feature, read the tutorial how to import several images from the same row.
Different products might have a different count of media links. You don’t have to worry about that because if the file will be missing from the URL, it will still skip it and continue importing only files that really exist.
How to get the list of all uploaded media files into Excel?
If you just want to get the list of uploaded files to the Excel table, so that you can then put the links where you need them, you can copy-paste them from CrossFTP app to Excel.
To do it, select all uploaded files on the server, and press Ctrl+C on the keyboard (Cmd+C on MacOS). That will have your whole file list copied. Then go to Excel and paste the list of files.
The pasted list of files in Excel will look like this:
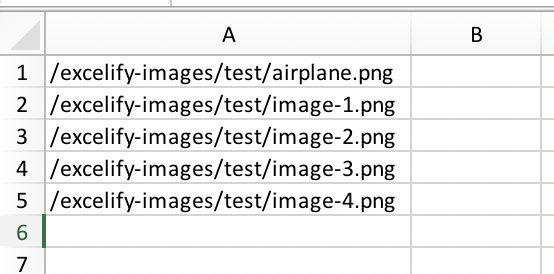 Now, to make the file URL of those files, you can use the formula like that:
="https://s3-us-west-2.amazonaws.com/"&A1
Potential issues with uploading files and how to solve them
If you find yourself on the empty server
 Notice in the address bar at the top – where you are located. If you see you are at the /excelify-images folder, then most likely you have entered the [..] folder (which takes you one level up), or you have pressed the backspace on the keyboard (which also takes you one level up). There, one level up, is an empty void of nothingness, because it’s outside of your image folder. Now you need to go back to your store image folder. The easiest way to do it is to connect again.
Press File, and Connect to bring up the Site Manager. Find your saved connection there, and click Connect. It should connect you again to the server, and you should see your files again.
If that still doesn’t help, then please check the Remote Location field in the Site Manager. It should be /excelify-images/<your-store-folder>.
If that doesn’t help either, please, contact Matrixify Support.
If your internet got disconnected or CrossFTP closed while upload was not finished
The CrossFTP app is robust enough to be able to continue uploading files from where it left off, in case you lost the internet connection or had to close the app.
When you will open the app again, it will offer you to continue uploading, like this:
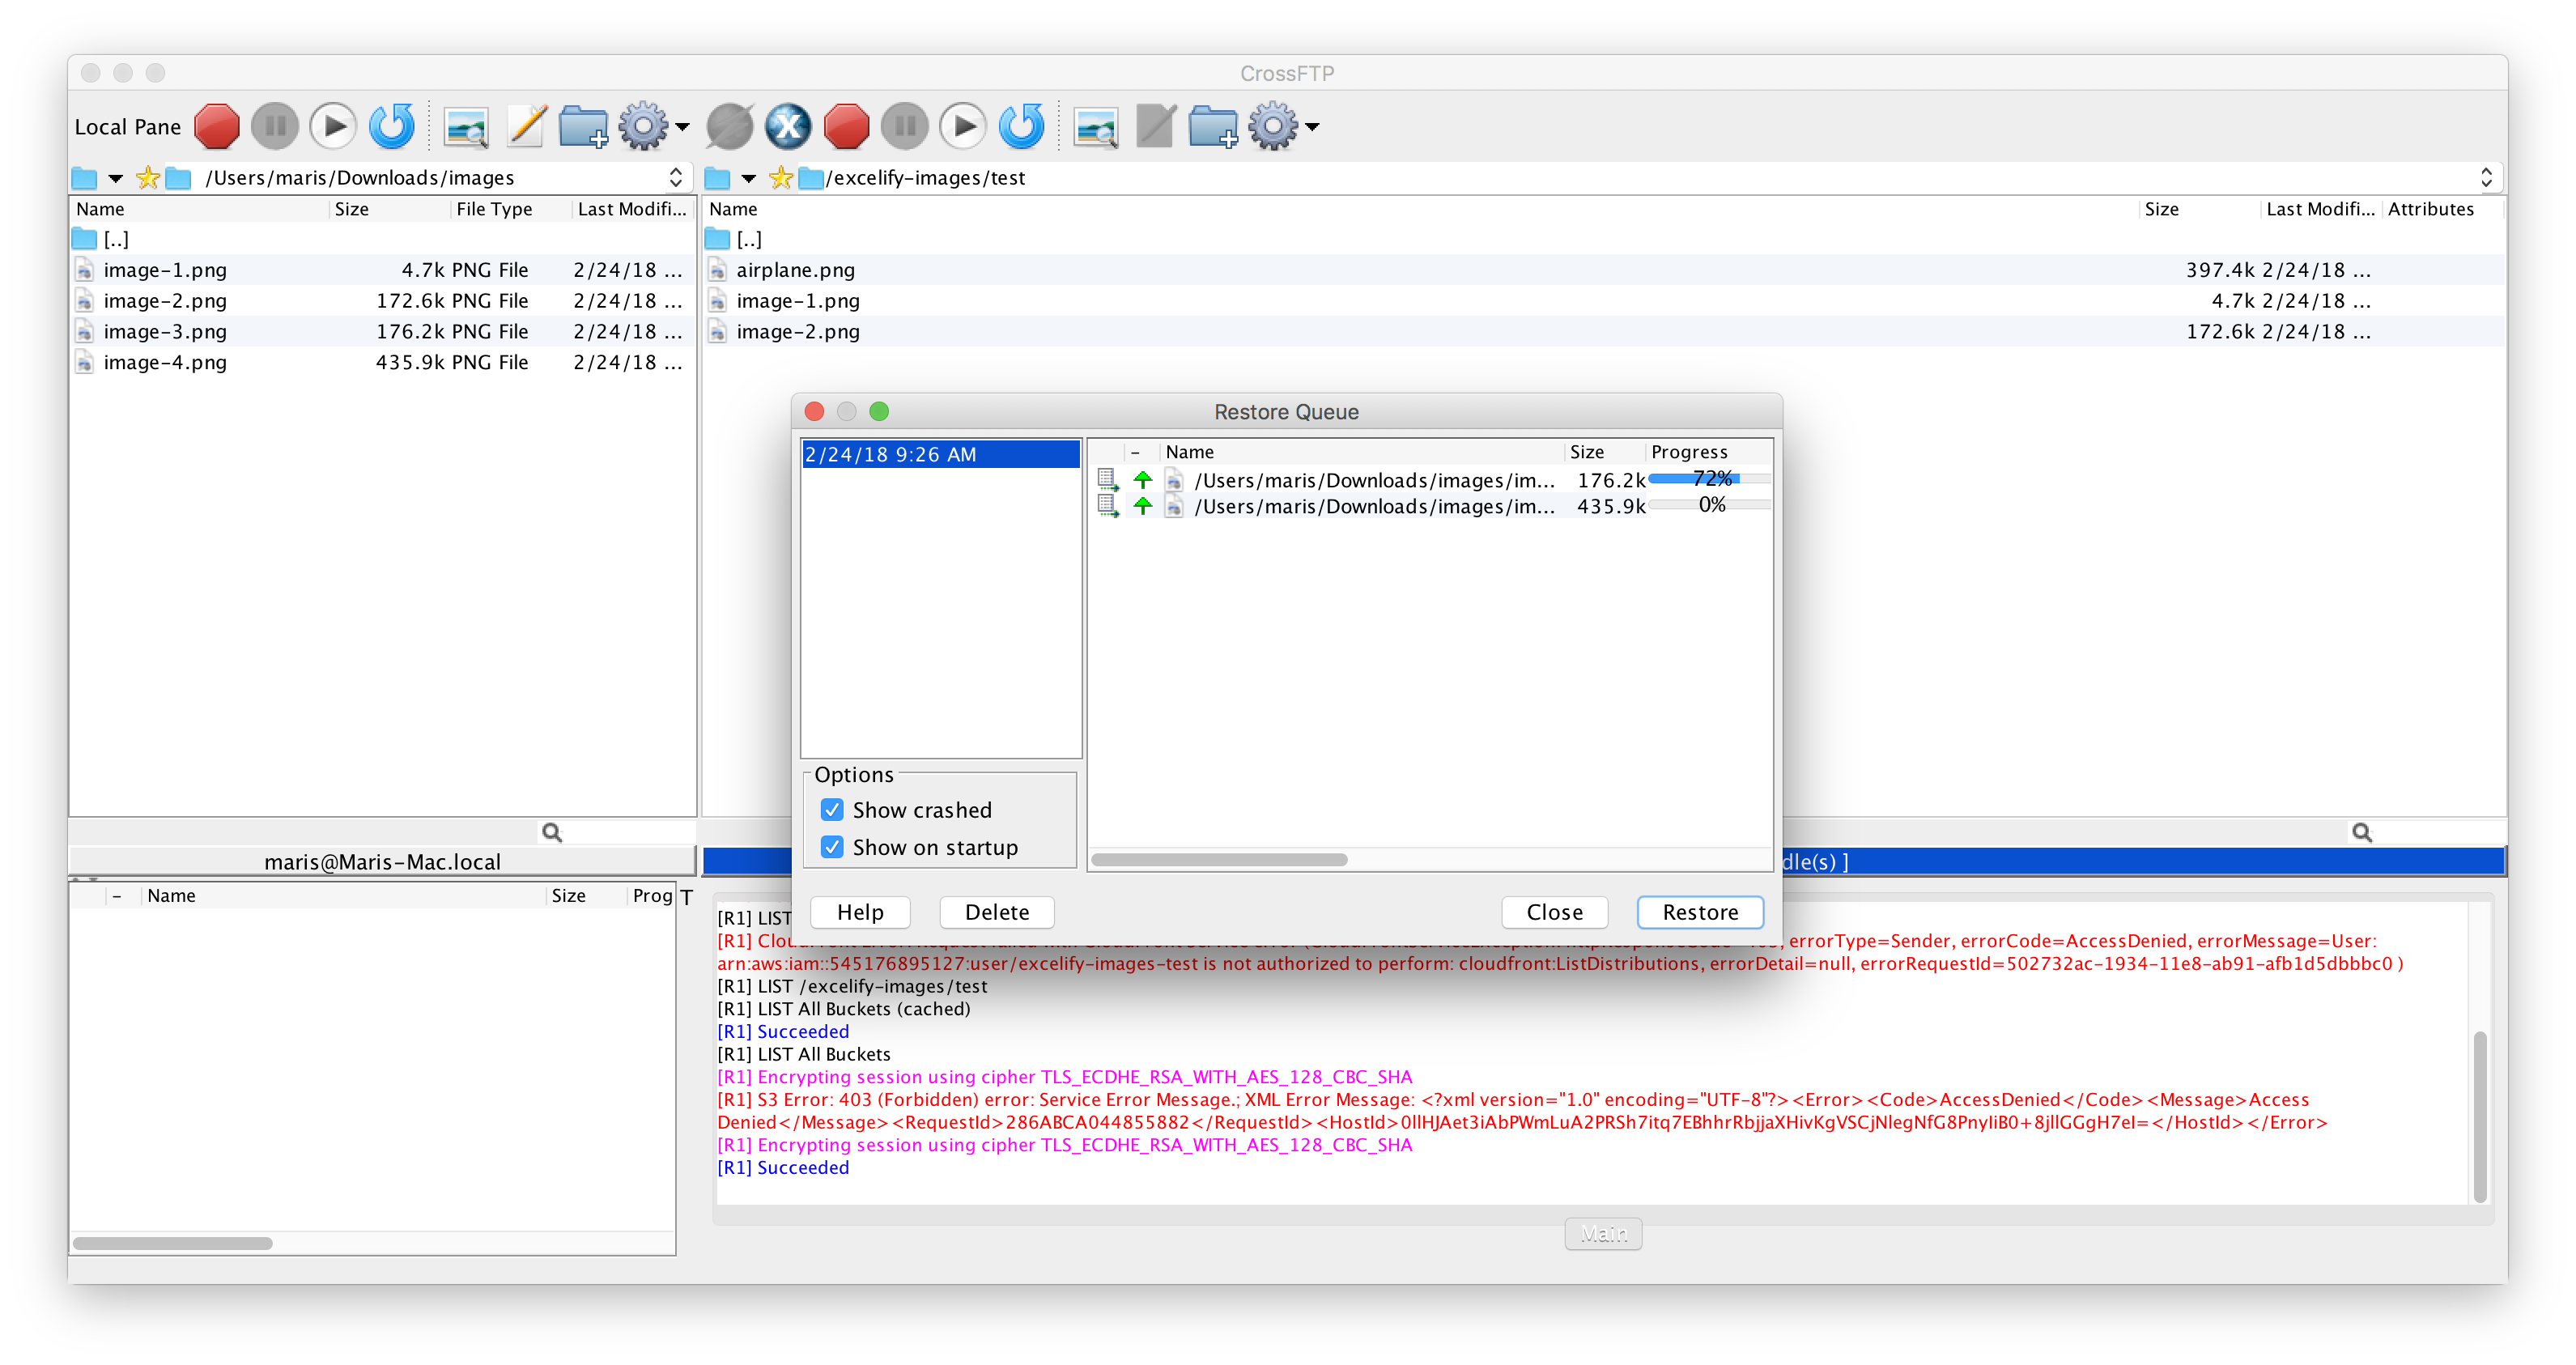 There you need to press the Restore button. It will restore the “queue” of files that still need to be uploaded.
After pressing Restore, you will again see the queue of files in the left bottom section. Click on that queue and press Ctrl+A (or Cmd+A on MacOS) to select all items. Then right-click with the mouse there and select Start Transfer. That will continue uploading files from where you left off.