
The task to migrate Gift Cards between Shopify stores is tricky in Shopify, but can be essential to opening new or duplicate stores.
In this tutorial, we will look into how you can import Orders in your store where Line Items are Gift Cards so that Shopify generates gift cards in your new store and send to the customer.
Important!
- This tutorial will import Orders where Line Items are Gift Cards so that Shopify generates Gift Cards and sends them to the customers automatically.
- Existing Gift Card codes currently cannot be migrated so these will be new gift cards with new codes that will get sent to customers.
- Expiration dates will not be migrated.
- Disabled and expired Gift Cards when going through the tutorial will not be migrated. Otherwise, when importing they would be created as new and active Gift Cards.
Steps, in short, to migrate gift cards by generating Gift Card Orders
- Export Gift Cards from Shopify Admin.
- Remove unnecessary data from the file.
- Edit file to Matrixify Orders template to import as Gift Card Orders.
- Save the file.
- Set up your new store before the import.
- Import your Gift Card Orders.
1. Export Gift Cards from Shopify Admin
First, we need to get all stores Gift Card data in a spreadsheet file.
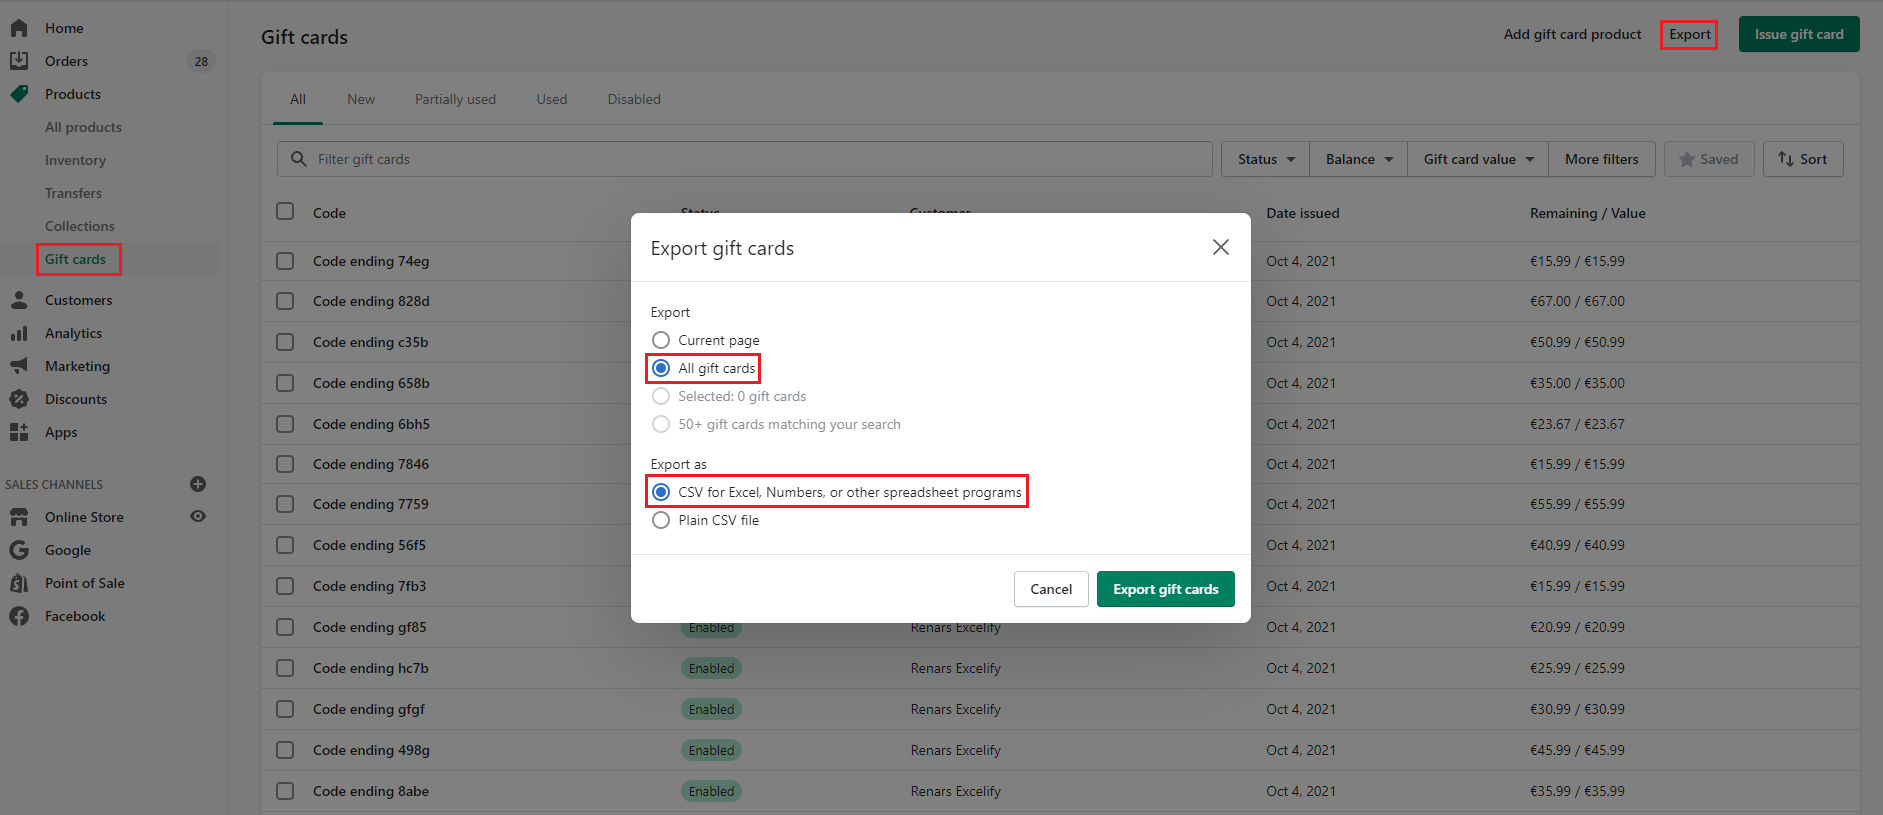
To do so, go into your source stores Admin -> Products -> Gift Cards section.
At the top-right corner of the page click the “Export” button, this will open a popup to set up your Shopify export.
Select:
- export
All gift cards - export as
CSV for Excel, Numbers, or other spreadsheet programs.
Depending on the amount of Gift Cards the export could download right there in the browser or be sent to you via the email.
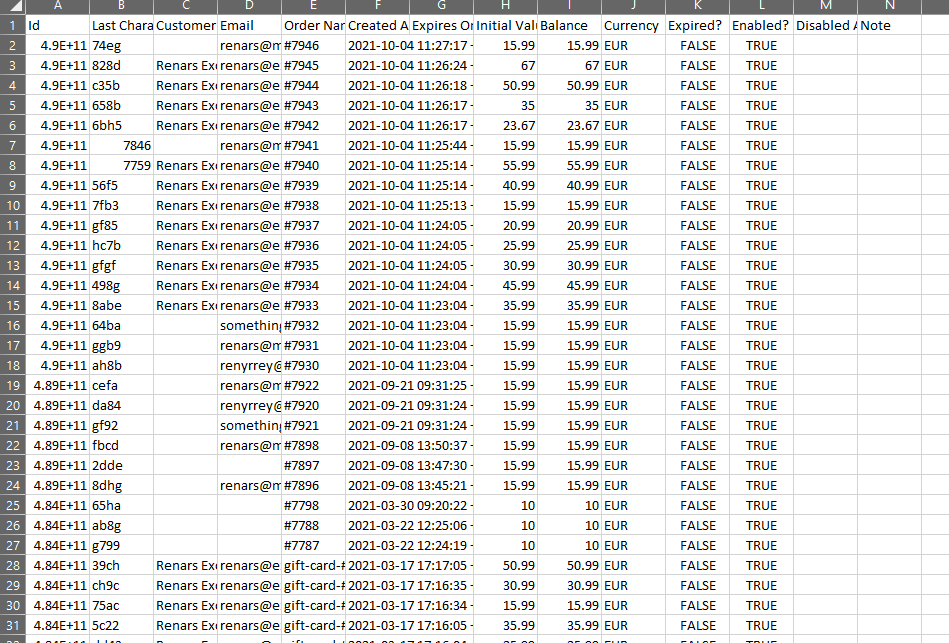
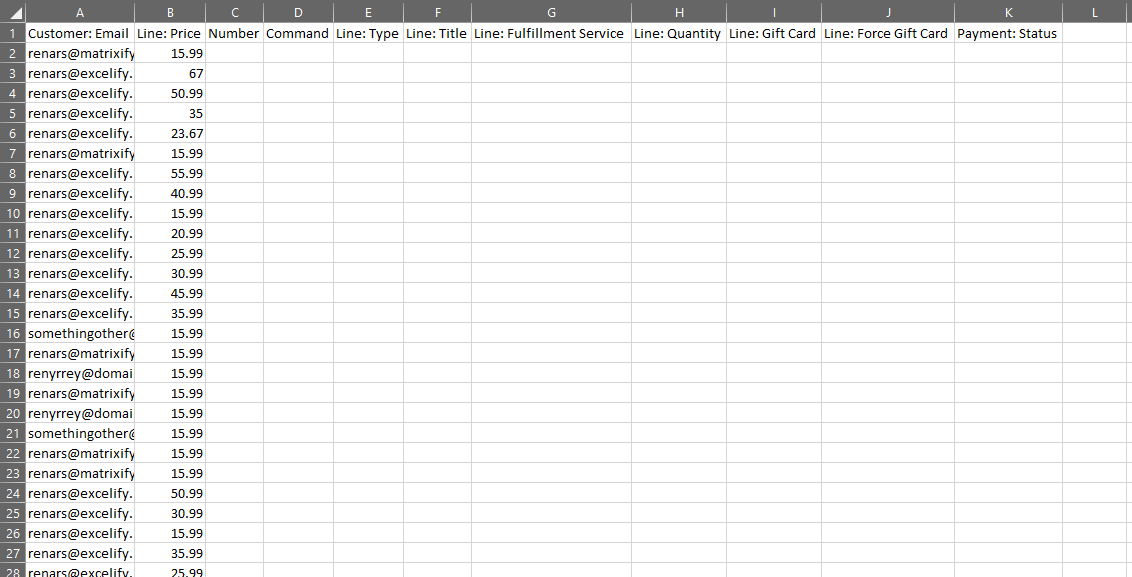
The exported file should look something like this:
2. Remove unnecessary data from the file
All data from the Shopify export is not needed, so let’s now remove rows and columns that we will not need.
2.1 Remove Gift Cards that you do not wish to migrate
Usually, you would not want to migrate any disabled or expired gift cards as when importing them as Orders, Shopify will create them as active Gift Cards and send to Customers.
So delete any rows where the column Expired is TRUE and/or Enabled is FALSE.
As only real Customer identifier here is Email then remove also any rows where theEmail column is empty.
You can also delete any rows where Email is empty as those cannot be linked to customers anyway as there is no customer.
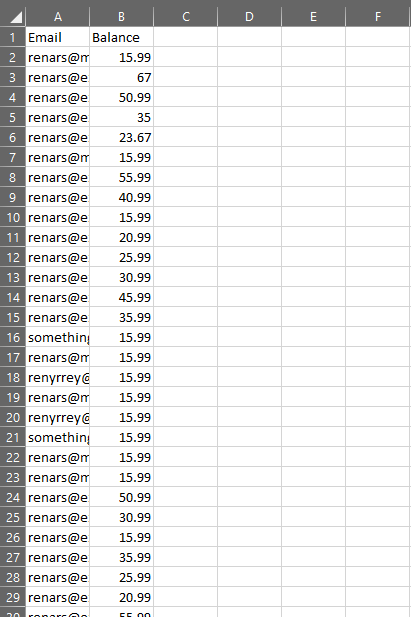
2.2 Remove columns that are not needed
From this file, we will only need 2 columns Email and Balance so delete any other columns from the file.
Important note!
When following this tutorial, gift cards will be automatically sent to customers, so we strongly suggest testing the process with one or a few Orders before going “all-in”.
So you can first go through the tutorial with only a few Gift Cards by removing others and changing email to your own, to see how the result looks.
3. Edit file to Matrixify Orders template
Now we can start constructing the Matrixify Orders import file where these Gift Cards are Line Items.
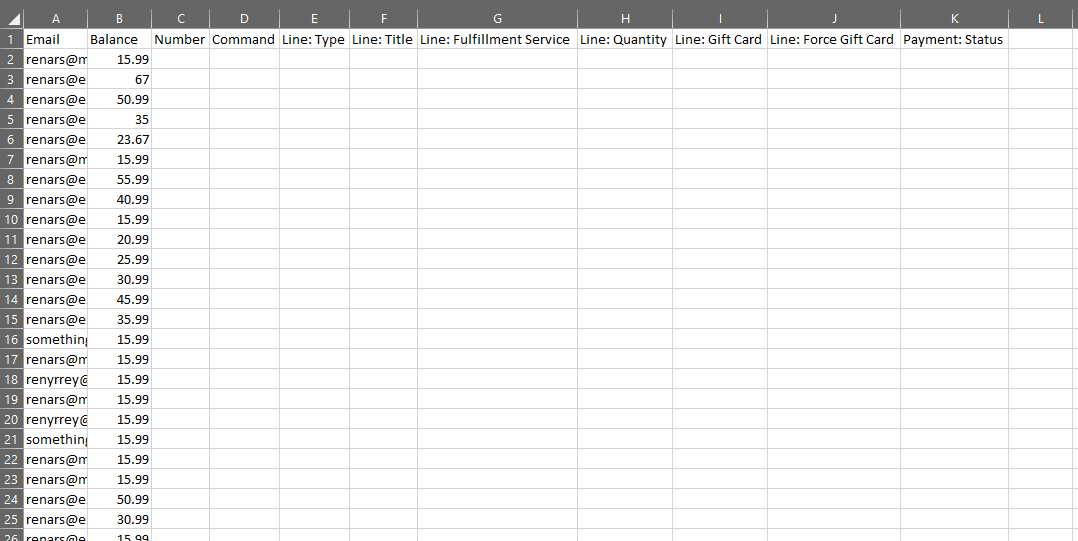
3.1. Add new columns to the file
First, add columns we will need – Number, Command, Line: Type, Line: Title, Line: Fulfillment Service, Line: Quantity, Line: Gift Card, Line: Force Gift Card and Payment: Status.
It is very important that column headers are written correctly so that no essential data is missing – the app will ignore any column headers that are not recognized.
The column order in the file does not matter.
3.2. Rename Shopify template columns to our Orders template
Also Shopify’s Email and Balance columns to do not match our template. So we need to now rename them:
Email – rename to Customer: Email
Balance – rename to Line: Price
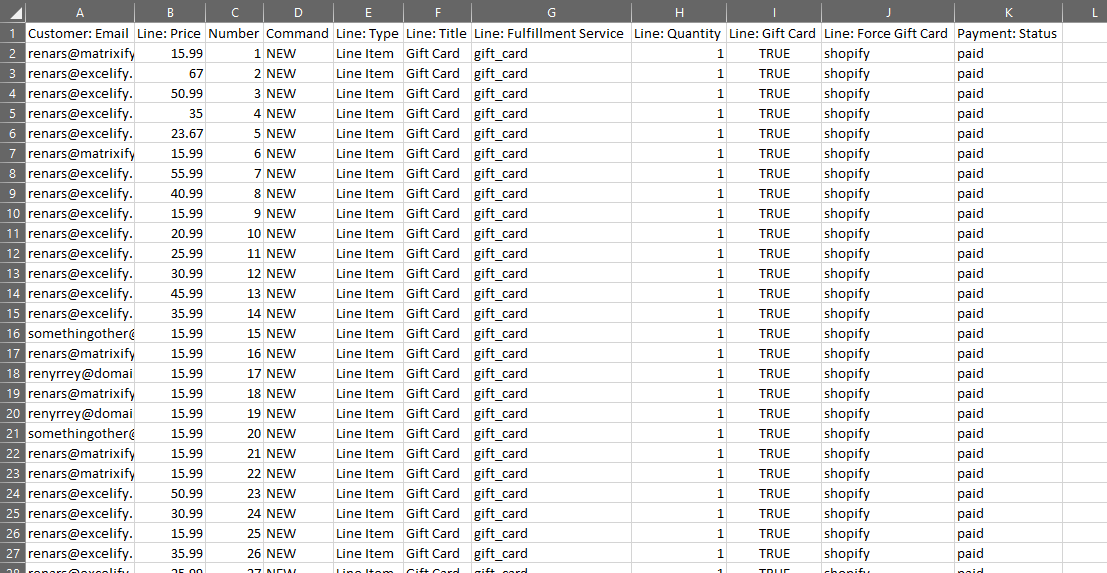
3.3. Fill added columns with data
Now once the columns are all set up, we need to set data in them.
Number– set just a number value in each row for app to see that each row is new order. Such as1for first oreder row,2for next one, etc.Command– valueNEWin all rows.Line: Type– valueLine Itemin all rows.Line: Title– this would be gift cards product name, I would just putGift Cardin each row, but you can set anything there.Line: Fulfillment Service– valuegift_cardin all rows.Line: Quantity– value1in all rows.Line: Gift Card– valueTRUEin all rows.Line: Force Gift Card– valueshopifyin all rows.Payment: Status– valuepaidin all rows.
4. Save the file
Now the file is ready and we need to save it.
We suggest saving it in XSLX format which the app supports. In that case, make sure that the sheet/tab name in the file is set to Orders.
If saving as CSV file, make sure to include the word orders in the file name.
This is important so that the app can properly detect the file contents as Orders.
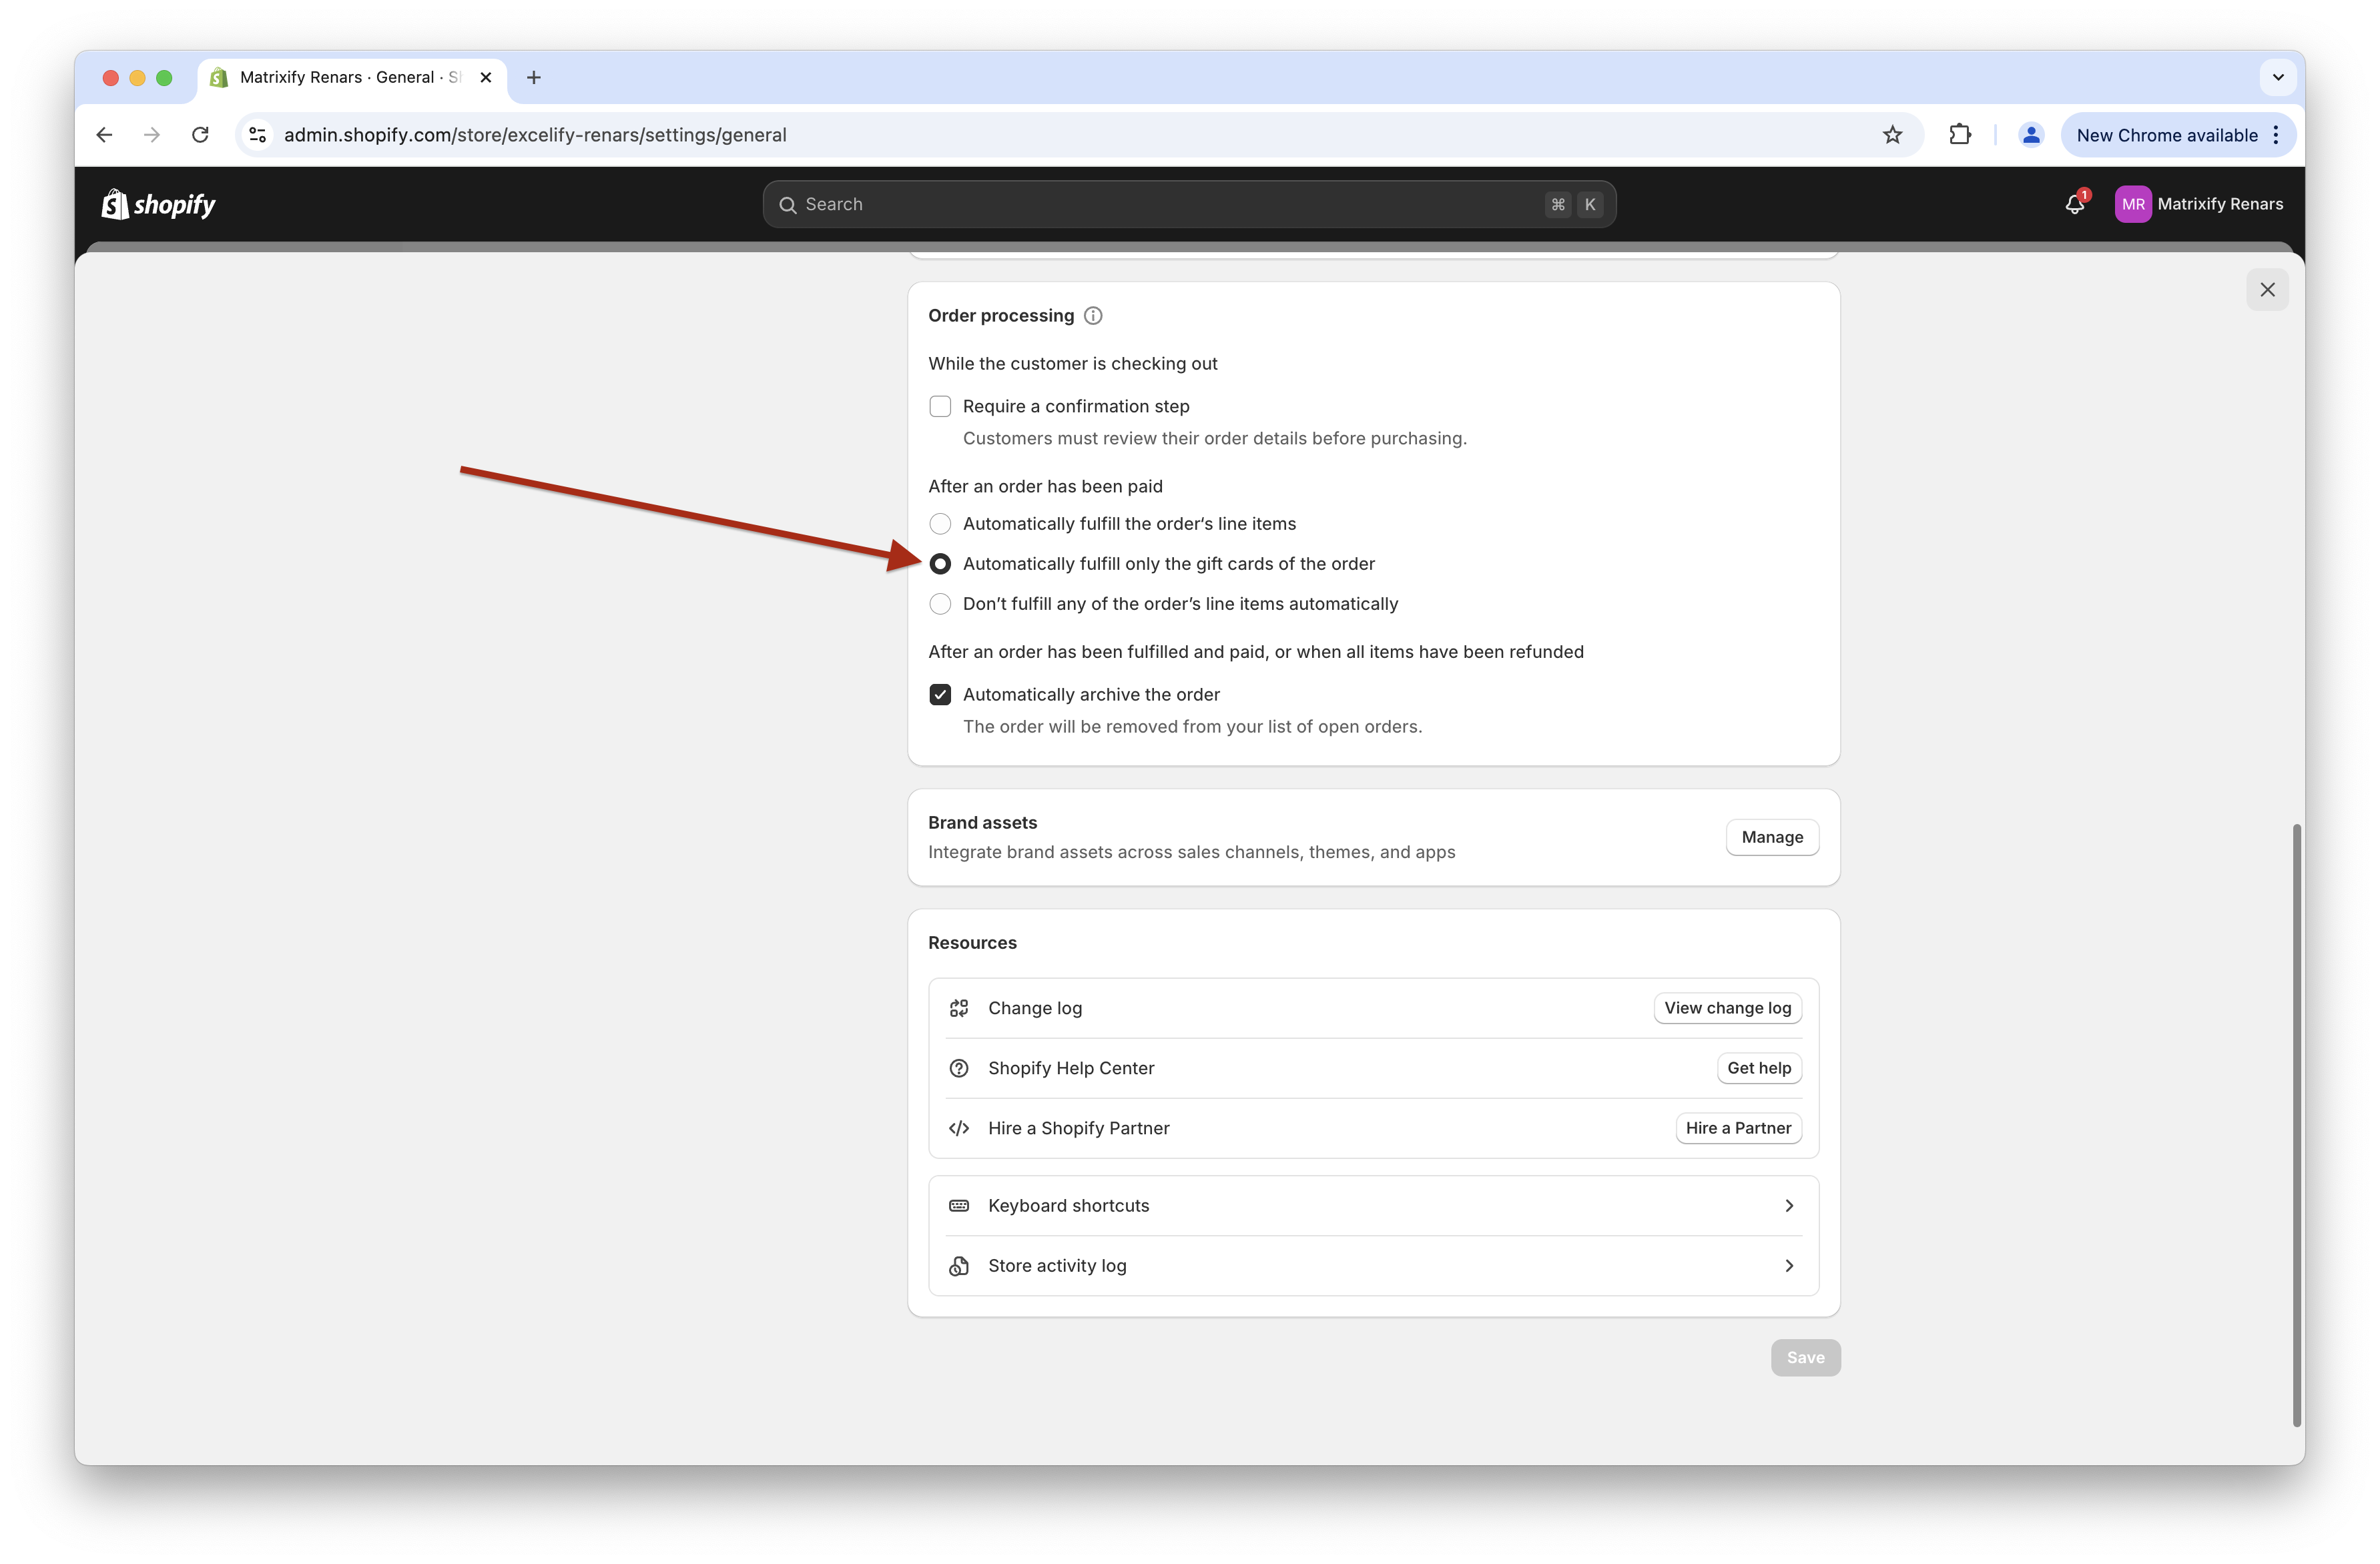
5. Set up your new store before the import
Before we can start importing, we need to make sure that Shopify properly generates Gift Cards from the Order data.
Go into “Shopify Admin -> Settings -> General -> Order Processing -> After an order has been paid” and make sure that option Automatically fulfill only the gift cards of the order is selected. It should be by default.
6. Import your Gift Card Orders
Head into the Matrixify app home page and in the “Import” section upload your file.
Double-check that the app recognizes the import as Orders. If it shows Products or another entity name, make sure that the file name/sheet name is set as per step #4. Save the file.
If all looks correct, start the import by pressing the “Import” button and start to migrate Gift Cards between Shopify stores.
As the import is going you should also see gift cards show up in the Admin -> Products -> Gift Card section, and they would be also automatically set to the customer.

Good to know!
- If you have any issues, questions, or concerns along the way, please reach out to our support directly.
- Check out other Gift Card related tutorials.
- See our Orders template documentation to learn what other fields you can set when importing Orders.
- Read more about Shopify Gift Cards.


