
You can export Shopify Payouts with Transactions to Excel or CSV format.
Export all of the payouts, or filter them by date intervals.

Filter Payouts
To see full list of currently available export filters, check out our full Export Filters documentation.
Export all payouts or apply the date filters:
- Relative Date – for x last full minutes, hours, days, months
- Date Interval – from date to date
Filter by relative date:
To filter for x last full days or months.
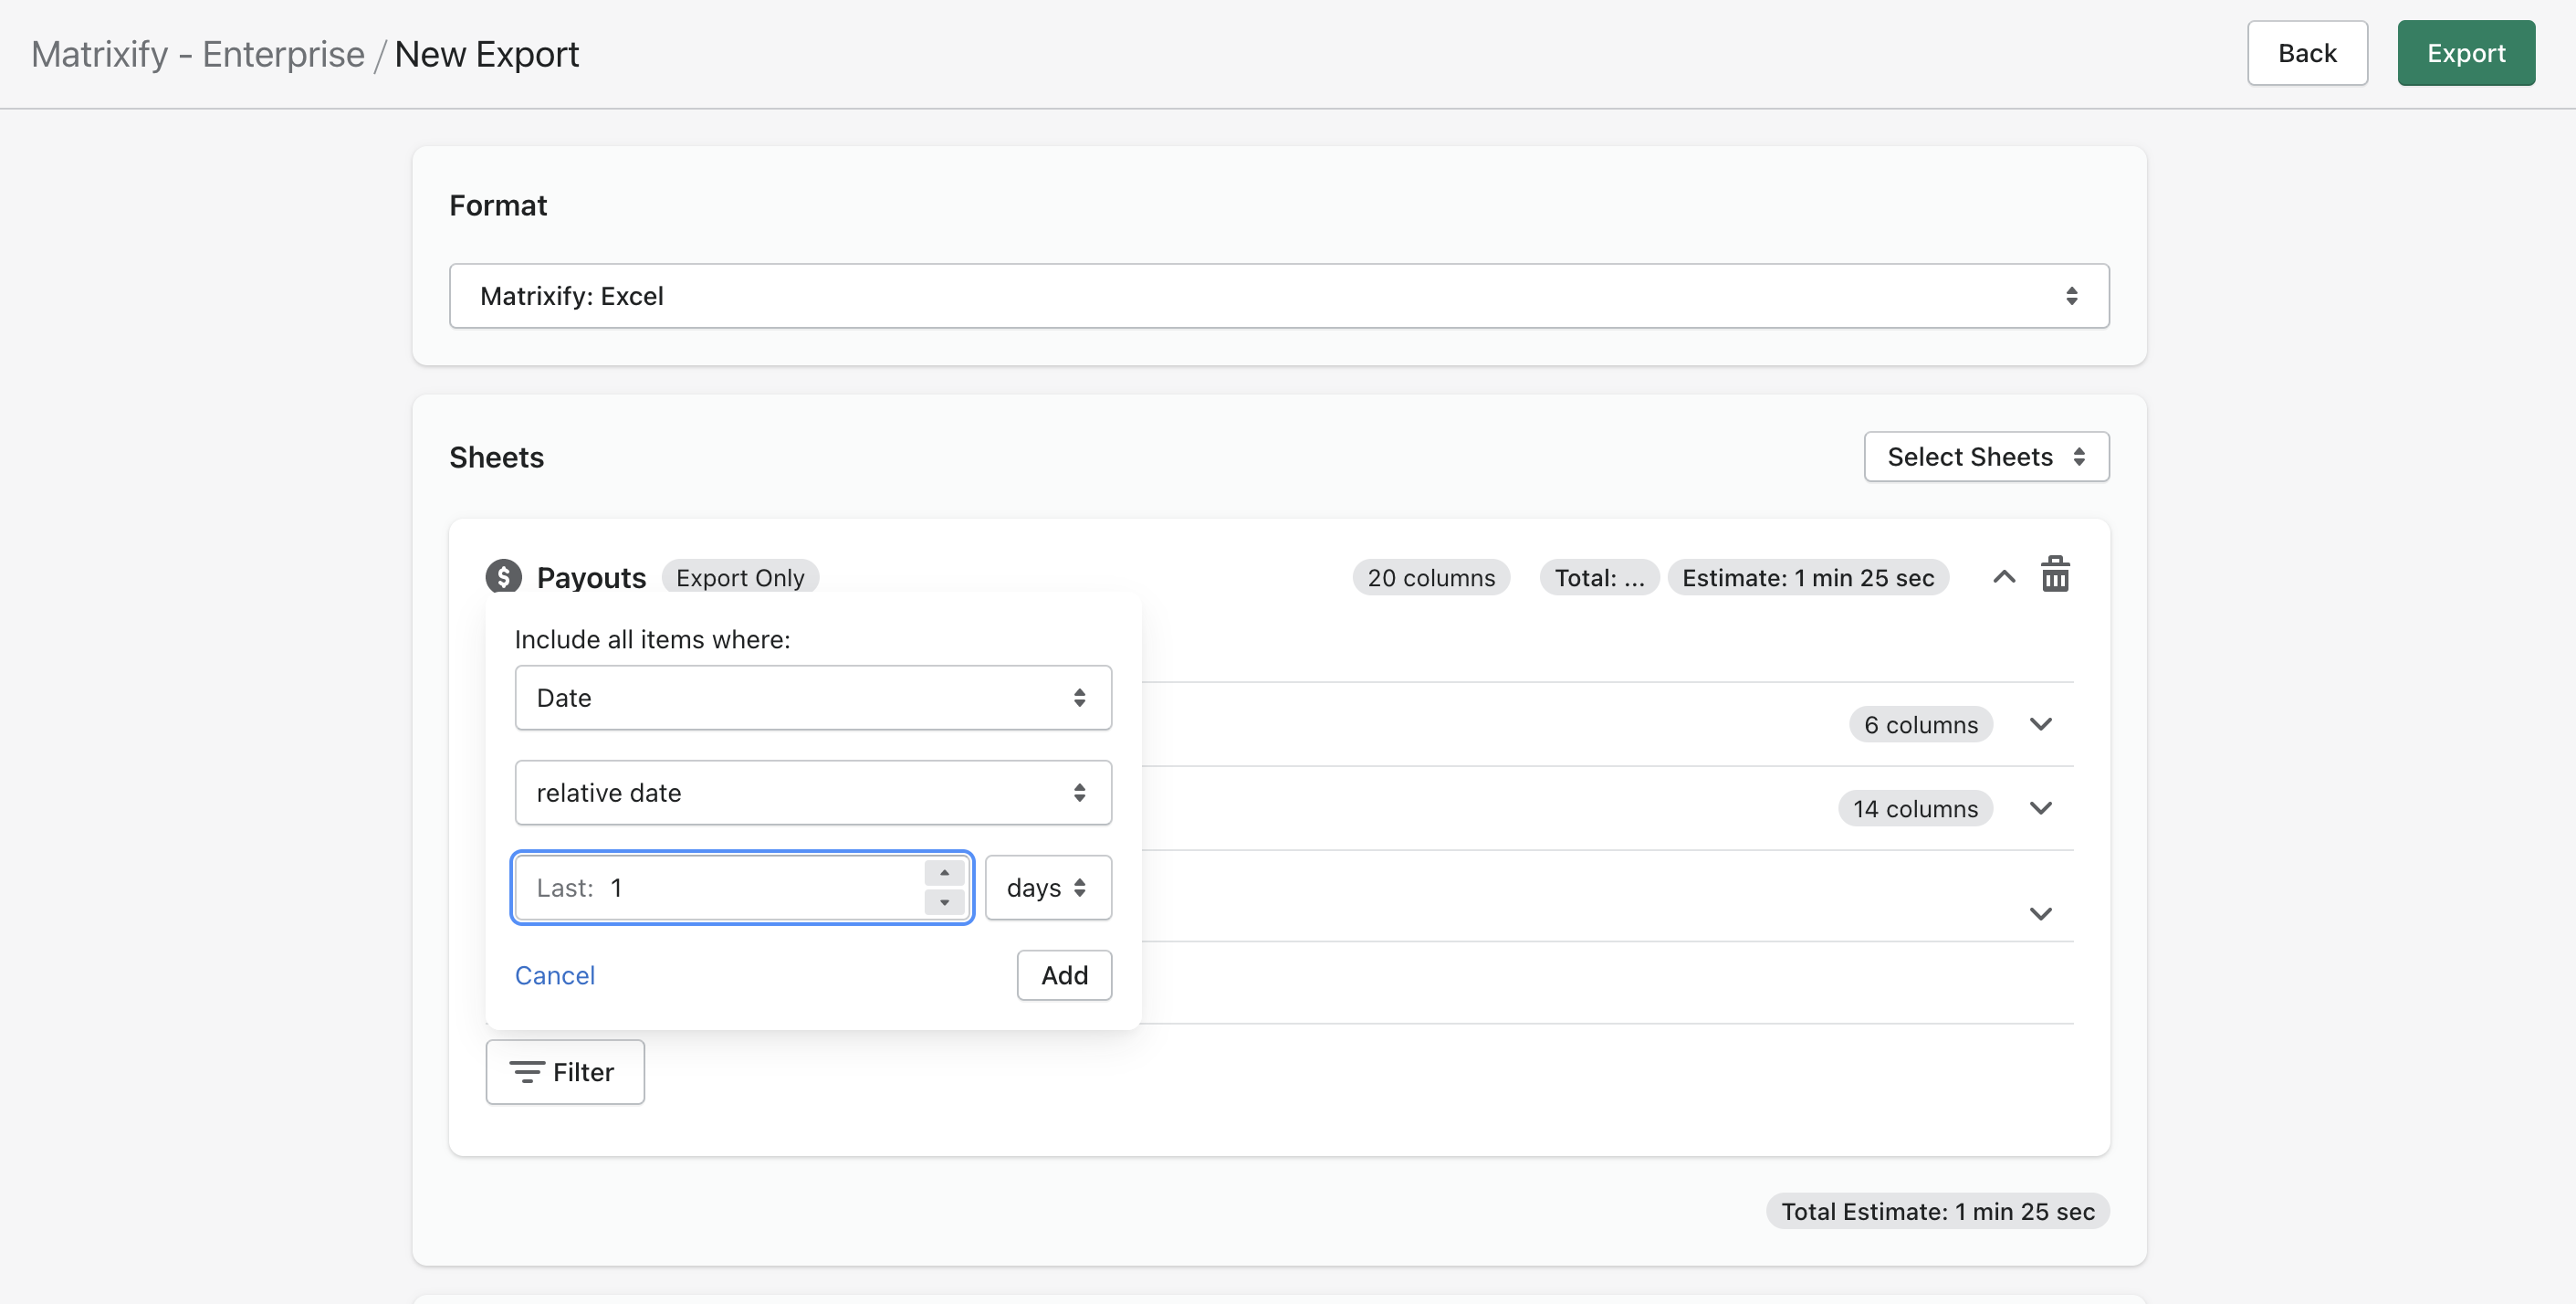
The full-day means that it will not export for today because it’s not yet ended.
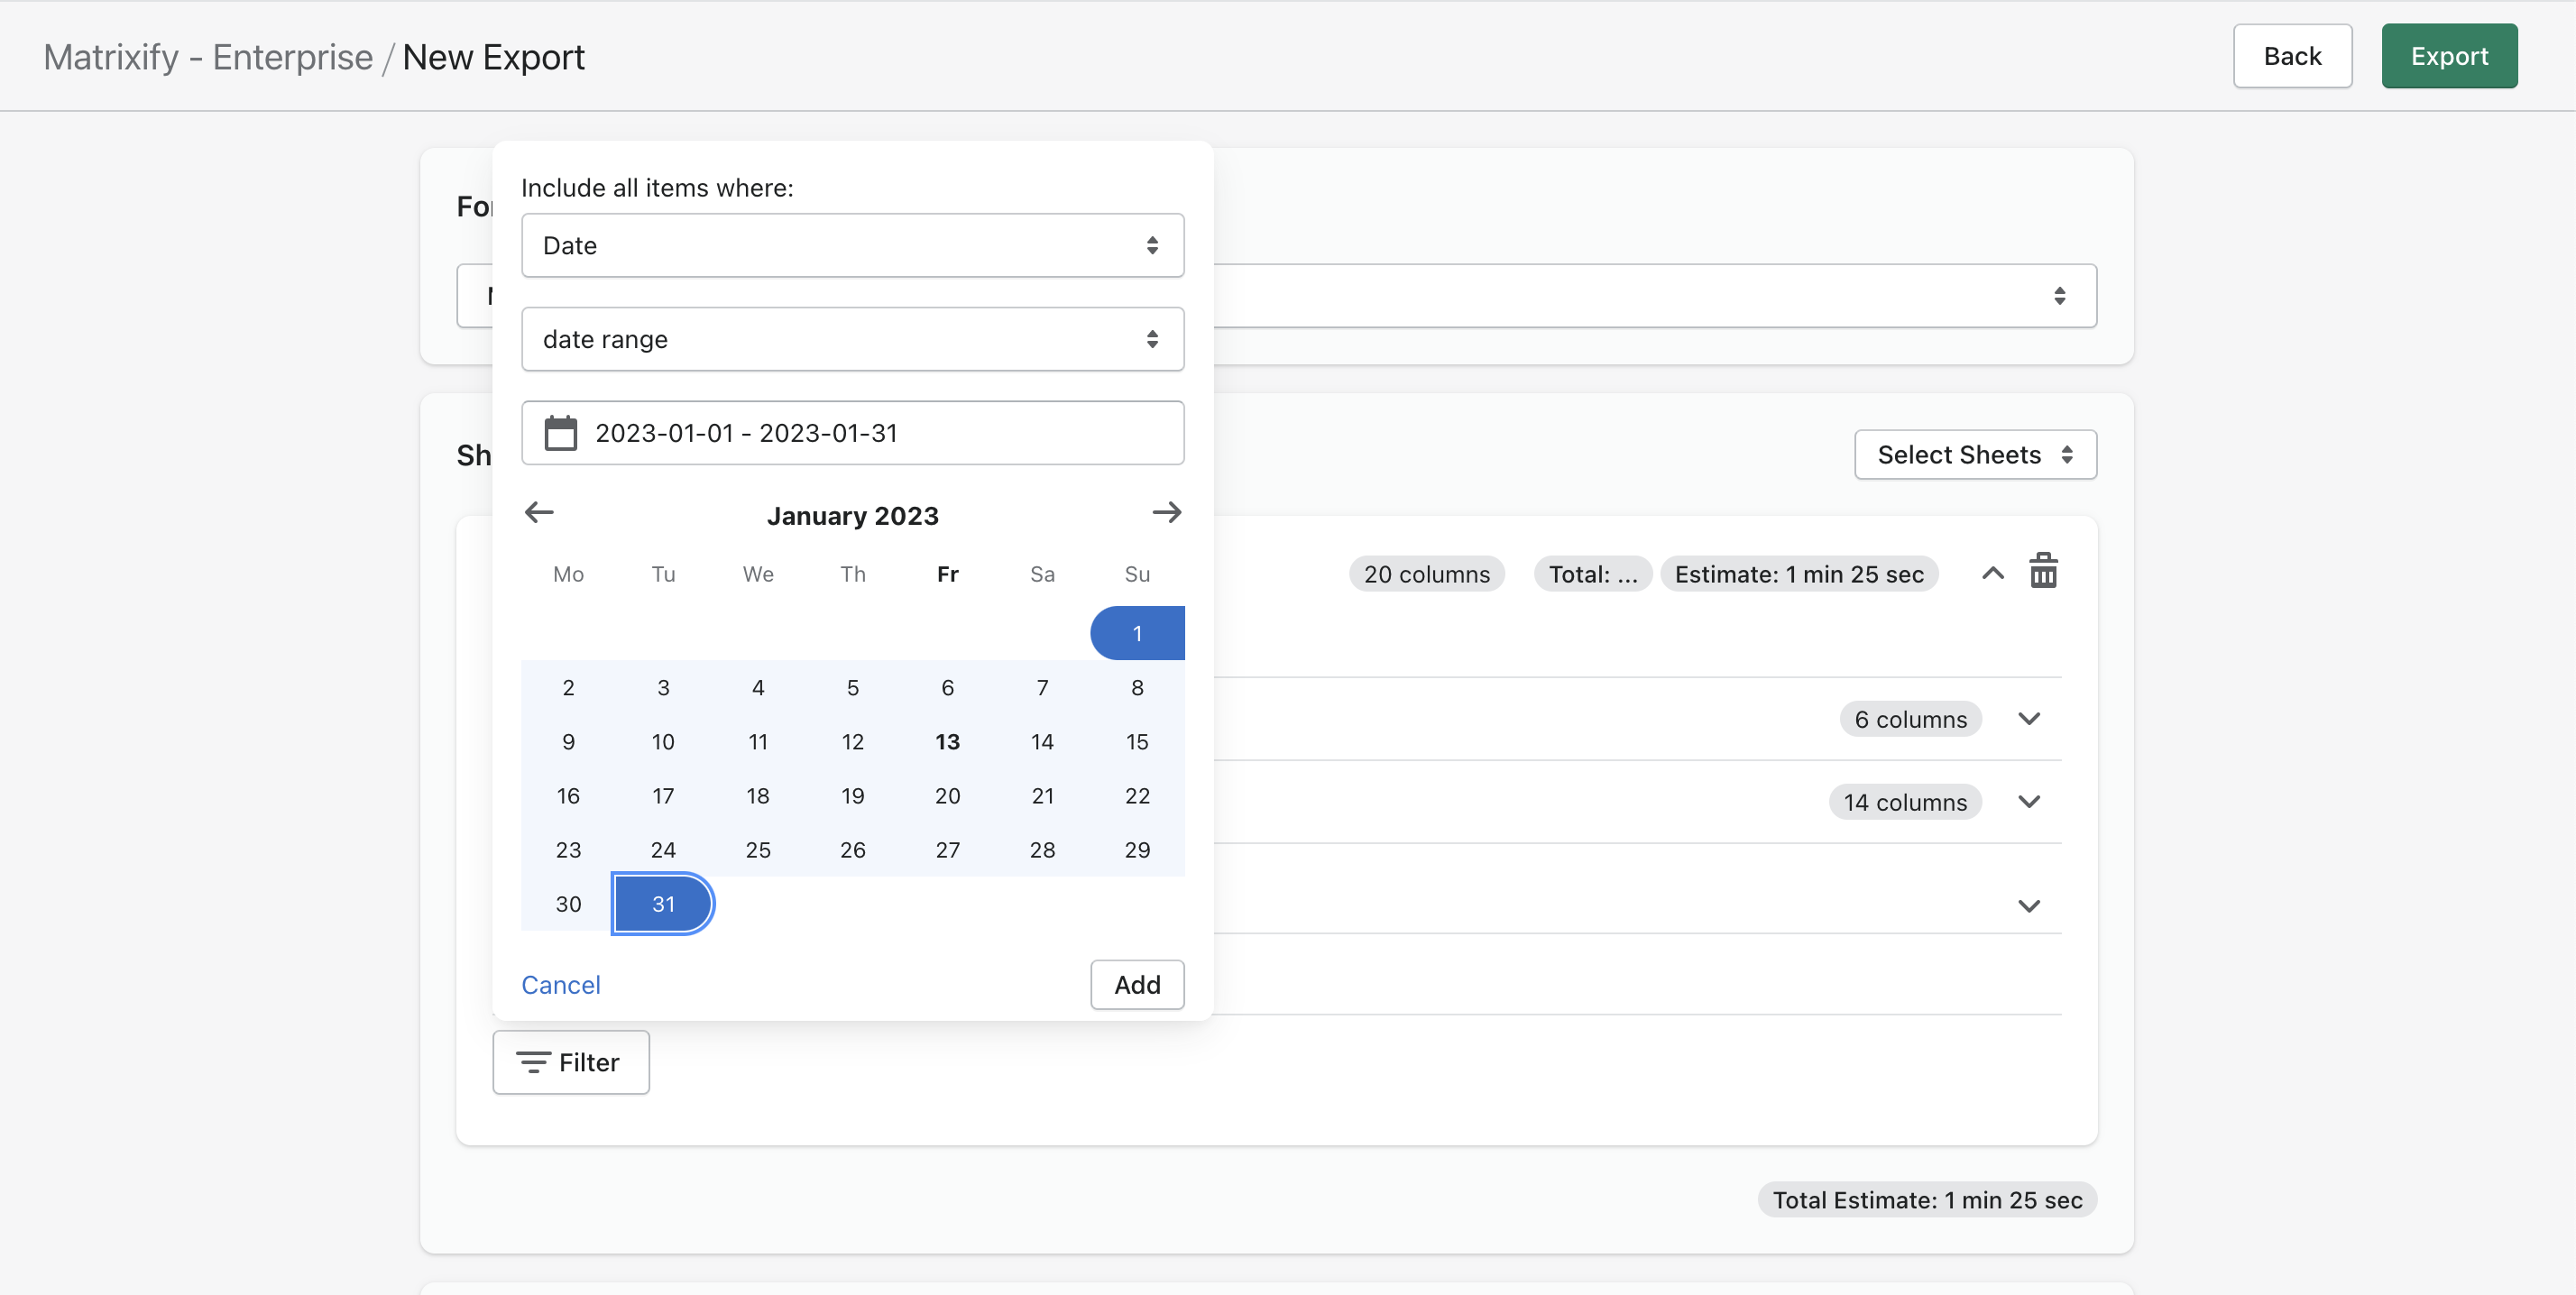
Filter by date interval:
For the date interval, you can set the dates in the past and in the future.
That’s because Shopify actually generates the transactions for the future which are in pending status. But you can already see what the amounts are.
For example, to set up the repeated Payouts export for the whole year, you can set the date range from Jan 1 till Dec 31.
As a date range, you can also select on or after and on or before filter conditions where you can specify a single date and the app will take all Payouts after or before that date.
Read further to see how you can make this beneficial for reporting.
Automated Shopify Payouts Report
You can become creative and make the repeated export which is used in the Excel or Google Sheets reports by automatically loading it from the exported URL.
You can also send that exported file to FTP/SFTP server each time it exports.
This example shows you how to create automatic Payouts report on Google Sheets.
1. Select export Payouts without filters
First, at the top of the new export page, you need to select the export format.
Choose the format to be “Matrixify: CSV” to generate export as a CSV file to be imported into Google Sheets automatically.
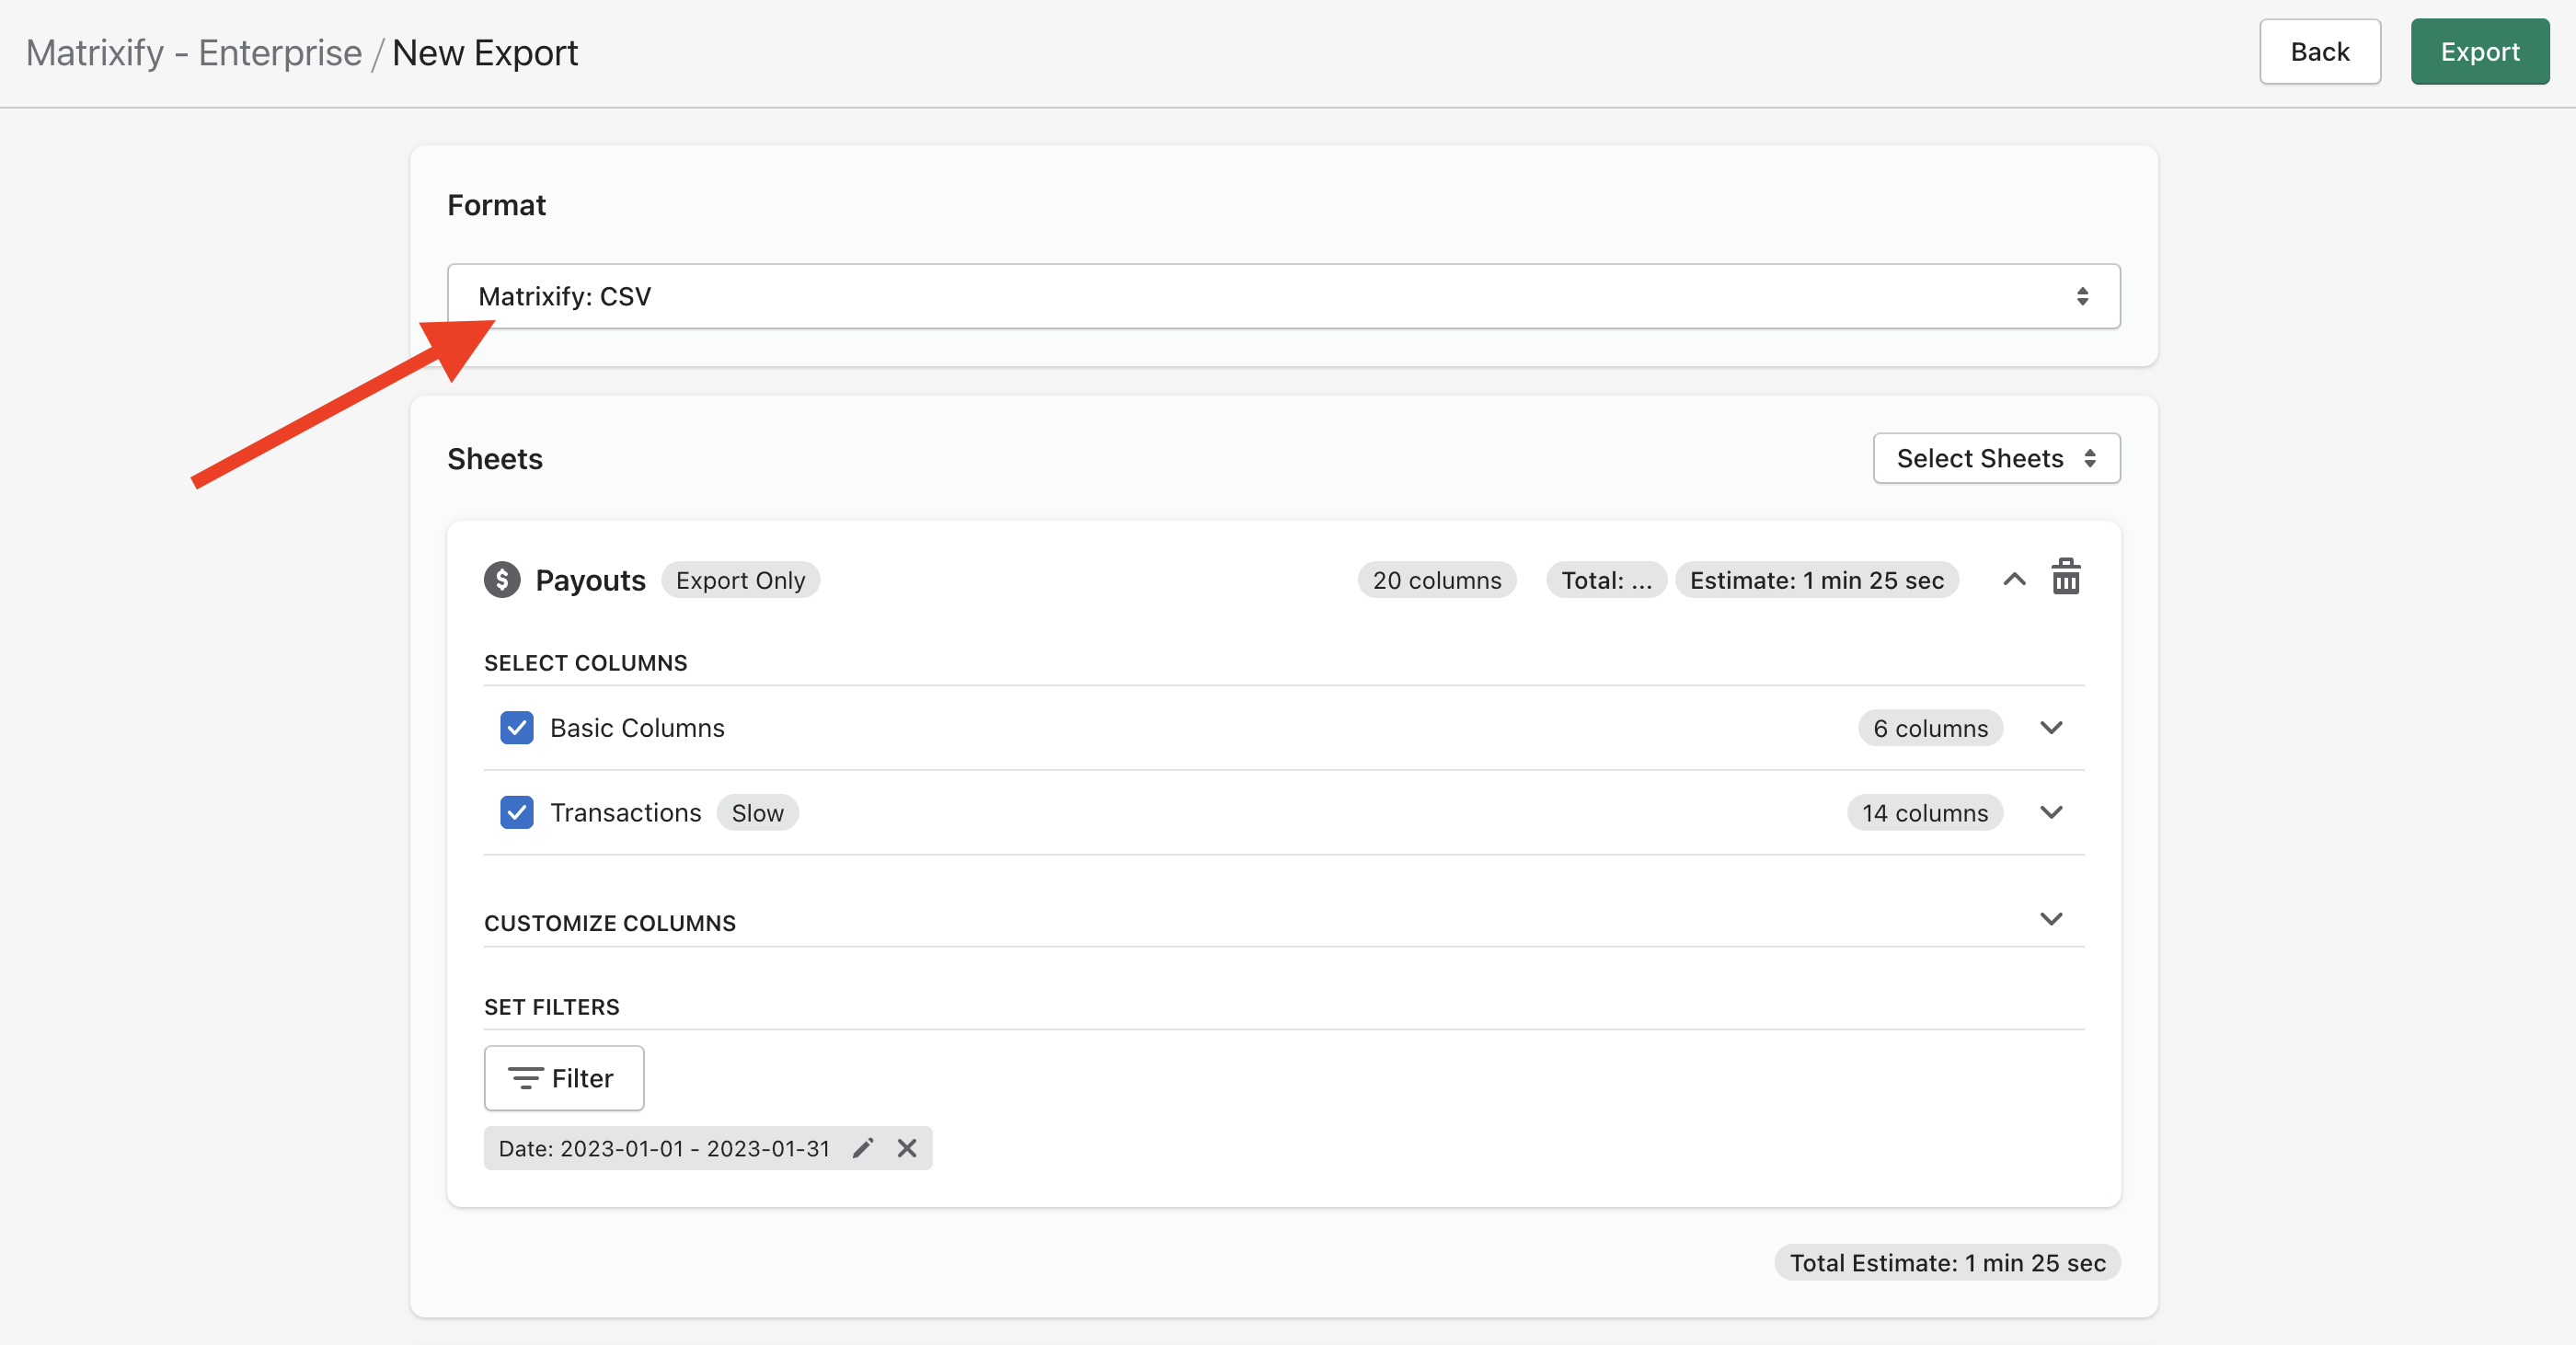
Select whether you want to include Transactions for your payouts.
Don’t apply any filters if you want the full payouts history to be visible on your Google Sheets report. Or you can apply the date filter if you want to limit it in certain timeframe.
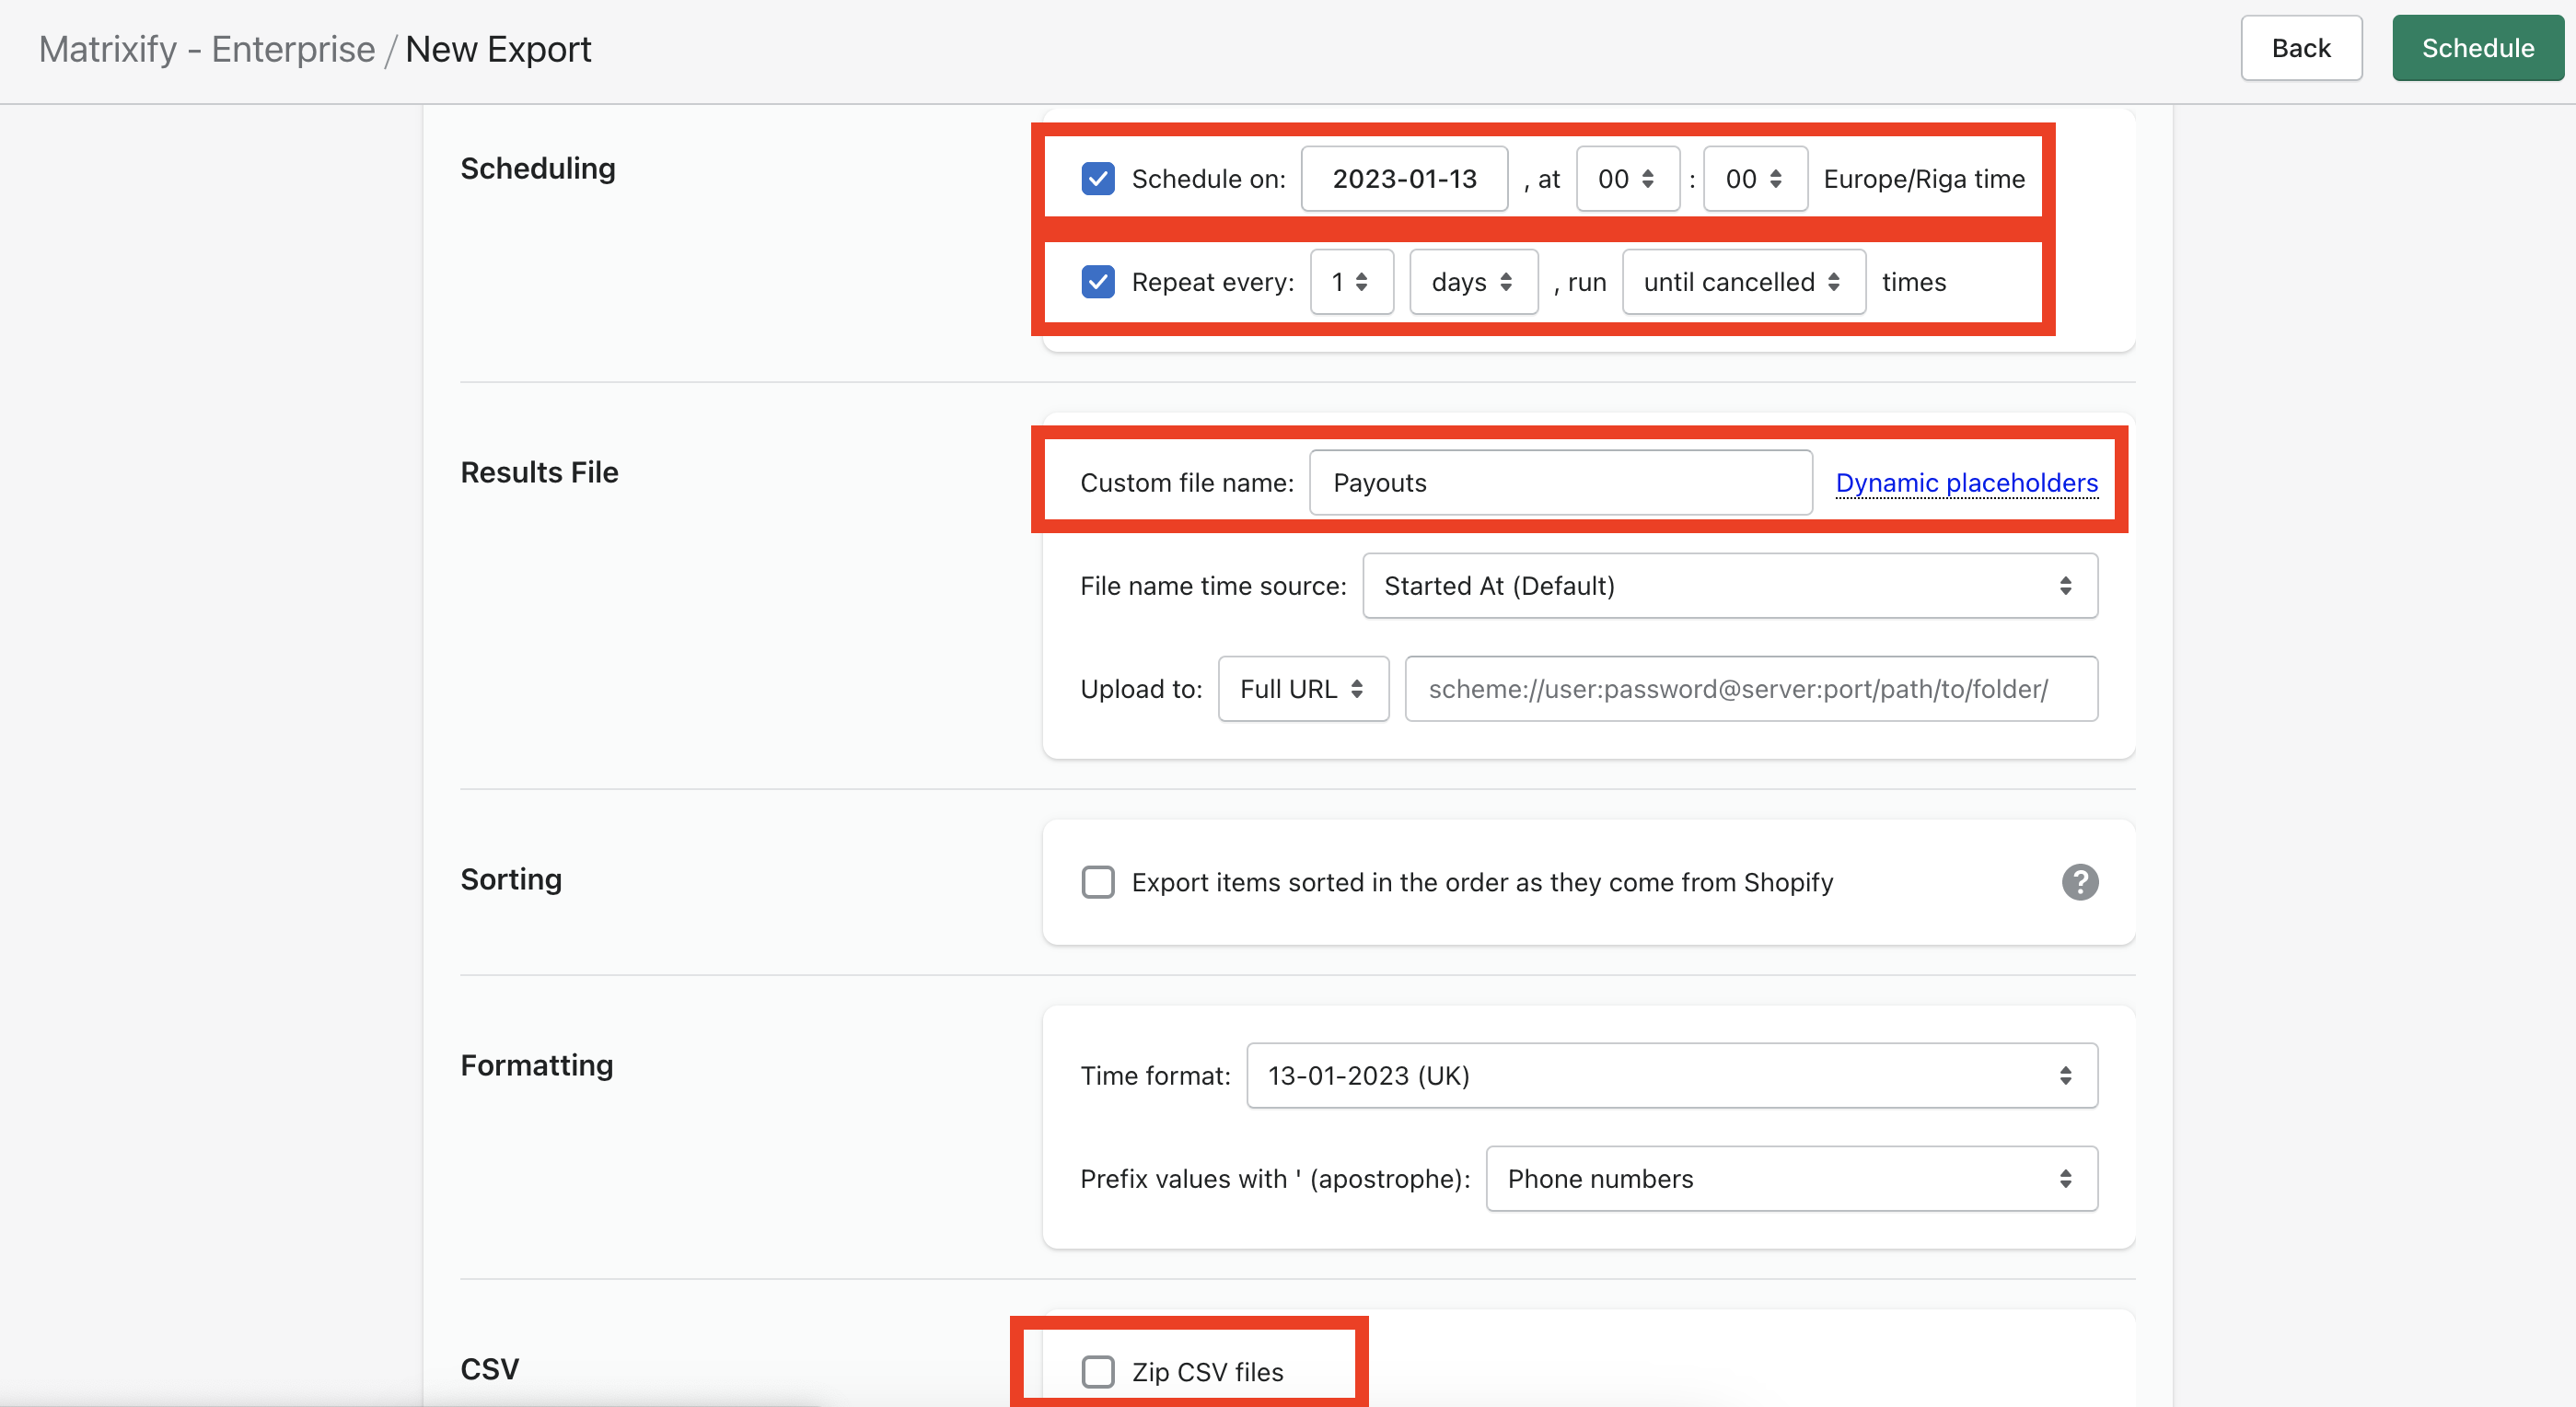
2. Set the Export Options
- Select the “Schedule on” and set the time when do you want the export to start every day. The time is in your shop time zone.
- Select “Repeat every” and choose it to run every day.
- Set the “Custom file name” so that each time the export runs, it generates the data in the same URL.
- Uncheck the “Zip CSV files” checkbox so that the export is not zipped.
Other options should be left as they are by default.
3. Press “Schedule Export”
After pressing “Schedule“, wait a couple of minutes because your first scheduled export for today will run automatically.
Then go to the “All Jobs” page and find the finished export to “payouts”. If it’s not yet finished, wait a bit, it should be done within 1-2 minutes depending on how large are your payouts.
You should see the history like this:
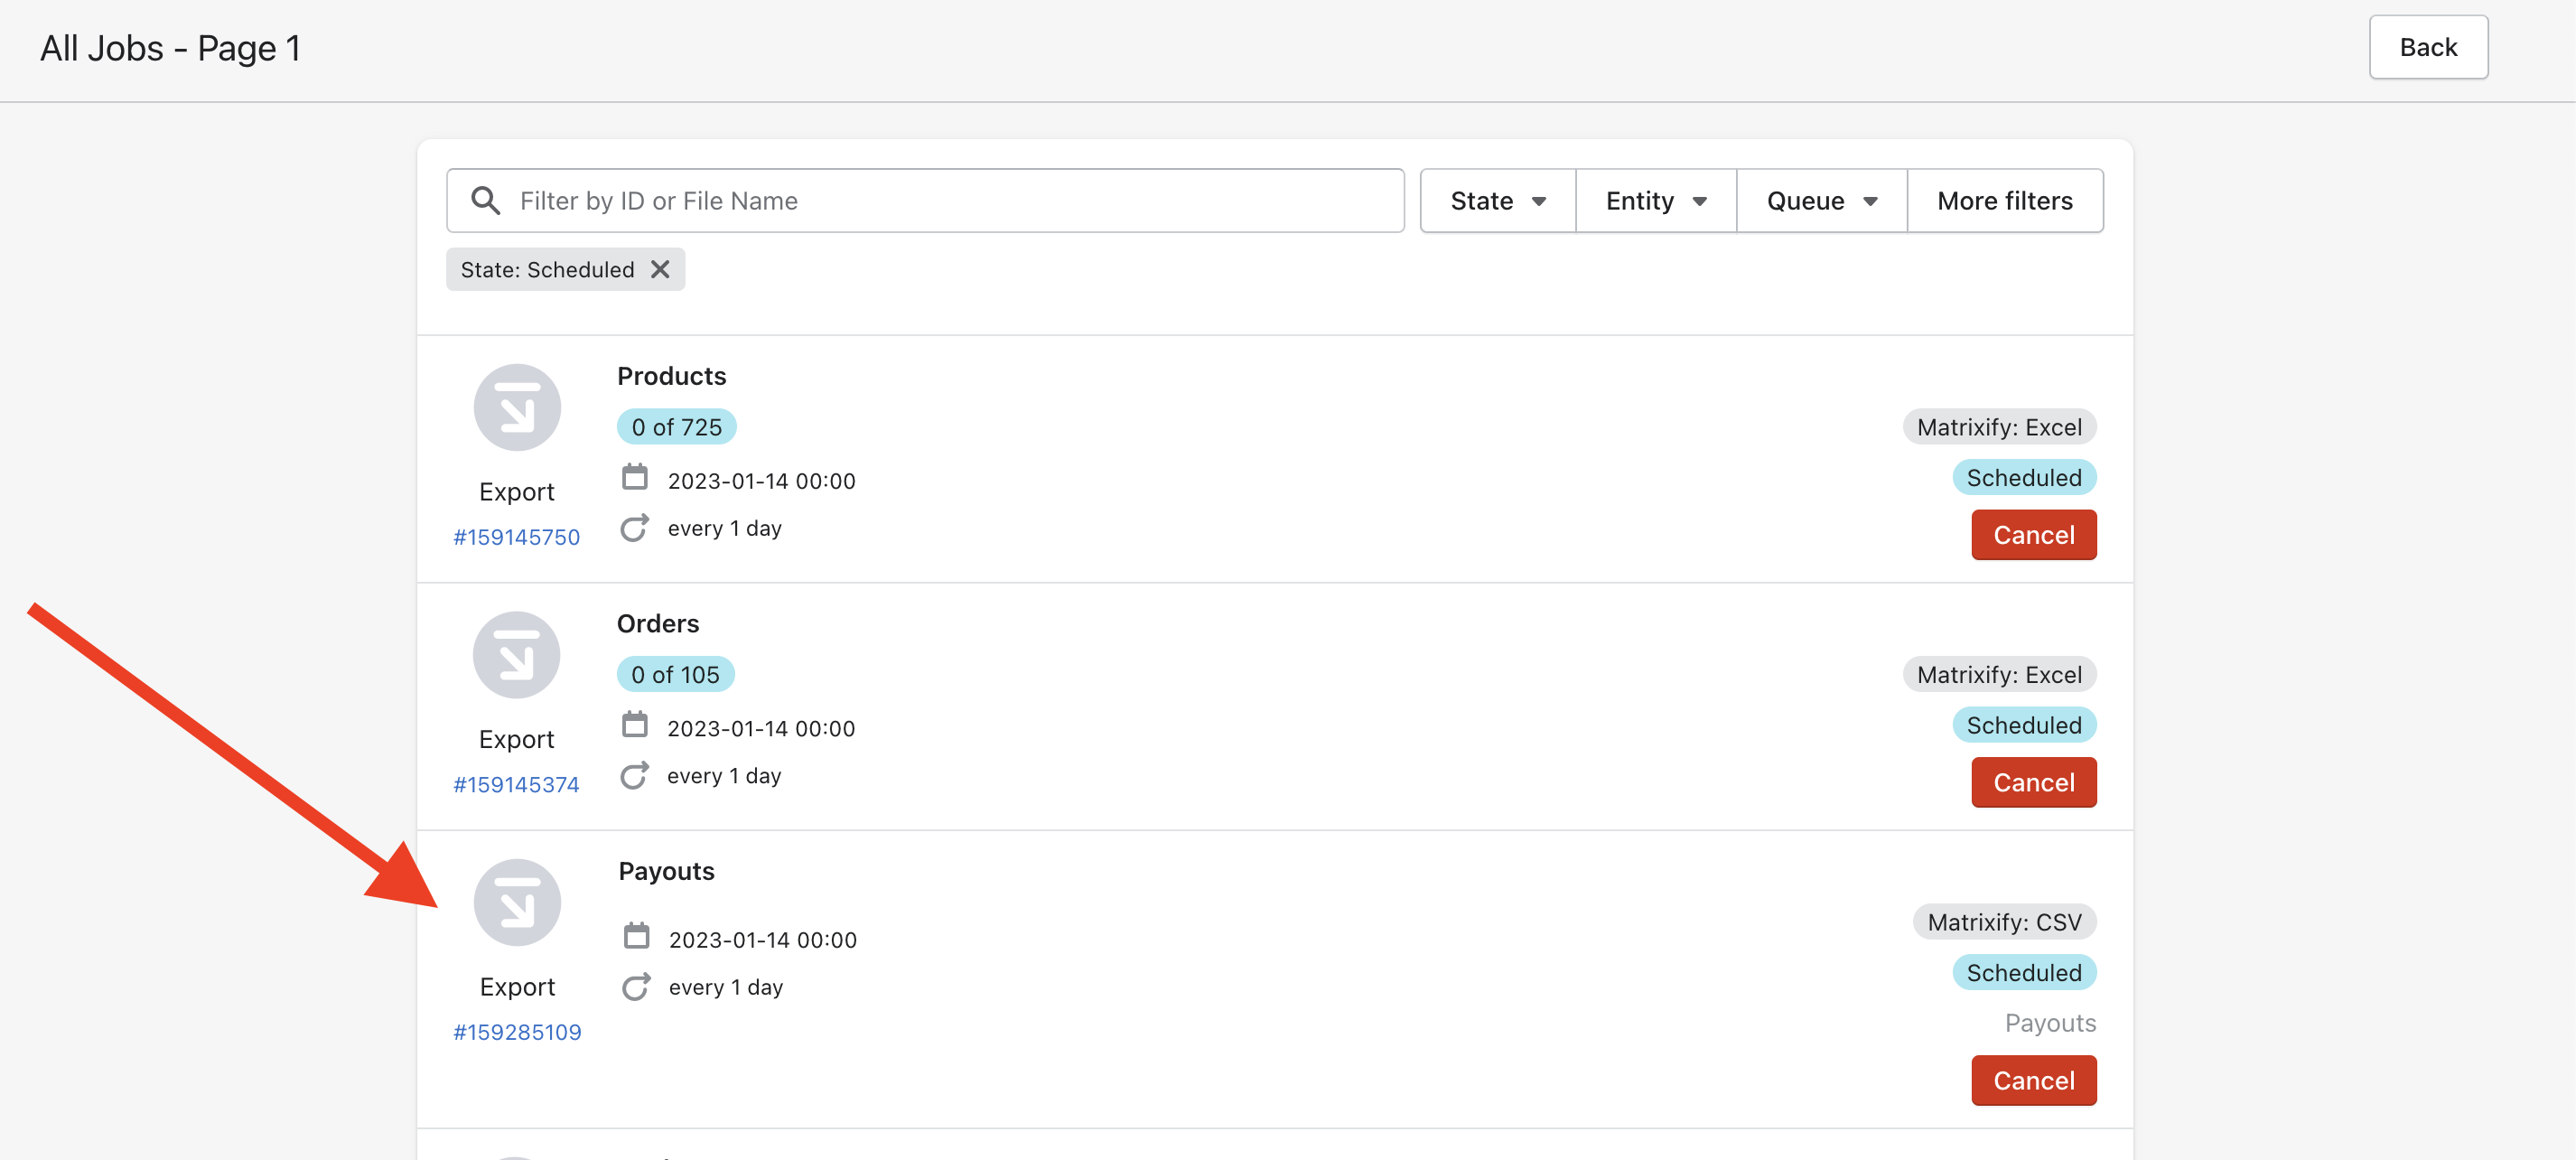
The next scheduled export will start at midnight.
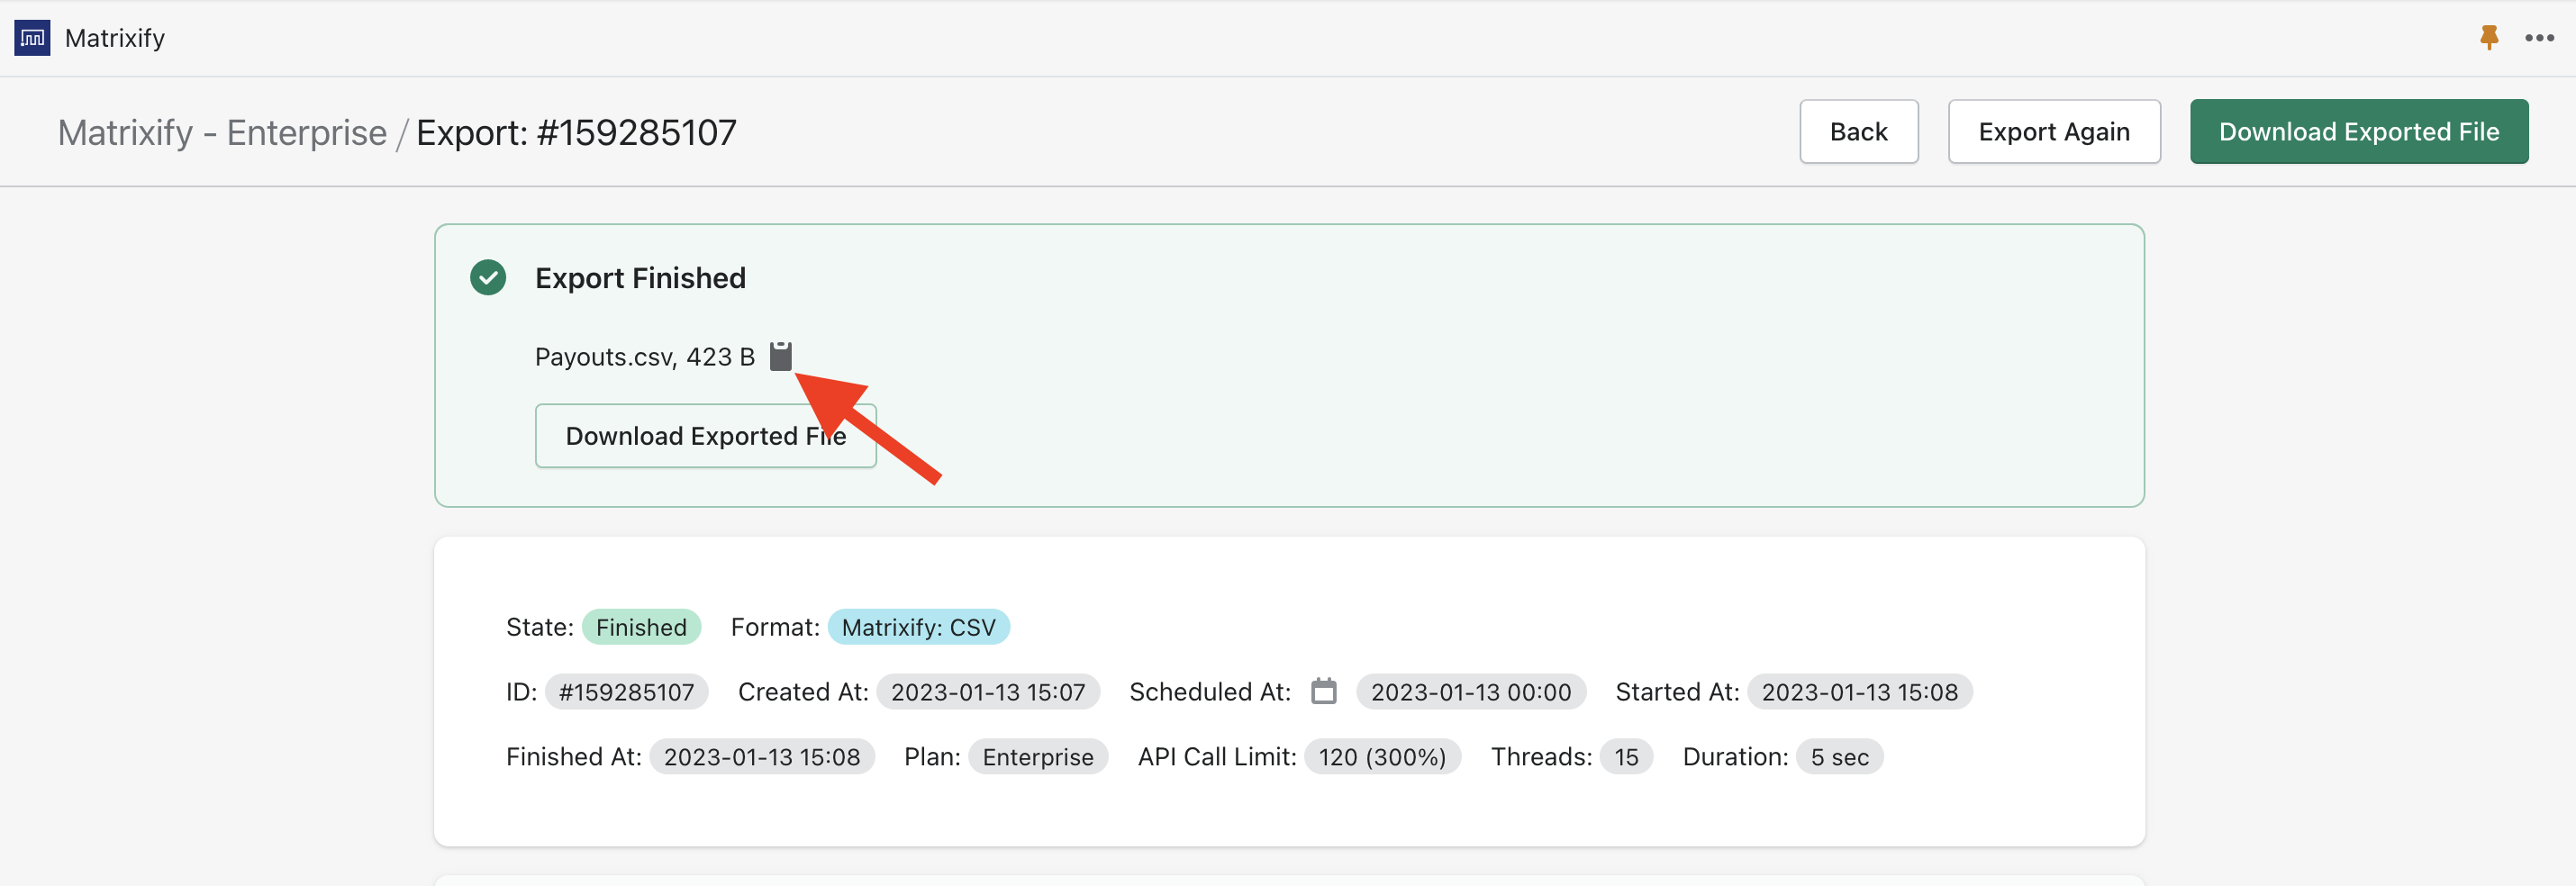
For the finished job, open it and click on the little clipboard by the file name:
4. Use the link in the Google Sheets =IMPORTDATA formula
The link will be something like this:
https://app.excelify.io/files/excelify-renars/12349b7a4c12c12323a12345adbc5e8d/payouts.csv?job=49579283&kind=exported
As you can see there are specific job details at end of the URL, we would need to remove those from the link so that Google Sheets do not download specific job, but always newest file with that name.
So the link would look like this.
https://app.excelify.io/files/excelify-renars/12349b7a4c12c12323a12345adbc5e8d/payouts.csv
So the formula in your Google Sheets will look like this:
=IMPORTDATA("https://app.excelify.io/files/excelify-renars/12349b7a4c12c12323a12345adbc5e8d/payouts.csv")
Your Google Sheet will be like:
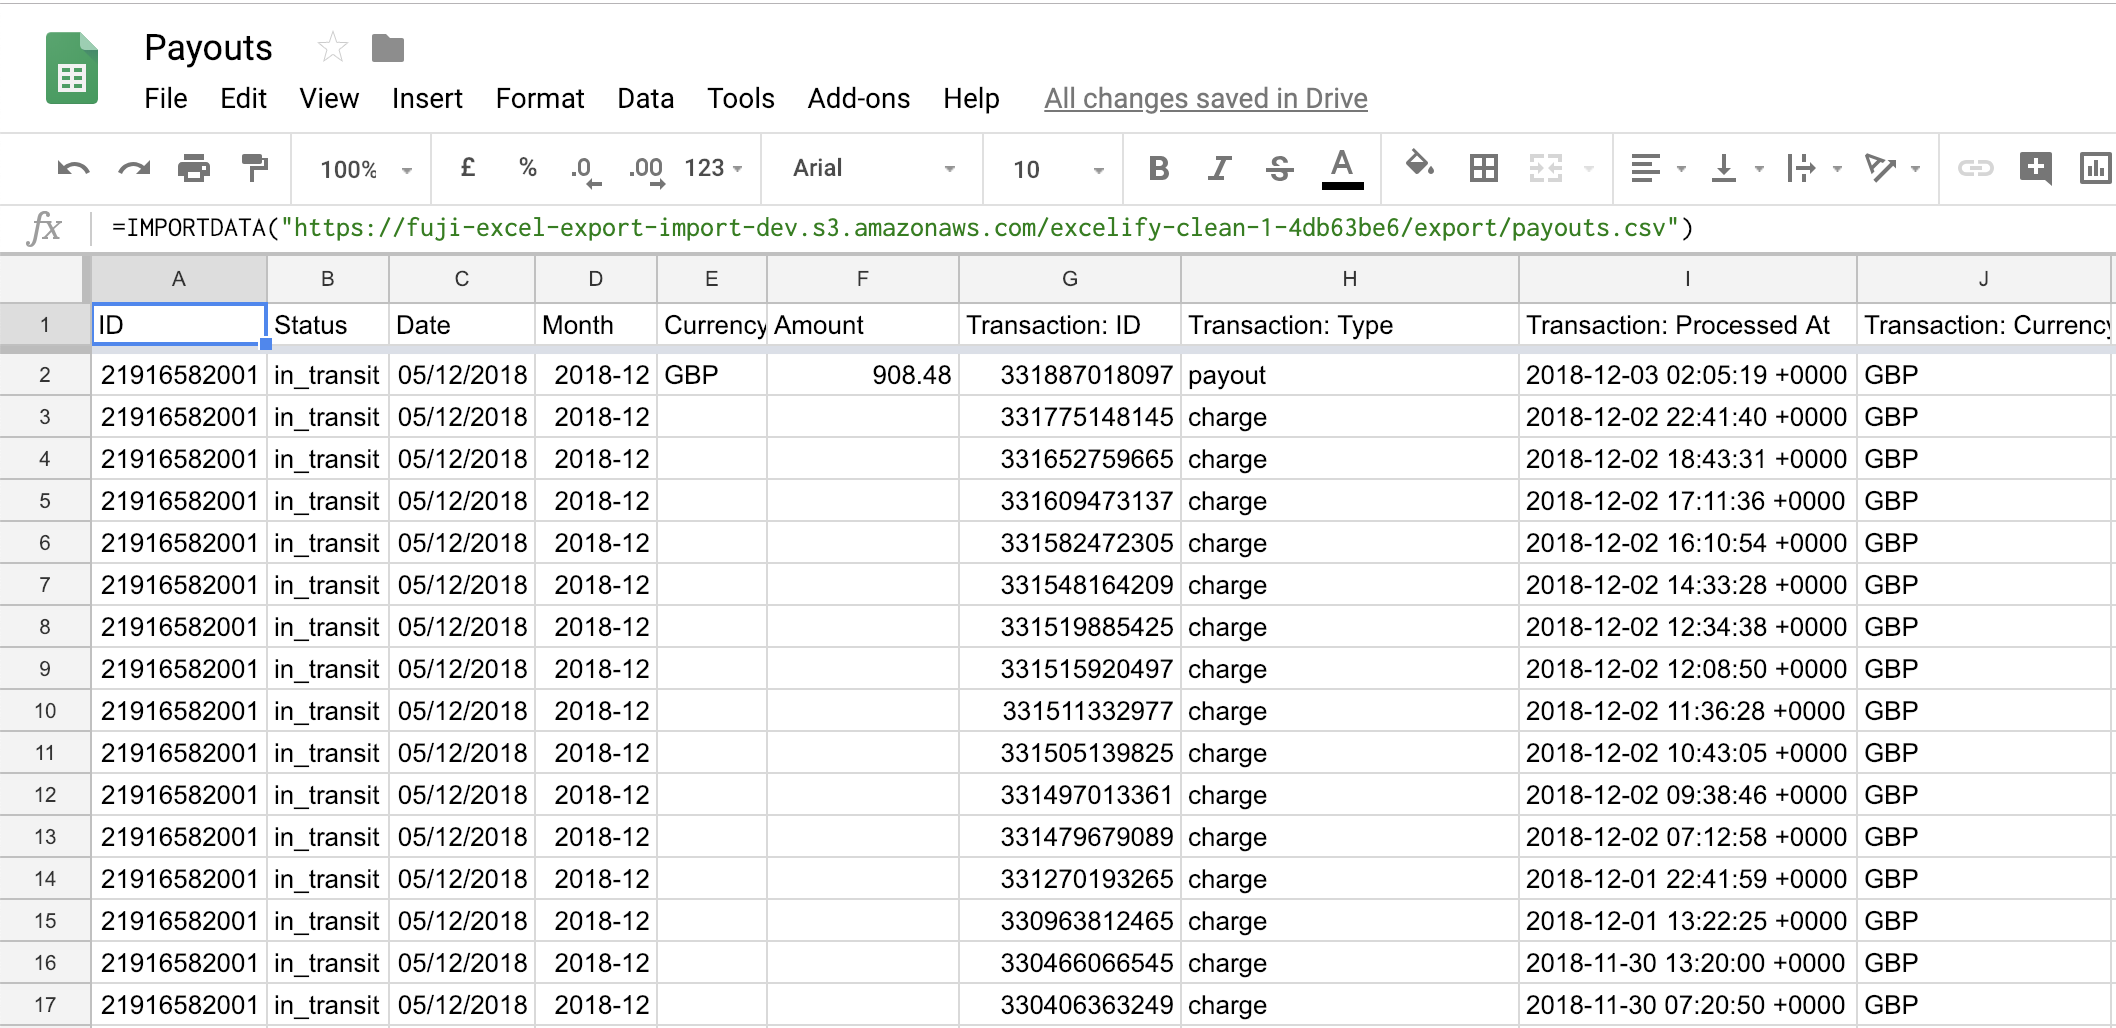
Notice that the ID is repeating for each Transaction row, and the Amount is filled only for the first row of that payout.
That’s important so that you can sum the Amount column in Pivot tables, and at the same time be able to see what transactions make up that Payout.
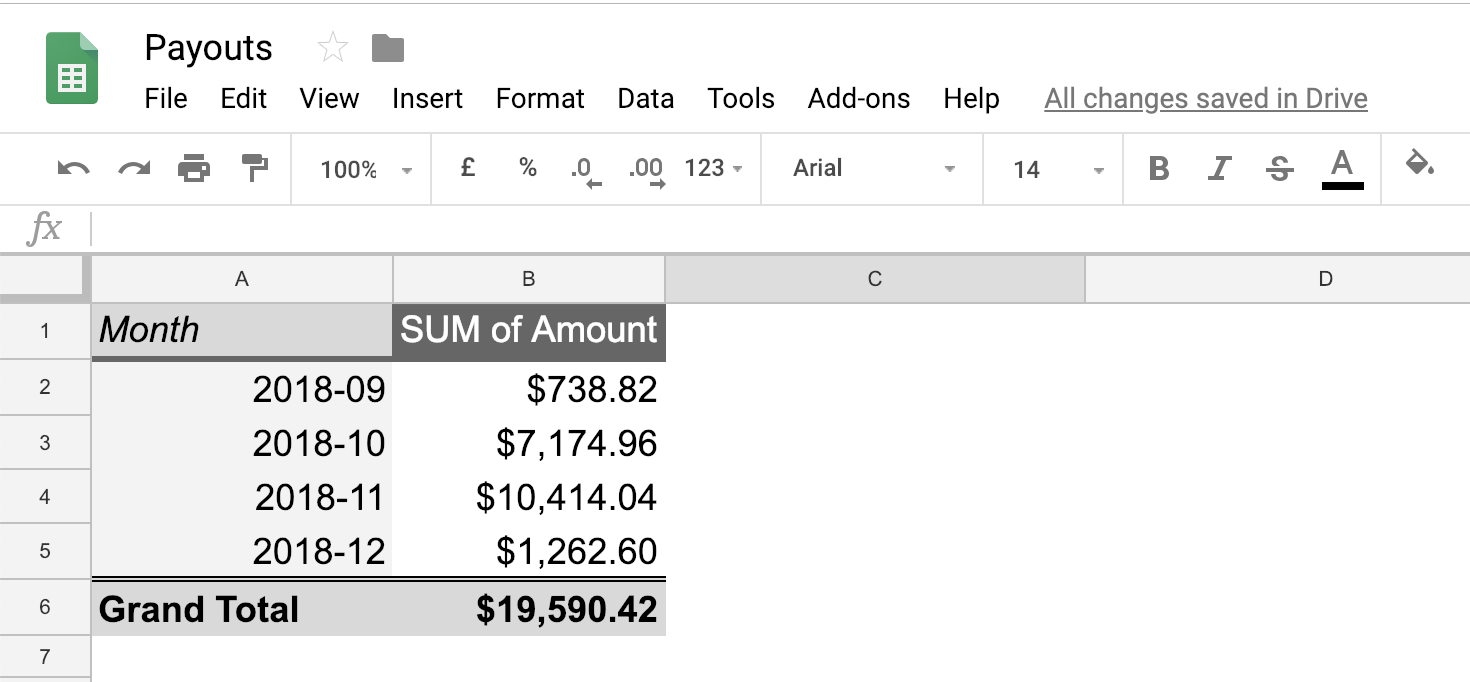
5. Make the Pivot Table
Here you can knock yourself out by using this data in Pivot Table to make whatever report you need.
For example, here is how you can make the aggregated payouts by month:
Good to know
- If you already had Matrixify installed, next time when you launch the Matrixify app, it will ask you to confirm the changes in permissions because to export Payouts, the app needs access to this data.
- If your Date and Month columns don’t show as a proper date but as some number, you should change the format of that column to display as Date.
Google Sheets menu: Format -> Number -> Date - See the detailed documentation of each Payouts columns.


