
You can create orders on behalf of your customers, those are named draft orders. Draft orders are similar to the orders that your customers create for themselves.
With the Matrixify app you can import your Draft Orders to Shopify in bulk by following these simple steps.
The step-by-step process
- Export some existing Shopify Draft Order using Matrixify to get a sample Draft Orders sheet to use as a template.
- Fill minimum necessary columns:
- Name
- Command
- Line: ….
- If you wish to also send an invoice for this Draft Order, then fill columns:
- Send Invoice: ….
- If you wish to also complete the Draft Order fill columns:
- Complete
- Complete: Payment Pending
- Save the file and import via Matrixify app.
- Enjoy your Draft Orders.
1. Export existing Draft Order for a template
This is an optional step. You can also create the file from scratch yourself by looking up all possible fields in our Draft Orders documentation or download our Demo Template file and use columns from this file.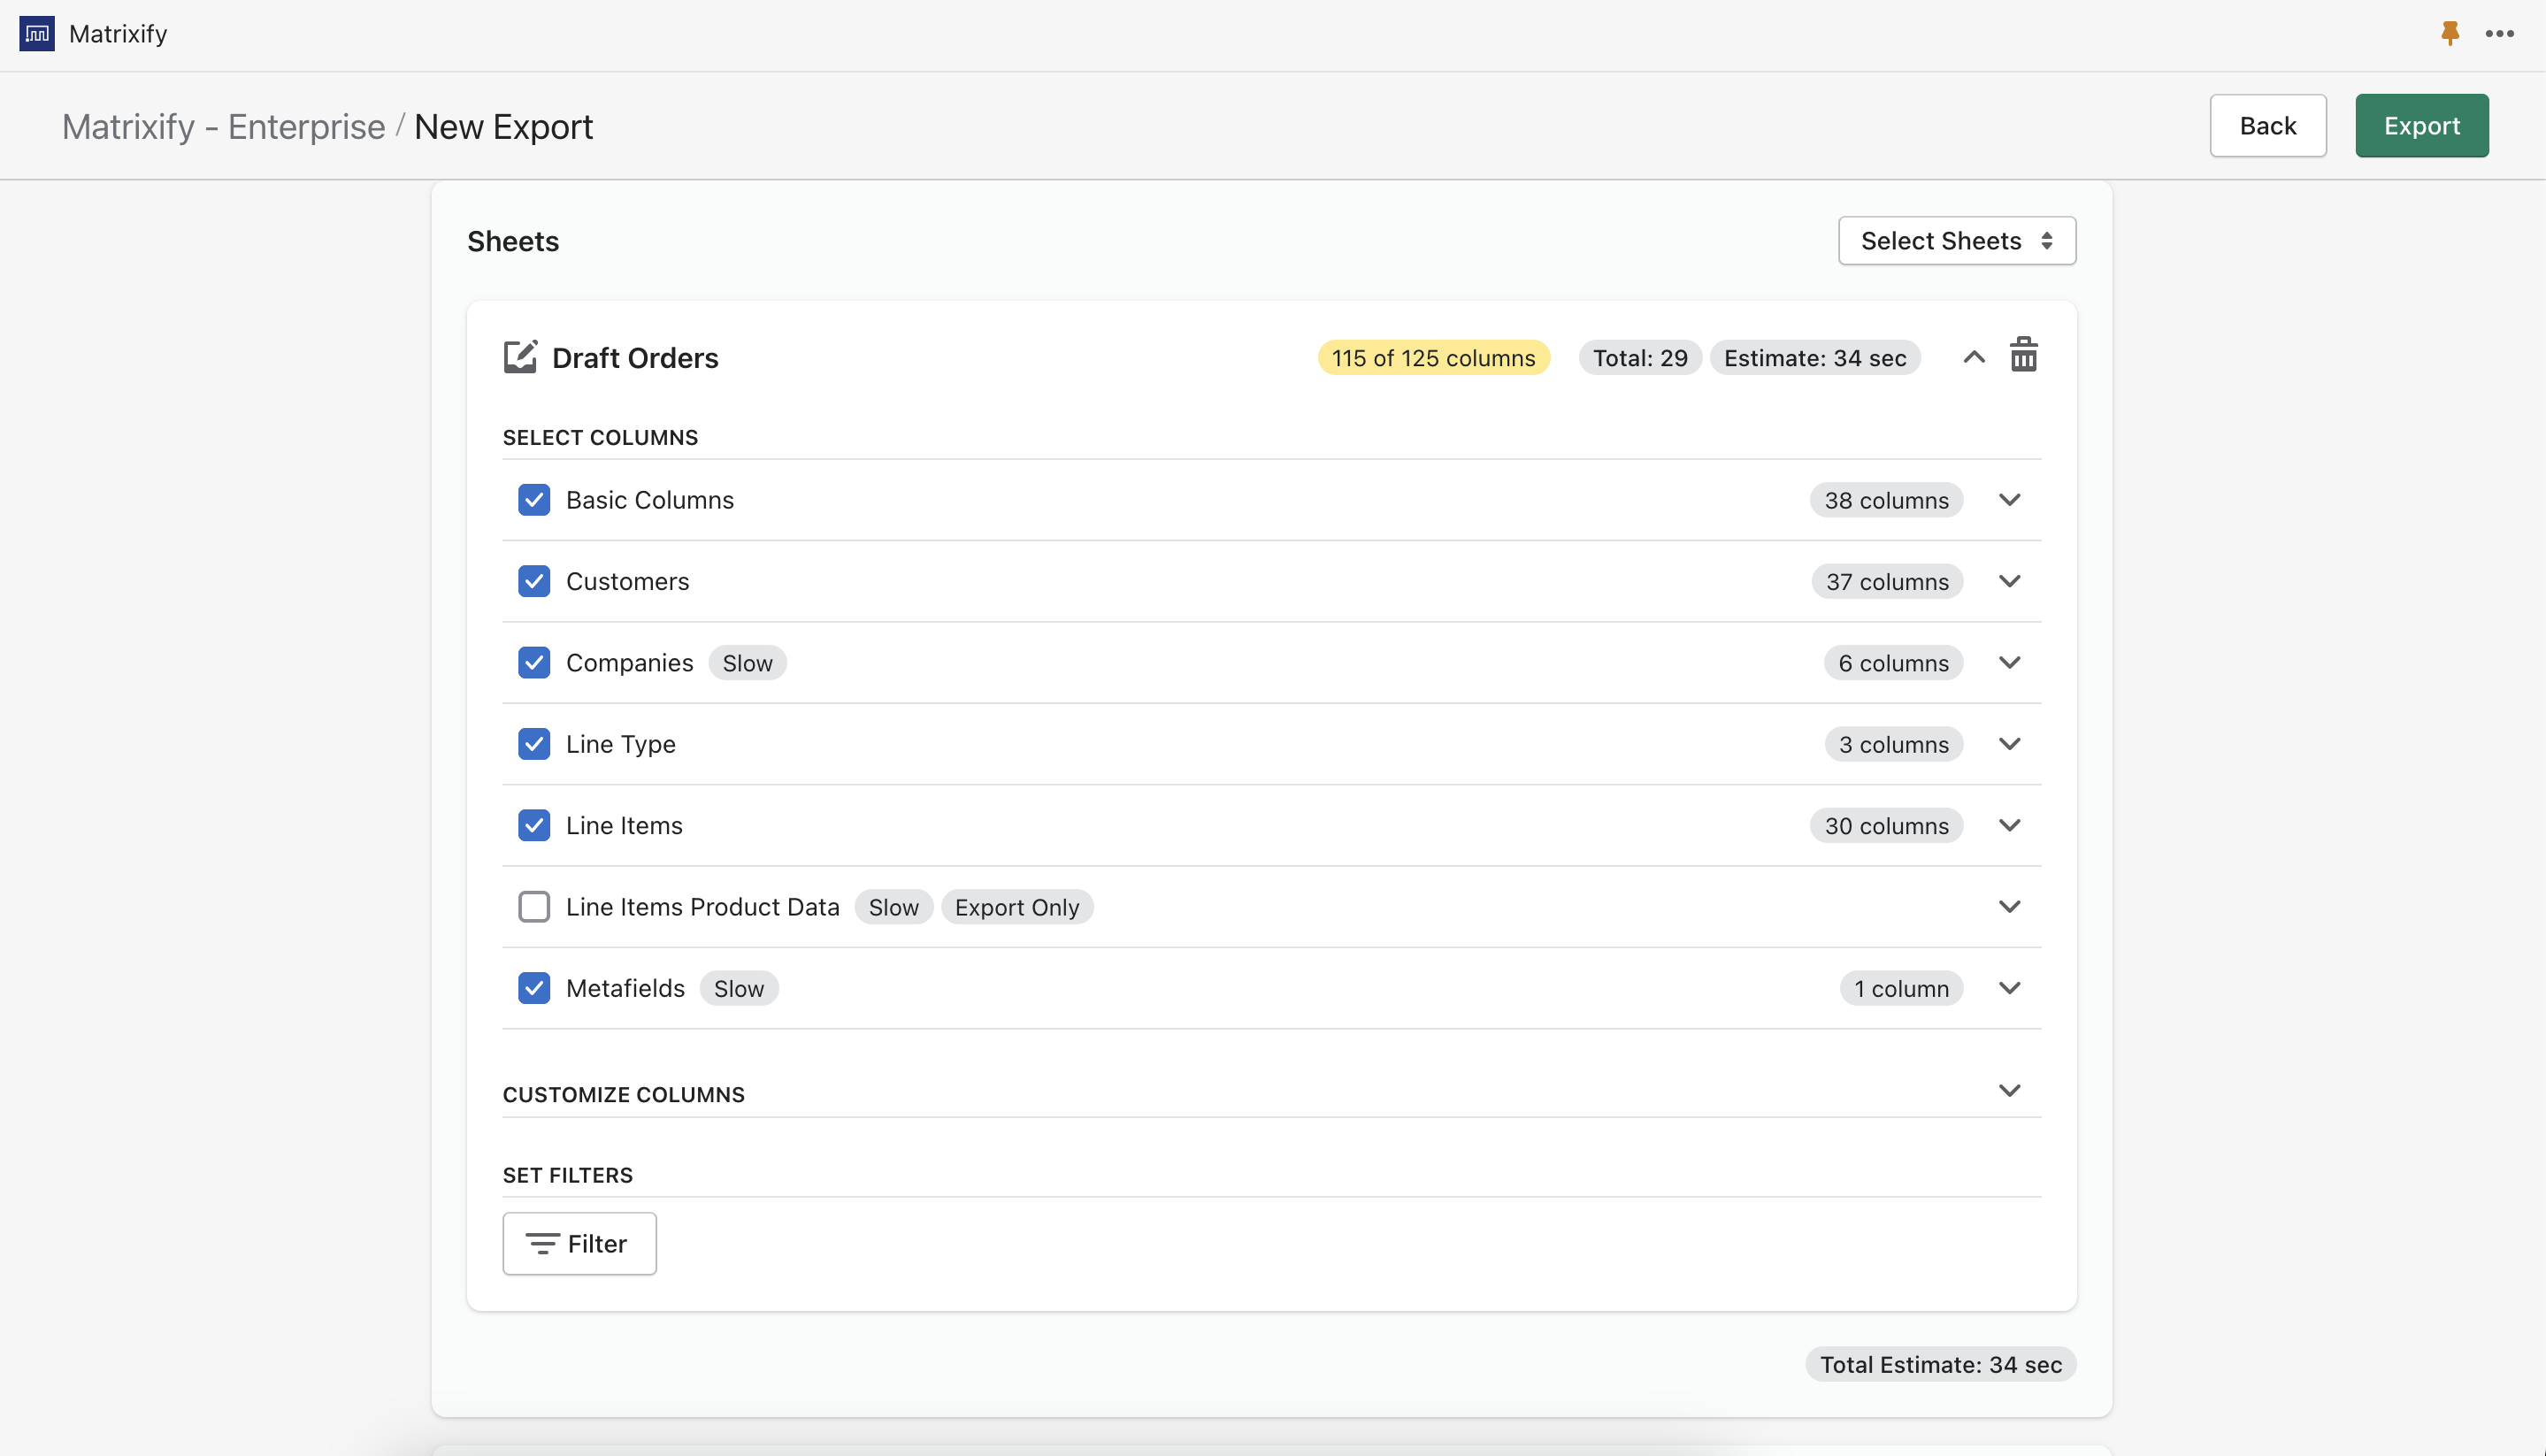
2. Fill minimum necessary columns
Firstly you would need to fill mandatory fields for any draft order.
Name
Shopify is always generating its own Draft Order name and doesn’t allow you to assign any specific custom Name to it.
Anyway, when you create new Draft Orders, you need to specify any unique Name for each Shopify Draft Order so that the app can distinguish which rows belong to which Draft Order.
Command
As we are creating new draft orders then we will fill this column with value “NEW”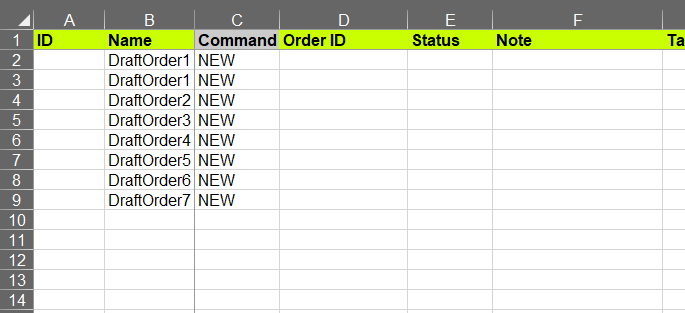
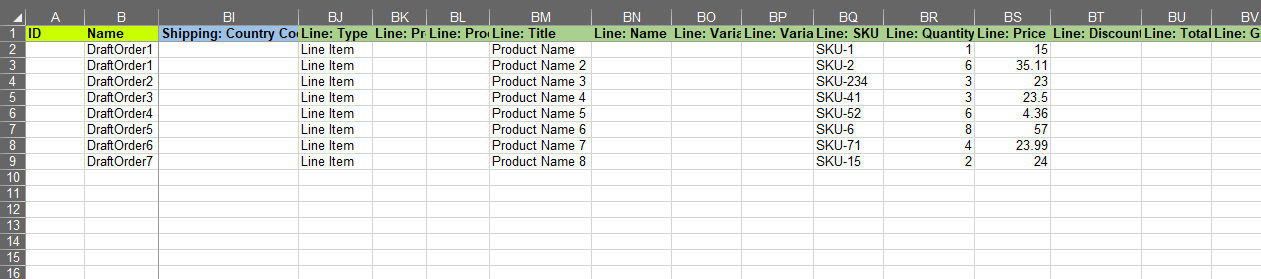
Line: ….
Each Shopify Draft Order must have at least one Line Item. It is indicated by the column “Line: Type” with value “Line Item”.
To add multiple Line Items to the Draft Order, insert the same Name and Command in the next row of that same Order and fill Line: … columns. (See “DraftOrder1” has 2 lines in the screenshot below).
Now we need to fill this row with information about the product.
- If you wish to attach this Shopify Draft Order to an existing product then you must fill columns – Line: Product Handle, Line: Quantity (also Line: Variant Title or Line: SKU if the product has multiple Variants).
- If you wish to attach this Draft Order to a custom product that is not in your store then you must fill columns – Line: Title, Line: Quantity, Line: Price
 .
.
Optional columns
Most other columns are optional and can be filled upon creating a Draft Order. Check out our Draft Orders documentation for a detailed description of the column.
3. How to also send an invoice for your Shopify Draft Orders
To send out invoices for your Draft Orders you must fill “Send Invoice” columns:
- Send Invoice – with value TRUE.
- Send Invoice: To – Email of the recipient. If you also have filled the “Customer: …” columns with an email then it may be left empty.
- Send Invoice: From – Sender e-mail address which will show for the customer who received the invoice.
- Send Invoice: Bcc – (Optional) Additional recipients of the invoice. Their e-mail addresses will not be visible by e-mail receivers.
- Send Invoice: Subject – (Optional) If left empty, the Shopify will put its own default e-mail subject.
- Send Invoice: Message – (Optional) If empty, then the default Shopify e-mail message will be used.
More details about each column you can see in the Matrixify Draft Orders documentation page.
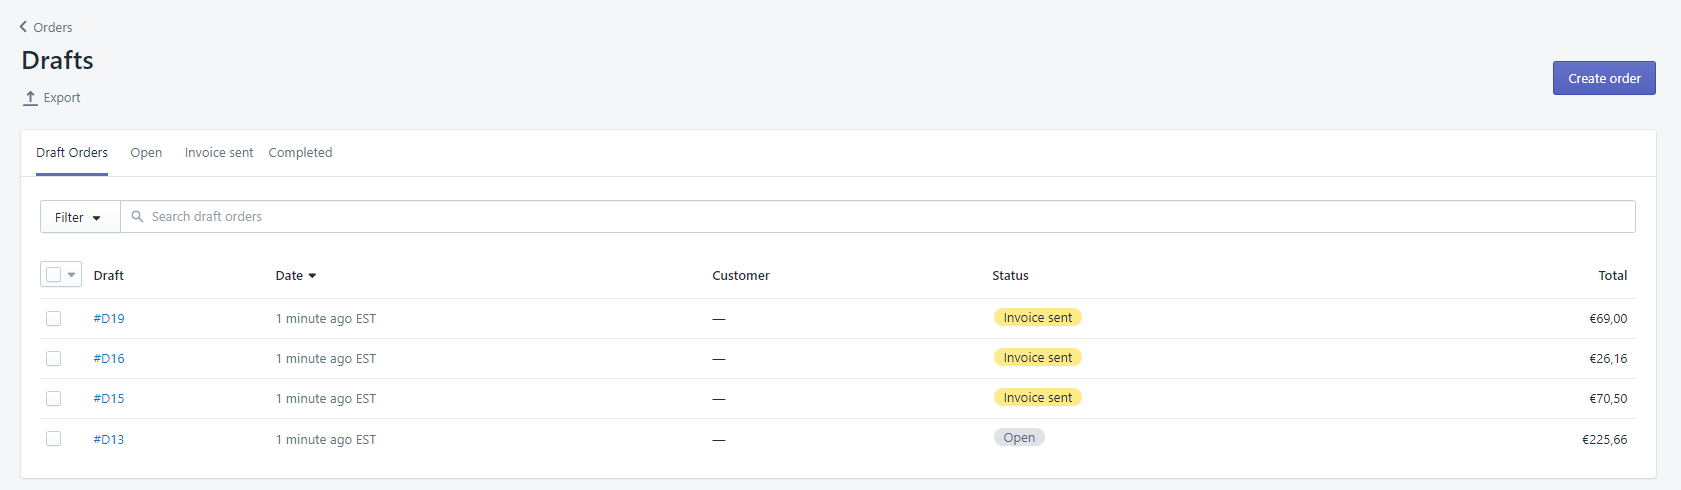
The link received by the customer will take them to the Checkout page. Once they will complete the checkout, the Draft Order will get completed – it will create the real Order.
4. How to complete some of your Shopify Draft Orders
You can instruct the Shopify to complete the Draft Order – thus making the real Order from the Draft Order.
For this you must fill columns:
- Complete – with value TRUE.
- Complete: Payment Pending – Is set to TRUE will mark generated real order as Payment Pending. If left empty or set FALSE will mark the order as Paid.


5. Save the file and import the draft orders via the Matrixify app
Now we can save the file. Go back to the Matrixify app and import the file in the Import section. The app will analyze the file and count how many Draft Orders we are importing.
Press the Import button to start import of your draft orders
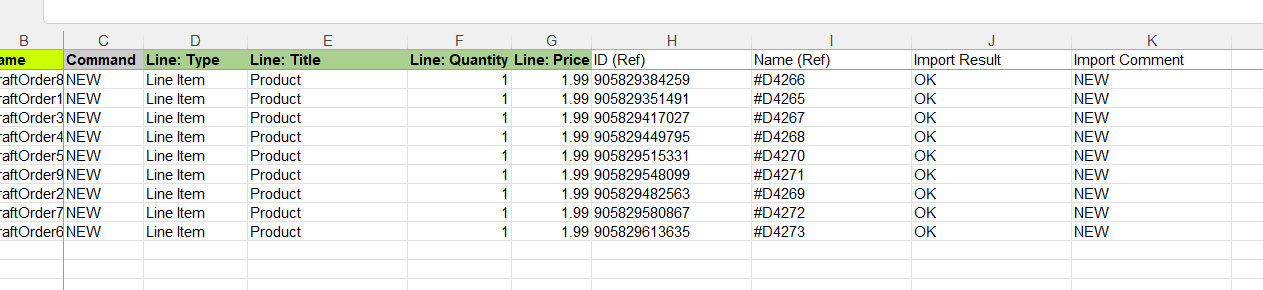
If you see any Failed items, then after the import has finished, you can download the Import Results file and look into the “Import Comment” column. It will tell why the particular Draft Order has failed. Then you can fix that issue and re-import just those failed and fixed rows again.
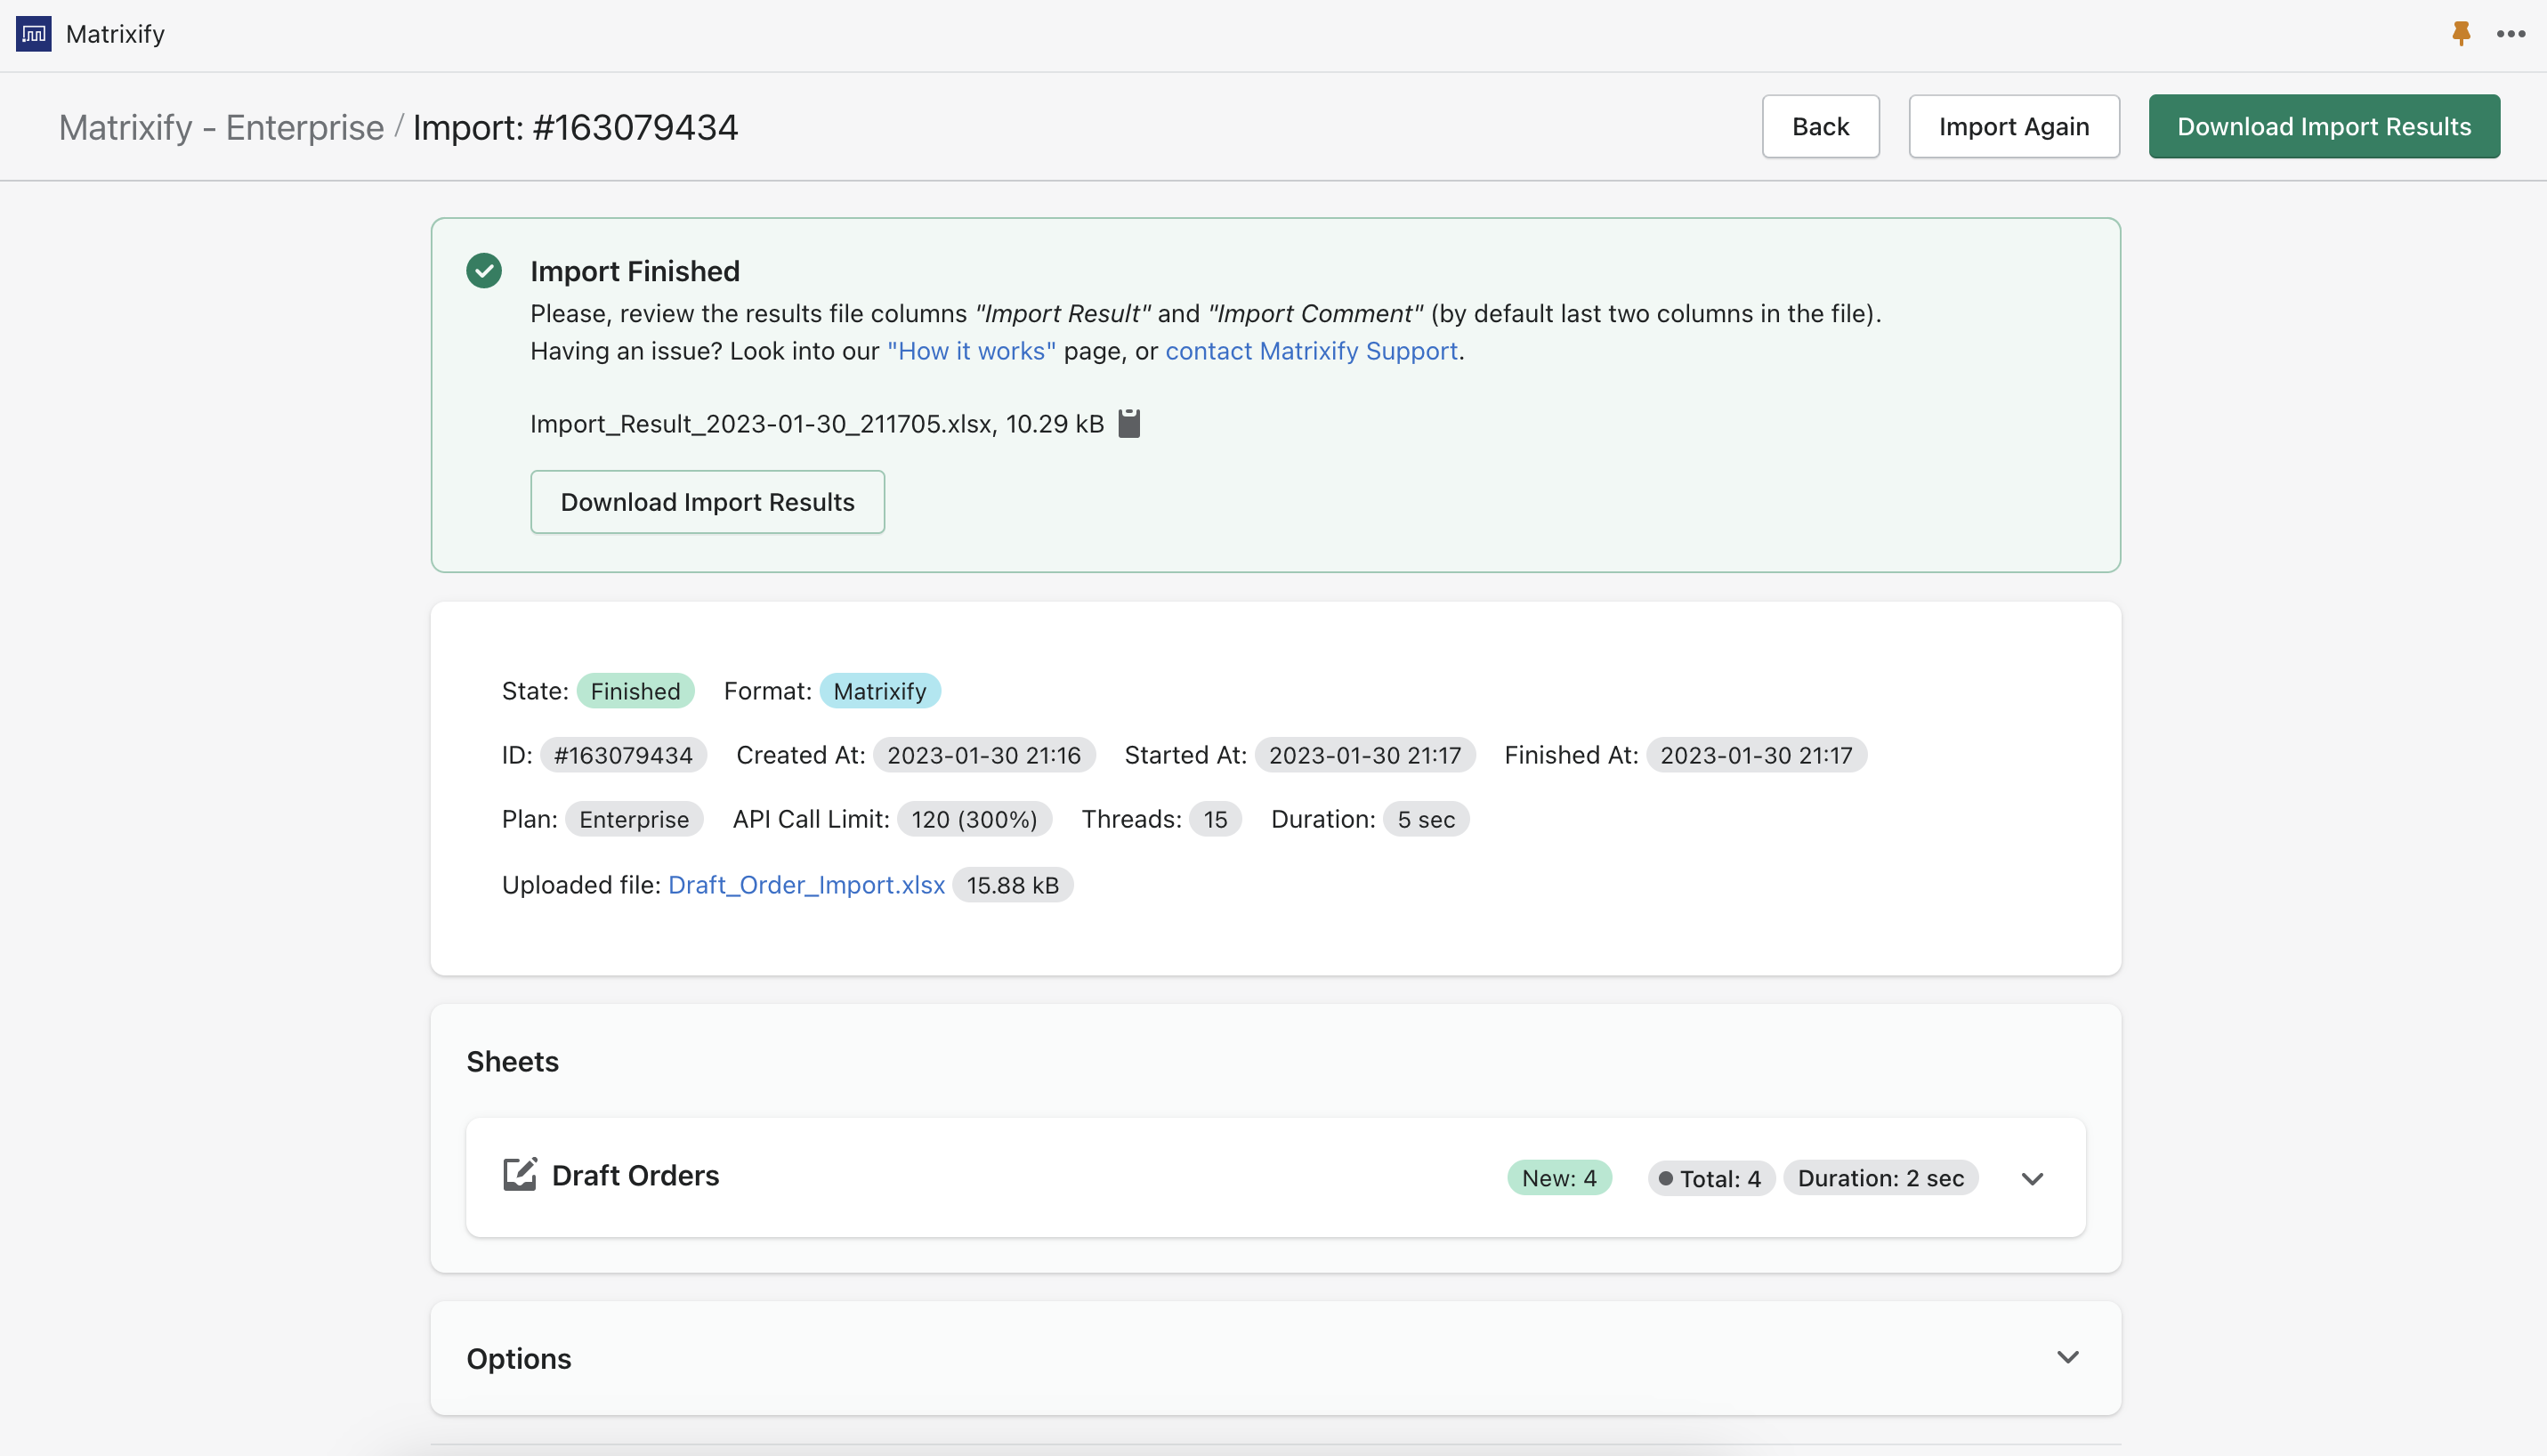
In the Import Results file you can also see columns with (Ref) added to them. Those are to reference the imported Draft Order.
As Shopify does not allow assigning Names for Draft Orders then you can use values from this column to identify which Draft Order in the file imported with what Name in the Shopify.
6. Enjoy your Shopify Draft Orders
Completed Draft Orders will not show up with all Draft Orders, switch to the “Completed” tab to check them.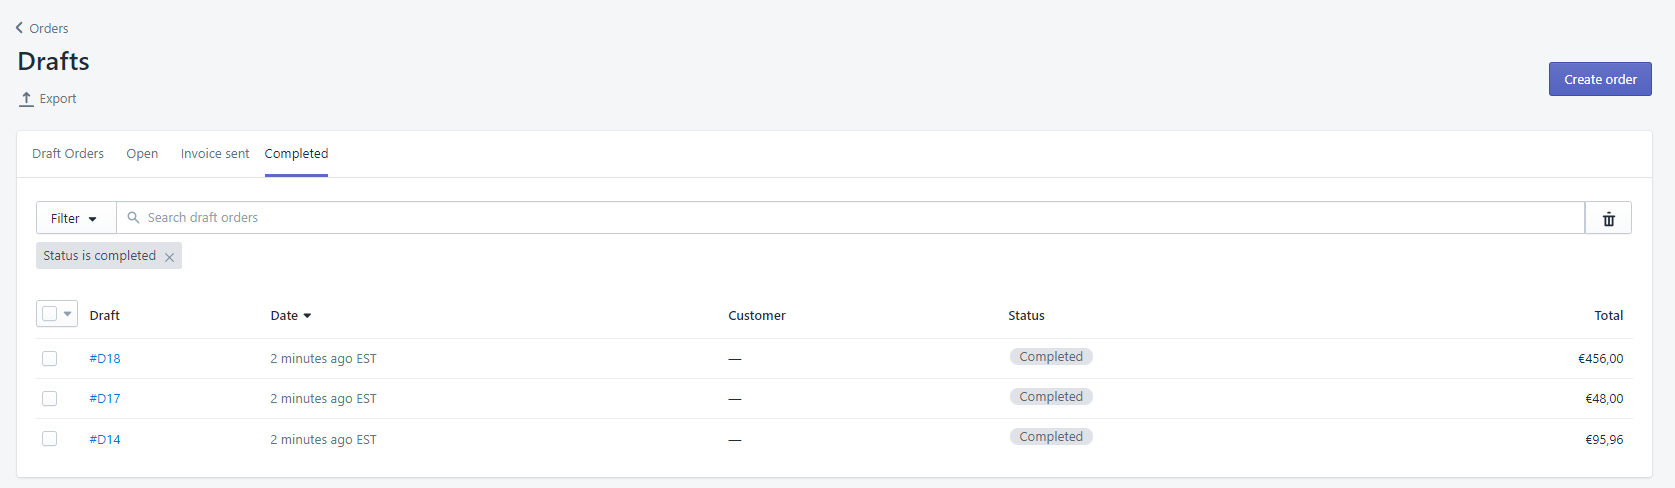
What to do next?
- Install the Matrixify App
- If your Draft Order imports are long, then it might be because your store has a lot of Draft Orders already and it takes a lot of time for the app to index existing Draft Orders.
In this case, use “Number” column and remove the Name column from the file. - Check out our Draft Orders documentation.
- Check tutorial on how to send Invoice for existing Draft Orders.
- Check tutorial on how to complete existing Draft Orders.
- Contact Matrixify support if you run into any issues or have additional questions.


