
With Matrixify it is now even easier to Import multiple Images and Media files for your Products! Instead of adding a new row for each file, you can now do so, by using only one row.
Here is our guide on how you can import several media files per Product as one row – by separating image URLs with ; (semicolon) or using multiple Image Src columns.

*Video uses semi-colon method in a single cell but does not cover that you can use multiple Image Src columns.
*Video covers only images, but you can also bulk import other media files such as videos and 3d models.
Steps in short on how to import several product media files from one row
- Prepare an Import File With Several Product Images and Media files.
- Import the created file into Shopify using Matrixify.
- View your imported Media in Shopify!
1. Prepare an Import File With Several Product Media files
There are two ways to import images and media without a need to use multiple rows.
A note about the file URLs themselves. If Shopify will not be able to download all files, there will be a warning about that in the Import Results file “Import Comment” column which can be downloaded after the Import has finished.
Media file links listed in this column need to be direct and public links.
You can always test your links by trying to add files from URL links manually in Shopify Admin to any product. If it works manually in admin, it should work with Matrixify import.
Only exception would be Google Drive and DropBox shared links which are not direct file links, but we have developed to the app to be able to import directly from their shared links.
To change files for a Product, you need at minimum the following columns in your import file:
ID or HandleImage Src
What media file types can be imported?
With the Matrixify app you can bulk import all Media file types that Shopify supports, including images, videos and 3d models.
See a full list of supported file types and sizes in the Matrixify Products documentation.
Separate media files by semi-colon in the same cell
Prepare your import file. The Import file should have one row per Product, and put all your media files in the same Image Src column, delimited by a ; (semicolon).
For example:
https://i.com/image-1.jpg ; https://i.com/image-2.jpg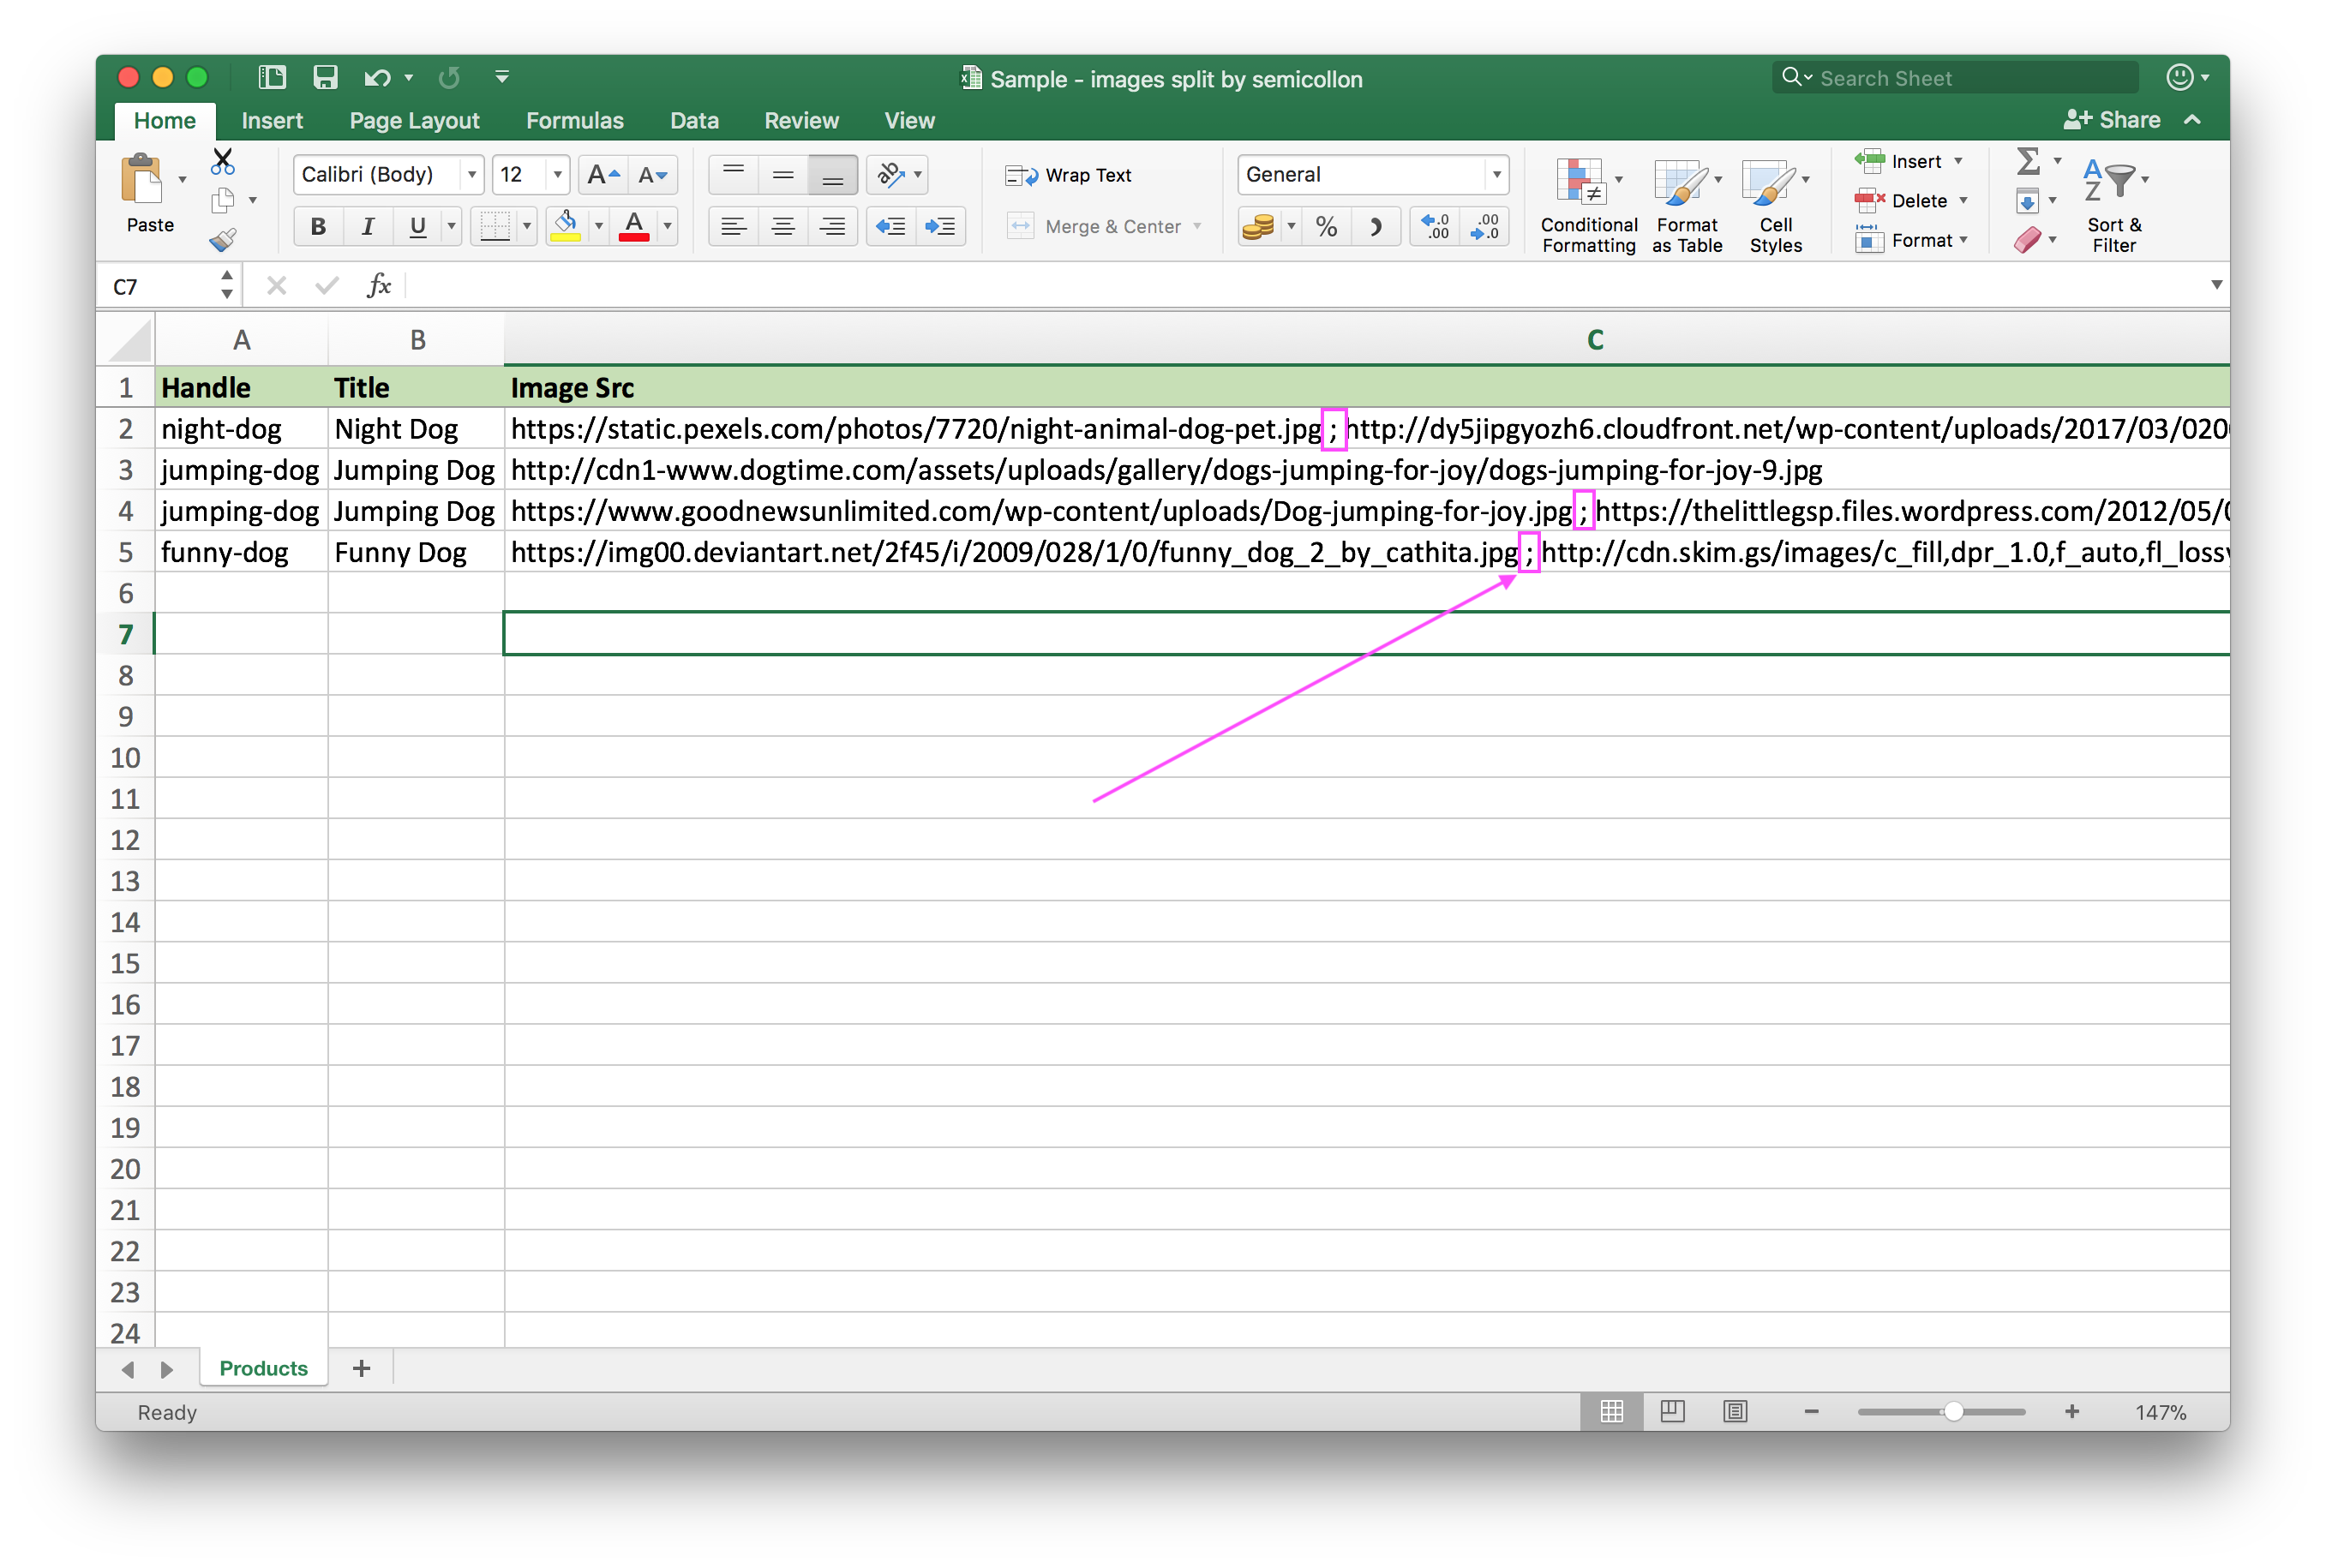
Have multiple media file columns
You can also use multiple Image Src columns. The benefit here is that you are able to list different alt text for each file which you would not be able to do when listing images separated by a semi-colon.
You can list also Image Alt Text and Image Position columns for each Image Src column in your file.

2. Import created file with images into Shopify using Matrixify
All that is left to do is to save your file and Import it back into Shopify using Matrixify! Your Import page should look something like this:
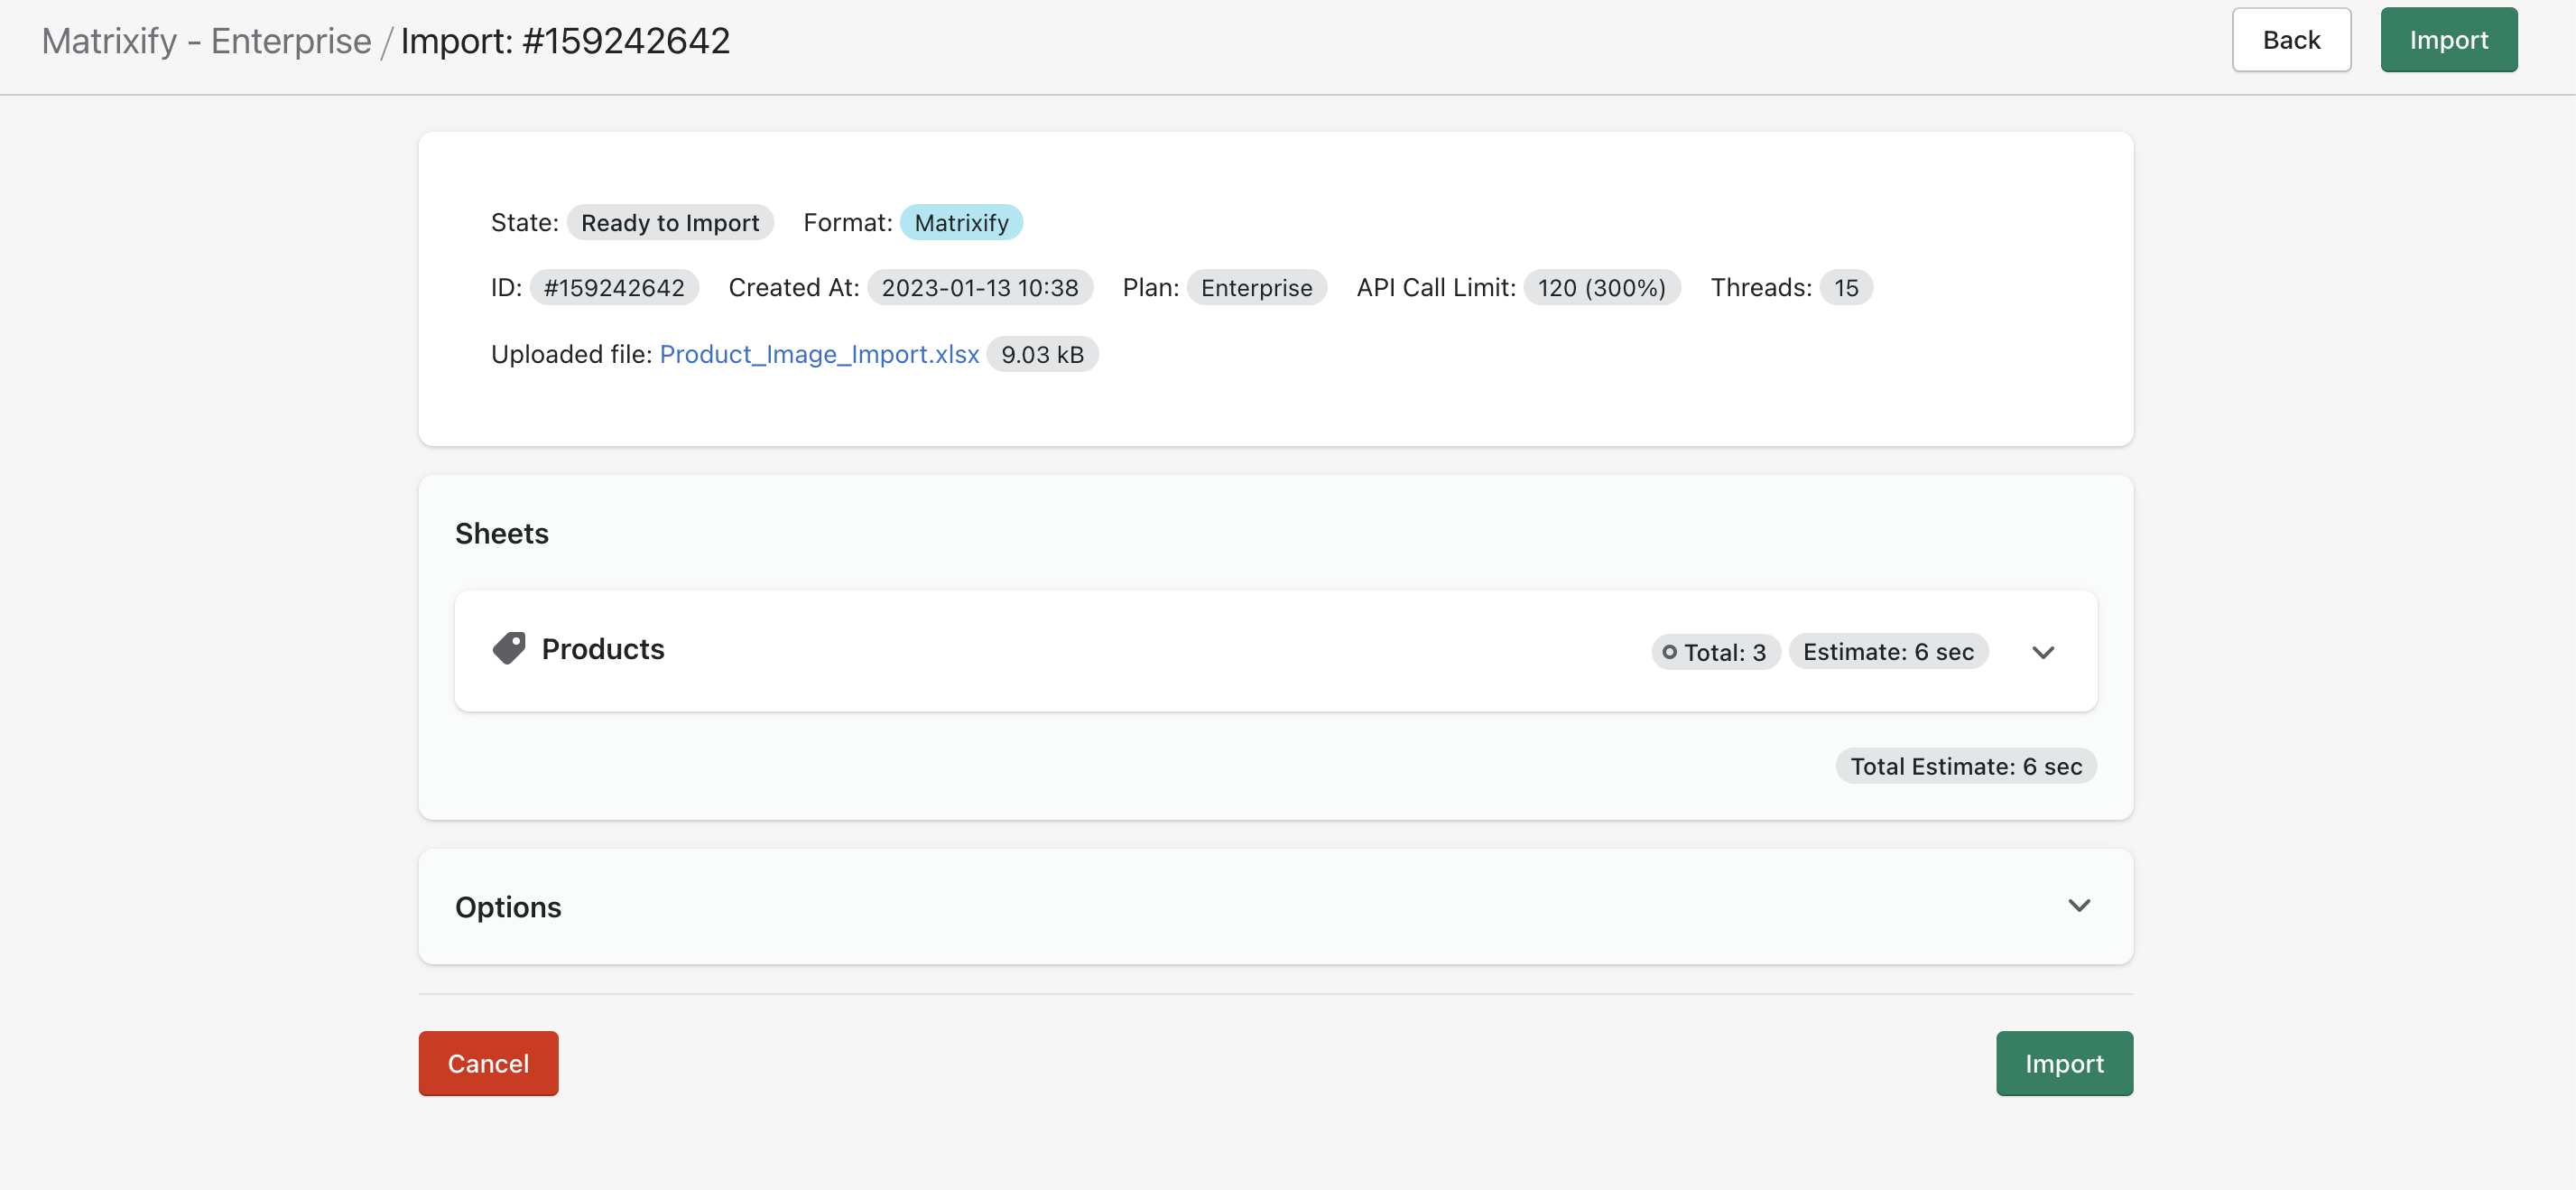
Then press the “Import” button in the top right-hand corner and the file will start Importing.
For more information on how the Import process works, you can take a look at our “How It Works” page.
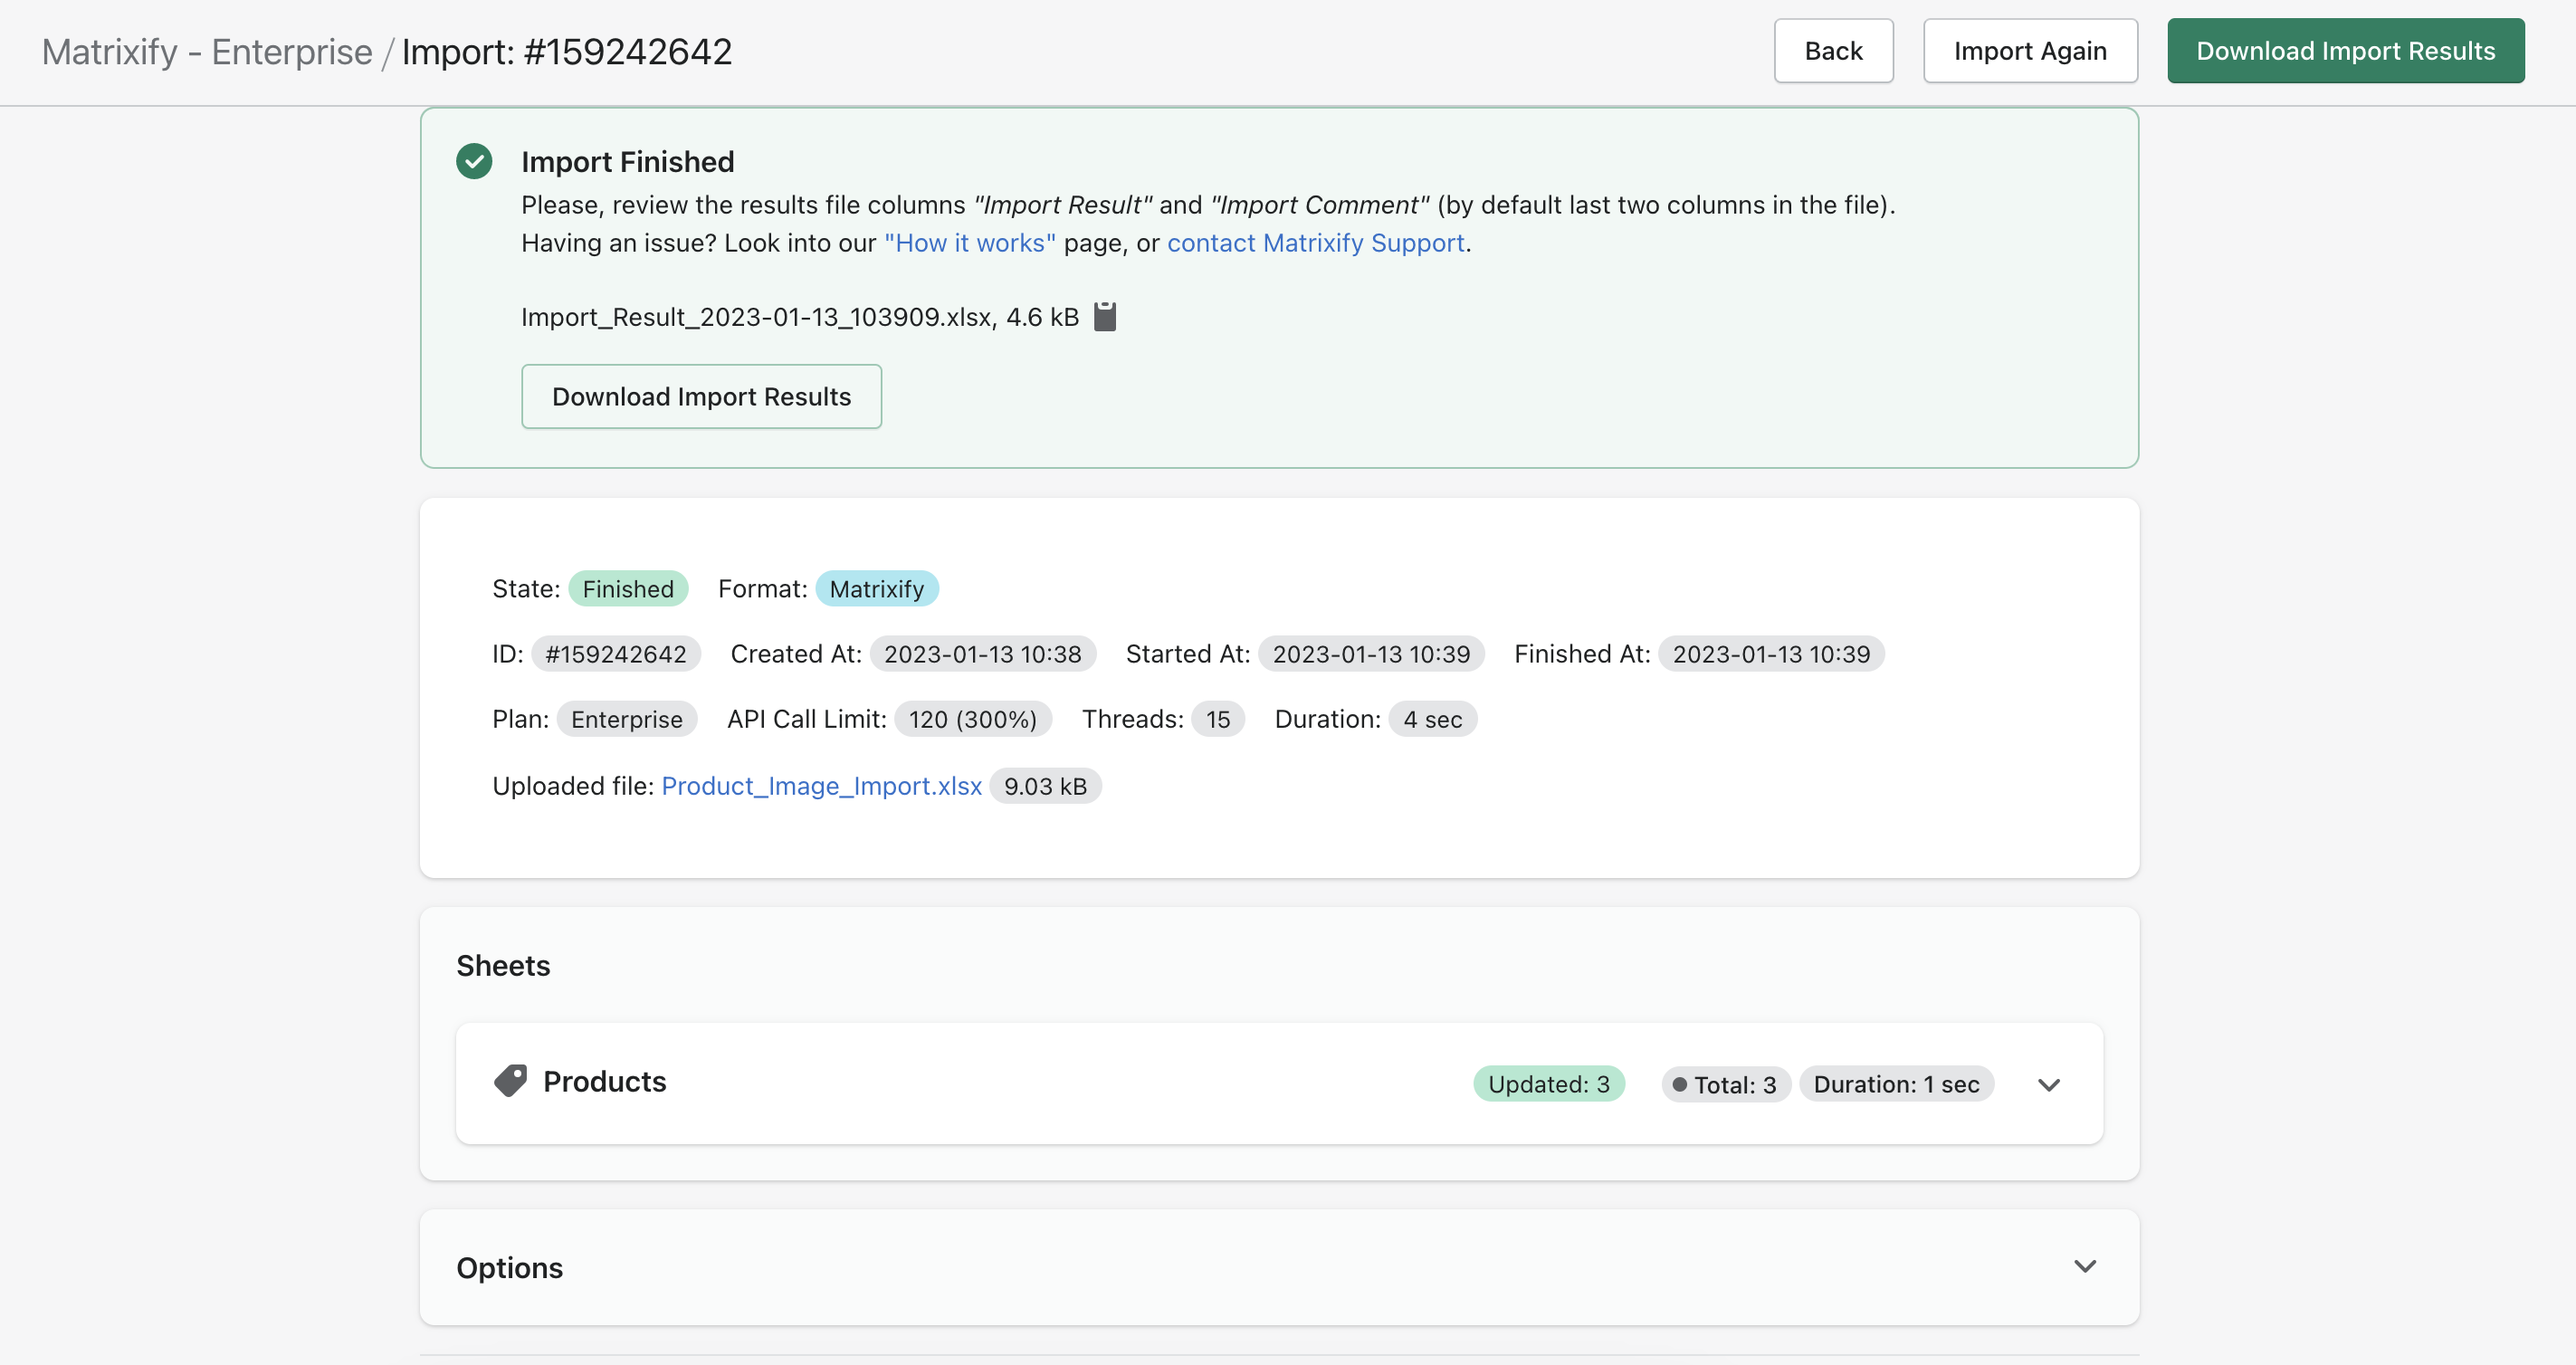
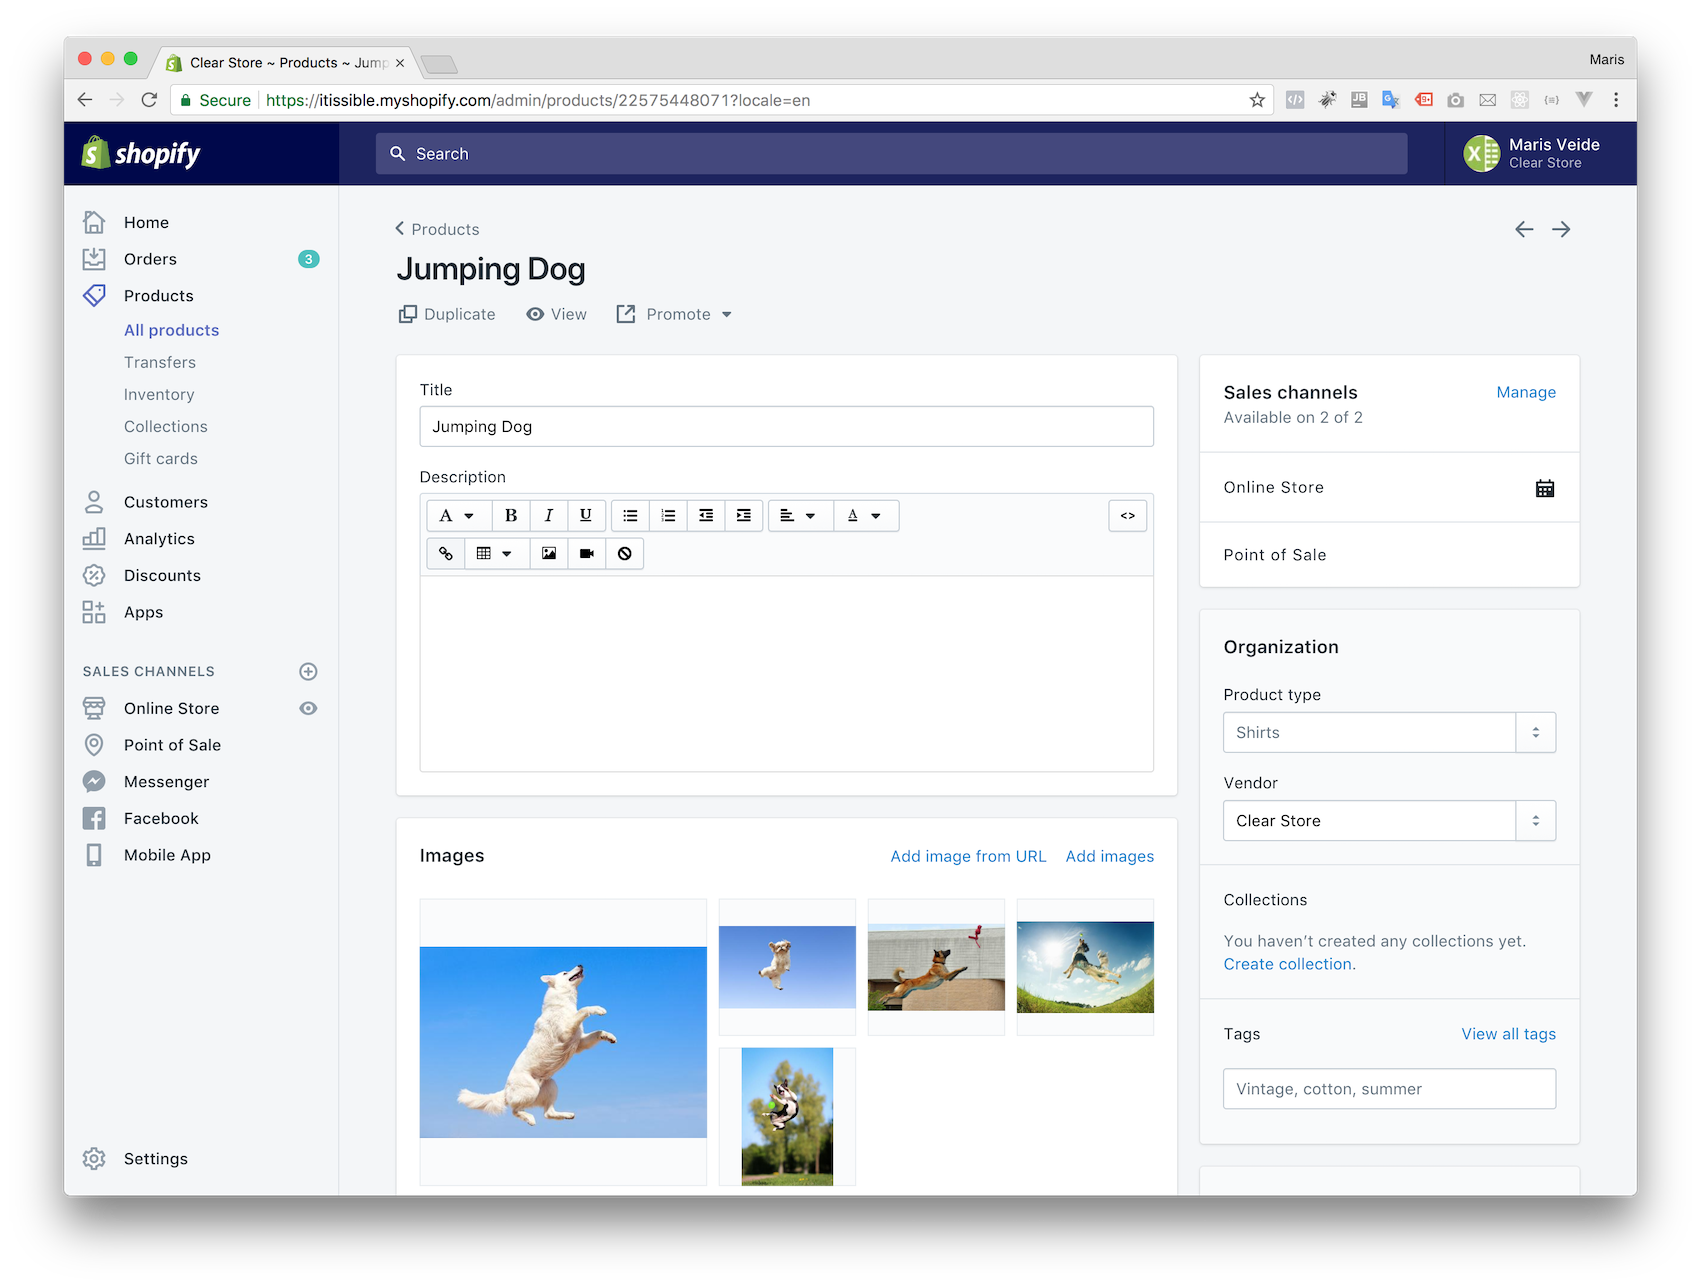
3. View your Imported Images and other media in Shopify!
Now you can go ahead and view your newly Imported media files in Shopify Admin!
Good To Know
- It is possible to have up to 250 images per Product.
- You can add, replace and update media files for products the same way.
- If you prefer, you can also combine both media import methods. It can be a mix of having them as several rows, and split by a
;(semicolon) in the same cell. As visible in the example image with Product “Jumping Dog”. - Remember to name the sheet/tab “Products”, so that the app knows which sheet contains Products import.
Where To Go From Here?
- Install the Bulk Import Export Update with Excel app from Shopify AppStore and try bulk update for Free on your own store.
- If you want to know more about this app, look the How it works? tutorial and video.
- Read the detailed Field Descriptions.
- Read how to bulk import images if you have them on your computer.
- If you are not sure how to prepare the import file, ask our Support, we will teach you, or do that for you.


