This tutorial will help you to migrate your Lightspeed Orders into Shopify with ease.
Note: This tutorial is for migration from Lightspeed C-Series.
To migrate data from other lightspeed platforms you would need to manually convert your file data to Matrixify template column headers and structure.
Quick summary to migrate your Orders:
- Export your Orders from Lightspeed.
- Give the file name such that it contains the word “Lightspeed” and a word “Orders“, e.g. “lightspeed-orders-export-2019-08-06-16-29-18.csv”.
- Upload to the Matrixify app.
- Under Options, choose “Dry run” – to not import just yet.
- Download Import Results file and check that all Products look as you need them.
- Make your corrections.
- Disable staff order notifications in Shopify Admin Settings so that you don’t receive notifications about the newly imported Orders.
- Import the finalized Excel file.
Now let’s go thoroughly through each step to do that migration.

1. Export your Orders from Lightspeed
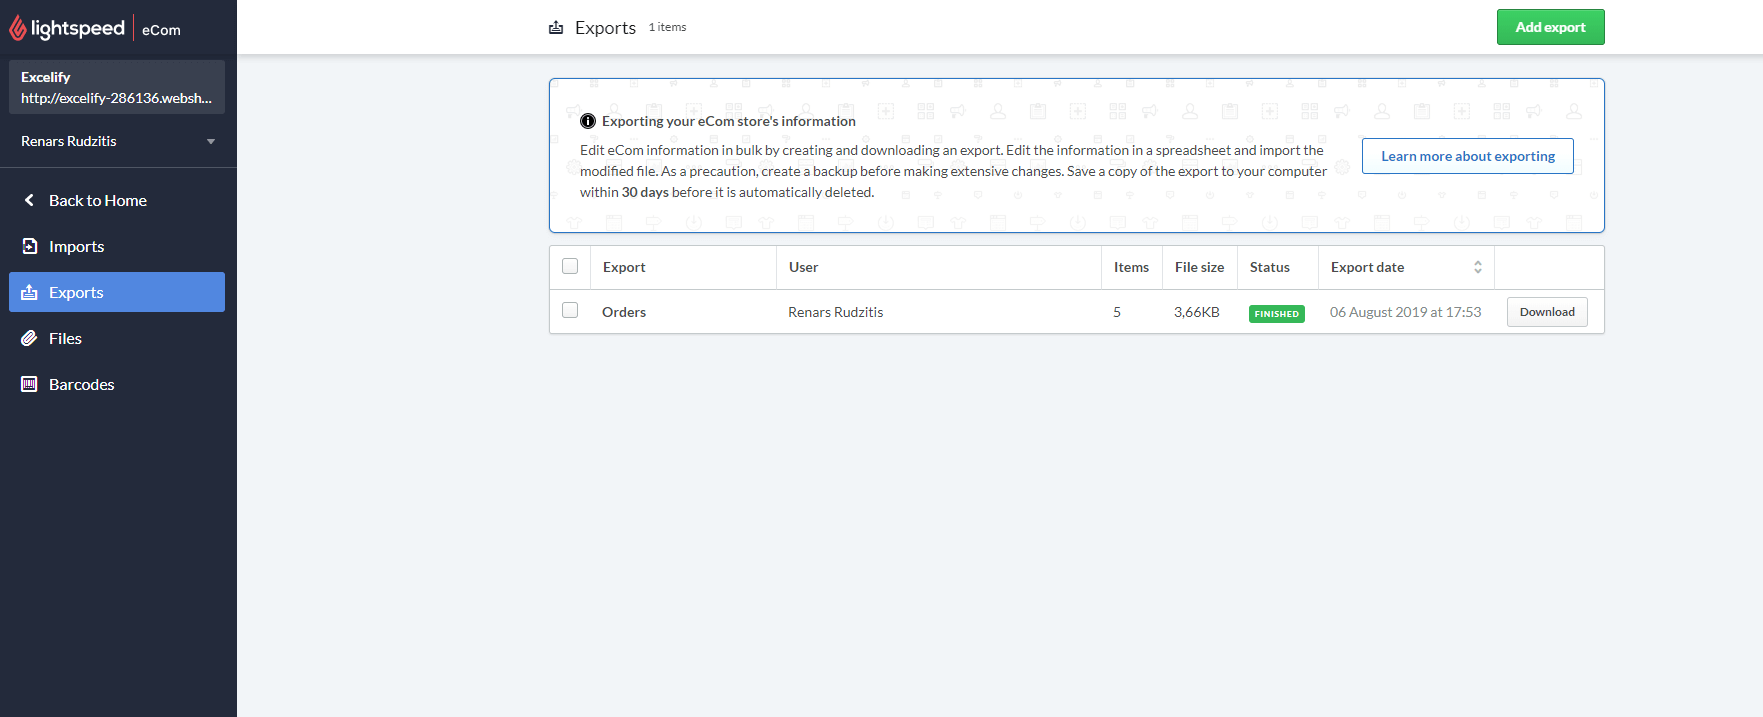
To export your Orders from Lightspeed, you would need to go into your Lightspeed store Admin -> Tools -> Exports.
In this page, click on the “Add export” button.
A popup will appear where you can select to export “Orders” and choose a date range to filter what Orders will get exported.
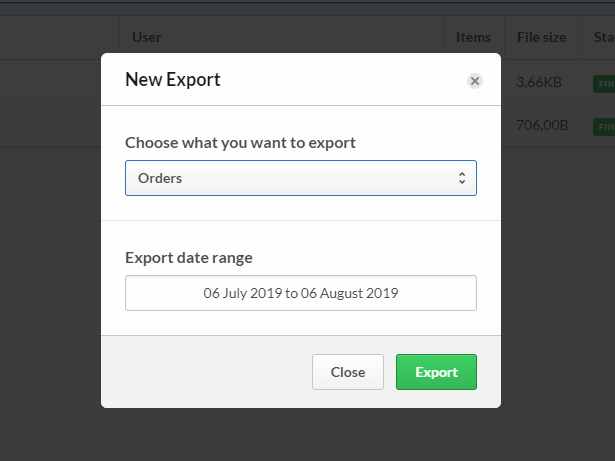
Press the “Export” button in the pop-up to start the Export and once completed press the “Download” button to download the file.
2. Rename the exported file
Once you have downloaded the file, you do not need to open and edit it.
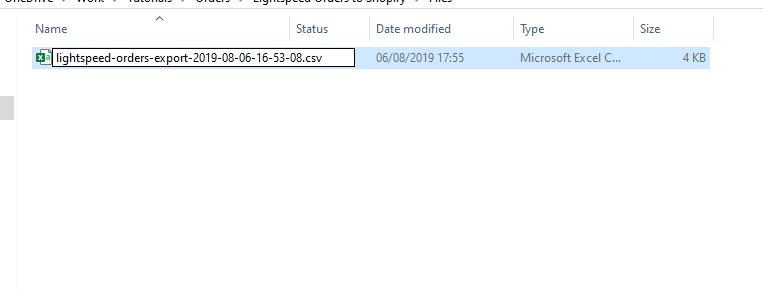
Find the file in your computer and rename it to contain words “Lightspeed” and “Orders“.
The simplest way to do so is just to add the word “Lightspeed” at the beginning of the file name.
3. Upload to the Matrixify app
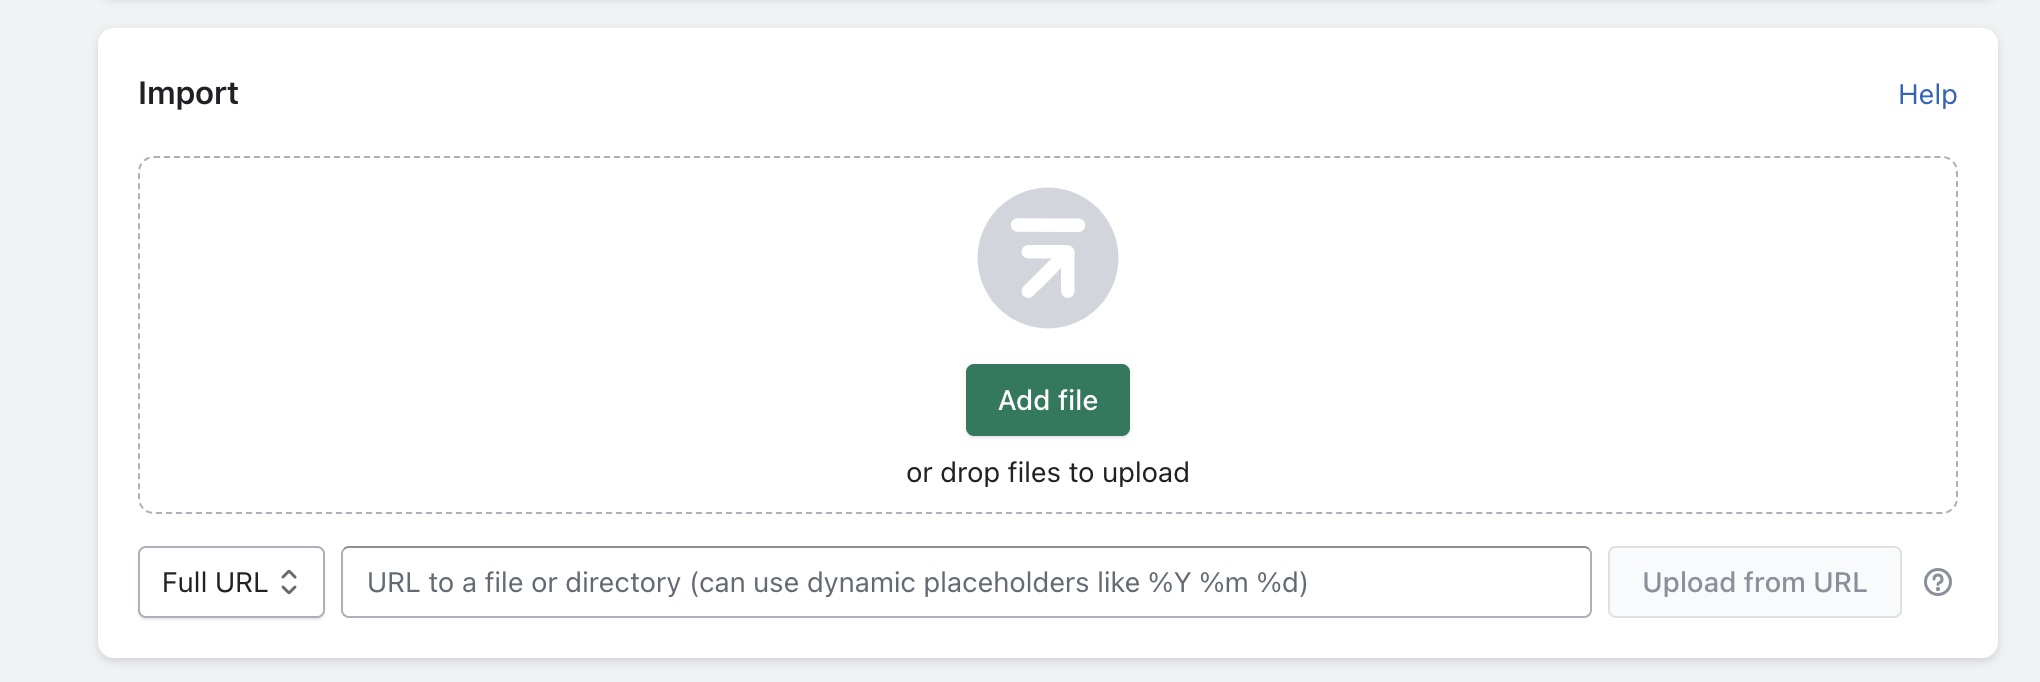
Now you can go into the Matrixify app and upload the file in the Import section of the app.
You can drag and drop the file in this Import section or click on the “Add File” button to upload the file.
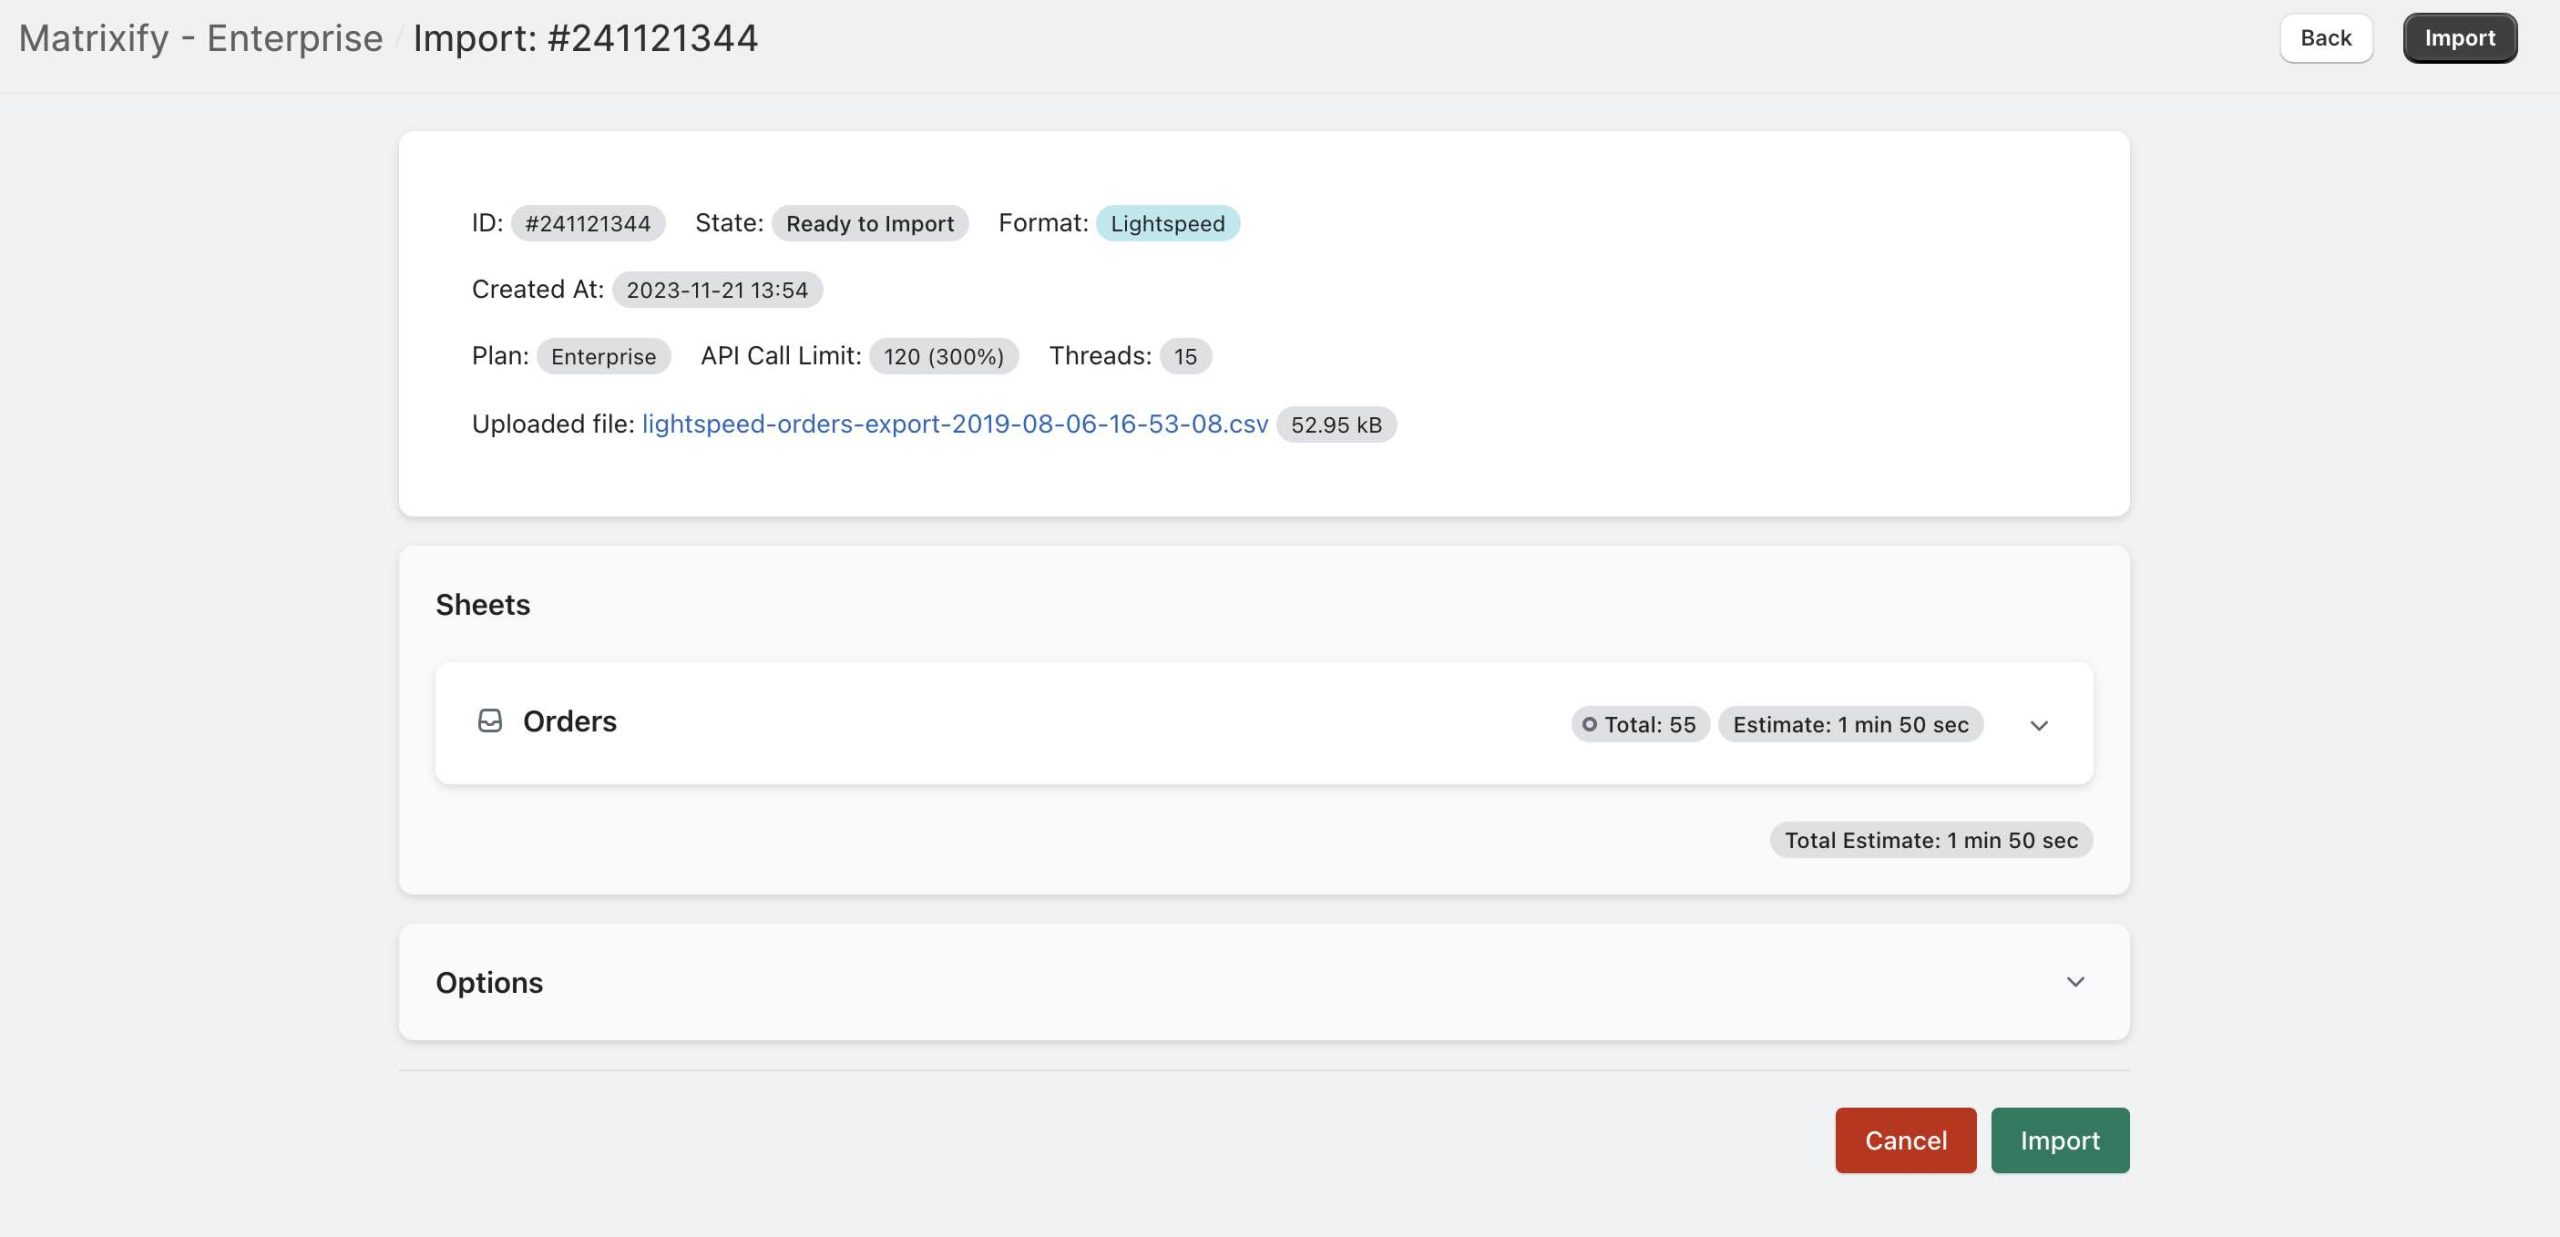
As soon as you have uploaded the file, the app will open a separate window for this import job where the app will analyze the file.
Make sure that the app recognizes the import as “Lightspeed” format and that you are importing “Orders”.
4. Select “Dry-run” option
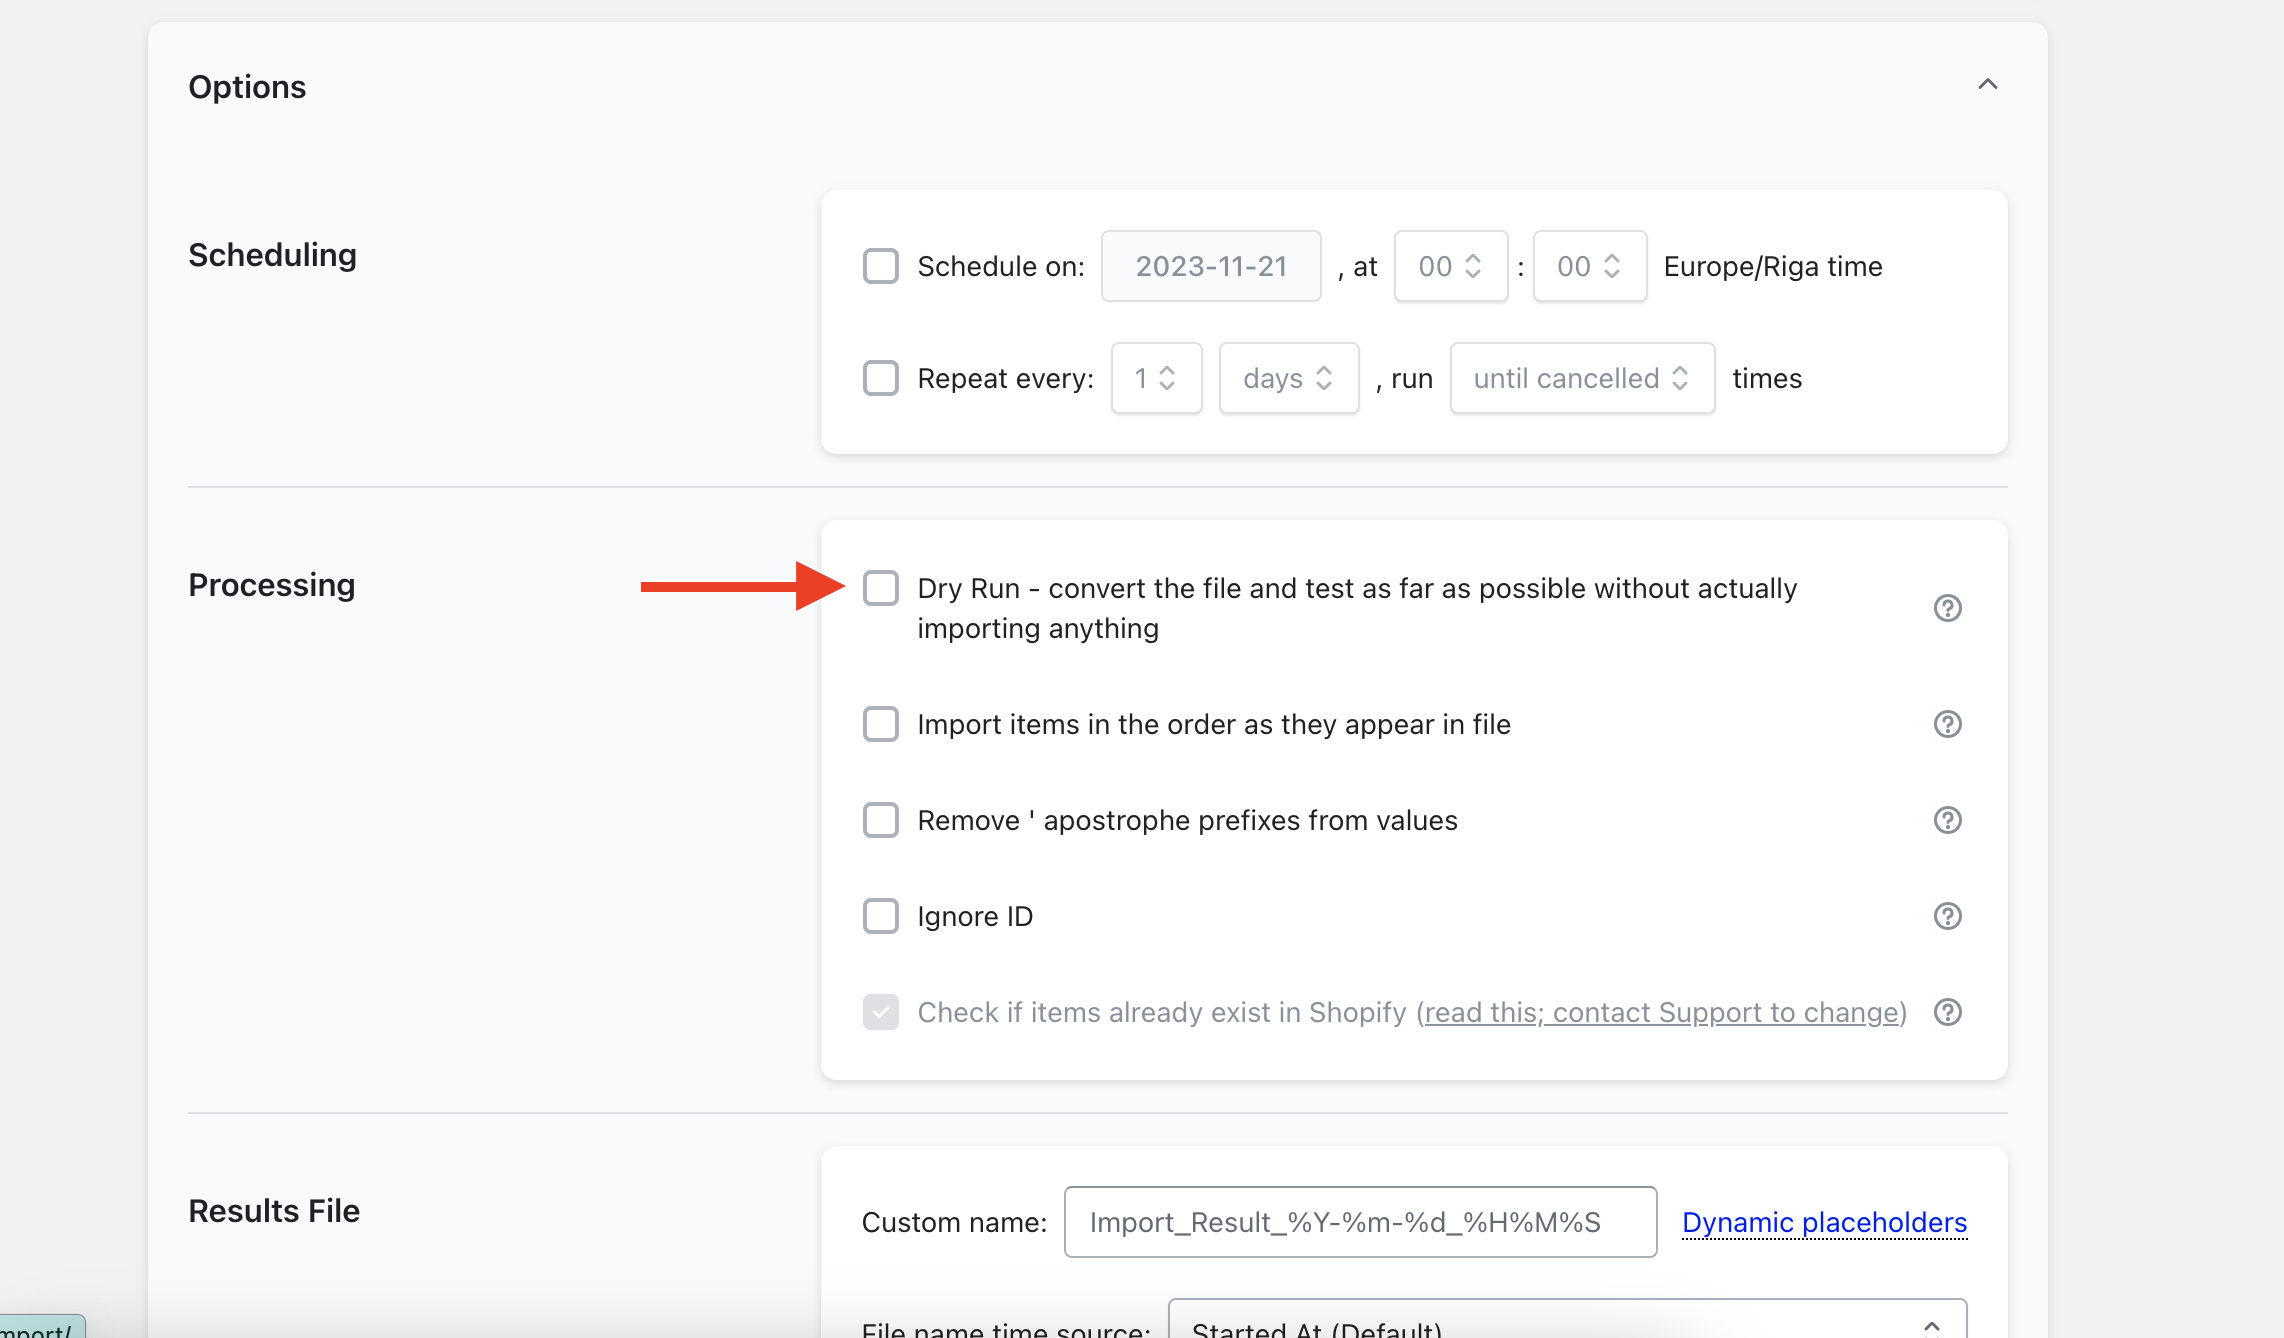
In the Import job view, you also have a lot of different “Options” to select for your imports.
You can leave all the default options selected as they are, and select the option “Dry Run – convert the file and test as far as possible without actually importing anything“.
That will not do any real import just yet – it will run through our data transformation engine to simulate the import, and as a result, you will get the “Import Results” Excel file which is in the Matrixify “Orders” import template format for importing to Shopify.
Press the “Import” button. Don’t worry – if the Dry run is on, there will be no changes done to your shop data just yet.
While the app is generating the data, you are free to close the app and browser. You can later find this job in “All Jobs” page of the app, and you will also receive an e-mail from Matrixify when the file is converted.
5. Download Import Results file
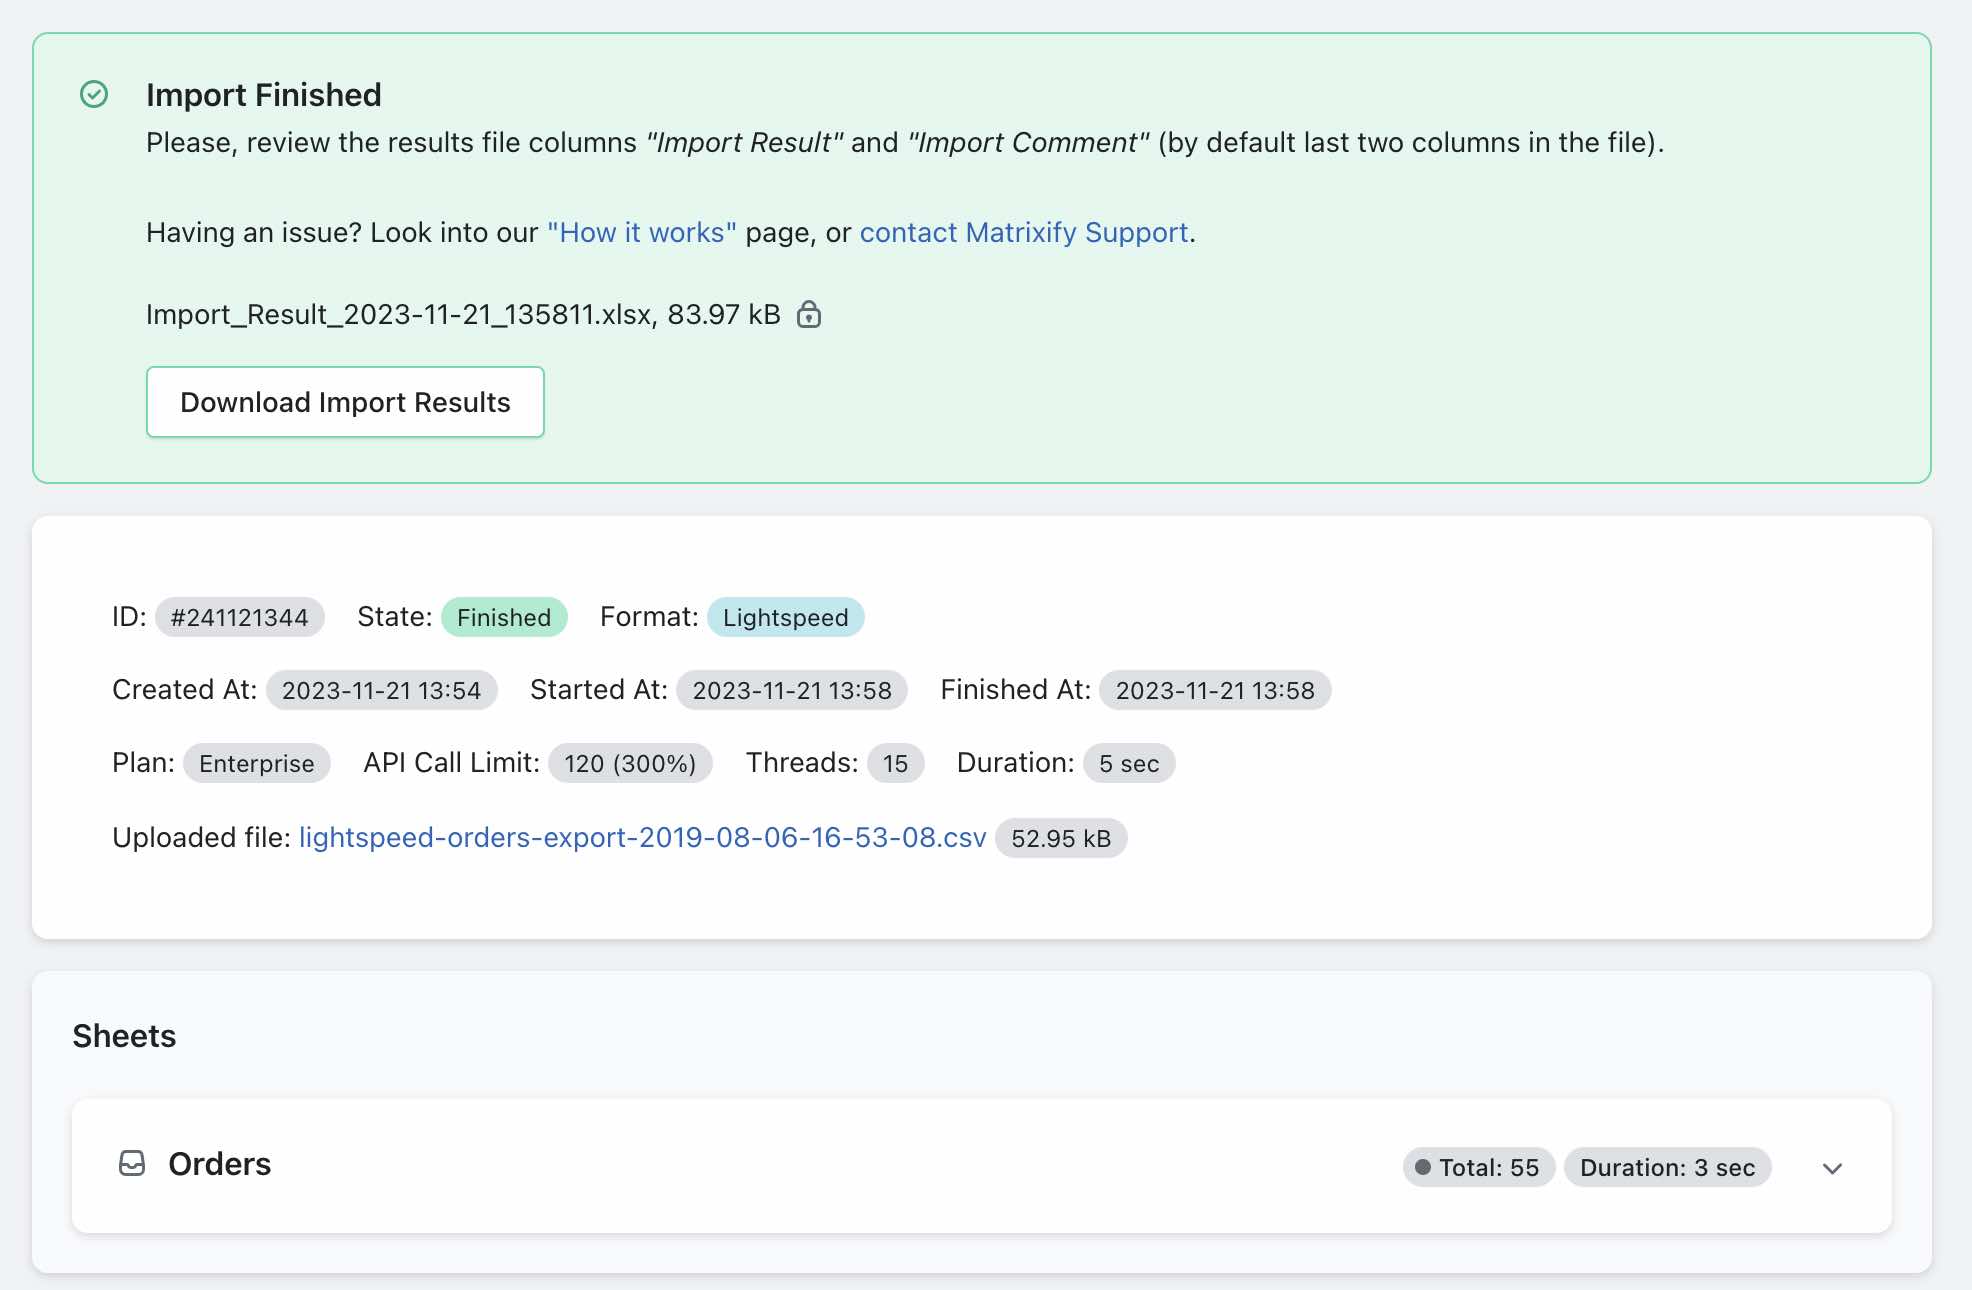
When the “dry import” is finished, you will see a green “Import Finished” label with “Download Import Results” button.
Press it and download the “Import Results” file of your test Orders import – it will be in the Matrixify Excel file format.
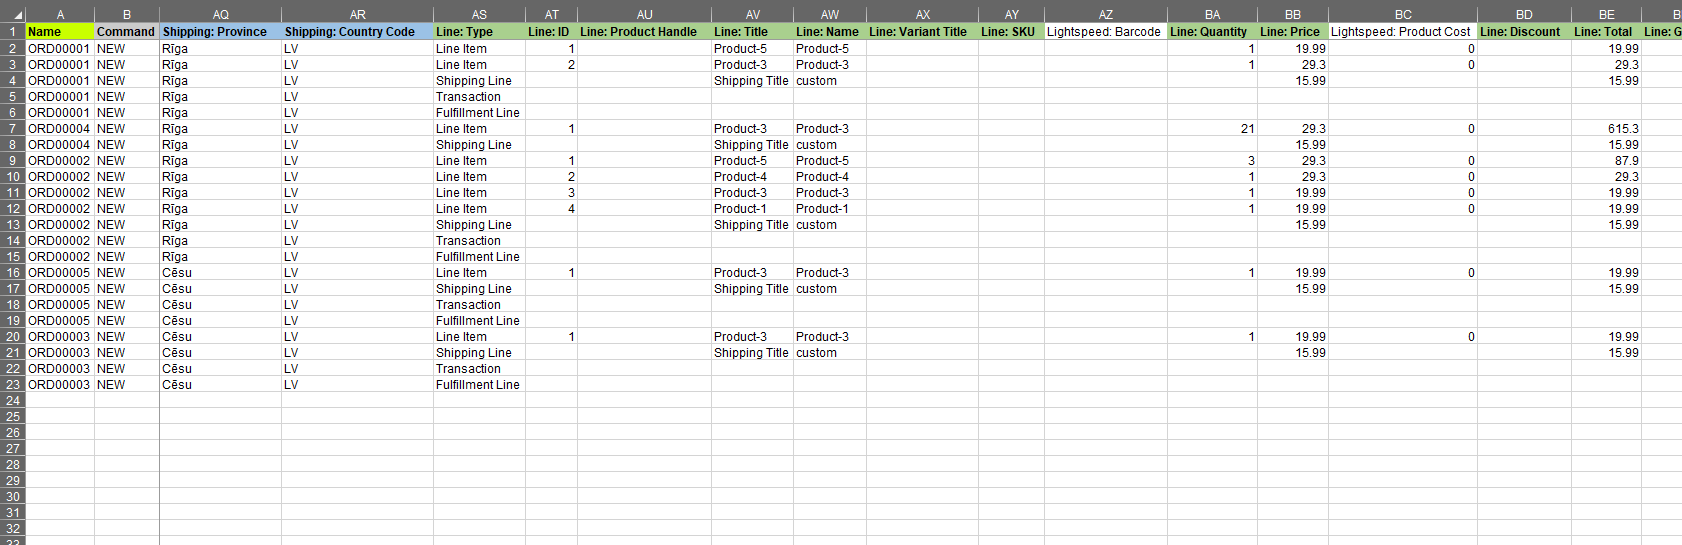
The file will contain all of the Orders, their customer data, line items, shipping cost, refunds, fulfillments, and financial transaction that the app was able to gather from the Lightspeed exported data.
6. Make any corrections you need
You might want to look at the total amounts, check the currencies, transactions.
Maybe improve the data of some of your customers, check that their phone prefixes are correct, as Shopify requires international phone codes for all phone numbers.
Check customer address data, their countries, cities, regions, streets.
Also, you might want to check the totals for line items, and Orders themselves, and the Taxes, tax codes, etc.
If you wish to send out a receipt to the customer for some orders, then you can update the column “Send Receipt” to the value TRUE for your orders – but by default, it will not send any e-mails to your customers.
7. Disable staff order notifications in Shopify
If you as the store owner don’t want to receive e-mail notifications from Shopify for creating each Order, go to Admin -> Settings -> Notifications -> Staff Notifications, and disable the “New order“ notifications.
8. Import the finalized Excel file
Also, you might want to try importing just 1-2 Orders from that file first, to look how they look in Shopify.
Once you feel ready, grab the prepared Matrixify Import Results file and import that by uploading again using the same Matrixify app import section.
When you have uploaded this file, make sure that “Dry-run” option is no longer selected to actually import the Orders to your Shopify store.
When importing, be patient – there is a lot of stuff going on under the hood to construct your Orders, so it might take a while to complete, but it should be worth the wait.
Good to know
- This tutorial explains how the migration can be done with the Matrixify app, click here to install the Matrixify app.
- If you feel like a kamikaze, you can skip the whole “Dry run” part, and just import the Orders zip/CSV file directly, without looking at the Matrixify Orders format file.
- Read about all the fields you see in the Orders Matrixify template Excel file.
- Check out other Shopify Order related tutorials.
- Look up other information about migrating data from Lightspeed to Shopify.
- Learn more about migrations to Shopify and what other types of data Matrixify can migrate to Shopify in bulk.
- If you see that some Orders import is showing as Failed, don’t worry – you can download the “Import Results” file of that import, and at the last columns you will see the comments for why those failed. Then you can resolve those issues, and re-import just the Failed rows.
- If the import speed is important to you, the higher plan you upgrade to, the quicker the import will be, as for example, Enterprise Plan essentially spins off 10 parallel import processes, achieving the effect as if 10 apps would import your data in parallel.
- If you feel stuck with something, our Support is willing to help you – just reach out to us.


