
If you have to issue refunds for your existing Shopify Orders, and you have a lot of them, then doing it manually for a lot of Orders takes ages!
Here is how Matrixify can help you to bulk issue Shopify refunds for your Orders in a few simples steps.

Warning!
Always test with just one Order first to make sure you have it all set up correctly.
Only then, once this has been confirmed, are you ready to import the Order refunds into Shopify.
Summary of steps to bulk refund your Shopify Orders:
- Export existing Orders with the Matrixify app
- Make the import file from the exported Orders file
- Import the file using the Matrixify app
1. Export existing Orders with the Matrixify app
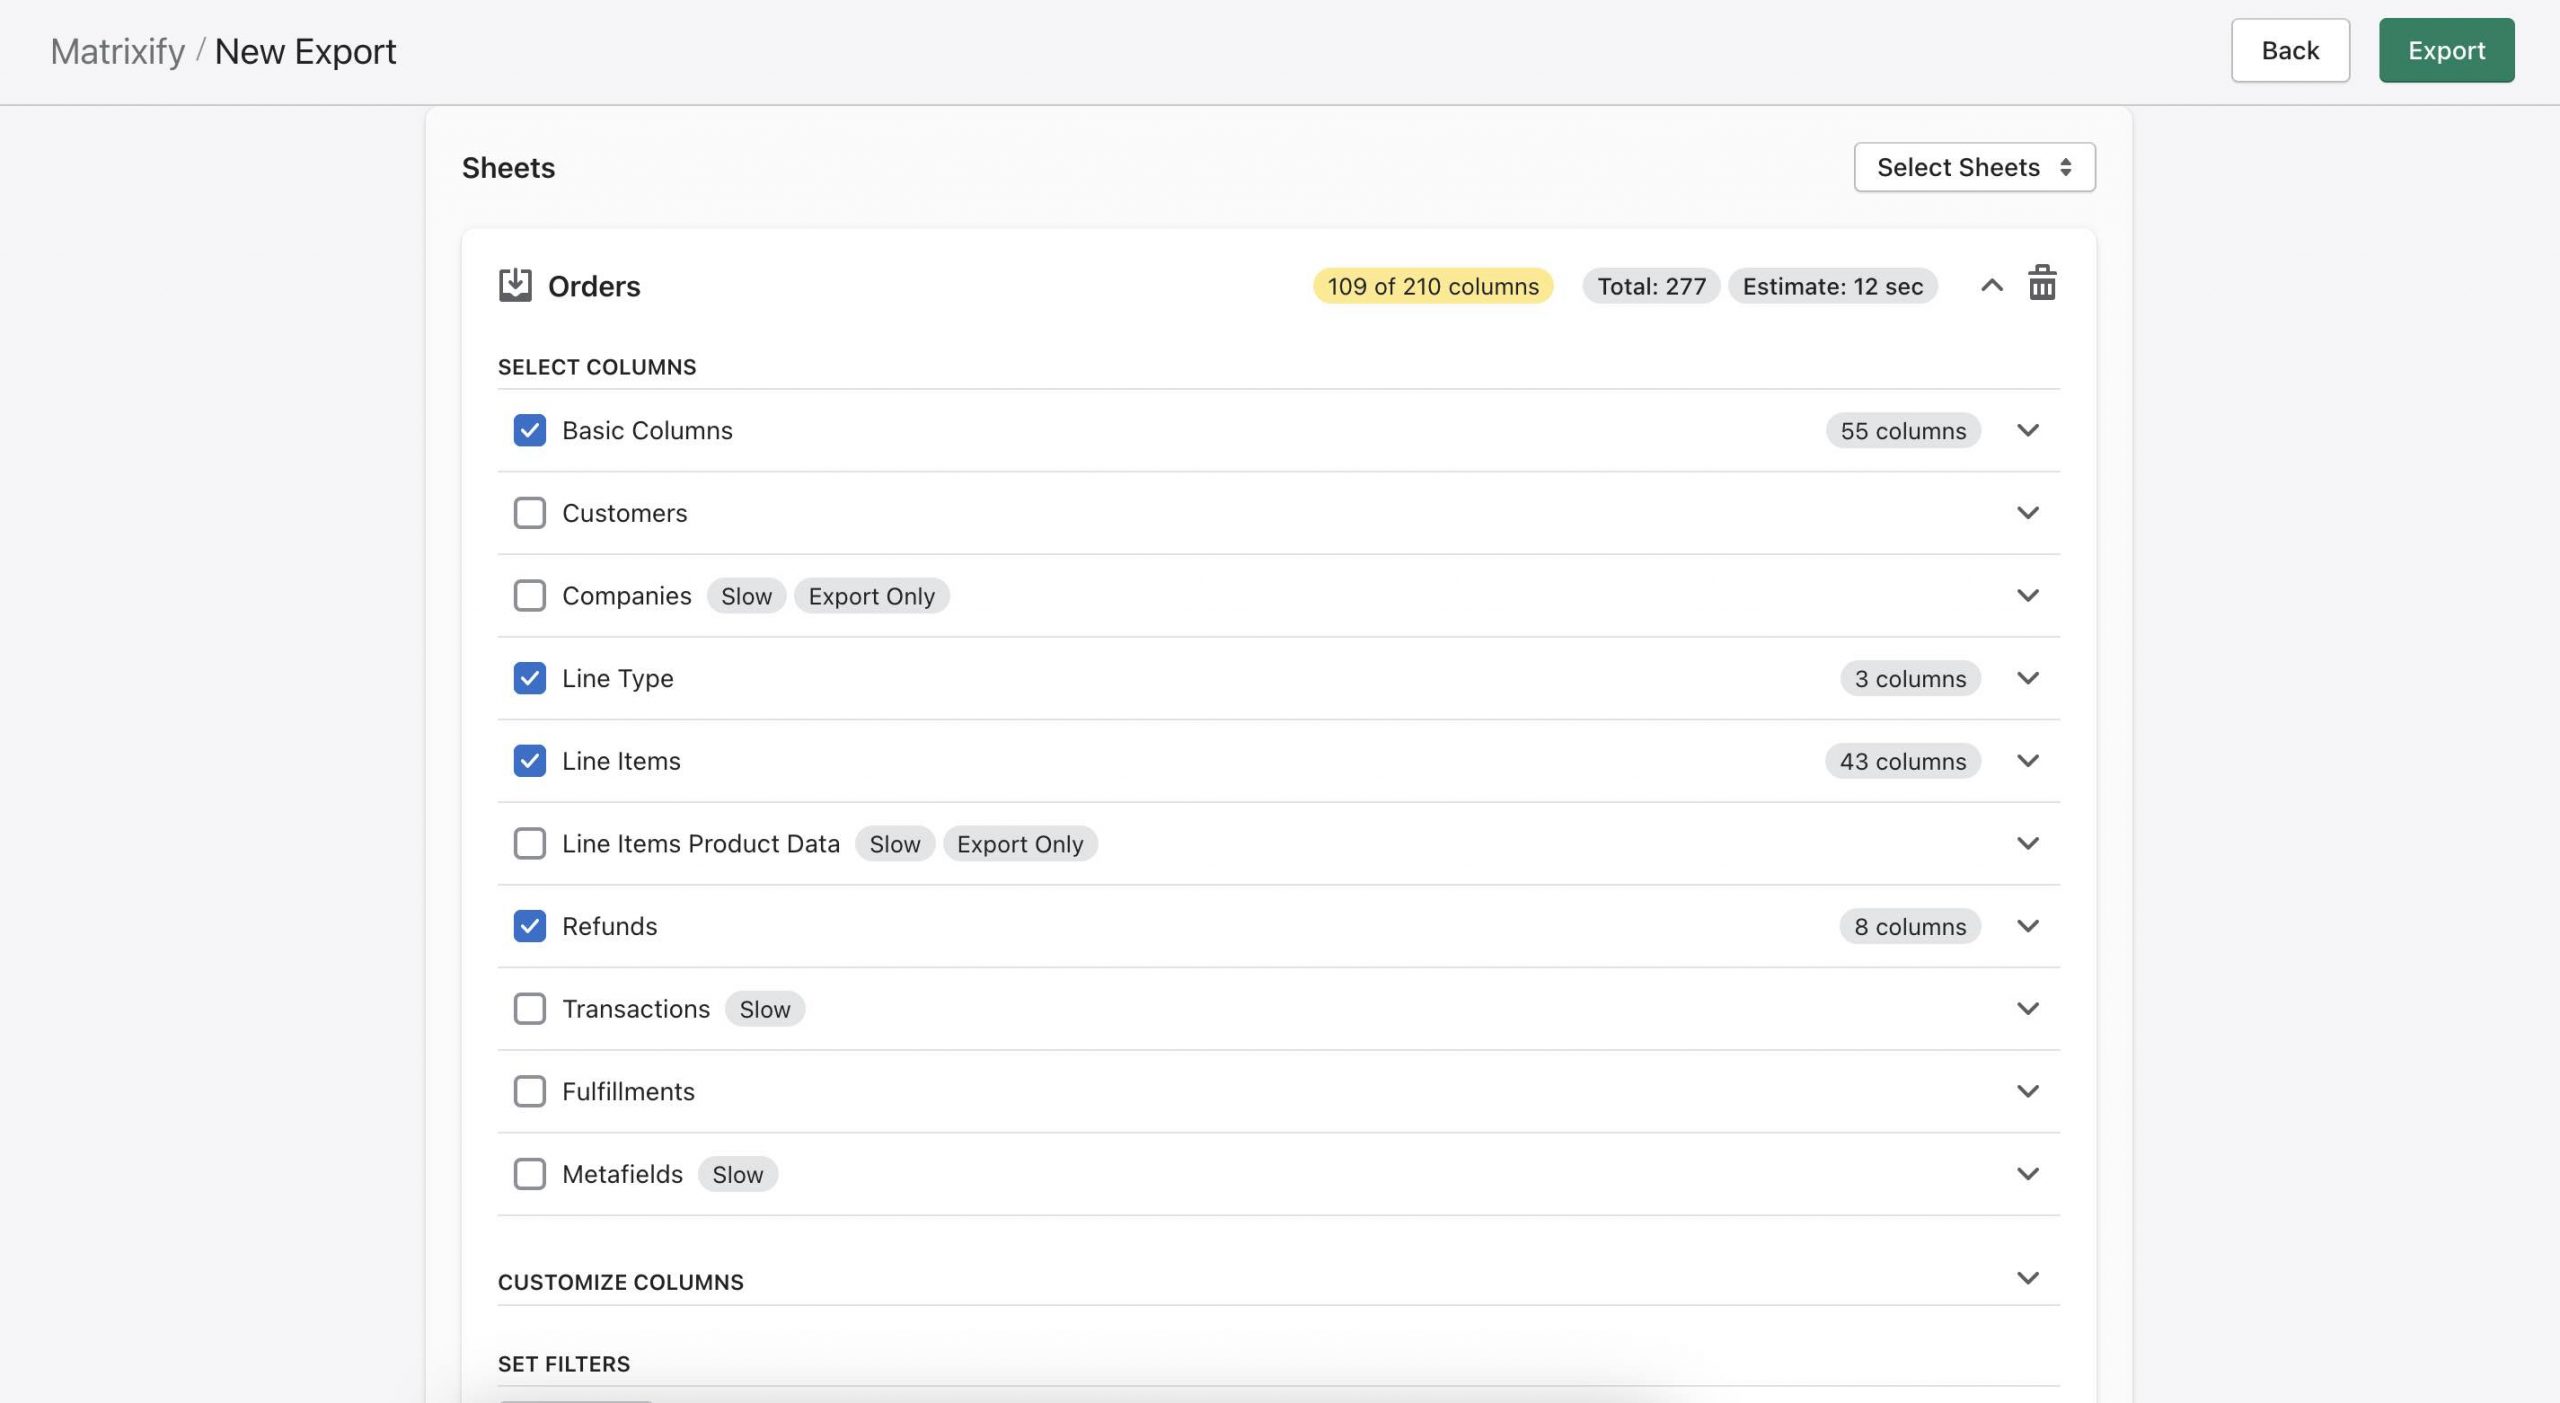
Include the following details for those Orders only:
- Orders
- Basic Columns
- Line: Type
- Line Items
- Refunds
You can select to Export Orders by checking the “Orders” checkbox in the “Select Sheets” drop-down. Your Export setup should look like this:
 You can also apply filters to target more specific Orders to Export.
2. Make the import file from the exported Orders file
Take the exported file and delete any other columns, keeping just these columns in your file:
- ID
- Name
- Command
- Line: …
- Refund: …
Change the values for the following columns:
- Command: set values “UPDATE” for all lines, so that the app knows you want to update existing orders.
- Line: Type:
- Change the “Line Item” rows to “Refund Line” for those lines which you want to refund. You can change the quantity and total amounts for them if you want to refund a smaller amount than paid.
- Change the “Shipping Line” rows to “Refund Shipping” if you want to refund also the shipping cost.
- Refund: ID: set any kind of number there, for example, “1” for all the rows – that way app will know it is one and the same refund. You can create several refunds by changing the “Refund: ID” number, and group several line items into several refunds if you like.
- Refund: Note: write any notes you want to add about this refund.
- Refund: Restock: put the TRUE there if you want to restock the refunded products, and FALSE if you don’t want to restock.
- Refund: Restock Type – Only used when “Refund: Restock” is TRUE, and you are restocking only a part of a line item and its partially fulfilled. To restock the unfulfilled part of the line item put the value “cancel”, to restock fulfilled part of the line item put “return”.
- Refund: Restock Location – If you have the “Refund: Restock” set as TRUE, then you can set here the name of the location to which the restocked items should be sent. If you leave this empty then the items will be sent back to the default location.
- Refund: Send Receipt: put the TRUE if you want the customer to receive an e-mail notification about that refund. FALSE – if you don’t.
The final table you import will look something like this:
![]()
Warning!
You cannot specify a specific refund amount when refunding the full line item. If you wish to partially refund a specific item or just a specific amount please check the “Refund partially with a specific amount” section of the tutorial.
3. Import the file using the Matrixify app
When uploading your file, make sure that sheet/tab name is Orders so that app detects the file contents correctly if uploading an Excel file. If uploading a CSV file, you must make sure the file name includes the word Orders.
If detected data looks correct in the app, then you can start the import by pressing the Import button.
It should show that X count of Orders got updated.
 When looking in Admin, your refunded Shopify Order will look like this:

Warning!
Always test with just one Order first to make sure you have it all set up correctly.
Only then, once this has been confirmed, are you ready to import the Order refunds into Shopify.
Where to go from here?
- If you need to cancel the Order, read the tutorial on how to cancel Orders, also with refunding them.
- With the Matrixify app you can bulk-partially Refund Orders for specific amounts without refunding Line items.
- Read the documentation of all the fields of Orders.
- See other Tutorials about Orders.
- Contact our support to get help.


