
Using Matrixify you can do much more than create brand-new Fulfillments – you can also revisit any existing Fulfillment on a Shopify Order and append or correct its tracking information in bulk. In just three steps you’ll Export the Orders (together with their current Fulfillment IDs), fine-tune the file by keeping only the essential columns, add or adjust Tracking Numbers, and then Import the file back to Shopify. The app matches each row to the correct Fulfillment by its Fulfillment ID, so you’ll keep every other detail of the Order intact while effortlessly updating Tracking Numbers, carriers, Shipment Status, and even deciding whether to send Customers a notification.
Steps in short
- Export the existing Orders with Fulfillments using the Matrixify app – to Excel or CSV file.
- Edit the file so that you just keep the columns and rows that you want to update.
- Import the edited file with the Matrixify app.
1. Export the existing Orders with Fulfillments
It is first important to Export the Order with its existing Fulfillments so that the app is able to identify the existing Fulfillment to update. Without Exporting the app will not be able to identify the existing Fulfillment and the app in turn will try to create a new Fulfilment for the Order. To Export your Orders, you must go to the Matrixify app and select to create a new Export by pressing the New Export button. Once on the Export page, you can start setting up your Export. At the top of the page, you can choose which Format you would like to Export in. If not Exporting more than the Excel limitations, it is recommended you Export in the Matrixify: Excel format, however, if working with a CSV file is simpler for you, you can also select to Export in the Matrixify: CSV format.
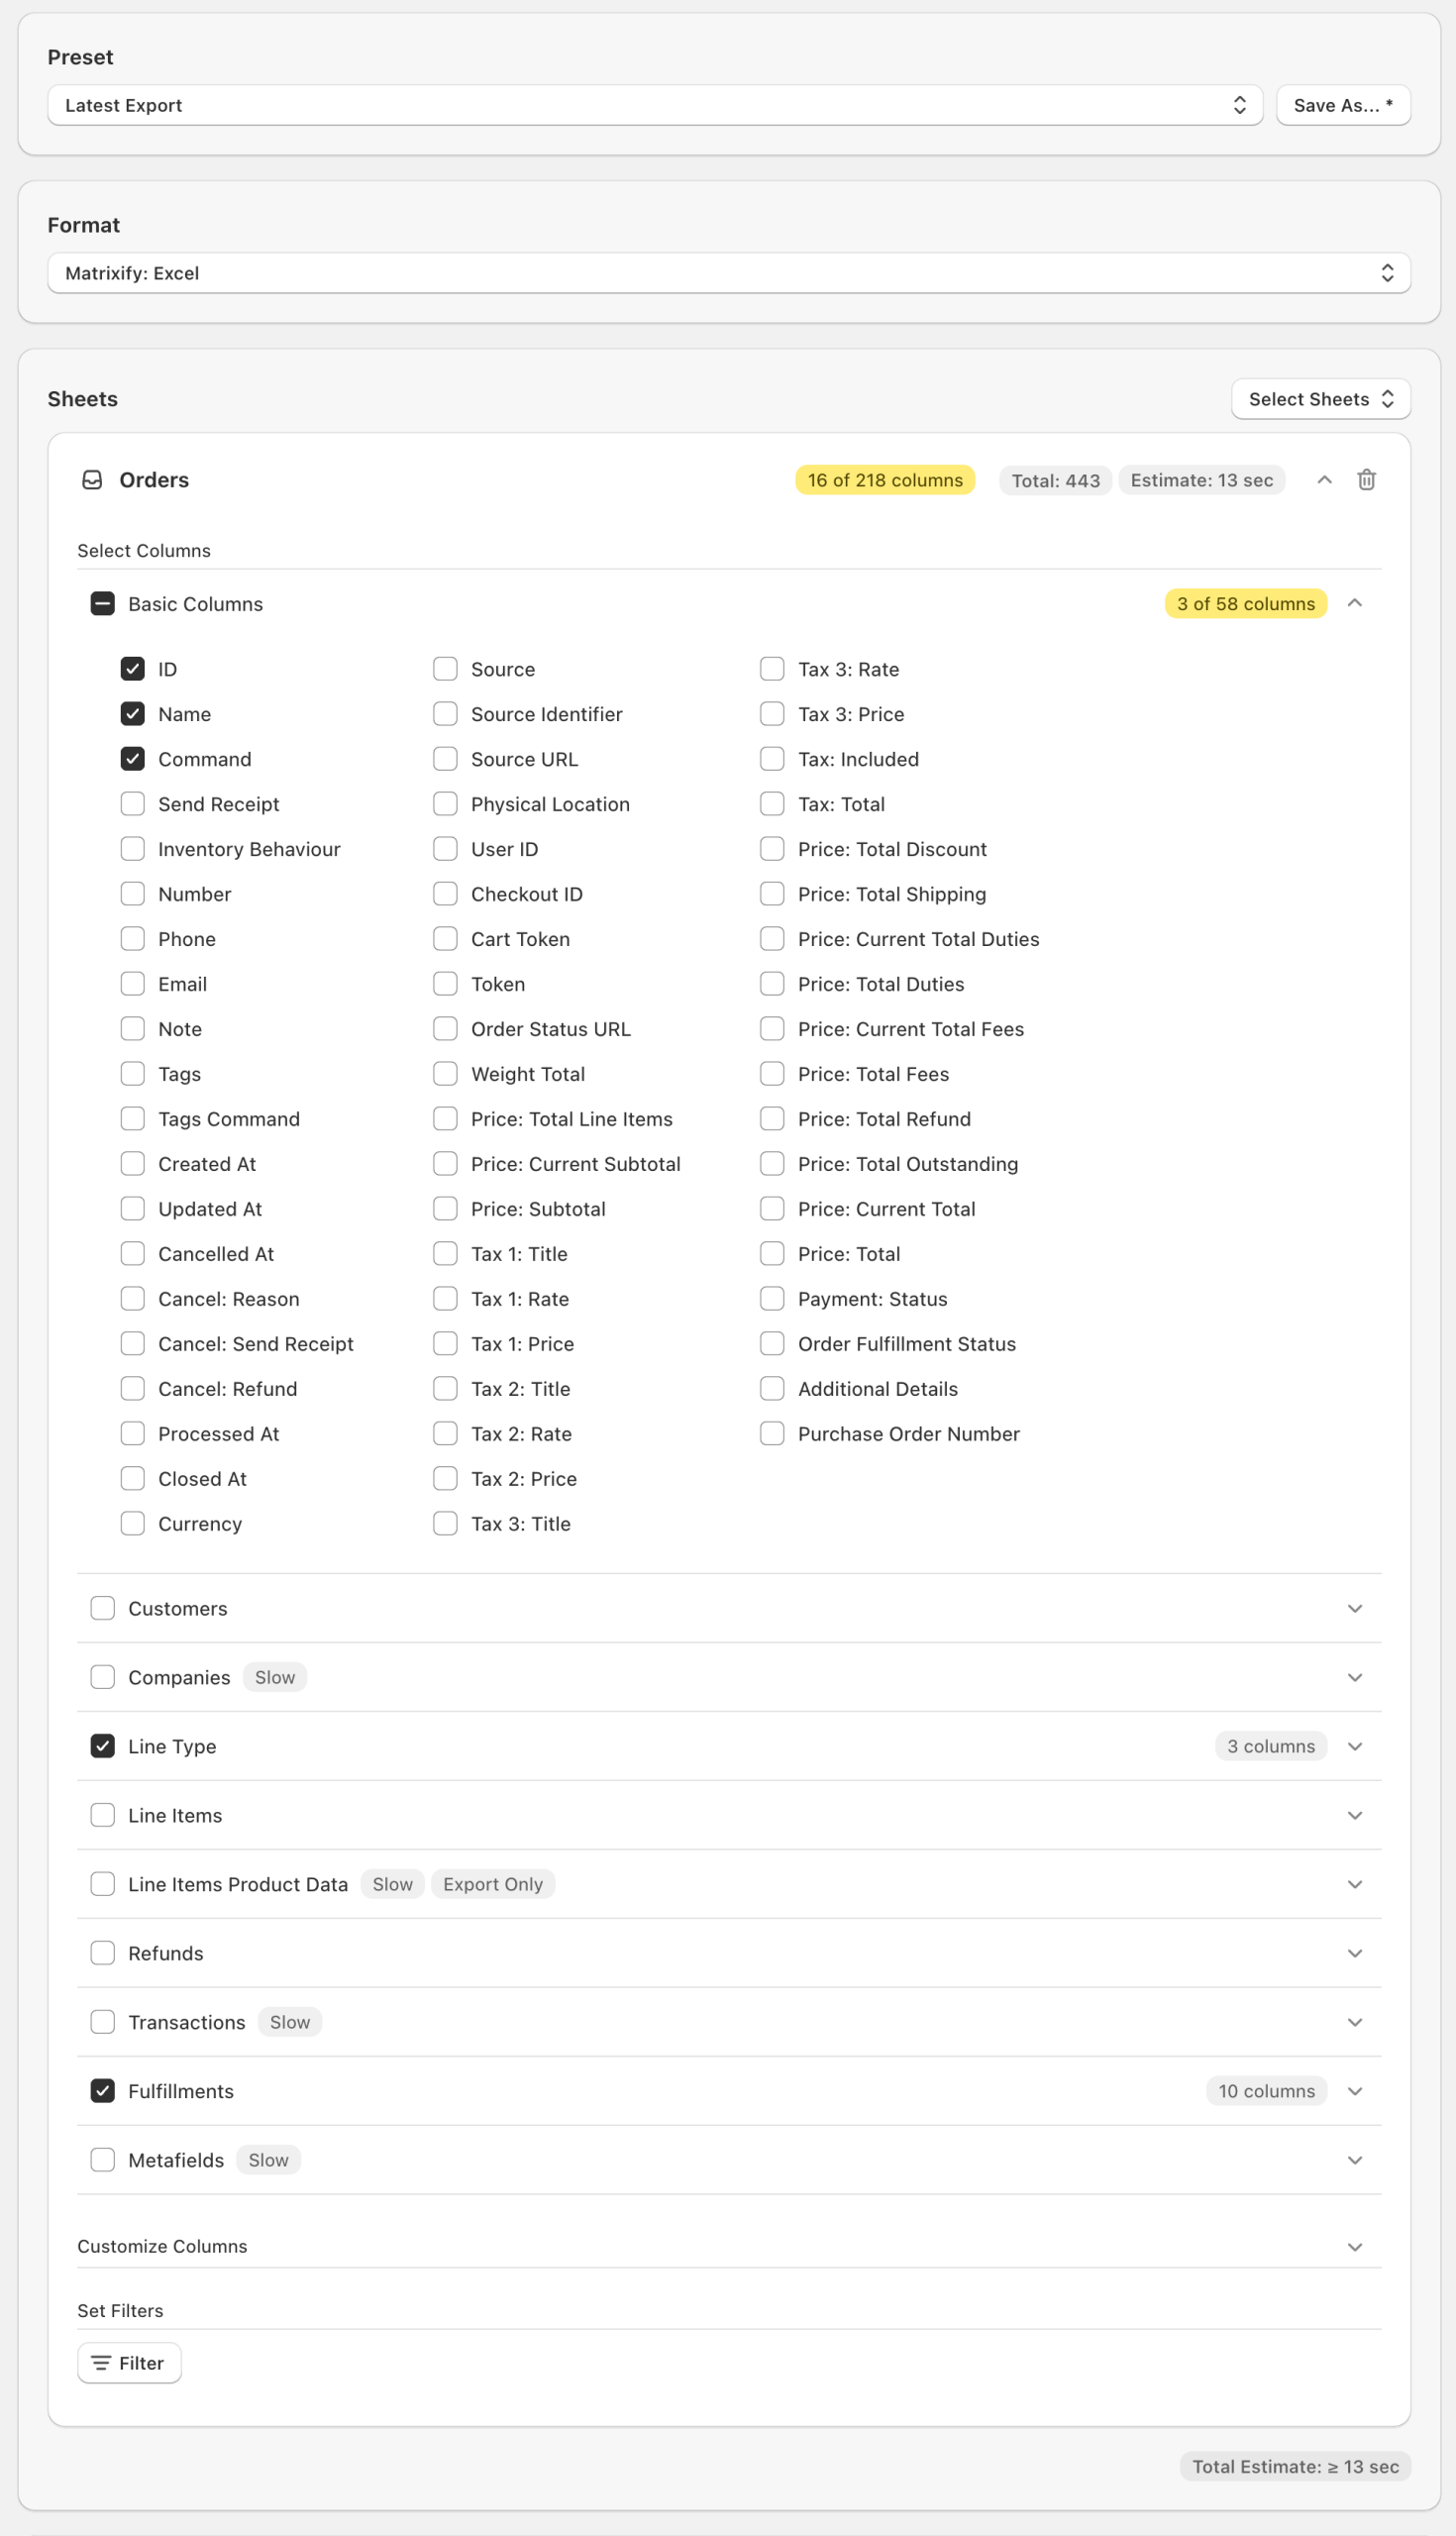
From the Select Sheets drop-down, select to Export Orders. Once selected, you must then choose to Export Basic Columns, Line Type and Fulfillments.
You can then further refine your Export by selecting only the minimum required columns. Expand the Basic Columns section and select to Export only – ID, Name and Command. You can leave Line Type and Fulfillments selected.
Your Export set up should end up looking something like this:
You can also add filters to the Export to Export only specific Orders if needed.
Once you have set up your Export, you can go ahead and click on the Export button.
2. Edit the Exported file
In your Exported file you should only keep the Orders you want to update Tracking Numbers for. The only columns your file should contain are the following columns:
IDNameCommandLine: TypeFulfillment: ID- Fulfillment: … columns
You must then change the values for these remaining columns:
- Change the
Commandcolumn value toUPDATE - Change the
Fulfillment: Tracking Numbercolumn – fill with your tracking numbers. You also set multiple tracking numbers for the same fulfillment by listing them in the same cell separated by a semi-colon. - If you want the customer to receive an e-mail about changed fulfillment, set the
Fulfillment: Send Receiptvalue toTRUE, if not, then set the value toFALSE. - Optionally, you can also fill in the other
Fulfillment columns.
In addition to only keeping specific columns, you should also only keep the rows where Line: Type is Fulfillment Line (otherwise the app will ignore the Fulfillment columns if there is no Line: Type). Your file should end up looking something like this:
![]()
3. Import the edited file with the Matrixify app
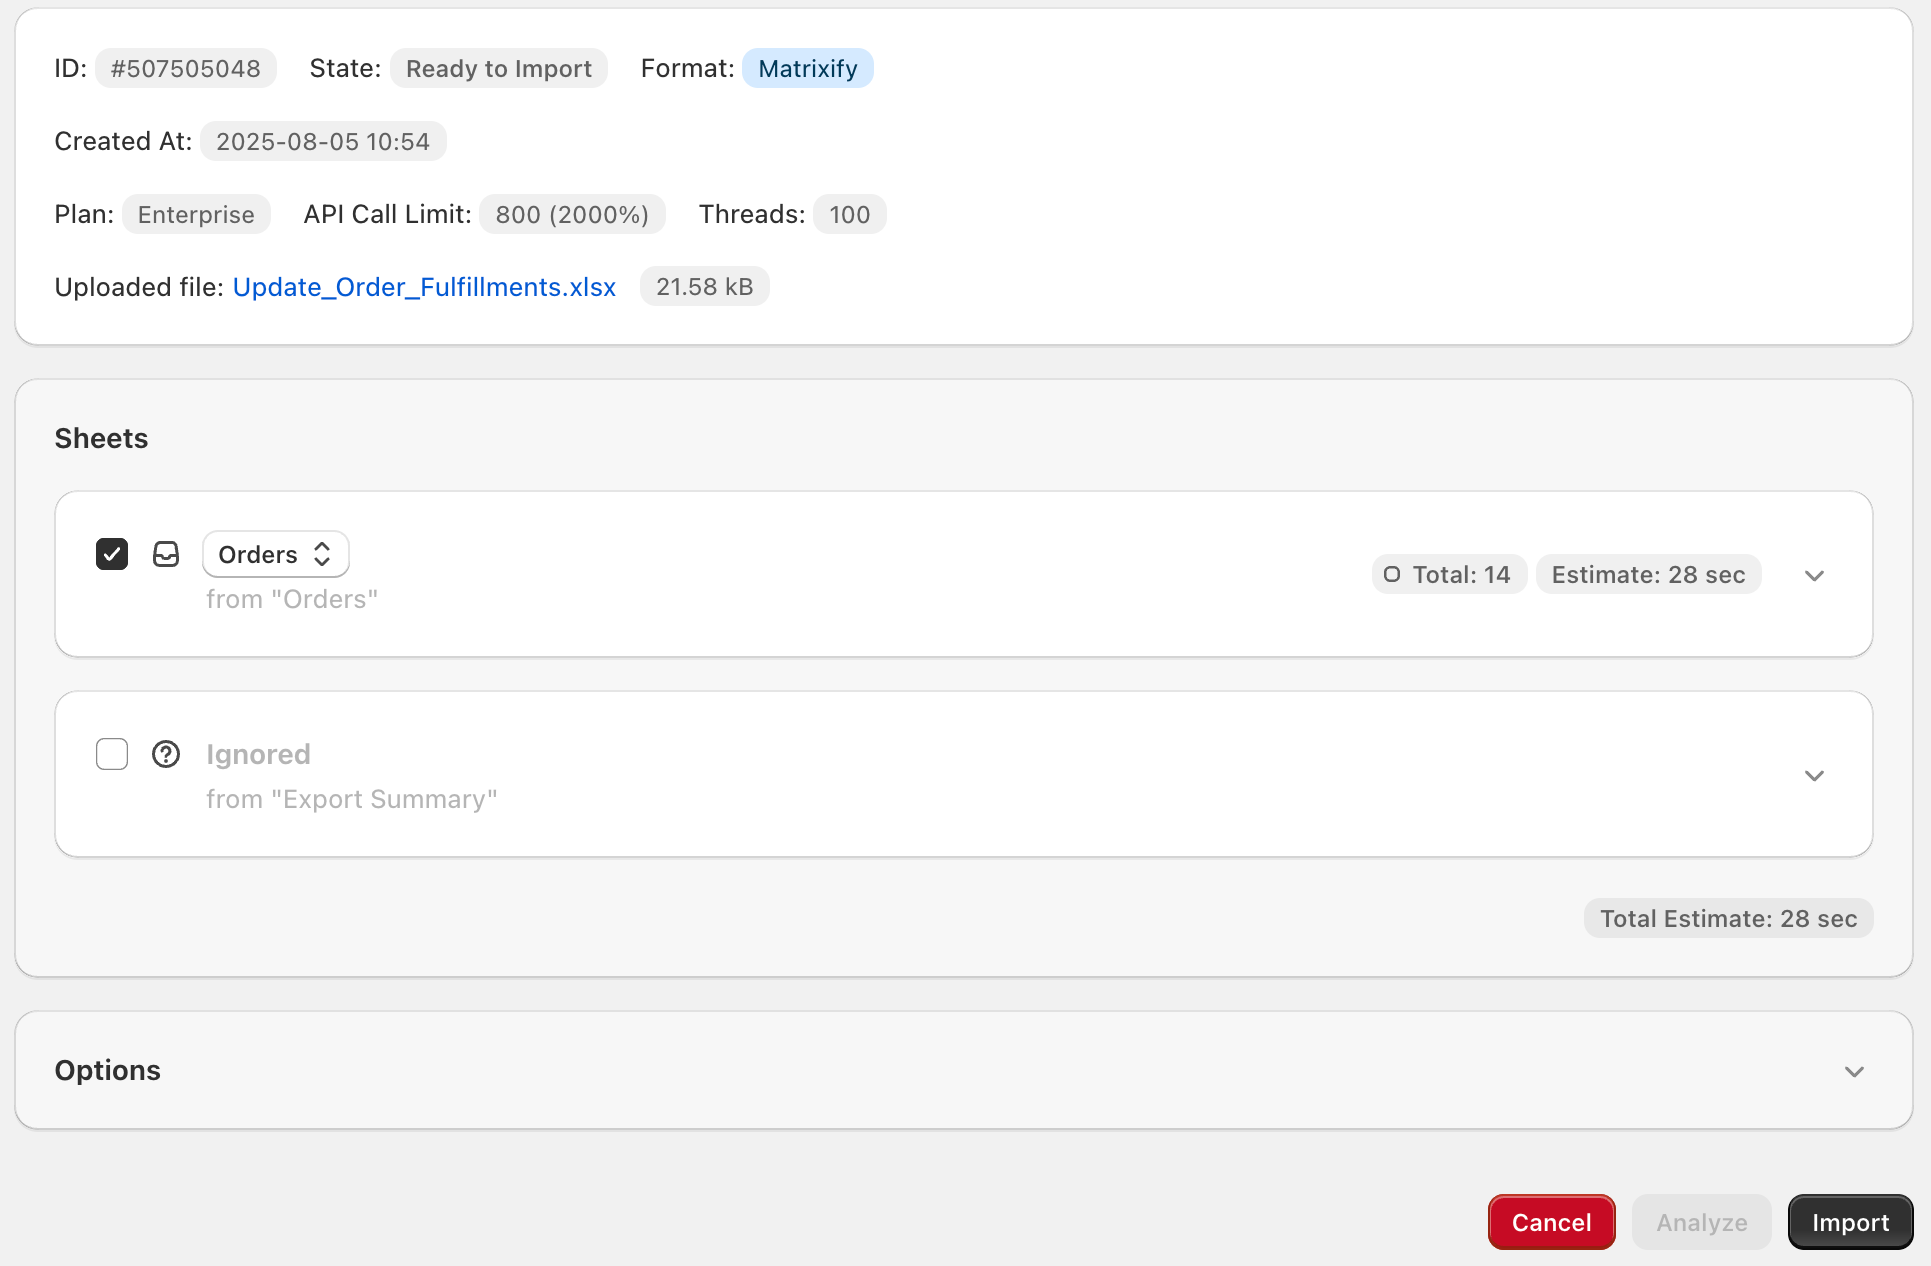
Once you have edited the file and saved it, you are ready to Import! Take your file and uploaded it to the app in the Import section of the apps homepage. The app will analyse and upload the file. Make sure the app has recognised the file as Orders and the correct amount of Orders have been recognised before you press the Import button:
If all looks correct, you can press the Import button. The app will then Import your Orders and if the app runs into any errors along the way you will be able to see them once the Import has finished by downloading the Import Results file.

Your Order Fulfilments will now be updated with their new Tracking Numbers!
Where to go from here?
- Install the Matrixify app from the Shopify App Store.
- See the other things that you can do with the Matrixify app.
- If you have any questions, please reach out to our support!
- Make sure to check out our Orders documentation to see all columns available for the Orders Export.


