
There may be times where you need to bulk cancel a batch of Shopify orders. Often in these situations, time is of the essence and you need a quick way to deal with hundreds, or maybe even thousands of orders in one go. Luckily, the Matrixify App is here to help make this process as quick and easy as possible. The following tutorial explains how.
To Cancel Shopify Orders, do the following steps:
- Export the Shopify Orders you want to bulk cancel.
- Delete Columns you will not need for the import.
- Update Command and Cancel columns.
- Save and Import.
Note that this will not replace the orders – this will truly update the existing ones.
Consider before starting
- It is very simple to cancel Shopify orders with the Matrixify app, but be careful, You cannot un-cancel the cancelled Order.
- To archive or unarchive Orders, follow this tutorial: Archive and Unarchive Shopify Orders in Bulk.
- Cancelling an Order where a line item/product is a Gift Card will also deactivate and cancel that Gift Card which cannot be re-activated.
1. Export the Shopify Orders you wish to bulk cancel
The first step would be to export your data.
In the Matrixify app Home page, create new Export.
The app will open a new export page where you need to select “Orders” from the “Select Sheets” drop-down. Once you have selected “Orders”, you must select the “Basic Columns” checkbox.
No need to select any other order data.
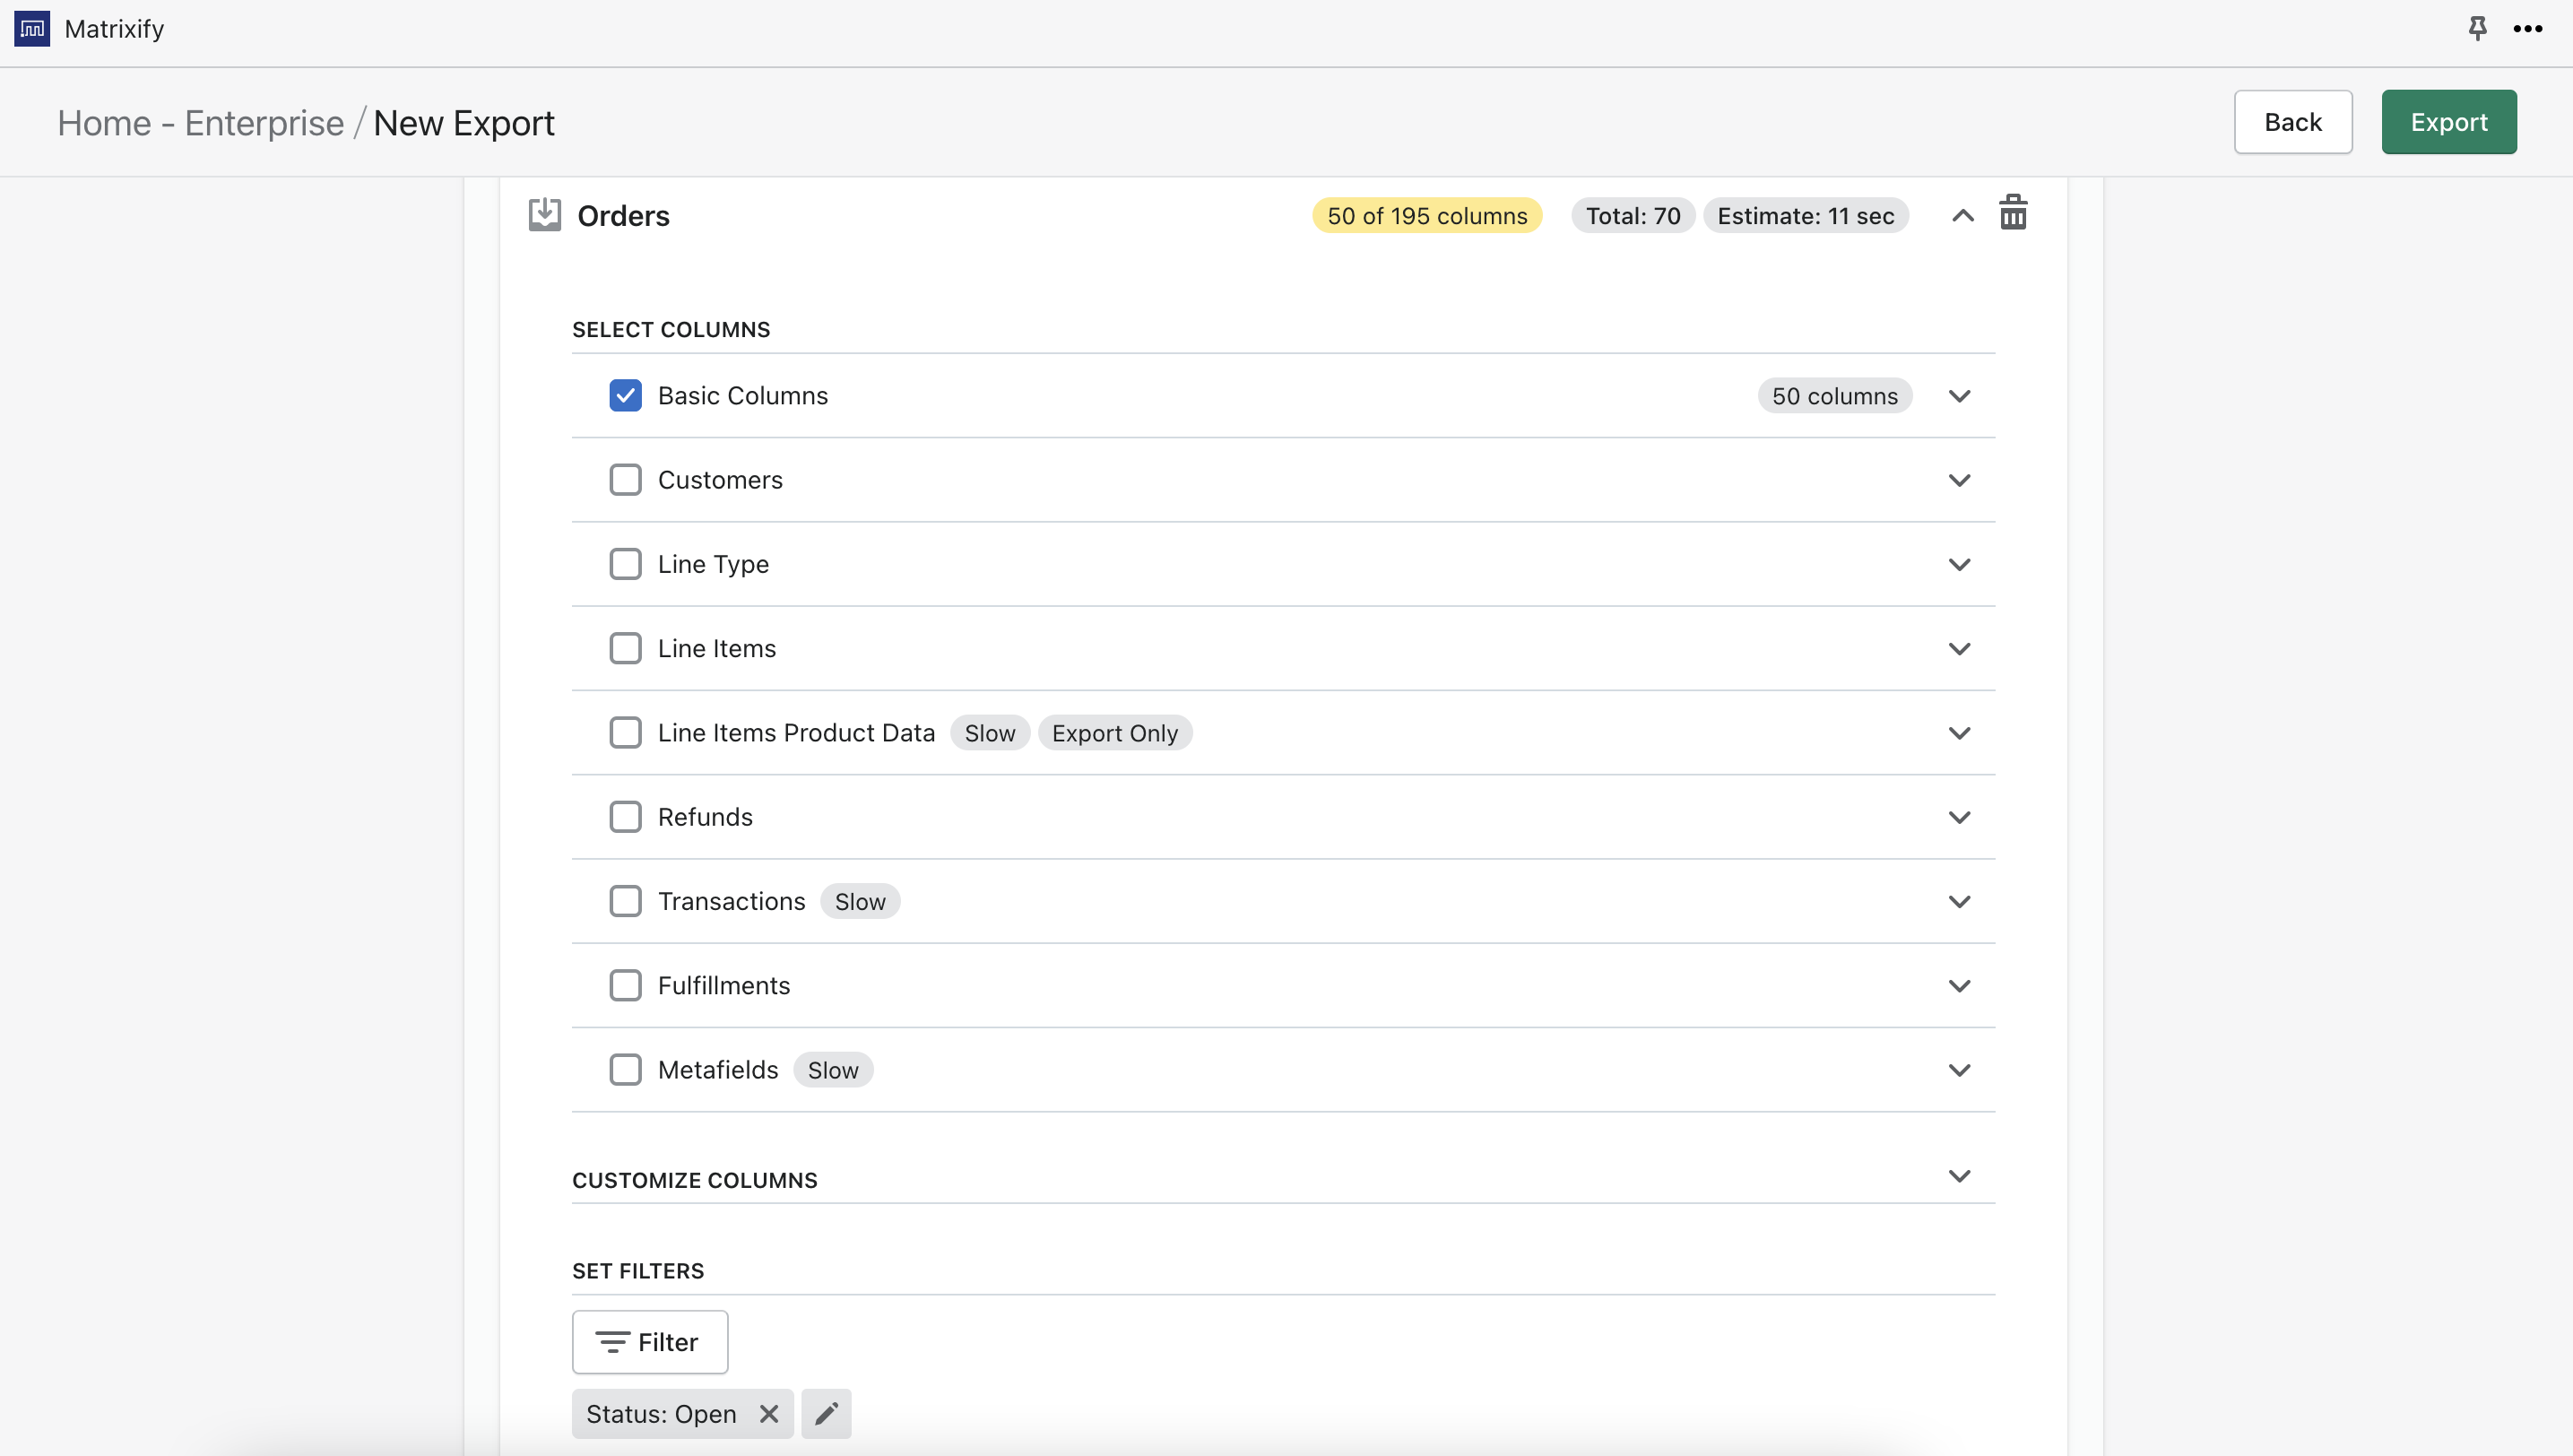
You can also apply filters by pressing the “Filter” button.
For Advanced Matrixify users, you can also open the Basic Columns group and select to export only fields listed in step #2.
To start the export press “Export” button.
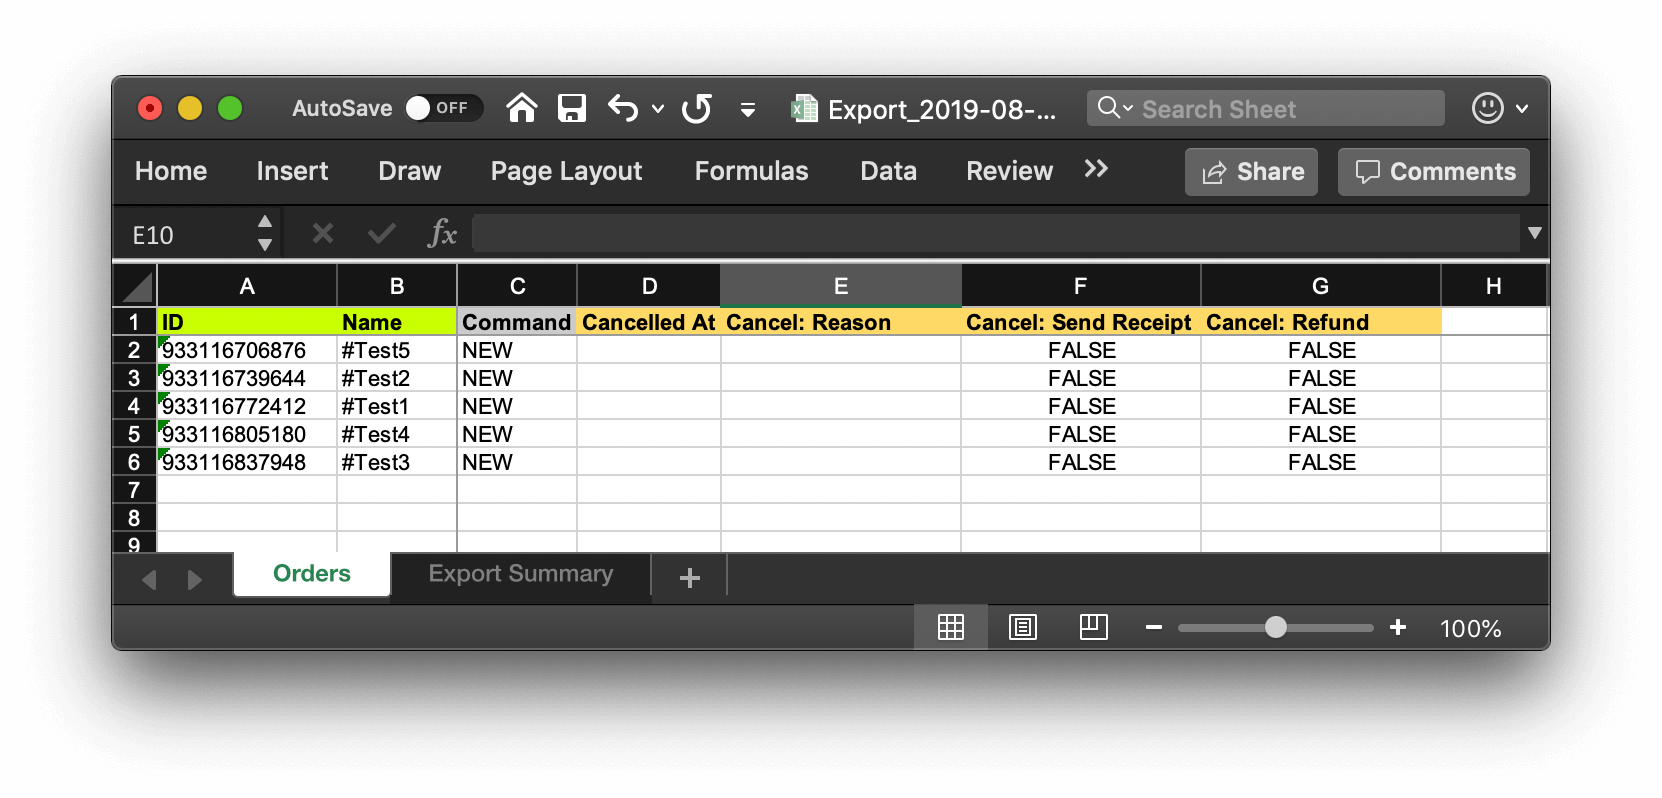
2. Delete columns you will not need for import
In the exported file you would have all Basic Columns from the Order.
Since we do not need all of them then you can completely delete all columns, leave only the following columns in your Excel file
-
- ID
- Name
- Command
- Cancelled At
- Cancel: Reason
- Cancel: Send Receipt
- Cancel: Refund
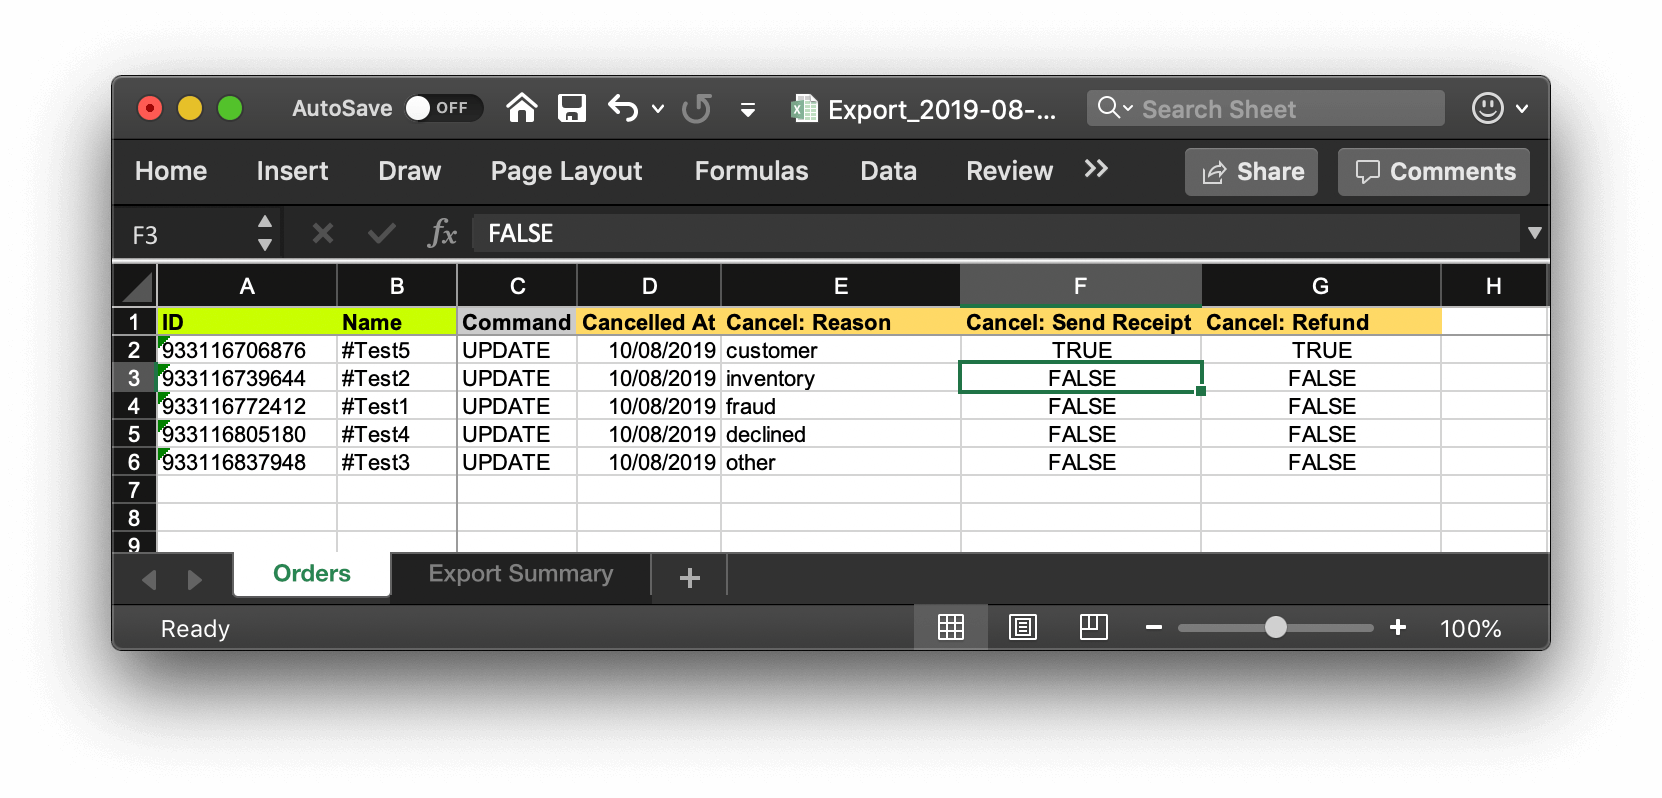
3. Update Command and Cancel columns.
- Set the “Command” column values to “UPDATE“.
- Set the “Cancelled At” column values to whatever date (it doesn’t matter what date it is because orders will anyway get cancelled with today’s date).
- Set the “Cancel: Reason” column values to one of the following: customer, inventory, fraud, declined, other. You can leave this empty, then the app will assume other by default.
- Set the “Cancel: Send Receipt” column to TRUE if you want the customer to receive the e-mail notification about the Order cancellation.
- Set the “Cancel: Refund” column to TRUE if you want to refund the whole Order when cancelling. If you don’t set it to TRUE, then it will not get refunded automatically. To refund partially, you can set up the Refund columns and rows as explained in this tutorial.
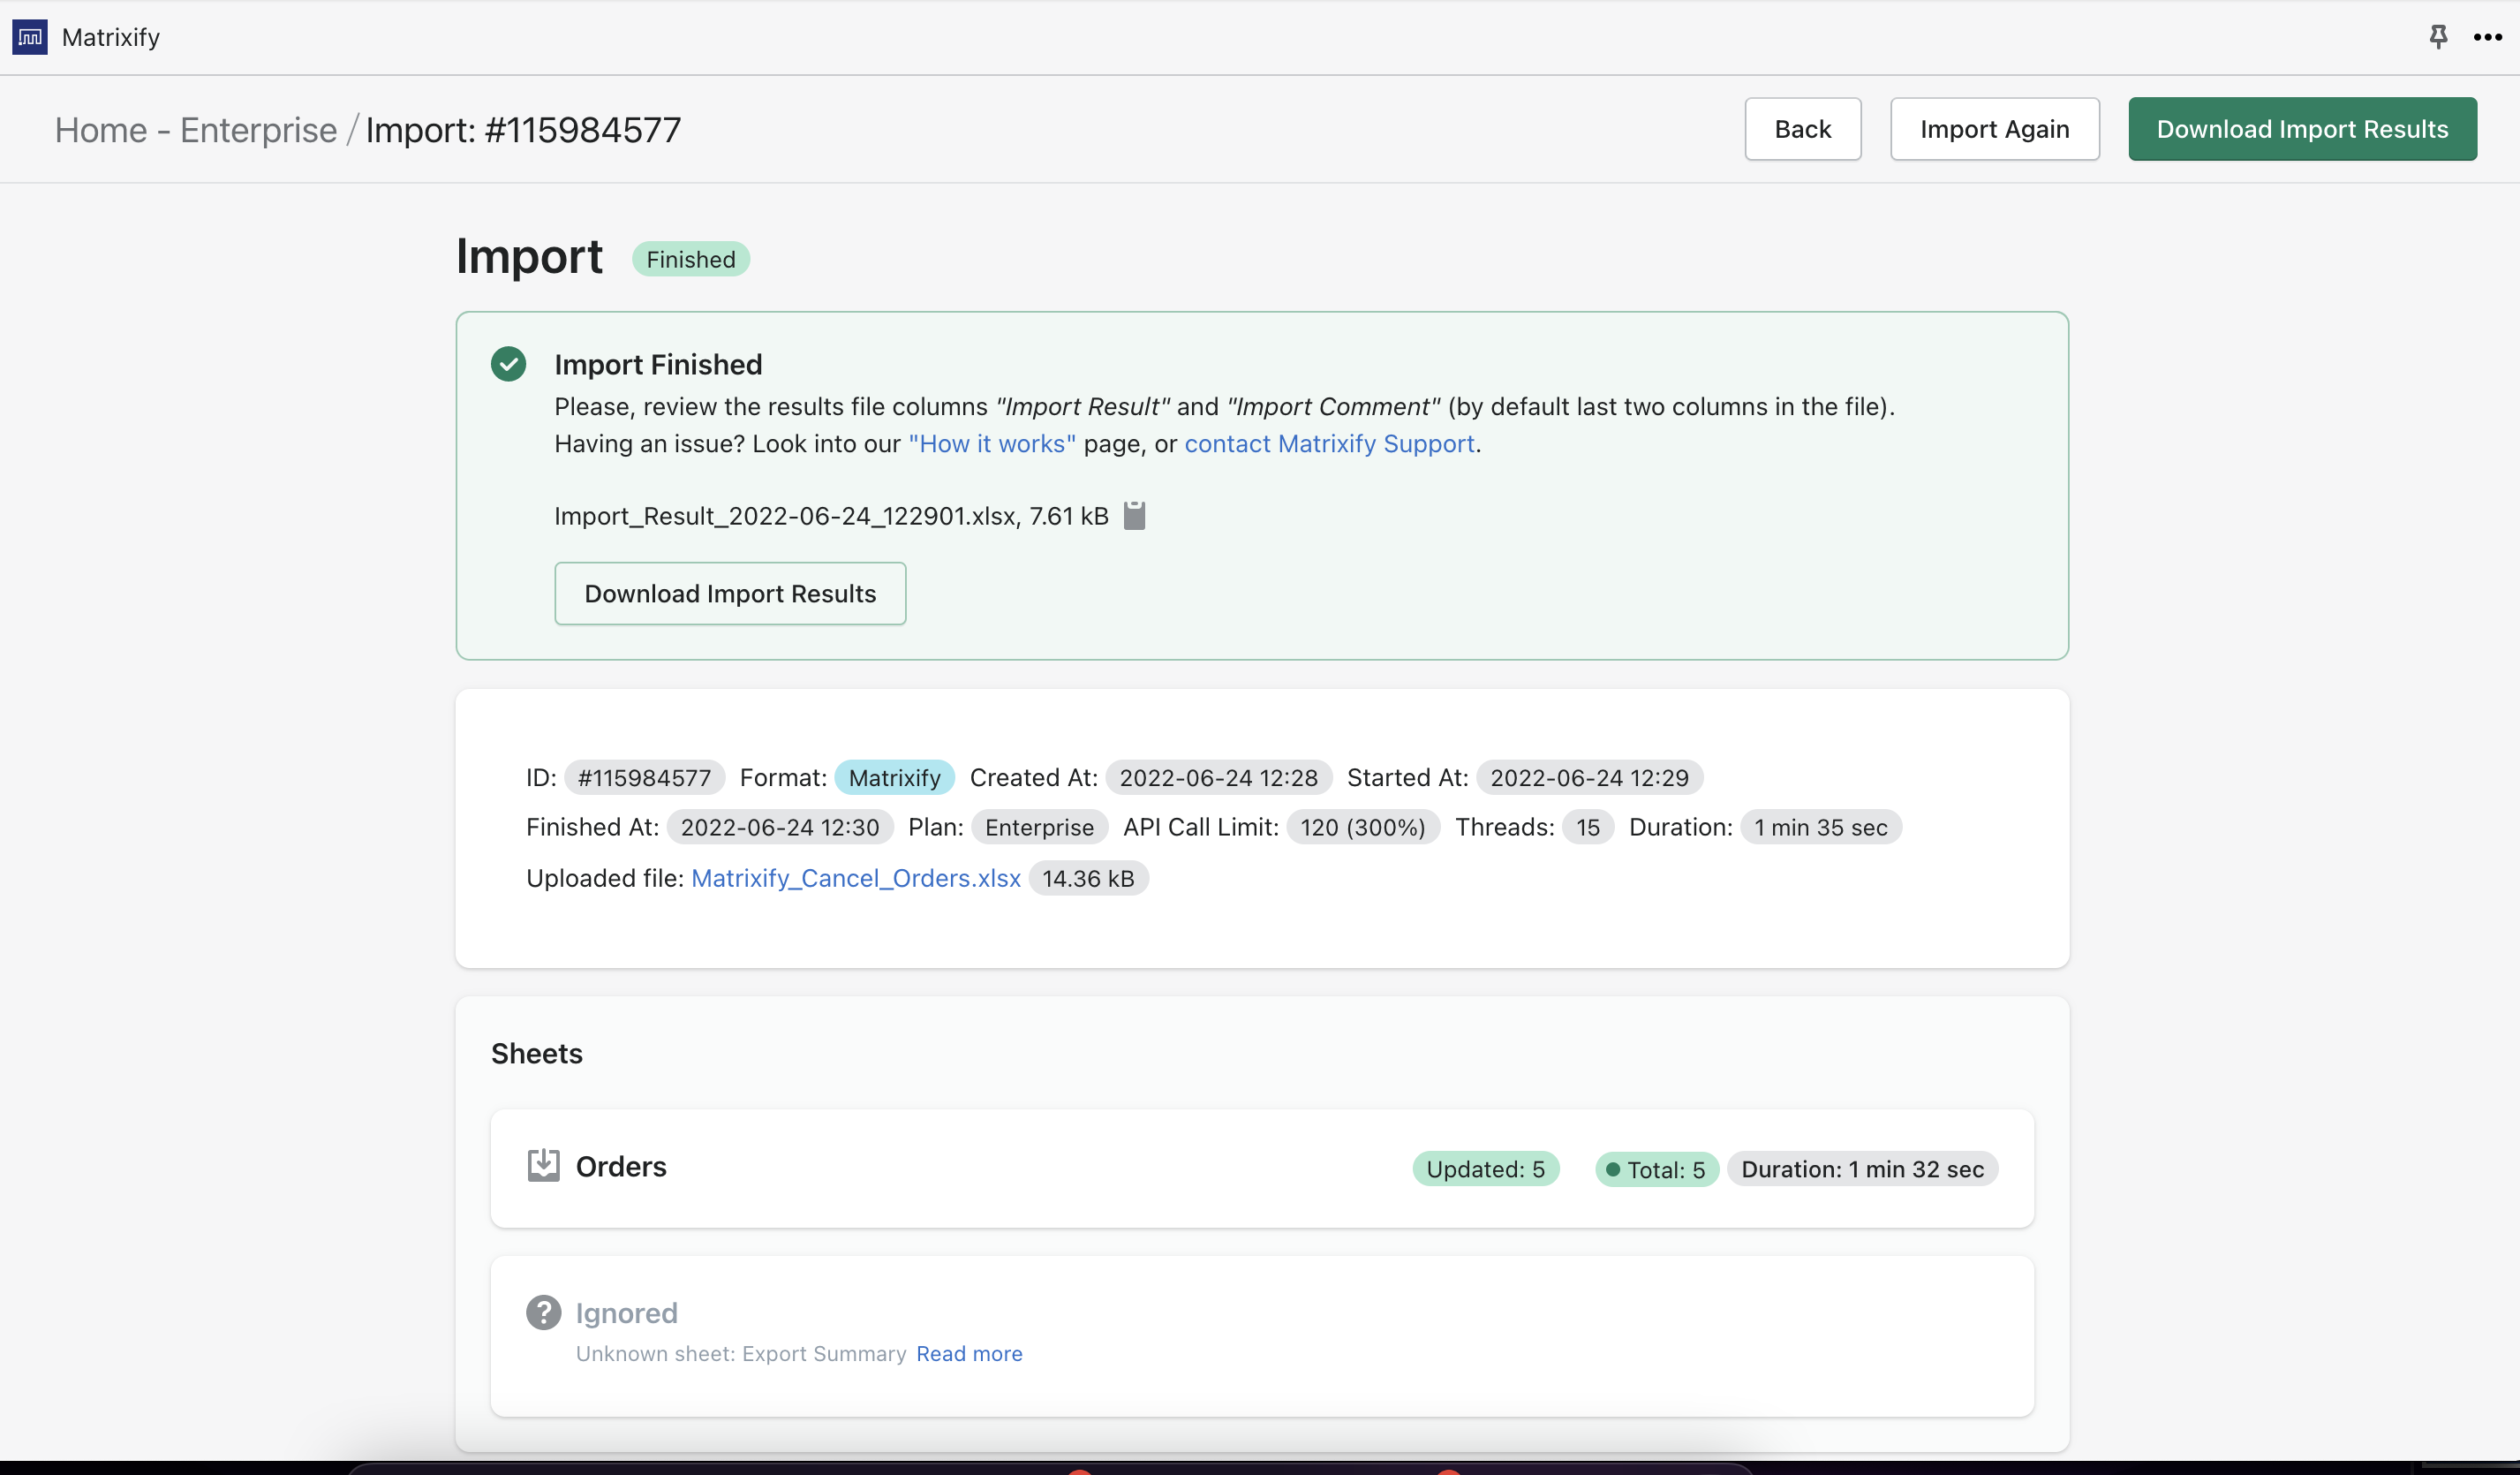
4. Save and Import.
Go back into the Matrixify app.
Import the file with the orders you want to bulk cancel back into Shopify.
Good to know
- Your Excel sheet (tab) name must be “Orders” – for the app to know that you are importing Orders.
- In case you are importing from CSV file then your CSV file name must be “Orders.csv” – for the app to know that you are importing Orders.
- You cannot cancel the Fulfilled Order.
- If you also need to Refund the specific payments for those Orders, you need to also import the Refund Lines, as demonstrated in this tutorial.
- If you need to delete the Shopify Orders, you can do it like explained in the tutorial “Bulk Delete Orders from Shopify“.
- Check out Matrixify tutorial on how to bulk refund Shopify Orders.


