
If you’re running a store with multiple locations, managing inventory levels can be a daunting task. But don’t worry, we’ve got you covered! With Matrixify app, you can easily adjust and set inventory levels for your Shopify inventory locations in bulk. This tutorial will guide you through the process step-by-step, making inventory management a breeze. Let’s dive in!
In Short
- Export your Products with checkboxes:
- Basic Columns
- Inventory / Variants
- Multi-Location Inventory Levels
- Delete unnecessary columns from the exported file. You only need the following columns:
- ID
- Handle
- Variant ID
- Variant SKU or Variant Barcode
- Inventory Available: ….
- Inventory Available Adjust: ….
- Update Multi-Location columns.
- Inventory Available: …. – if you wish to set inventory quantity.
- Inventory Available Adjust: … – if you wish to adjust inventory quantity.
- Save & Import.
- Enjoy your updated Inventory levels.
Let’s look into each step in detail:
1. Export your Products
You do not require all the information about the products so you only need to select following checkboxes in Matrixify export section once you have checked “Products” from the “Select Sheets” drop-down:
- Basic Columns
- Inventory / Variants
- Multi-Location Inventory Levels
Once selected you can press the “Export” button to start the export. 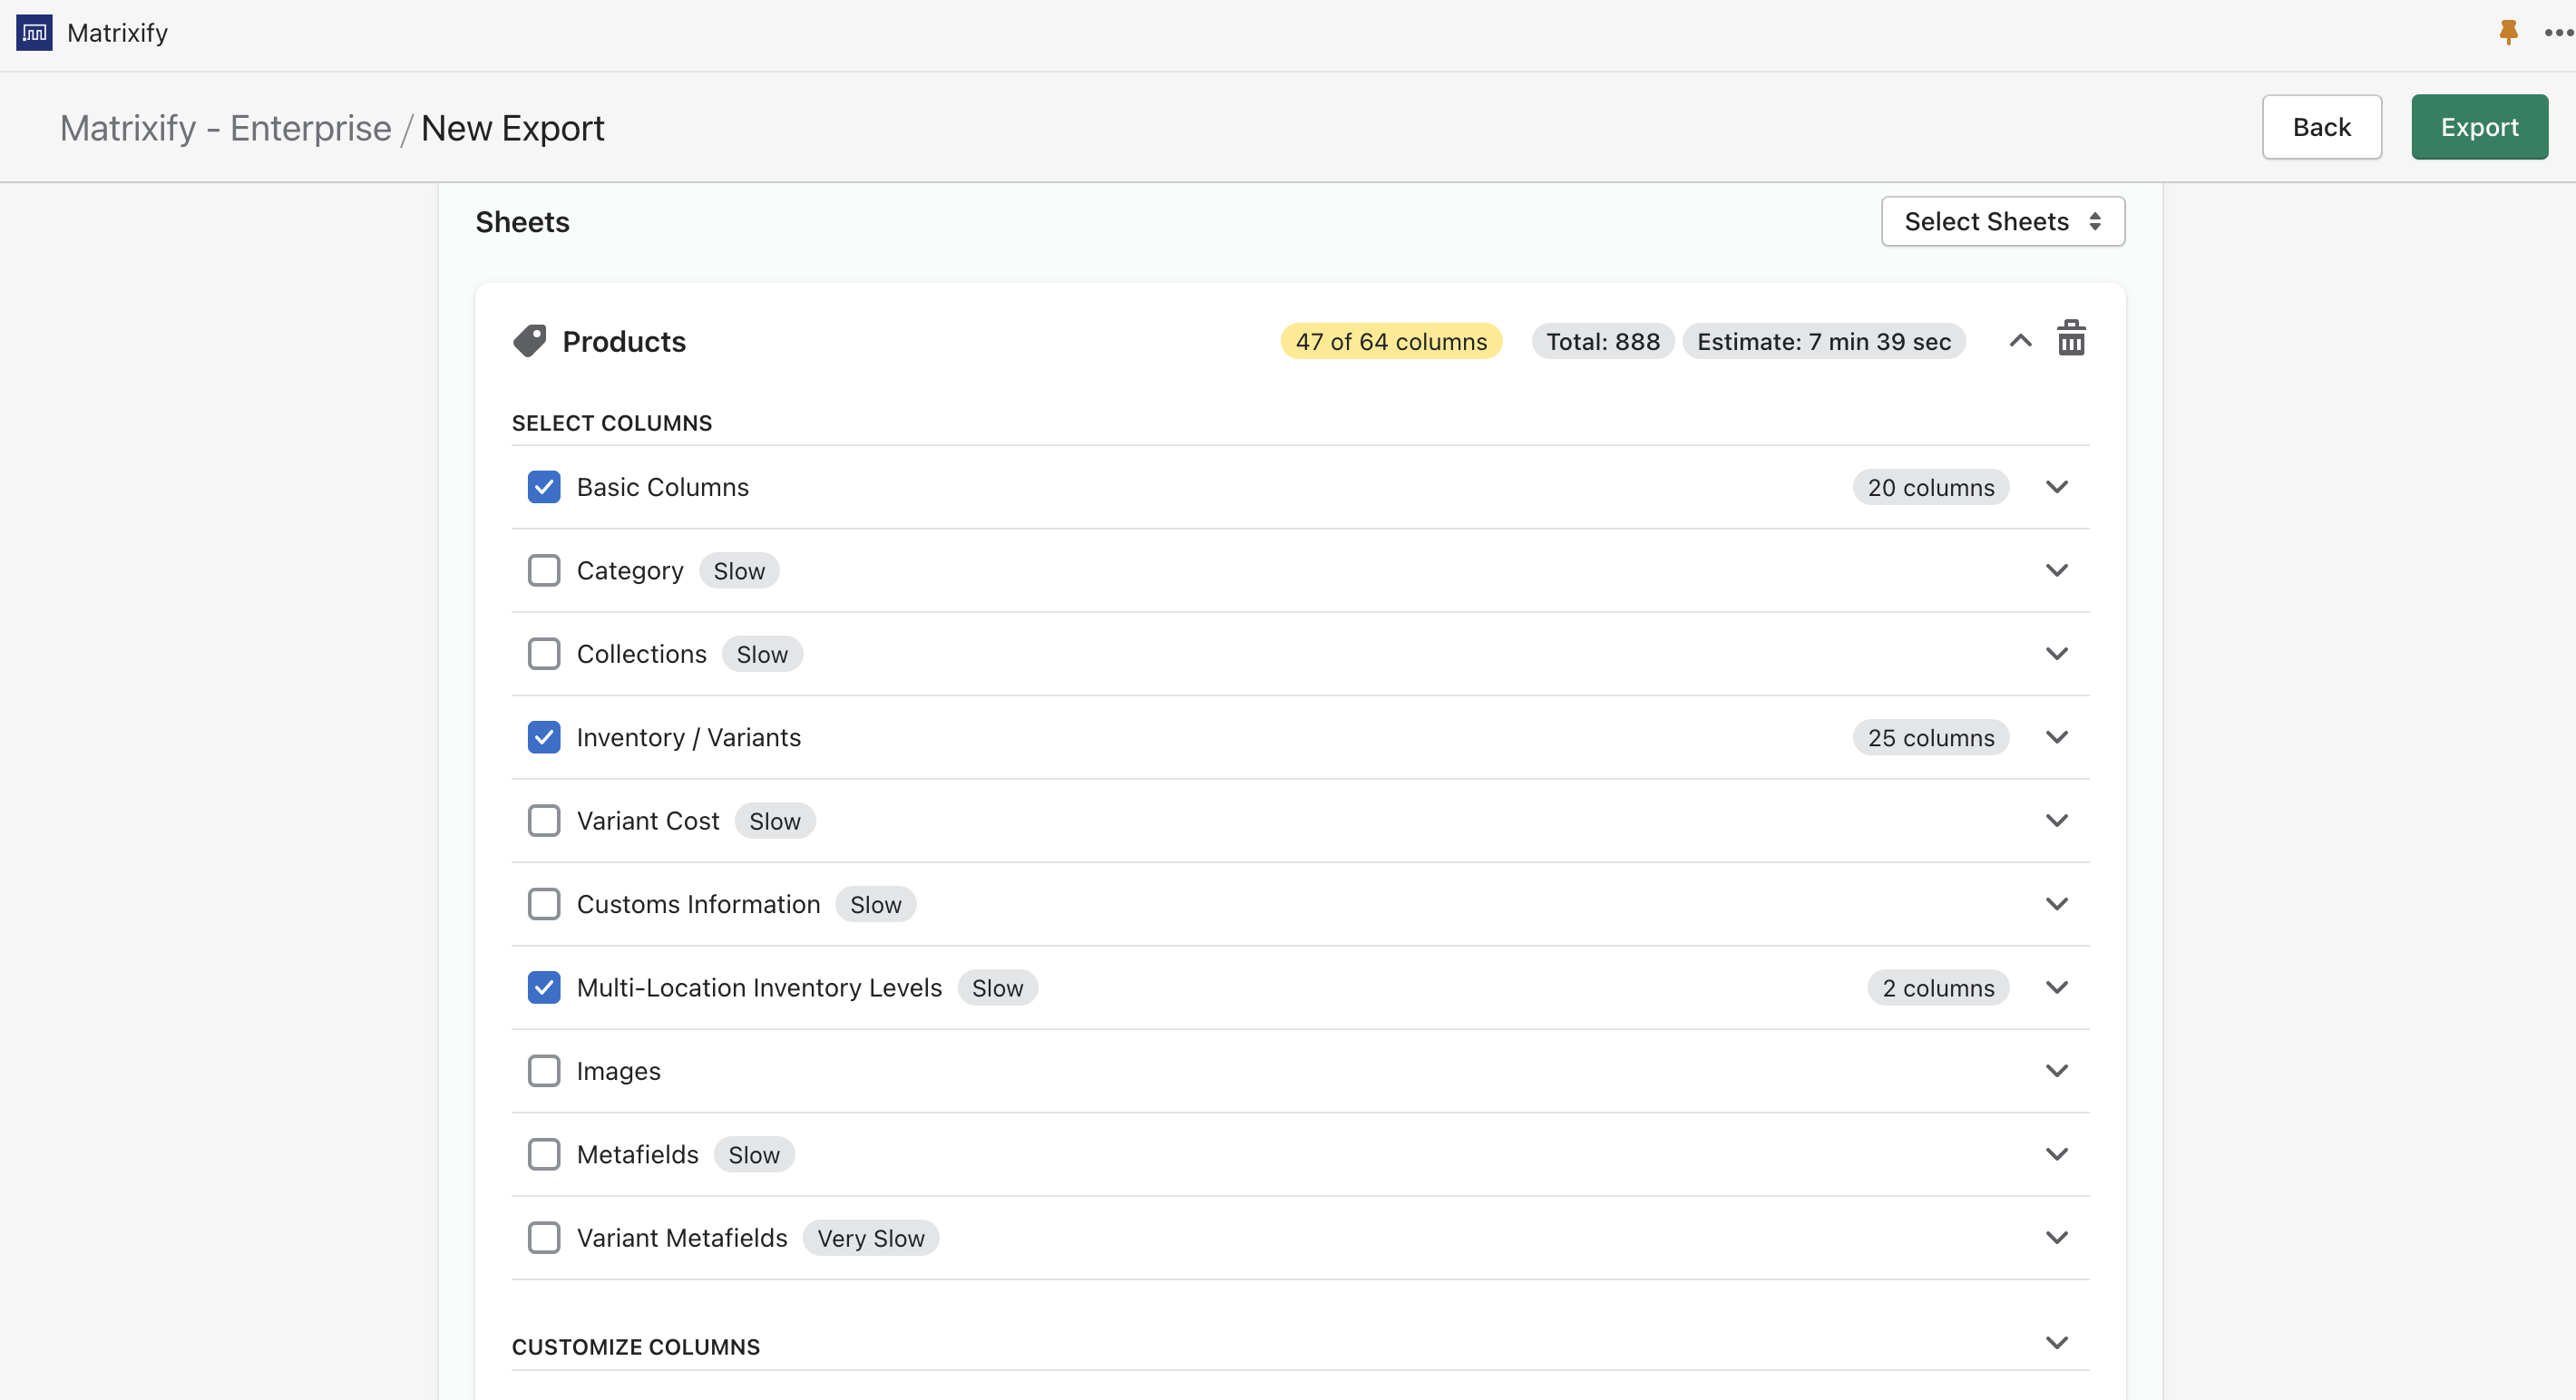
2. Delete unnecessary columns
When export has been finished you can press the “Download Exported File” button to download the file and start editing.
The first thing that you would need to edit would be deleting all irrelevant information from the file. So delete all columns except:
- ID
- Handle
- Variant ID
- Variant SKU or Variant Barcode – These are both optional, but preferred so you can more easily see what item you are updating by the SKU.
- Inventory Available: …. – Leave only columns for the location you are updating. If you wish to adjust your Inventory levels at this location, then you do not need these columns.
- Inventory Available Adjust: …. – Leave only columns for the location you are updating. If you wish to set your Inventory levels at this location, then you do not need these columns.
You can also delete the rows of Products or Variants that you do not wish to update.
So in my example file, I will only wish to add a specific amount of items to one location named “RW Warehouse” and set specific inventory level at the location “Jonathan Ball”, so I only need columns “Inventory Available Adjust: RW Warehouse” and “Inventory Available: Jonathan Ball“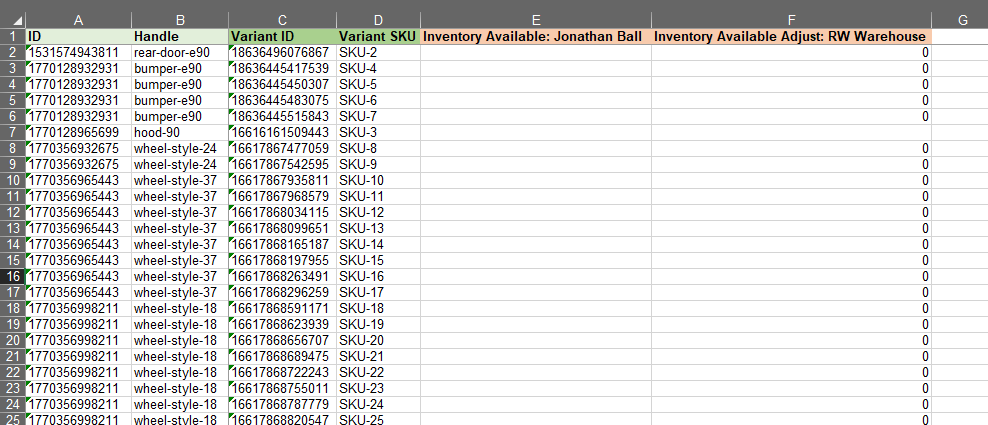
3. Update Multi-Location columns
Now you can fill your Location columns with the values that you wish to be set or adjusted. 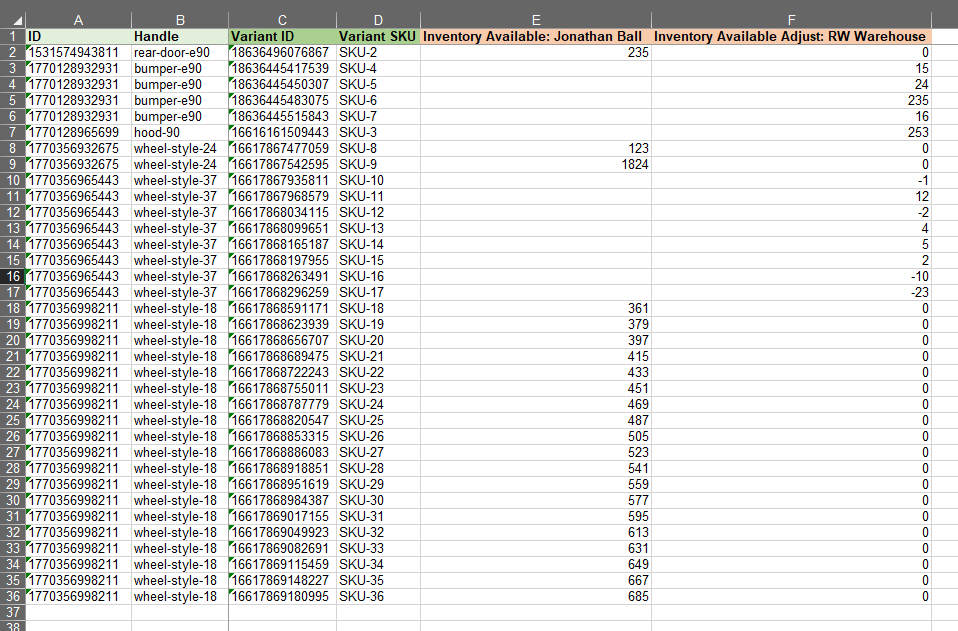
Set items to be stocked at a location when not tracking inventory
Shopify also allows you to specify at what locations you are stocking the inventory even when you do not have an inventory tracker turned on.
In that case, you can use the same “Inventory Available: …” column and set the value “Stocked“.

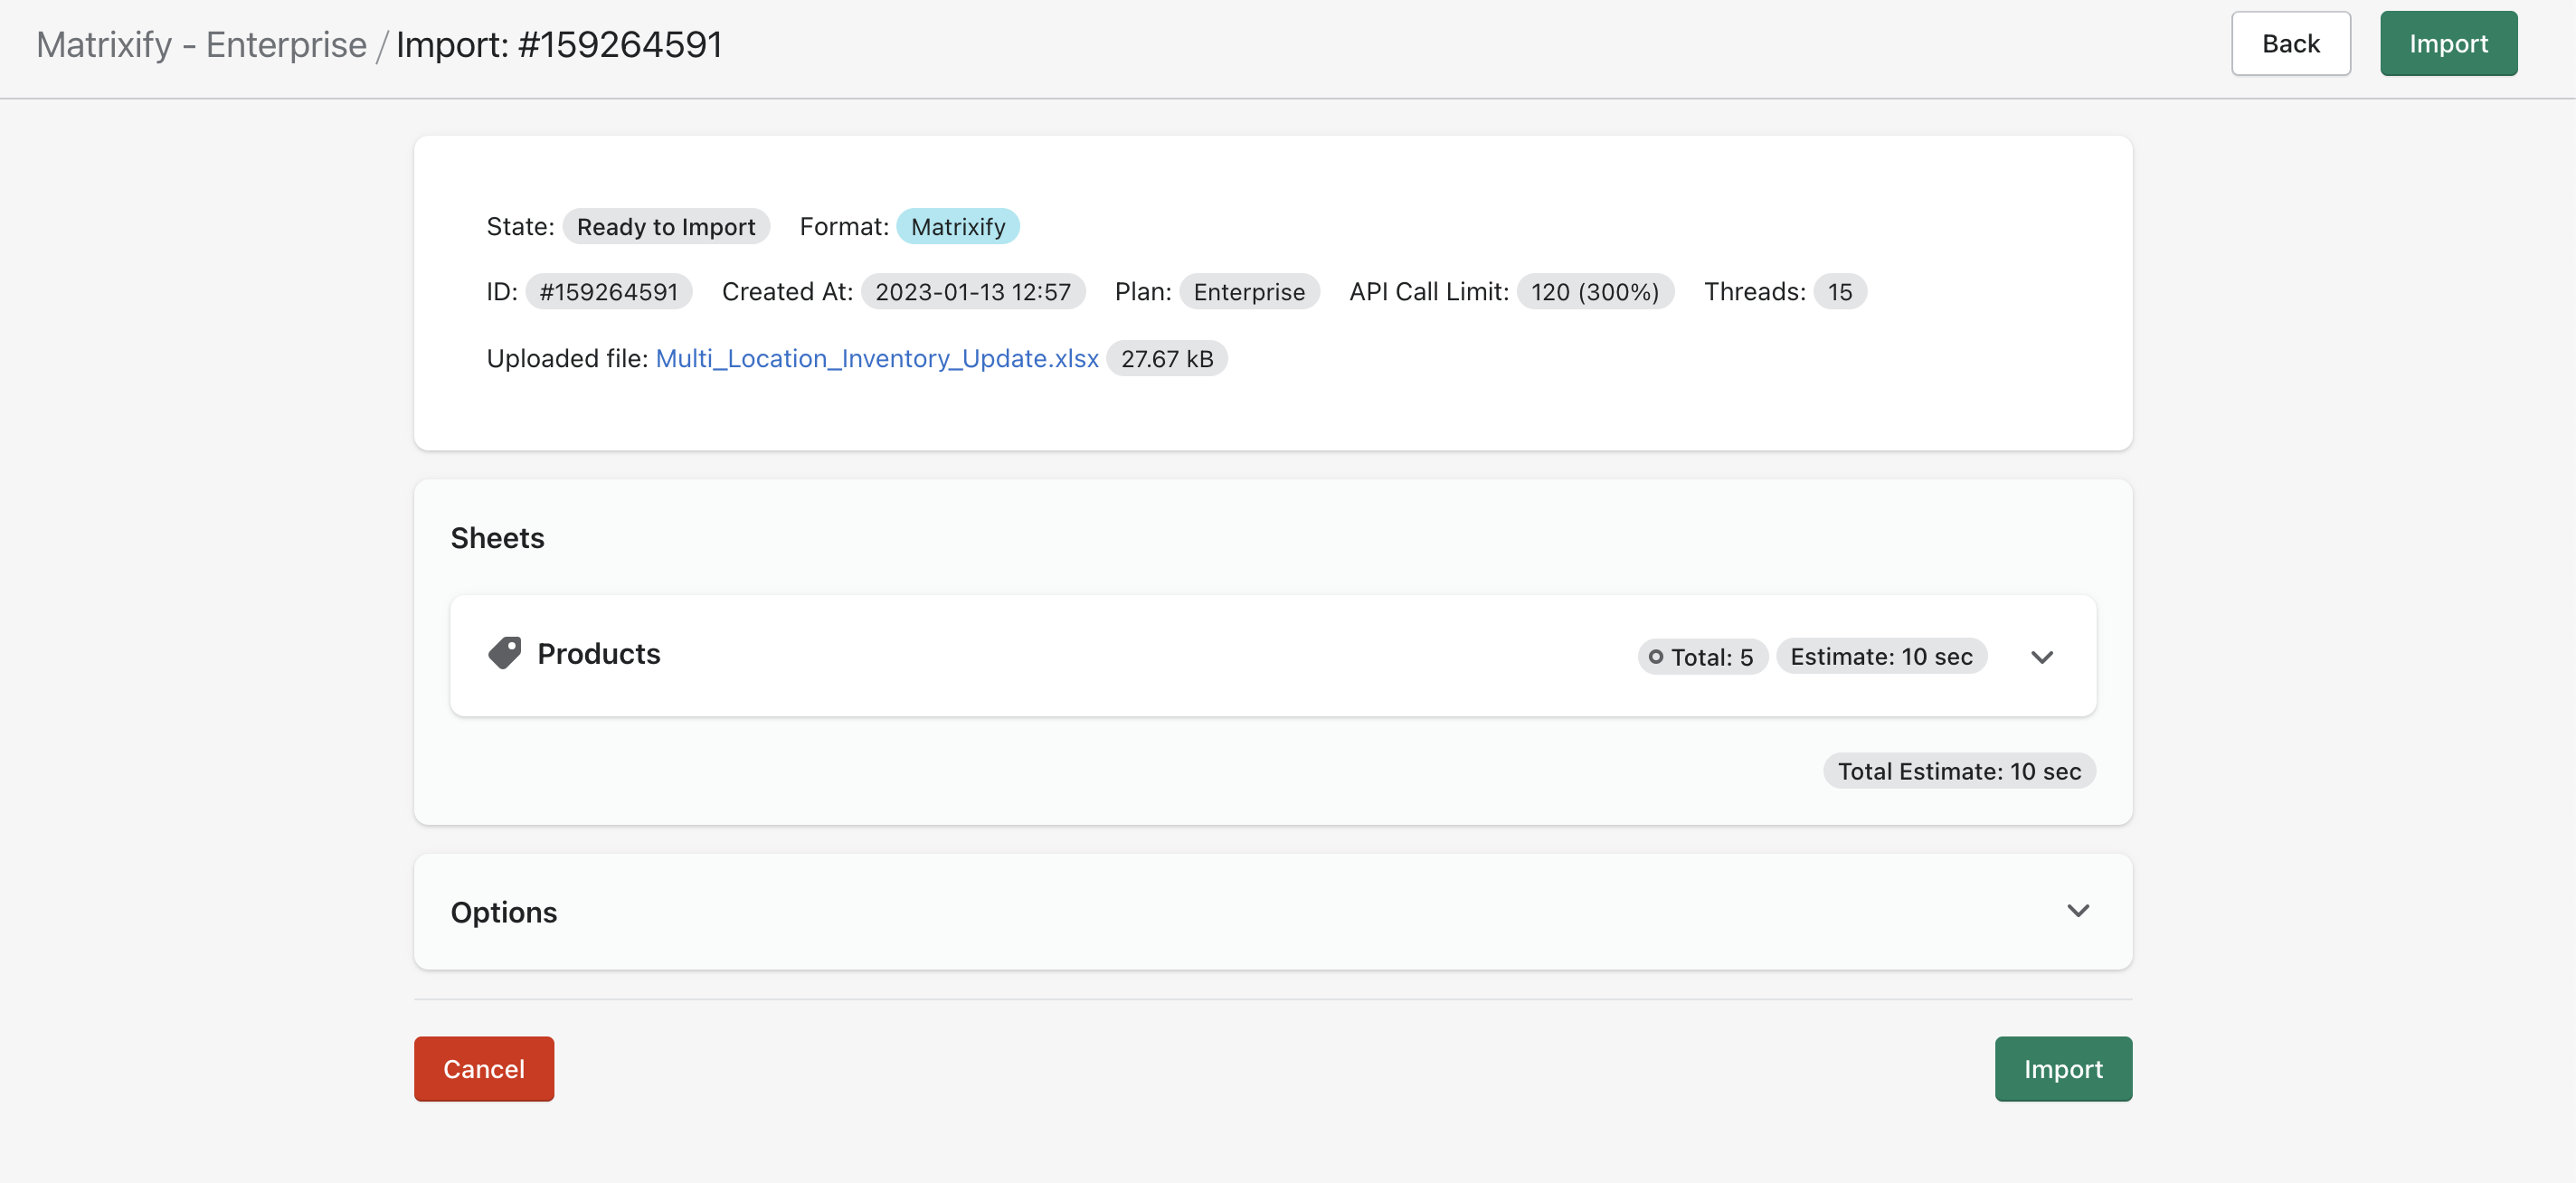
4. Save & Import
Now you can save the file. Go back to the Matrixify app and import the file in the Import section. The app will analyze the file and count how many Products you are importing.
Press the Import button to start the import.
If you see any Failed items, then after the import has finished, you can download the Import Results file and look into the “Import Comment” column. It will tell why the particular Product has failed. Then you can fix that issue and re-import just those failed and fixed rows again.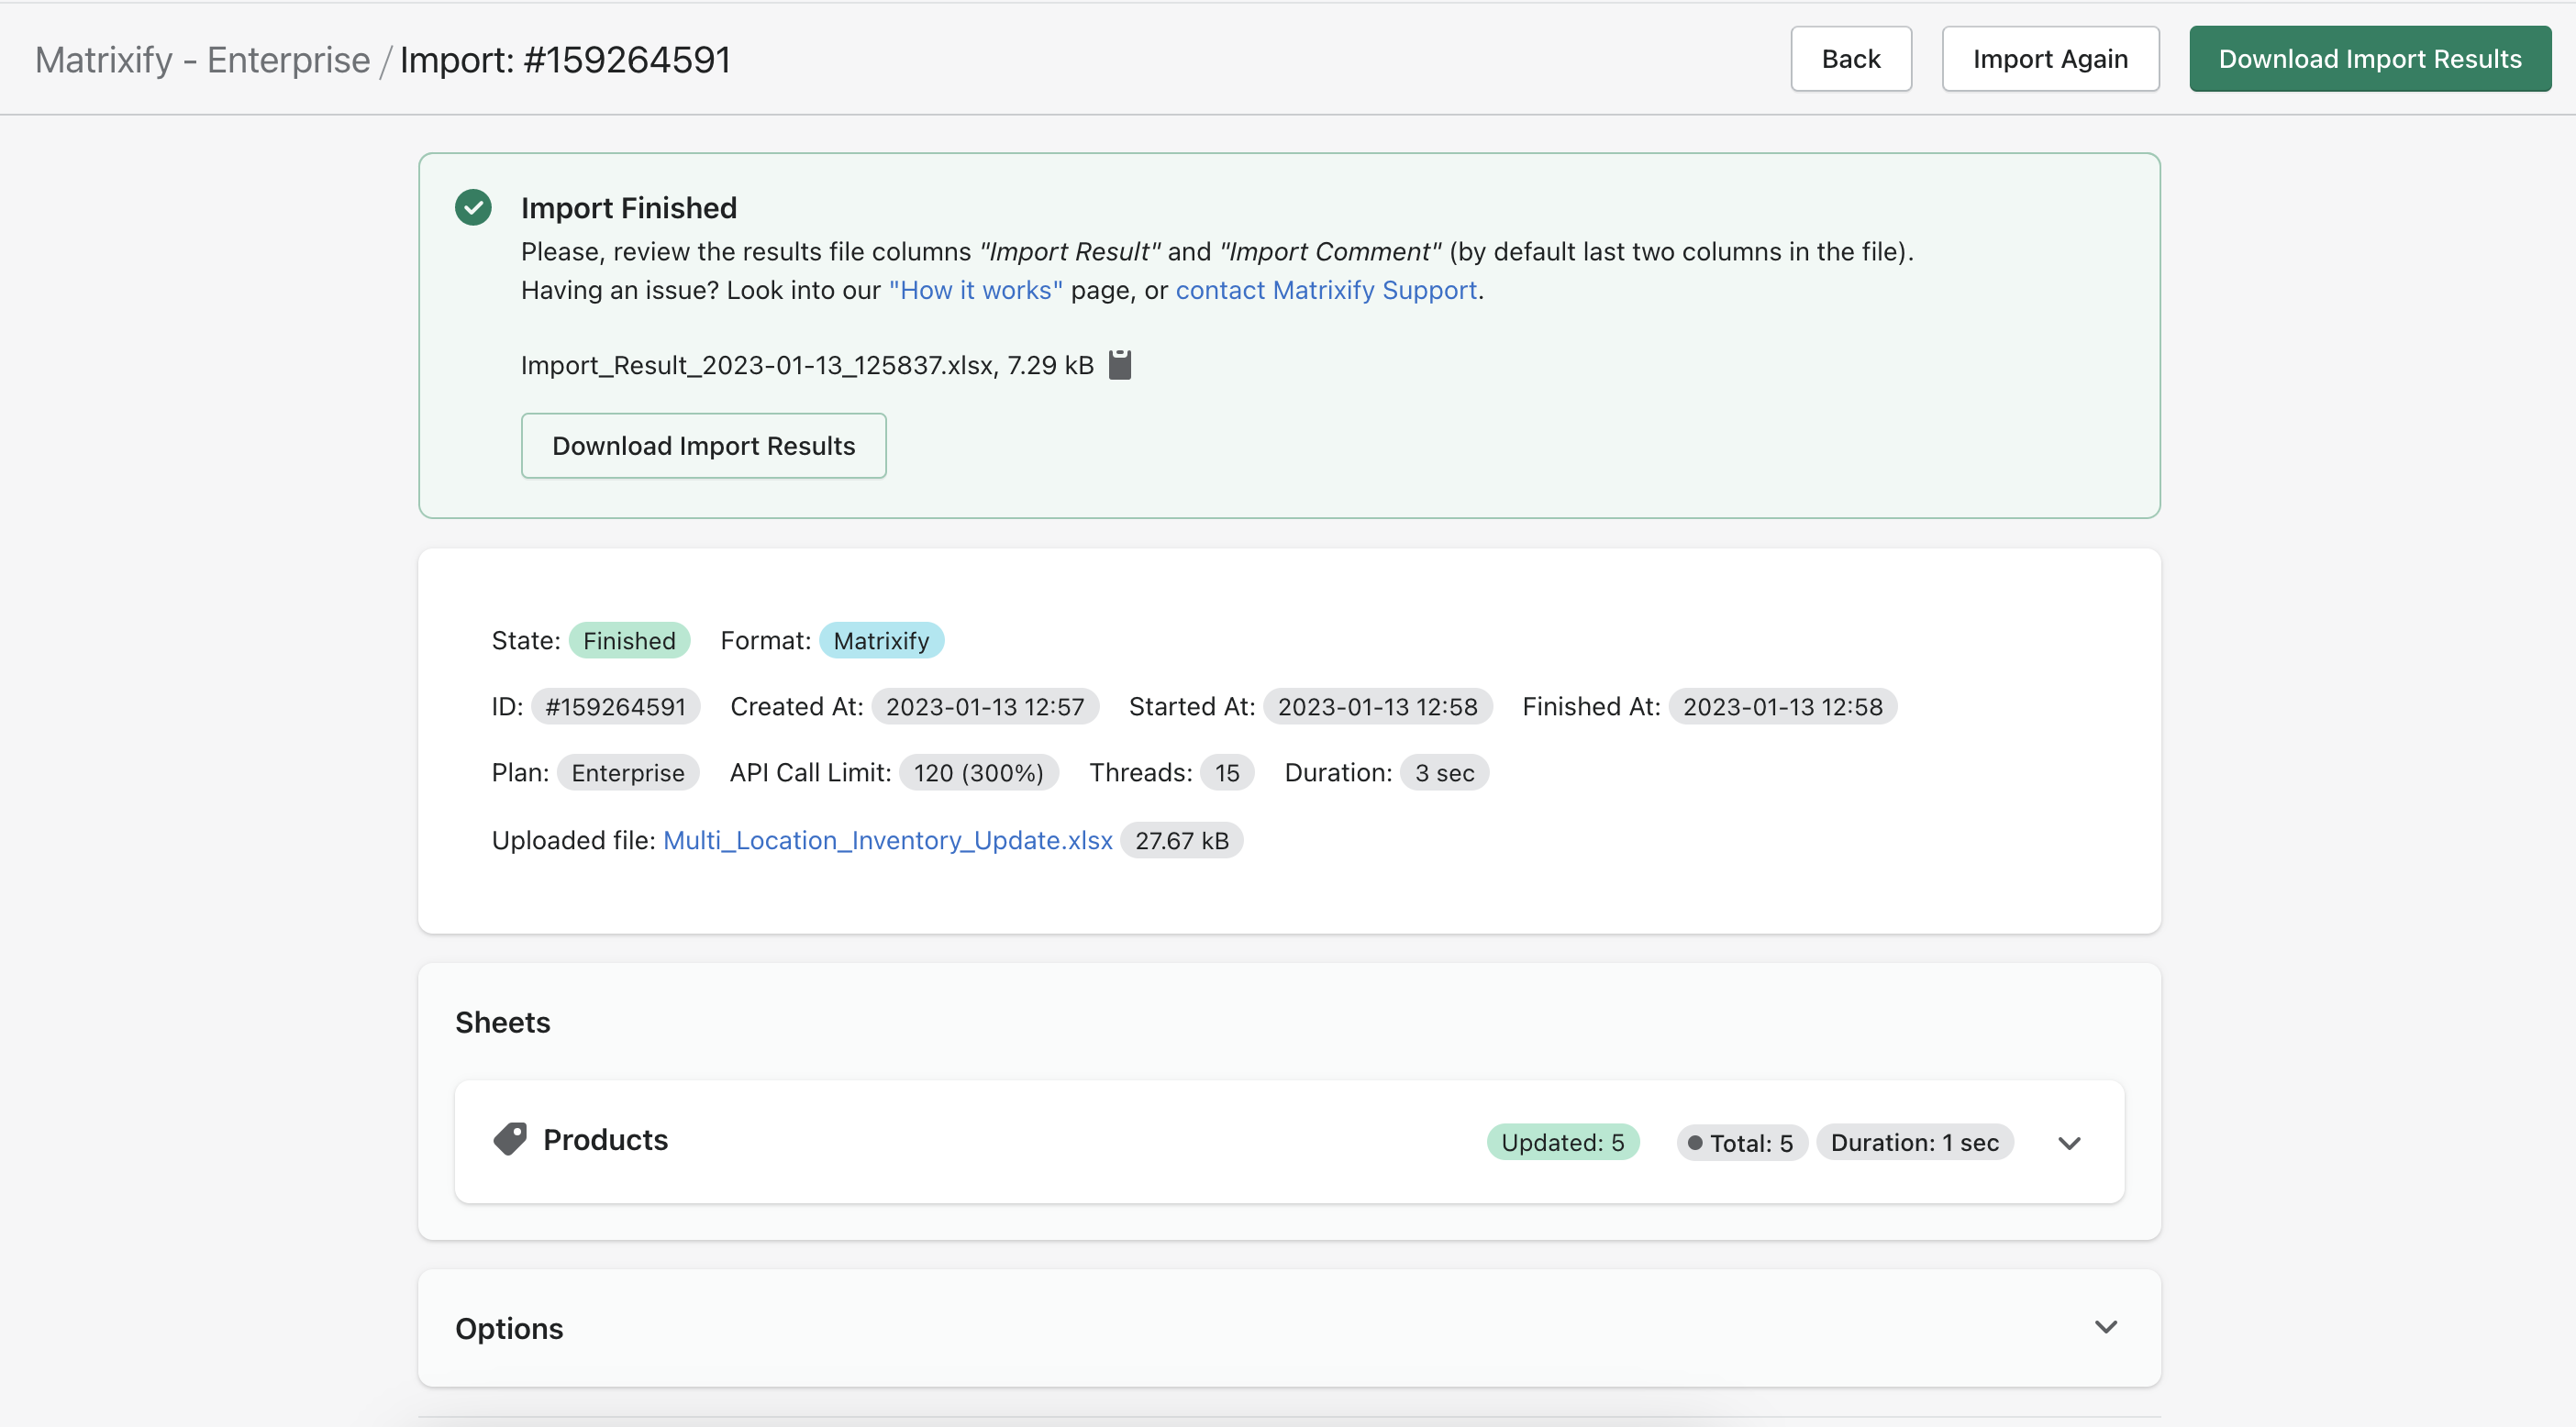
5. Enjoy your updated Inventory levels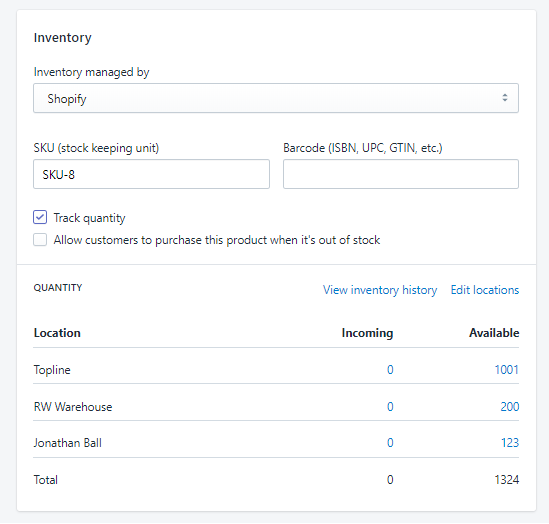
What to do next?
- Install the Matrixify App.
- Importing the Inventory column empty will remove that location from the Variant.
- Check out more information about multi-location importing and exporting.
- Check tutorial on how to update Products only by Variant SKU.
- Contact Matrixify support if you run into any issues or have additional questions.


