
The Matrixify app fully supports Shopify Multi-Location Inventory and has implemented all the required changes for all types of items.
Shopify Admin Settings
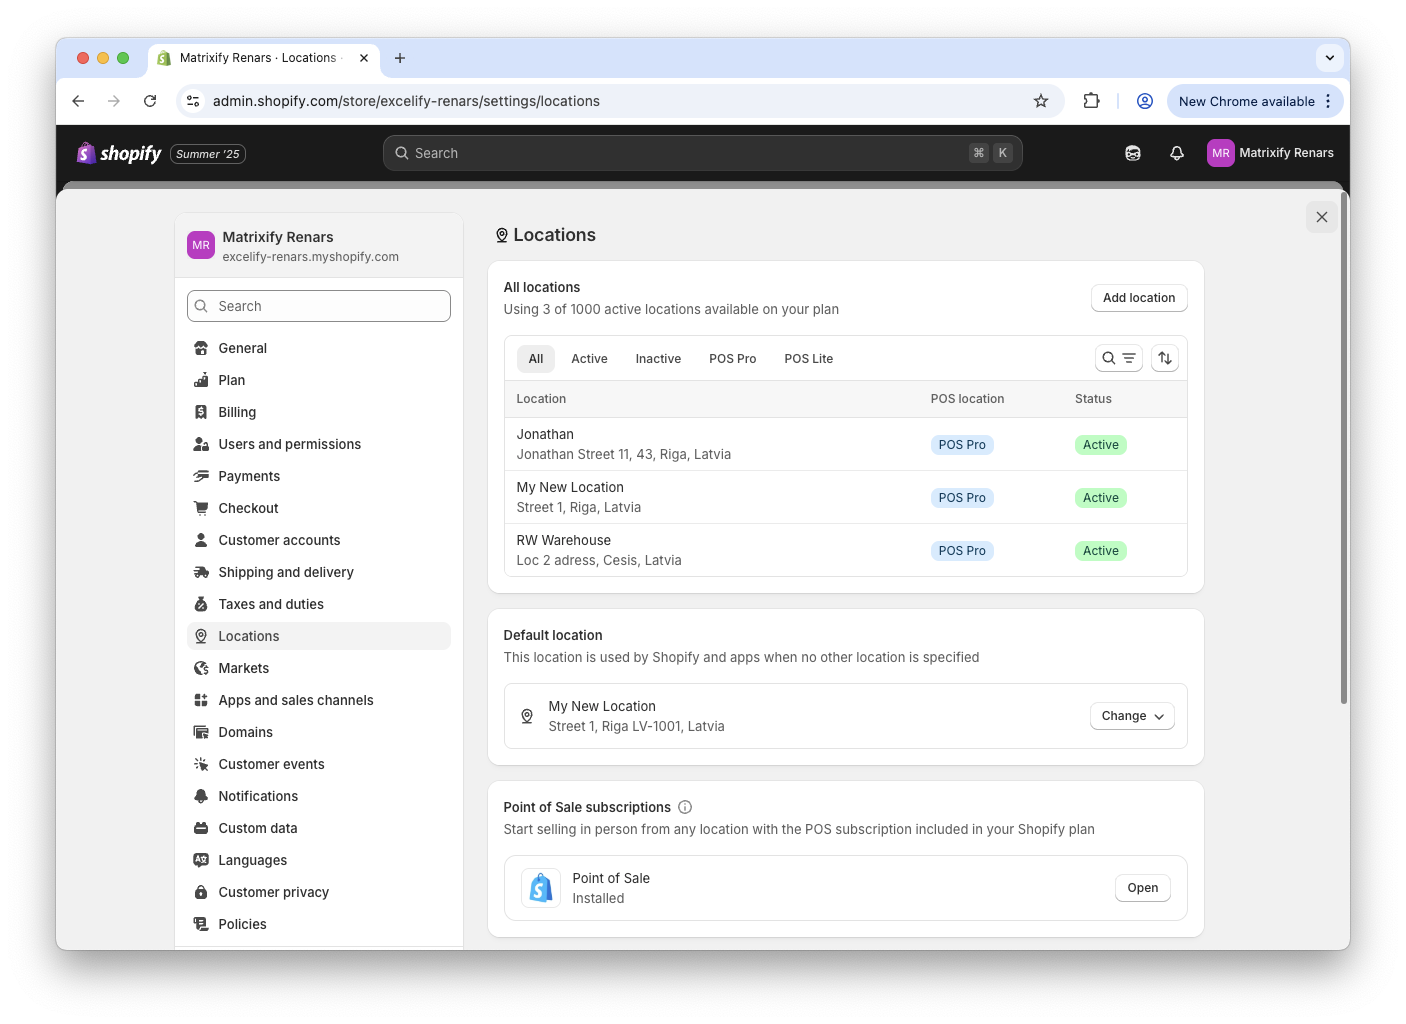
When your store has a Multi-Location Inventory, your Shopify Admin will have the section in Settings, called “Locations“. It will looks like this:
Products
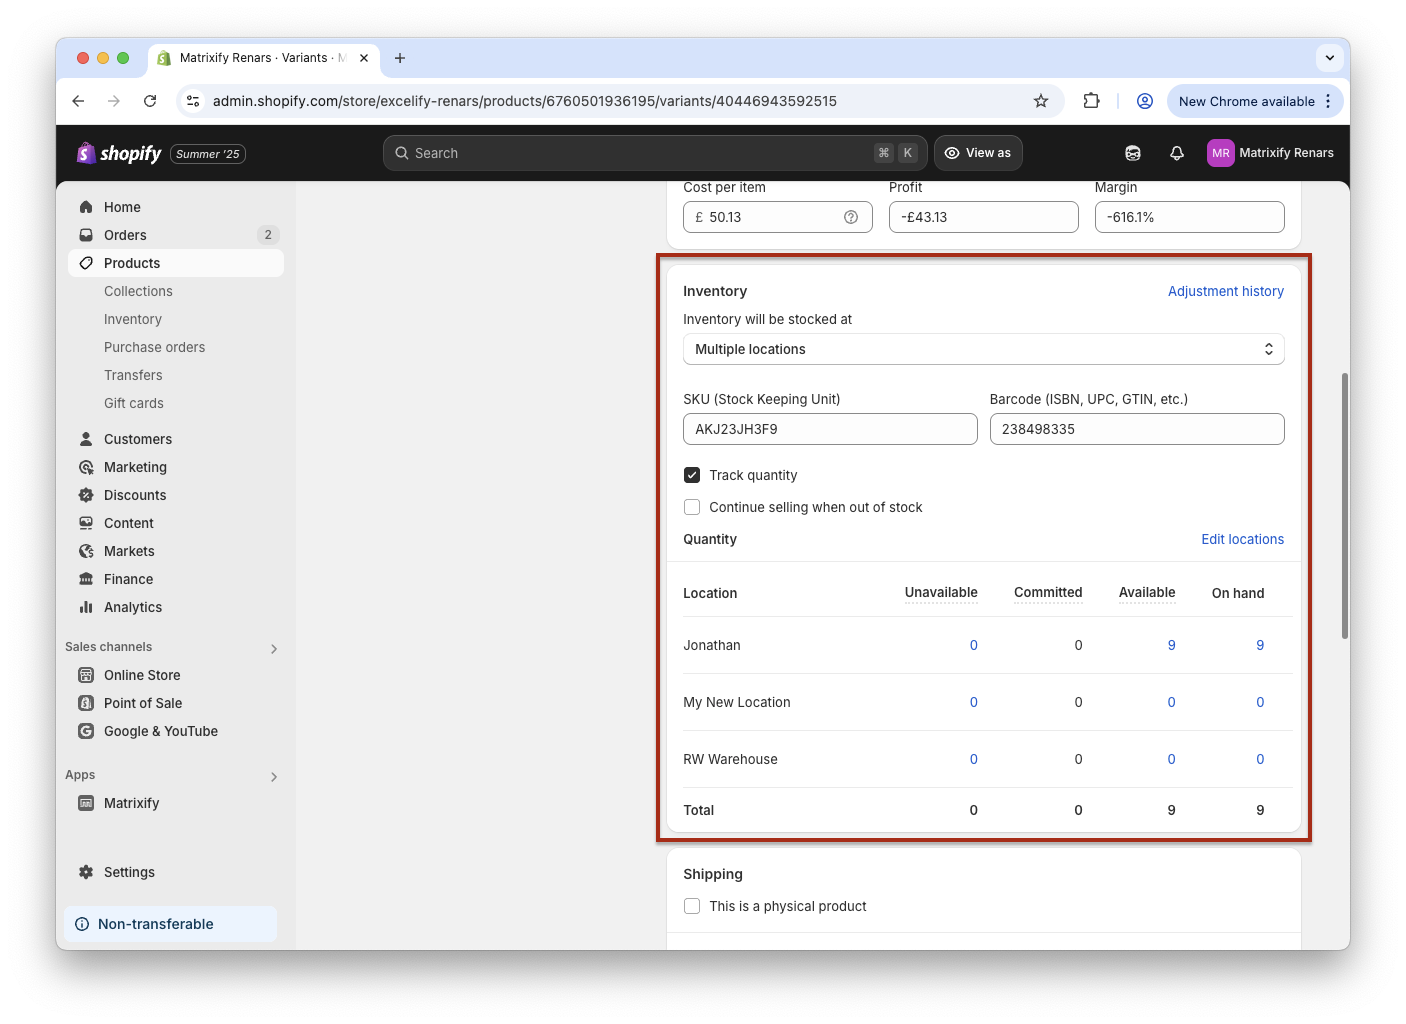
From that point, you will see for your variants the following table of the inventory quantities by each location.
In the Matrixify app’s New Export page, you will see a column group “Multi-Location Inventory Levels“:
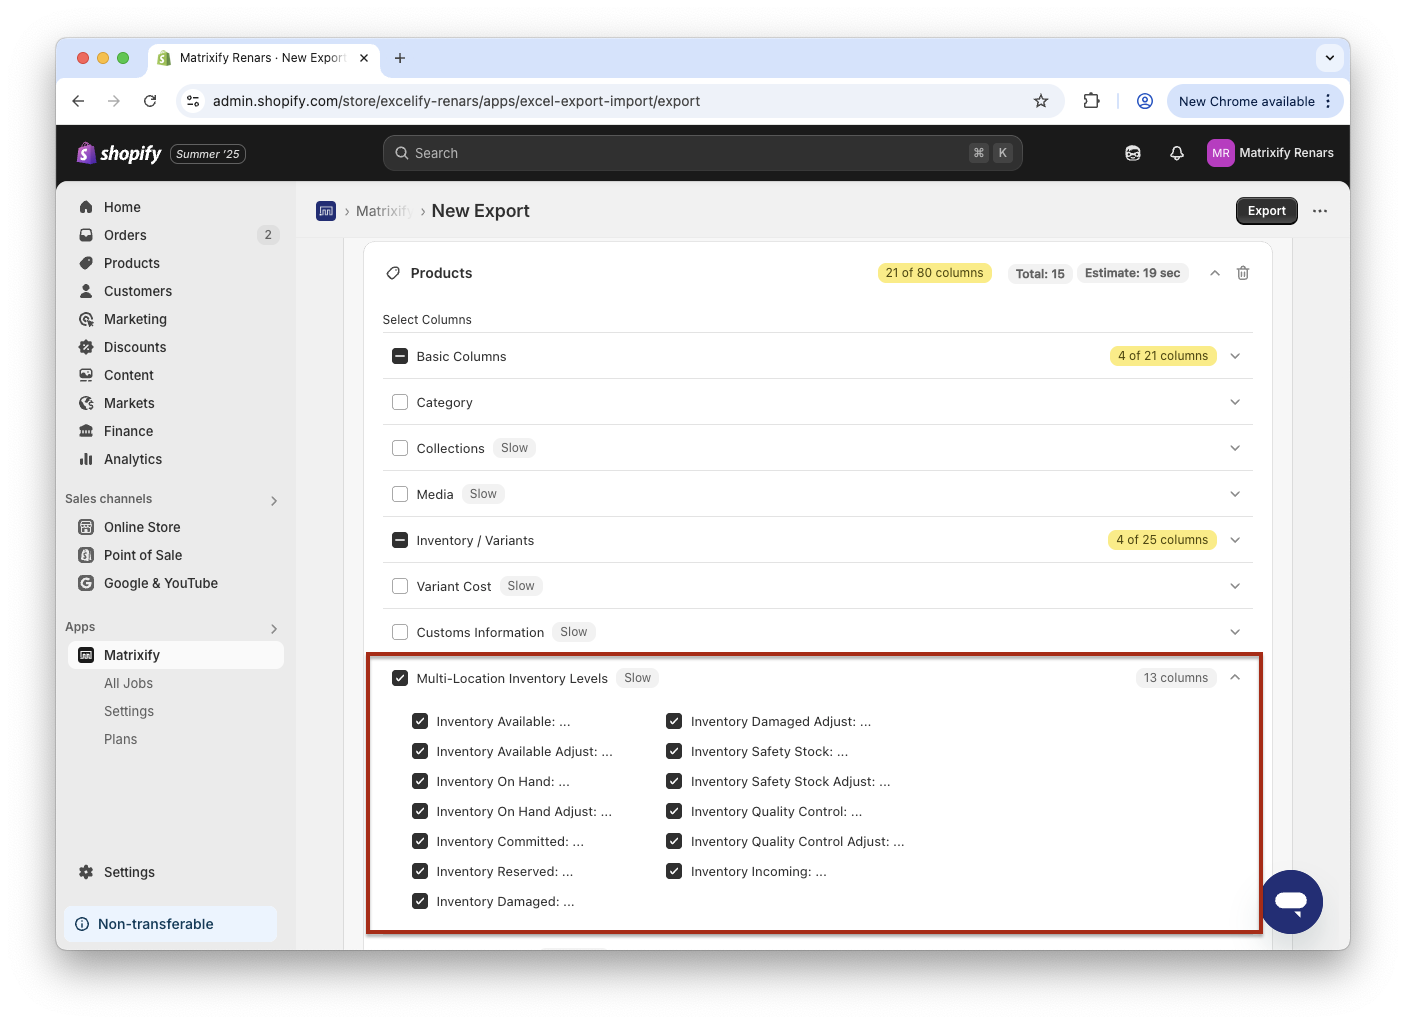
Select the inventory quantity columns you need, such as Available, On Hand, Committed and others.
In the exported file each inventory location will have columns for all the quantity types.
Those columns will look like this if, for example, exporting only Available, On Hand and Commited inventory:
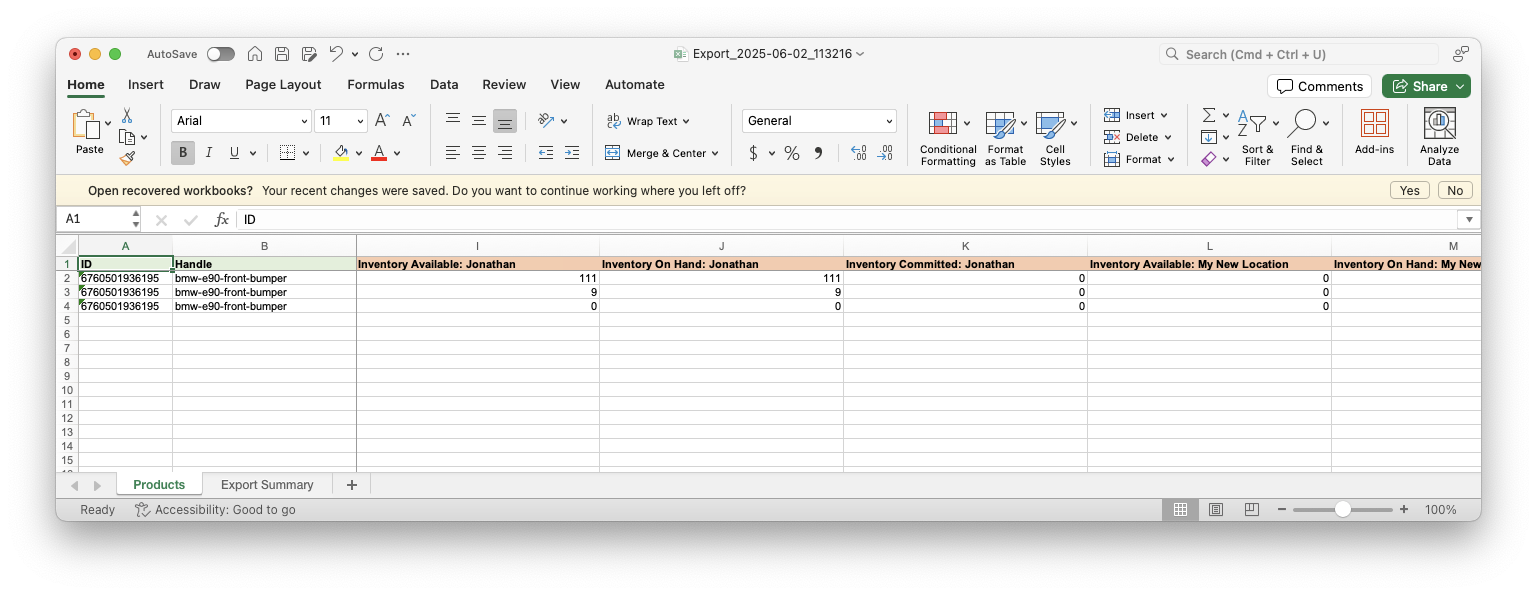
Notice that each of those columns have the location name in it (like “Jonathan”) – that is important because this is how you will tell the app to change the quantity for that specific location.
Be aware that exporting those columns will make your export run longer, as the Matrixify app has to ask Shopify the inventory levels for each of your products separately.
We also offer a great tutorial to update Multi-Location Inventory for your Products.
Orders
Fulfillments
When you fulfill your Orders, you will see in the Admin new field for the Fulfillment where you can change the Location of that fulfillment.
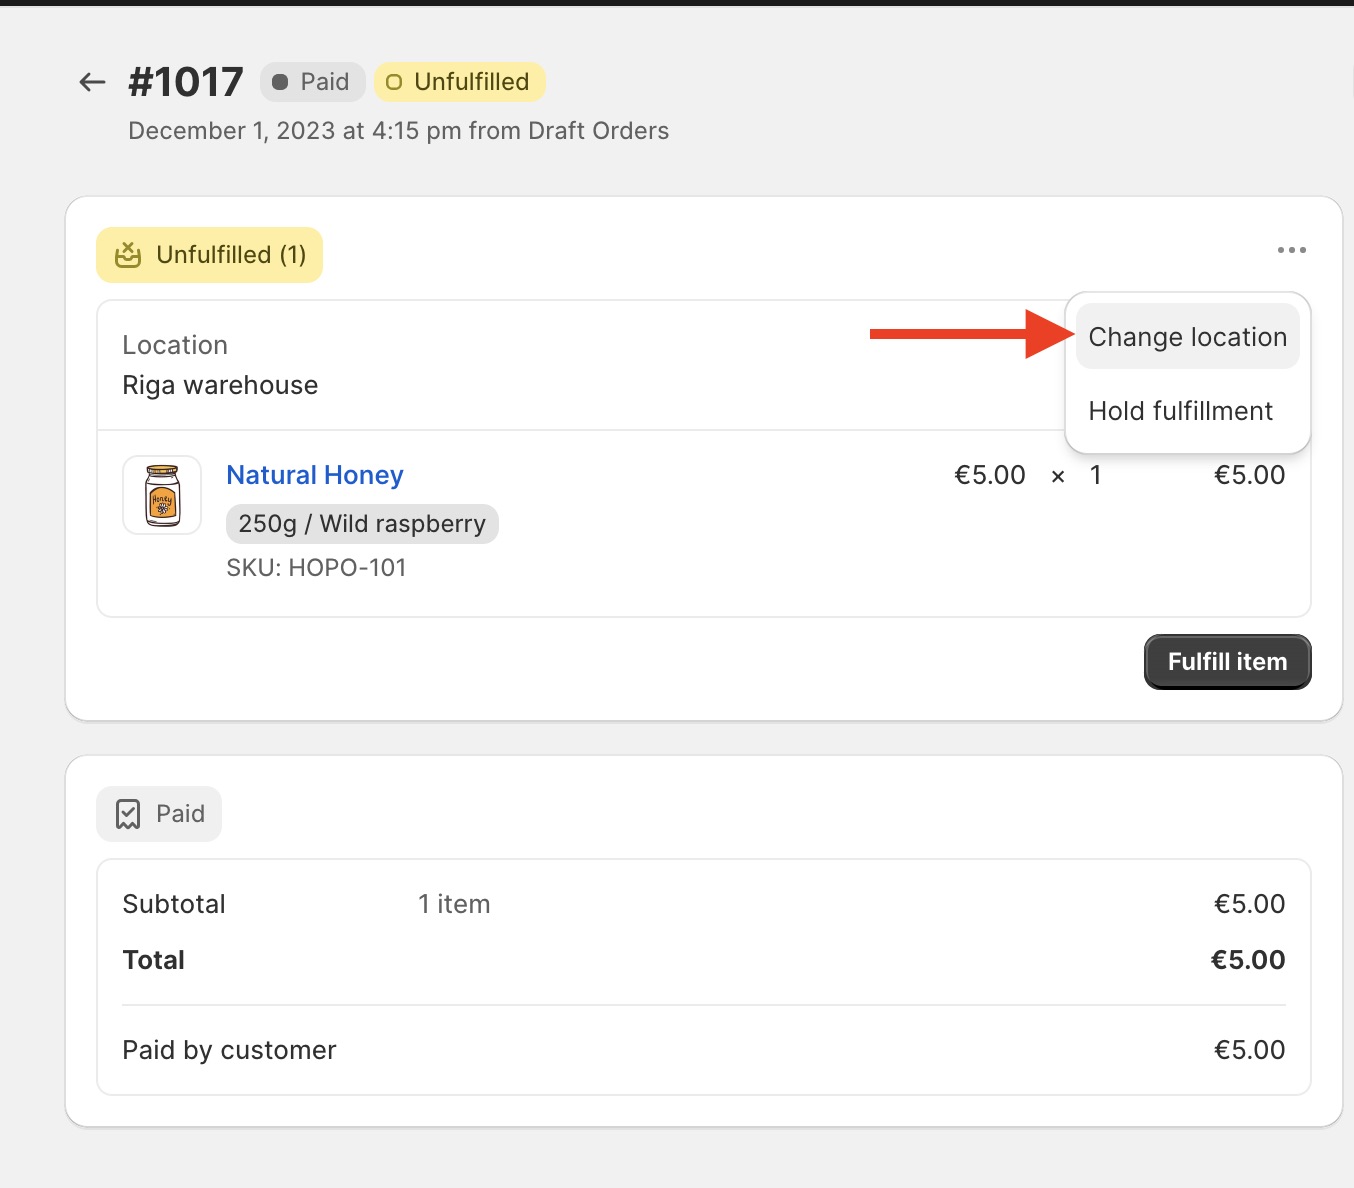 When you export your Orders using the Matrixify app, you will see this location name in the column
 Fulfillment: Location but only if the Order is fulfilled. This value cannot be Exported for an unfulfilled Order.

If you need your Order to be fulfilled from the specific location, you need to provide that location name.
If you don’t provide any name, the app will automatically assume that you are fulfilling from the first of your locations.
We offer a great tutorial on how you can fulfil your Orders in bulk.
Refunds
When you issue the Order Refund with restocking, in the Admin you are offered to choose the location to which to restock:
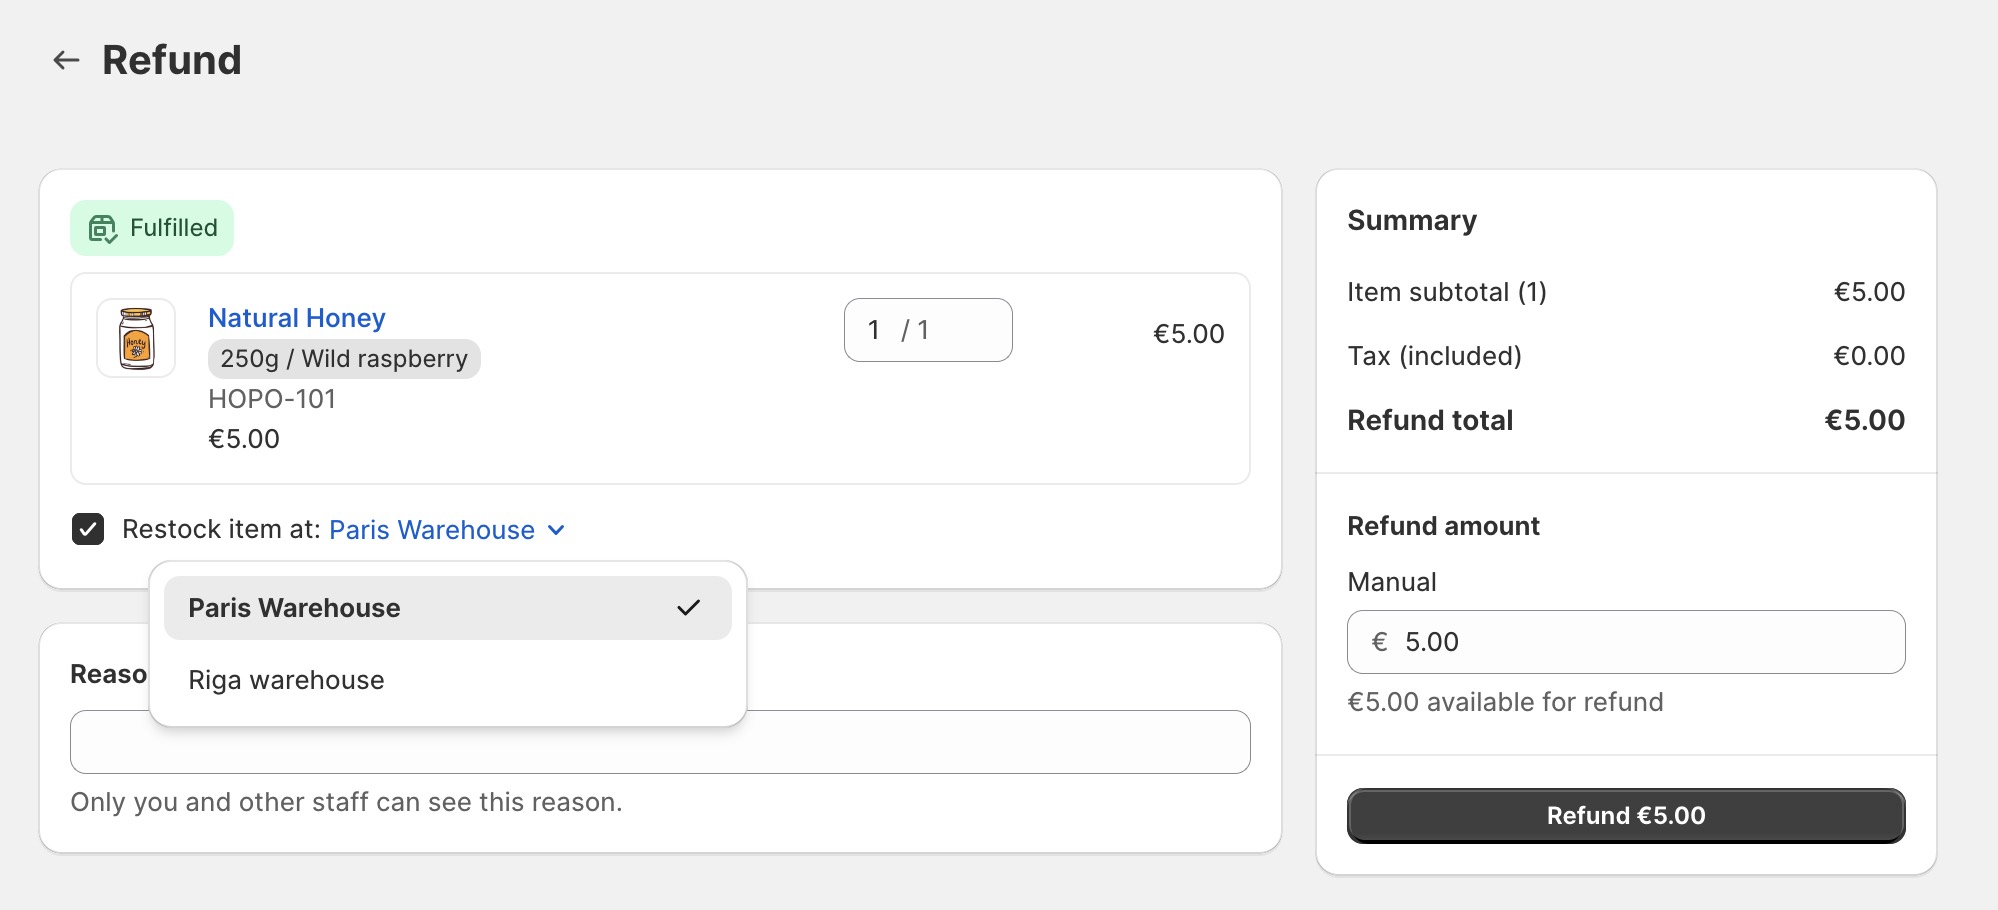 That same value appears in the Matrixify app Orders Export for Refunds, in the column
 Refund: Restock Location:

Also, when importing Orders, you can specify the Location name in that column. If you will import it empty, the app will always assume the first of your Locations.
You can read about all the Products columns in the Orders documentation and also check out our tutorial on how to refund Orders in bulk.


