
With the Matrixify app you can simplify creating your Shopify Discounts by bulk importing Discounts using Excel spreadsheet files.
The step-by-step process
- In your Shopify Admin create a new Discount as a sample that you wish to create in bulk.
- Export your Shopify Discount Code using the Matrixify app.
- Edit the exported spreadsheet to fill with data for your new Discounts:
- Save the file and import with Matrixify.
- Enjoy your new Discount Codes.
- Bonus: Create many codes for one Discount.
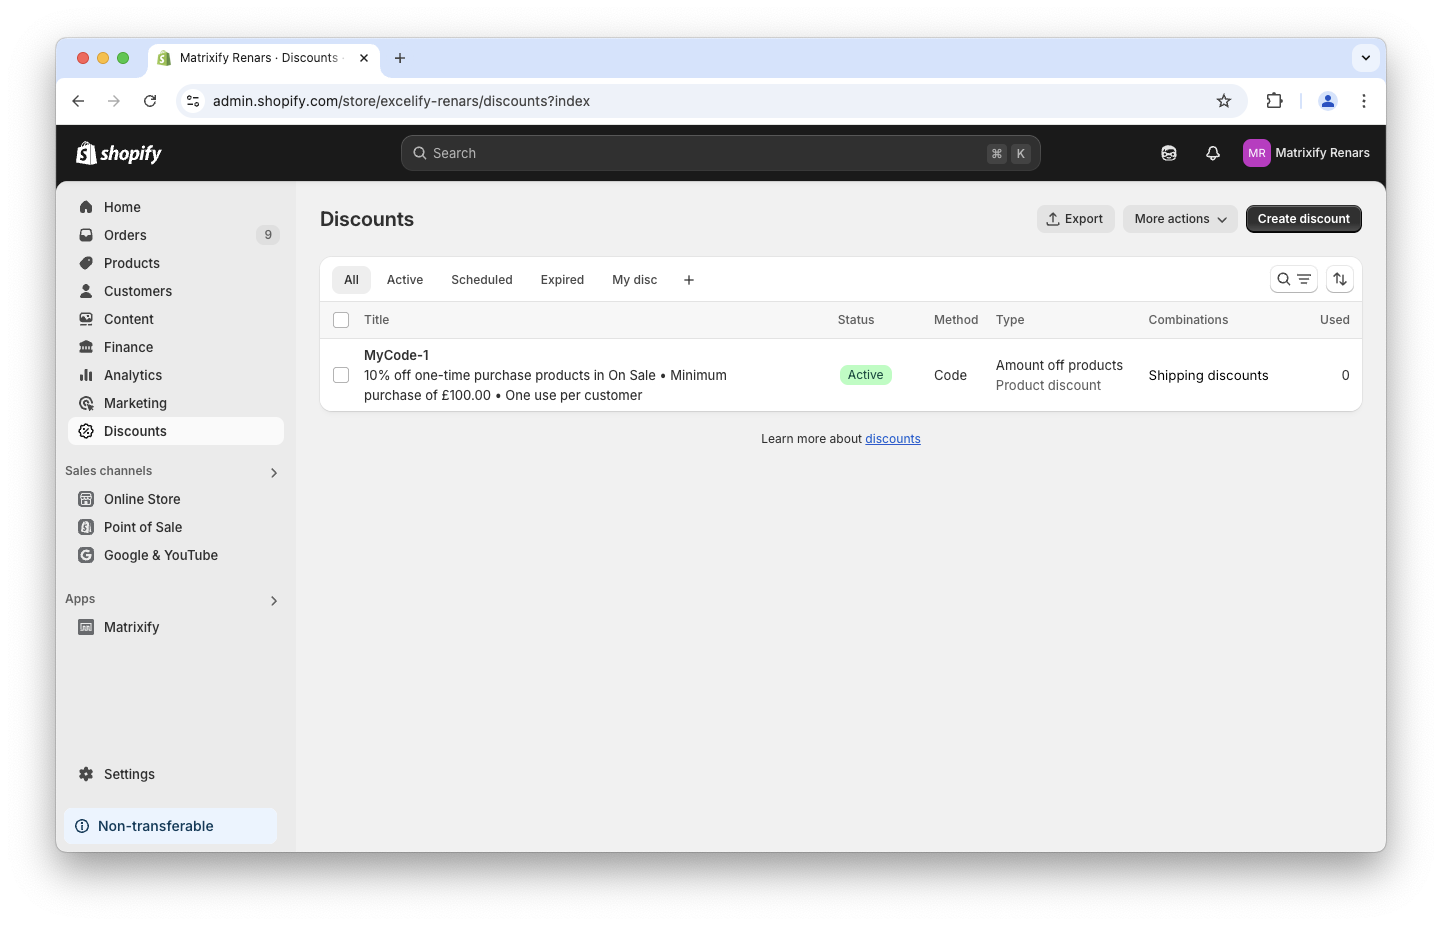
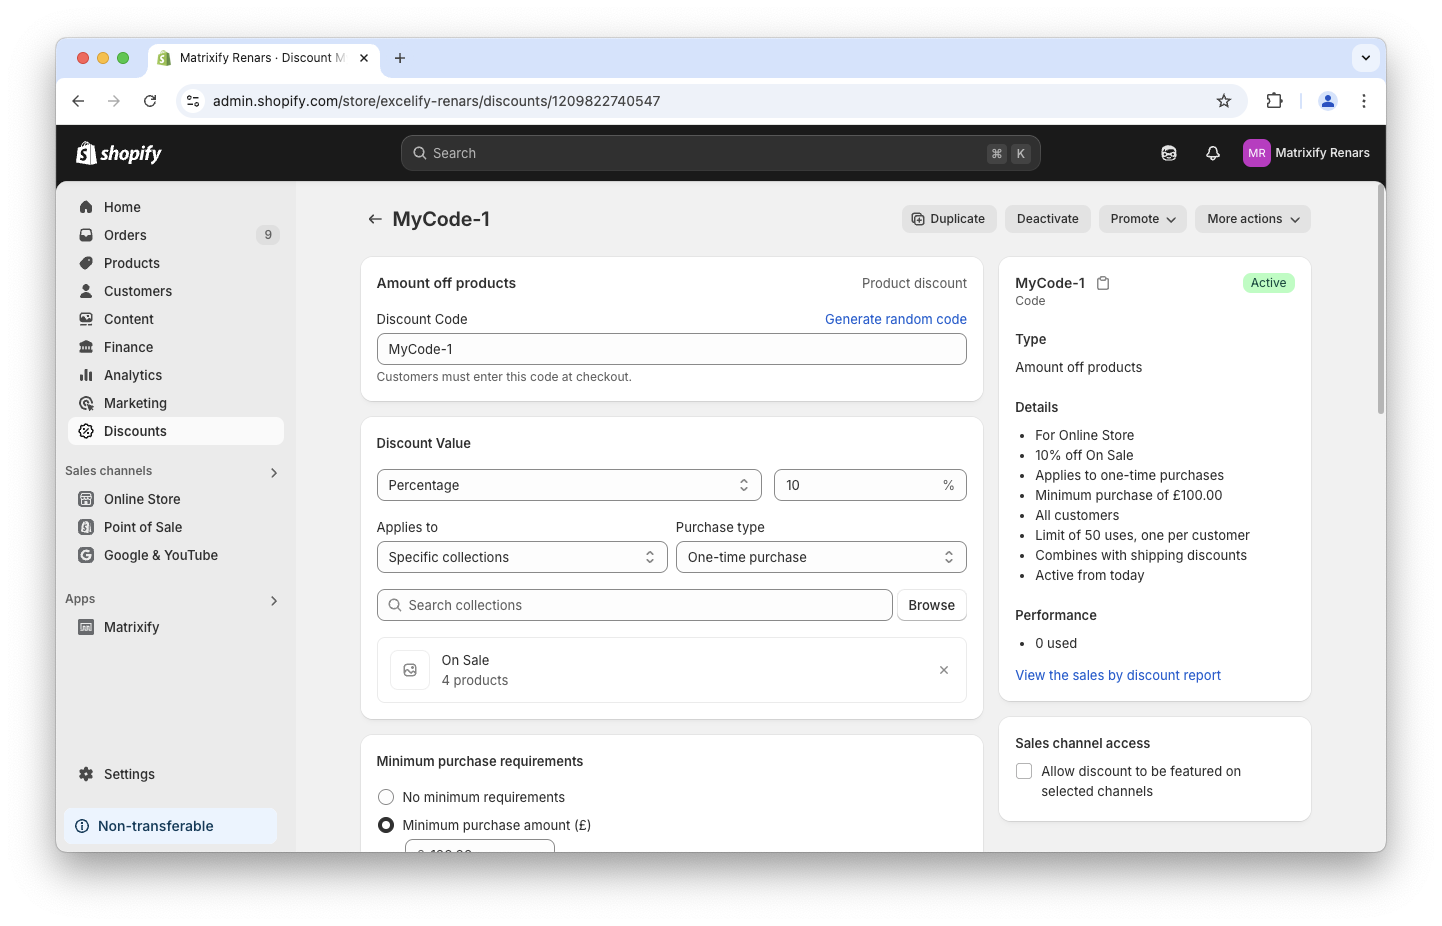
1. Create a sample Shopify Discount
Creating a sample discount in the Shopify Admin simplifies the process as it can be exported to have sample data.
In the exported file you will be able to easier see what values go into what columns for our selected Discount type.
In this example, I will use the “Amount of Products” Discount with as many fields and attributes set as allowed. You can use any other Discount type and field combination.
2. Export your sample Shopify Discount
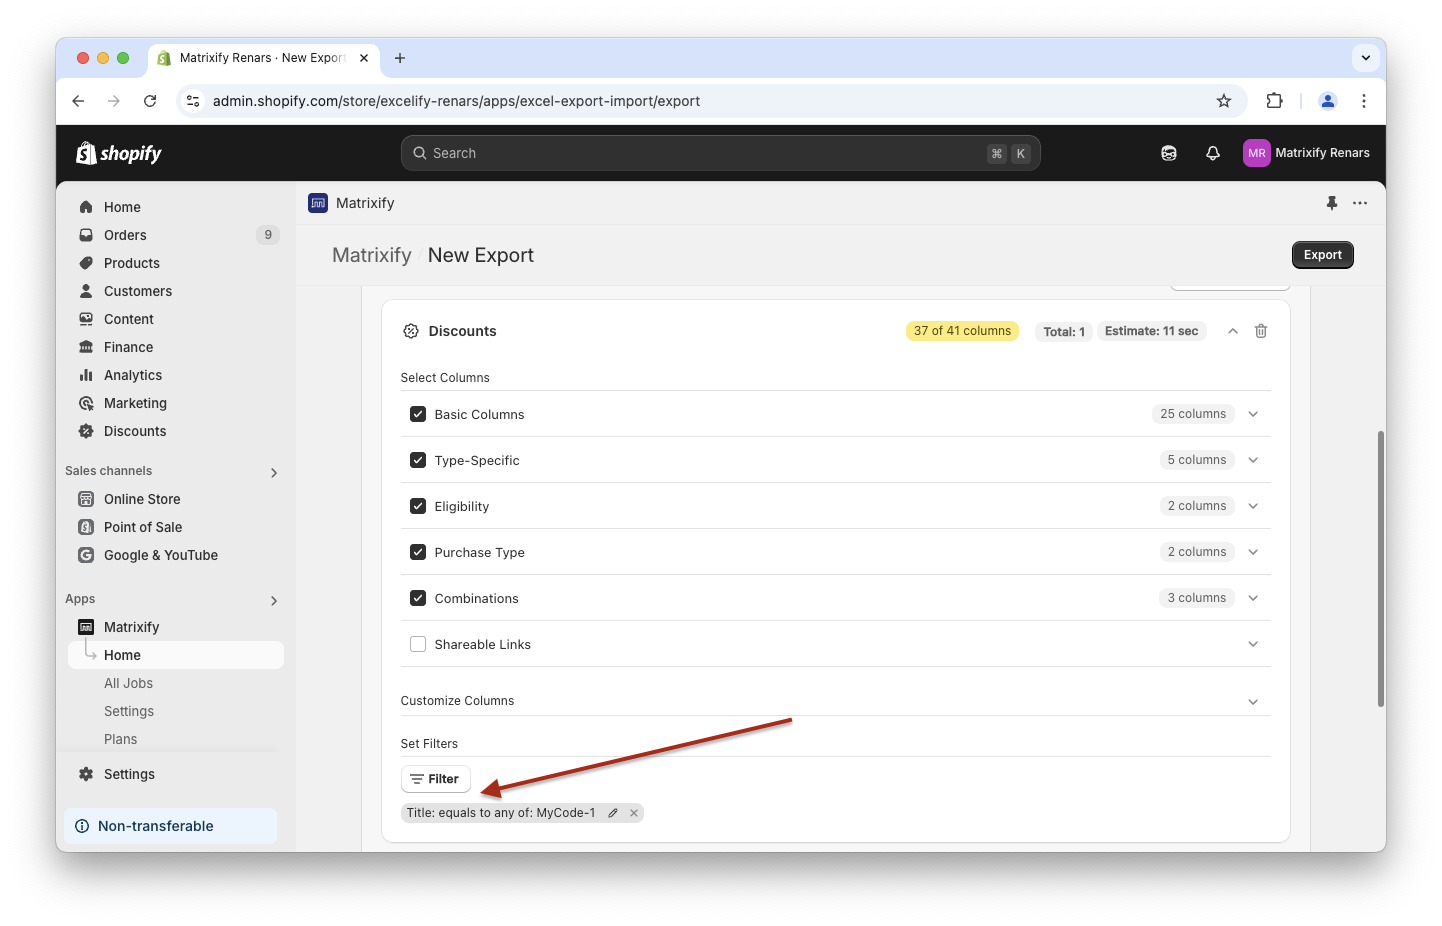
Now head over to the Matrixify app and create a New Export job.
On the New Export page select “Matrixify: Excel” file format.
From the Select Sheets drop-down select the “Discounts” sheet.
As our goal is to import new Discounts then we do not need to export data that cannot be imported.
Select to Export column groups “Basic Columns”, “Type-Specific”, “Eligibility”,”Purchase Type” and “Combinations”. You do not need to select “Sharable Links” as it is Export Only and cannot be imported.
To Export only the created sample Discount click on the “Filters” button and apply the filter by the “Title” with the Title value as you set for your sample Discount. For me, the Title of sample Discount created is “MyCode-1”.
Click the “Export” button to start the Export job in the Matrixify app.
3. Edit exported Discounts spreadsheet
Copy exported discount in new rows
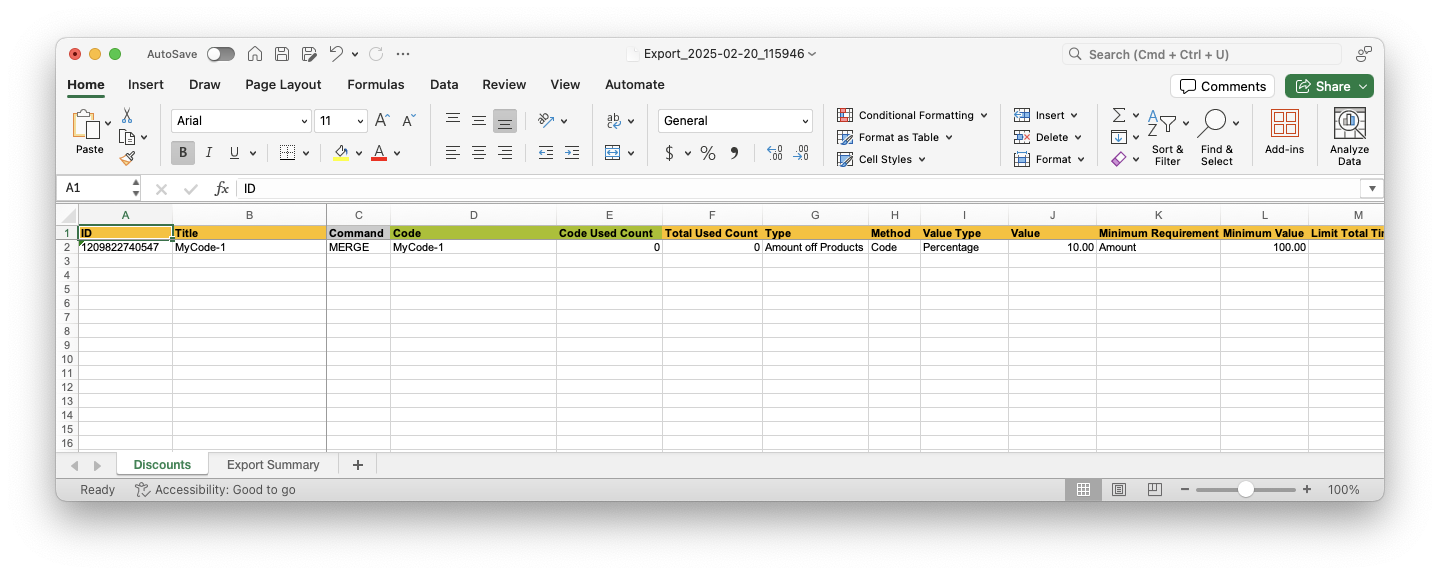
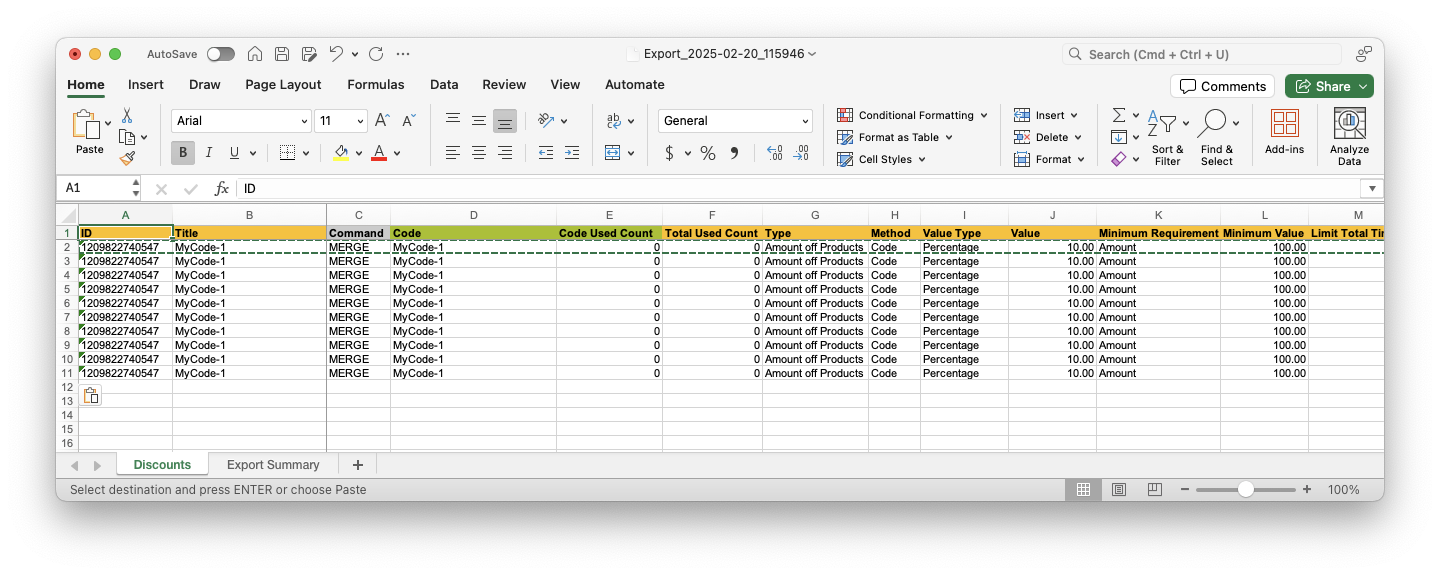
Once the Export has finished, download the exported file by using the “Download Exported File” button.
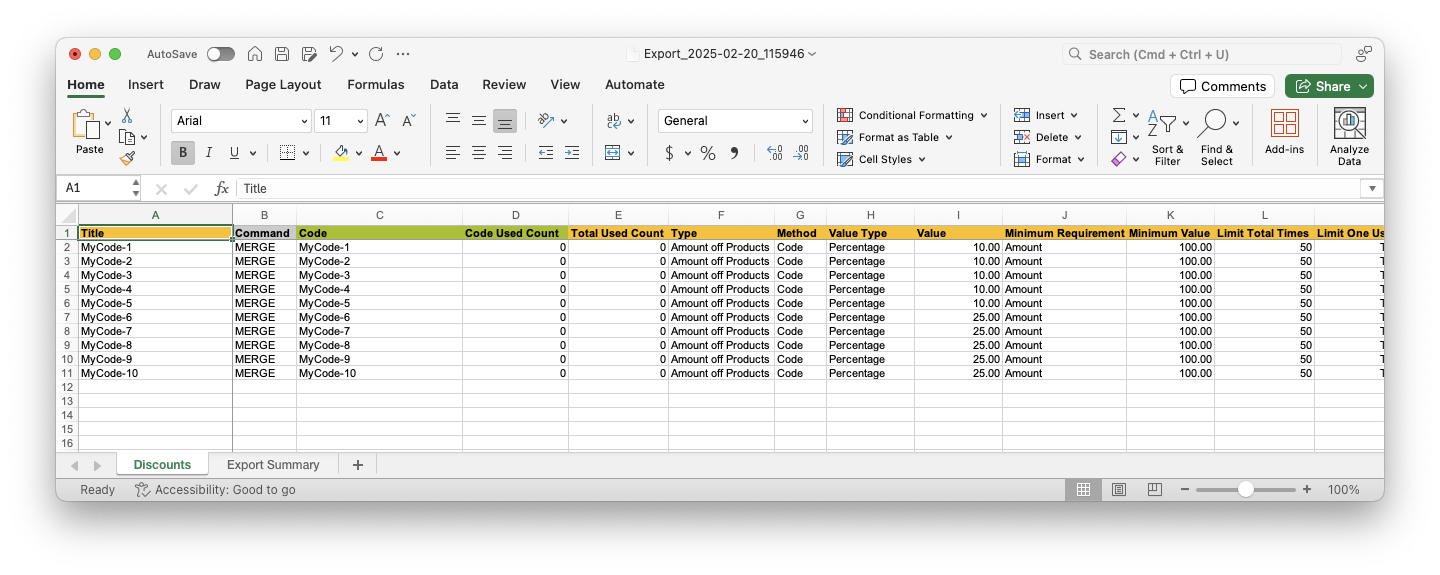
In the exported file, you can see the same sample Discount in Matrixify Discounts template. The first thing to do now would be to duplicate/copy this discount code as many times as Discounts you wish to create.
In the example, I will make a total of 10 Discounts (1 existing sample Discount and 9 new Discounts), but you can create as many Discounts as you need (See Matrixify Pricing page for different app subscription plan limits).
Before:
After:
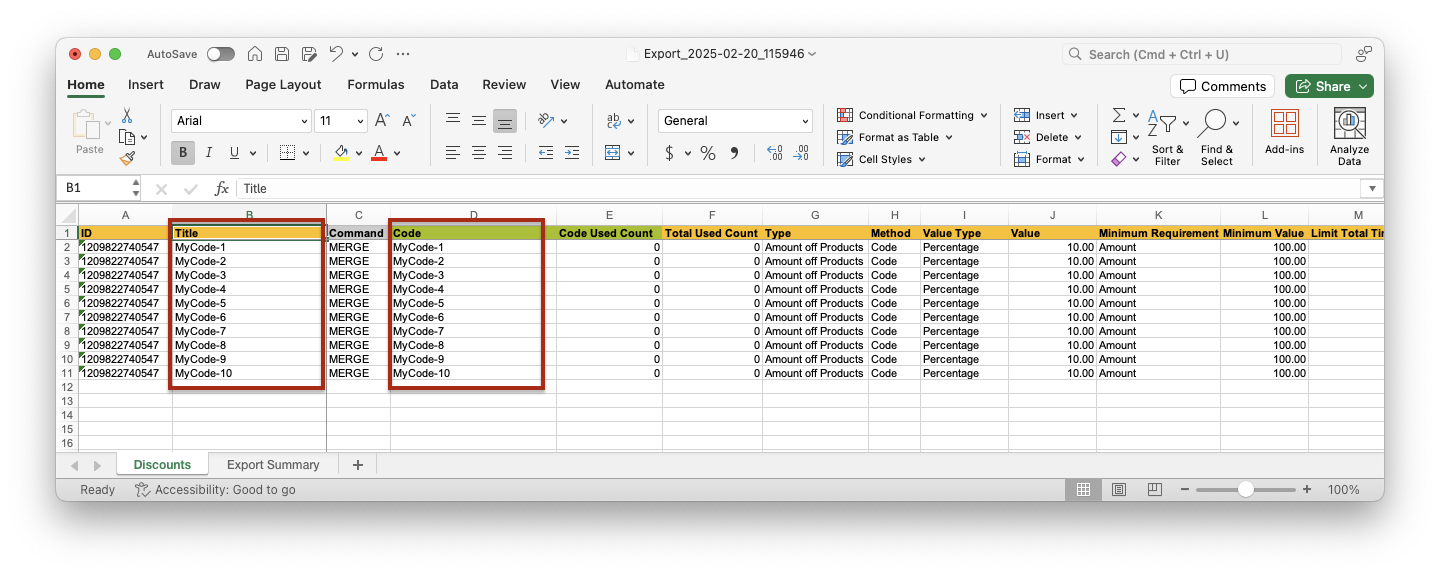
Update Title and Code columns
At the moment the app would see this as one large Discount as we do not yet have assigned new Codes and Titles to each row.
For each row to indicate a unique Discount – each row should have its own “Title” and “Code” values.
These two columns can and should be the same for a single Discount (if you are not creating multiple codes within a single Discount).
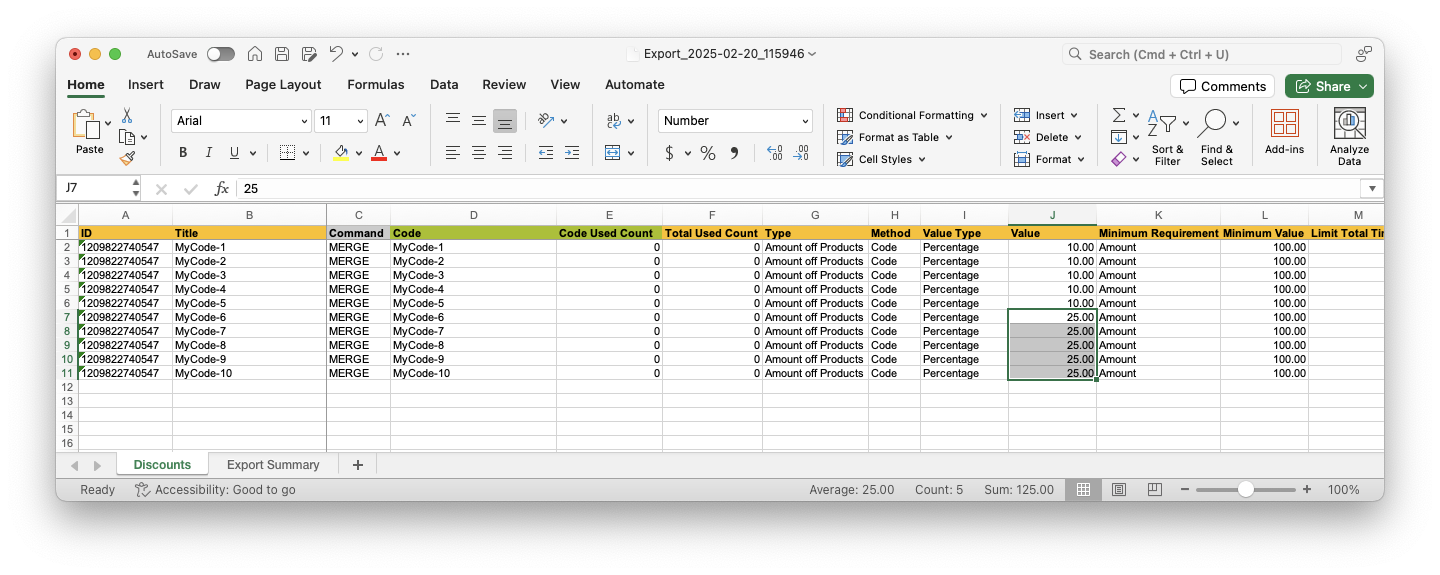
Update other Discount fields
At this point, you can edit other fields and set different values for each Discount as needed.
To see more detailed information about every column in our Discount sheet, head over to our Discounts sheet documentation where you can see every column, possible/allowed values, and their descriptions.
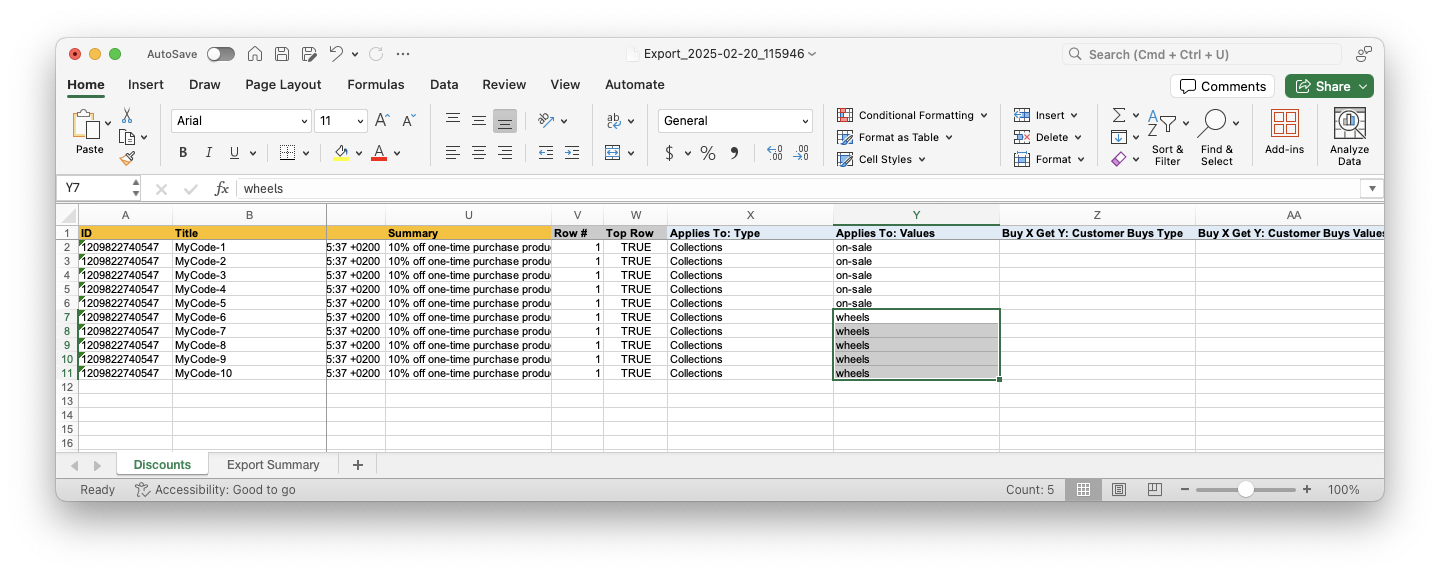
In my example, I will keep 5 discounts as they are and change 5 discounts to:
- different discount values by changing the number in the “Value” column;
- apply discounts to different Shopify Collections by changing values in the “Applies To: Values” column.
Delete the ID column
The last important thing to do is to delete the ID column.
As we currently still have all the same IDs for these codes, the app will still understand them as the same code and will try to update the code by this ID only.
Matrixify can identify existing Discounts also by their “Title” and “Code” column values (just it is a bit slower).
New IDs will be assigned to the new Discounts by Shopify when the Discounts are created.
So you can just delete the whole “ID” column from your spreadsheet file.
4. Save the file and import with Matrixify
Now you can save this file and import your Discounts into Shopify in bulk, using the Matrixify App.
Locate the Import section in the Matrixify App Home page and drop the file in the file upload area.
After the app has finished analyzing the data, make sure that it has detected the sheet as “Discounts”.
If different entity is detected, change it to “Discounts” and press “Analyze” button to re-analyze the file.
Make sure that the “Total” number of Discounts shown on the screen matches the count of Discounts in your file.
If it does not then double-check if IDs are deleted and each row has unique Title and Code values.
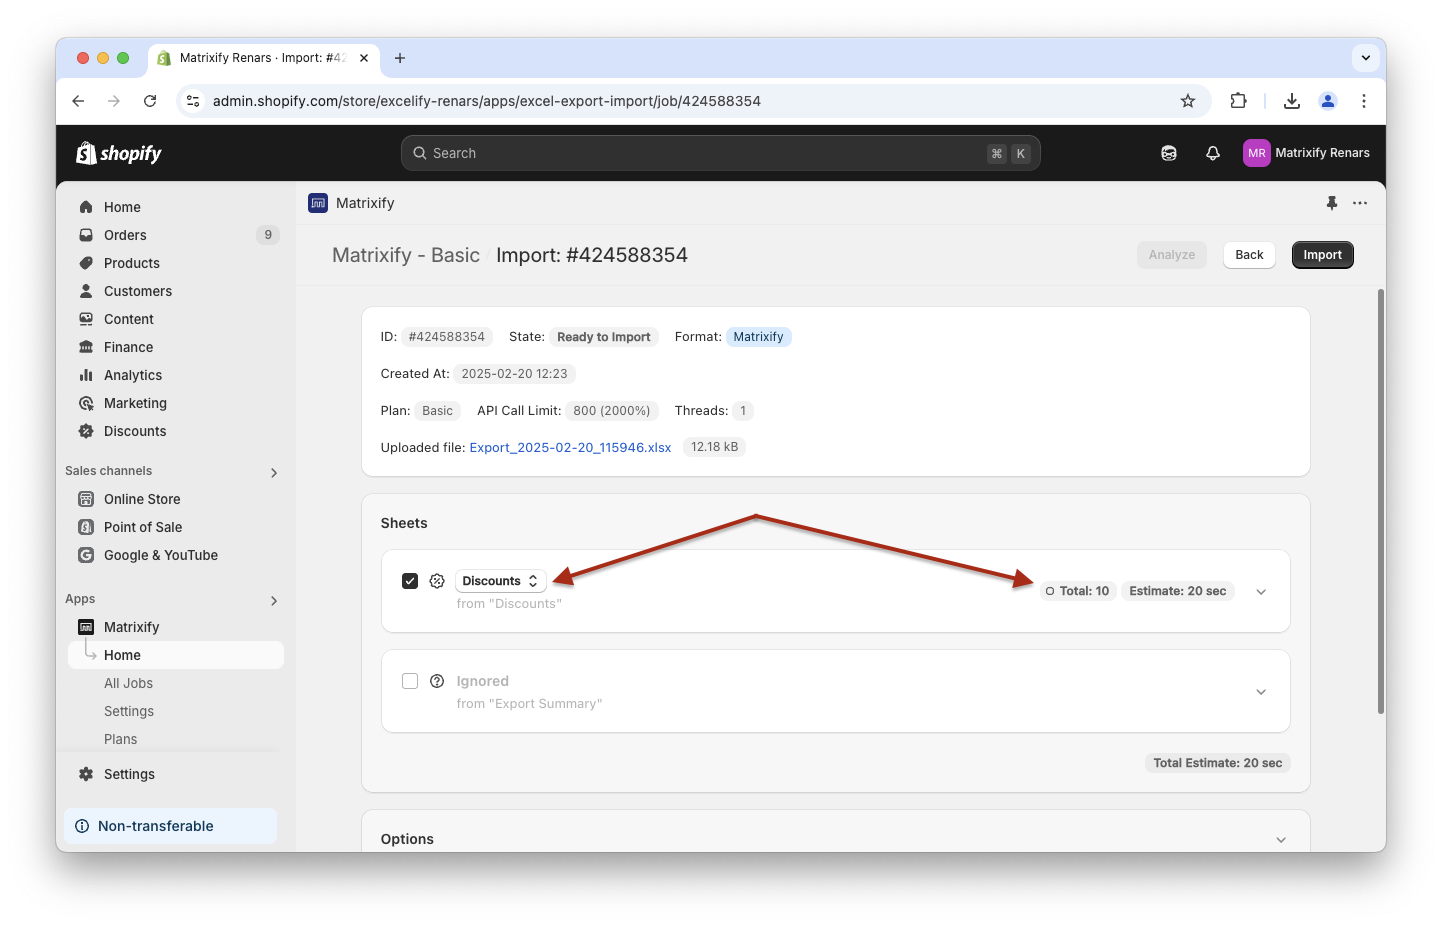
If all looks good and as it should, press the Import button to start the import.
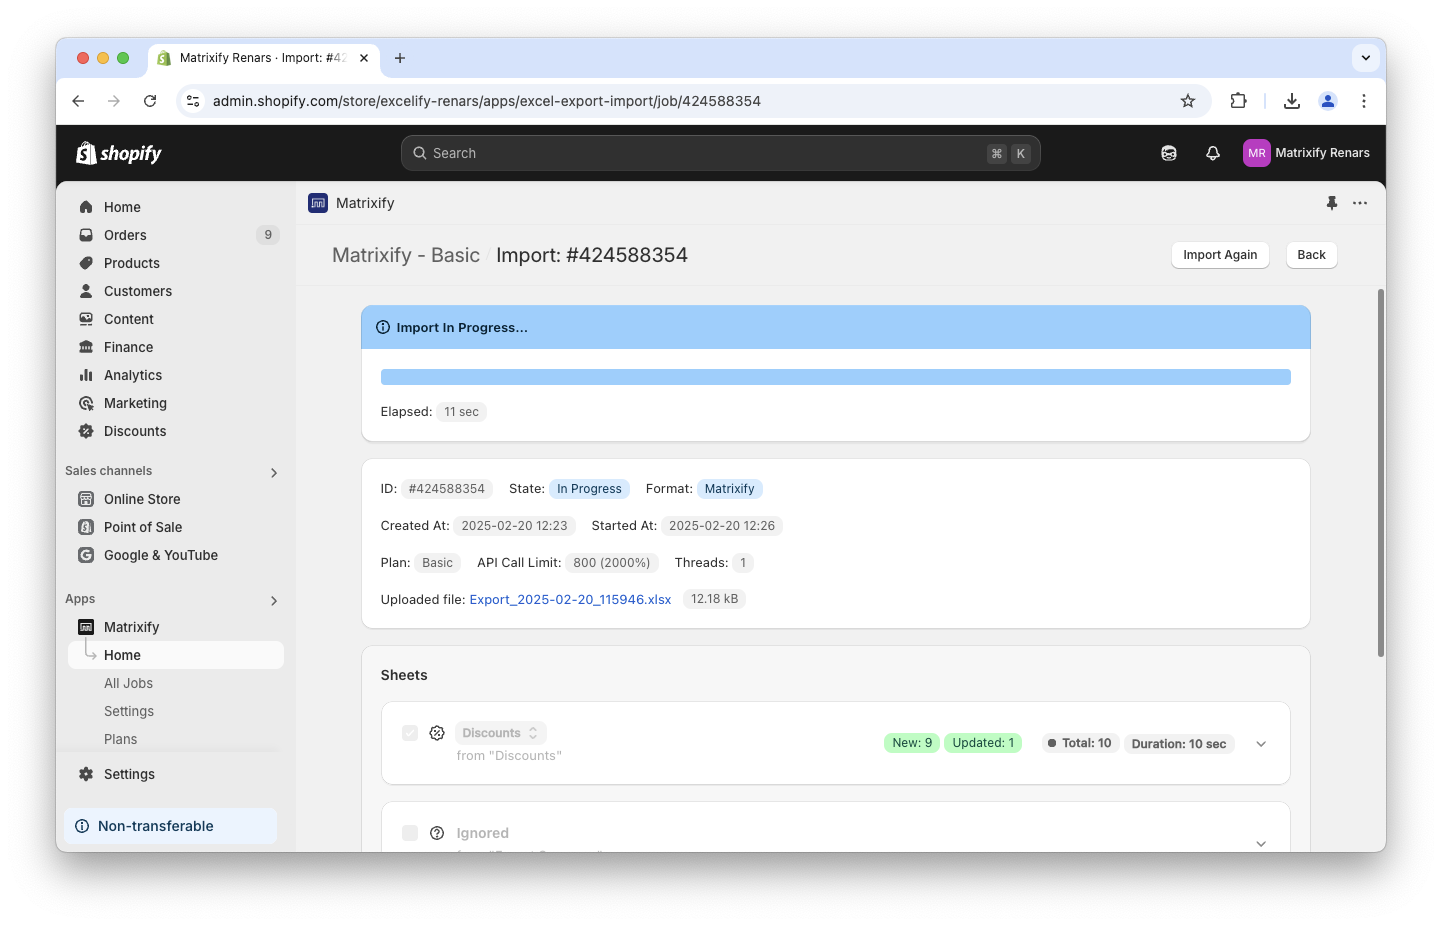
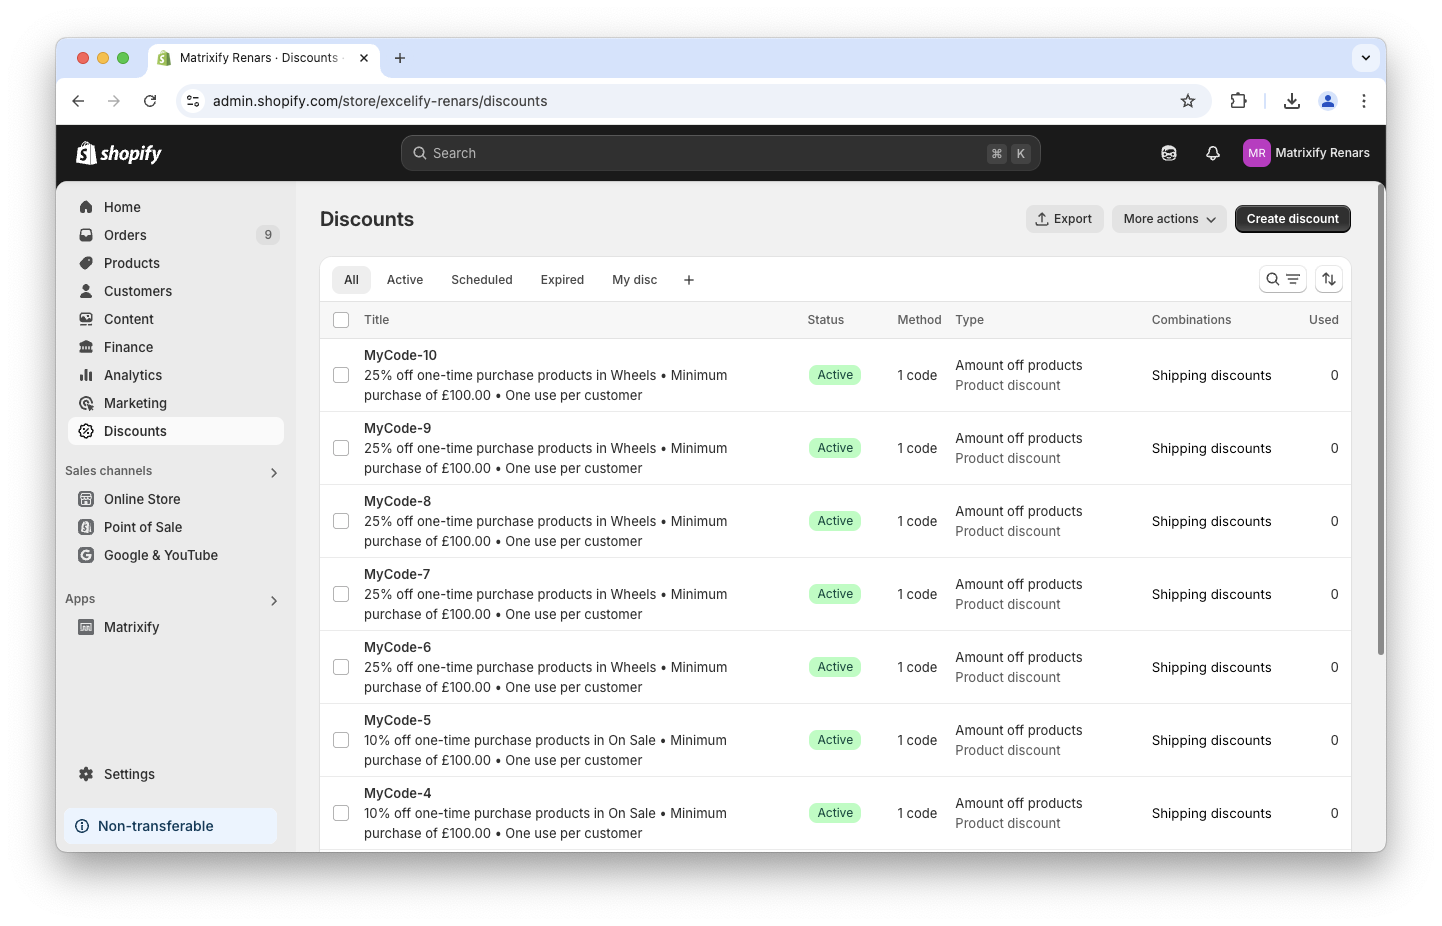
5. Enjoy your new imported Discounts
Bonus: Create many codes for one Discount
Shopify supports also having multiple Discount Codes for a single Discount. That is very useful when you need to have many codes with exactly the same conditions.
To import several discount codes for one Discount, repeat the rows with the same “Title“, and have a different “Code” column value for each of those rows.
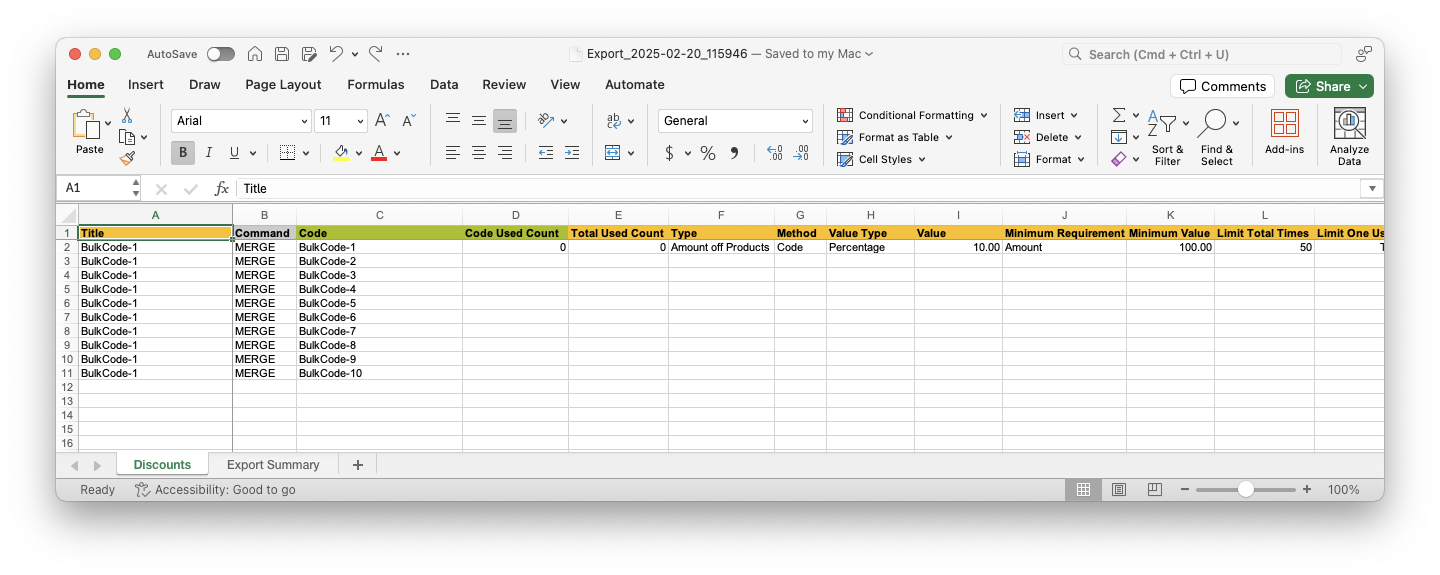
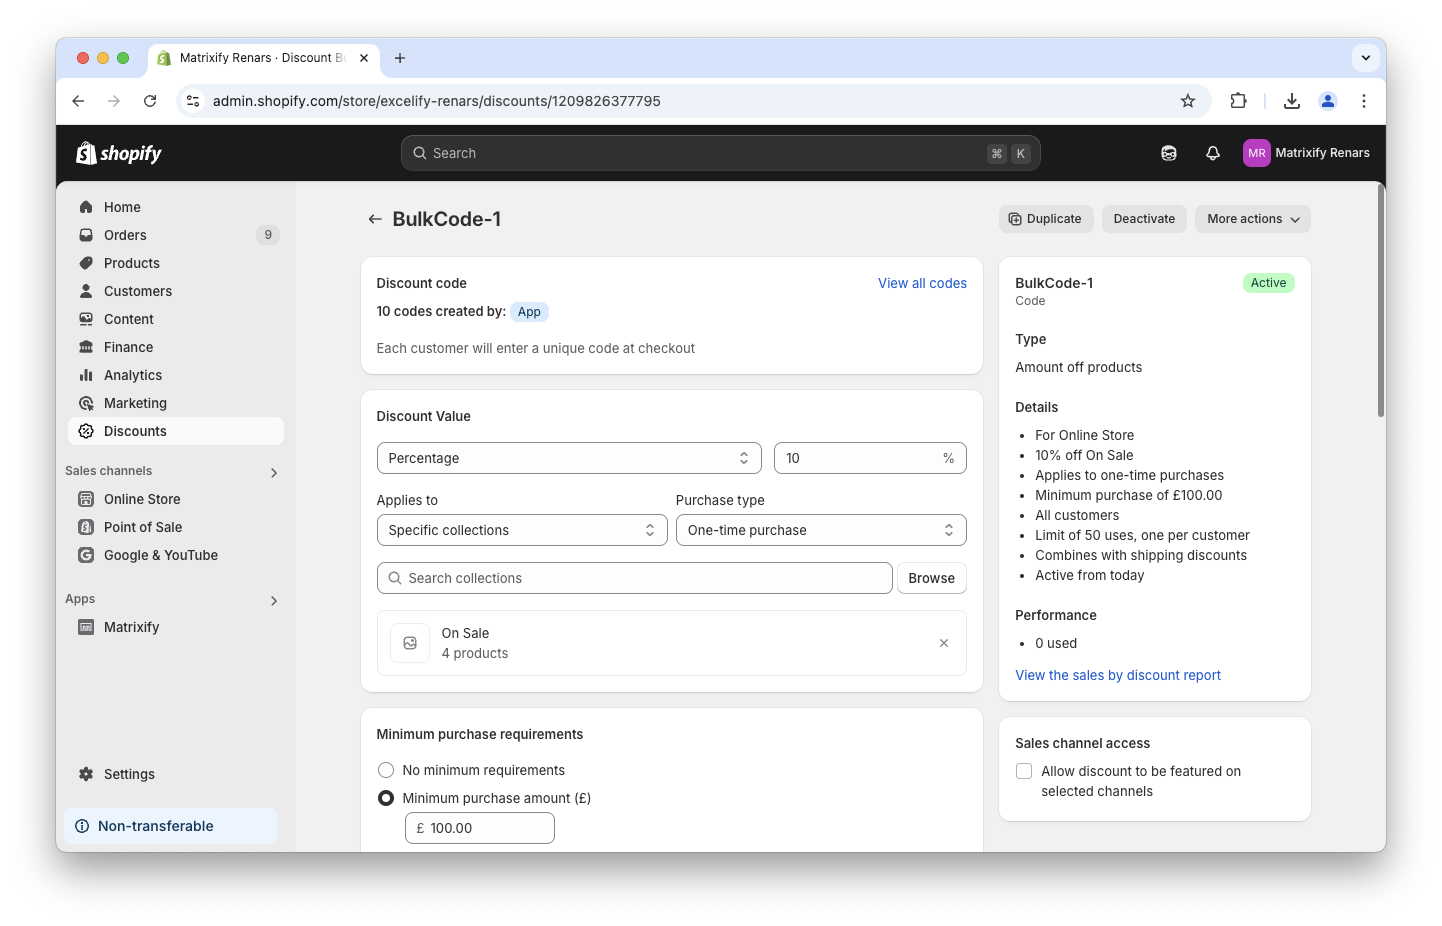
A Discount with several Codes will look like this in Shopify:
What to do next?
- Install the Matrixify App.
- See the Matrixify Discounts sheet documentation with explanations of each column from the Matrixify Discounts template.
- Read what limits Shopify has for your Shopify store Discounts.
- Contact Matrixify support if you run into any issues or have additional questions.


