

This is how to Import data from an SFTP server to Shopify
You can import to Shopify from SFTP by pointing the address exactly to the file which you need to import.
To schedule the import automatically at regular time intervals, do the following:
1. Creating the import from SFTP server
There are two main ways to create an import from your SFTP server.
You can create an import from the full URL to the file and in the URL list, your user credentials, or you can save your server in Matrixify so that you do not need to fill in username and password each time.
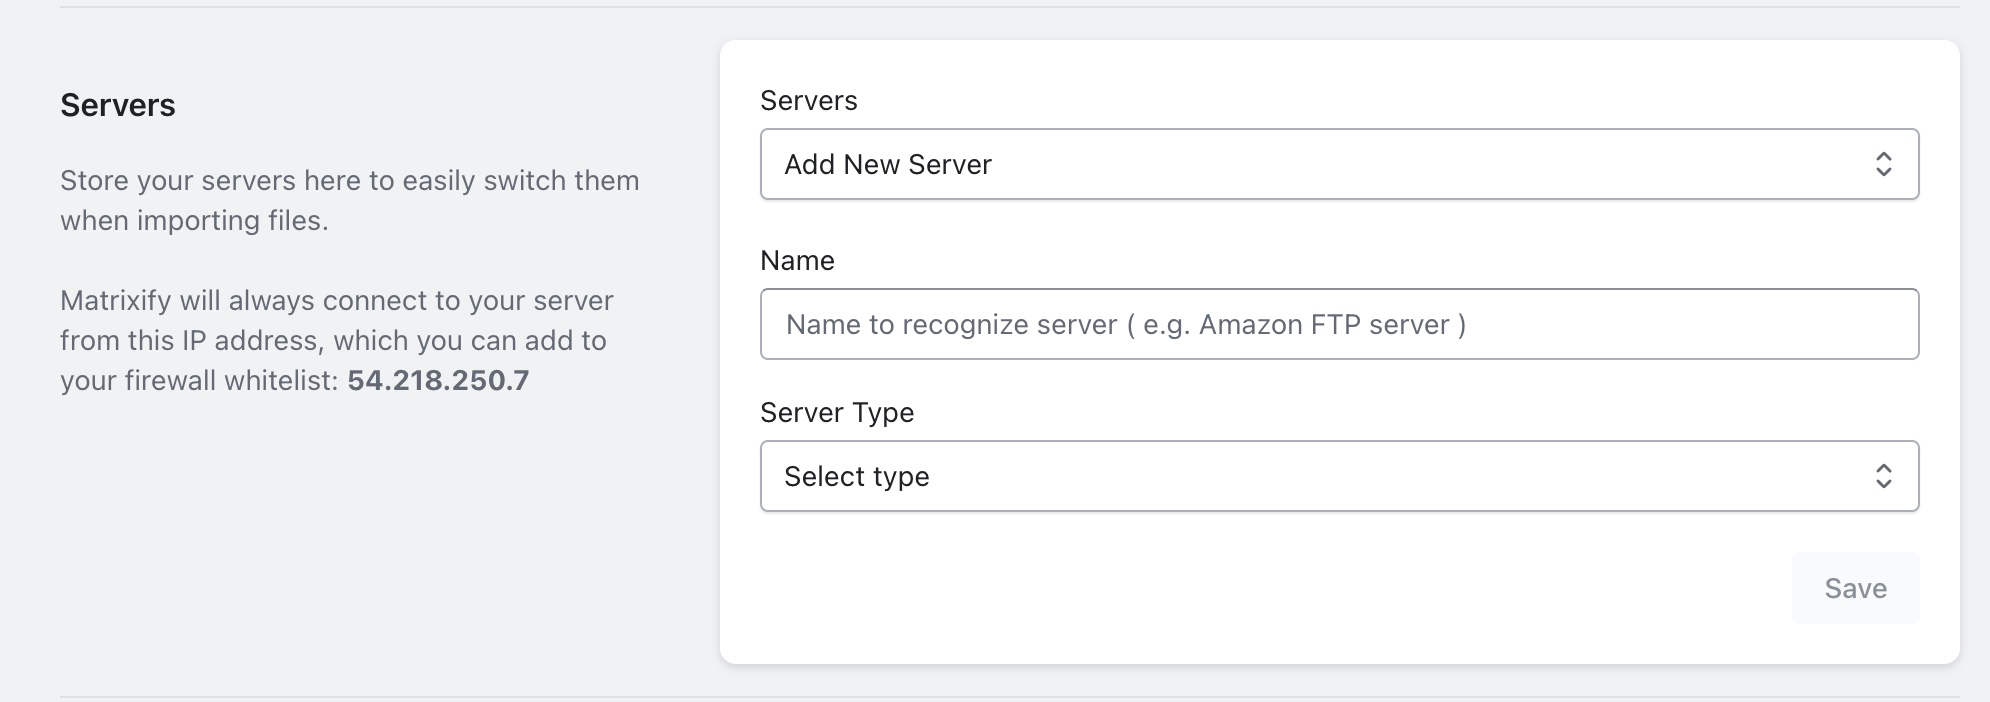
Option 1 – Save server in Matrixify and create an import from it
You can open the Matrixify app and head into the Settings page.
On this page, you can find the section “Servers” and there you can create a new server to save your user credentials. You can use two authentication methods – password and private key.
Find more details about how to set up a server in Matrixify “Set up Servers for importing files to Shopify” tutorial.
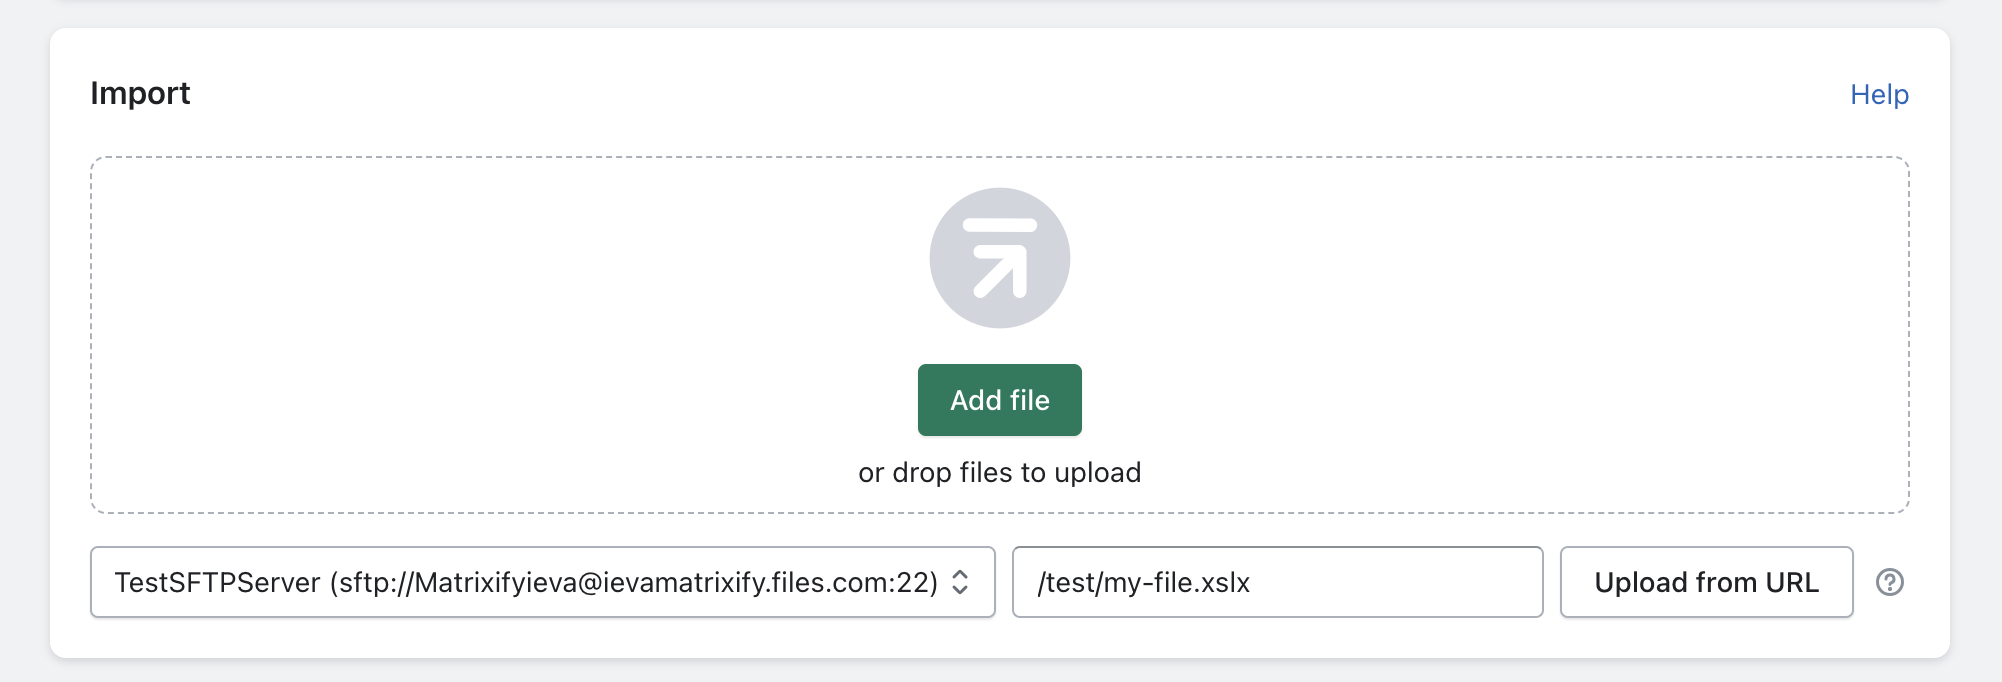
Then head back to the Matrixify Home page and in the “Import” section select your server from the Server drop-down menu.
Fill the path to the file starting from the root directory.
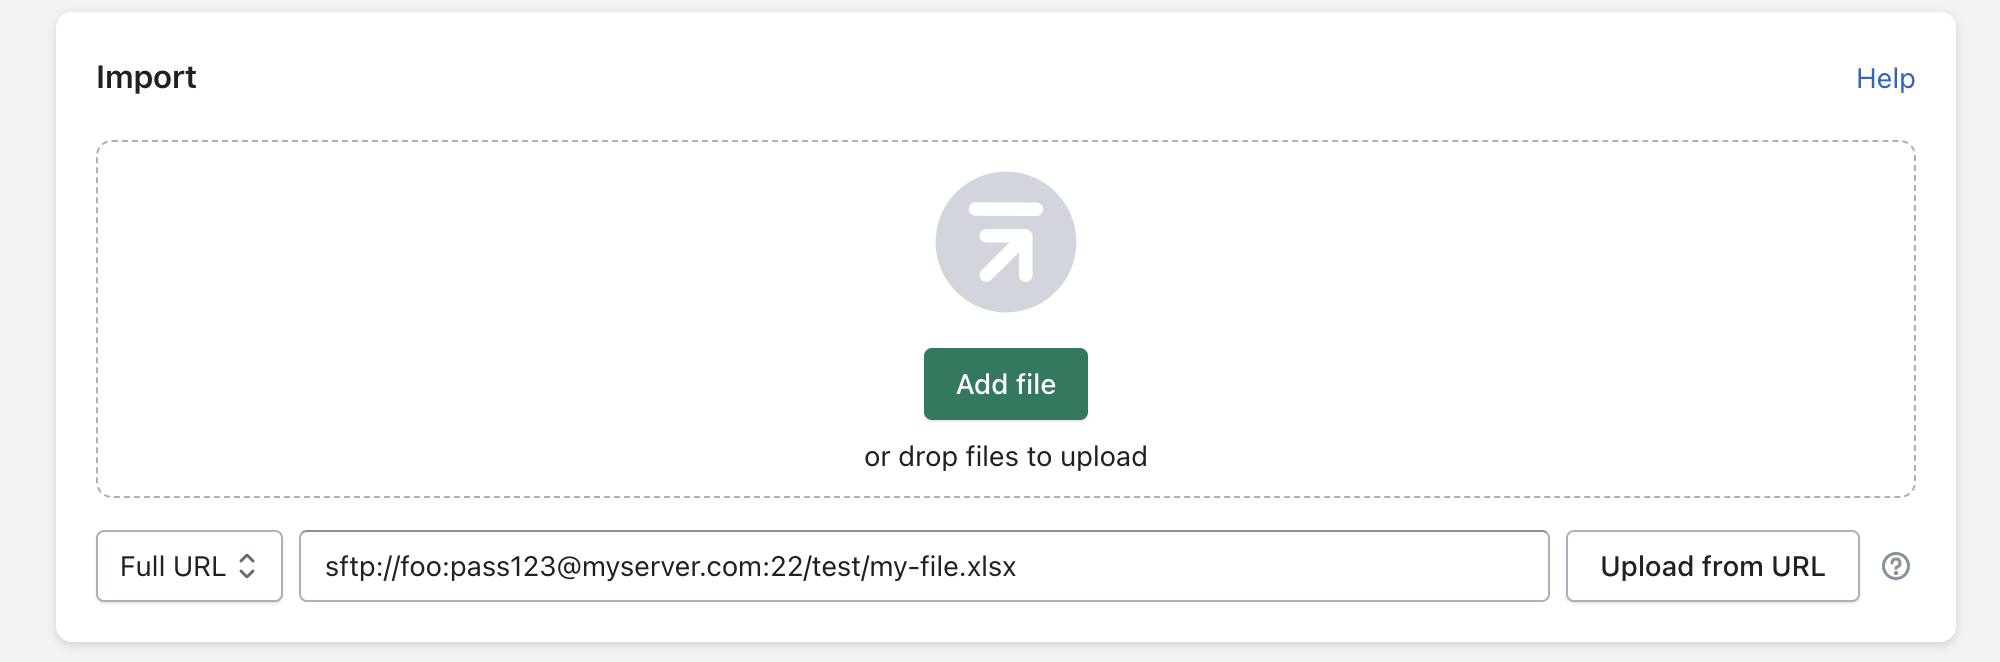
Option 2 – Import from full URL
When importing from the full URL you would need to each time list username and password in the URL.
The app would still not display the password anywhere in the app after the import file is uploaded.
The URL should contain user credentials and the full path to the file in the following format:
sftp://user:password@server:port/path/to/directory/file-name.xlsx
For example:
sftp://foo:[email protected]:22/test/my-file.xlsx
2. Press “Upload from URL” button
This will open a new page with your import.
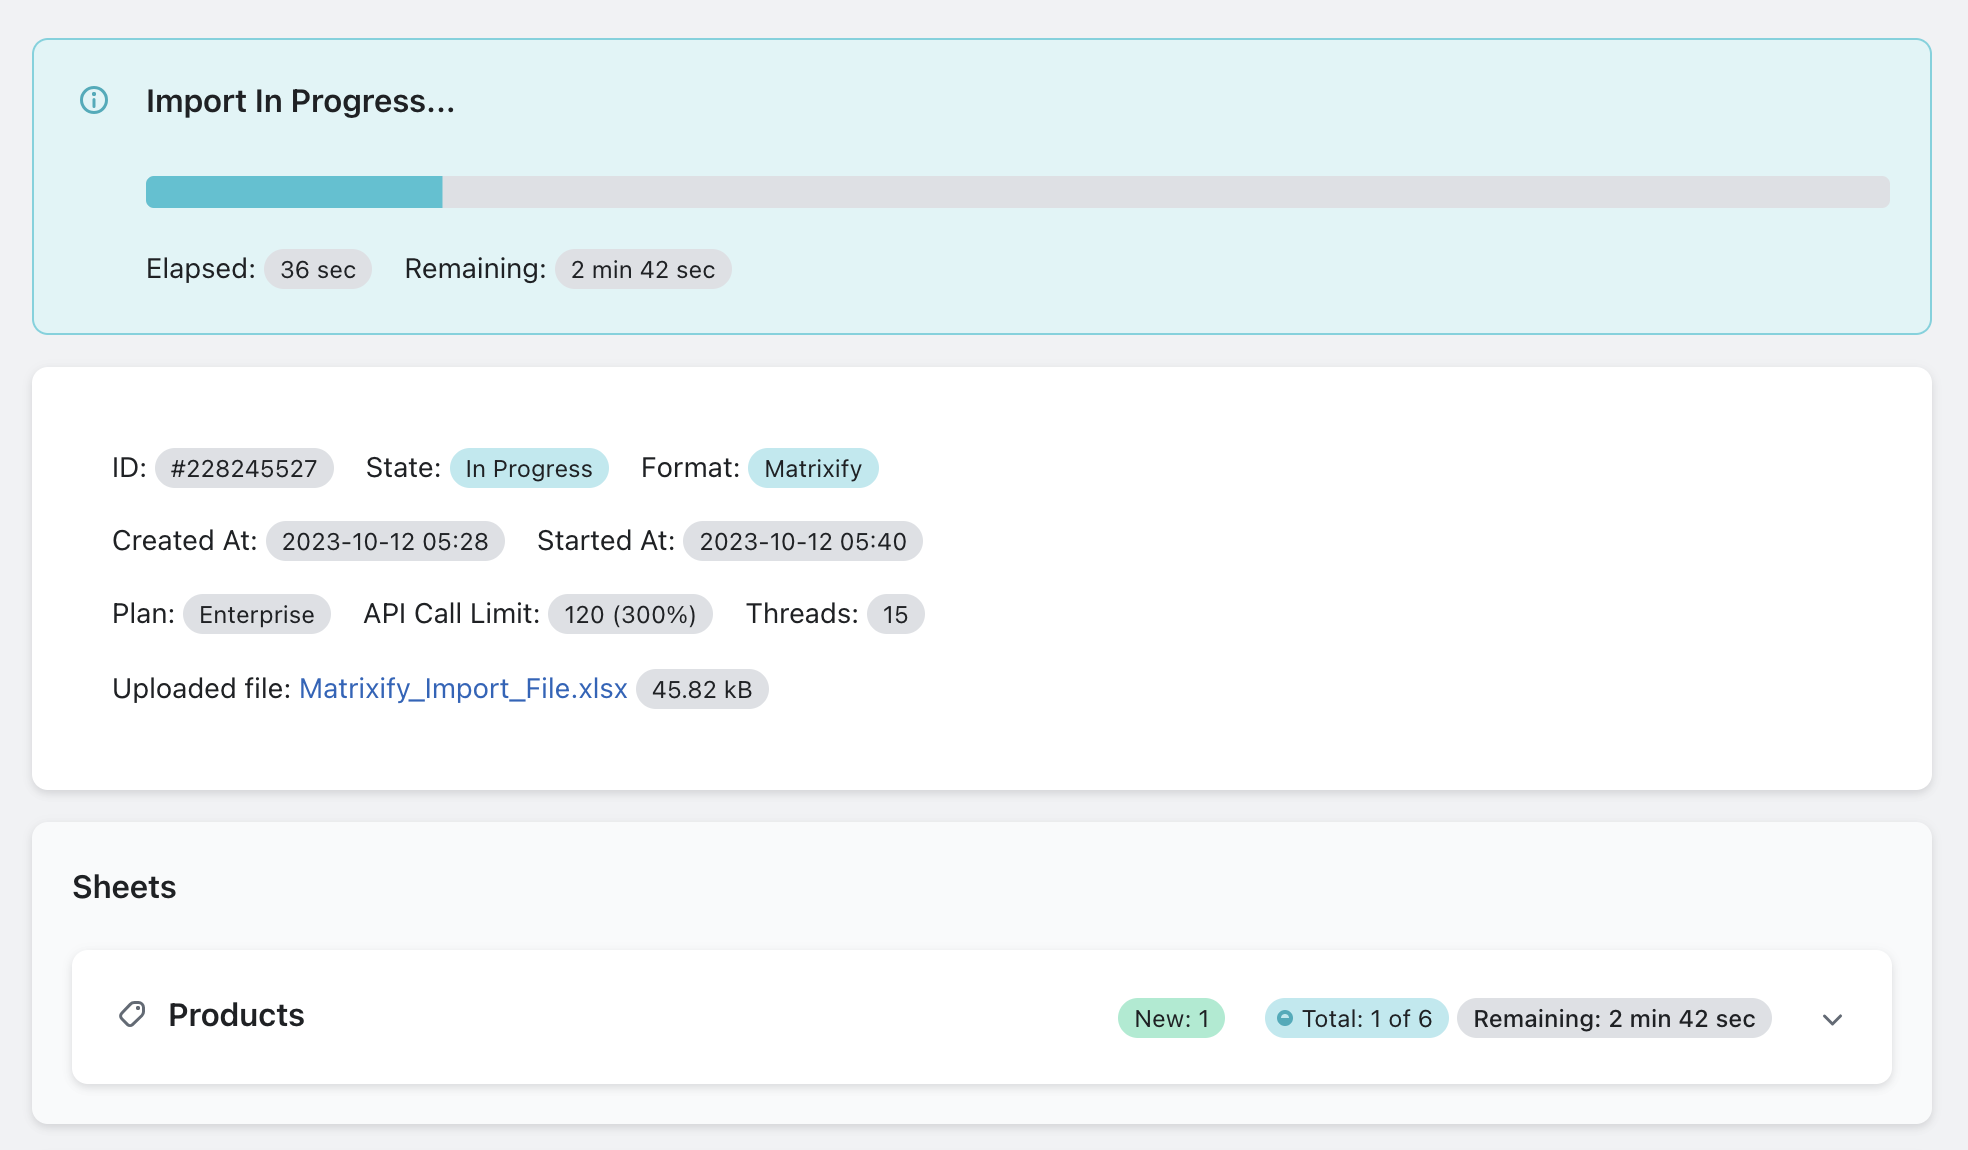
Wait for the app to download the file for the first time, and let it analyze it (or fix any issues if it says that the URL was not correct).
Once the app will have analyzed the file you will be able to set up options and see more details about your file.
Make sure that the app correctly recognizes data that you are importing and count of items in your file.
3. Verify that the app has found the file and sees its contents
If everything will connect as expected, you should see that the file got uploaded and the app will analyze its contents.
If you just want to import it right away, you can press the Import button and it will start the import. Maybe it’s even the right thing to do for the first time – to test if your file is prepared well so that it imports without any issues.
But if you want to schedule repeated import then continue with the following steps.
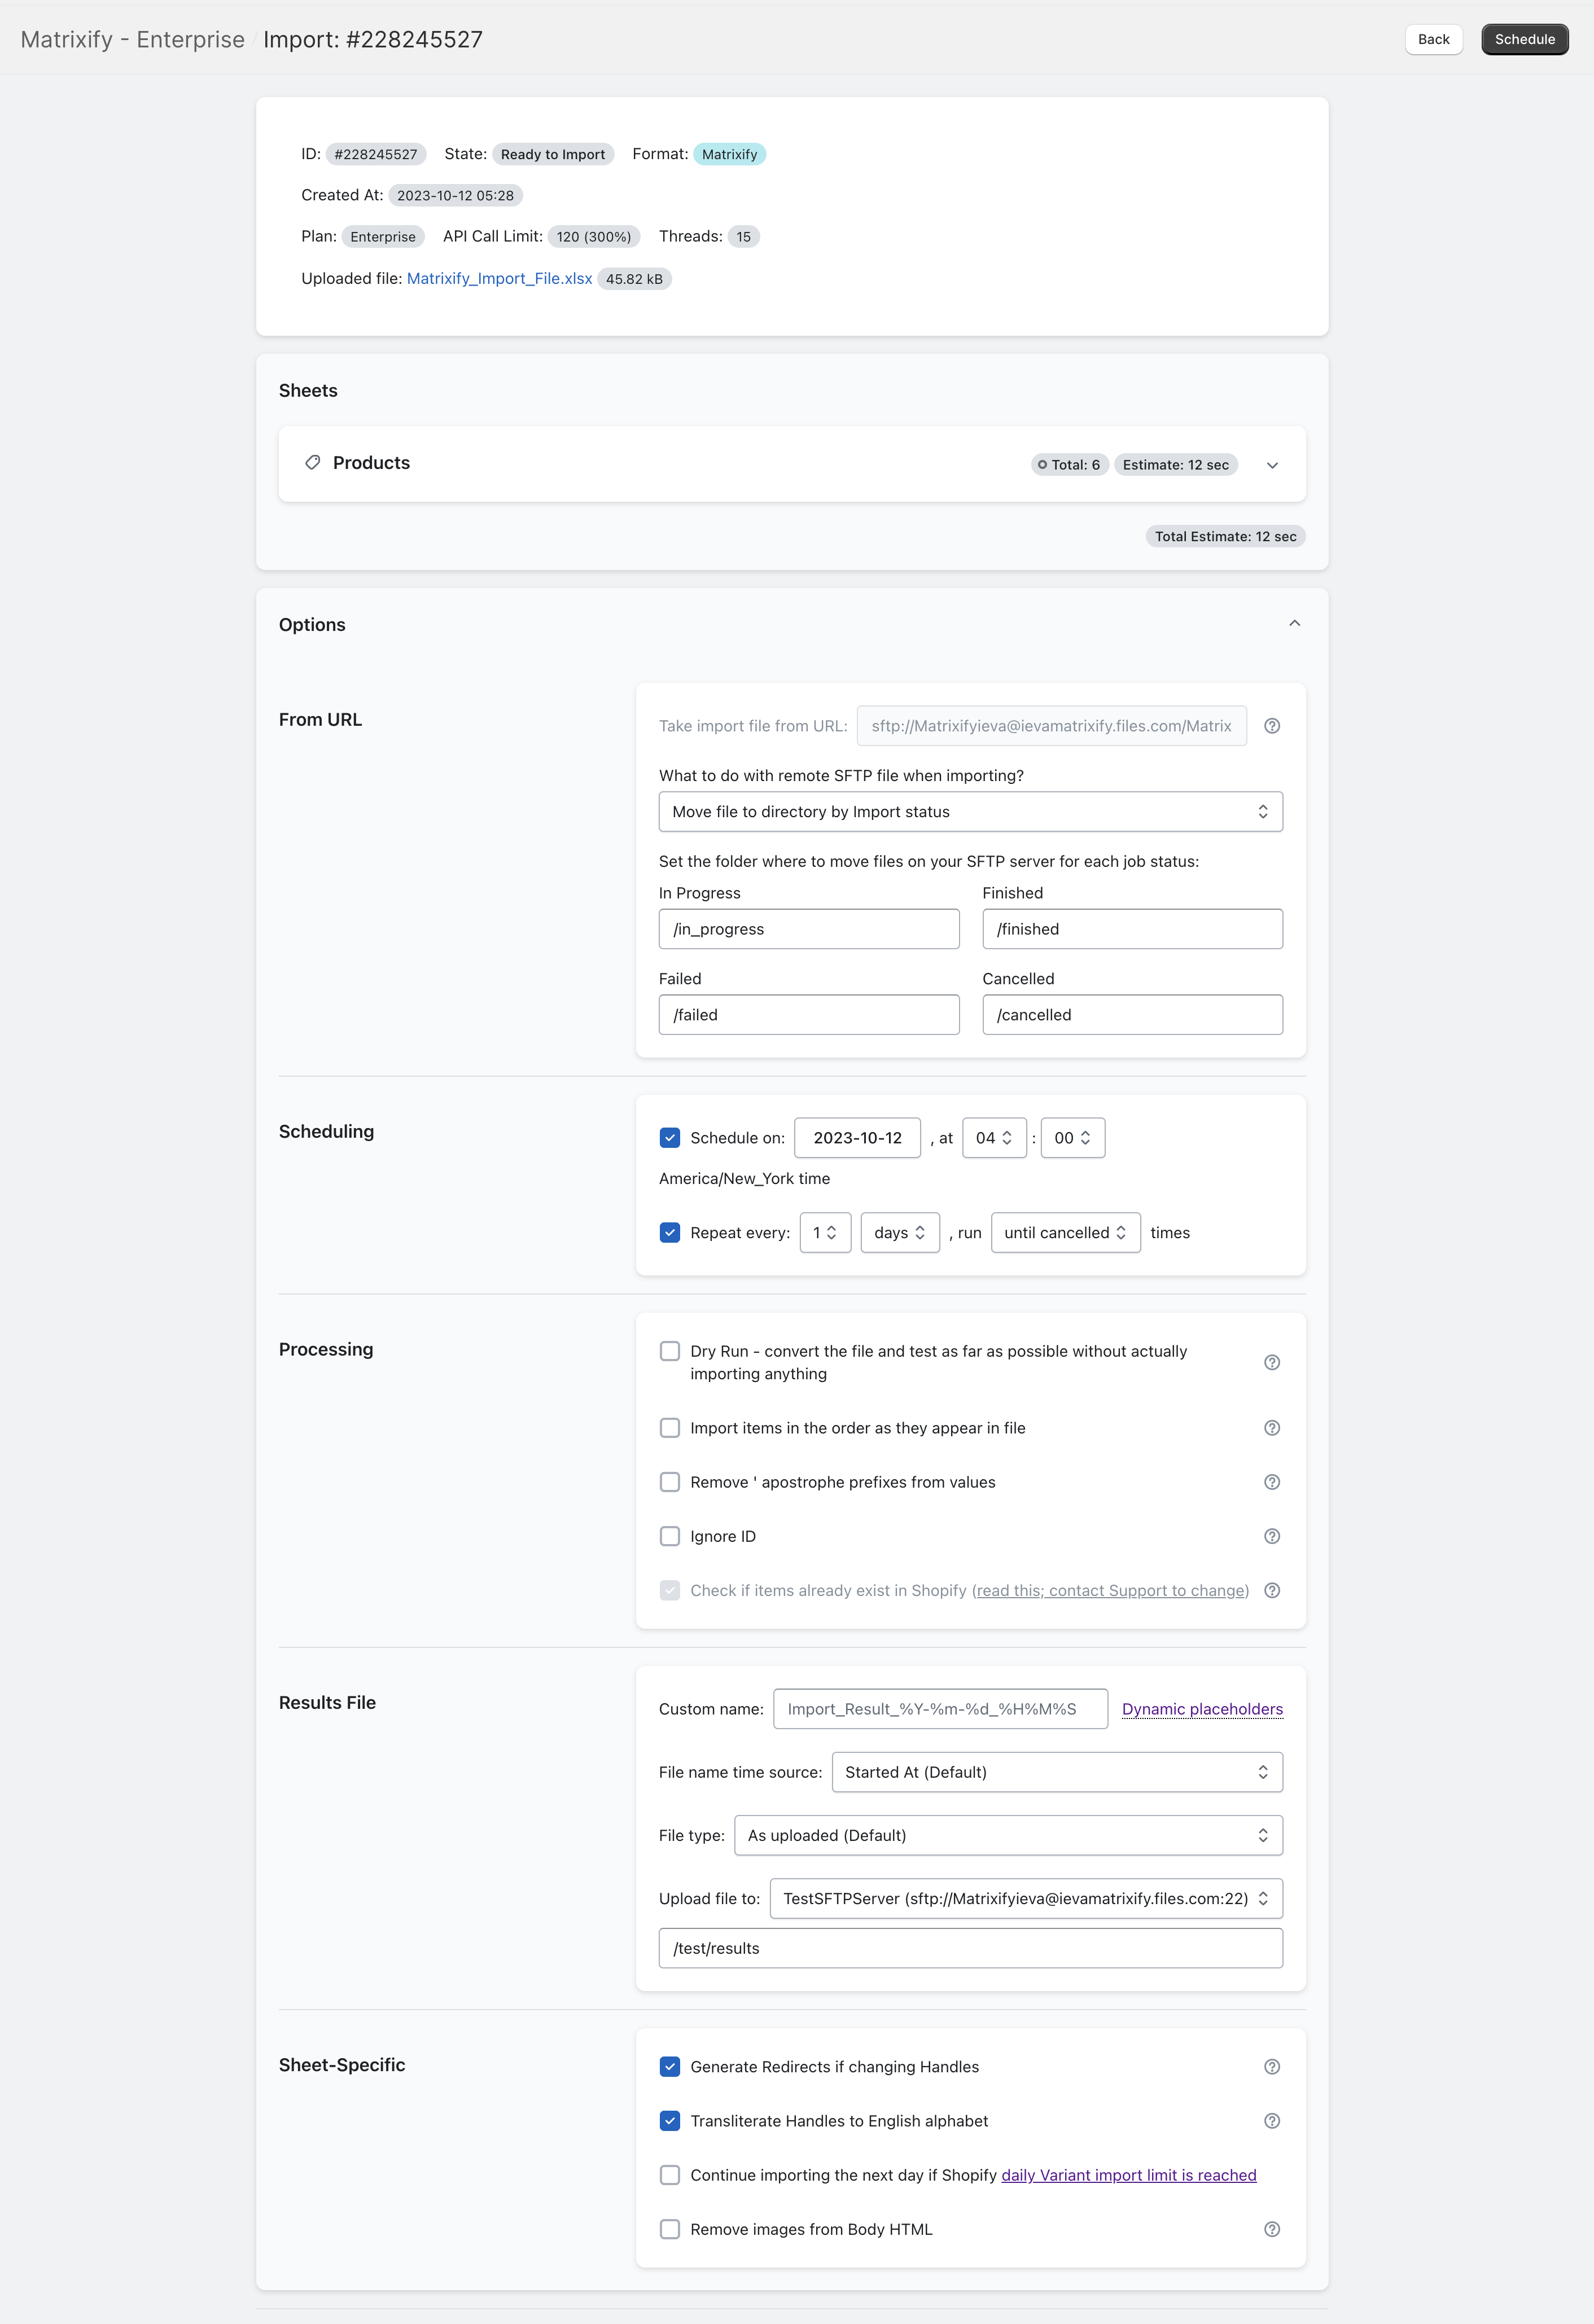
4. Set up your SFTP import options
4.1 What to do with the file?
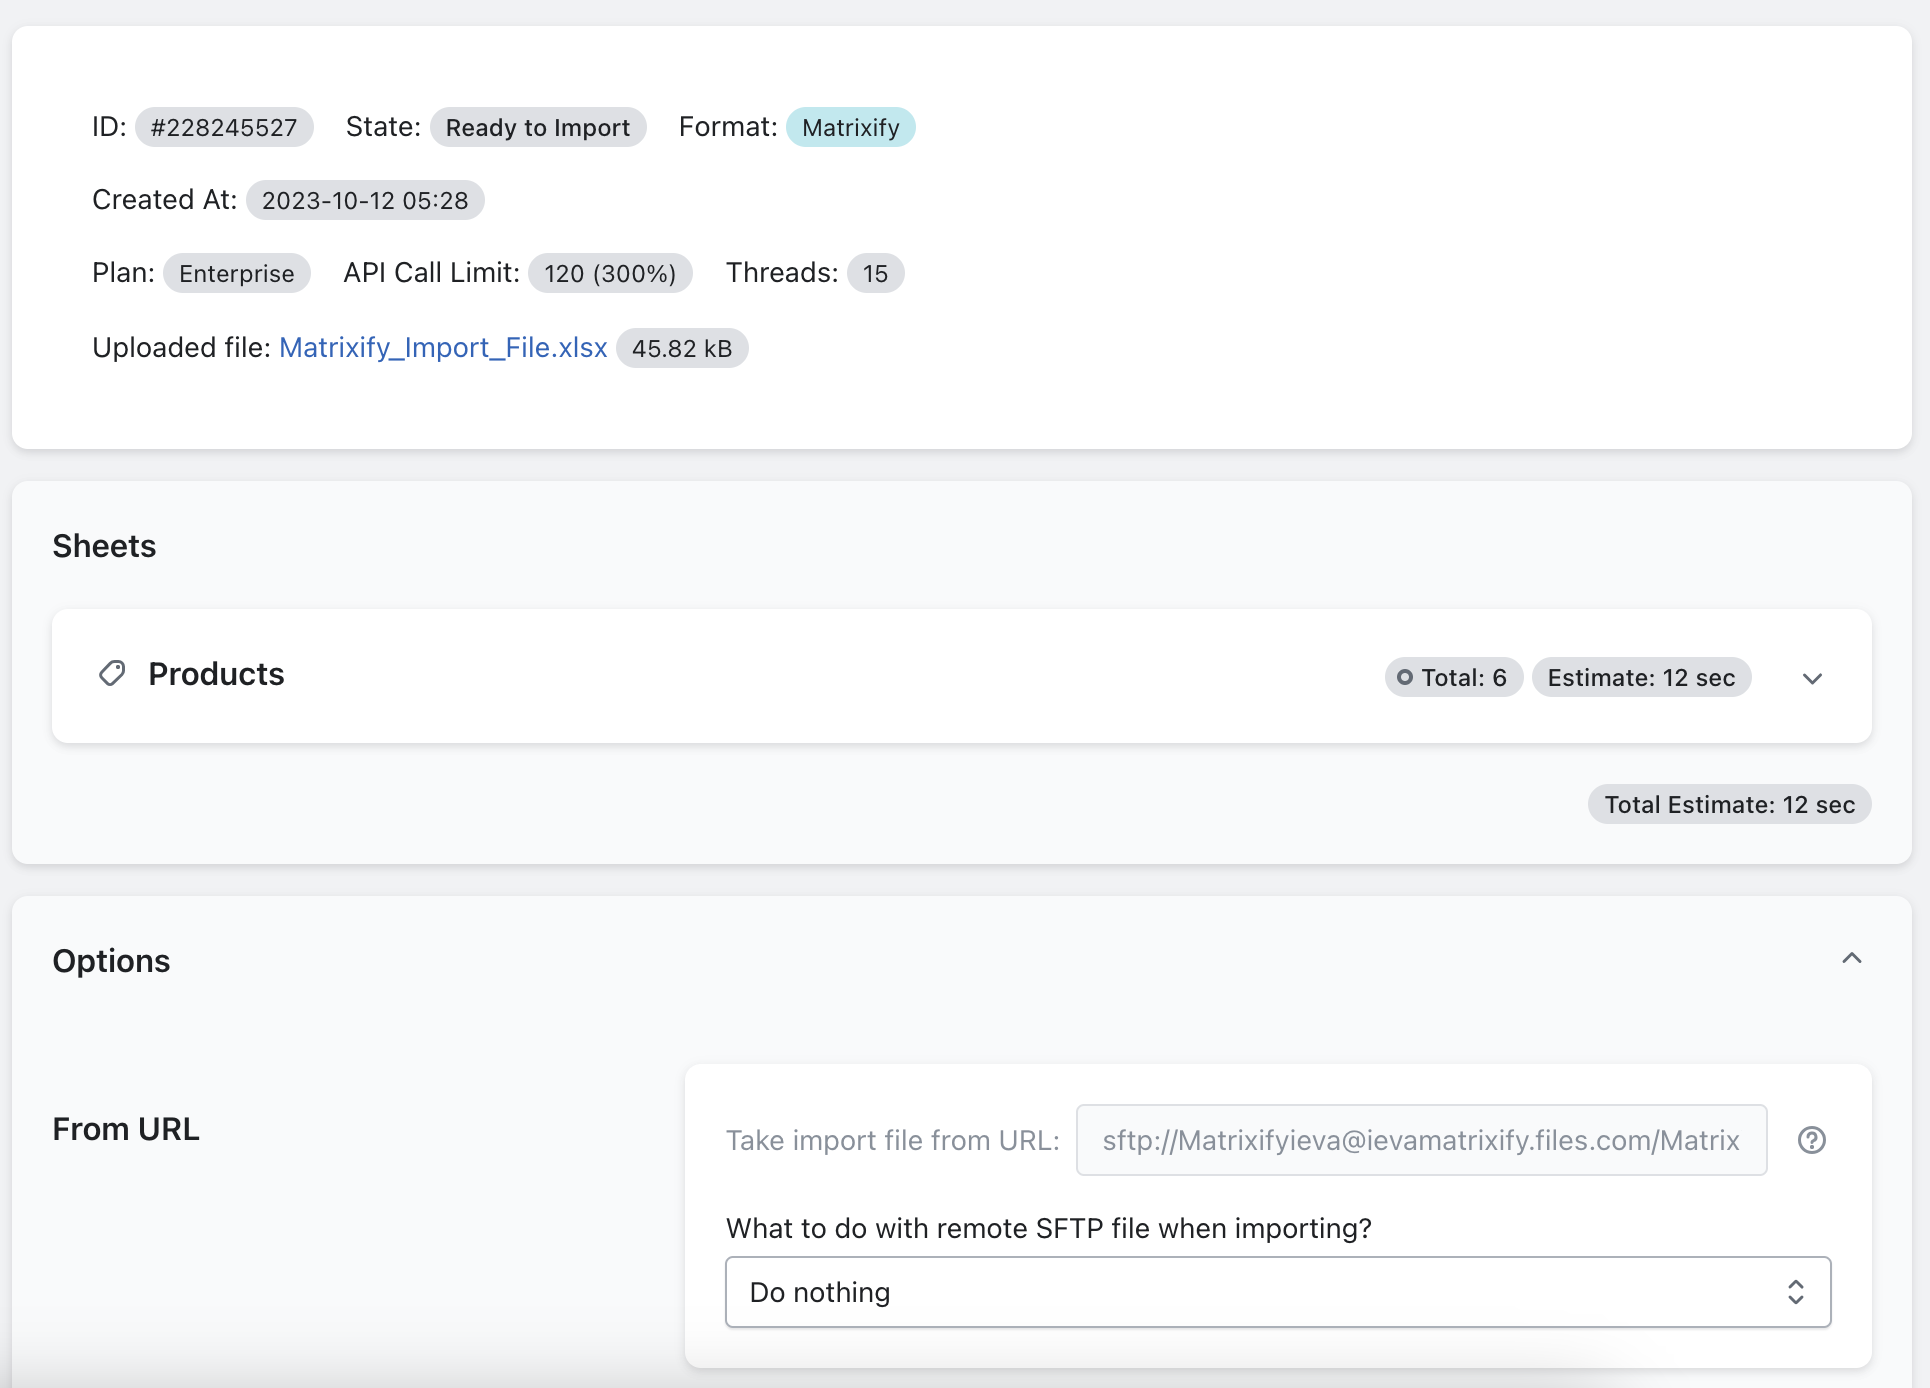
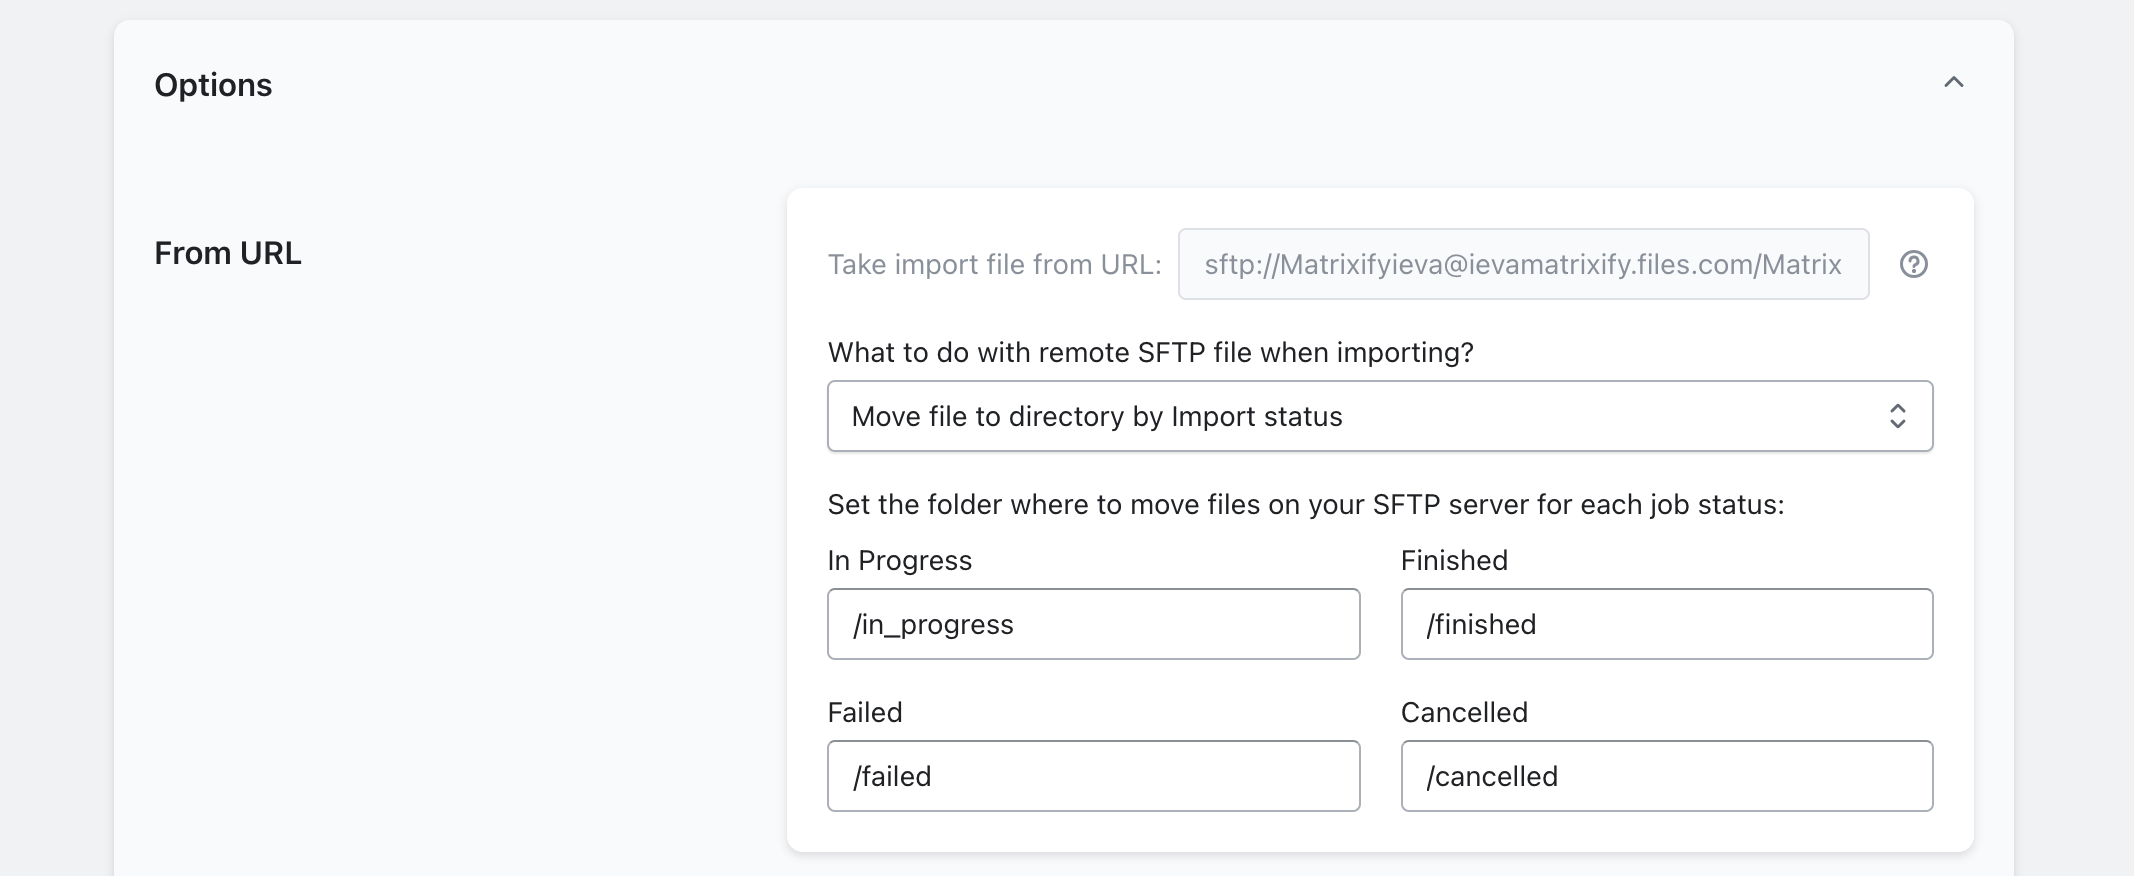
First, in the Options drop-down, we need to set up the option “What to do with remote SFTP file when importing?”
Here you can choose one of three settings:
- Do nothing – nothing will happen to your file in your server it will just get import and stay there.
- Delete that file on SFTP server – the app will delete each file it imports.
This is useful if you do not need the file after import, but have repeated import set up for this file and do not wish for next import to import again the same file. - Move file to directory by Import status – moves the file to a different directory based on its current status within this batch job.
If you have automation set up in your server that should pick up what happened with the file or just wish to be in control of your files then this is an option to select.
In this option you can set up to move file by the following conditions:- In Progress – the app will move the file to a specific directory once the app starts to import it.
- Finished – the file will get moved to the specific folder once it finishes importing (the file will be moved here even if there are some failed items inside the import, because in principle that import was finished).
- Failed – move the file if the whole job file fails to import (in most cases, when the template format is not recognized at all).
- Cancelled – move the file if that import job was cancelled.All 4 fields will be filled by default directories, but you can edit these values to move your file to different folders.
You do not need to fill full URL with credentials just path to the directory.
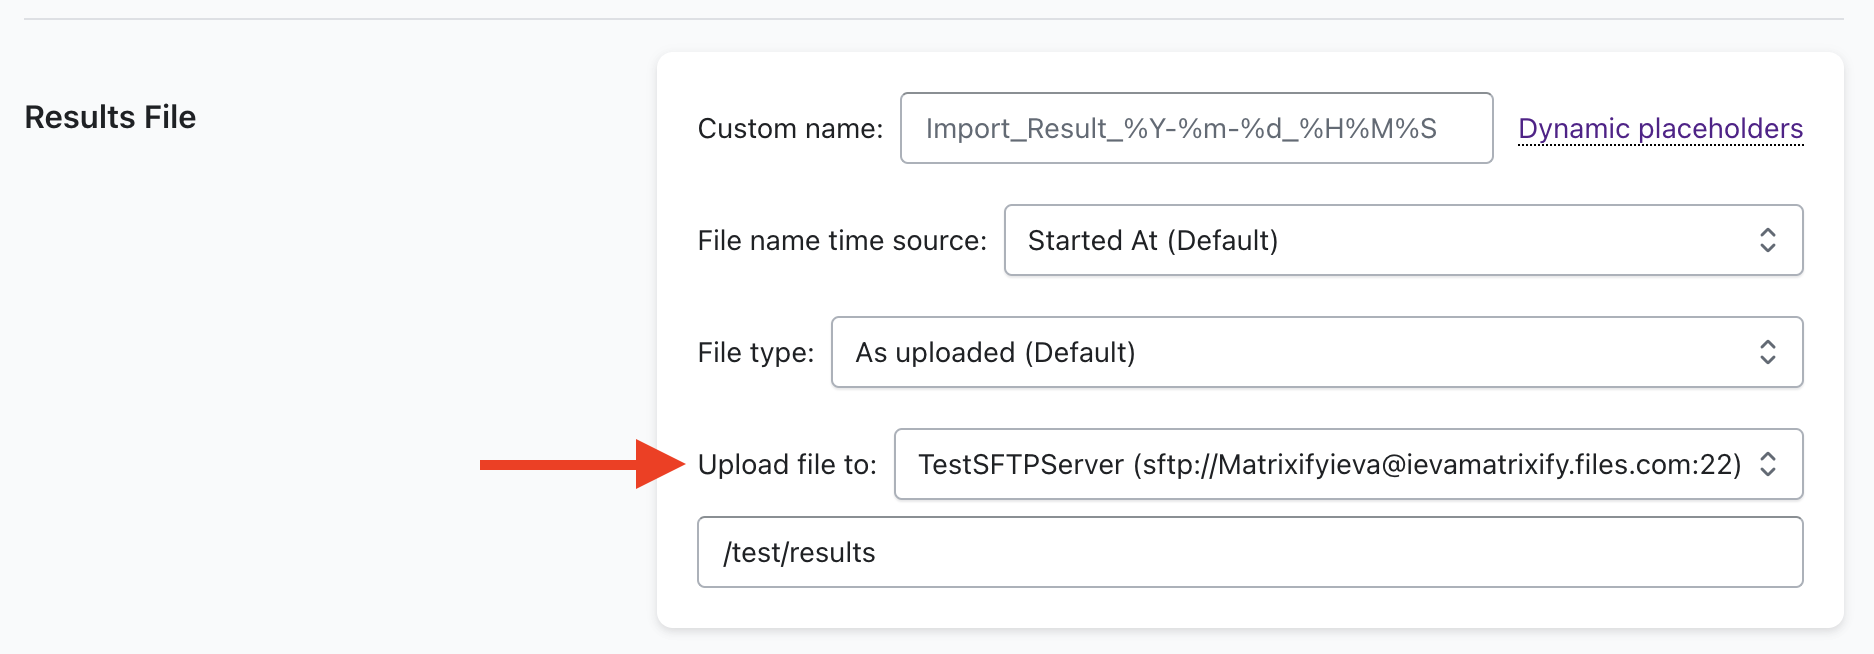
4.2 Upload Import Results file to your server
This section is optional if you need/wish to upload Results file to your server.
Now further below you see a lot of checkboxes, you can leave all these as they are, for default importing it should be fine.
Check here for more information about all the Options.
Each job will save and return the Import Results file in the app, but you can also upload it automatically to your server.
If you want Results file to be uploaded to your server, find and fill the option “Upload Results file to:“.
Click on the dropdown and select the server you’d like to upload the Import Results to or you can add the full url to the server.
In my example, this would be:
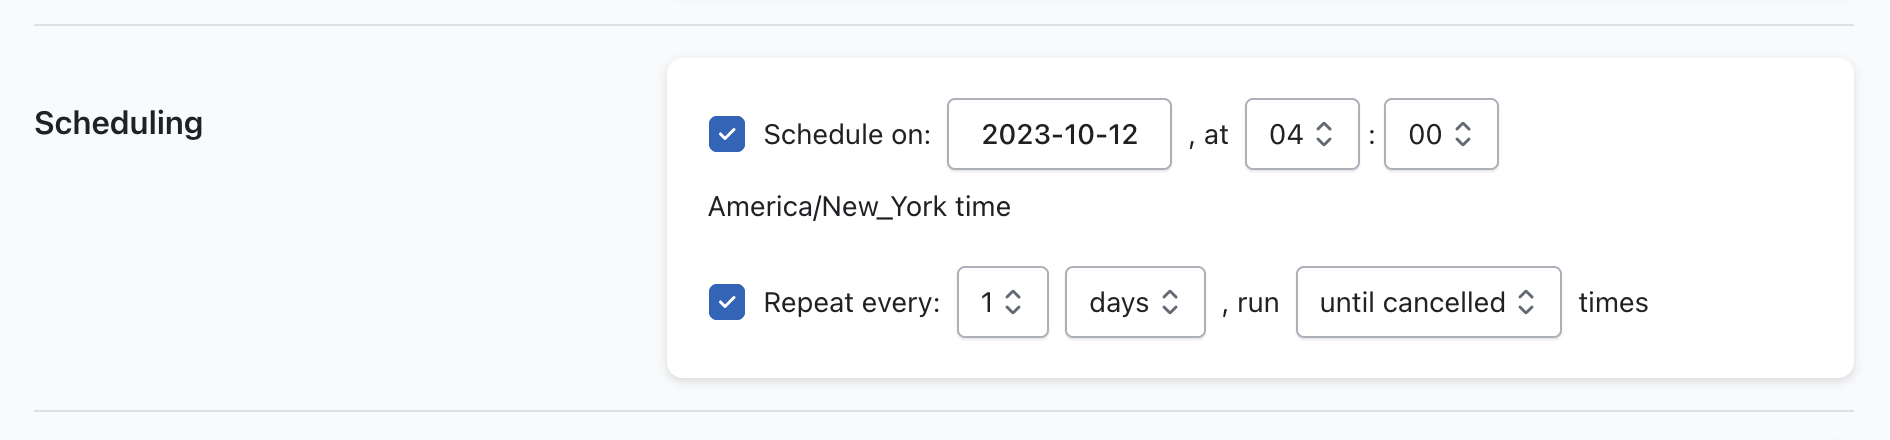
4.3 Set up Scheduled and Repeated import
At the very end of the Options section, you can set up scheduled and repeated import.
- Schedule on: – this option allows you to specify at what time to import your file. It works well together with the repeat option as the app will created repeated imported starting from this time.
For example, if you schedule your import to start tomorrow at 4 am and repeat every 1 day, then the app will import file under your initial URL every day at 4 am.
If do not select this option then the import will start as soon as you click the “Import” button. - Repeat every: – here you can set up how often you wish to import file from your initial URL. Each time new import starts from the URL the app will download new file from the URL so if you have changed your file under the URL then the new file will get downloaded.
Minimum repeat interval is every 1 minute.
5. Start your import by pressing the “Import” button
If you have set up “Schedule On:” option then this button will be called “Schedule“.
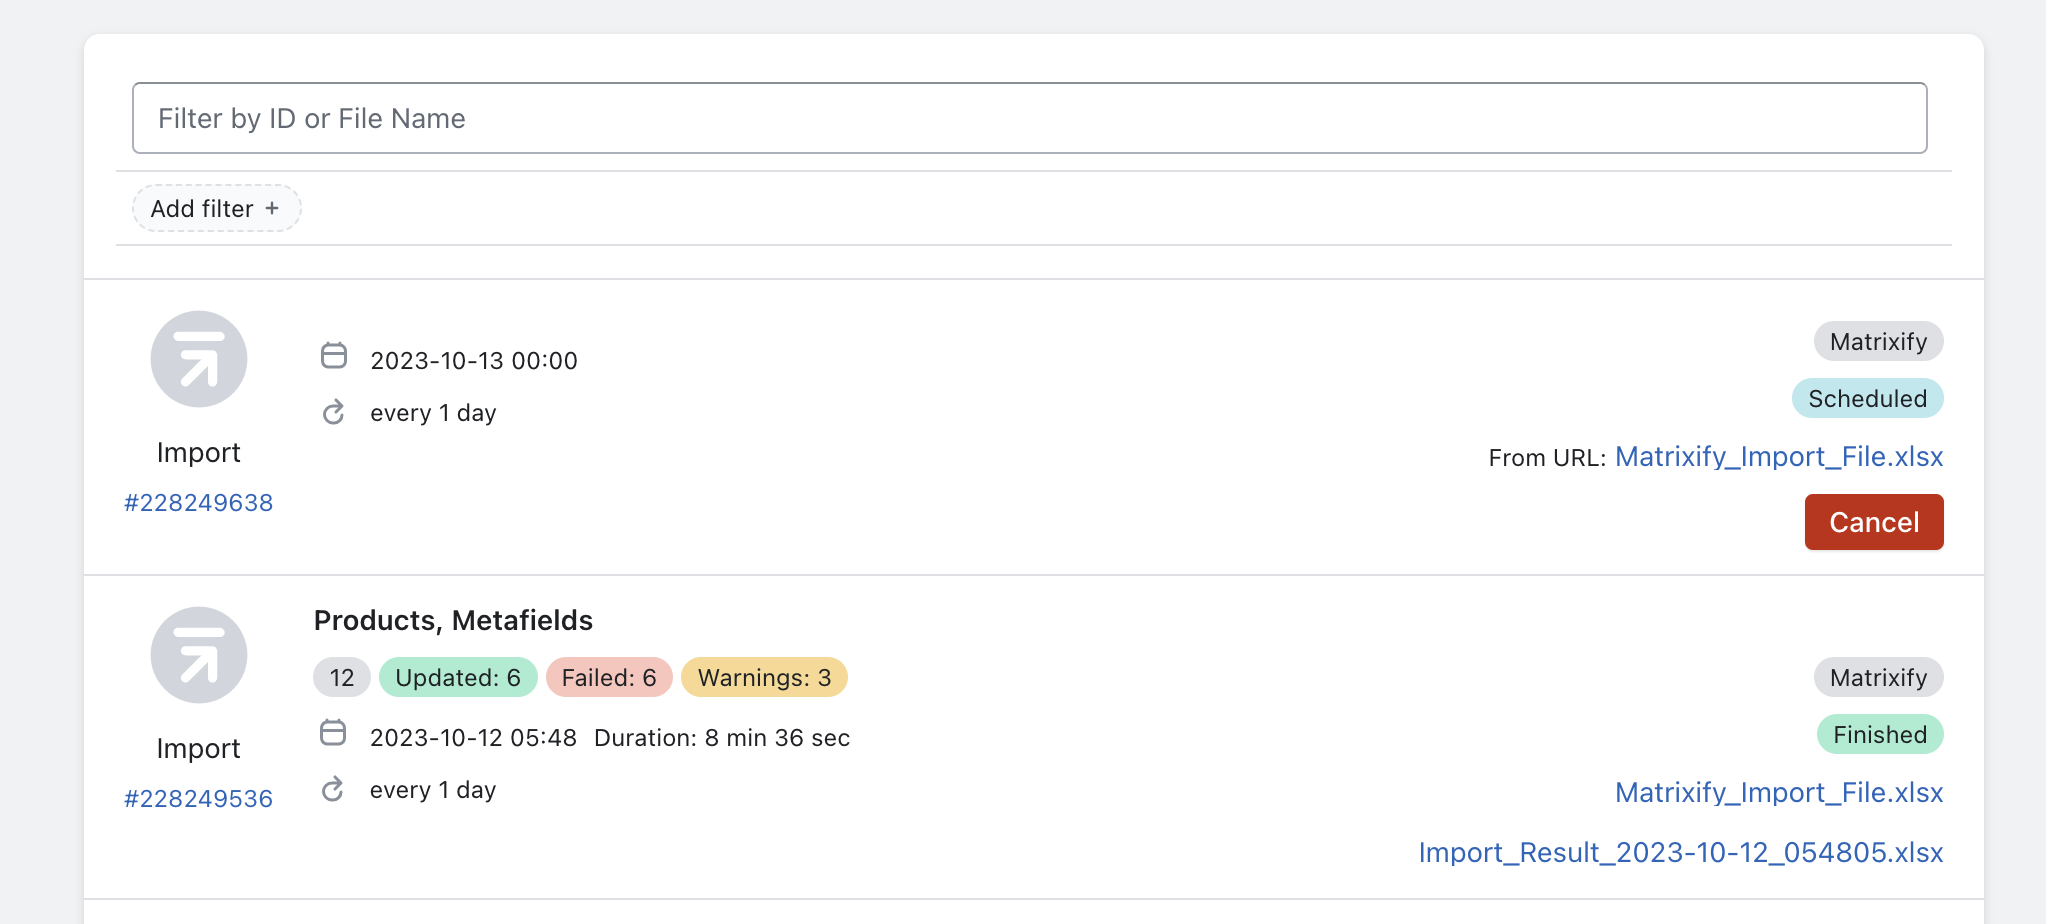
In that case, the app will schedule the job to start at your set date and time automatically, you will see that the job is set to “Scheduled” status.
If you did not set the schedule option then the job will start immediately after pressing the “Import” button.
When the job is running you can see the progress of the job, how many items have imported new, updated, replaced, deleted or failed.
6. Enjoy!
Once your import is finished you will see that the job also has “Finished” status.
If there are any failed items then you can download the Import Results file, and in last two columns for each imported sheet you will see what items failed and error message for each item.
You can fix these issues and import only the failed items again.
If you have “Repeat every:” option set up, then you can also go into the “All Jobs” page to see your next import already scheduled!
Good to know
- If the user is e-mail address then replace the “@” symbol with “%40”.
- If the password contains # or @ symbol then please create such password which doesn’t contain those symbols as those are special characters for the URL and will cause confusions.
- You are free to close the app as the import is happening on our servers, you can always come back to the job by clicking on this job in the app Home page (if it’s within last 5 jobs) or in All Jobs page.
- You can import any of the file formats which are supported by Matrixify.
- See this tutorial on how to export from Shopify to an SFTP server.
- Read how you can set up the app to monitor whole SFTP folder and automatically batch import any files that you upload to it.


