
It is possible to Import Transactions for existing Orders in your Shopify store. You can Capture real payments for the Transactions which are already Authorized. In addition, you can Void the transactions which were captured earlier with real money. If you do not wish to create a Transaction with real money, you can create artificial Transactions using the Bogus or Manual gateway for testing purposes or to re-create Order transactions that were actually paid in another system, e.g. when migrating old Orders to Shopify. Matrixify offers a way this can be done in bulk with ease!
Here is the step by step walkthrough how you can capture the payments for an existing Order.
Capture the payment for existing Order
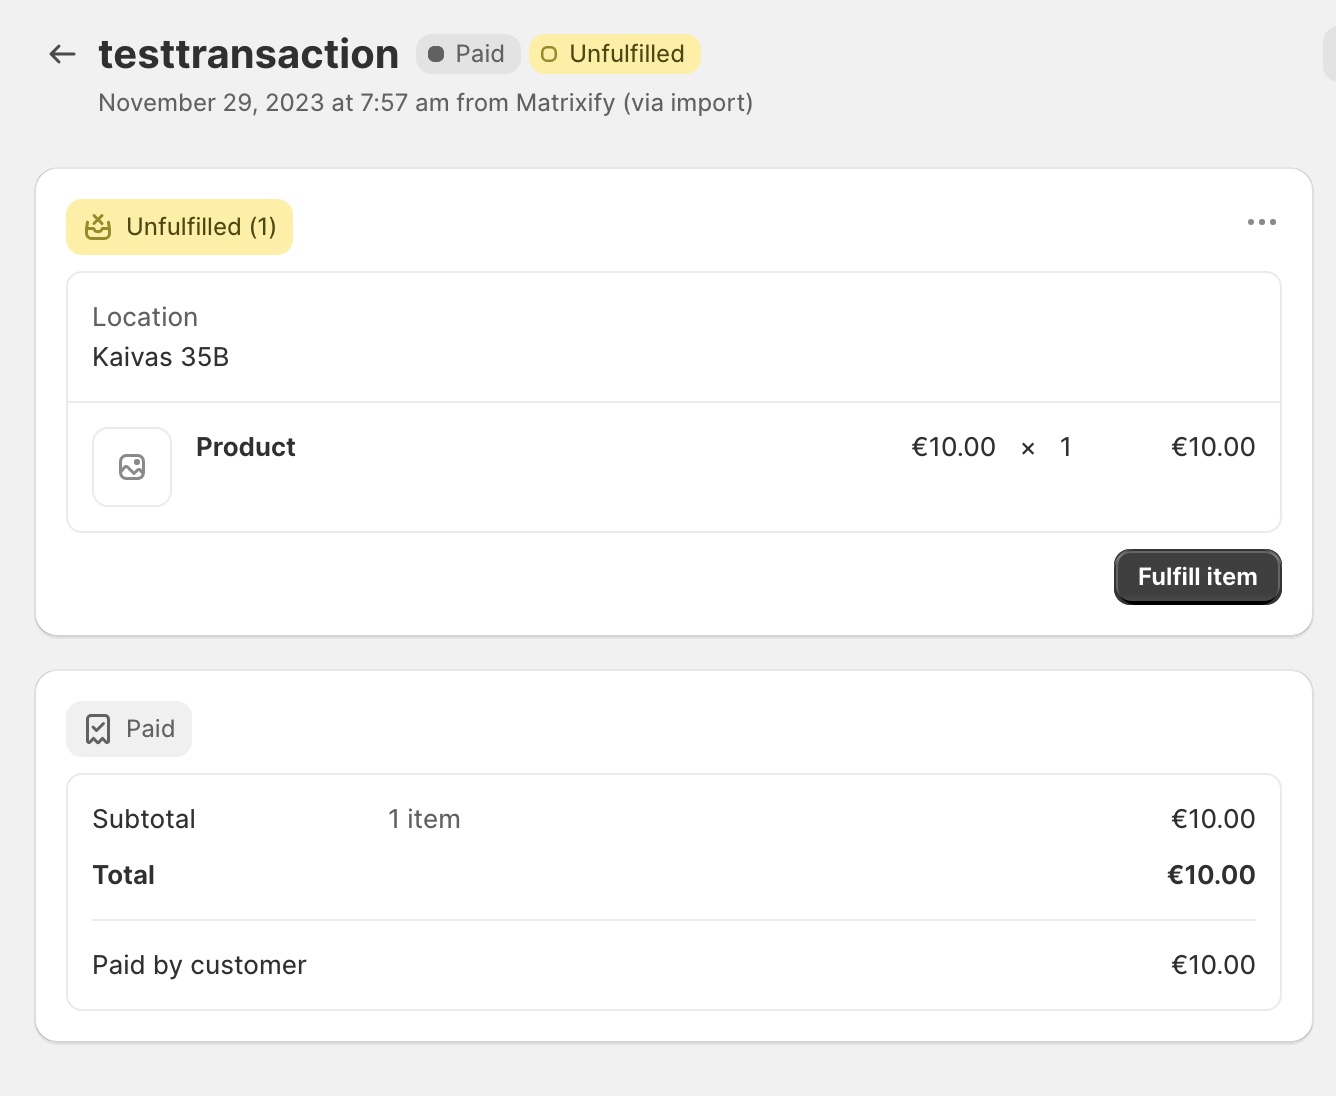
Let’s assume that you already have Orders for which you need to capture those payments. Here is an example Order with an Authorization payment that this tutorial will show you how to Capture.

Export your existing Orders for which you need to capture the payments
You will need to start by Exporting the Orders from Shopify using Matrixify. Head to the Matrixify app and click “New Export”. On the Export page you need to select the “Orders” checkbox from the “Select Sheets” drop-down. Once selected, the only column groups you need to choose to Export are:
Basic ColumnsLine TypeTransactions
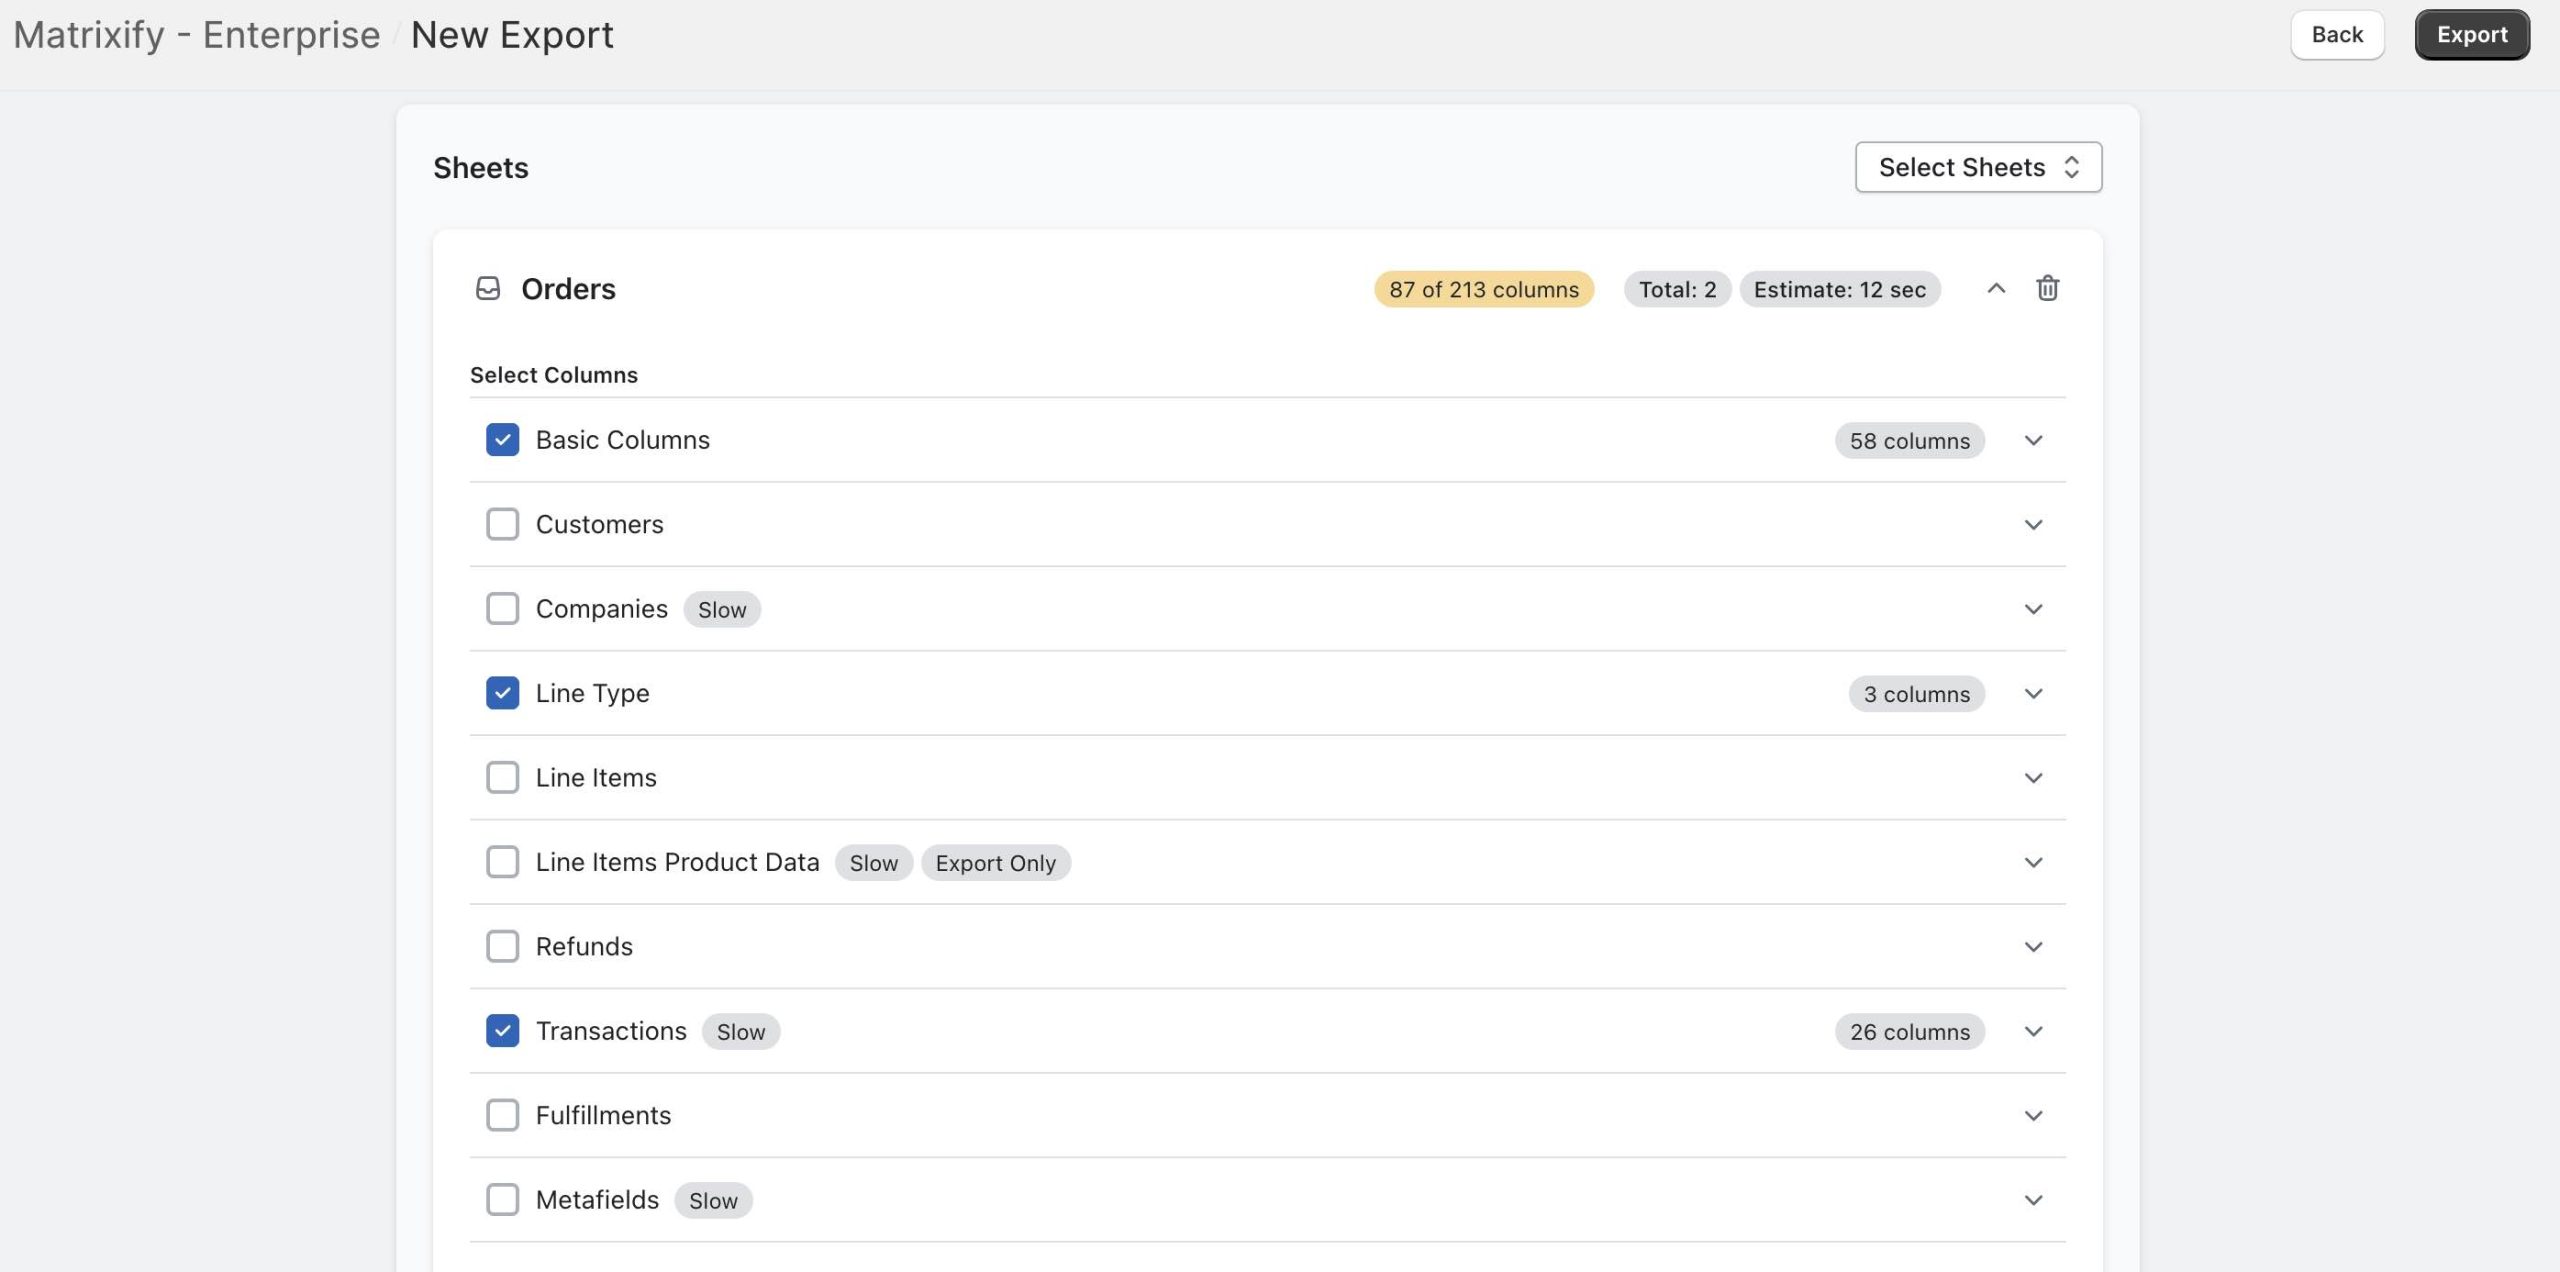
You can also choose to Export only the specific columns you require. If choosing to Export this way, you can click on each column group drop-down and select only the required columns. You only need to select the columns:
From the Basic Columnscolumn group – ID, Name, Command
From the Line Type column group – Line: Type
From the Transactions column group – Transaction: Kind, Transaction: Processed At, Transaction: Amount, Transaction: Currency, Transaction: Status, Transaction: Force Gateway, Transaction: Authorization.
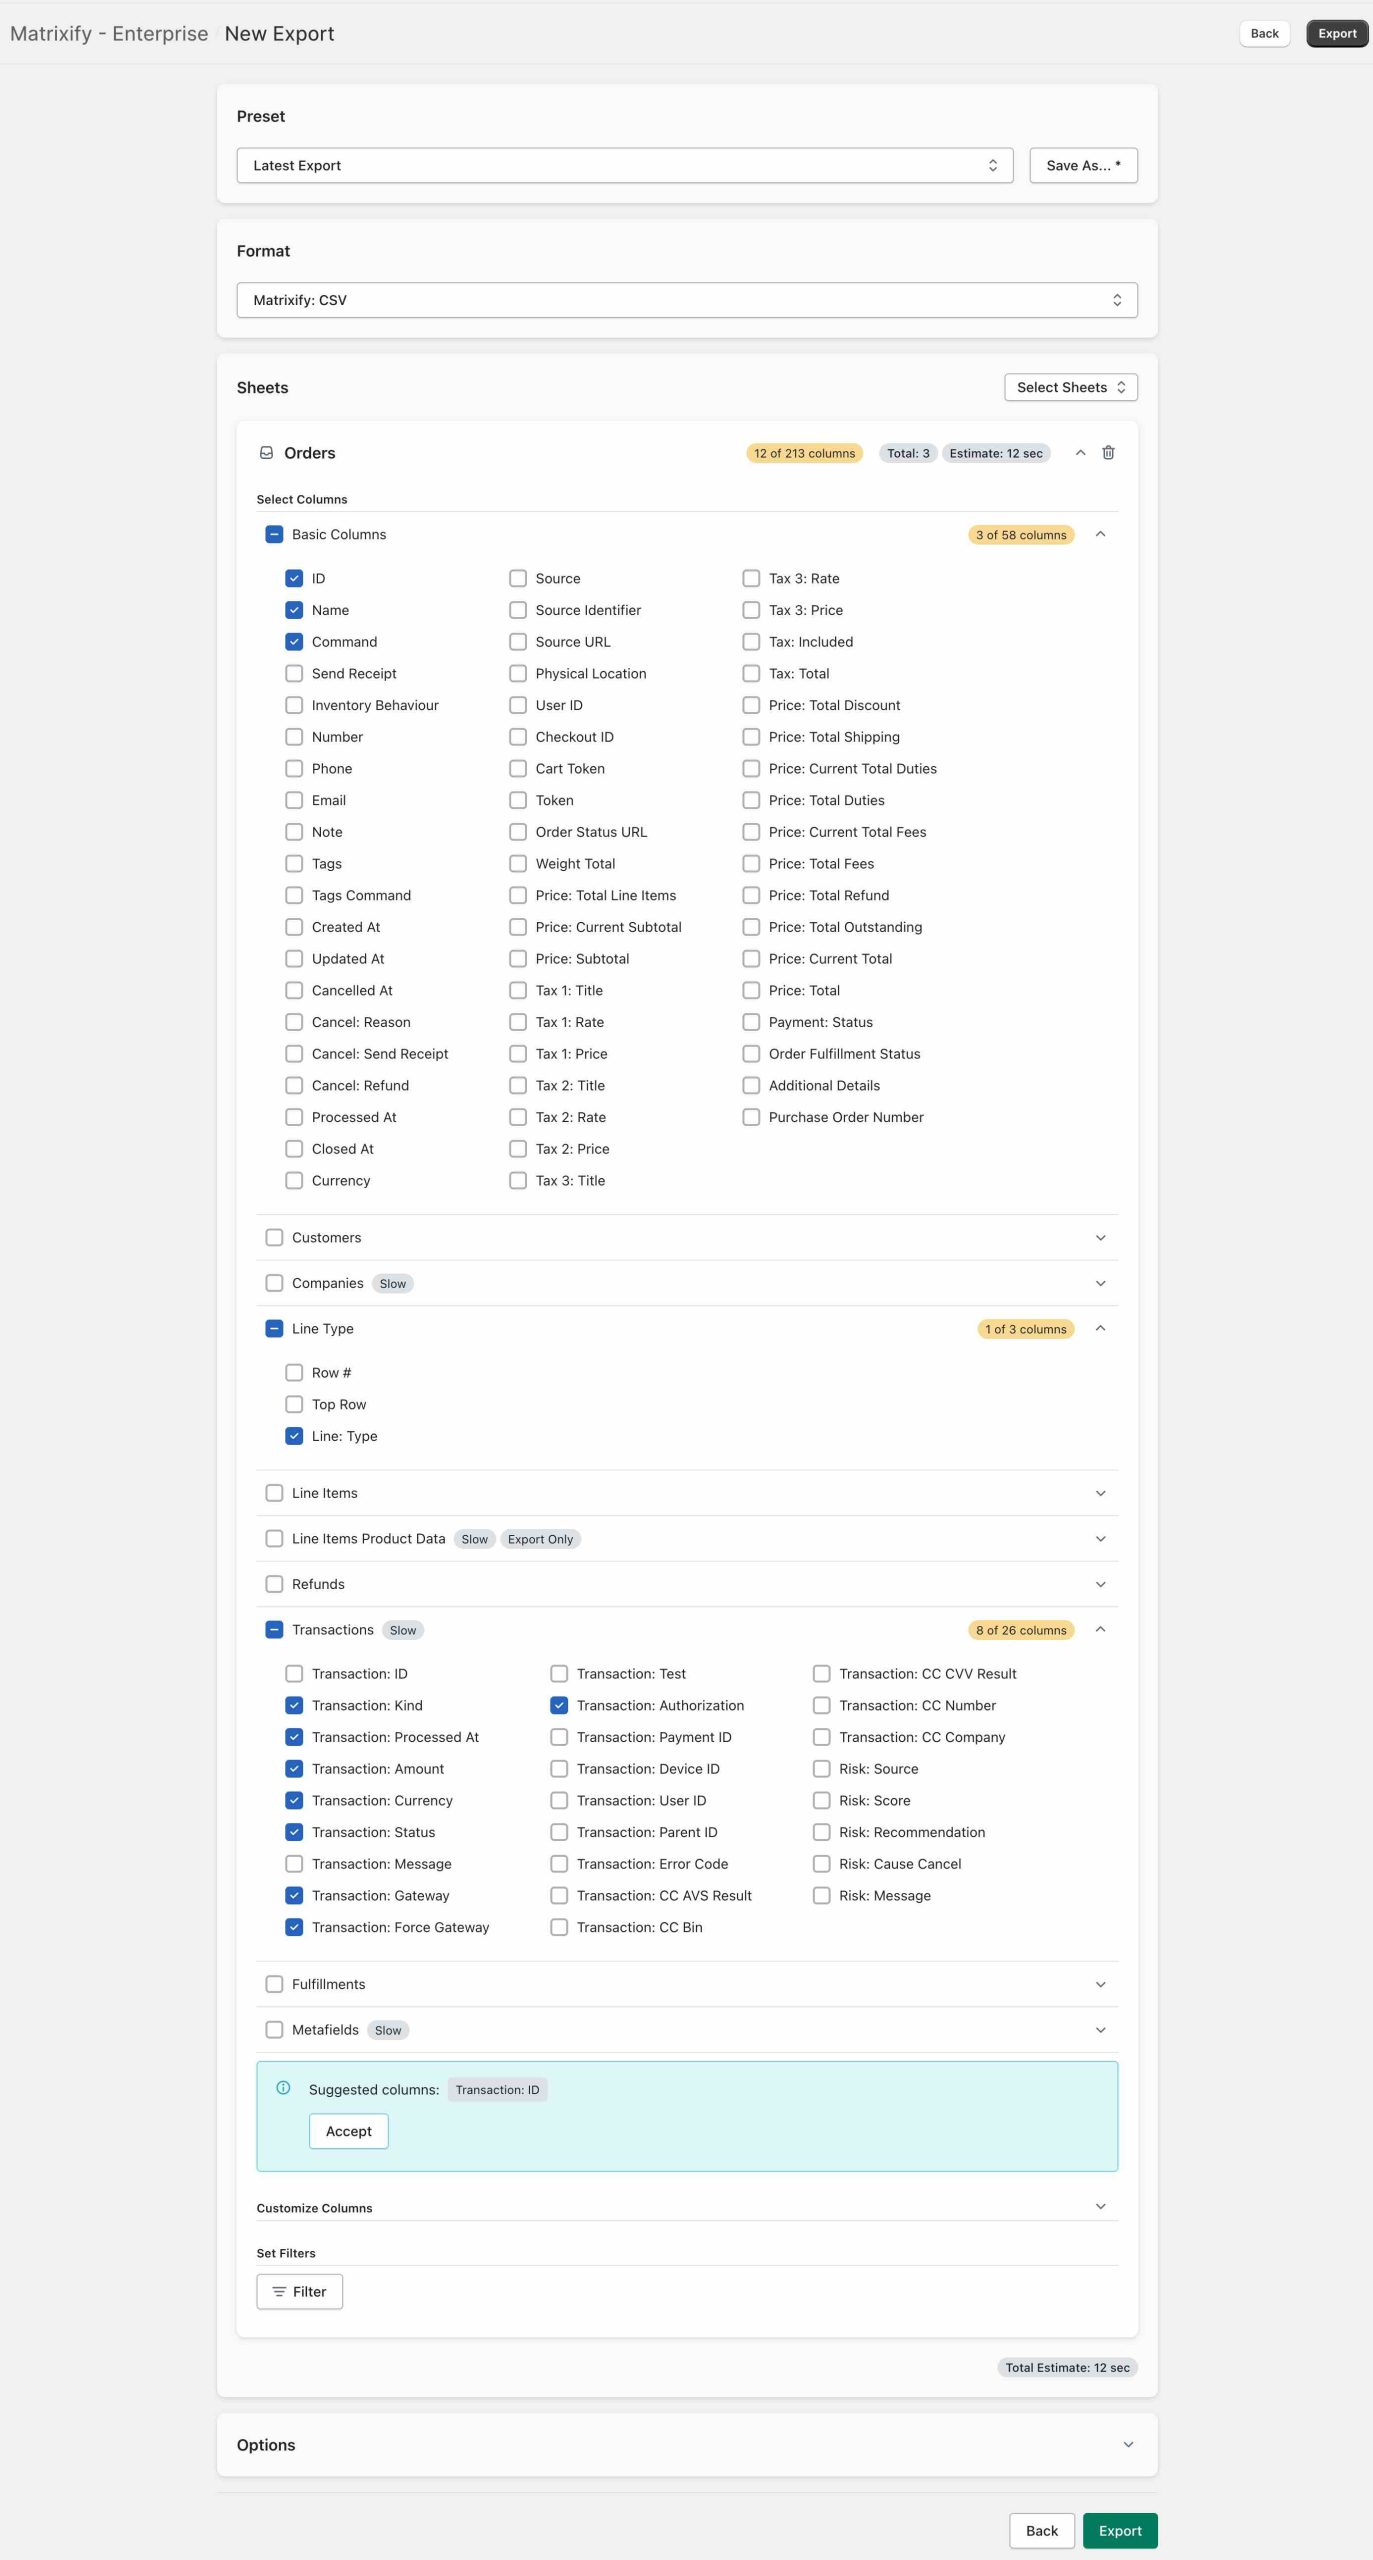
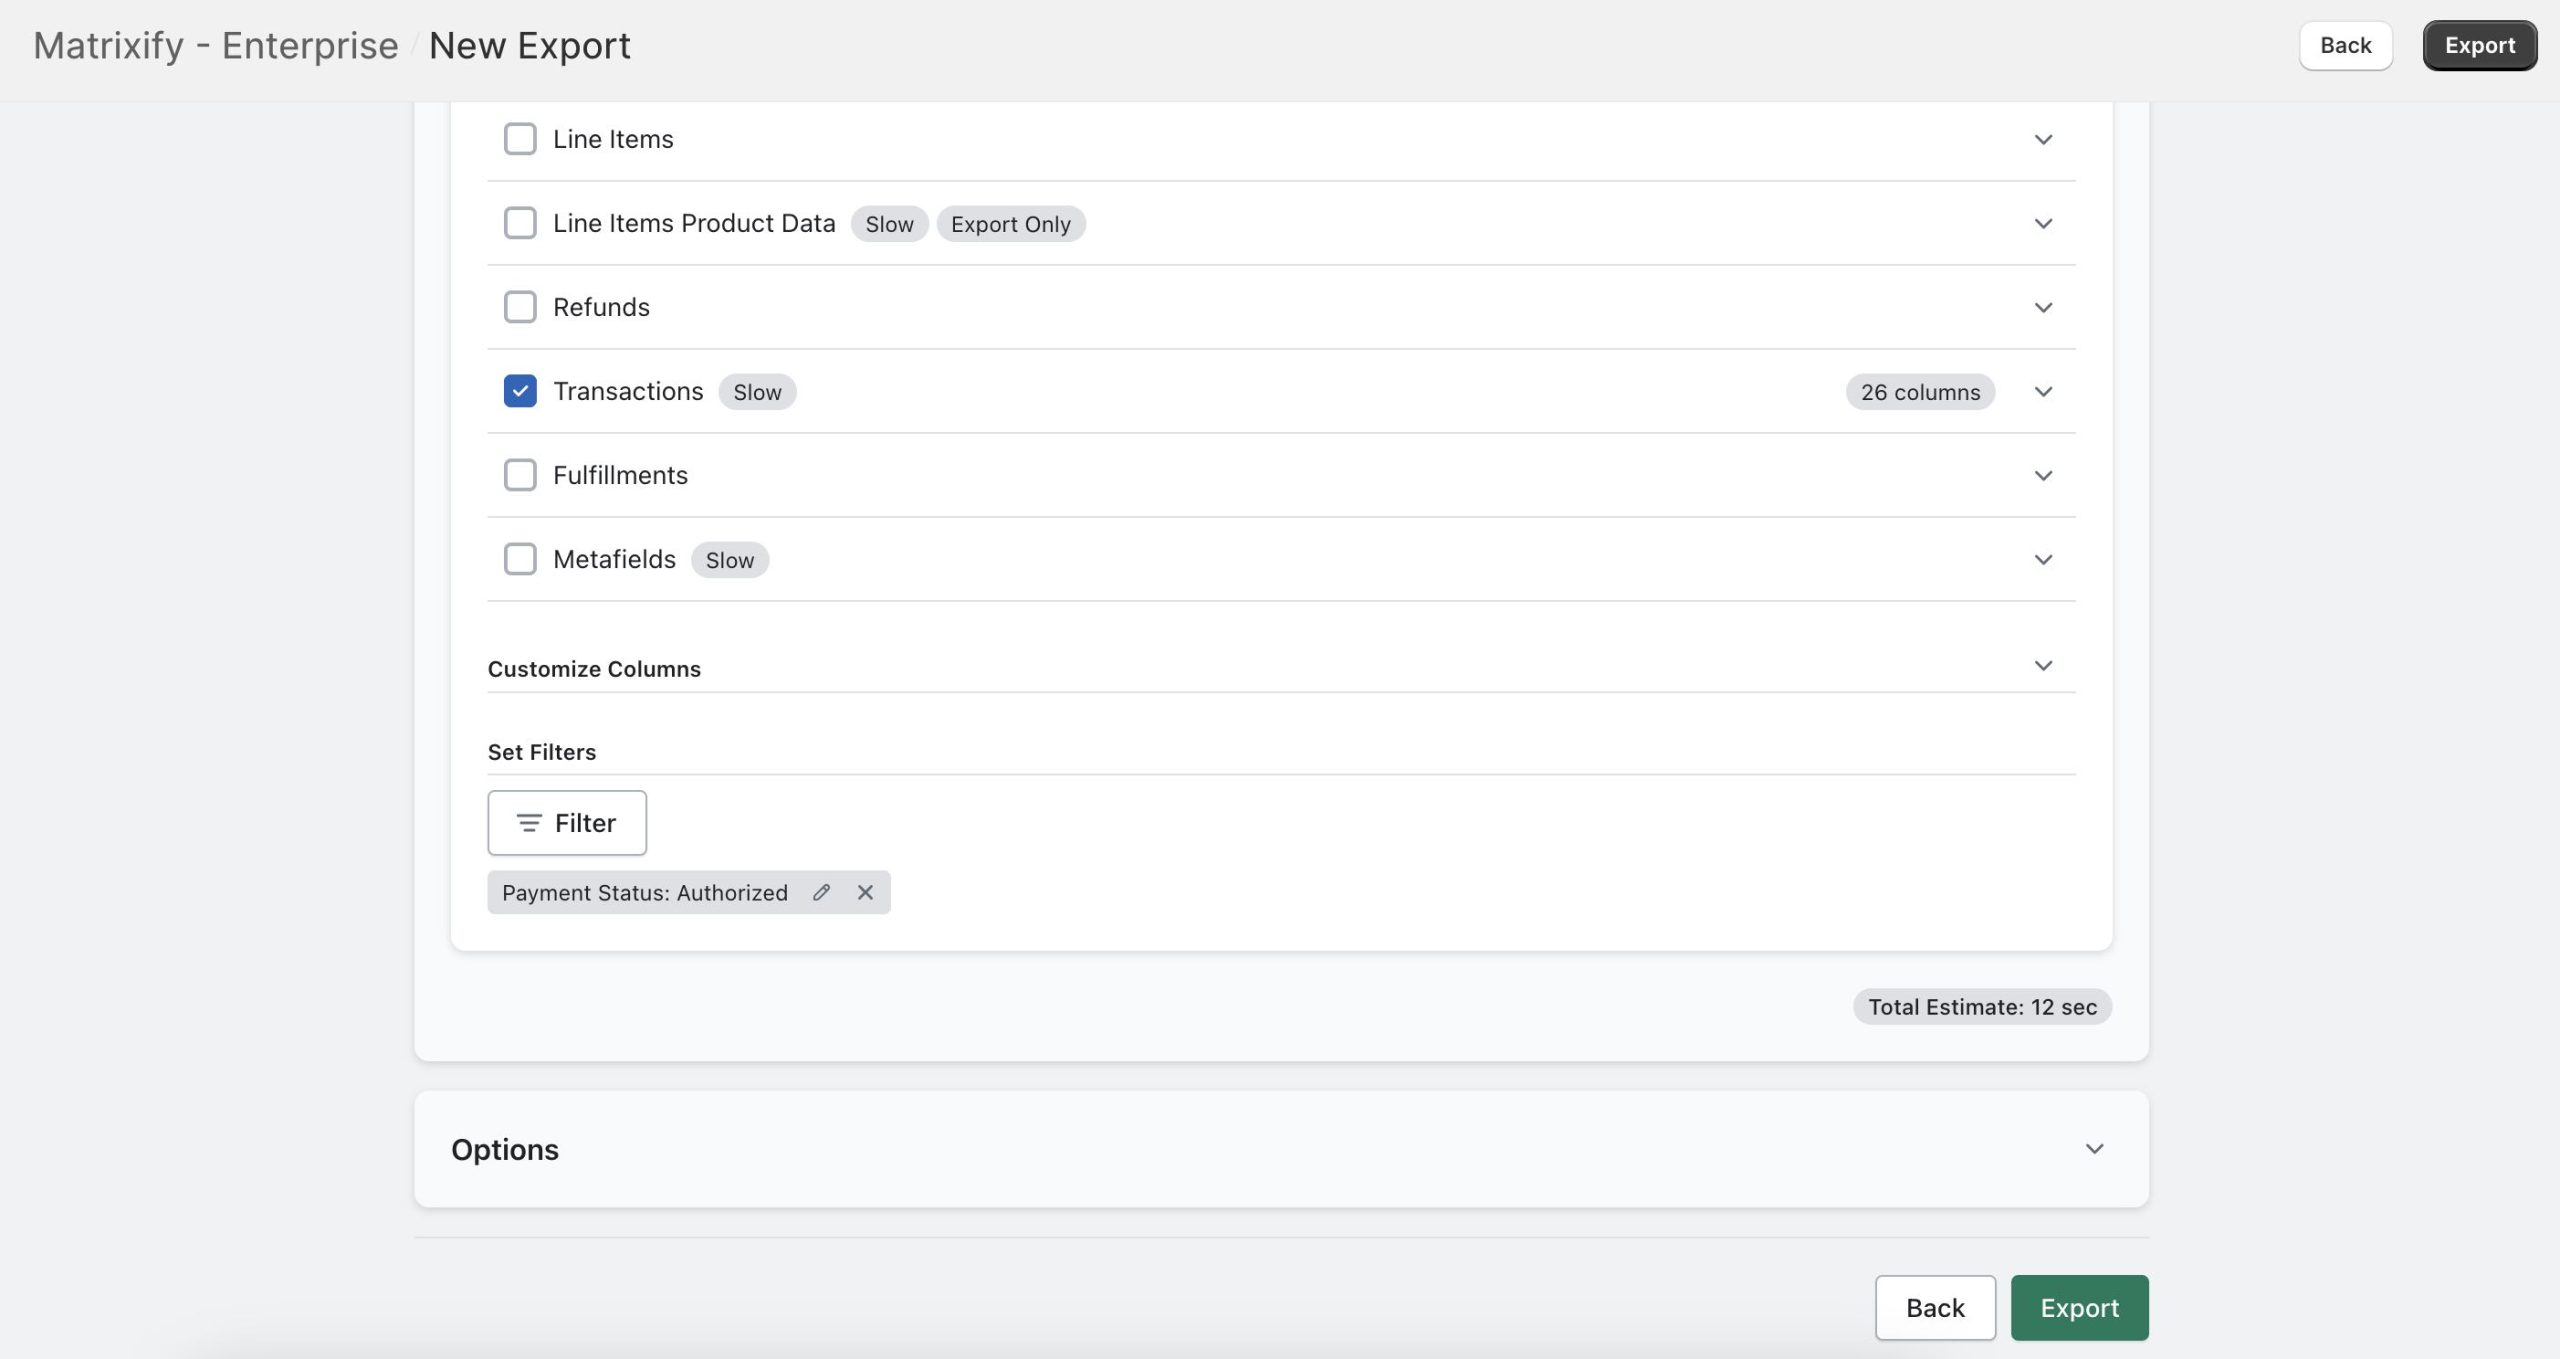
To only Export specific Orders, you can also add Filters to your Export. In this case, it would be handy to Export only Orders with Authorized Transactions from your store, therefore the “Payment Status” -> “Authorized” Filter has been added.
Once your Export is set up, you can go ahead and press the “Export” button.
Prepare the import file for capturing payments
Once the Export has finished you can download the Exported file by clicking “Download Exported file”.

When the Exported file has been downloaded, you can open the file and start preparing it for Import. Remove all the columns and rows and only keep the following:
ID– keep the existingID, this will allow the app to identify your existing Order.Name– keep this so that you know which Order you are updating.Command– change toUPDATEso that you update the existing Order.Line: Type– Leave the value asTransactionTransaction: Kind– set it tocapturebecause you want to capture the payment.Transaction: Processed At– set it to the date when you want this capture to existing, and show in reports.Transaction: Amount– enter the amount which you need to capture.Transaction: Currency– the currency for the capture transaction.Transaction: Status– set it tosuccess.Transaction: Force Gateway– This column works as an apps safety mechanism so that real transactions are not issued when migrating data from store to store. If left empty or is valueFALSEthen the app will set the imported Transaction: Gateway tomanual (<gateway>)If you wish to create transactions with a real gateway for captures, please set this column to the valueTRUE.Transaction: Authorization– leave this value as it was Exported.
Here’s how your import file will look like:

When you have finished editing your file, you can save the file and Import it into the Matrixify app.
Import edited file into the Matrixify app
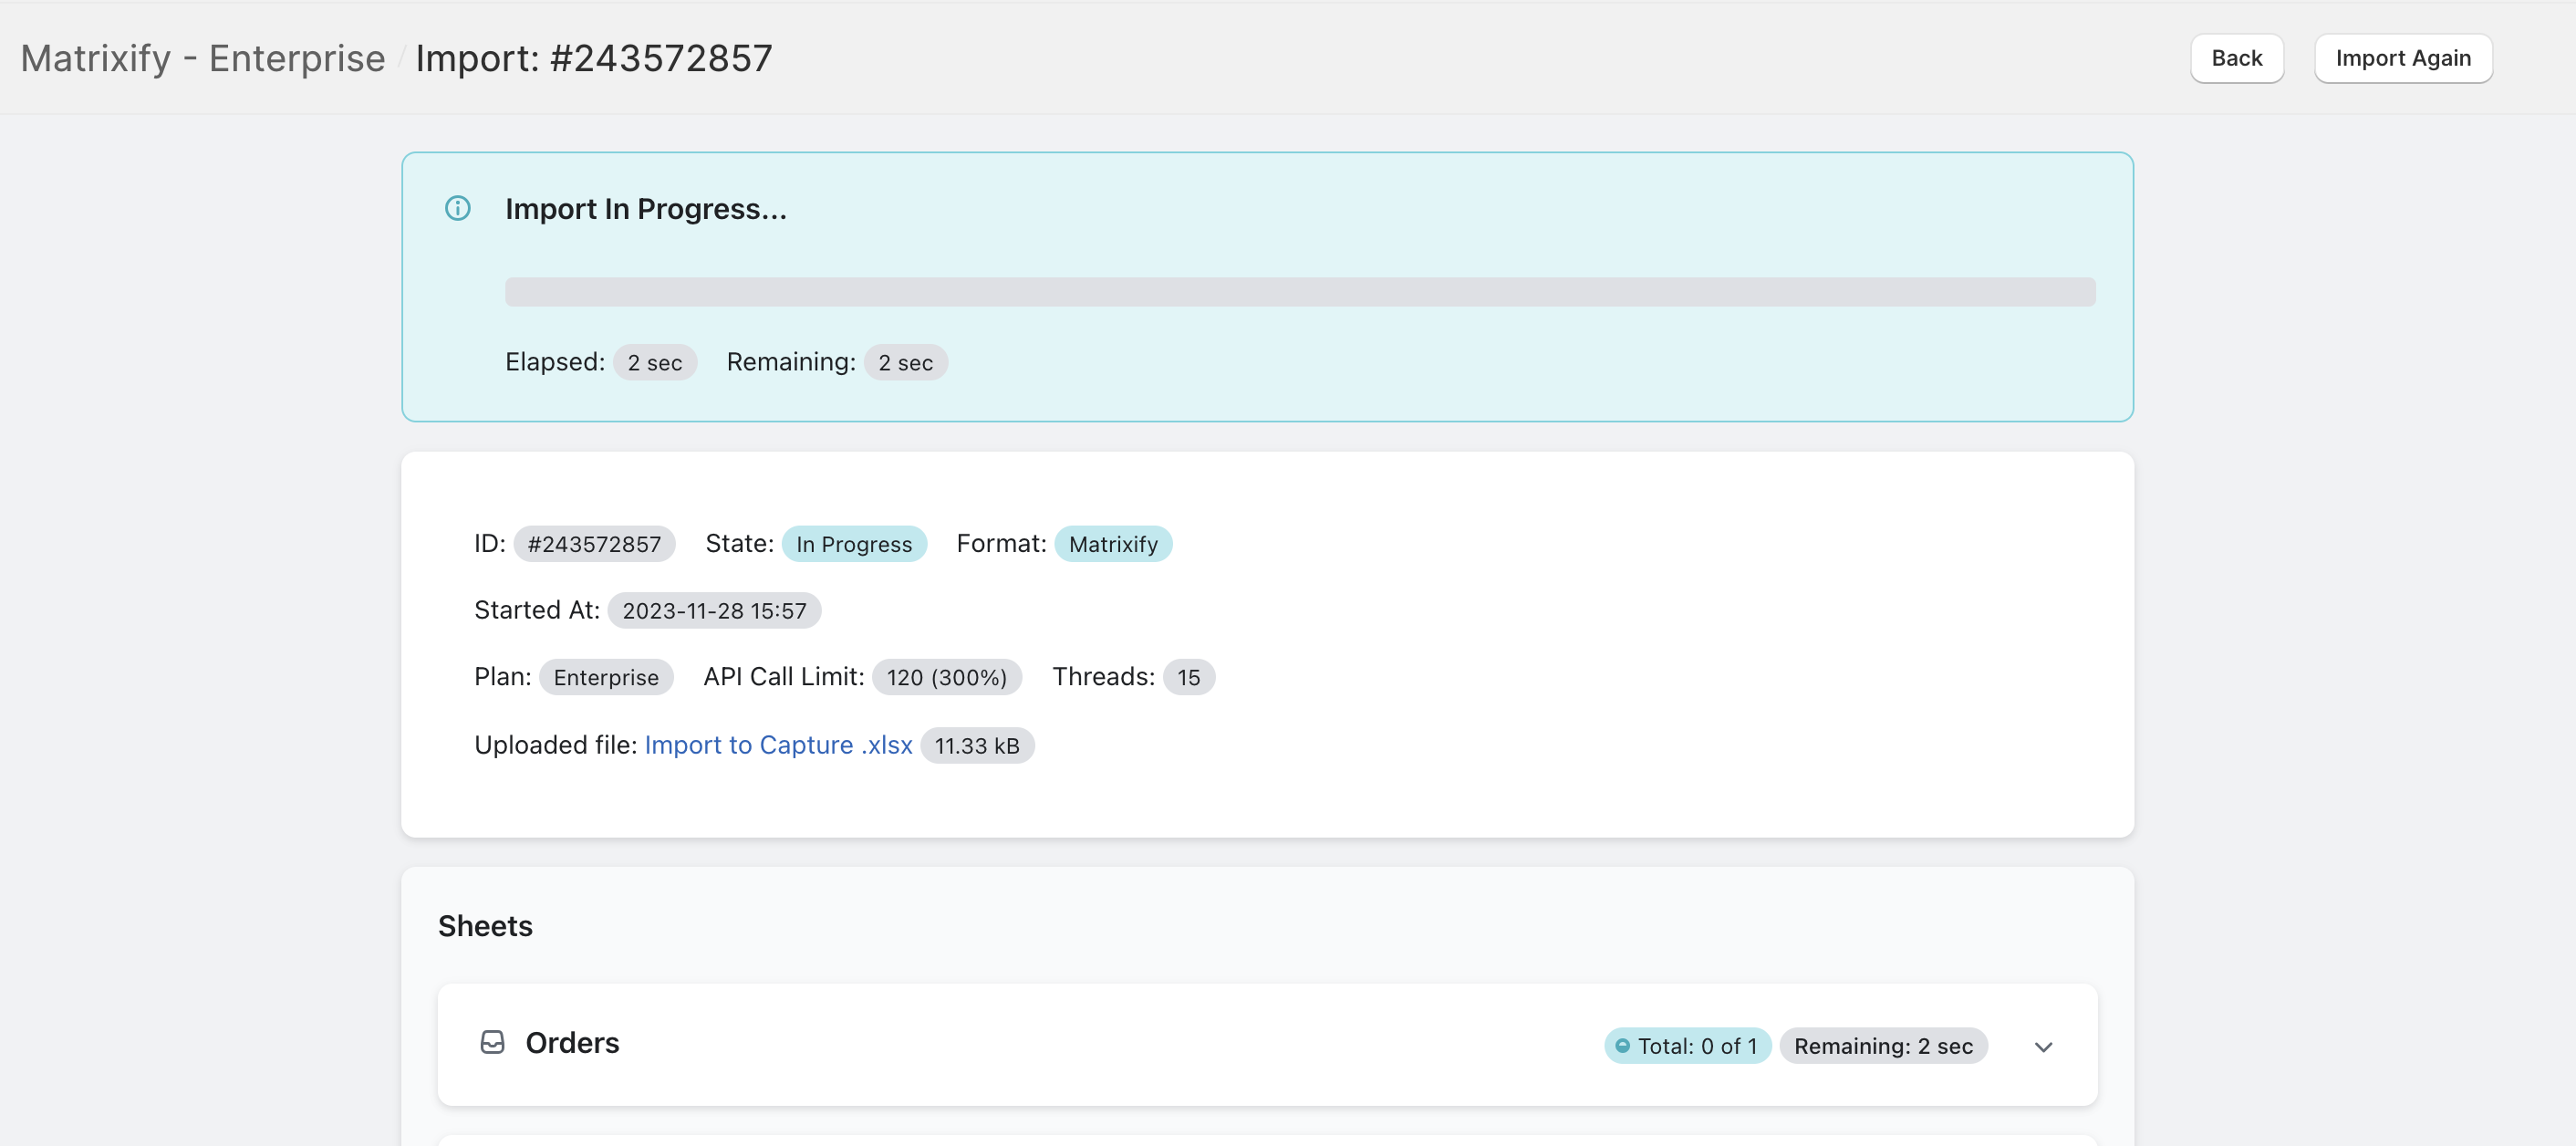
Take your edited file and drop it into the Import section of the Matrixify app Home page. The app will then analyse your file. Make sure that the app identifies your file as Orders and also displays the correct amount of Orders in your file. If all looks good, you can go ahead and press “Import”.
Once the import has finished, you can download the Import Results file. If any error have occurred, you will be able to see them in the Import Results and Import Comment column of the Import Results file.

Now that the Import has completed, you can enjoy your Captured Transactions for your Orders!
Void the payment for existing Order
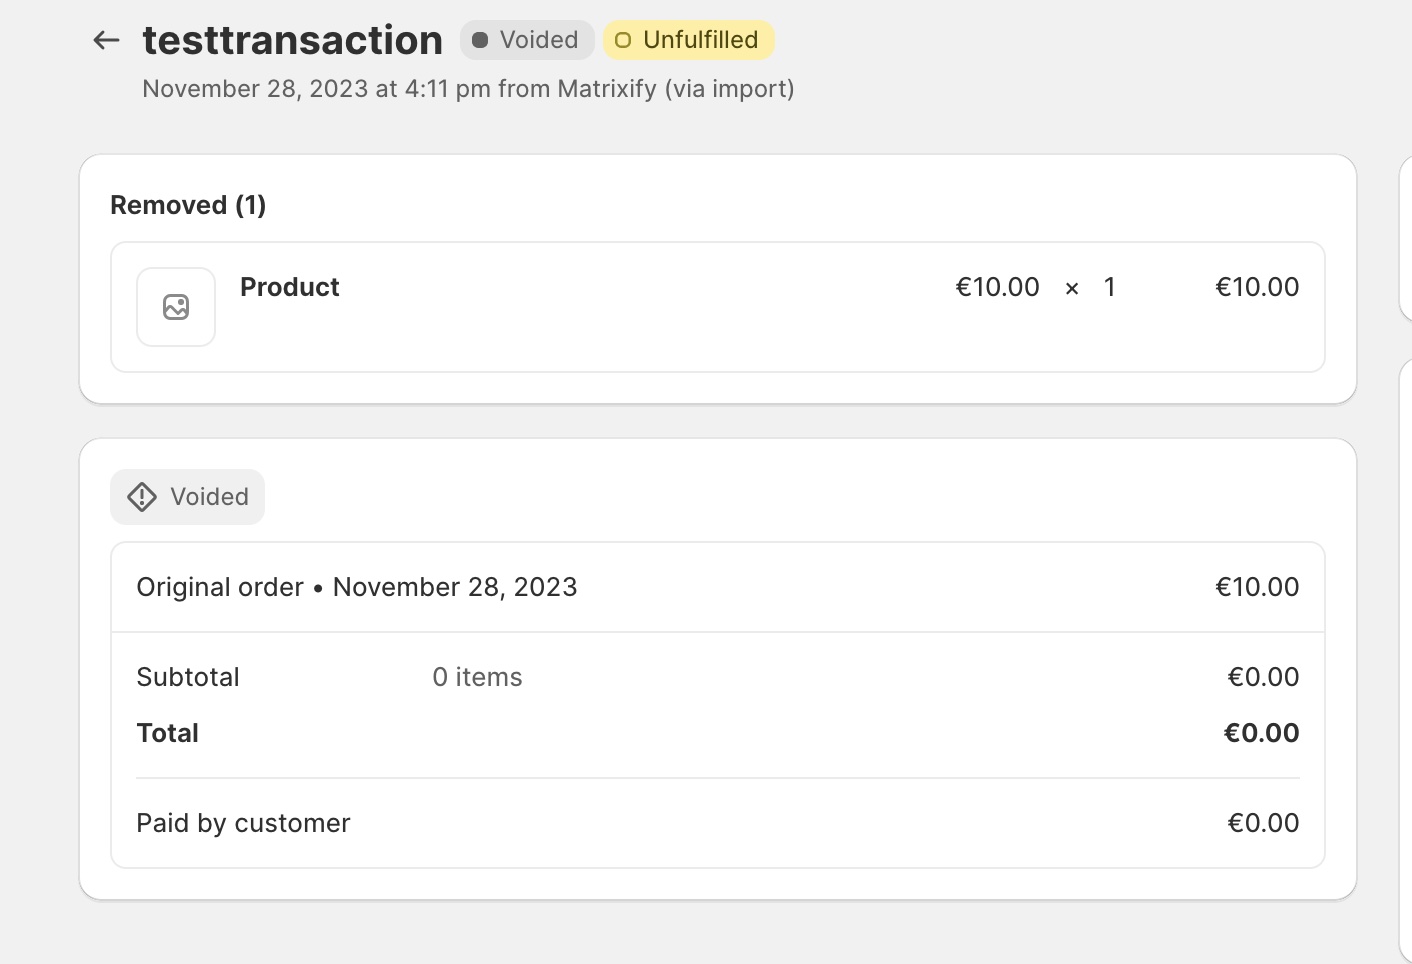
You may find yourself in the situation where you must also Void the Authorized Transaction. This can also be done with Matrixify in bulk! The process is very similar to Capturing the Transaction but this time instead of adding capture in the Transaction: Kind column, we will need to add void. You must first Export your Orders with the Matrixify app. You can Export your Orders by following the first part of the tutorial.
Your Import file should look like this:

After importing this file, your Order will look like this:
Good to know
- Check out Matrixify tutorial on how to bulk refund Shopify Orders.
- In the case of Cash on Delivery payment method, there is no possibility to capture the payment via API, as transaction cannot have status = Authorized. You can capture Cash on Delivery payments from the Shopify Admin, by filtering needed orders and choosing Action = Capture order payments.
- You can create and void transactions also without real money – using the Manual gateway. In fact, by default Matrixify always assumes the Manual gateway, unless you will set the
Transaction: Force GatewaytoTRUE. That is to avoid accidental captures or voids of real money as that can result in real financial consequences for your store. - If you see that your file upload has failed, make sure your sheet name is called “Orders”.
- If your transaction didn’t get created, make sure you have the column “Line: Type” with the value “Transaction”.
- Check our other tutorials related to Orders.
- If stuck, you can contact our support!


