
Shopify has an easter egg in its Discounts. You can import several discount Codes for one Discount. That way you can make logical groups of discount codes which have the same conditions. This tutorial will show you how to do exactly that.
Steps in short to Import several Discount Codes for the same Discount
- In your Shopify Admin create a Discount as a sample Discount to use as an example.
- Export the created Discount with the Matrixify app.
- Edit the Exported file to create a Discount with multiple codes.
- Import back using Matrixify.
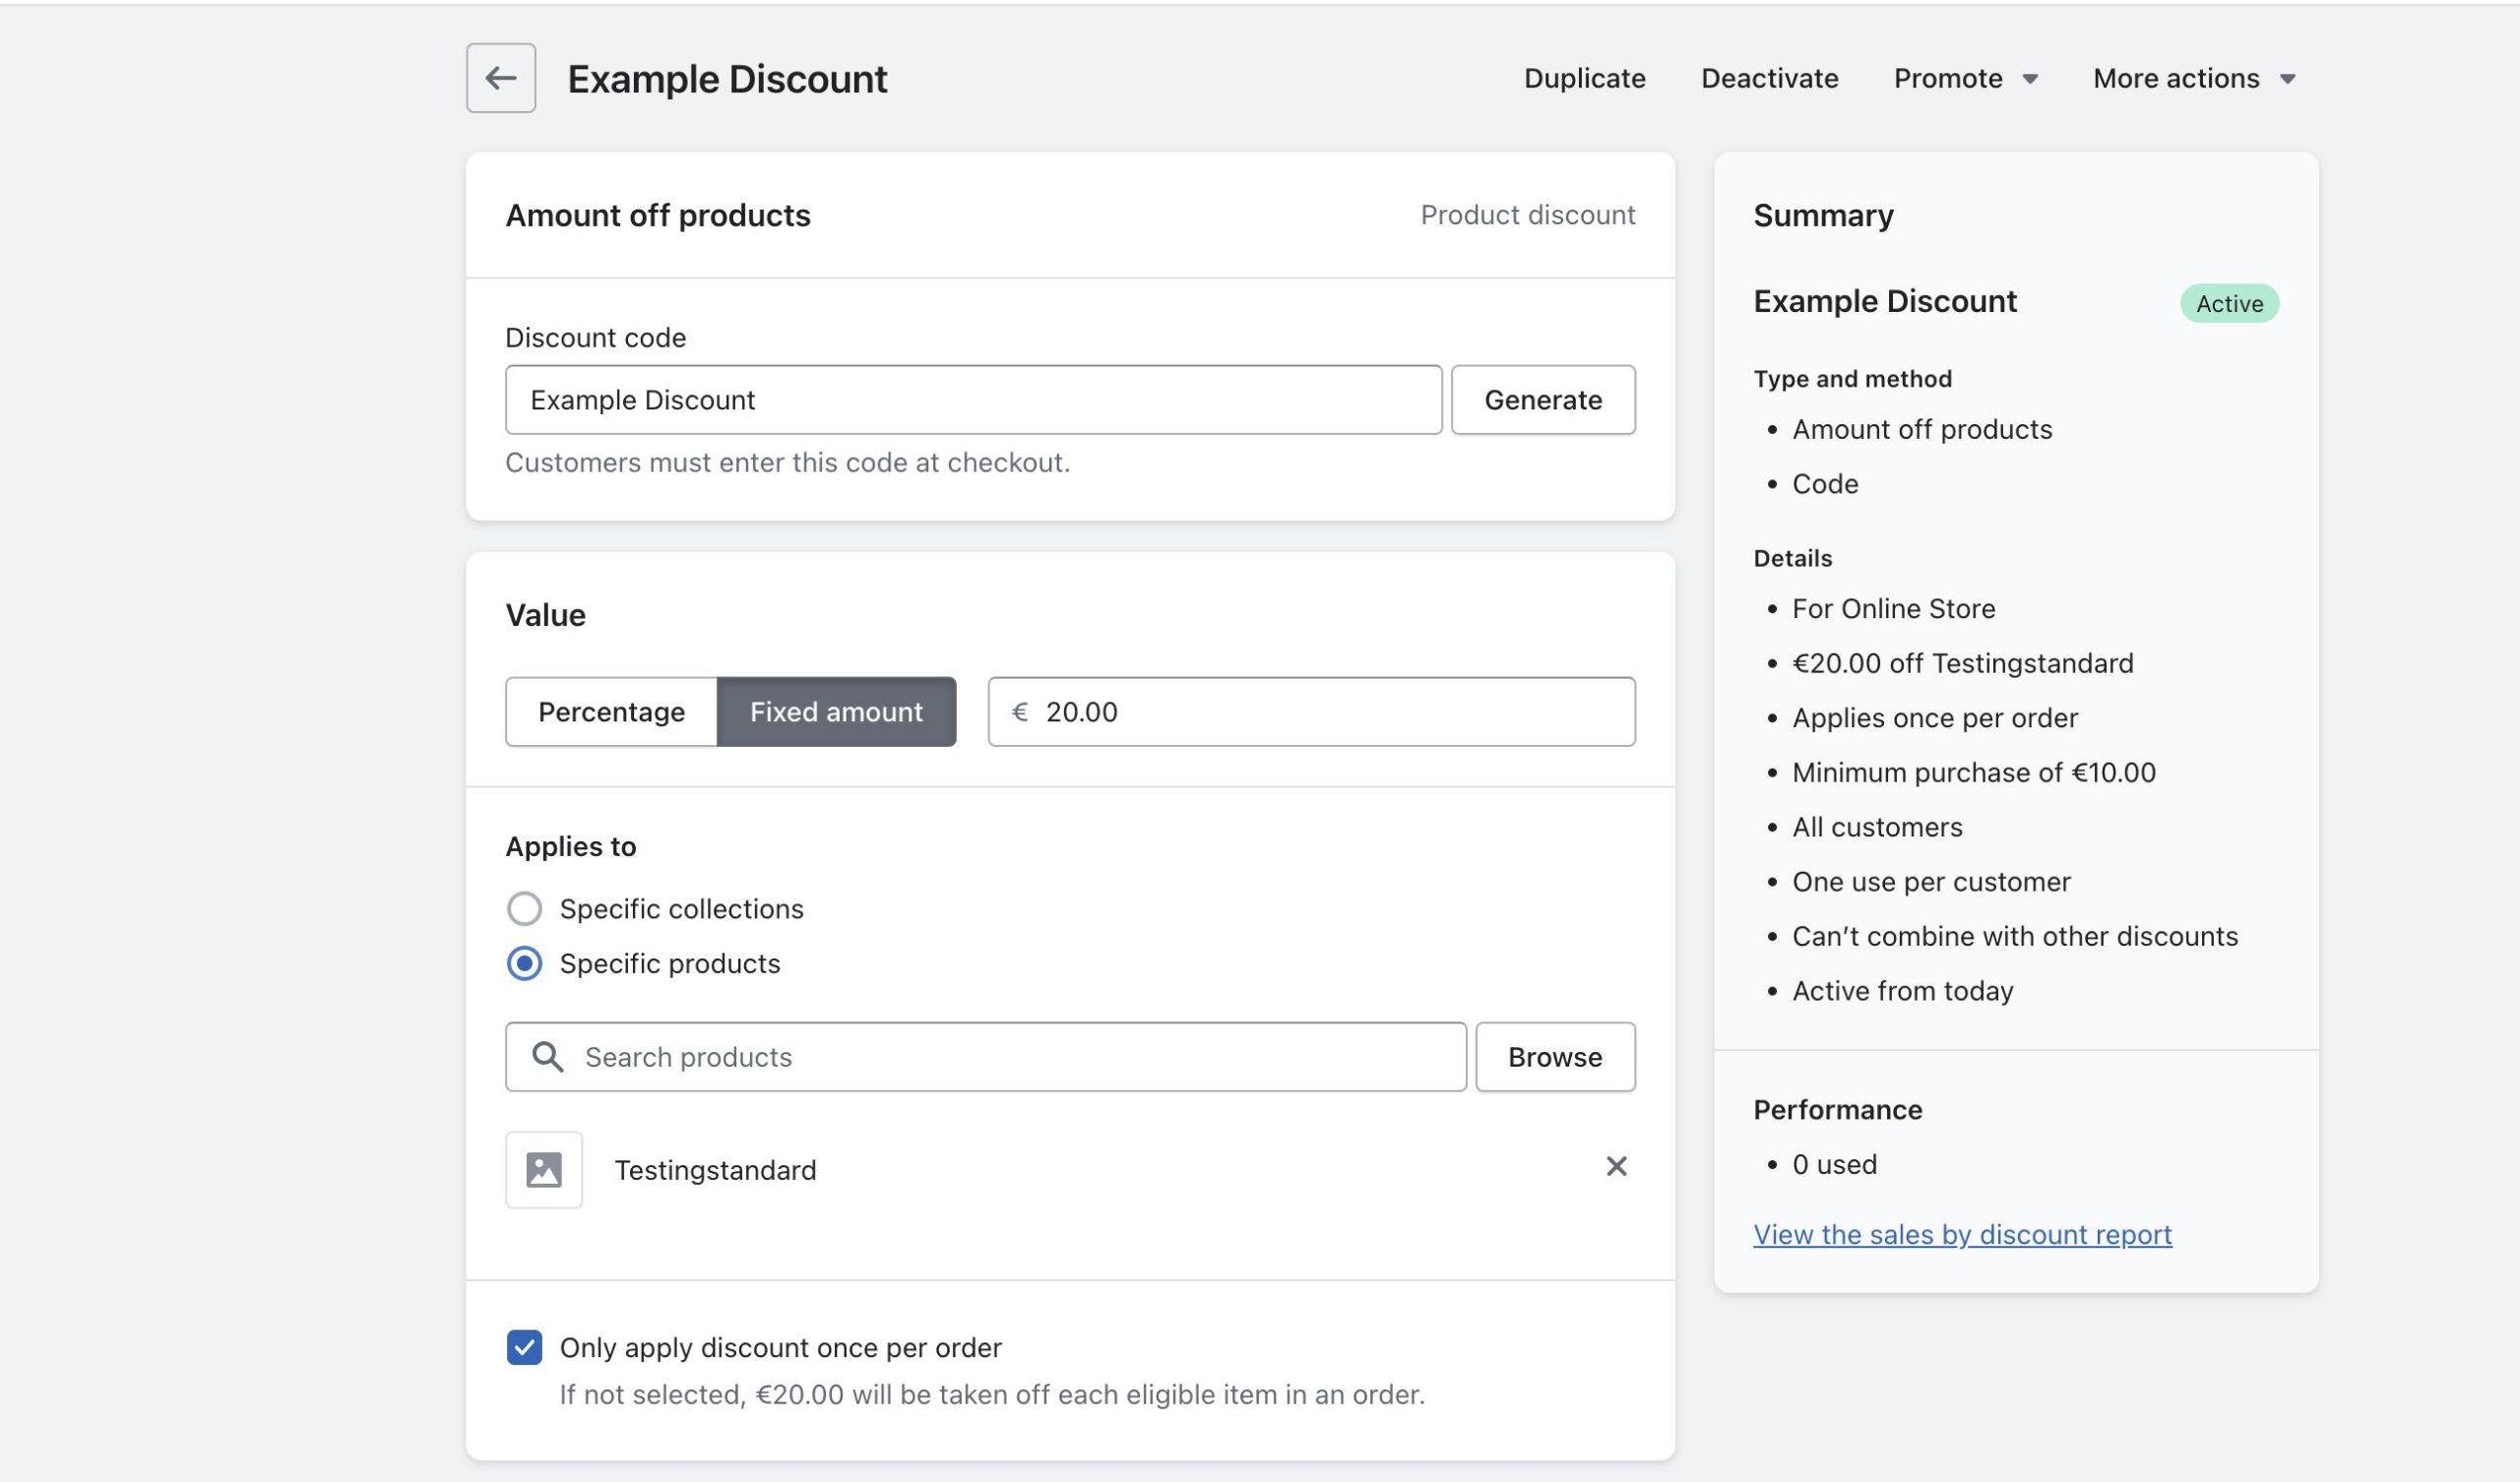
1. Create example Discount code in Shopify Admin
This step is not mandatory, but it is a great help in understanding the file and what columns would need to be filled in for Import to Import the Discount exactly as you would need it.
Go to your Shopify Admin and create a Discount as an example of the Discount you’d like to Import in bulk with several codes.
2. Export created Discount
Next you must go to the Matrixify app and press “New Export“. On the Export page select your desired Export format at the top of the page and then from the “Select Sheets” drop-down select to Export Discounts.
Once you have done this add the “Title” filter to the Export. This will allow you to Export the one specific Discount created in your Shopify Admin as an example. Your Export set up should end up looking like this:
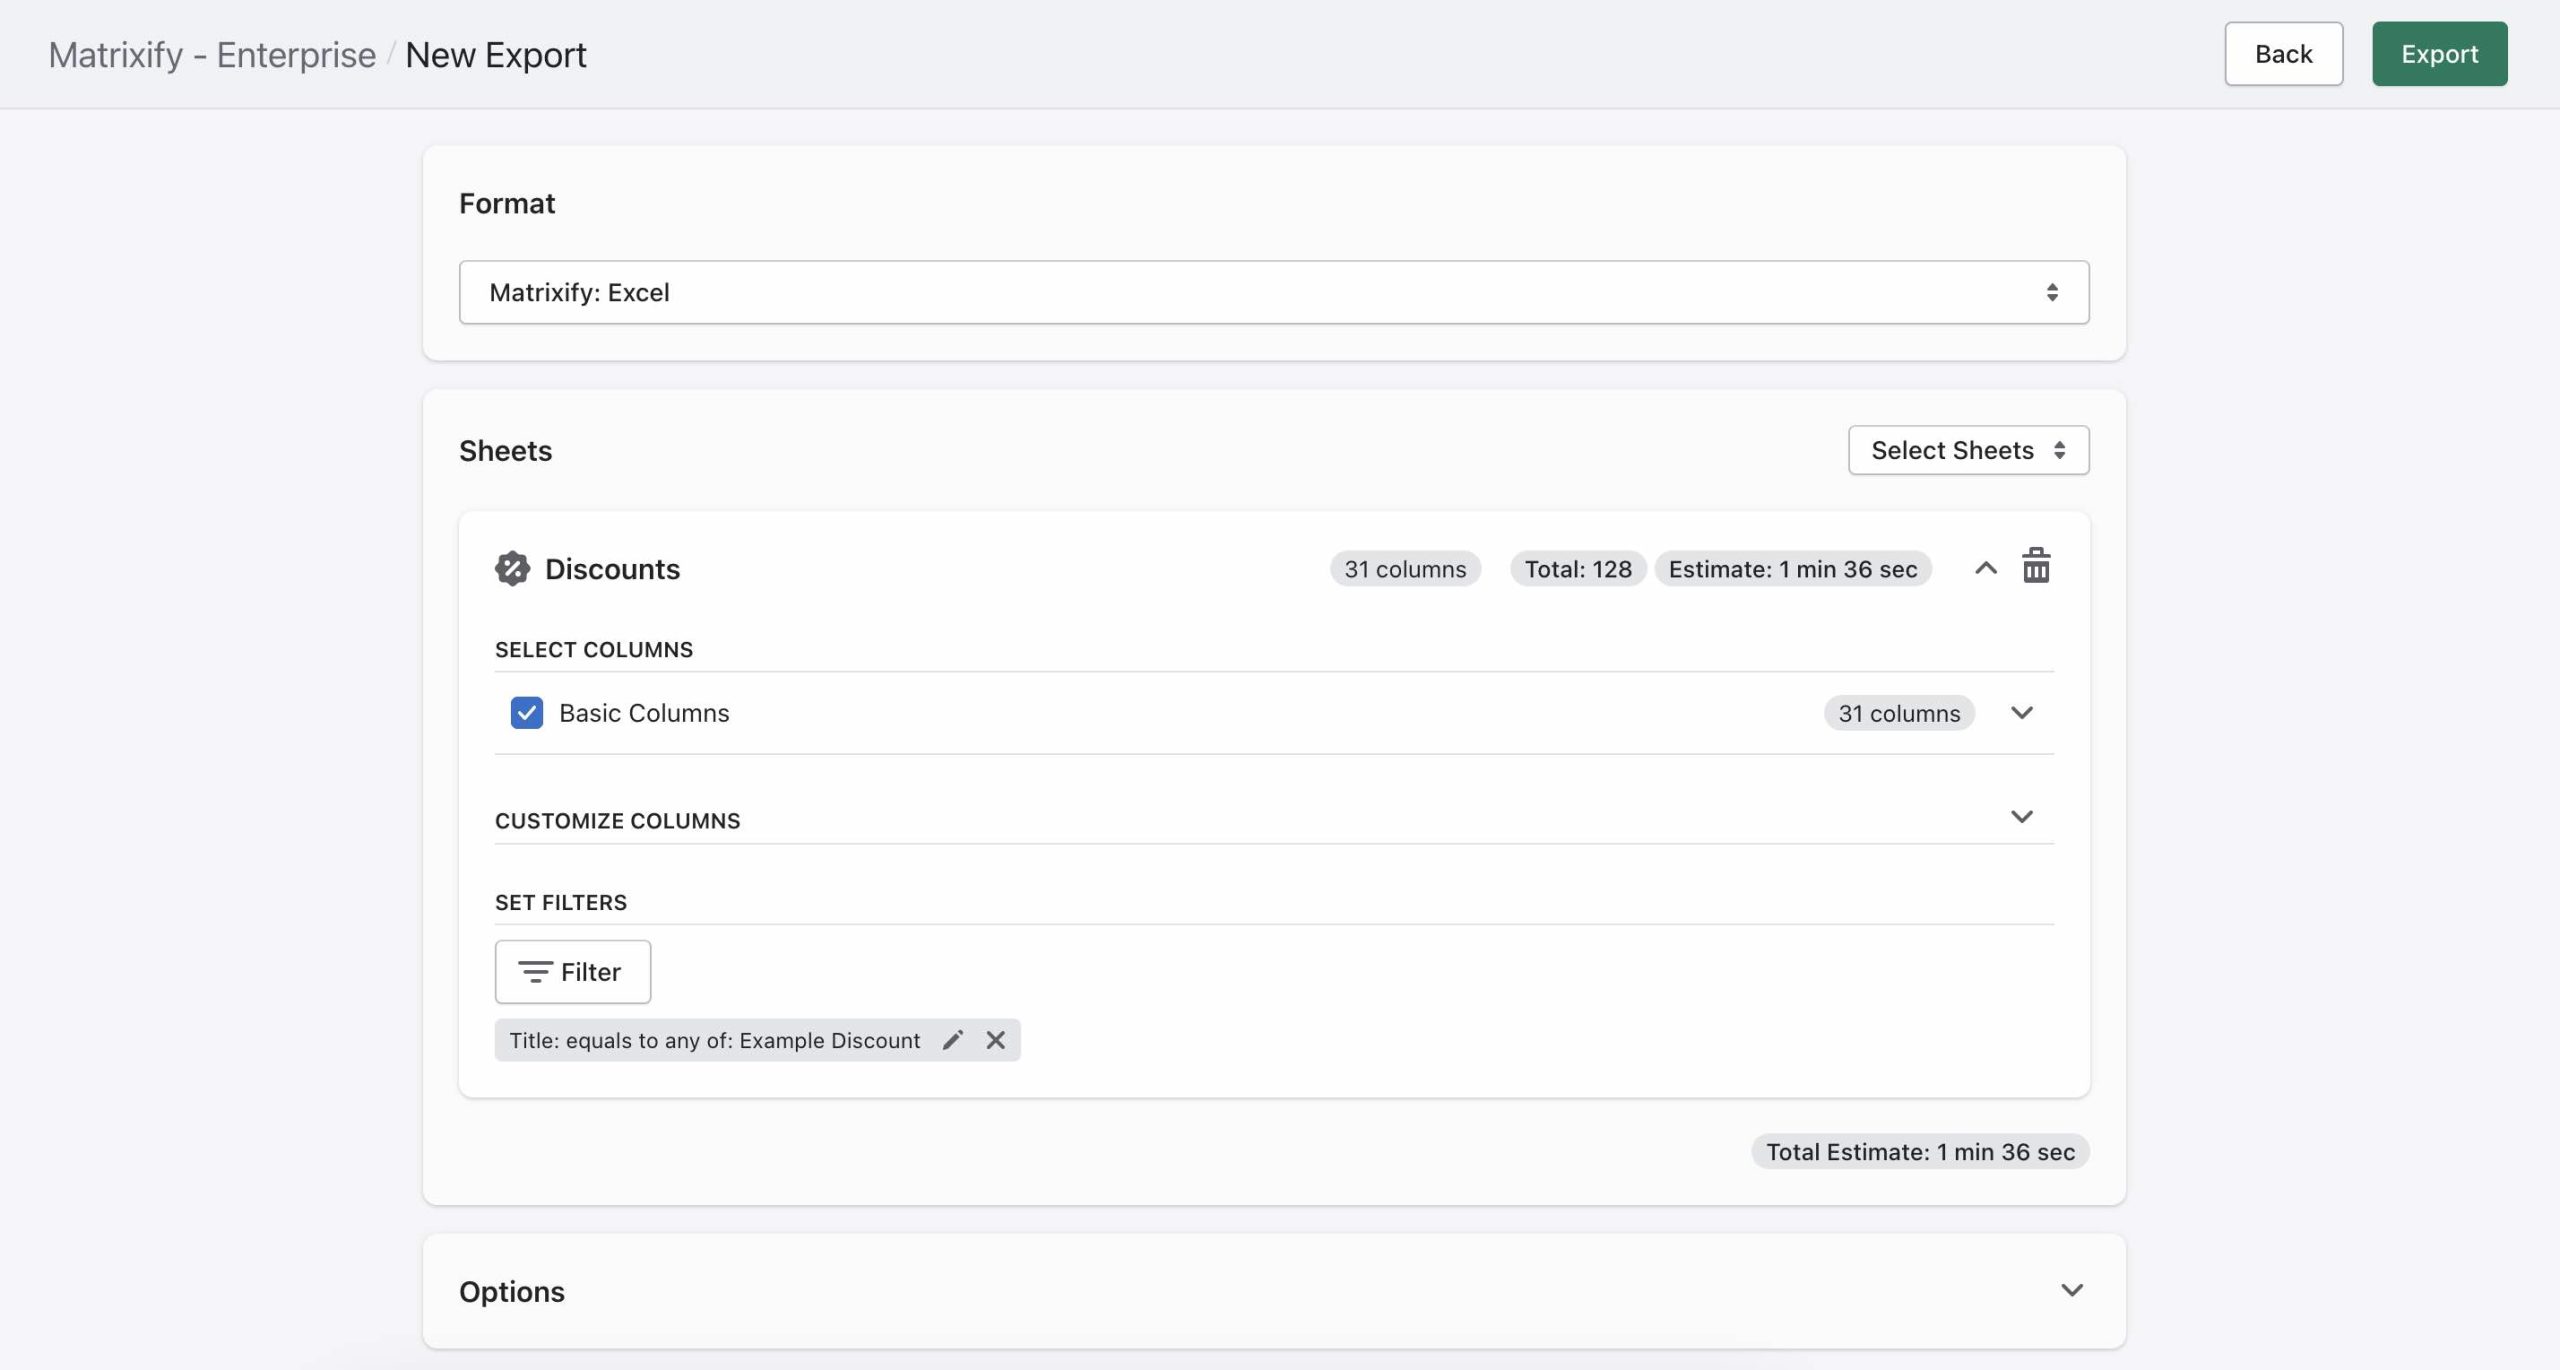 Once everything is set up, you can go ahead and press “Export“.
3. Edit Exported file
Once the Export has finished press the “Download Exported File” button to download the Exported file. In the Exported file, among other columns, there are the following two columns:
- Title
- Code
The “Title” column is the name of the Discount as you see it in the Admin when you look at the list of Discounts. The “Code” column – that’s the Discount code. You can duplicate the rows of the same Title, and create different Code for each of the rows. That way – you will create one Discount of several Codes.
You do not have to keep the example Title and Code, you can change these values to create a completely new Discount with codes. In order to do this, make sure to remove the ID column value as you’d be creating a new Discount.
Here is an example of what that would look like:
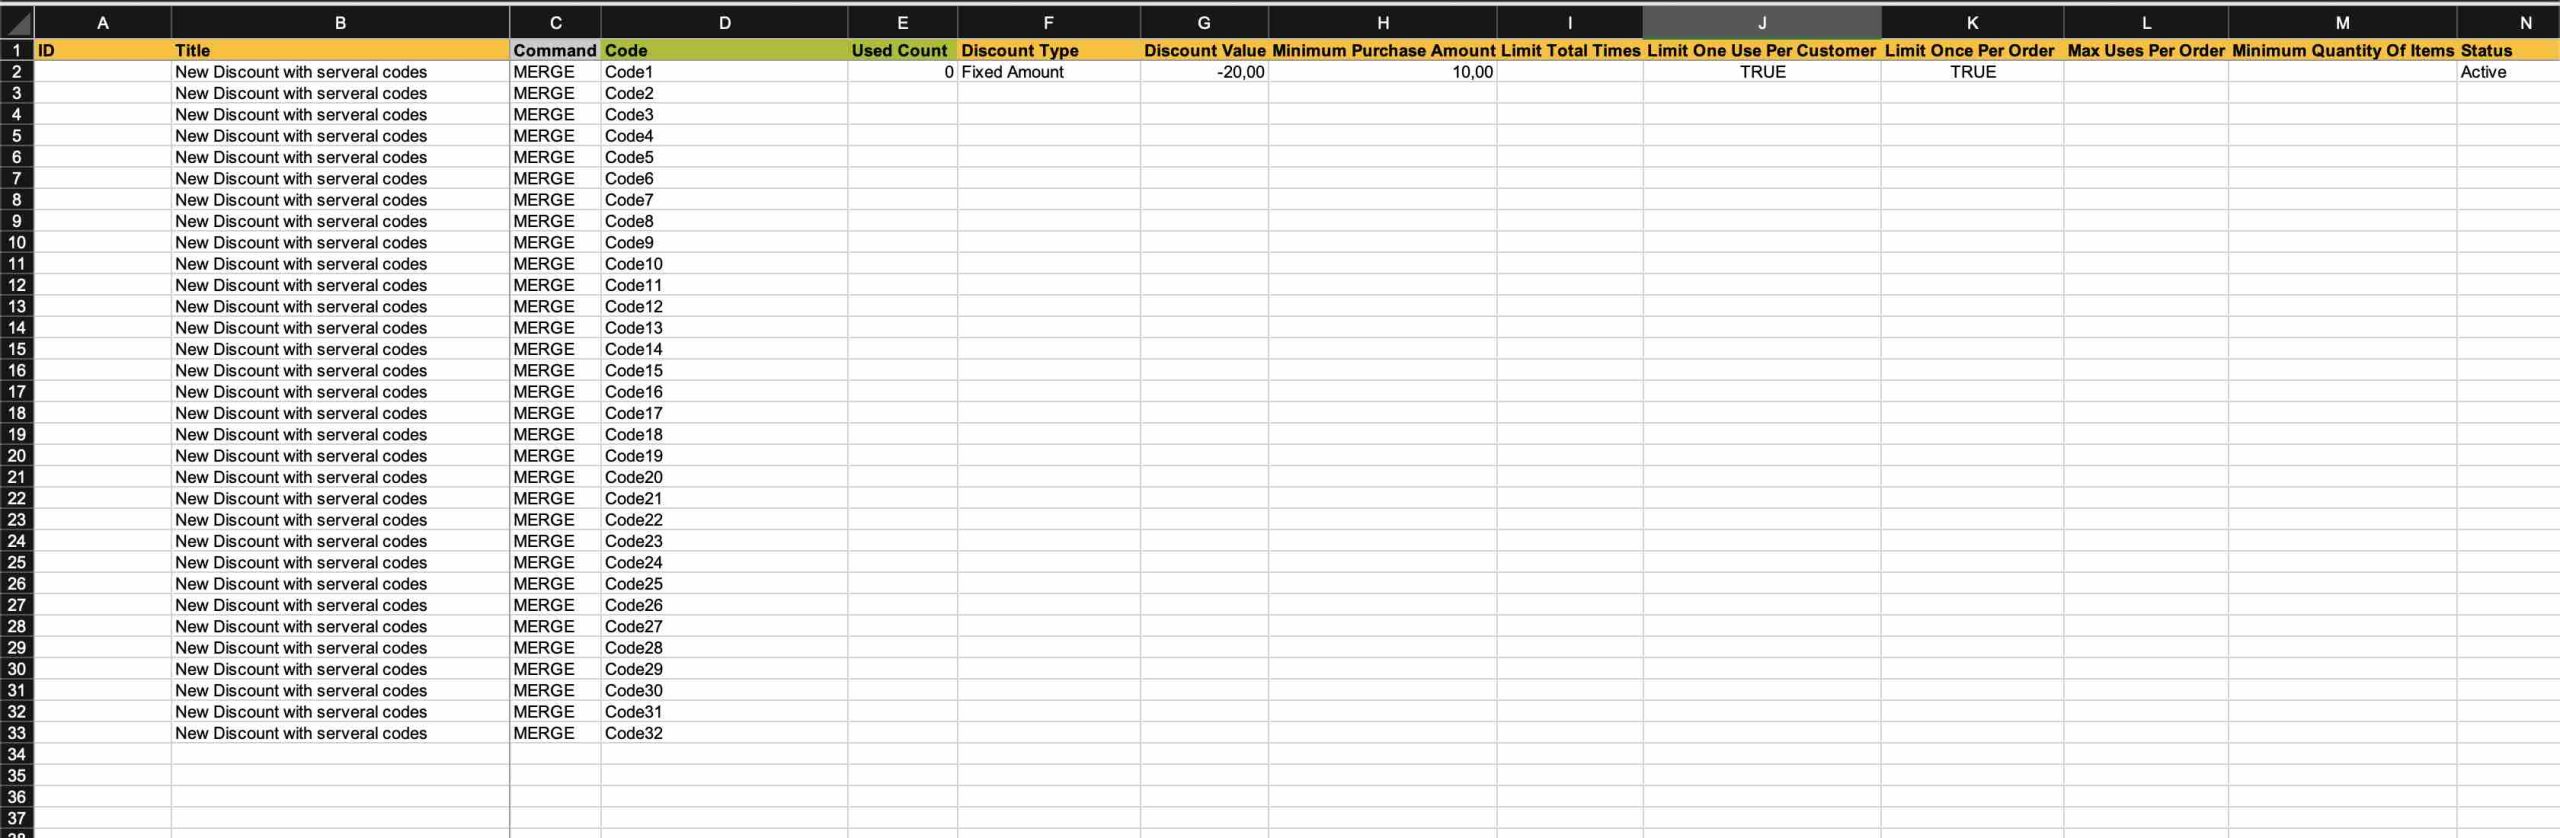 This will create a Discount New Discount with several codes which would have 32 different codes. The created Discount would have the same set-up as our previously created example Discount.
Matrixify reads the discount attributes such as “Type”, “Value”, “Value Type” and others only from the first row of each Discount, so you can either have them filled or not for all rows, whichever is more convenient for you.
When saving your file, make sure to tell the app you are Importing Discounts. To tell the app that you are importing Discounts you need:
- If using CSV file then the file name needs to contain the word “discount”, for example, “my-shopify-discounts.csv”
- If using XLSX file then the sheet/tab name in the file needs to be “discount”. The file name for the XLSX file does not matter.
4. Import back using Matrixify
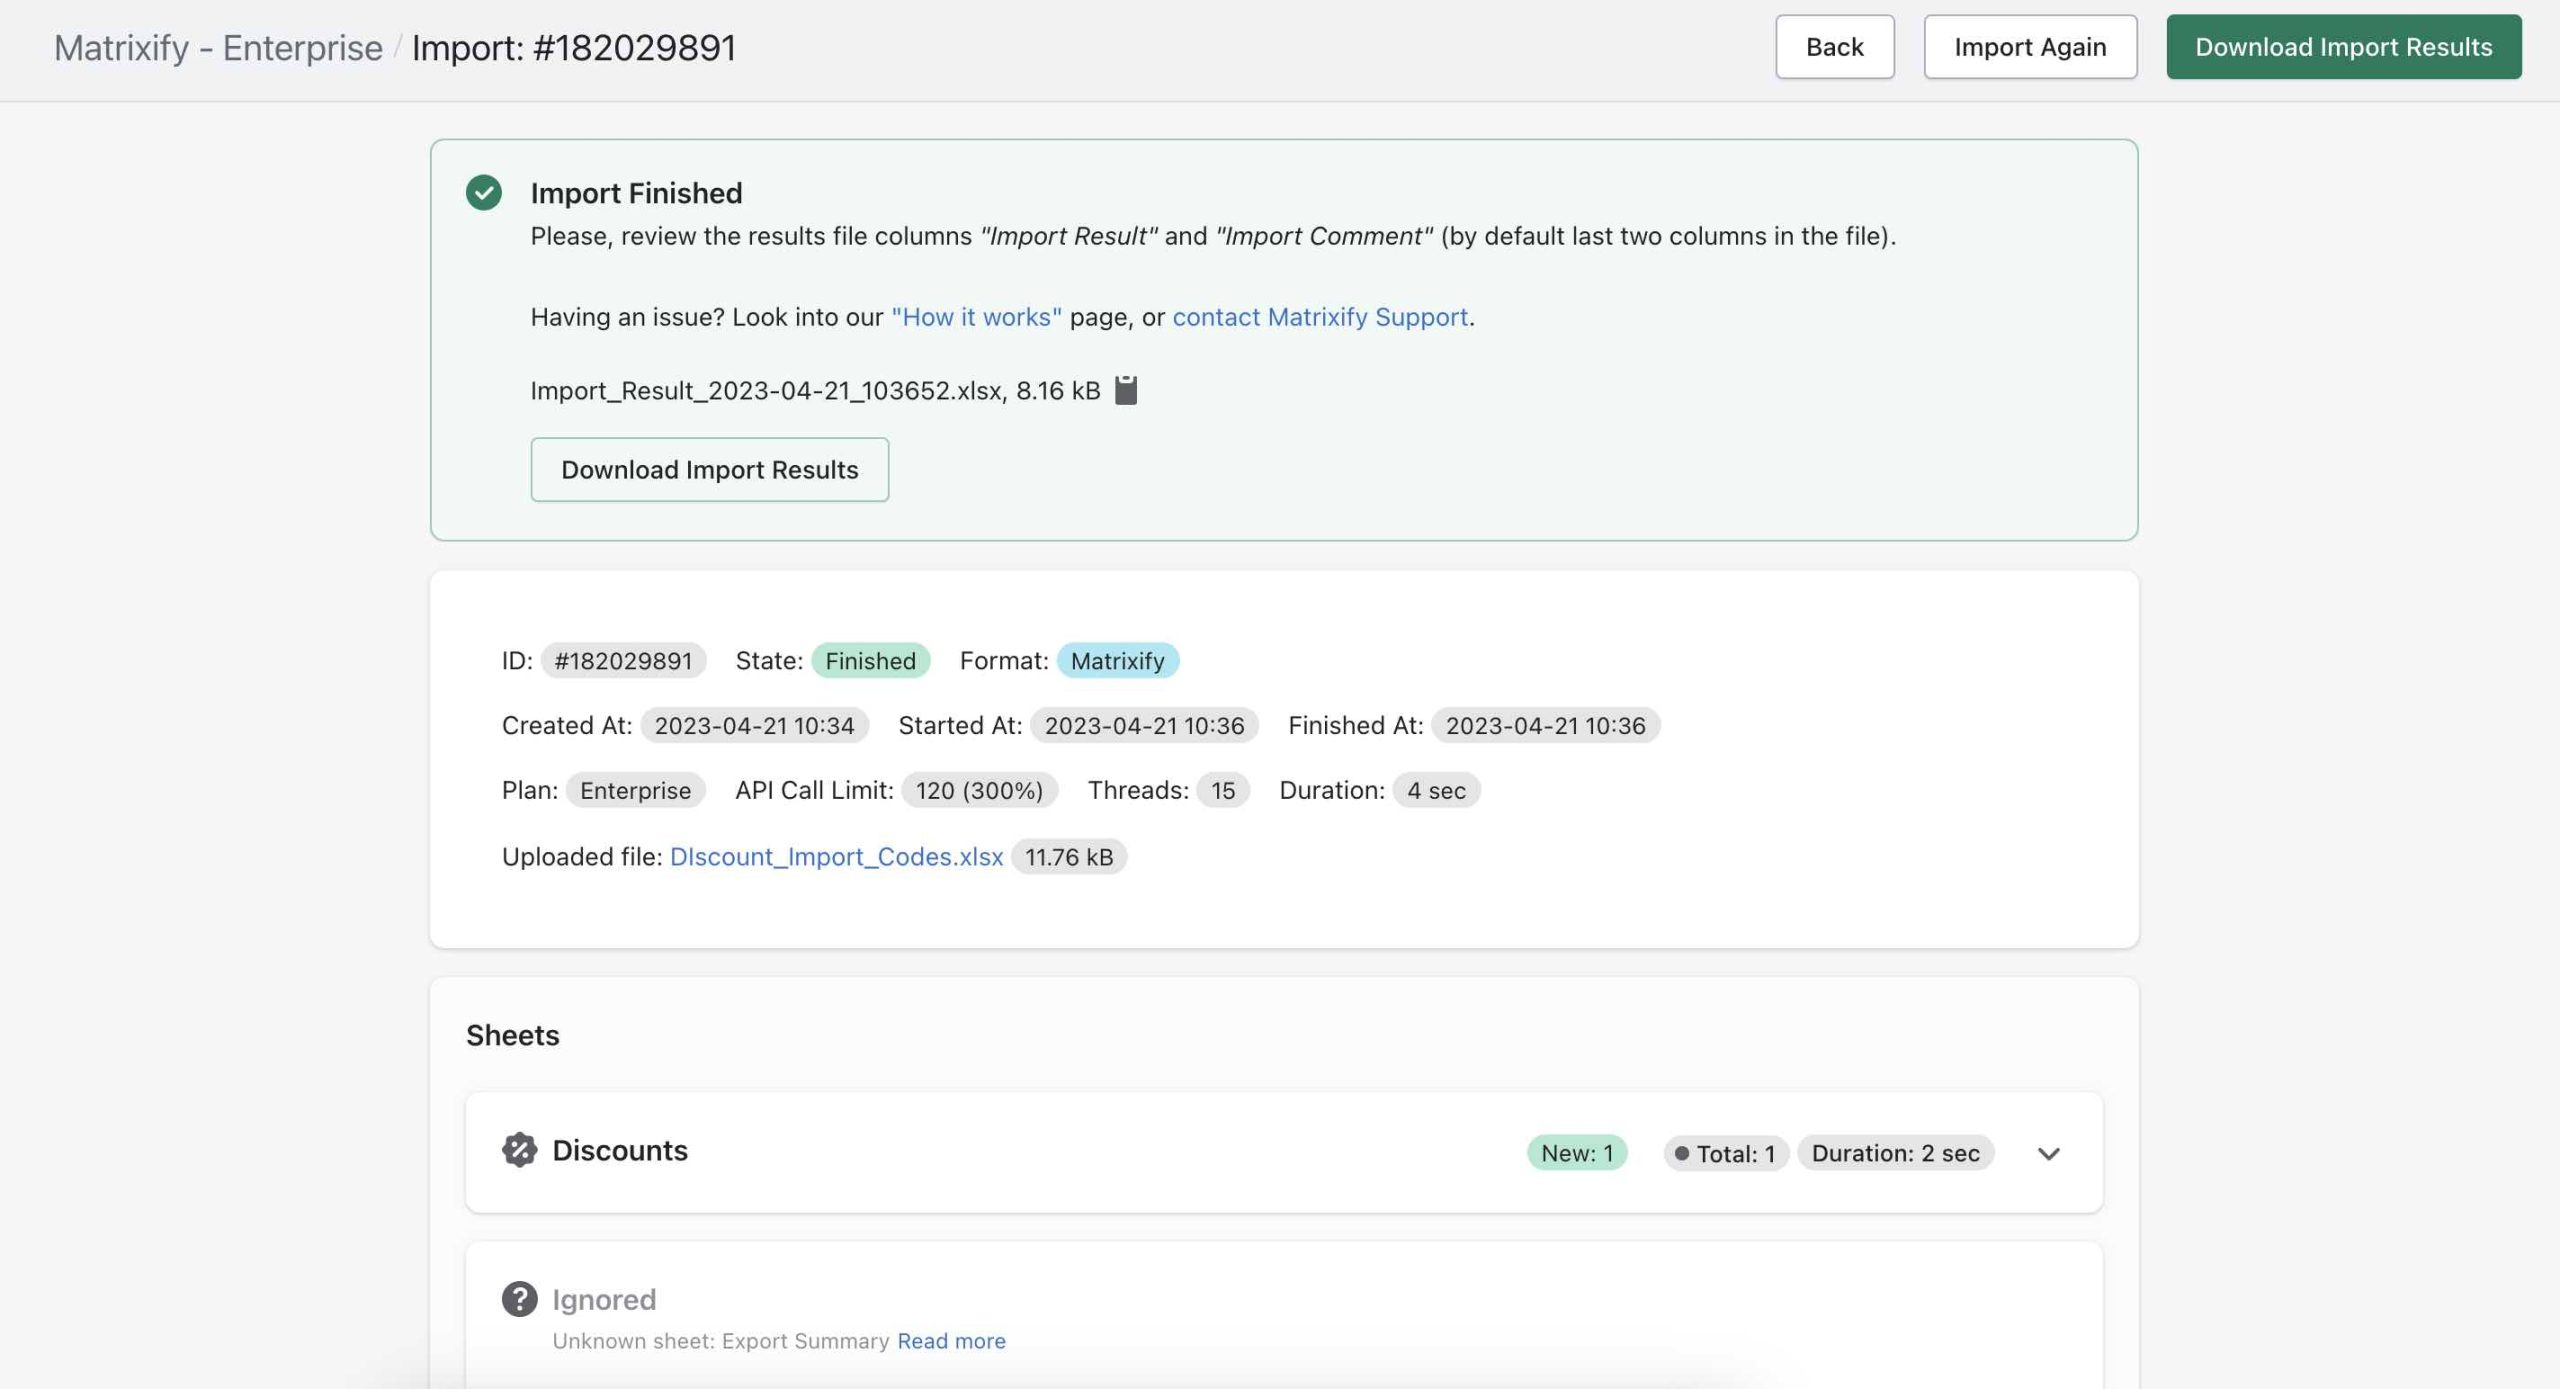
Save your edited file and Import it into Matrixify in the “Import” section of the app. Make sure that the app has recognised your Import as Discounts and that the Discount count in the file is correct.
The app will count Discounts in your file, not the Discount Codes!
This means that even though the Import file may contain 32 codes in our example, the app will still only see this as one Discount.
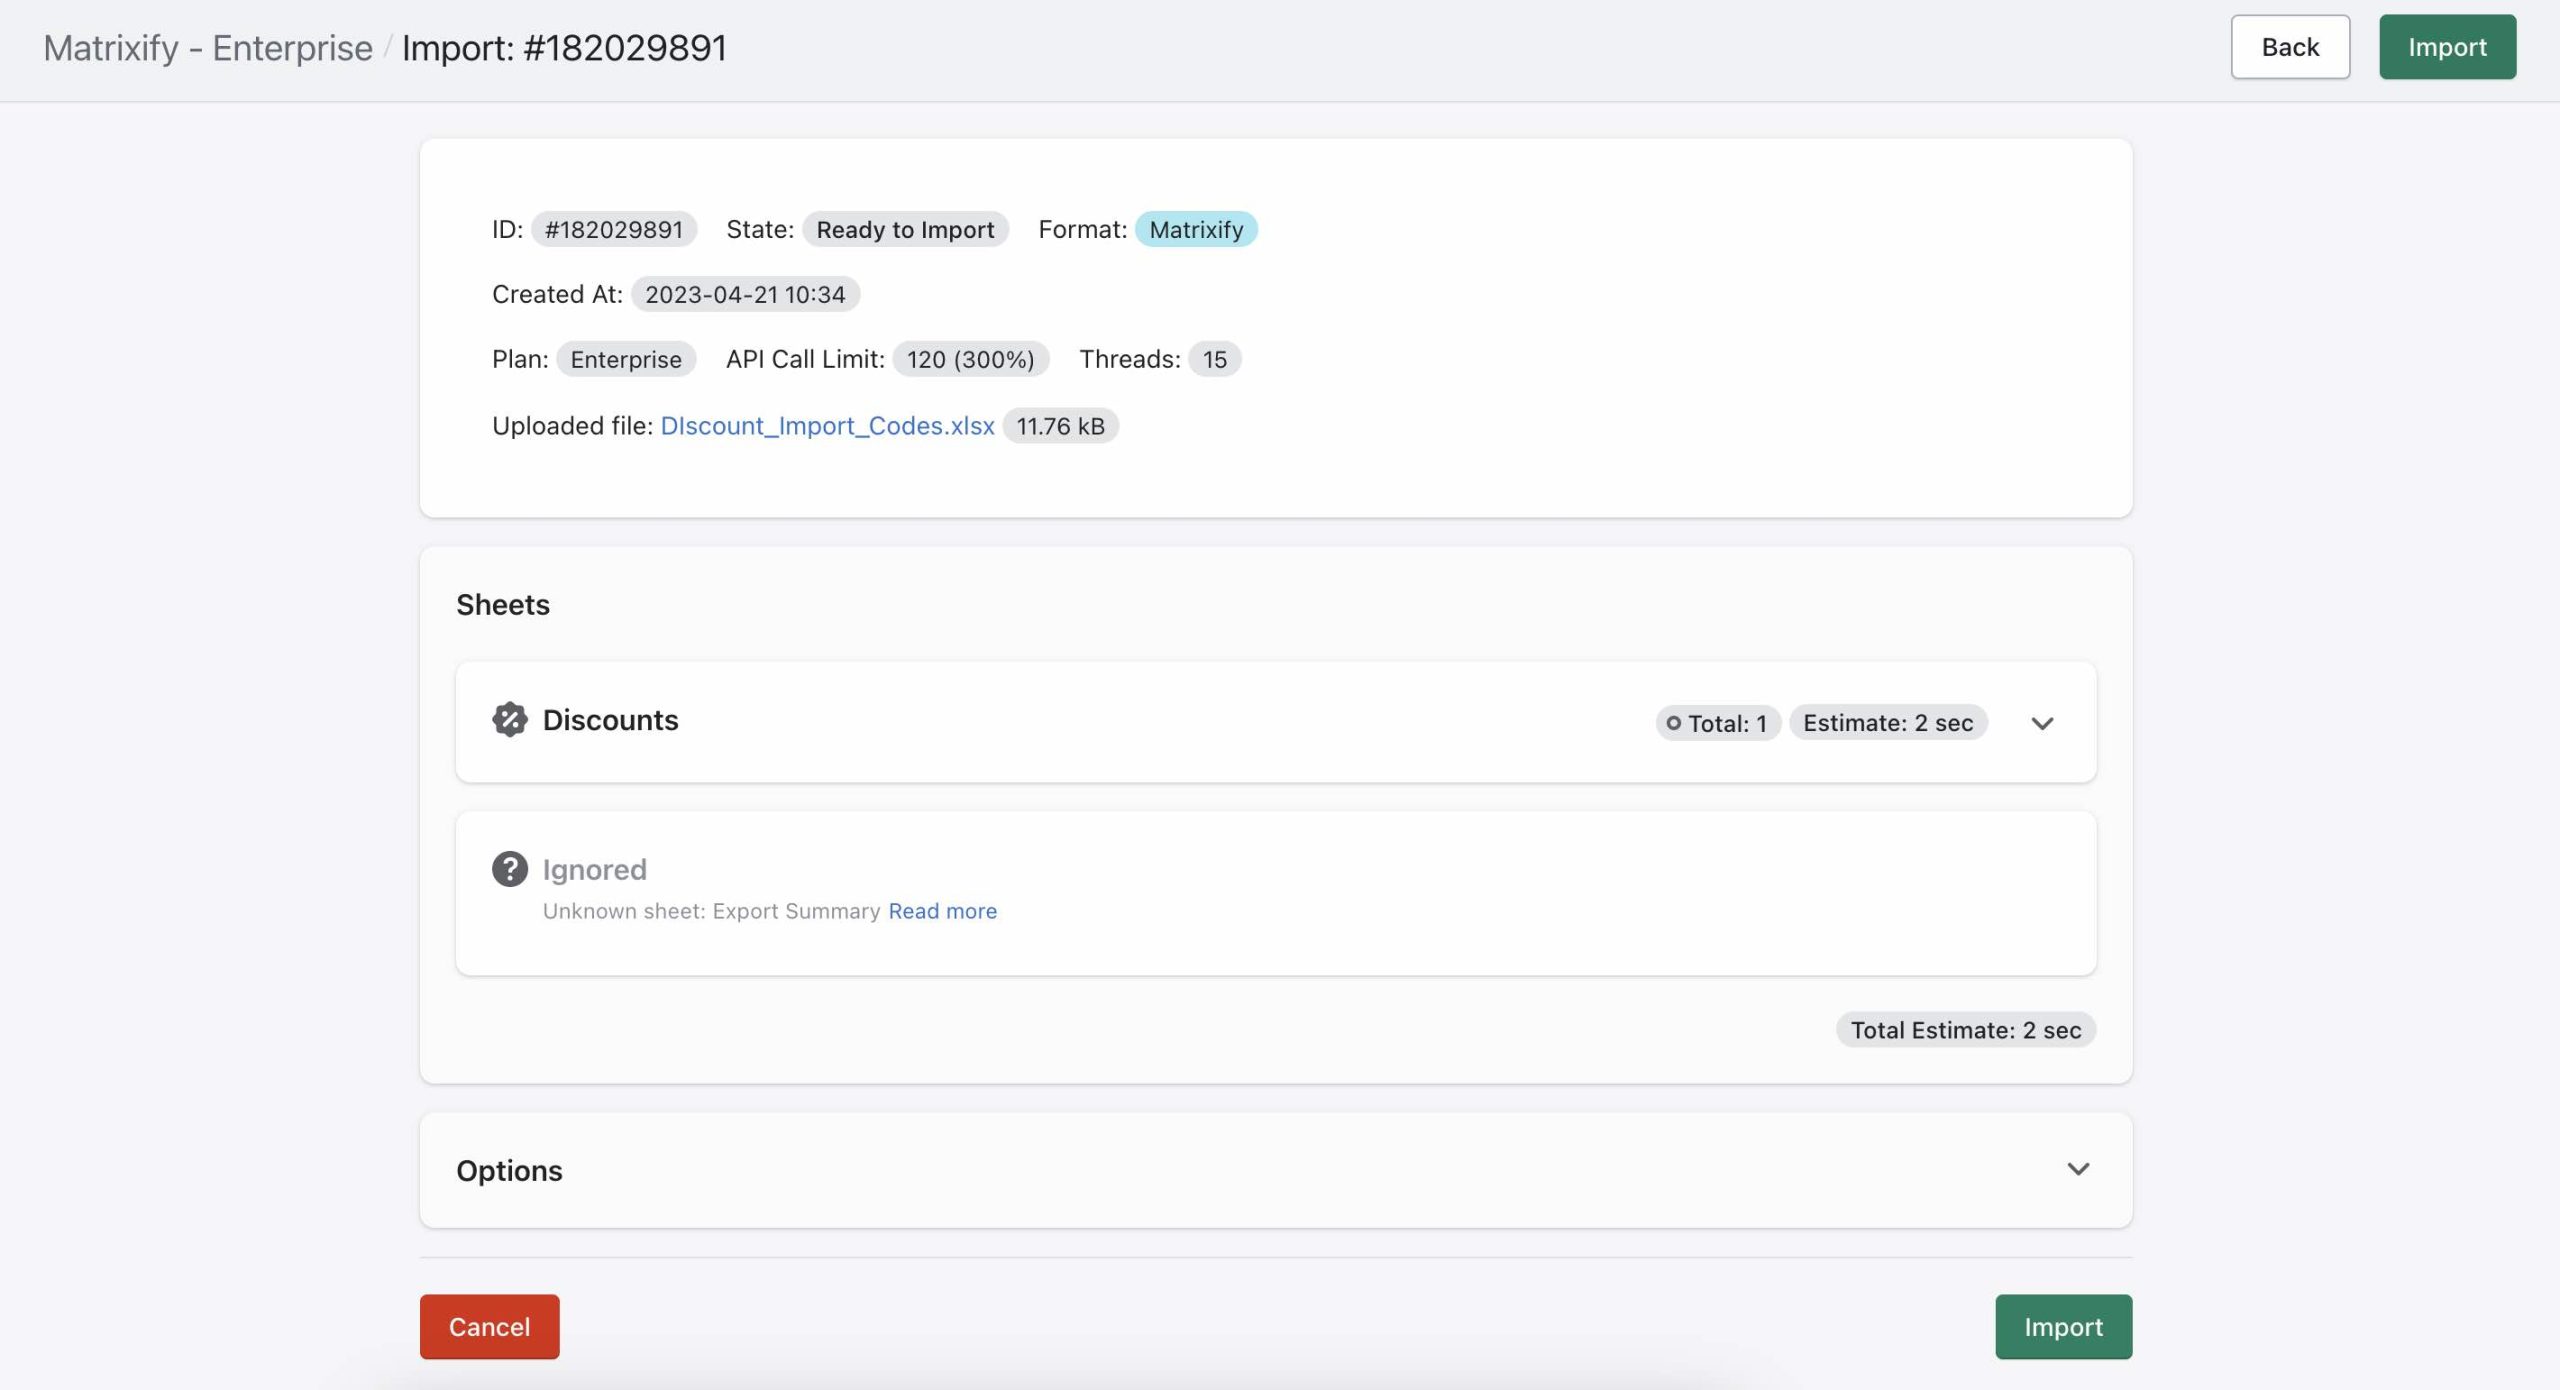
If all looks correct, you can go ahead and press the “Import” button. Once the Import is complete, you can view any error that may have occurred by downloading the “Import Results File” and viewing the “Import Comment” and “Import Result” column in the file.
Shopify Admin view
When you open the Imported Discount in your Shopify Admin, you will see a different block than usual. It will say “codes created by: Matrixify” which shows the summary of how many discount codes you have in this Discount:
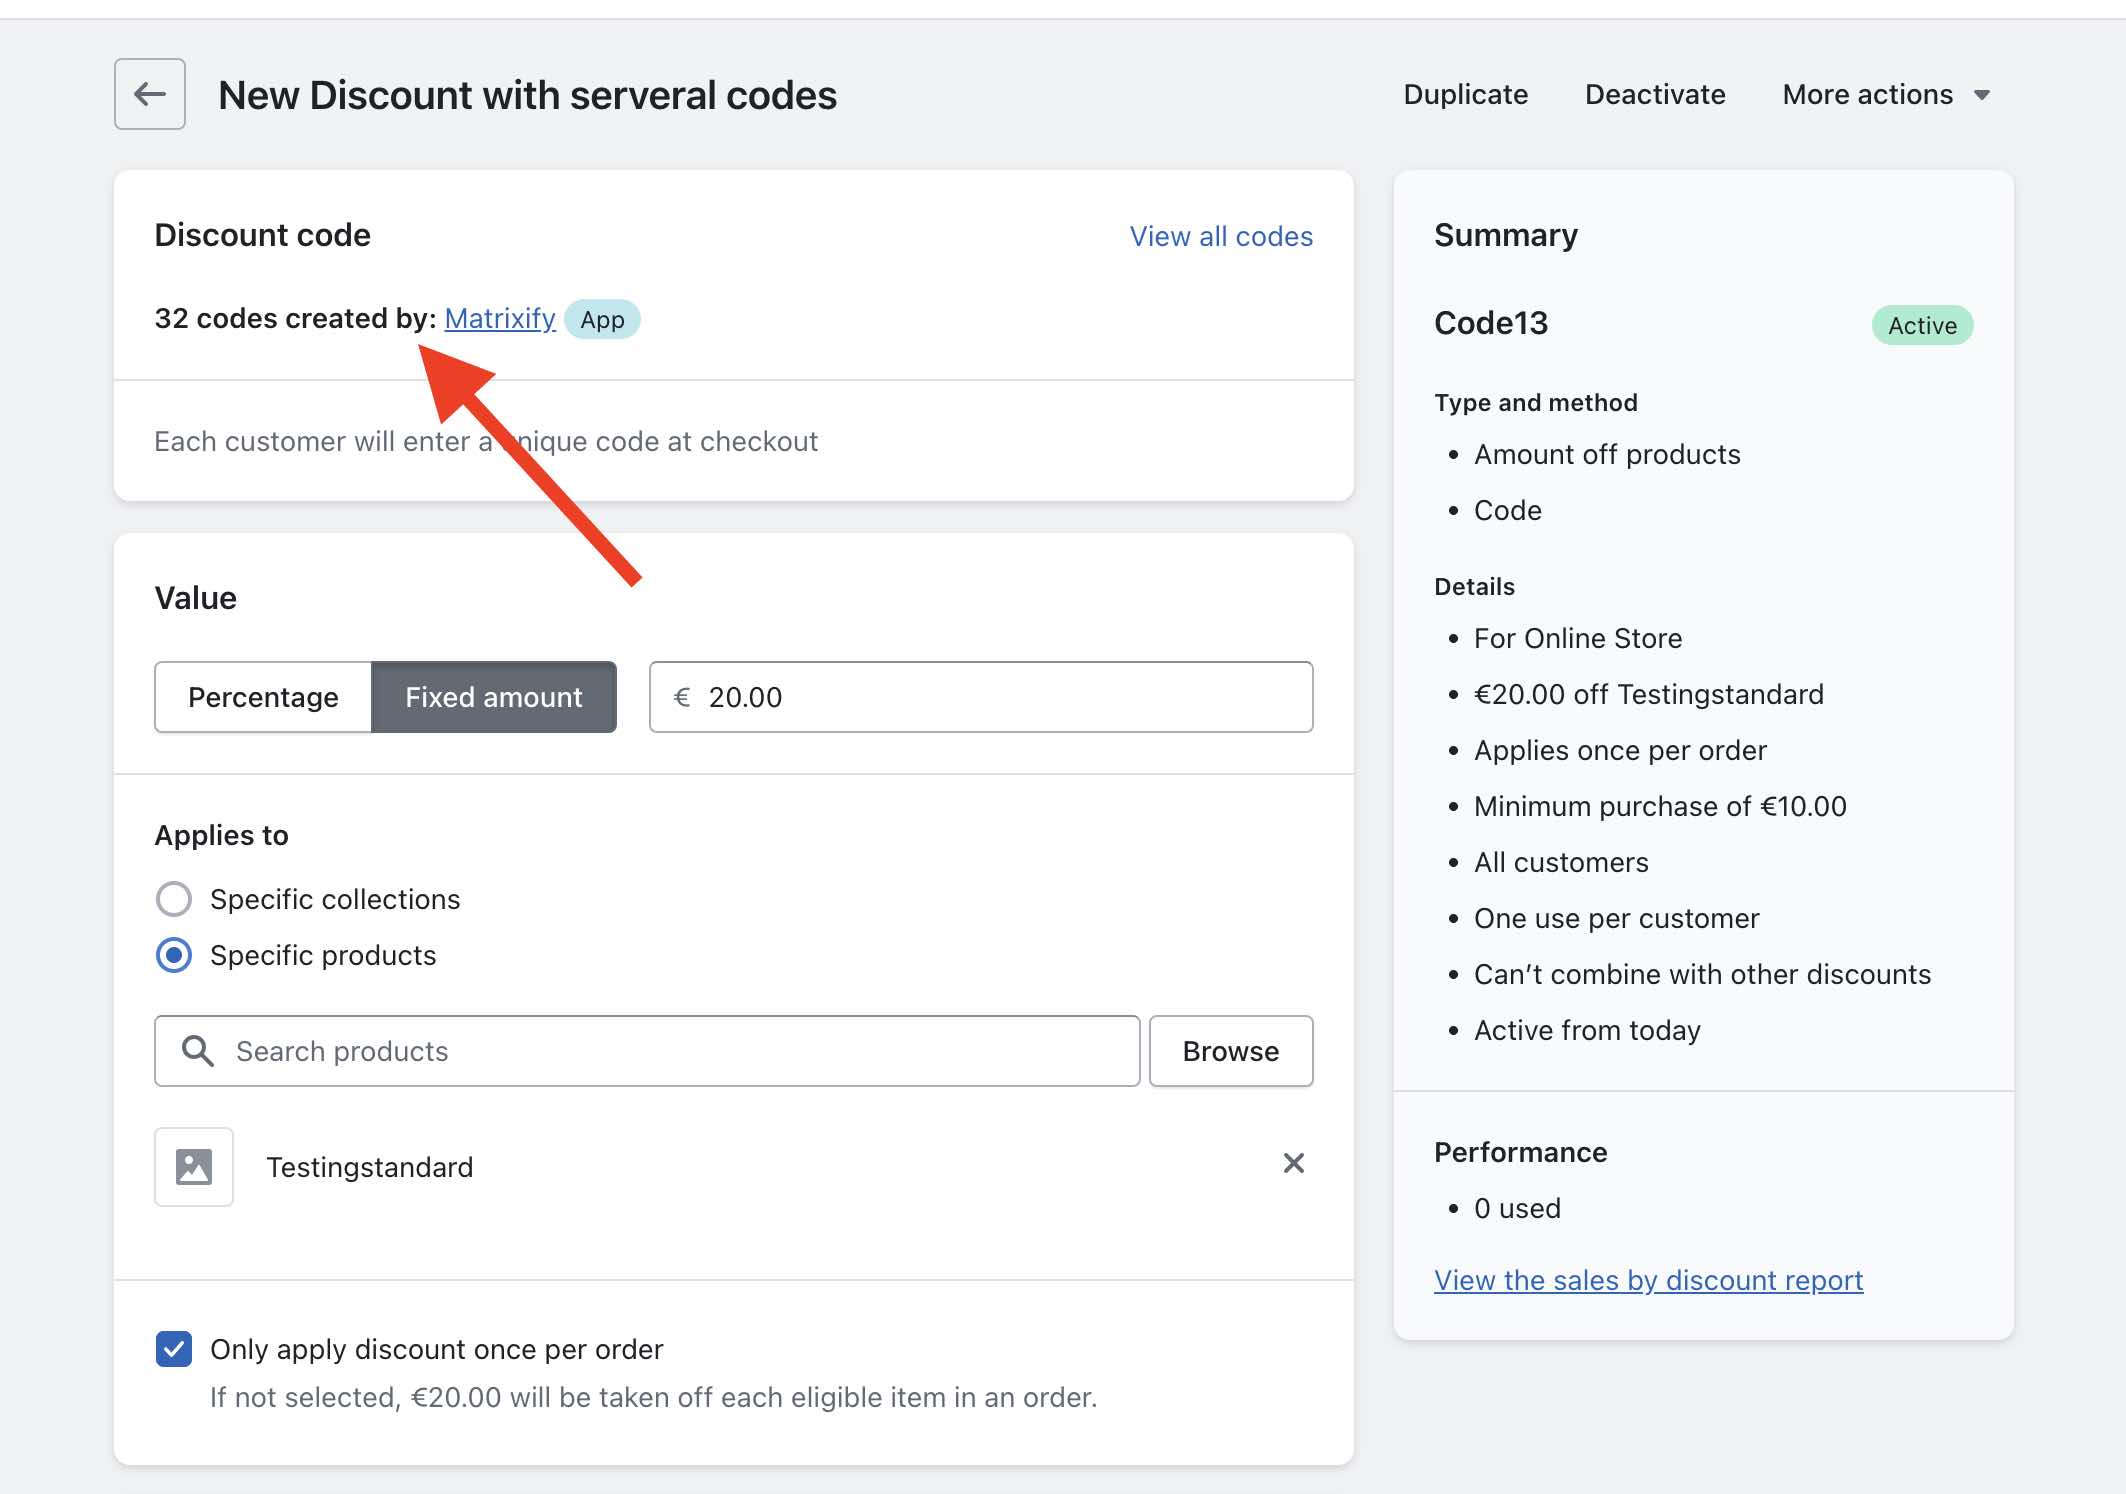
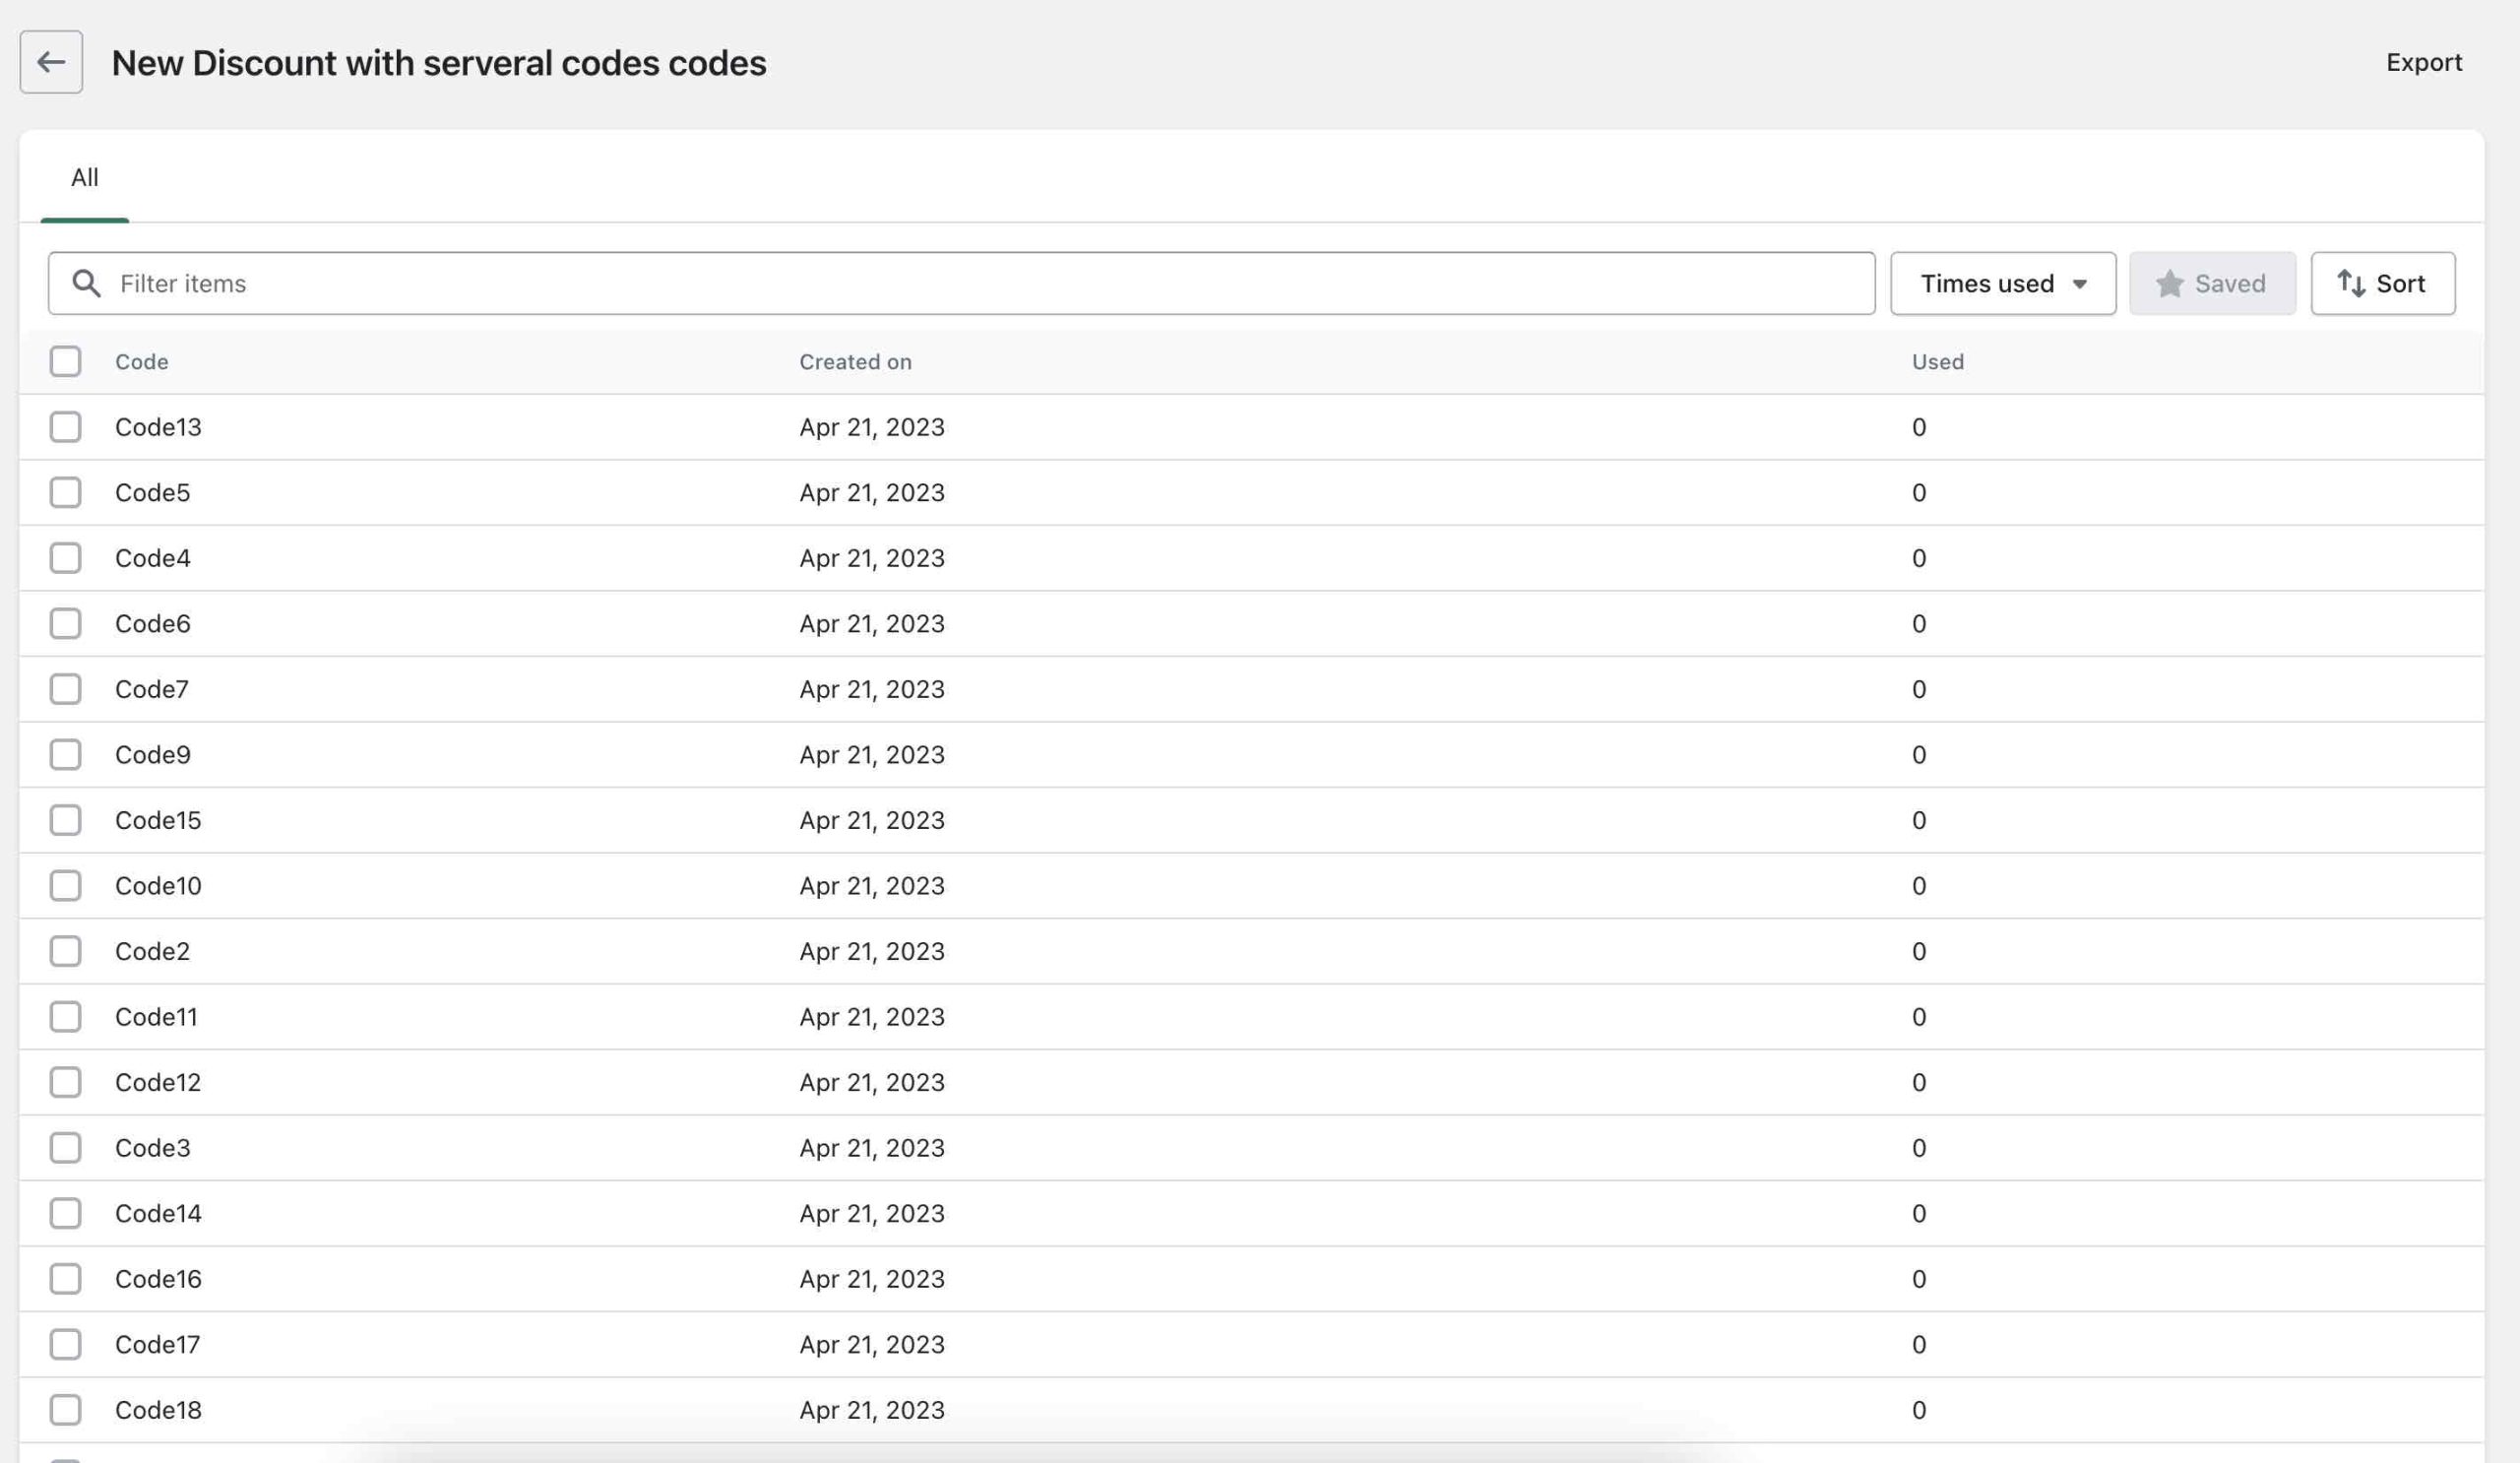
Then, when you click the “View all codes”, you will see the list of all the codes in this Discount:
Add additional Discount Codes to the same Shopify Discount
To add additional codes, just import the Matrixify file with additional rows of “Code” for that Discount – as an update to the same Discount by ID.
To just add those additional codes, you could import them with just 2 columns:
- ID
- Code
And repeat as many rows as you need for the same ID.
If you will import the codes which already are there in this Discount, Matrixify will take that into account and will add only those which you are adding.
How many codes can there be for one Discount?
We tested that Shopify allowed us to import over 100’000 Codes for one Discount. At that point, we stopped the experiment, because it seems that there is actually no limit for how many codes you can have for one Discount.
What to do next?
- Install the Matrixify app.
- Do the export and import to play with its Free Plan.
- Read our tutorial on how to bulk import Shopify Discounts.
- Read the documentation about all of the Discounts columns.


