
How does the product & collections import work?
When you are importing your products, you now can add products to the Custom Collections just by listing the collection in the correct columns so you do not need to manually add each product in your custom collections after the import.
Check out this tutorial to see how you can easily import Products with Matrixify.
Changes to the Product template
New column: “Collection”
This column is only imported – so that you can import the standard Shopify CSV files the same way as you would using the Shopify Admin CSV import.
The Matrixify app will read from the Collection column the collection title, and add your product to it.
The difference from standard Shopify CSV import is that you also can use this to add this product to several collections at once – just repeat the product row for each collection you want to add it to.
Importing from: “Custom Collection”
This column was earlier used just to export the list of Handles of all the Manual Collections where this product is in. Now you can import from this column too – the Matrixify app will add this product to all the collections that you have listed here.
If they don’t exist, then Matrixify will create them for you.
Example of how to add Products to collections
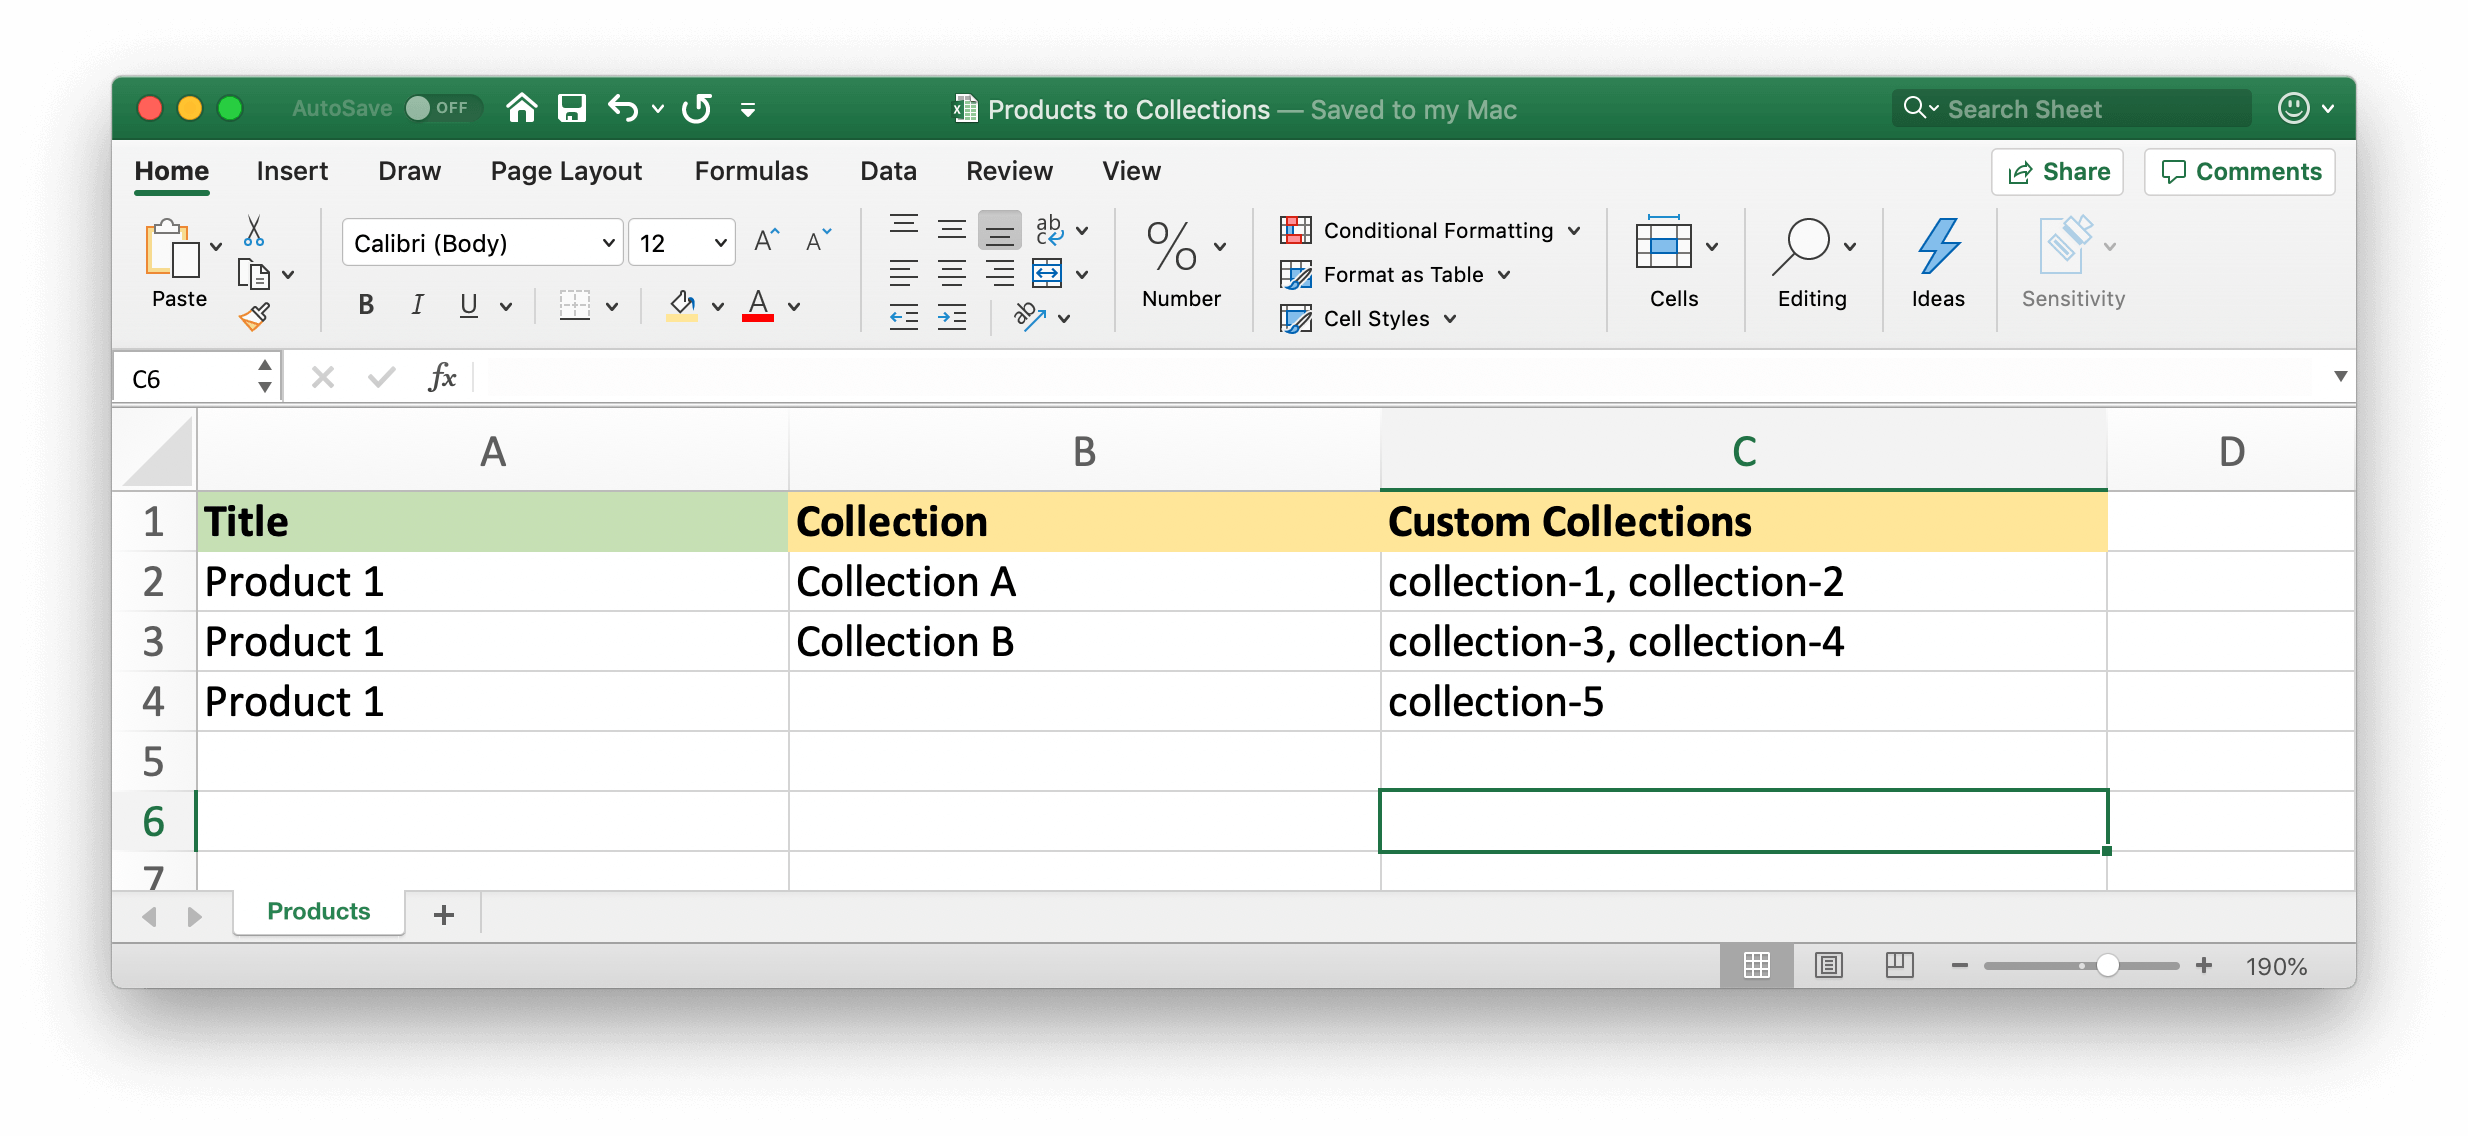
In this example you can see that we are importing “Product 1” which will be included in the following collections:
- Collection A
- Collection B
- collection-1
- collection-2
- collection-3
- collection-4
- collection-5
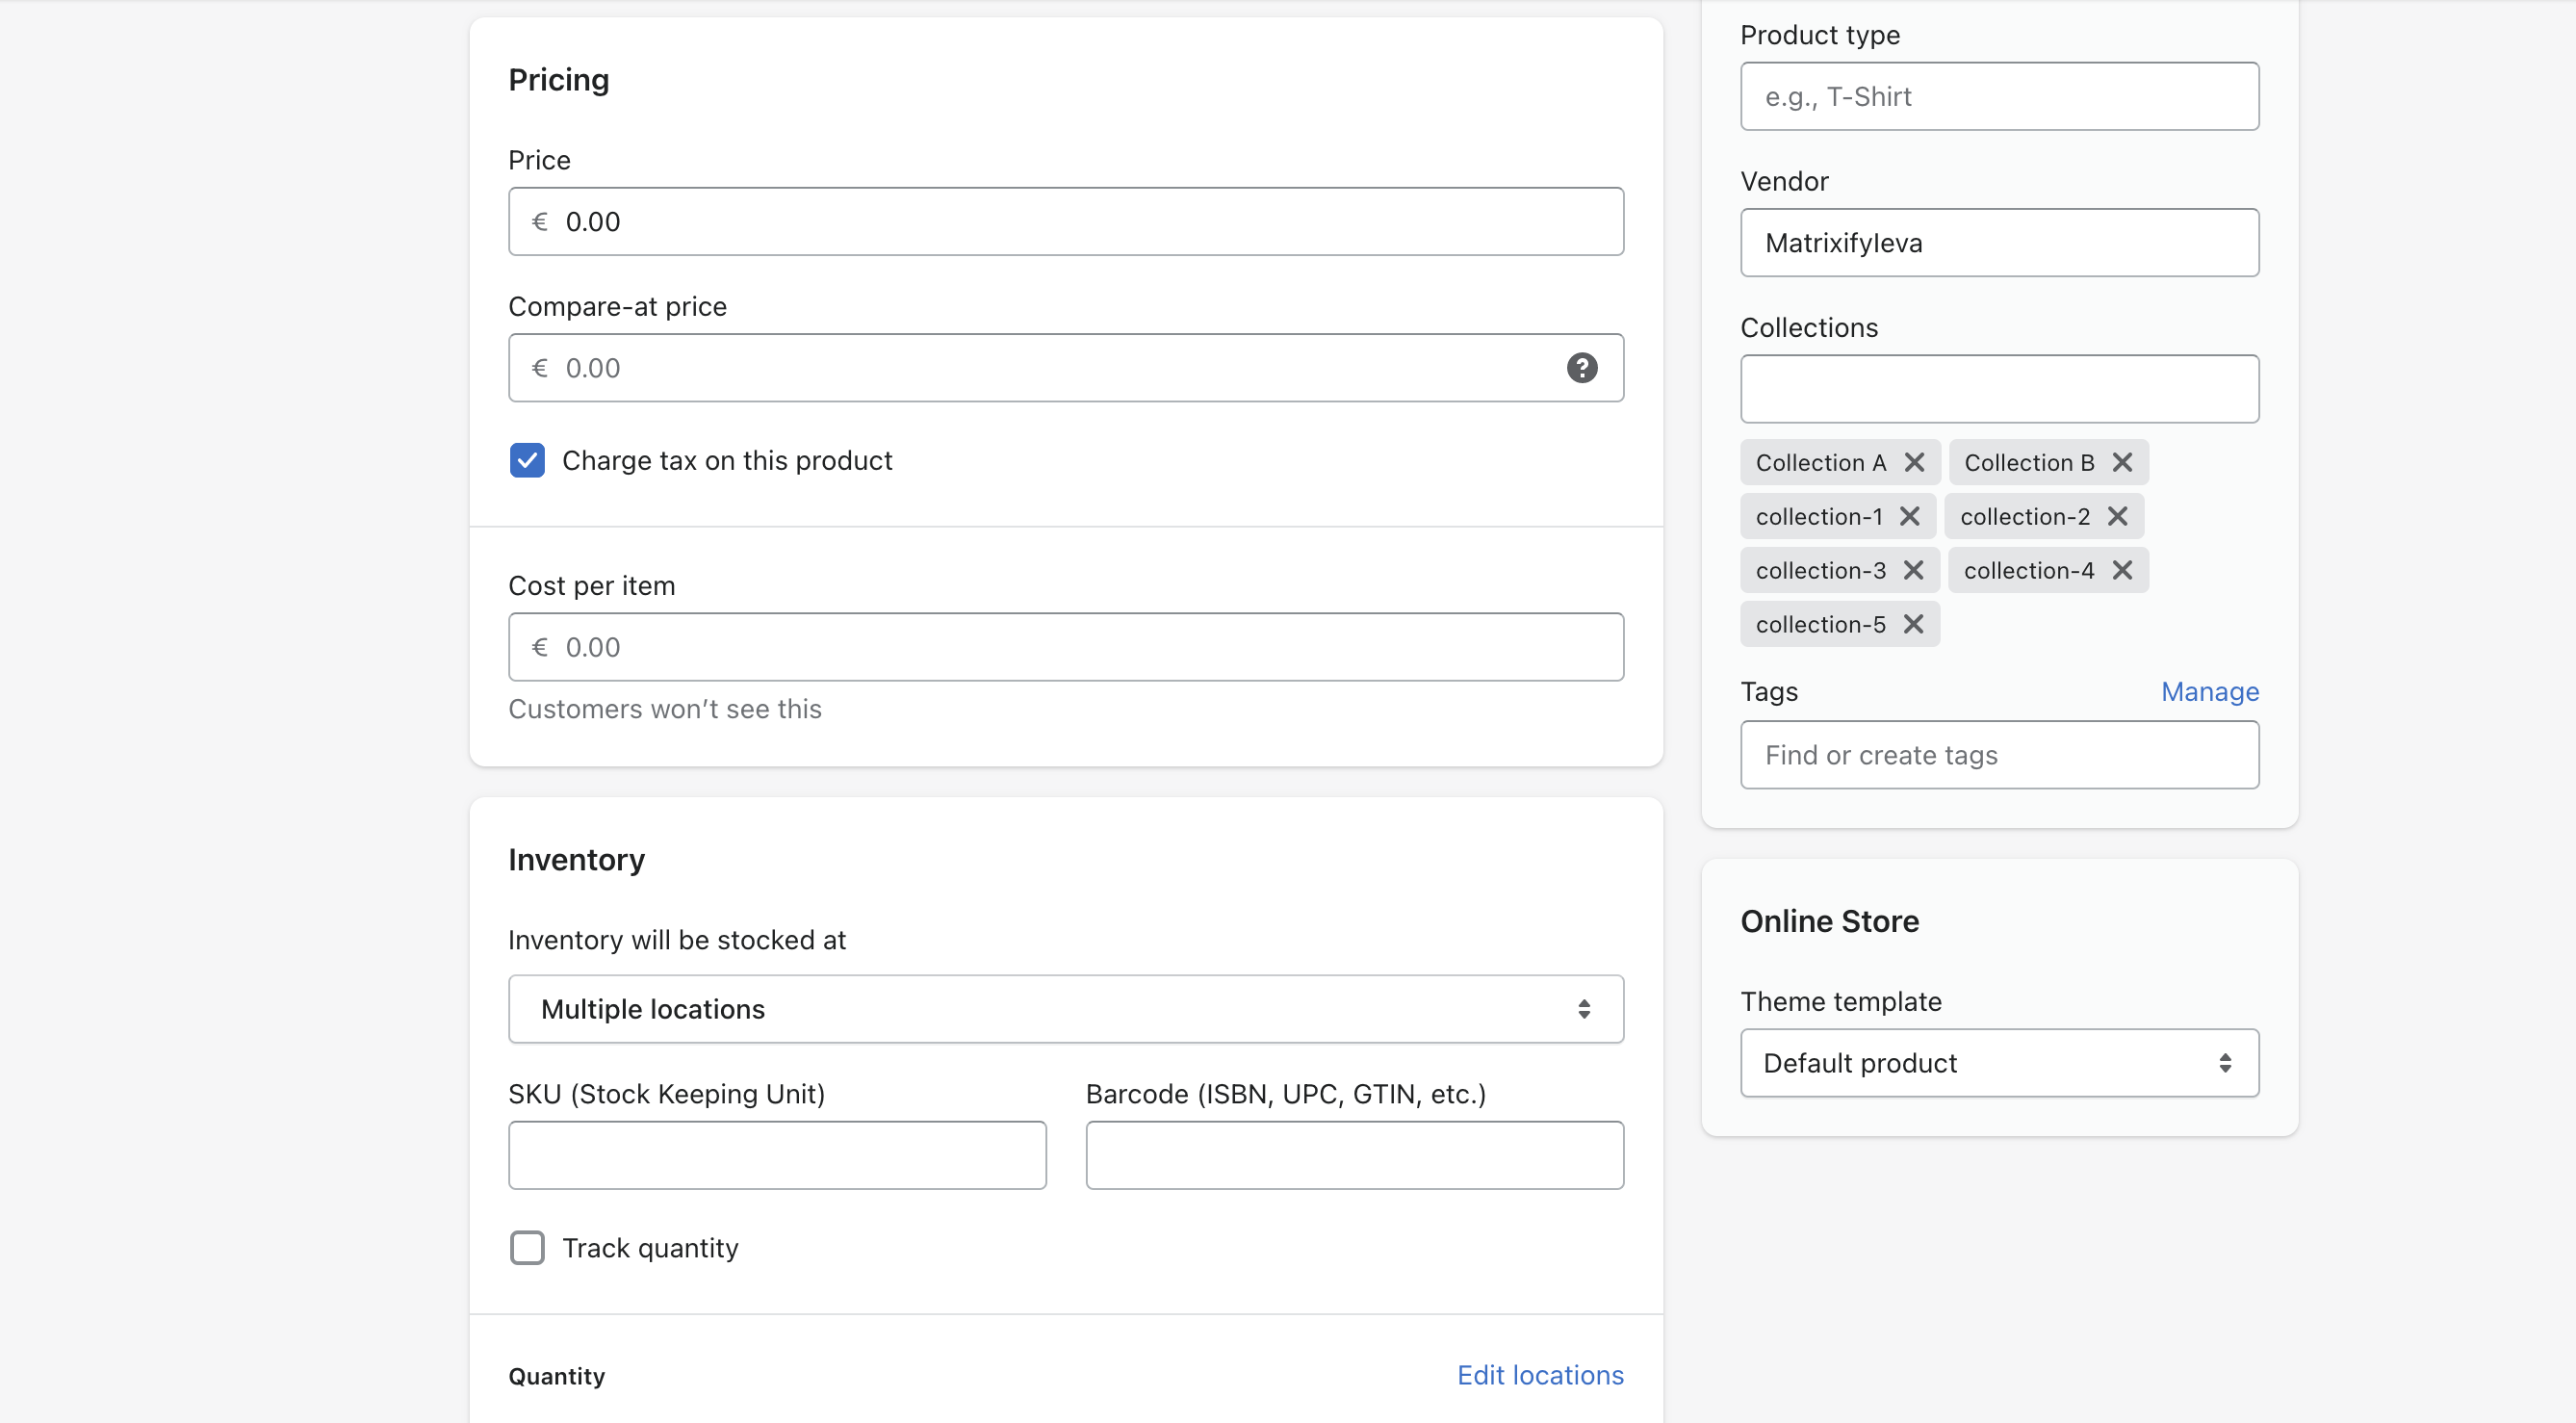
The result will look like this:
Good to know
- You can use those columns to also update existing products – add them to certain collections.
- If you need to manage your Collections in more details, including adding and removing products, please, refer to Custom Collections sheet documentation.
What to do next?
- Read full detailed documentation of Products Sheet each column.
- Read our tutorial on how to export Collections as Product columns.
- Try with your own products and collections.


