
With Matrixify App you can backup Shopify store daily, weekly, monthly or just per request. Here we will take a look at how to configure it.
Steps in short
- Select data that you want to backup.
- Specify how often, when and to what format you want to backup.
- Export your store backup.
1. Select checkboxes to export all fields.
In Matrixify App you can select checkboxes to export specific information from your store. Here we will select everything so our Shopify backup file contains all the information possible about the store, but you can also schedule backups for only a few specific items.
To export everything from your store select all possible checkboxes and sub-checkboxes except the following –
- Do not check Collections under Products – this is an export-only field, and will not be imported in case of restoring, so you do not need to include those in your backup.
- Do not check any Metafields – If you do not use metafields or don’t know what metafields are then most likely you don’t need them in your export. As metafields add a lot of time to export.
- Do not check Generate New Activision URLs for Customers – DO NOT select this for backup or export, as this will reset your customer accounts and your customers will need to activate their accounts.
- If unsure – copy the checkboxes from the picture below.

2. Configure backup data export options.
- In the Format section select the exported file format as ‘Matrixify: CSV‘ – CSV file format will export much faster and will import also faster if you will need to restore some data.

If you just want to create a backup data file for the one-time usage, for example, before some important changes, you can skip this step and go to the last step.
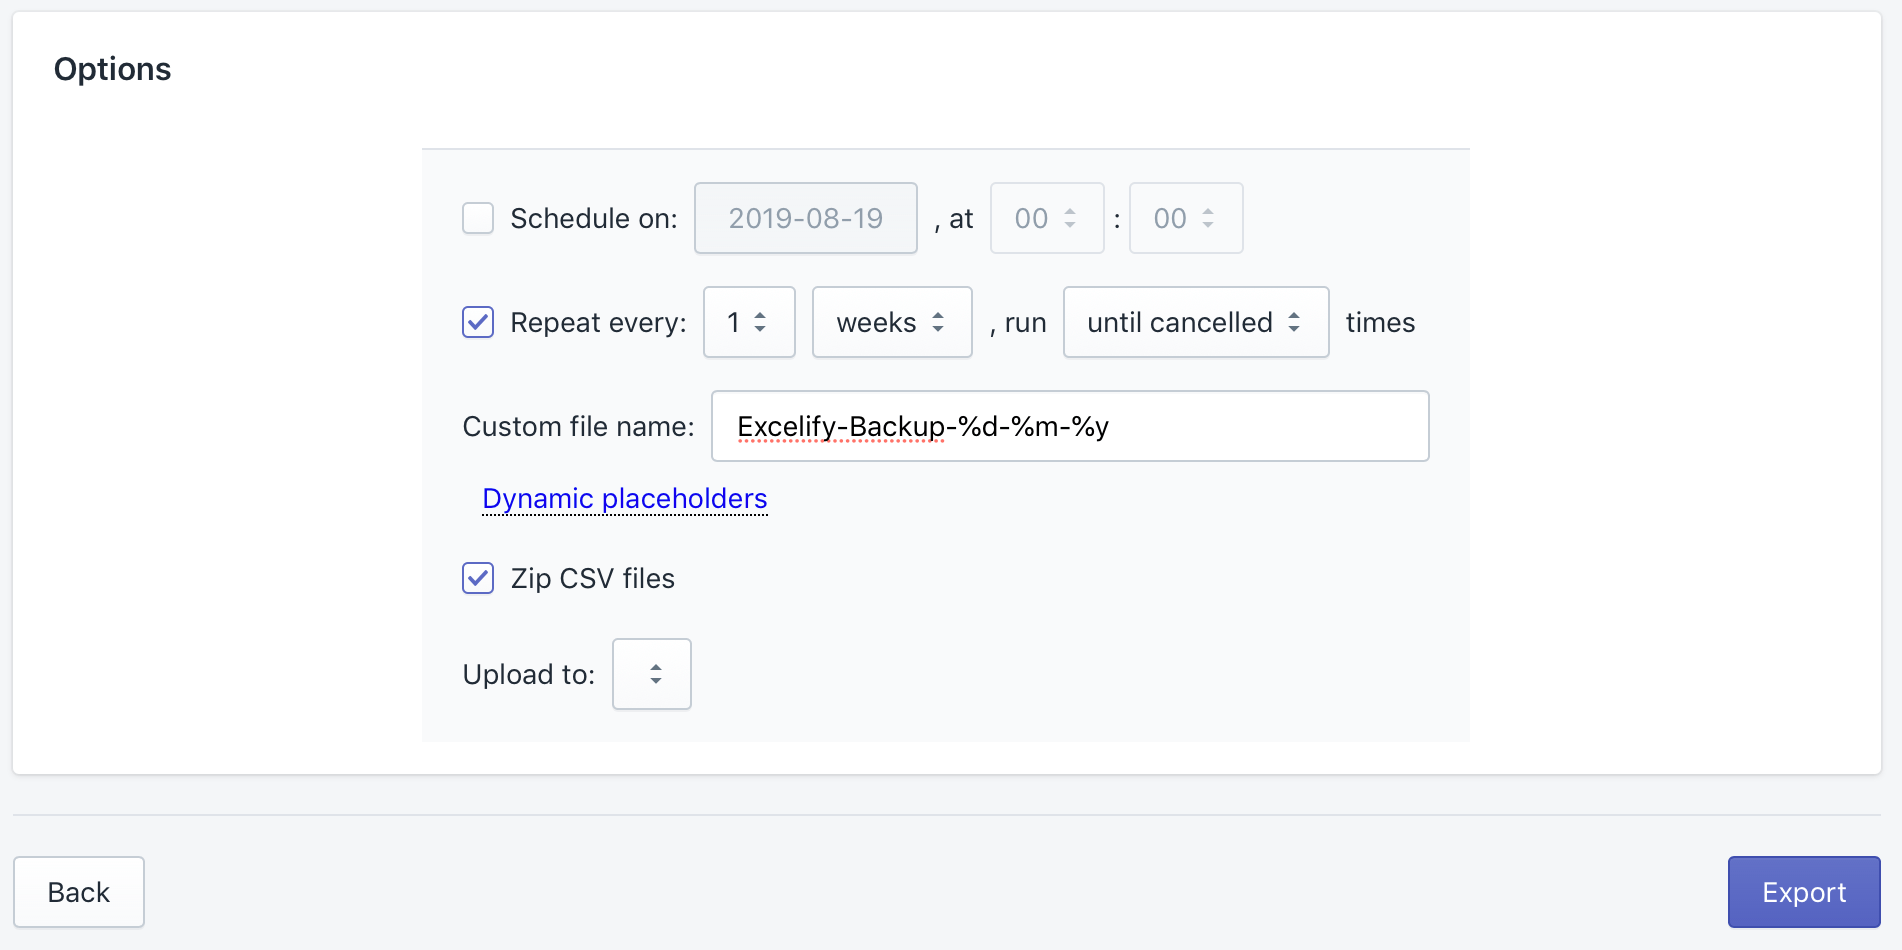
If you want to backup your data regularly, click on ‘Options’ and set up scheduled export.
- Checkbox ‘Repeat every‘ and select how often do you wish this export to run. Exporting every day might be a bit of ‘overkill’, so the preferred time would be every week.
- Now use the custom file name, so we can faster find the backup file when needed. We will use dynamic placeholders so we know what date it was exported at. One example name would be – Excelify-Backup-%d-%m-%y. Example of the exported file would be – Matrixify.Backup-20-12-18. *This is optional and you can also leave the field empty.
- Make sure to check the checkbox – ‘Zip CSV files‘
3. Start your export.
Now you can press Export button.
This is it, now once a week (or as often as you specified in the previous step) there will be export running that backups your whole store.
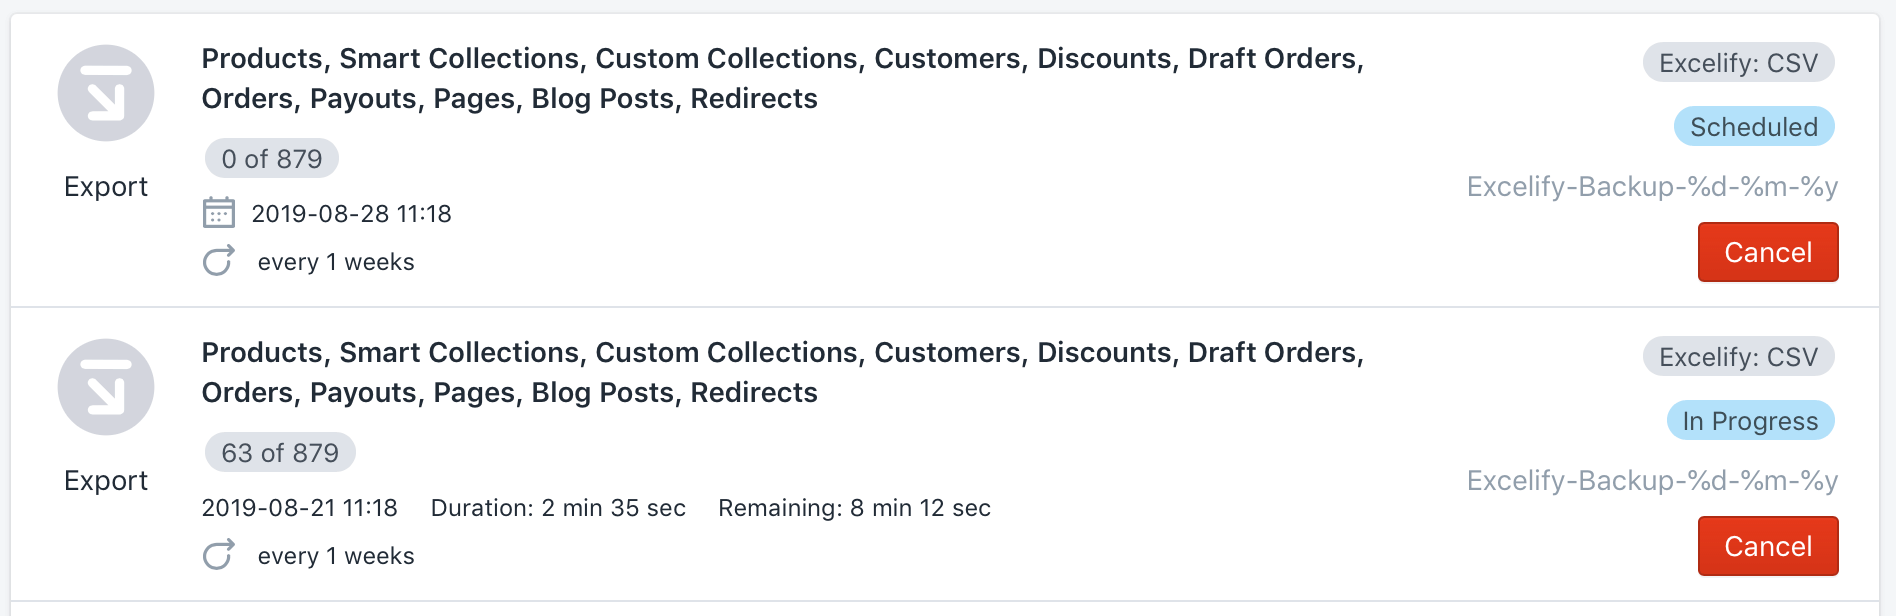
You can see all your scheduled exports when clicking on ‘All Jobs’. There will be a blue bubble with the text ‘Scheduled’ and a calendar icon with the next Export date and time. Here you can also download any exported file by clicking on the file name, this includes your Shopify backup files.
Good to know!
- You can also configure automated exports to Google Sheets, so you have easier access to your data all the time – Scheduled exports to Google Sheets
- In a similar manner, you can also synchronize your store with another Shopify store automatically – Synchronize your Shopify stores
- Read our tutorial on how to clone/duplicate your Shopify store.
- If you need assistance to configure your store back up contact our support and we will help – Contact Us
- When you need to restore your Shopify store data from the backup, you just need to follow these steps:
- Download the backup file;
- Go to the Import section of Matrixify app and upload the file;
- Press Import, as you would do with any other Import.


