
Want to tidy up your Shopify admin by moving completed Orders out of sight – or bring some of them back for a second look? With the Matrixify app you can Archive or Unarchive any number of existing Shopify Orders in one quick import. All it takes is a lightweight spreadsheet that contains just four columns – ID, Name, Command, Closed At – and a couple of clicks in the app.

Steps in short
- Export Orders from Shopify using the Matrixify app.
- Edit Exported file.
- Import edited file into Shopify using the Matrixify app.
1. Export Orders from Shopify
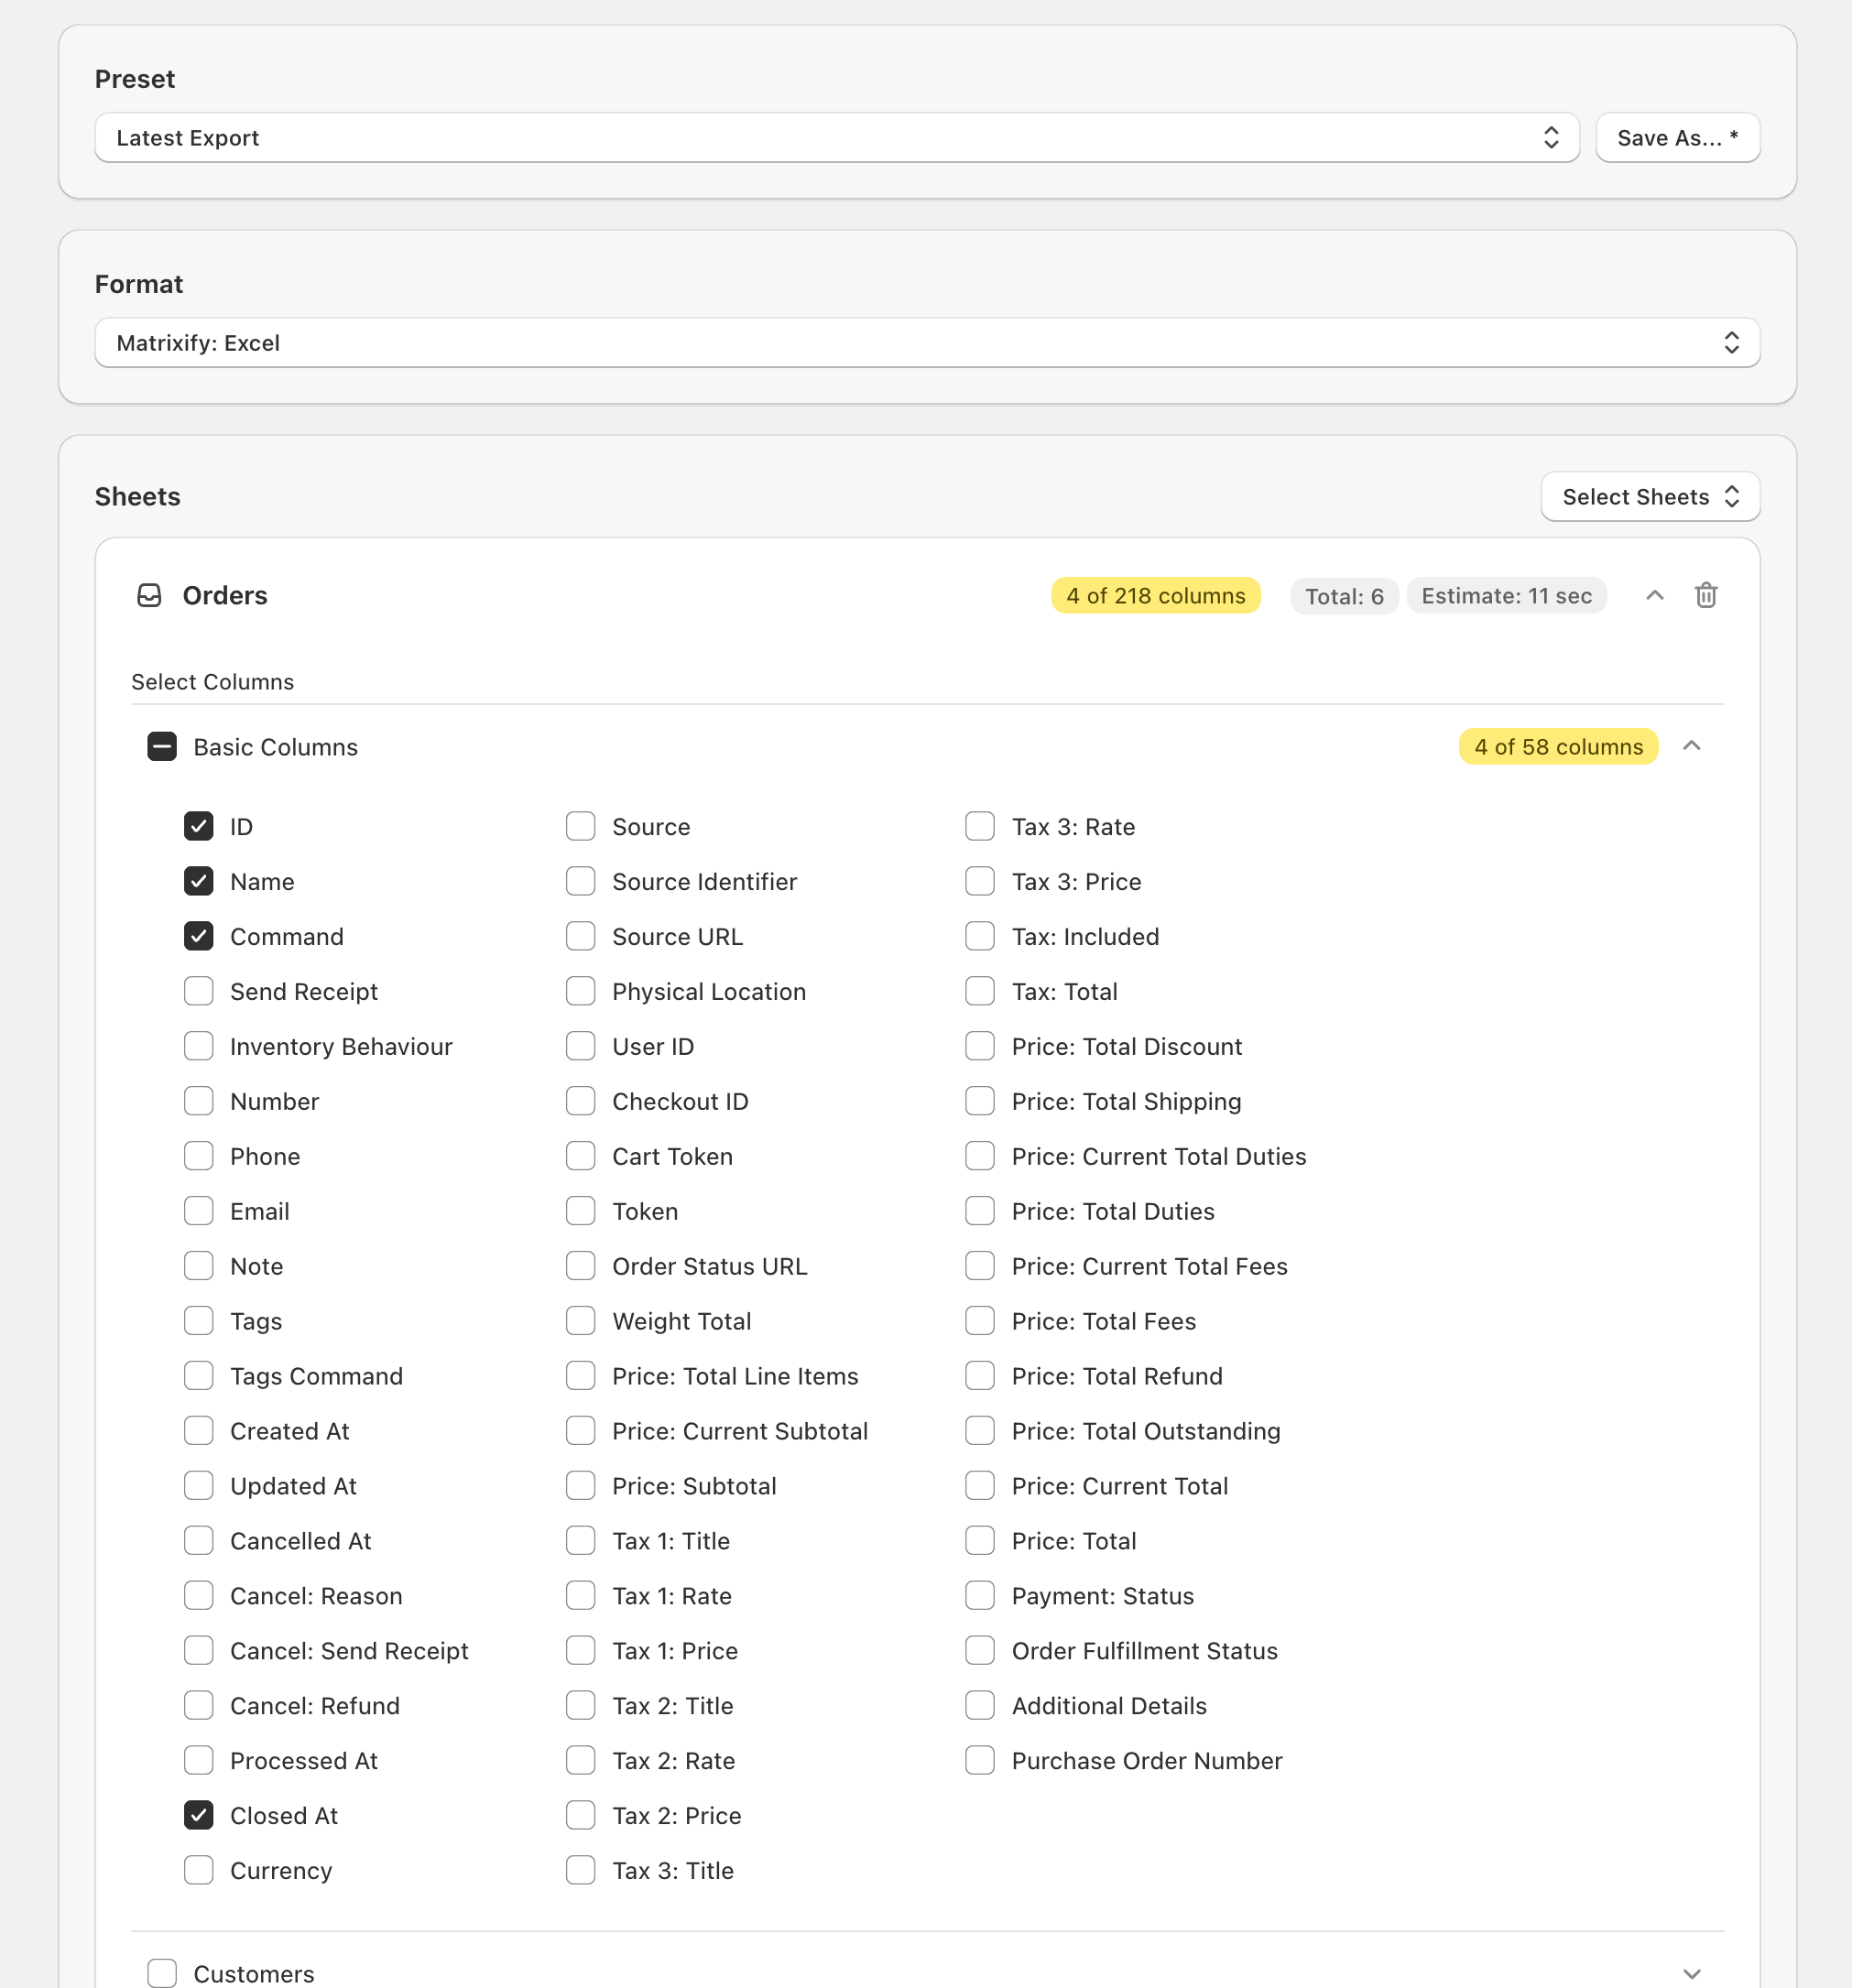
Start by using Matrixify to export the specific Orders you intend to archive (or later unarchive). Head to the Matrixify app and select New Export. On this page select the format you would like to Export in from the Format drop-down. If not Exporting a large amount of data, we recommend Exporting in the Matrixify: Excel format as this tends to be the simplest to work with.
On that same screen expand the Select Sheets drop-down and make sure just the Orders checkbox is marked. For Orders the only checkbox that you need to check is Basic Columns. You can then further refine the columns to Export, by expanding the Basic Columns section and selecting to Export only – ID, Name, Command and Closed At.
Before you generate the spreadsheet that you will use for bulk archiving or un-archiving, you can narrow the Export to include only specific Orders. To do so, click Filter and select which criteria you would like to Export your Orders by. Here is a full list of Filters we offer for our Orders Export.
When your filters, columns, and format have been set up, click Export to launch the job and let Matrixify generate your spreadsheet.
2. Edit Exported file
Upon completion of the Export, download the generated file by clicking the Download Exported File button. Open the file and you will see the Exported columns. Depending on whether you would like to archive or unarchive Orders, the methods are different. Below both are described.
Archive existing Shopify Orders
Note that this will not replace the orders – this will truly update the existing ones.
- Update the file columns with data:
Unarchive existing archived Shopify Orders
- Update the file columns with data:
After completing all the spreadsheet edits—whether you updated the Closed At date to archive Orders or cleared it to un-archive them—store your work by saving the file and head back to the Matrixify app to Import.
3. Import edited file
Move to the Matrixify Home screen, drop the edited spreadsheet into the Import section or pick it with Add File, and watch the app analyse the contents. It should identify the format as Matrixify and detect your Orders sheet. Confirm that the item count is correct. No additional options are needed—simply scroll past the Options and press Import.
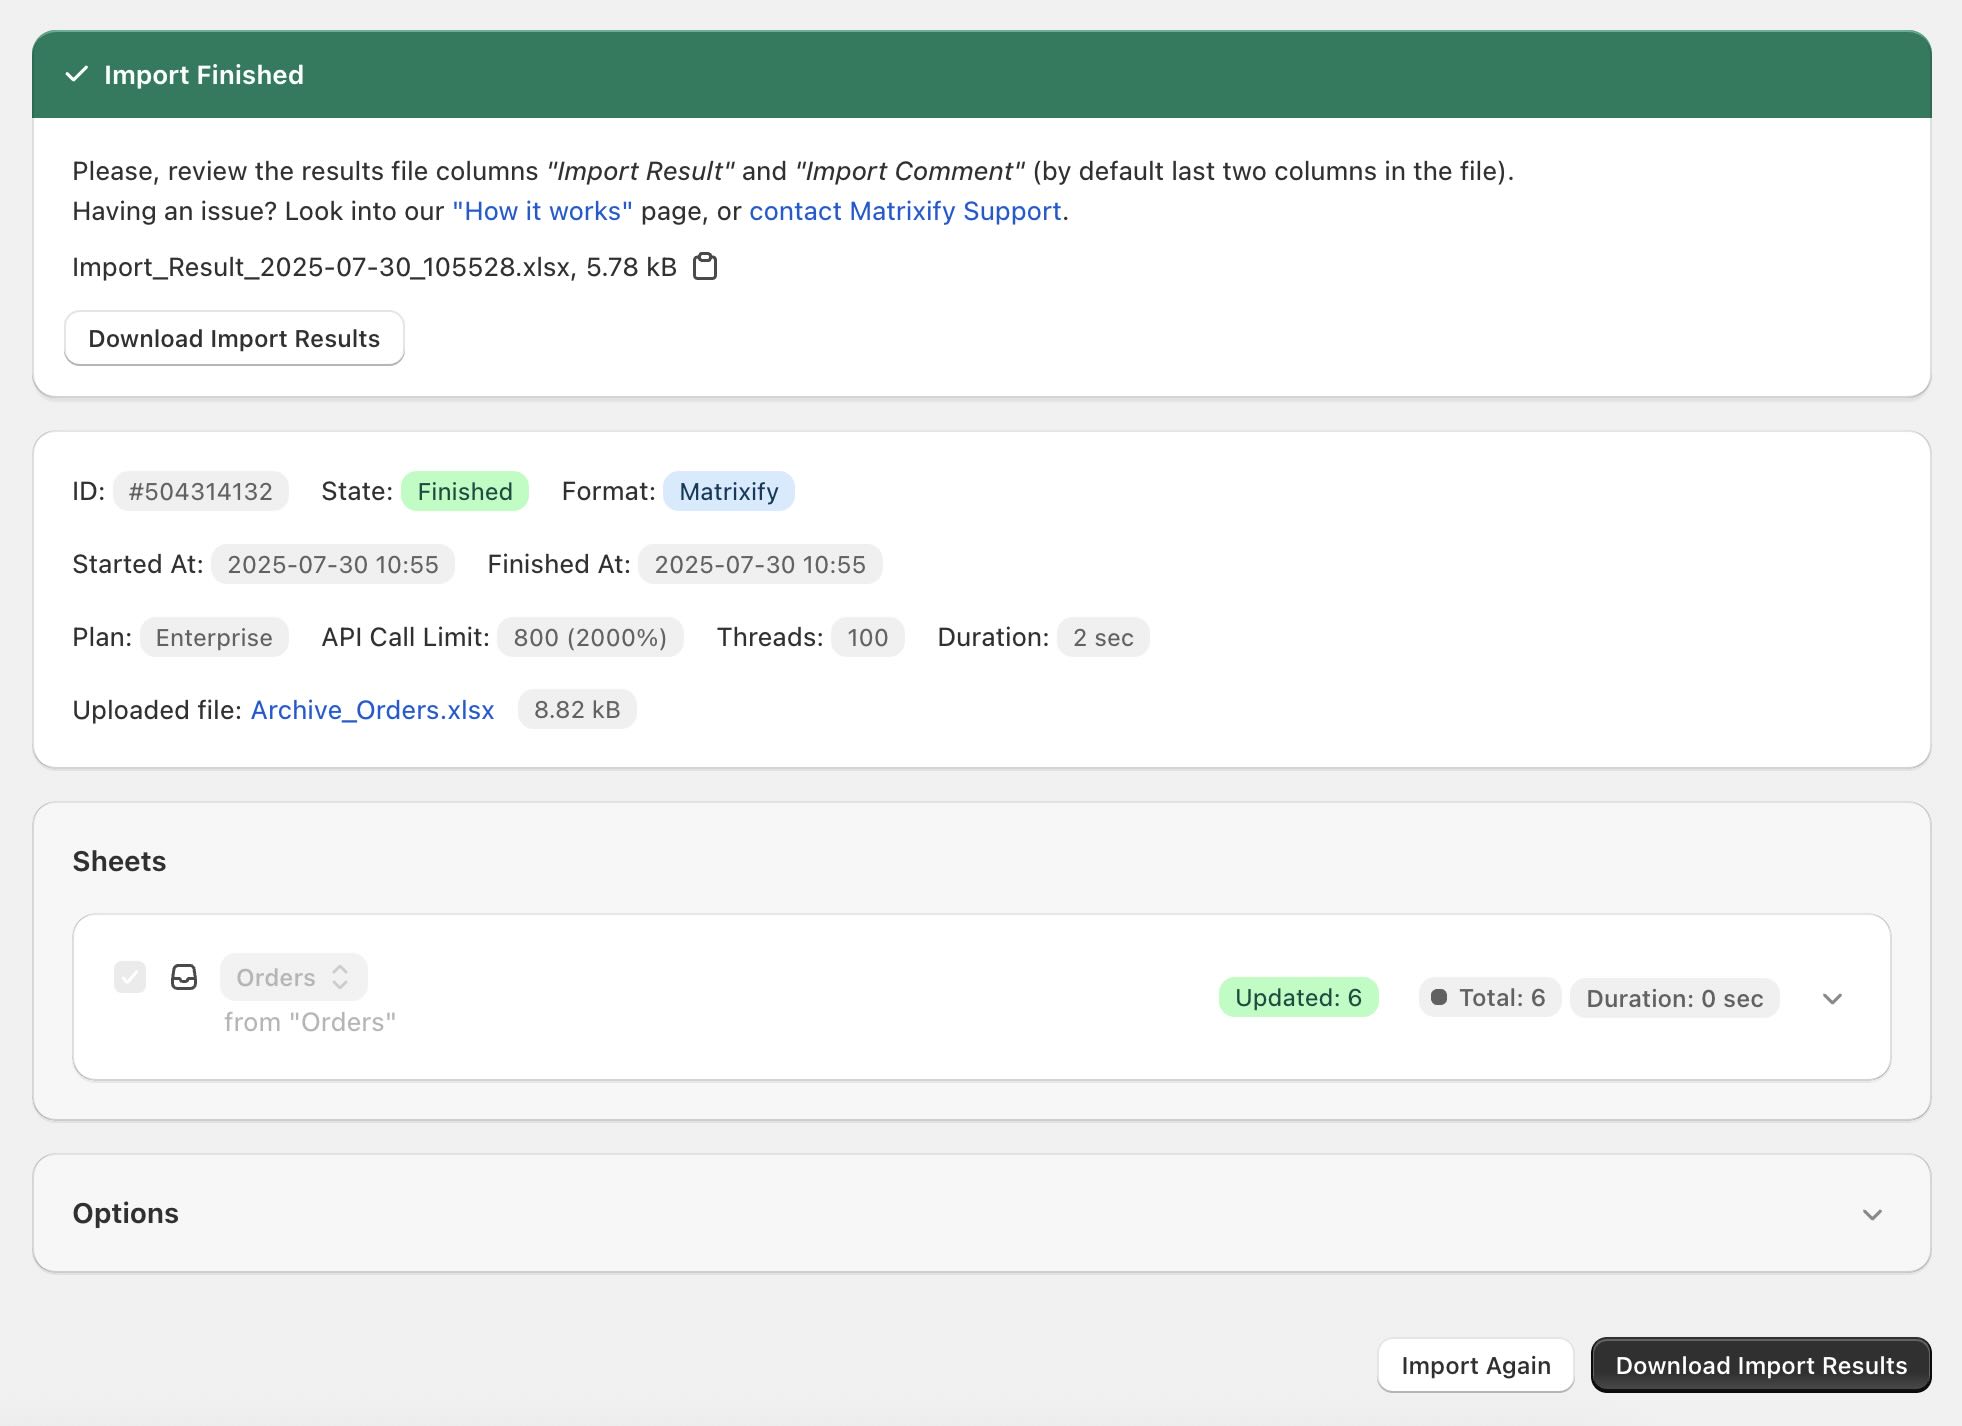
The job page will track progress in real time, and when the state changes to Finished you can download the Import Results file to verify that every Order shows Import Result = OK. If any rows fail, open the results file, read the Import Comment for a detailed explanation, adjust those rows accordingly, and re-import just the fixes.
And with that final Import completed, you’ve walked the entire loop – export the chosen Orders, adjust the Closed At column, and let Matrixify push those updates back into Shopify – so your store instantly reflects the archive or unarchive status you wanted. That’s the whole process for tidying up Orders in bulk with the Matrixify app!
Good to know
- If you need to delete the Shopify Orders, you can do it like explained in this tutorial.
- If you need to bulk Cancel your
Orders, do this same procedure, just instead ofClosed Atcolumn, set the date forCancelled Atcolumn. And you can add theCancel Reasonas well. We also offer a great tutorial on how you can cancel your Orders in bulk. - See more our Orders documentation for more information on available columns for Import.
- If you have any questions or concerns, please reach out to our support!


