
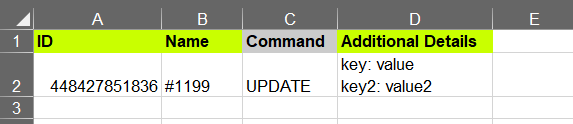
To update a few fields for Shopify Orders which are allowed to be updated, you can import tables like this.

Importing table like this, the app will do the following:
- Find the existing Order by ID.
- If it will not be able to find an existing Order by that ID, it will try to find it by the Name.
- Set the “Note” field to “Updated notes”.
- Add the additional Tag “New Tag” to whatever Tags this Order has (because the “Tags Command” is MERGE).
- Change the “Additional Details” value of that Order to two key:value pairs that you are importing.
It will not change any other data of that Order, only those fields.
Update only Order Tags

If you import table like this, it will just add (merge) “New Tag” to existing order tags, and will not change anything else.
Update only Additional Details
By importing a table like this, it will update only the “Additional Details” field of those orders you import.
Cancel an Existing Order

Import of this table will make that order Cancelled. Although you are importing a date in the “Cancelled At” column, Shopify doesn’t allow to set the specific date when the order shows canceled (you can only export that date). So whatever date you have here, it will get canceled at the moment when you do the import.
Valid Cancel Reasons are: customer, inventory, fraud, declined, other. The default is “other“.
It is only possible to cancel orders that have not yet been fulfilled (or partially fulfilled) – if an order has a fulfillment then you will not able to cancel it.
Archive an Existing Order

This import will make that order Archived. Although you are importing a date in the “Closed At” column, Shopify doesn’t allow to set the specific date when the order shows archived (you can only export that date). So whatever date you have here, it will get archived at the moment when you do the import.
UnArchive an Existing Order

When you import a “Closed At” column as an empty value – if your Shopify Order is archived, the app will unarchive it.
Remove the Customer from the Order
You cannot reassign another Customer to an existing Order. But you can remove that customer from the Order at least.
You can do it by importing this empty column of the “Customer: ID”.

Update Shipping Address

You cannot update the Billing Address of an existing Order. But you can update the Shipping address – all its columns to whatever you like.
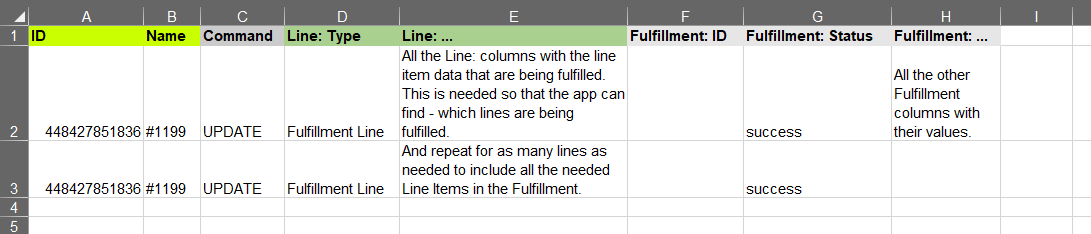
Update Order – Add Fulfillments
To create new Fulfillment for an existing Order, you would need to import the lines of “Line: Type” with “Fulfillment Line”, and fill in the Fulfillment columns.
if you will not provide any “Line: …” columns, the app will create a fulfillment of all the items you have in the Order.
Update Existing Fulfillment Tracking Number and Tracking URL
To update an existing fulfillment, you just need to specify additionally the “Fulfillment: ID” values – for those Fulfillments you need to update. You can update all the fulfillment fields, but for the sake of example, here is how you update the Tracking Number and the Tracking URL of the Fulfillment.
Notice that there is no need for “Line: …” columns – just the “Line: Type”.
![]()
If the “Fulfillment: ID” will not be found, the app will create a new fulfillment and will include the rest of the unfulfilled products in it.
Update Order Metafields

You just need to identify the existing Orders, set the Command columns to “UPDATE”, and then include as Metafield columns whatever metafields you need to update.
Read more about Metafields here.
Good to know
- The full list of fields that can be updated for Orders, is here in the documentation.
- You can update in the same import file many orders and any combination of those columns.
- Read our tutorial on how to bulk cancel Orders in Shopify.
- Check out other Order related tutorials.
- When preparing the import file, remember that you need to call the sheet (tab) of the Excel file “Orders” (or the CSV file as Orders.csv – which can be zipped).


