
Shopify Gift Card Products are basically the Shopify Products, so they also consume a lot of time to create manually.
That is why with Matrixify you can import Gift Card Products in your Shopify store – in bulk!

Let’s look into how to do that!
1. Activate Gift Cards feature in your store
Before you can import Gift Card Products you will need to make sure that this feature is activated in your store.
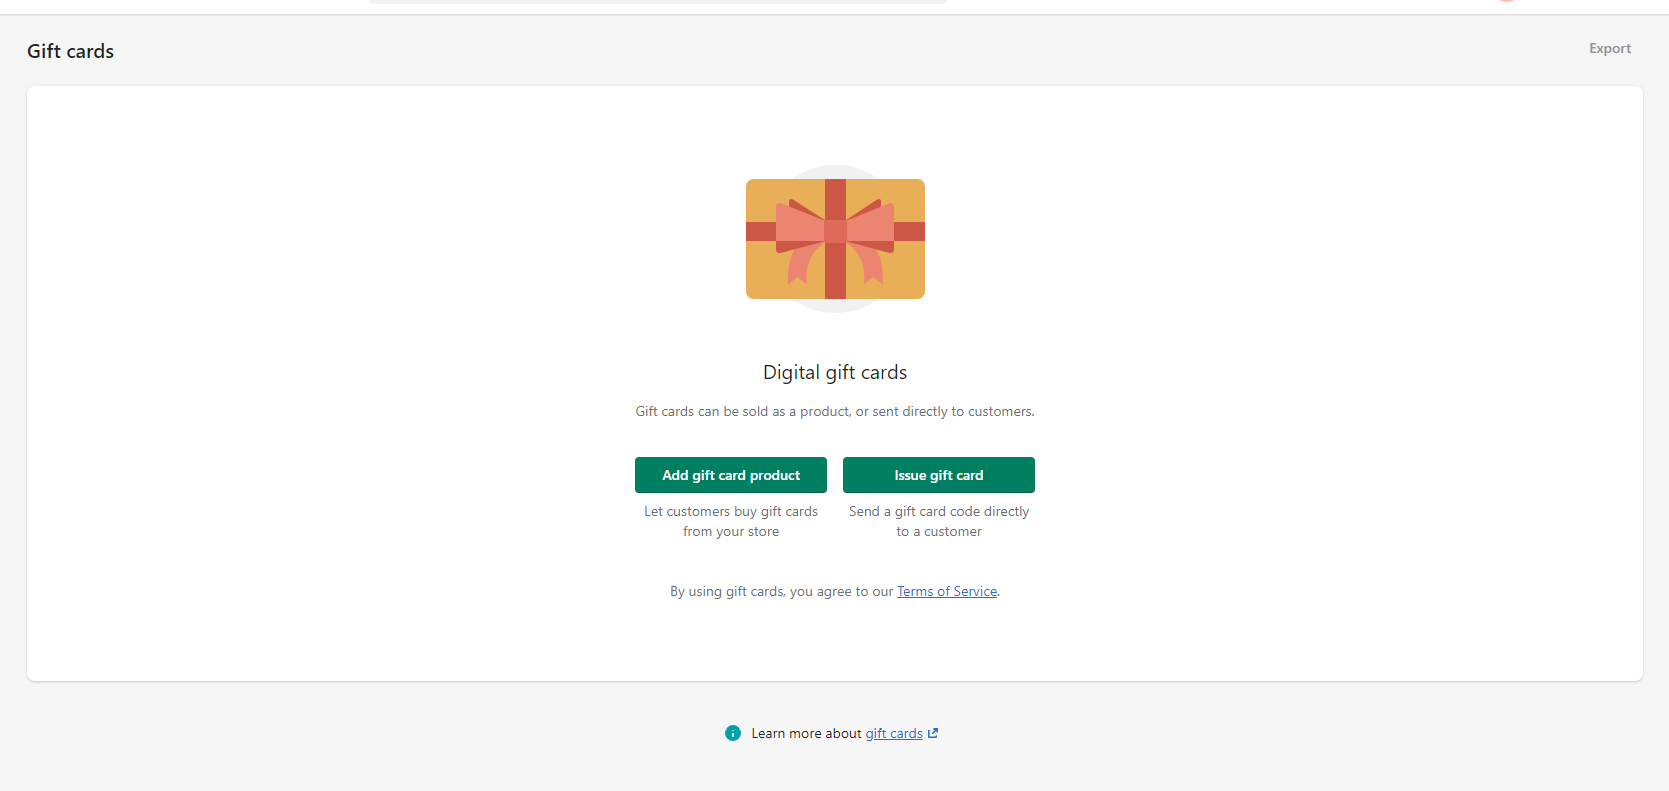
Go to Shopify Admin -> Products -> Gift Cards in your Shopify Admin.
To create a Gift Card Product, Shopify requires activating Gift Cards in the store, which shows that you have approved their Terms and Conditions for Gift Cards.
You can activate Gift Cards by creating a new Gift Card Product in the store. You do not need to actually save and create it, just press the “Add gift card product” button, and then in the new Gift Card Product page click “Discard”.
Then Gift Cards in your store will be activated.
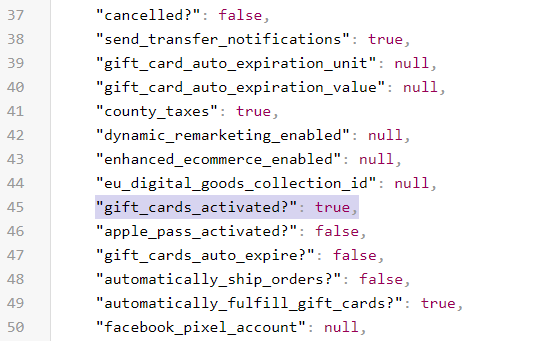
For more technical users – you can check if Gift Cards have been activated by checking the shop_settings.json in your store admin.
Open this page while logged in your store admin – shopify.com/admin/shop_settings.json
On the JSON page, you can see if gift cards are activated by checking the gift_cards_activated? property.
The process to activate them is the same as above by creating a new gift card product.
2. Construct a Products file to import Gift Card Products
This section will be split into two parts – one to create the file manually from scratch; and the other on how to change your existing Products to Gift Card Products.
2.1 Construct the file manually
Now we can get to our spreadsheet!
Let’s create two different Gift Card Products from scratch.
Create a blank spreadsheet, name sheet/tab in the file to “Products” as we will be importing Products.
To create Gift Card Products from scratch we will only need 5 columns:
- Title
- Gift Card
- Option1 Name
- Option2 Value
- Variant Price
Gift Card Products without variants
First, we will create a Gift Card Product that does not have variants with different selectable values.
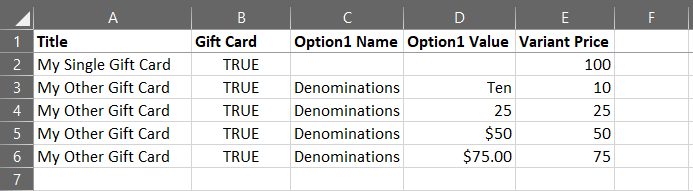
- Title – column set name of your Gift Card Product, for example, “My Single Gift Card”.
- Gift Card – set the value “TRUE” in this column as we wish for the app to know to create this Product as a Gift Card Product.
- Option1 Name and Option1 Value – for a product without variants, these columns can stay empty. If all your gift card products will be without variants then you do not need to have these two columns at all.
- Variant Price – the price of your Gift Card.

Gift Card Products with variants
Now let’s create a Gift Card Product with multiple variants that are handled as denominations for Gift Card Products.
- Title – In this example, we will have 4 denominations so we will need to fill the same Title in 4 rows. The app will use Title, in this case, to know which rows are from the same Product.
- Gift Card – Fill with value “TRUE” for all rows.
- Option1 Name – This would be the name of the option that your customers will see in the store. Usually its “Denominations”.
- Option1 Value – Here you can write out denominations so that your customers can understand which option is how much value. But this is still a free text field, so any words or numbers can be written here. It’s important that each row here has its own unique option value.
- Variant Price – fill with the actual price of each Gift Card product denomination.
You can also add other details to the product, such as images, description, etc. Check Matrixify Products documentation to see all listed fields.
2.2 Changing existing Products to Gift Card Products
The process itself to change an existing Product to a Gift Card Product is quite simple.
But since Shopify does not allow updating that for existing Products then we will need to replace the product (meaning – delete and re-create it).
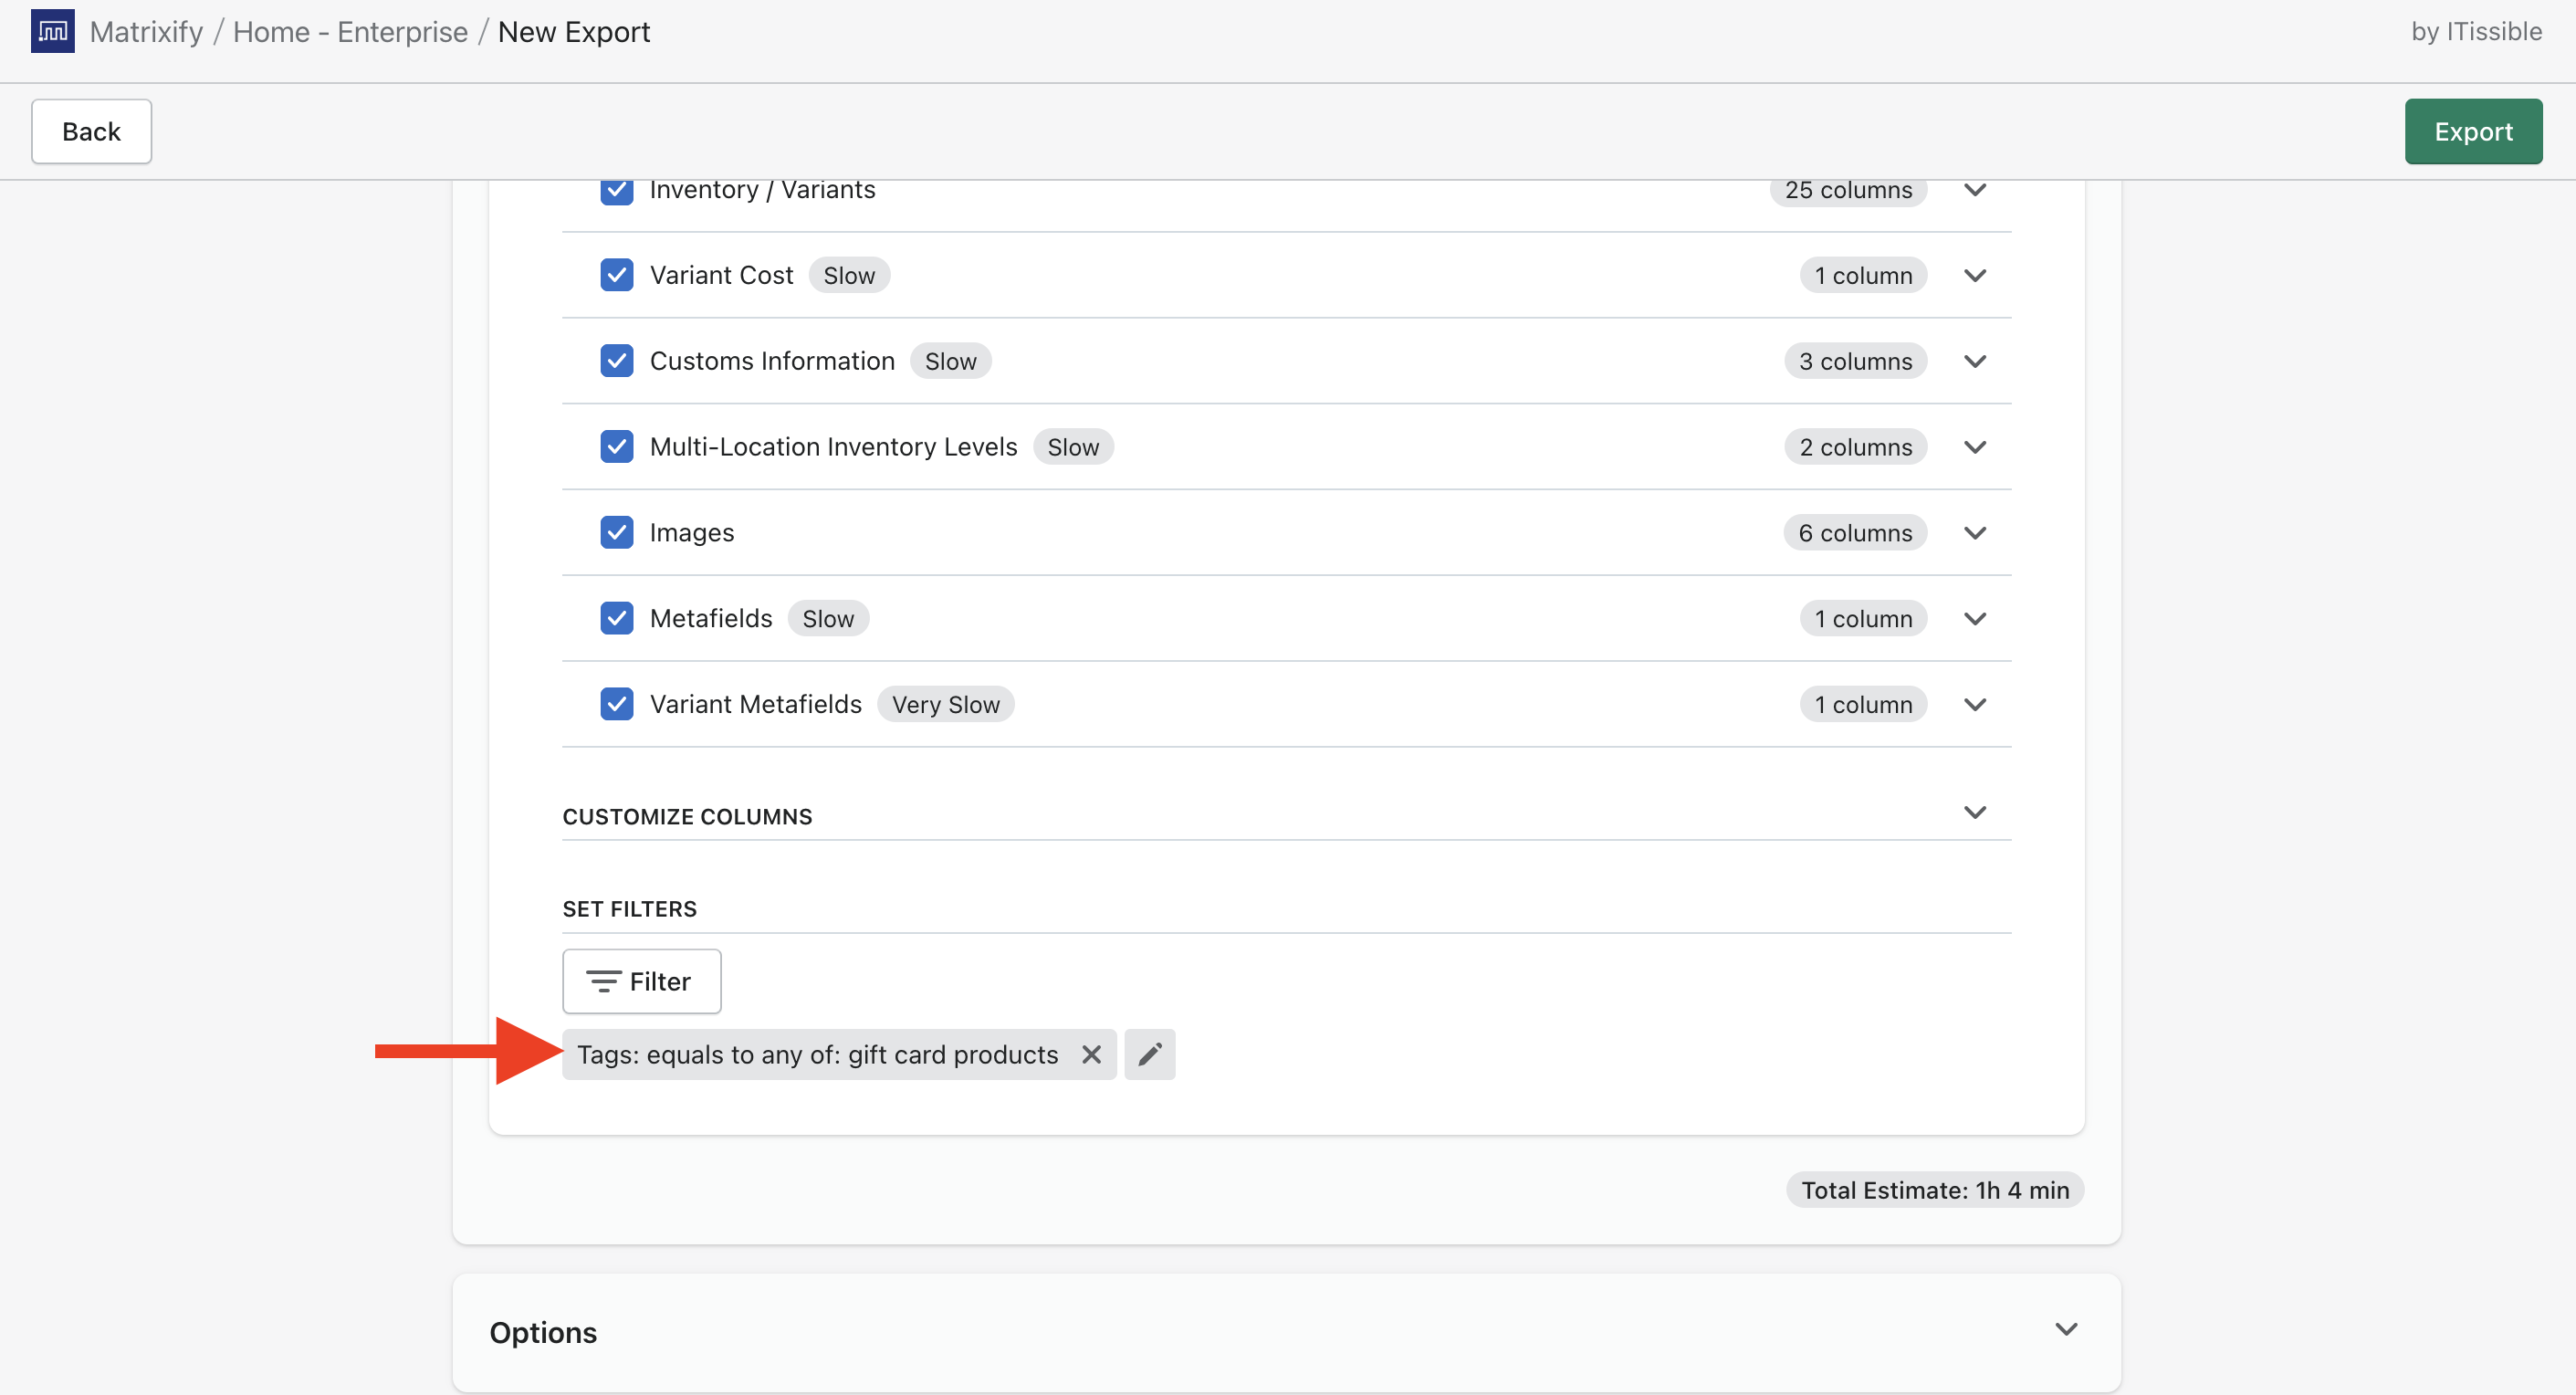
First, in the Matrixify app, create a new export – select Products in the “Select Sheets” drop-down and all their sub-checkboxes.
Make sure that all columns show as selected to be sure that no information is lost when the product is being replaced.
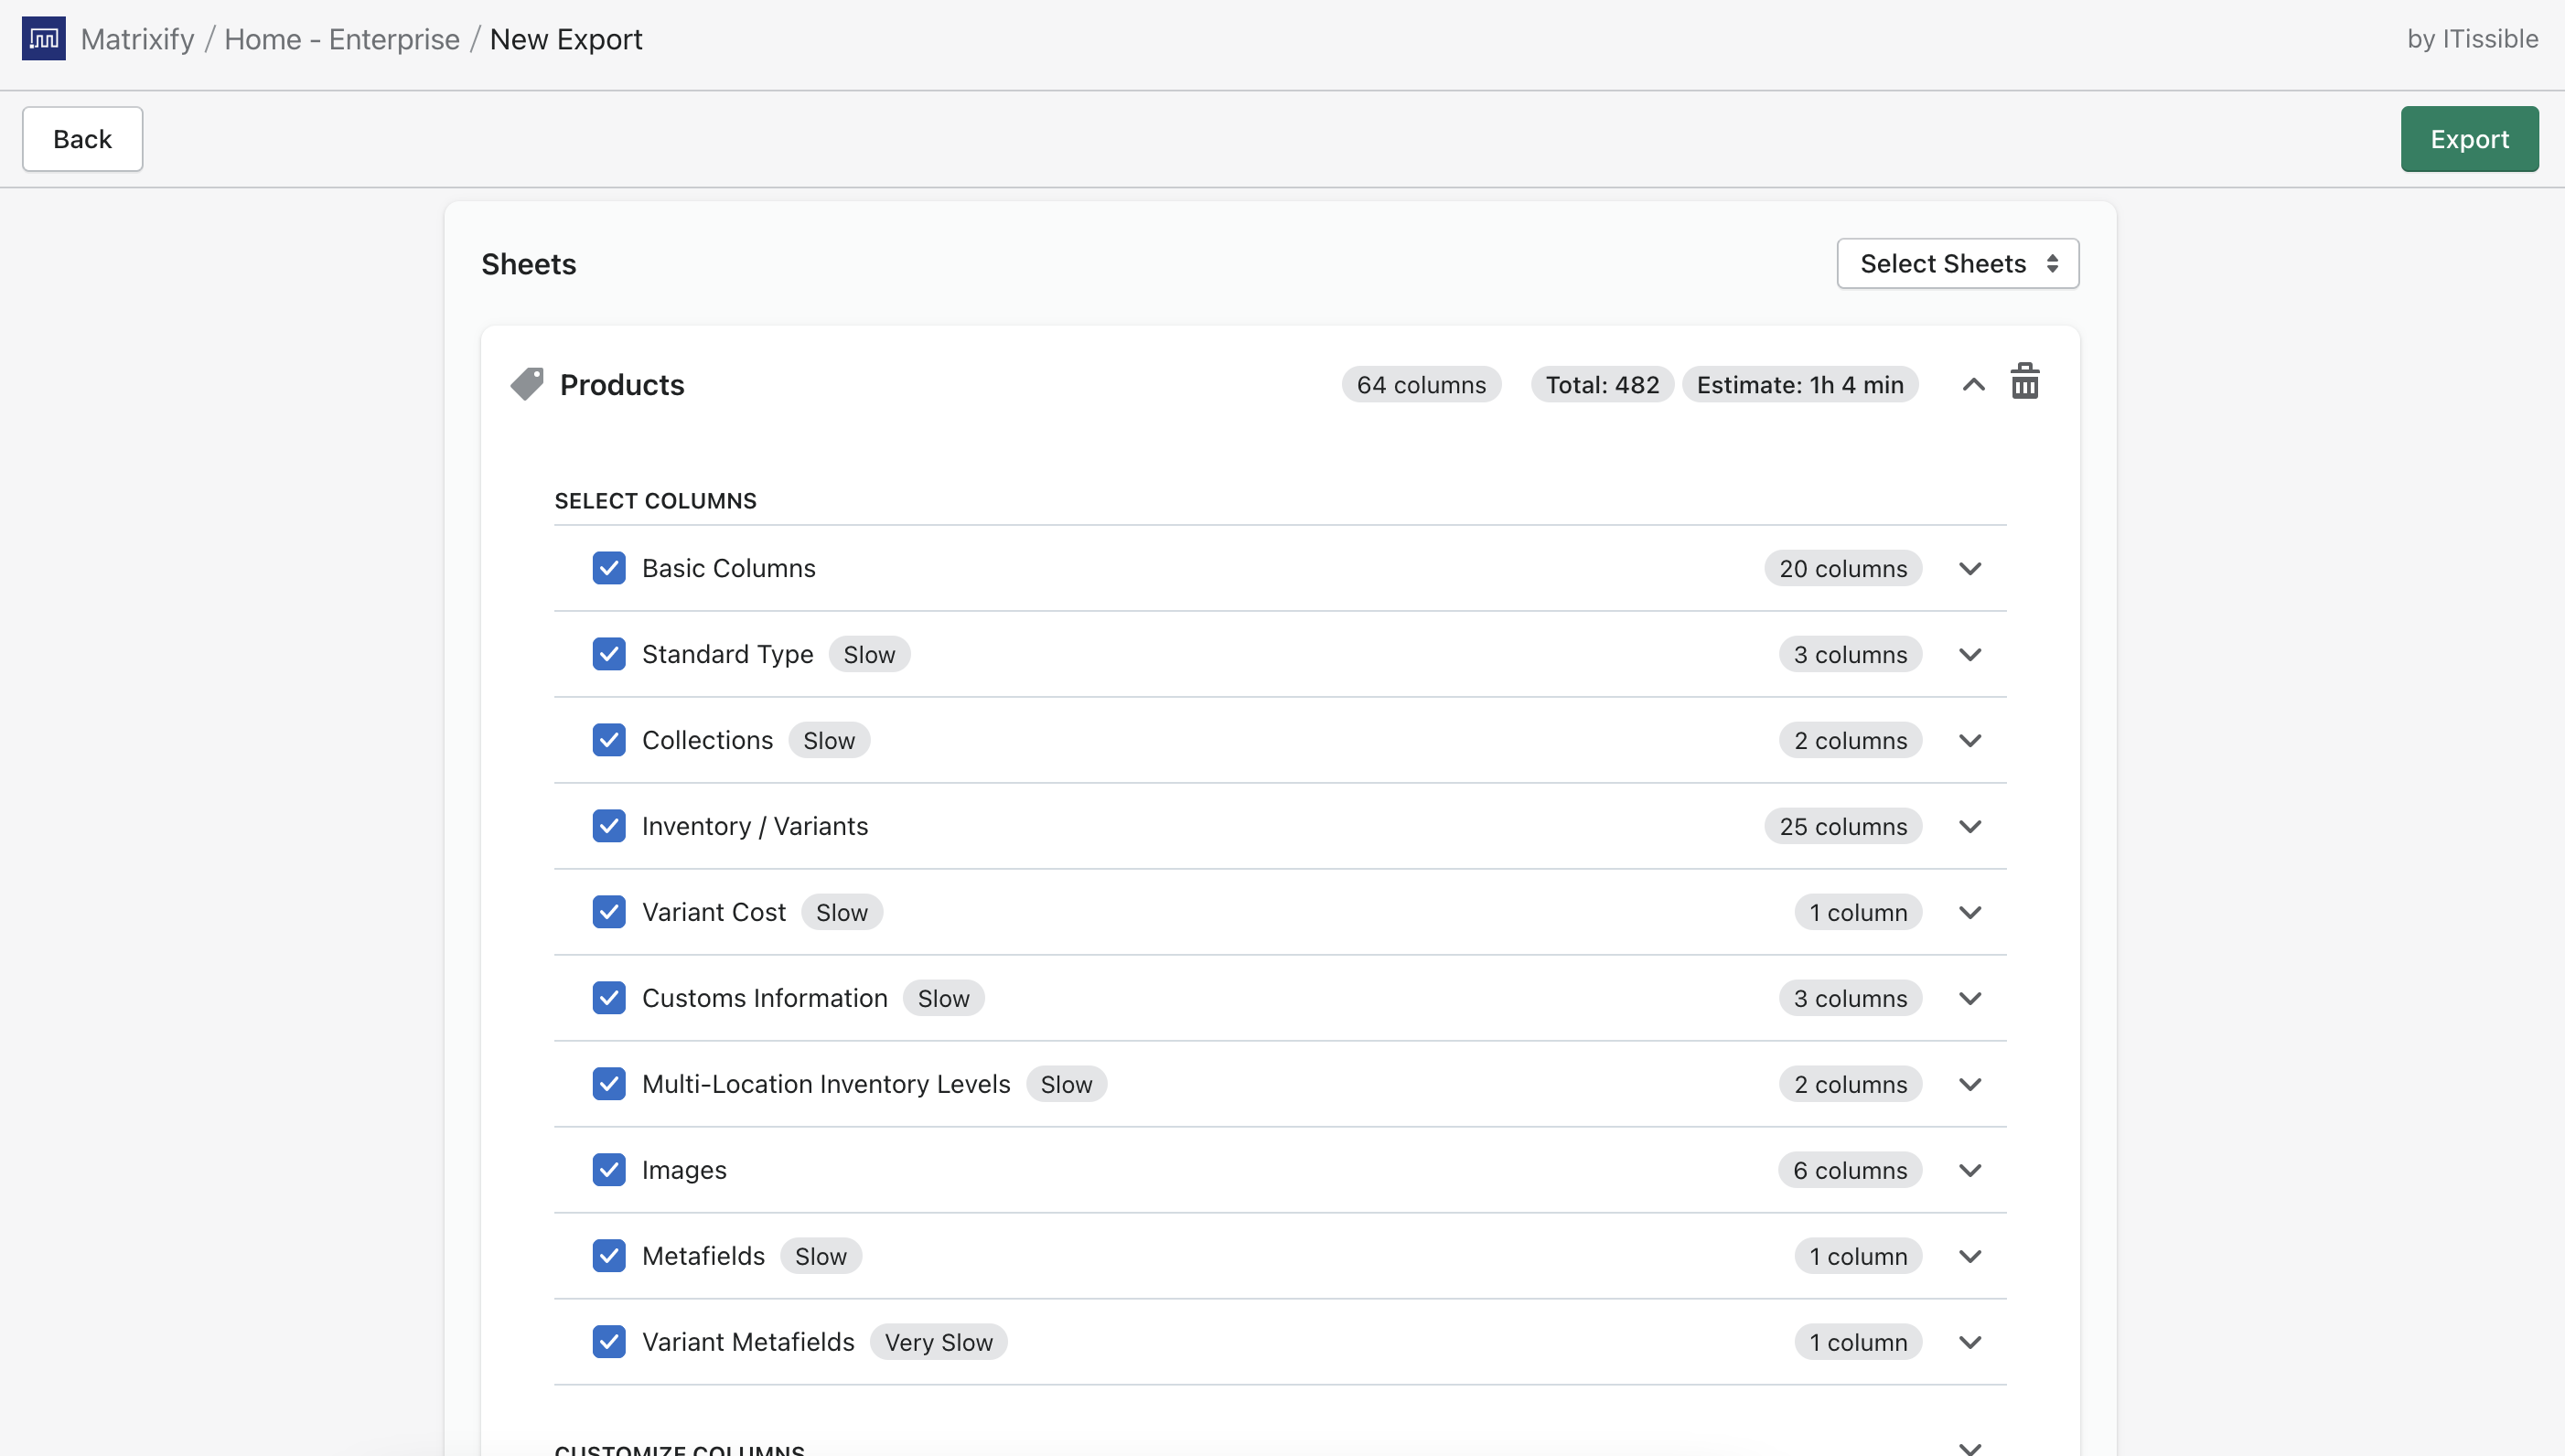
You can also click on the “Filter” button to apply filters and export only specific Products that you wish to change to Gift Card Products in Shopify.
Press the “Export” button to start your export.
Once the file is exported we can start editing it.
In the file we only need to change the following columns:
- Command – set to the value “REPLACE” in all rows for the product

- Gift Card – set to the value “TRUE” in all rows for the product

3. Import your file to create Gift Card Products
Now we can again go into the Matrixify app, in the Home page Import section you can upload your file.
Inspect all details about your import, to read what each detail means when importing, look into Matrixify “How it works” page.
Press the “Import” button to start your import.
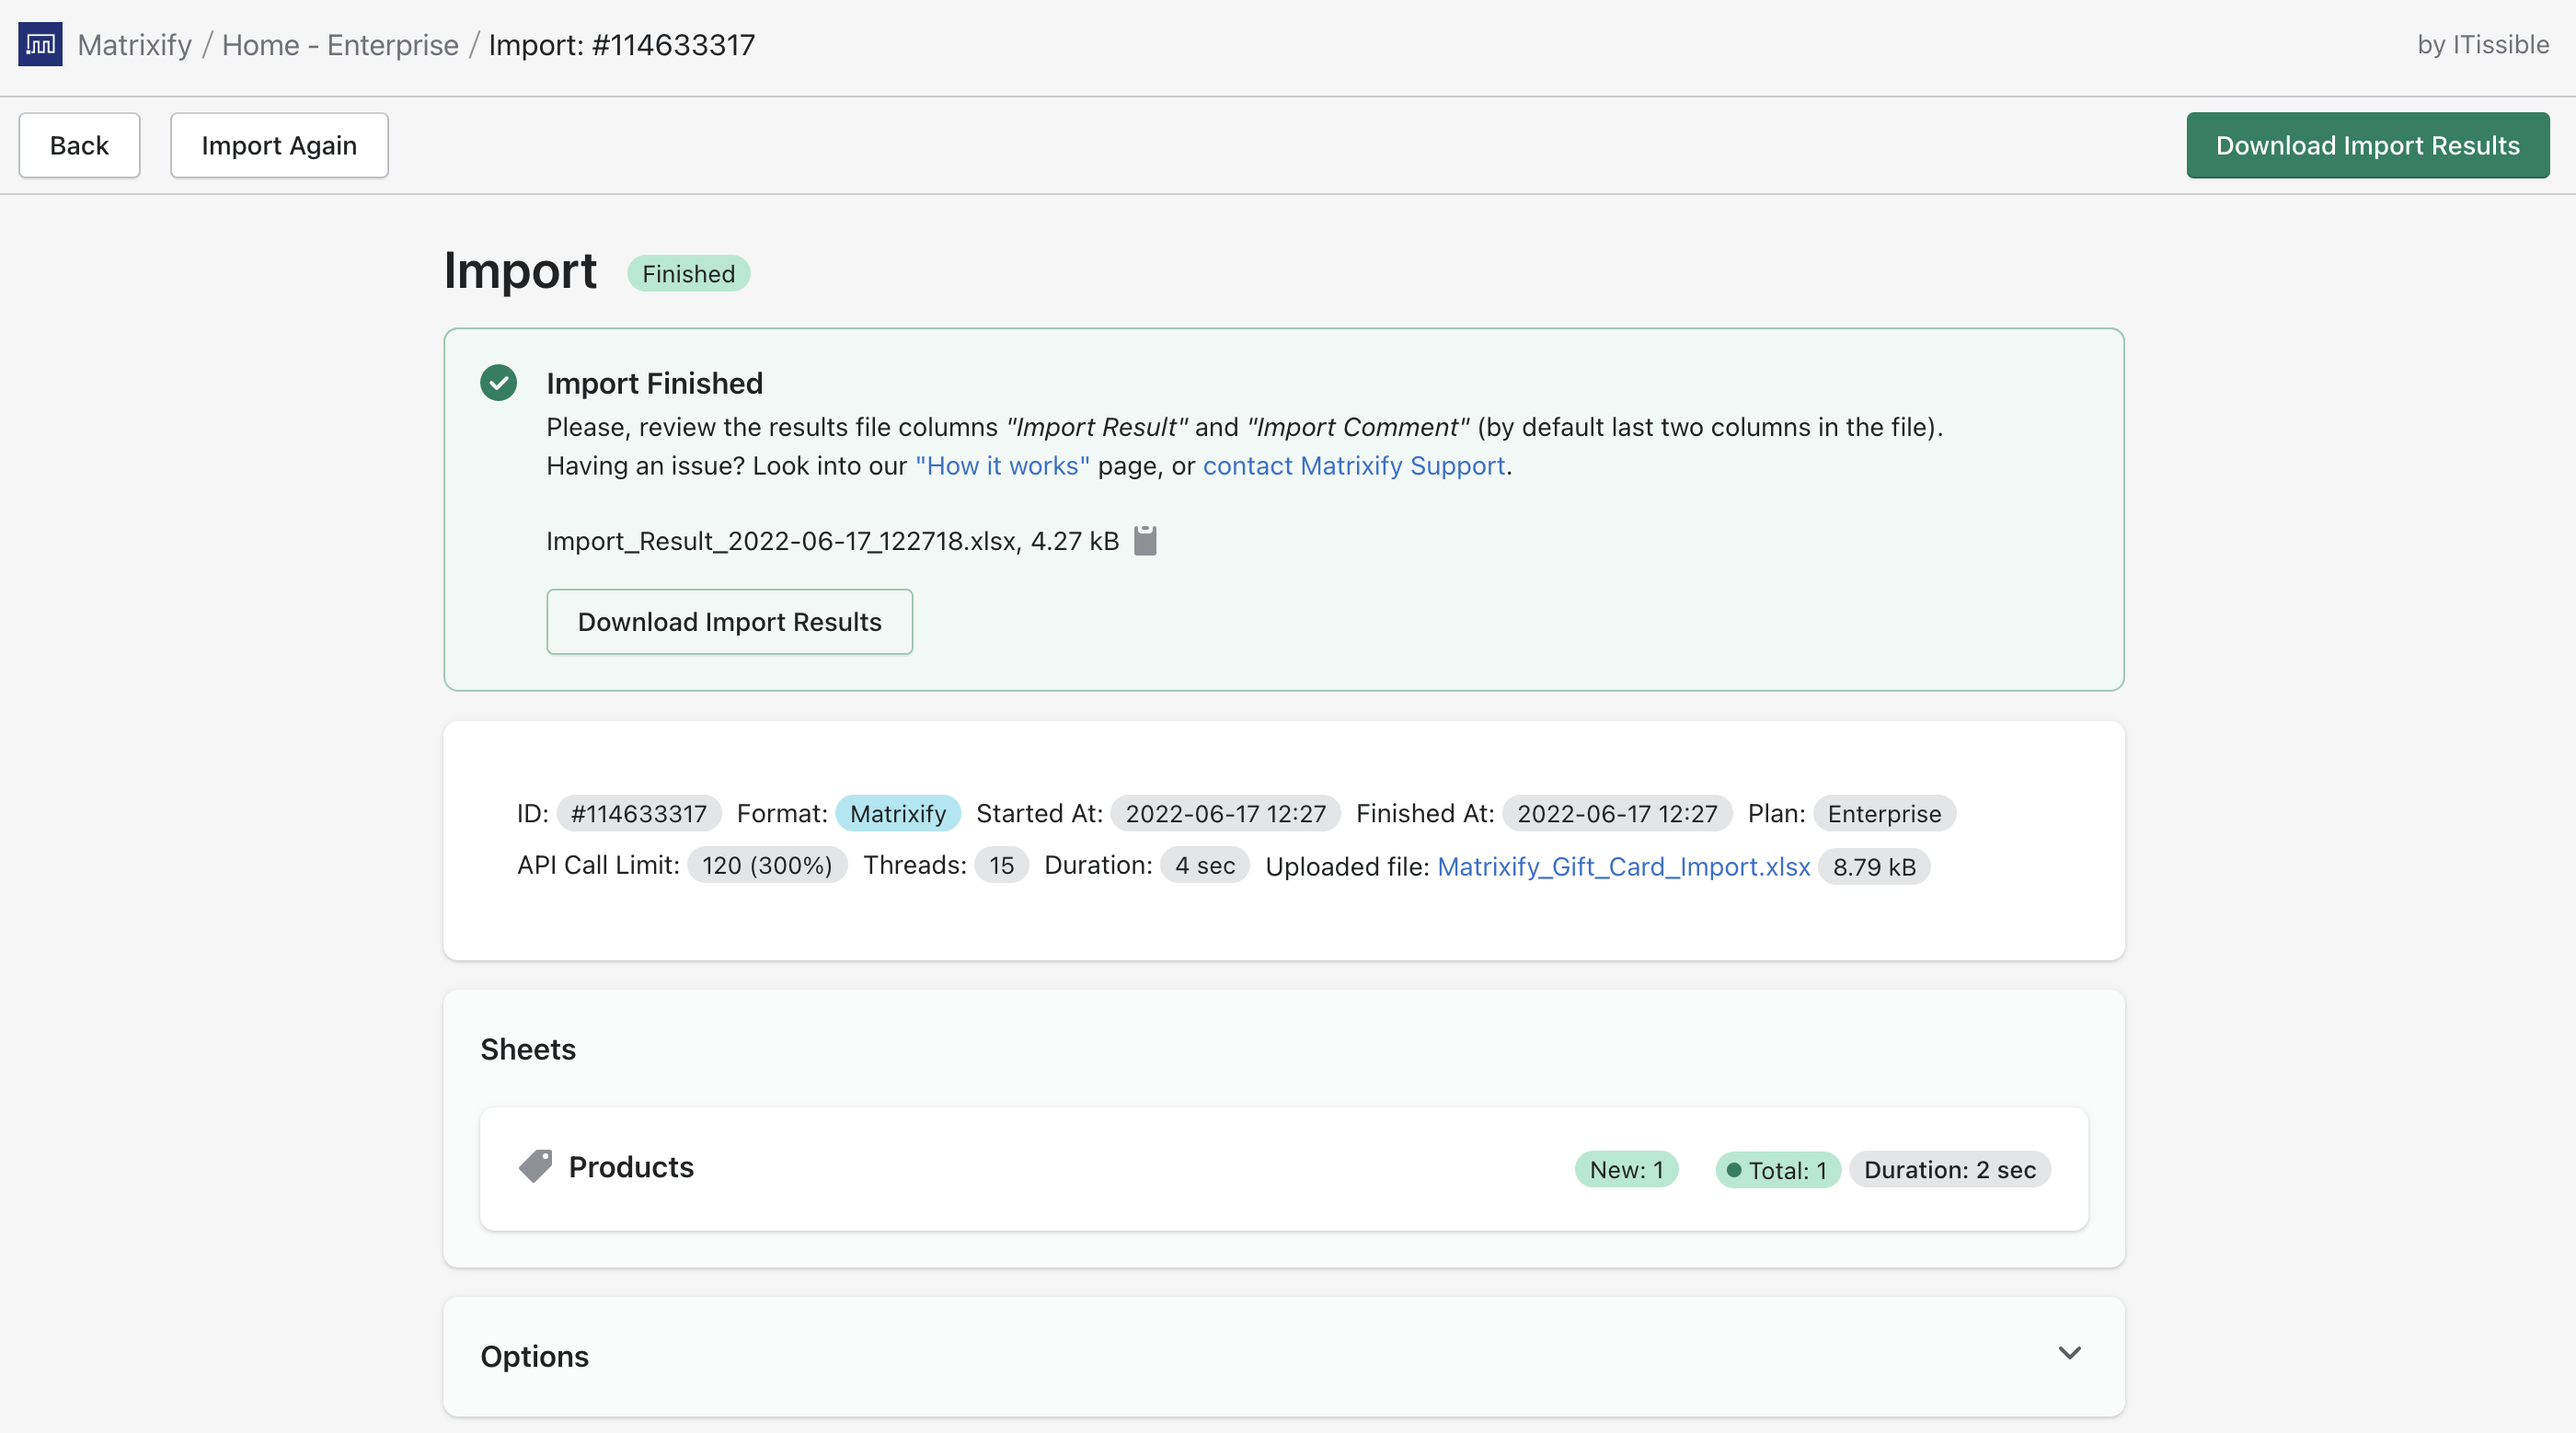
When importing new Gift Cards you will see Products being created as “New” when importing:
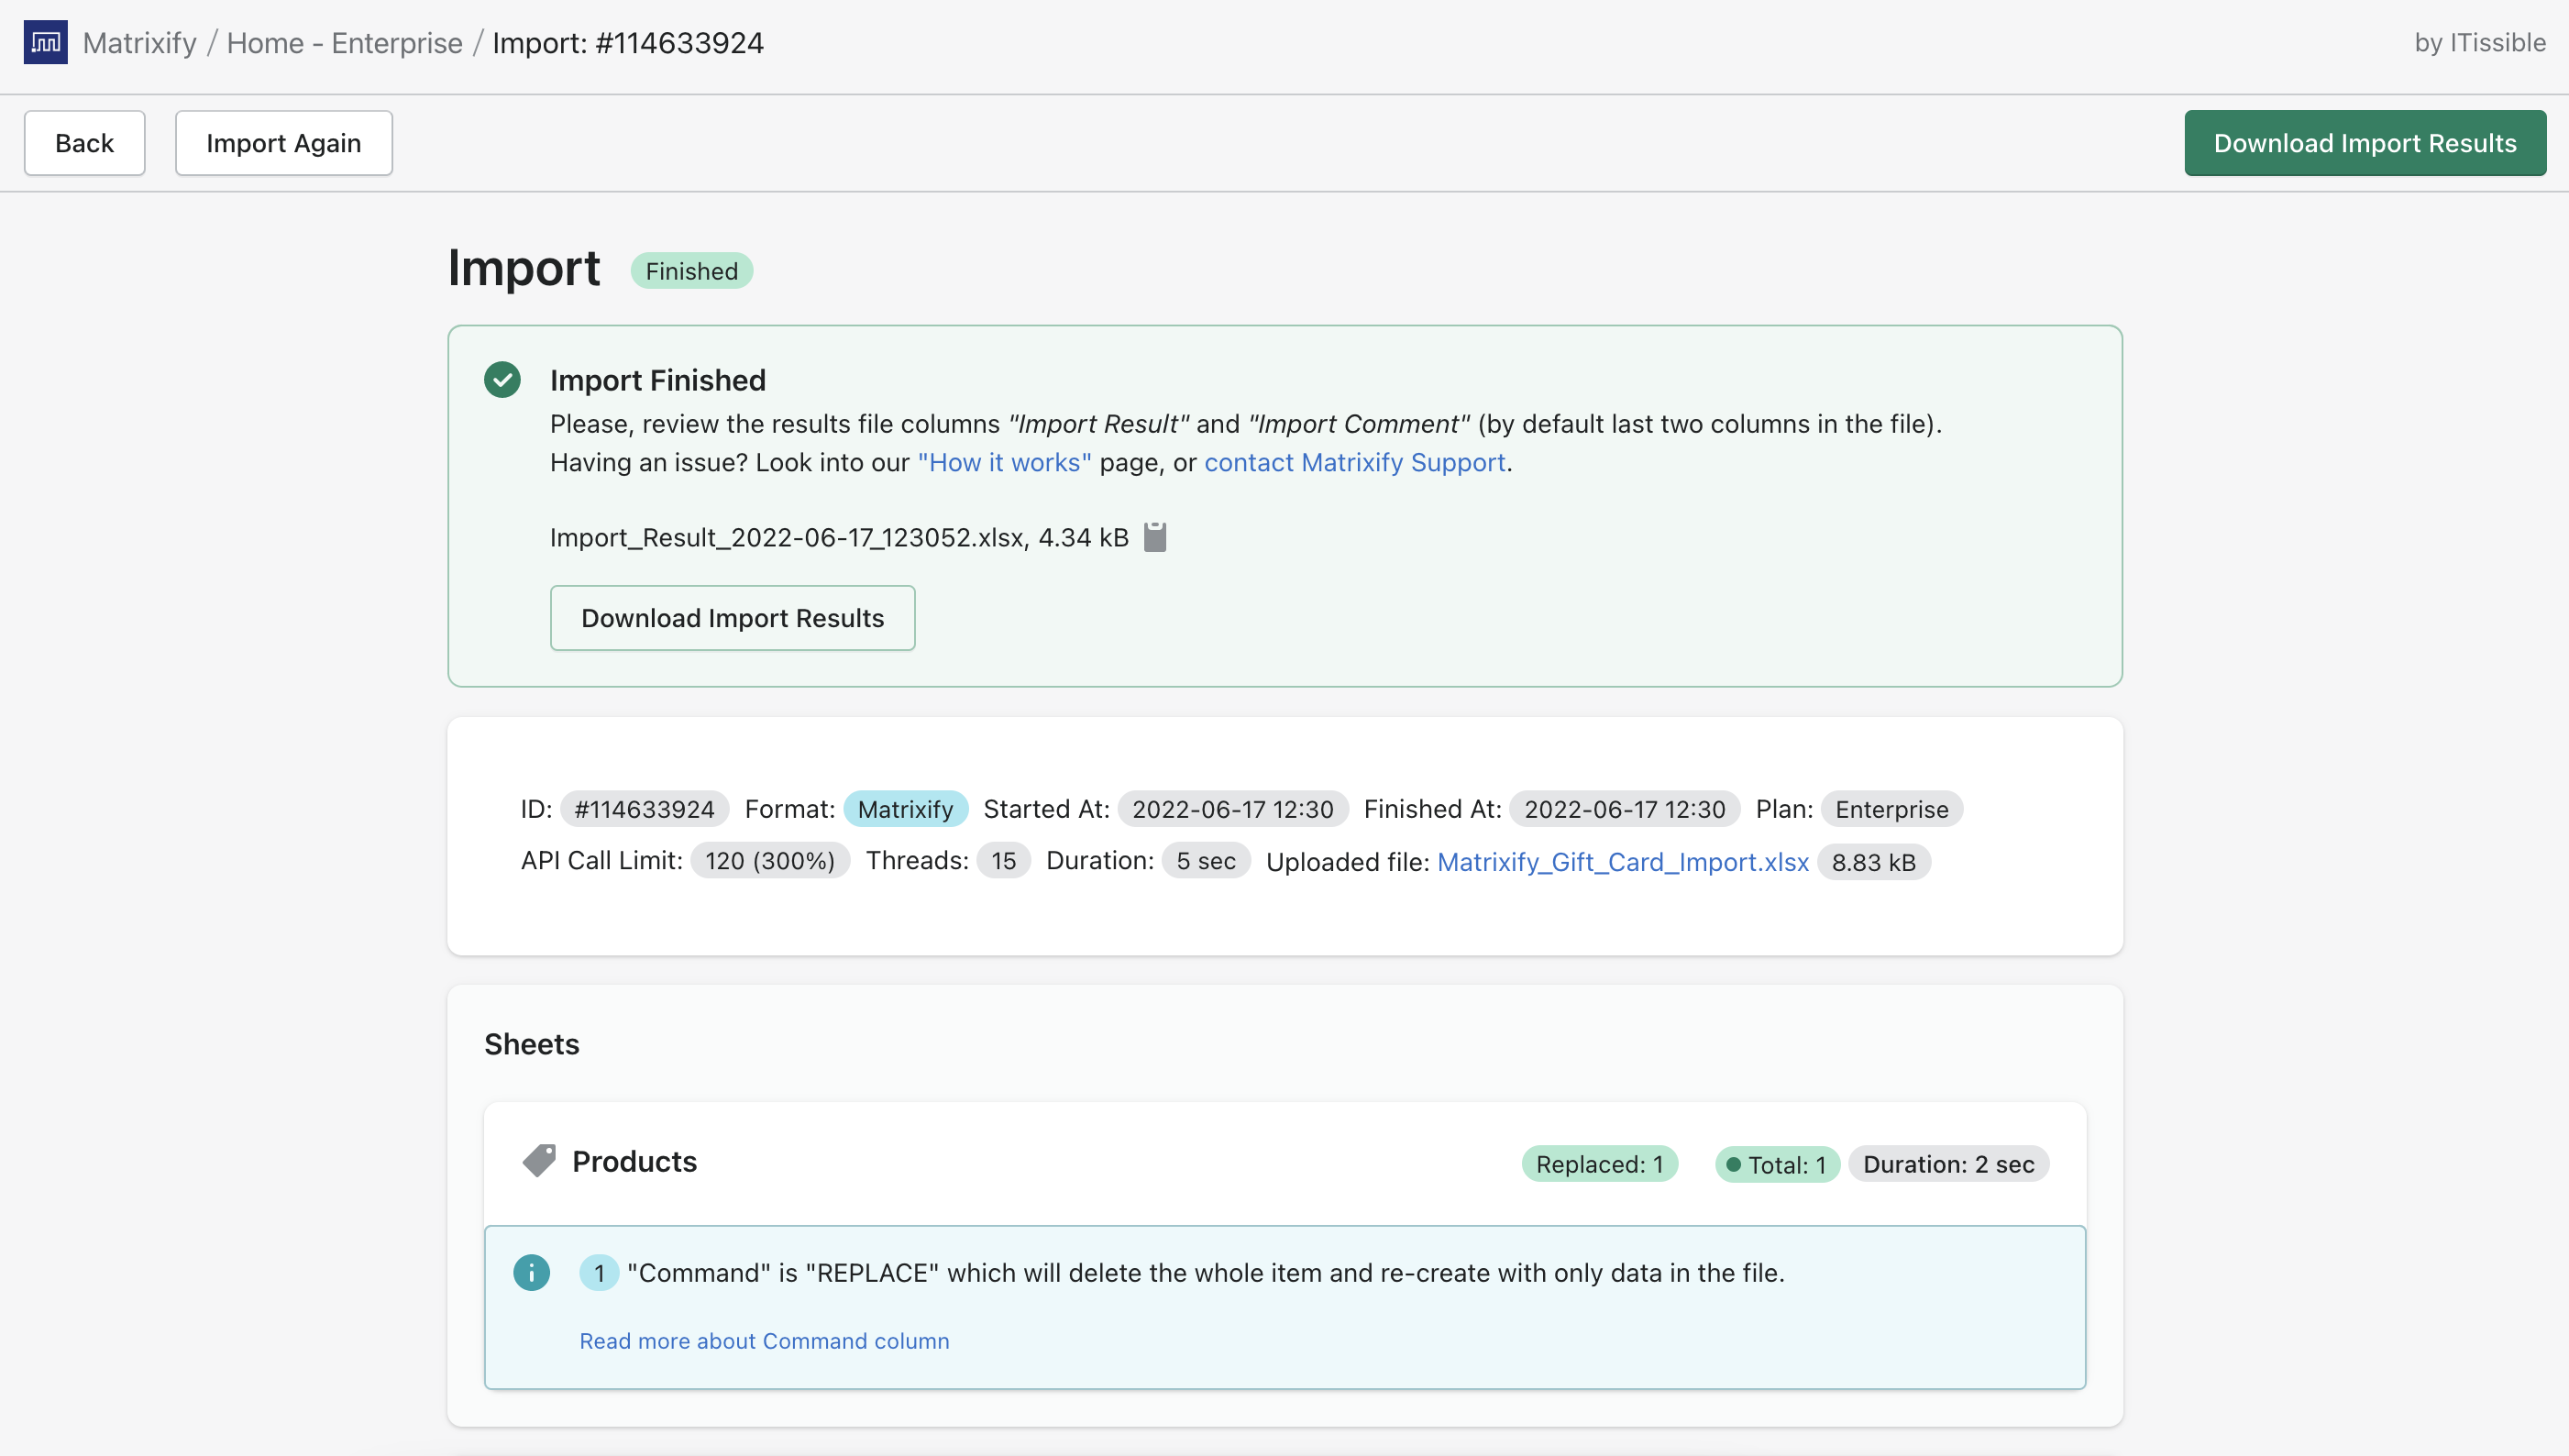
If changing existing products to Gift Cards – you will see the Products being “Replaced“:
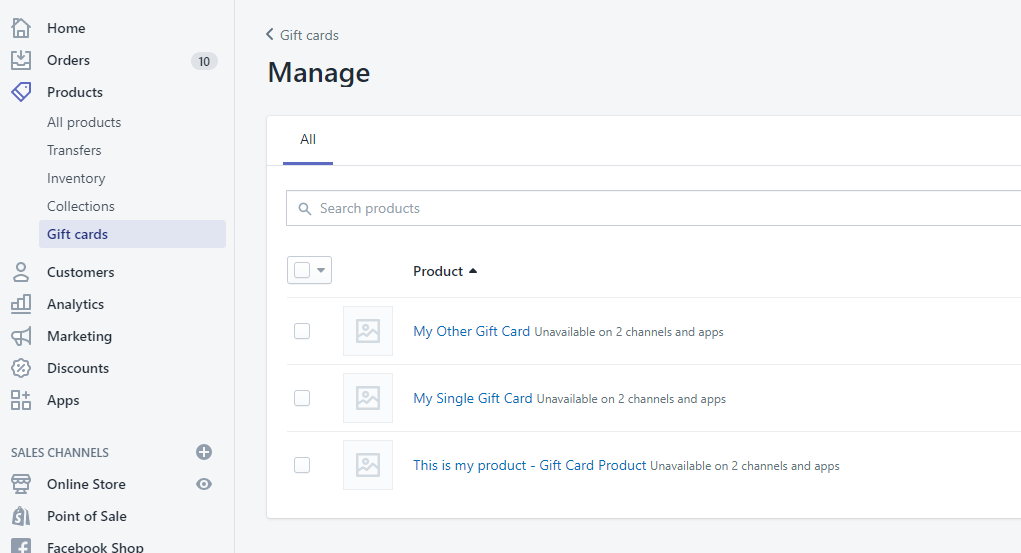
4. Now you can sell Gift Cards!
To check your Gift Cards go to your Shopify Admin -> Products -> Gift cards -> View gift card products.
Good to know!
- To read more details about all Product fields check out Matrixify Products documentation.
- Check out other Matrixify Product-related Tutorials.
- Is it possible to create gift cards with amounts (not gift card products) through Matrixify?Matrixify currently does not support importing actual Gift Card data directly, as Shopify limits app access to this feature only for Shopify Plus stores. However, you can import Orders with Gift Card line items, essentially imitating as if the gift card was bought by a customer. In this case, Shopify would generate the Gift Card in the store.
Please note that you cannot specify your own gift card code (it will be generated by Shopify), you cannot set the expiry date or gift card note in bulk, and the gift card is automatically sent to the customer.
For detailed instructions on importing Orders with Gift Card line items, you can follow the Matrixify app tutorial Migrate Gift Cards between Shopify stores using Gift Card Orders. To create Gift Cards from scratch, start from the third step.


