
You can migrate your Customers from Magento version 2 to Shopify by the following steps:
In short
- Export your Customers from Magento to CSV file using the standard Magento CSV export – two files:
- Zip both CSV files as they are into one Zip file and give it a name such that it contains the word “Magento” and a word “Customers“, e.g. “Magento_Customers-2018-11-13.zip”.
- Upload to the Matrixify app.
- Under Options, choose “Dry run” – to not import just yet.
- Download Import Results file and check that all Customers are as you need them.
- Import that corrected Excel file.
- See your Magento Customers in Shopify.
If you have the Magento version 1, then please, use this tutorial.
Video

We will work with the Magento sample data store with all the default settings in it.
Step 1: Export your Customers from Magento to CSV file using the standard Magento CSV export
Log in to your Magento Admin Panel:
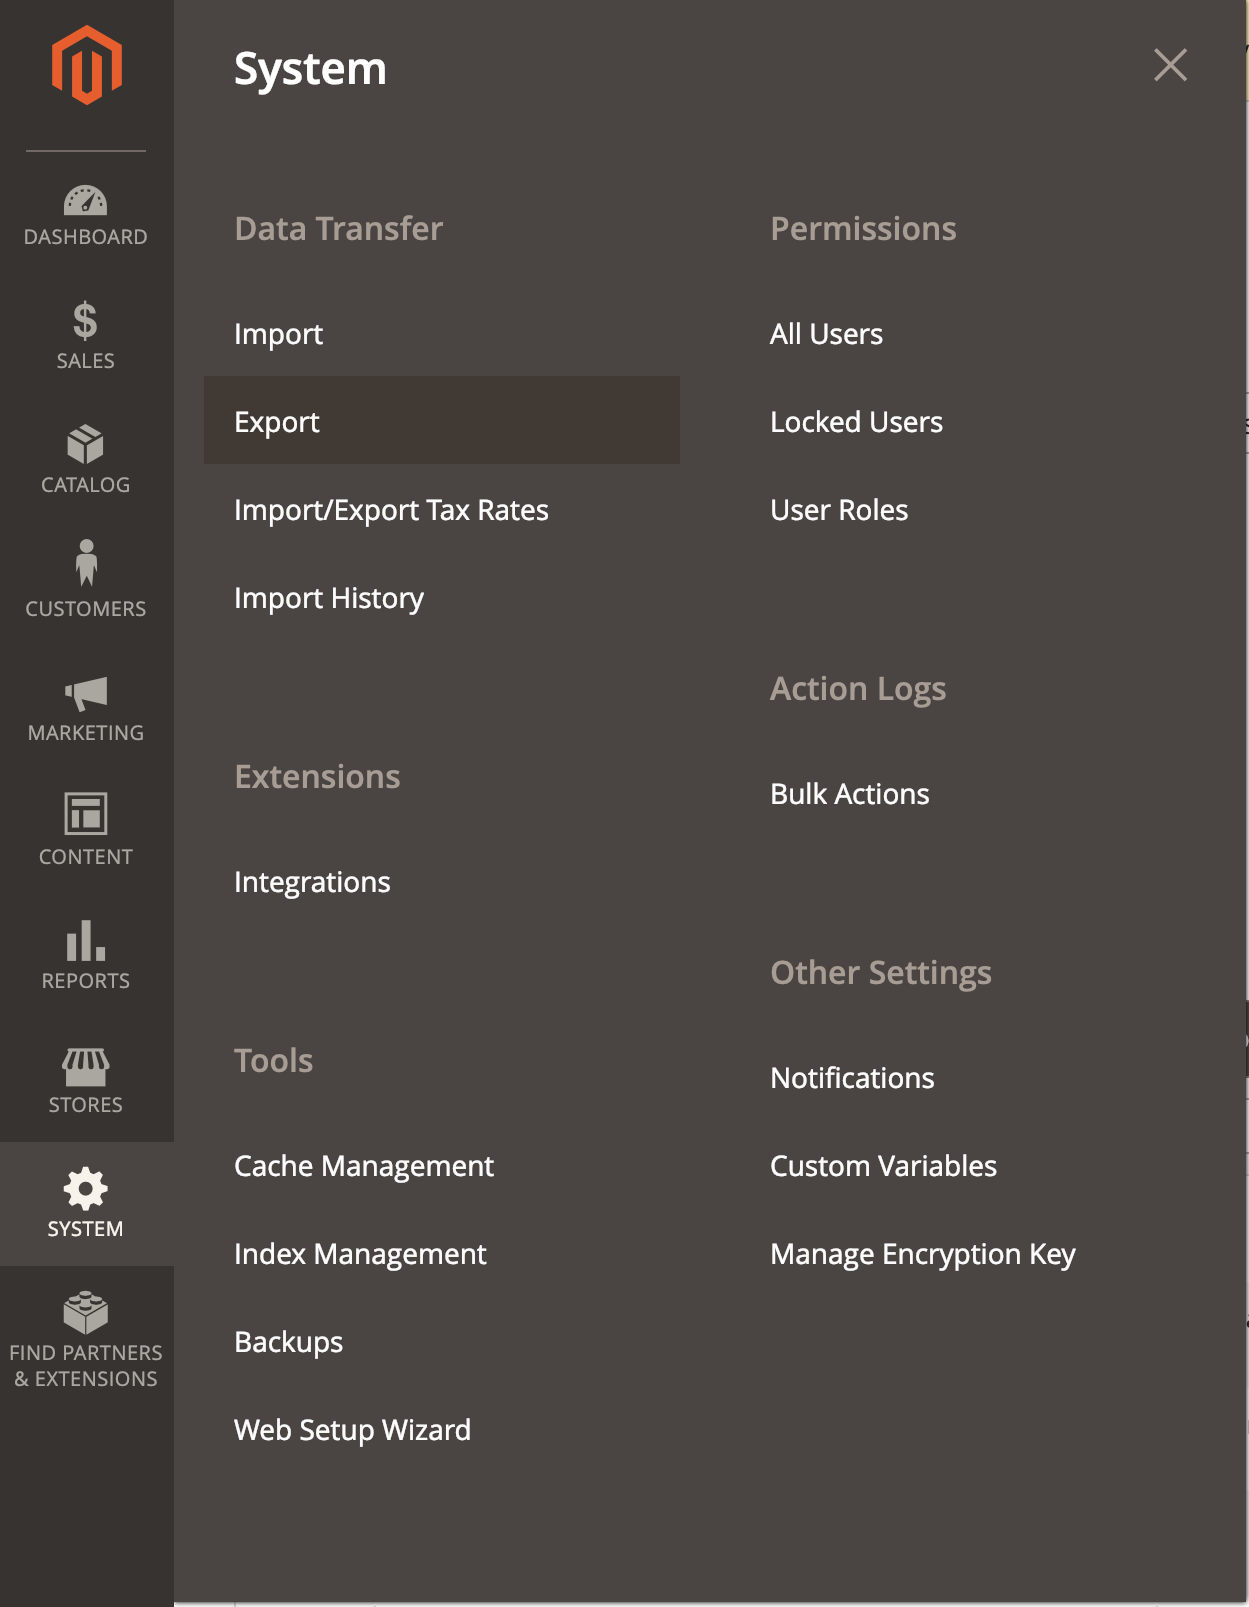
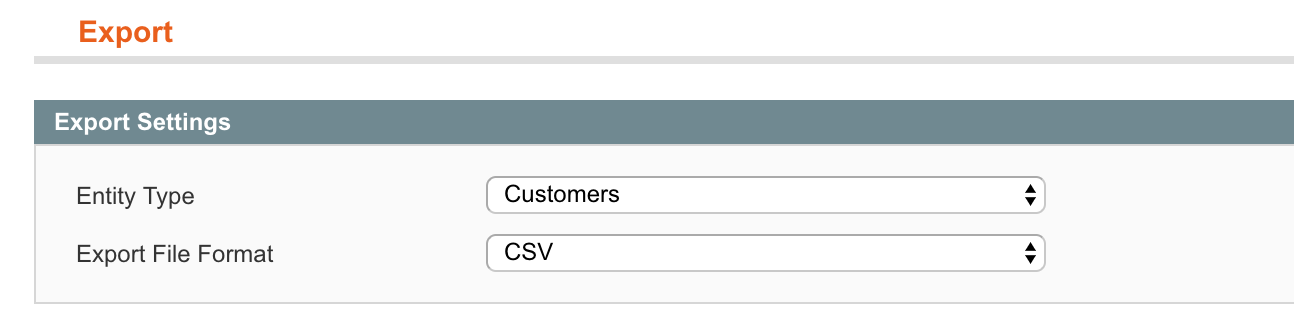
Go to menu: System -> Export
In the Export Settings choose:
Customers Main File
- Entity Type: Customers Main File
- Export File Format: CSV
- Fields Enclosure: (check)
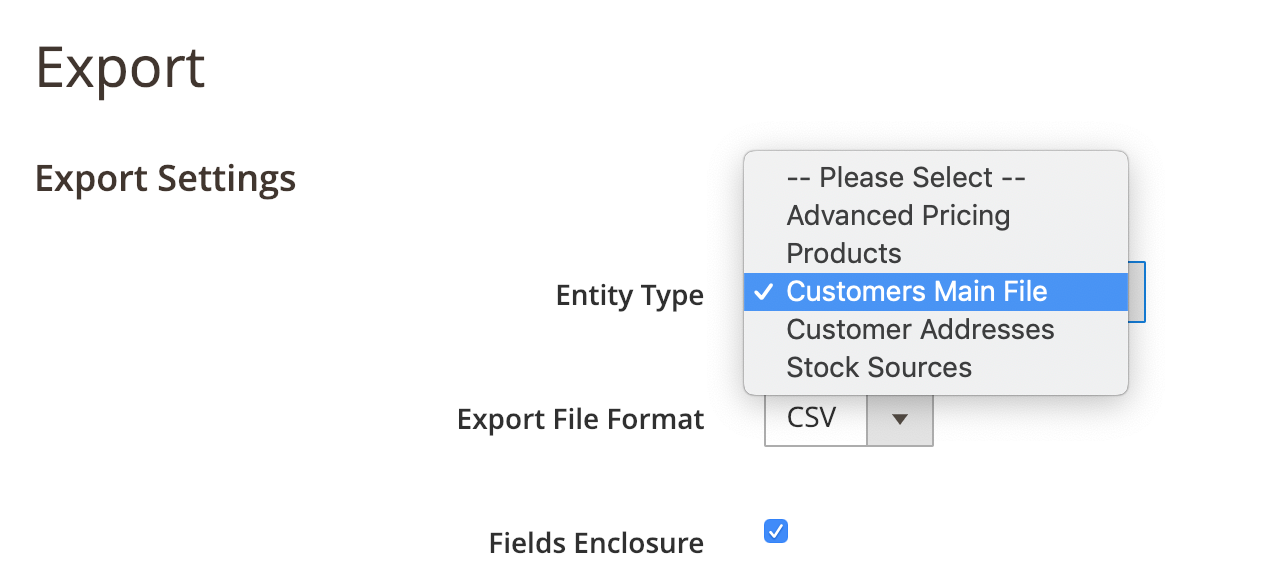
No need to fiddle with any of the other checkboxes.
Press the Continue button at the bottom of the page.
This will download your all Magento Customers as a CSV file.
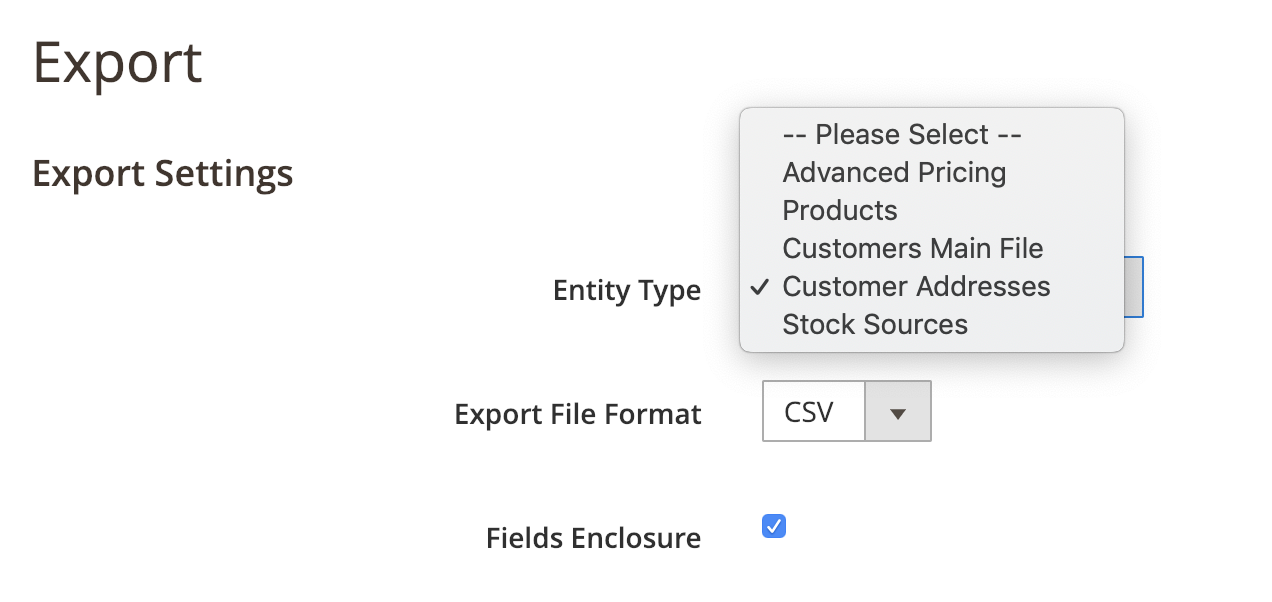
Customer Addresses
- Entity Type: Customer Addresses
- Export File Format: CSV
- Fields Enclosure: (check)
Step 2: Zip both CSV files as they are into one Zip file
When you download your exported CSV files from Magento, they will be called something like this:
customer_20190117_175758.csv
customer_address_20190117_175947.csv
Zip both those CSV files into one Zip file.
For Matrixify to know that this is Magento Zip file, you need to change that file name so that it contains “magento” and “customers”. For example:
Magento_Customers.zip
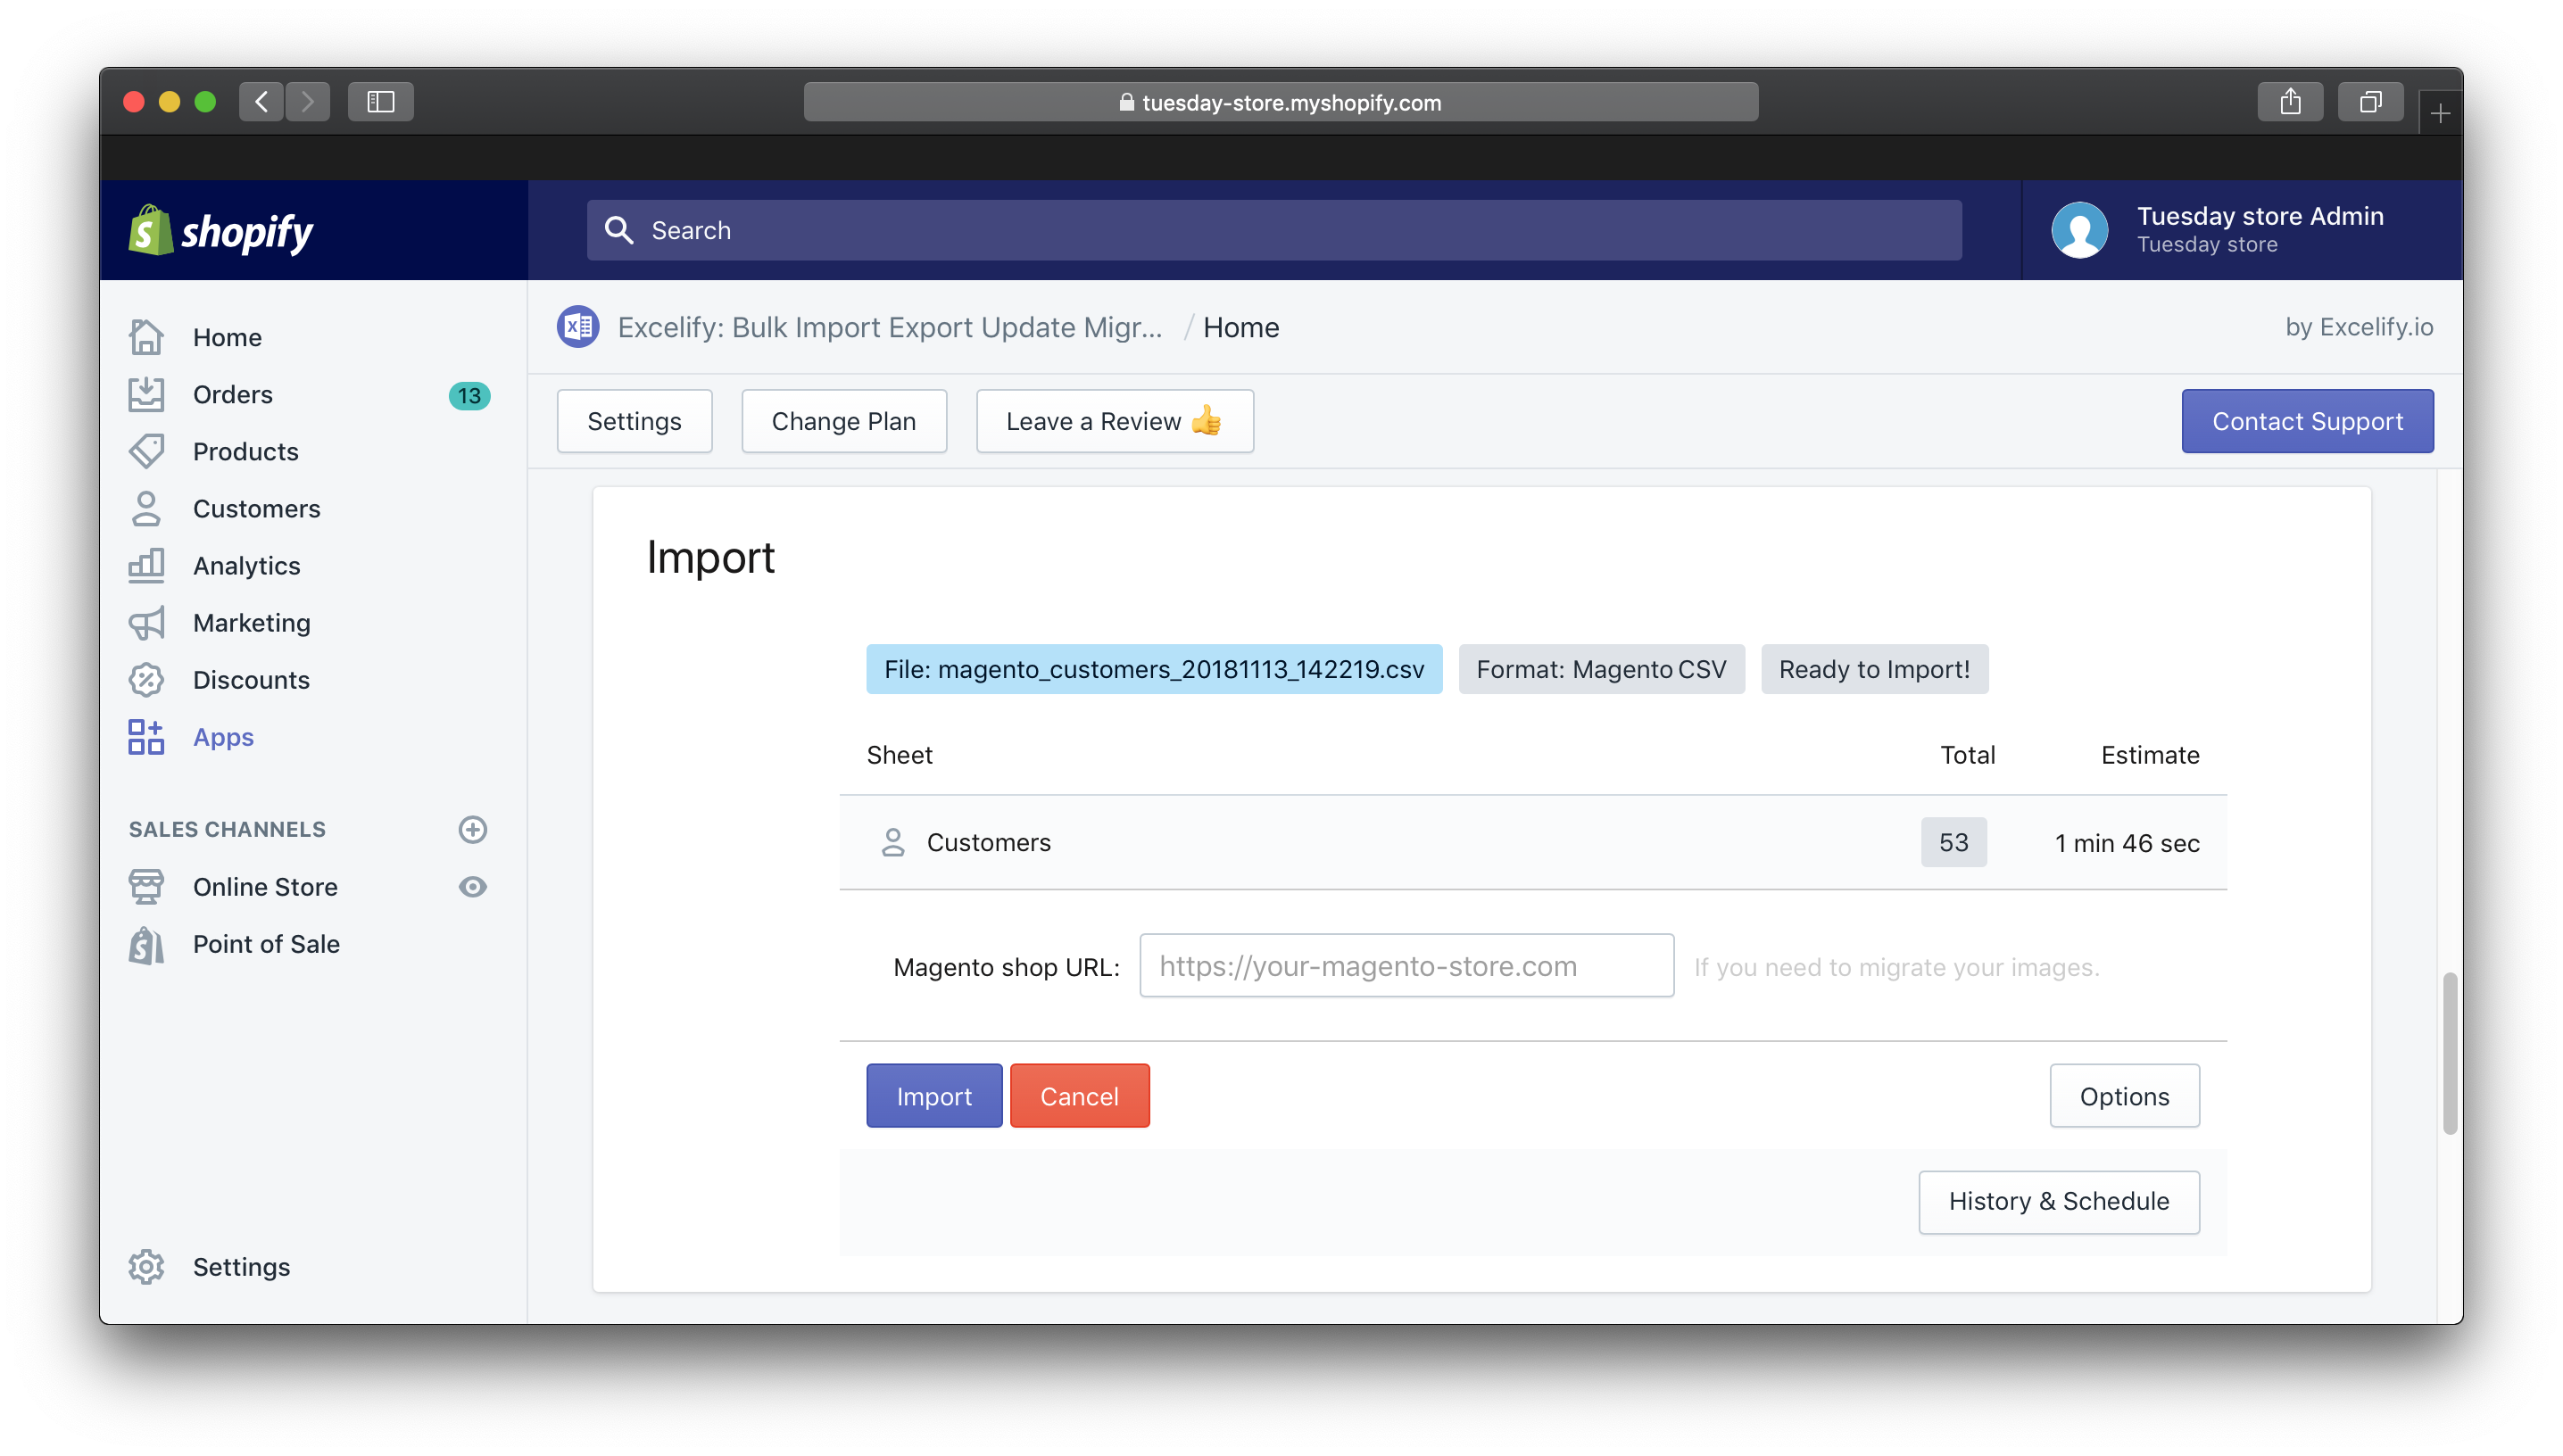
Step 3: Upload to the Matrixify app
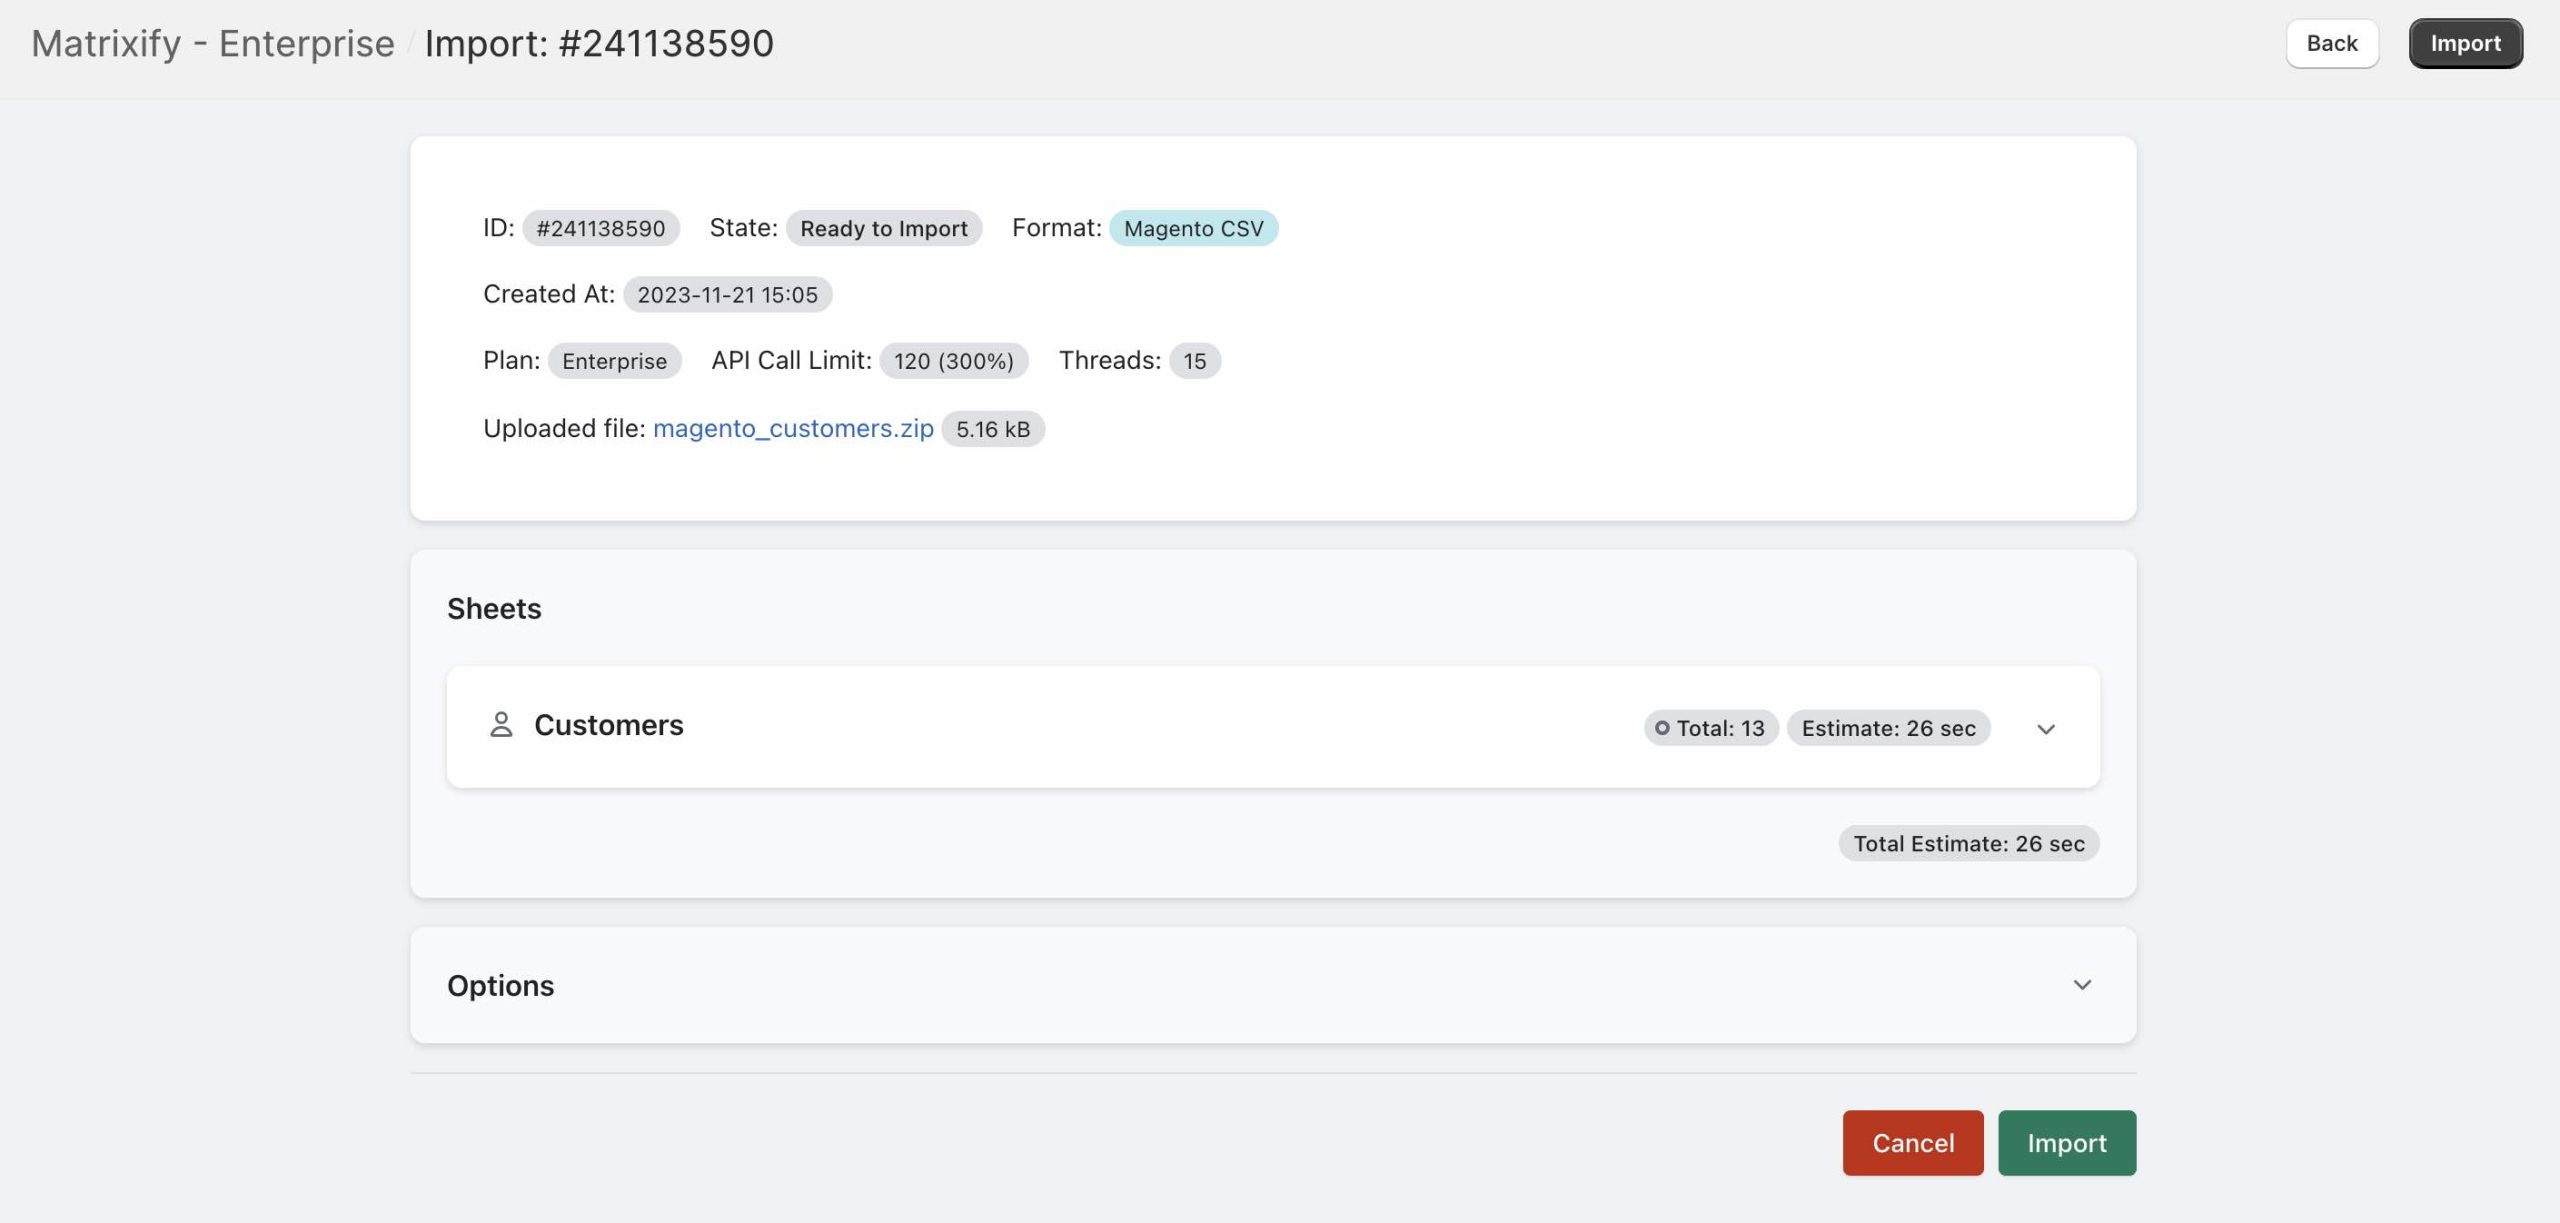
Right away, after Matrixify analyzed the file, you will see how many “Customers” are found in that file.
Note that it should say that it recognized the file as the “Format: Magento CSV”.
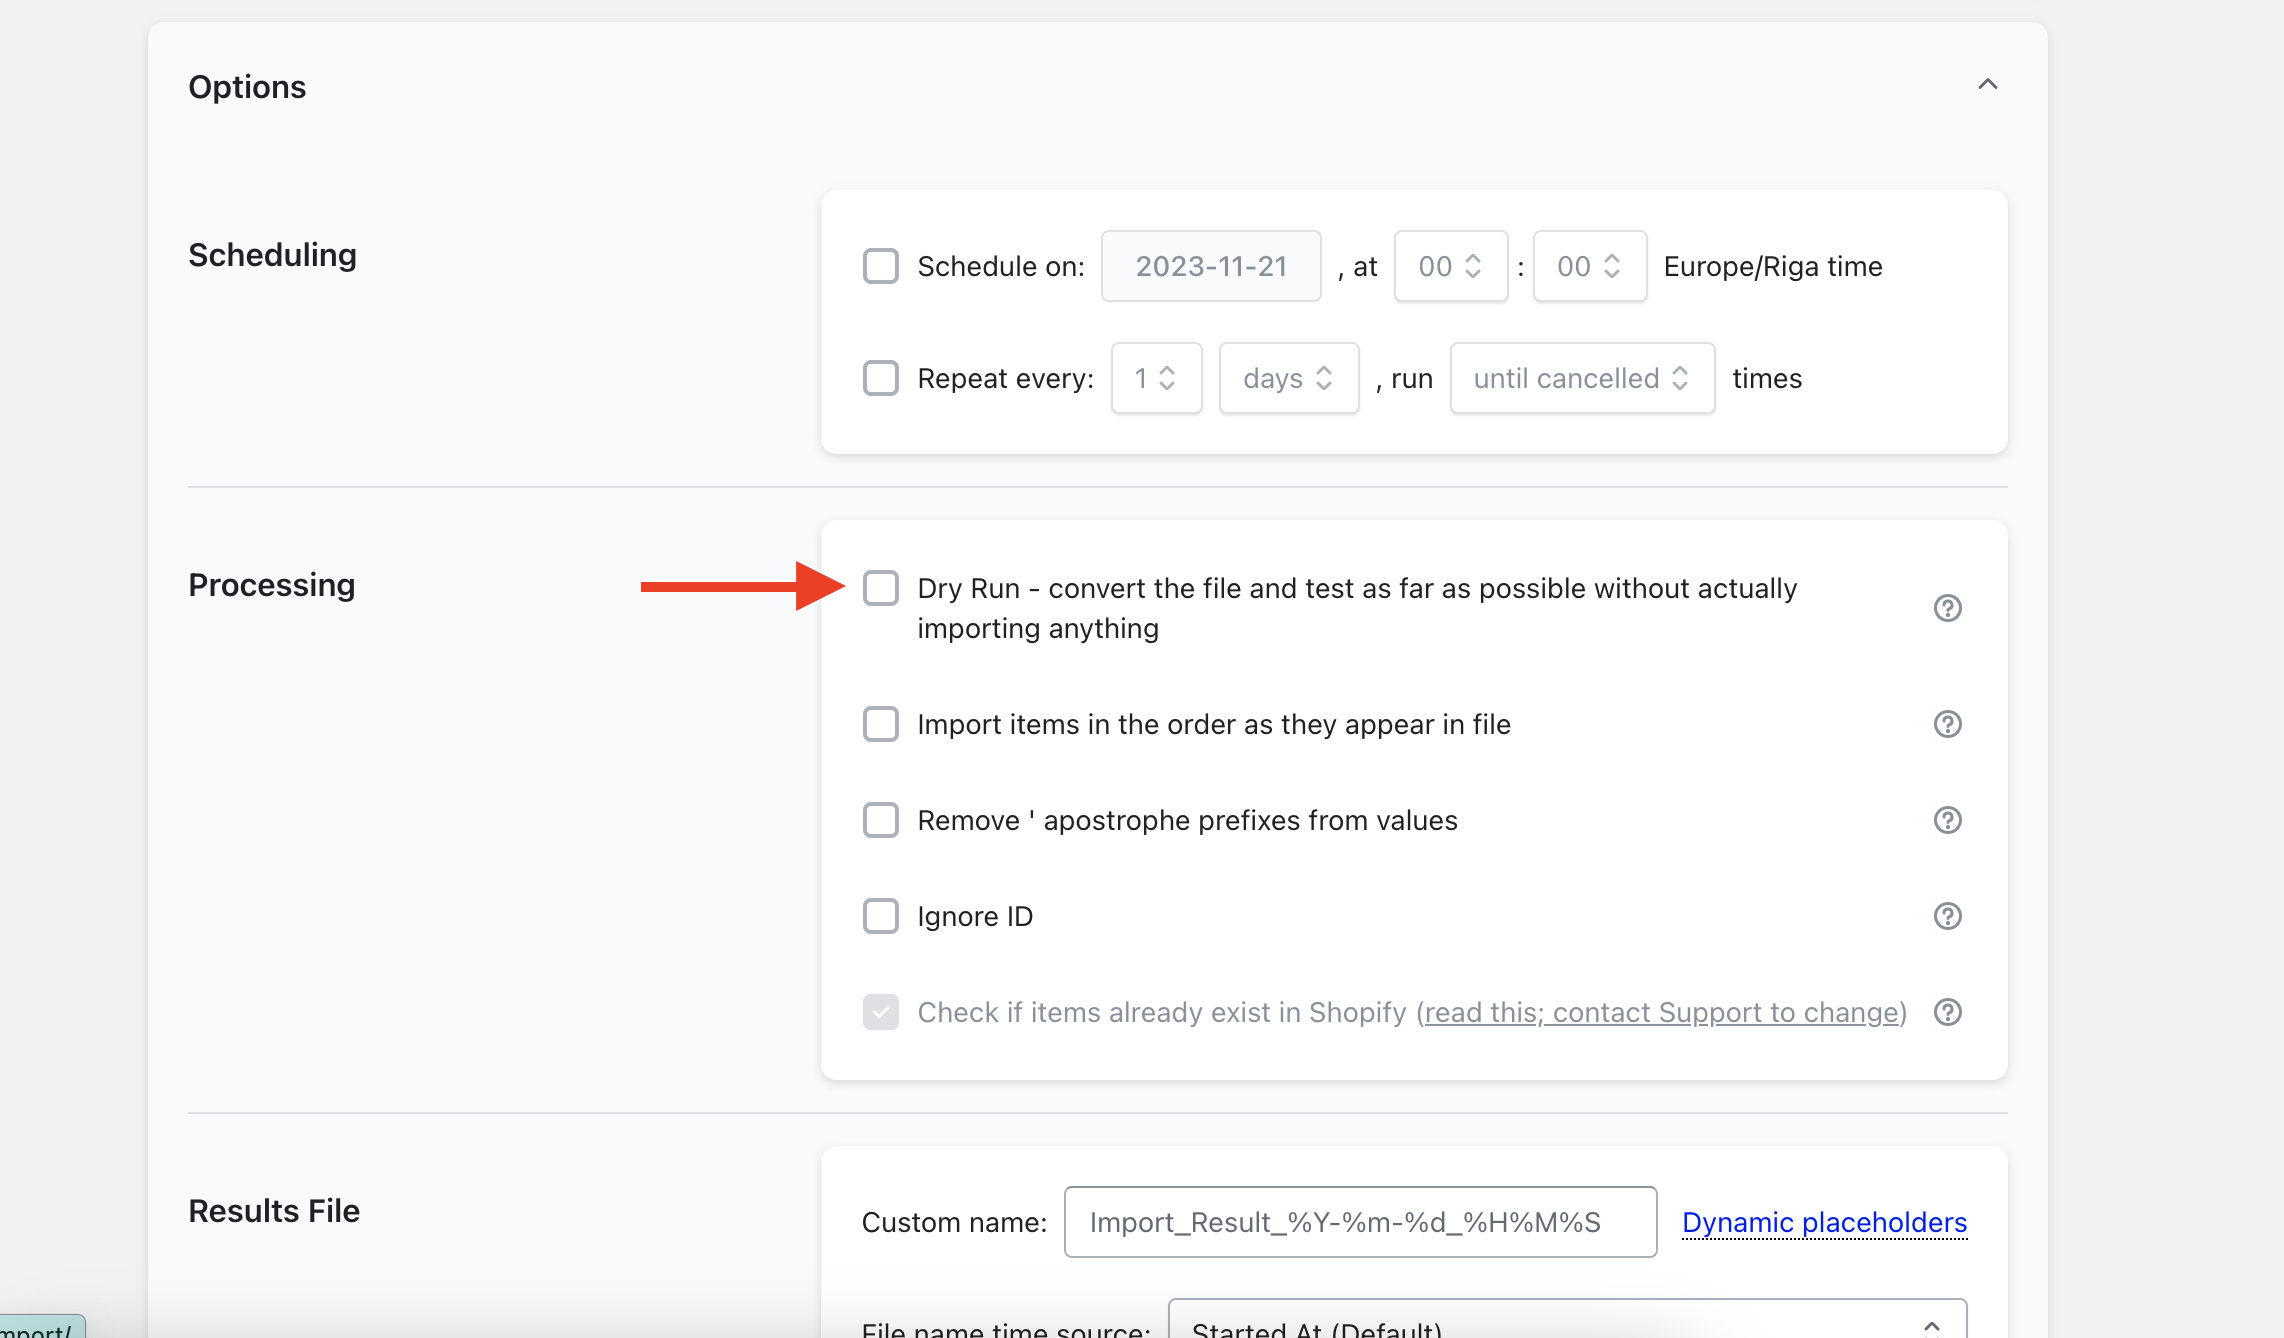
Step 4: Under Options, choose “Dry run” – to not import just yet
If you want to import without adjusting anything, you can skip this step.
We suggest you to first do the Dry run and check your import file – clean up the data and then do the actual import.
To set the Dry run, click on the Options drop-down at the bottom of the page and check the “Dry run” checkbox:
Doing the Dry run will just run through the file conversion process and will generate you the “Import Results” file in the Matrixify format – as if you imported it, but it will not actually import anything just yet.
Don’t worry about the time estimate here – that is shown approximate time it would take to actually import them, but the dry run will take just a few seconds.
Press the “Import” button.
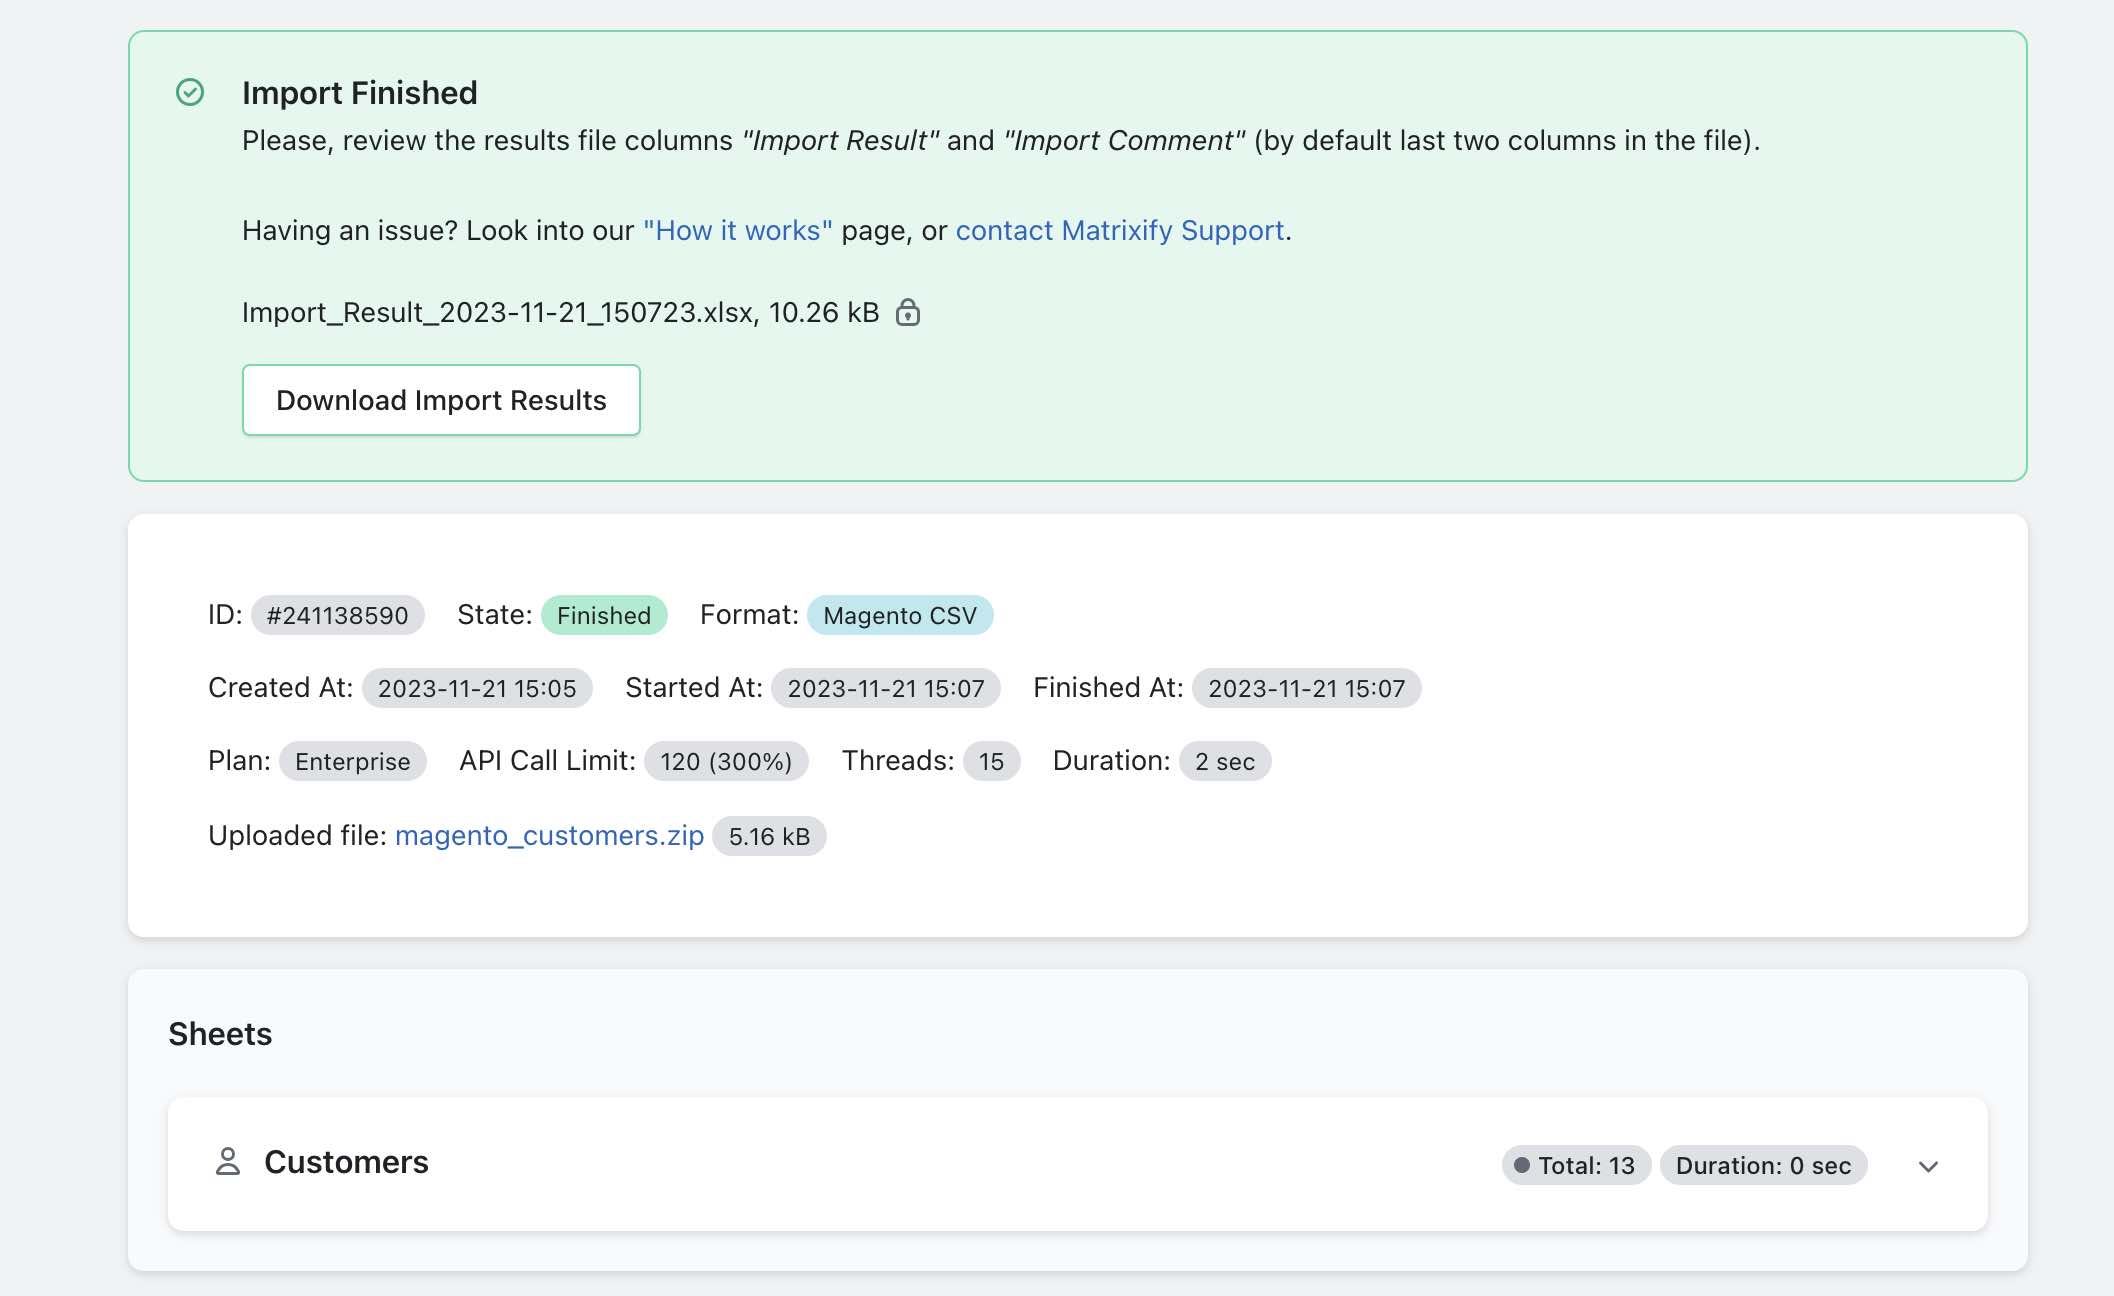
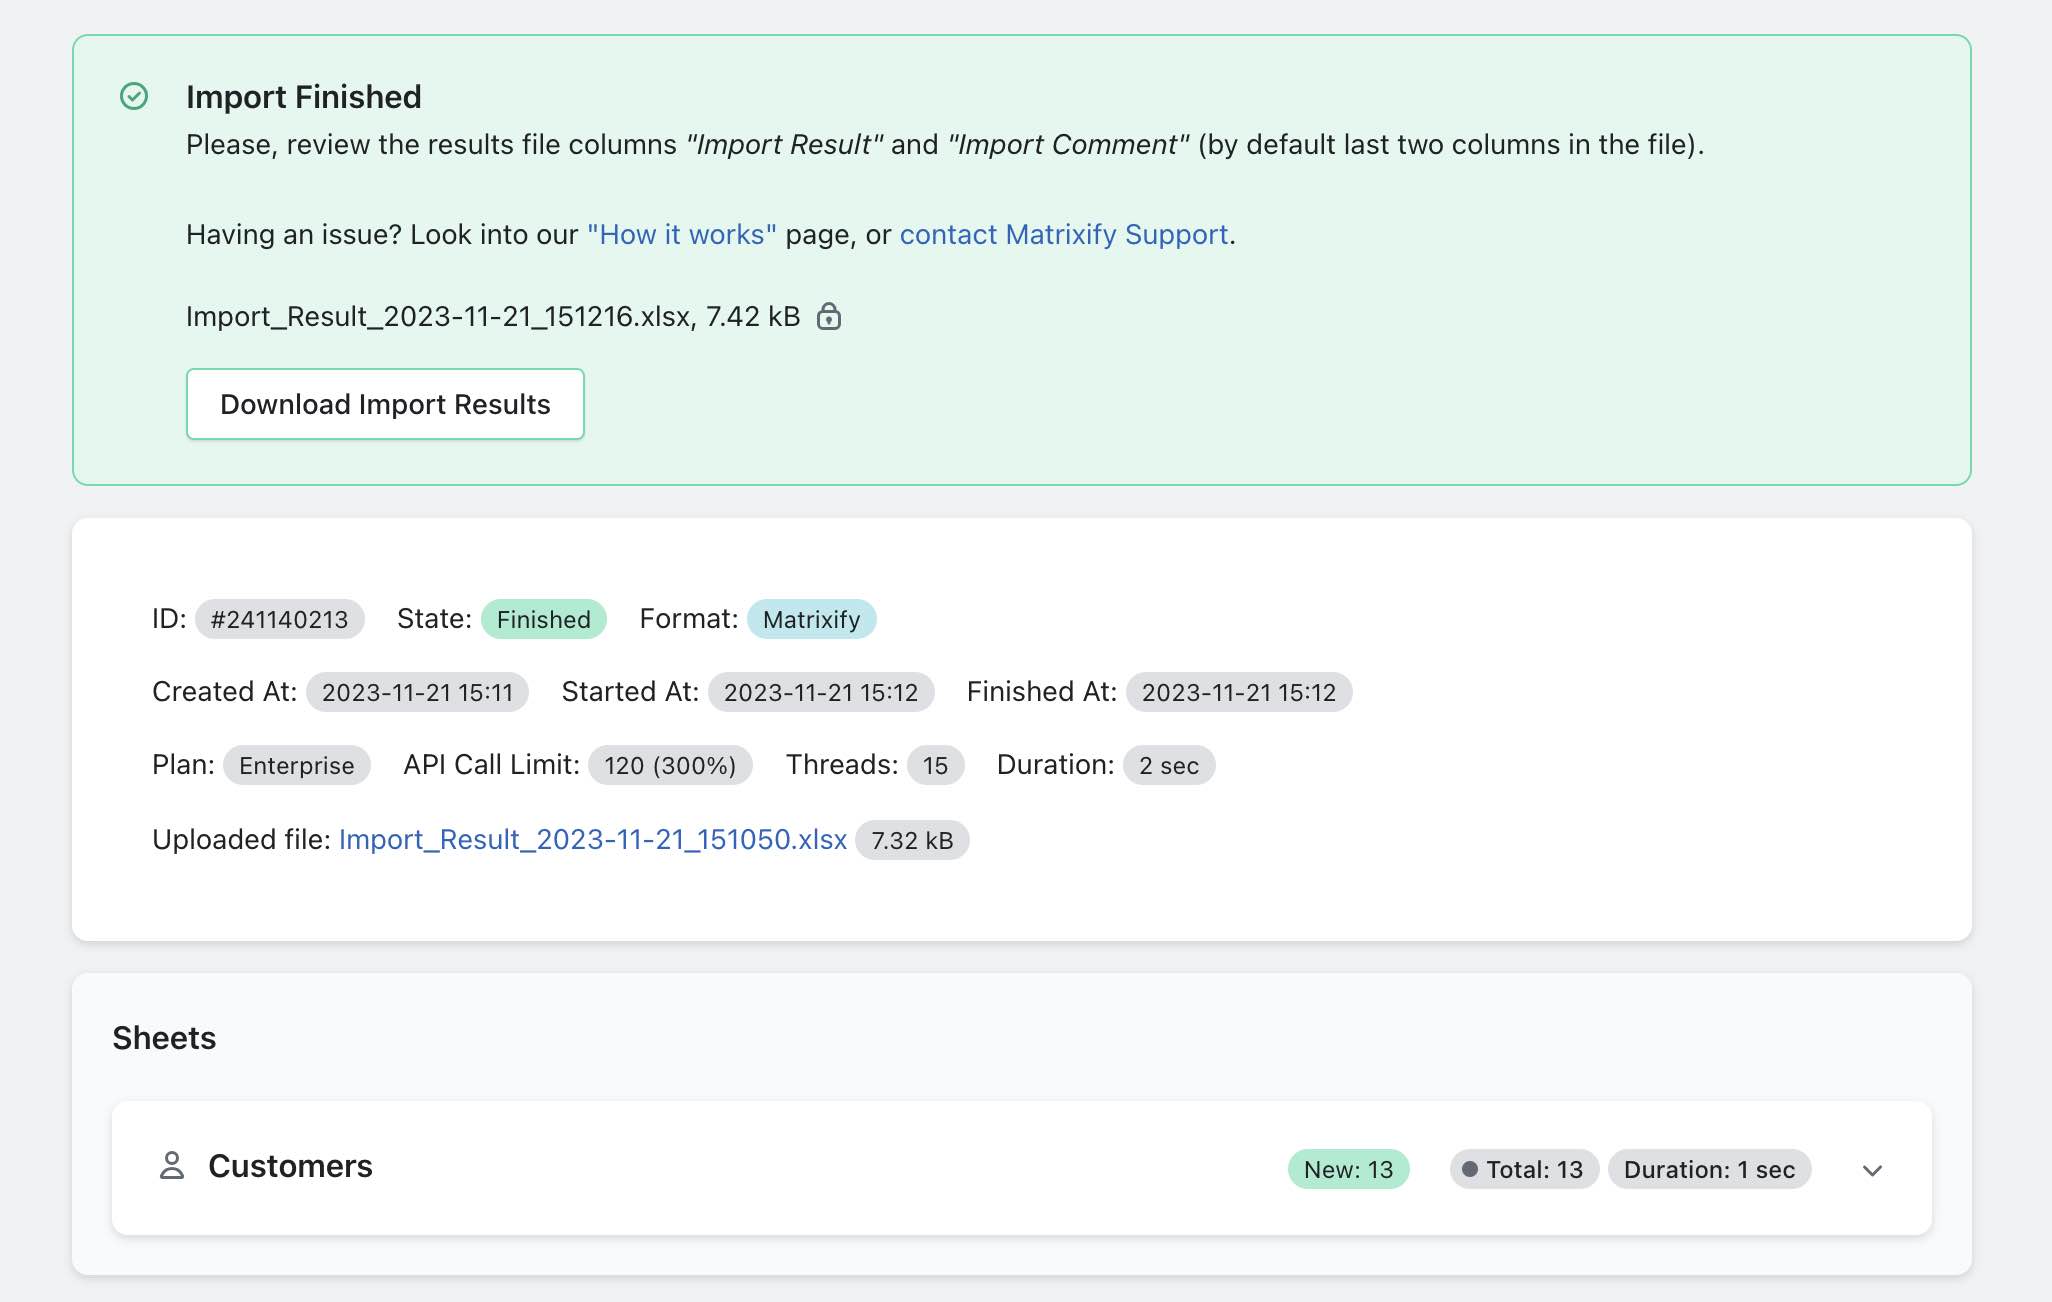
Step 5: Download “Import Results” file and check that all Customers are as you need them
After the Dry run is finished, download the “Import Results” file:
You will have the Excel file like this with one sheet (tab) in it: Customers:
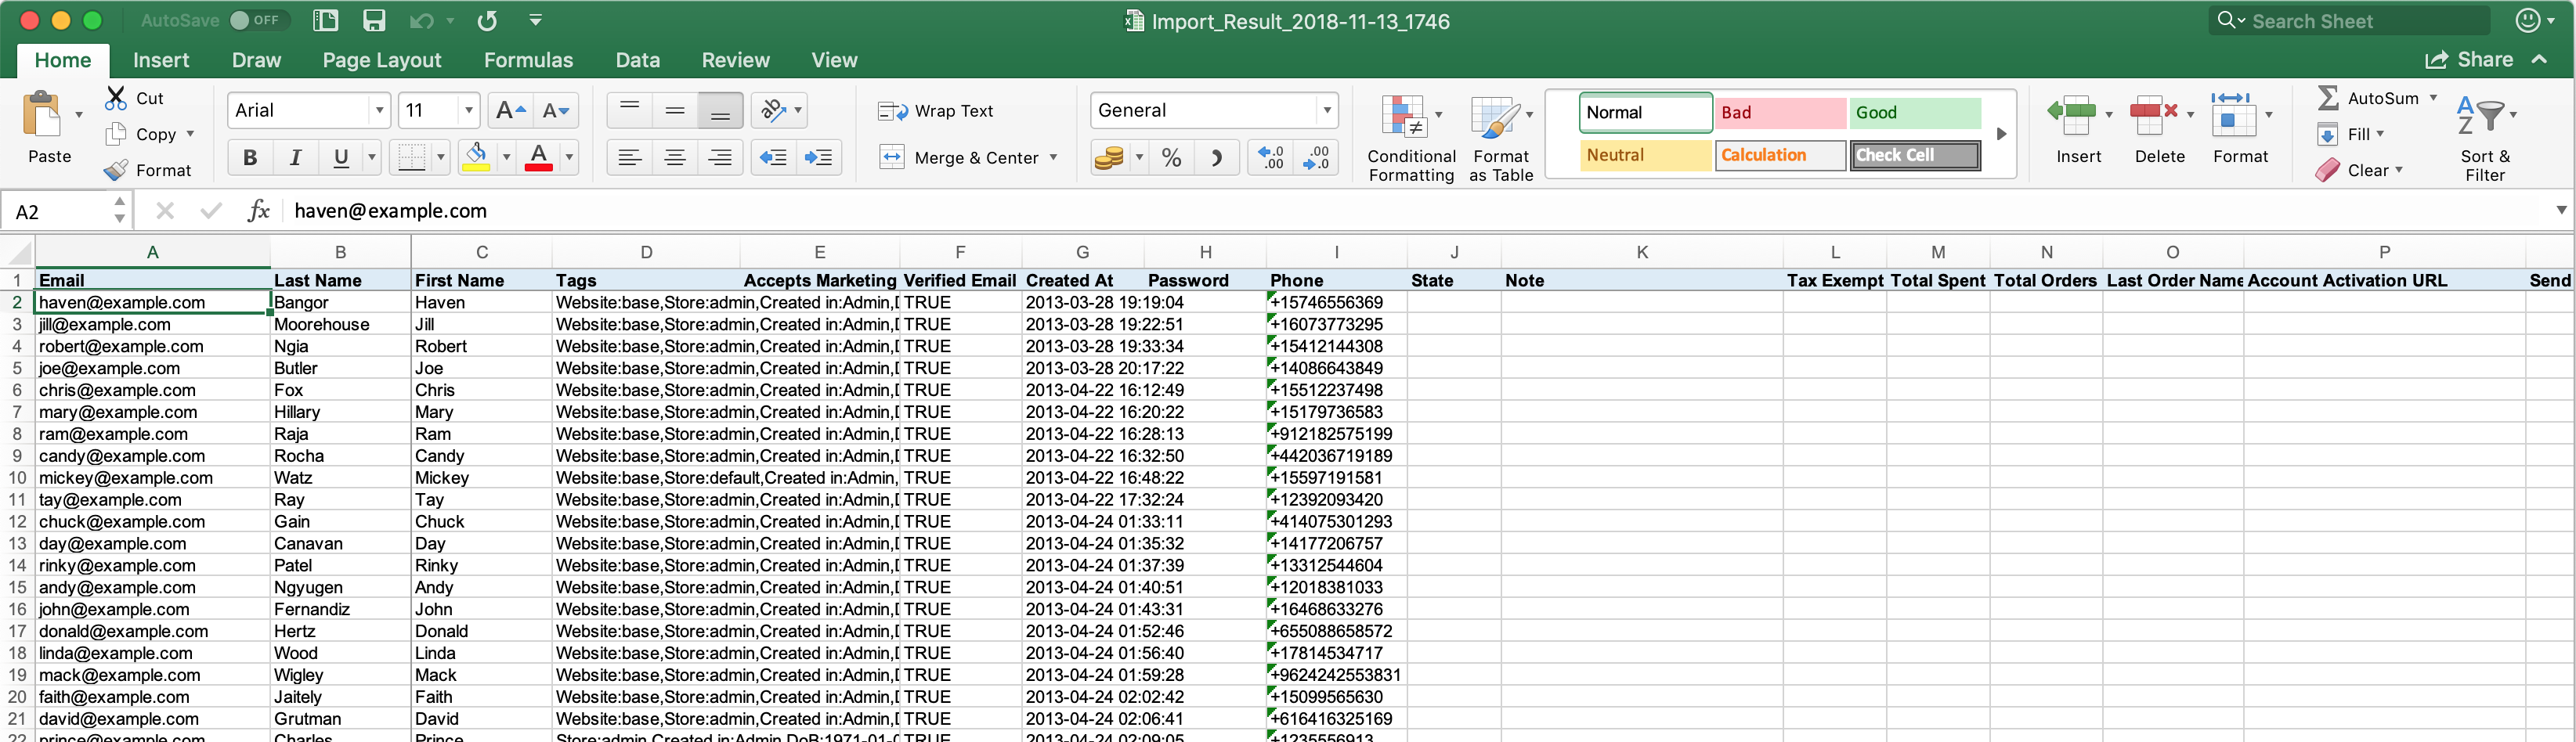
Here you can see, review and change any of the values in that Excel file.
Note the “Tags” column – those contain customer information from your Magento store, that does not have special field in the Shopify, for example, Gender:Male, Magento Group:4, etc. This information can be useful, but you also can delete it if it is not needed.
There are also two Metafileds columns: Metafield: dob – that contains customer Date of Birth, and Metafield: vat_id – for VAT. These data is easier to operate with, when it is in the separate columns. Again, you can delete those columns, if it is not needed.
Step 6: Import that updated Excel file
Take the Excel file which you have updated and prepared for the import, and upload it again to the Matrixify app.
And just press the “Import” button.
Wait for the import to run.
If you see any Failed items, then after the import has finished, you can again download the Import Results file and look into the “Import Comment” column. It will tell why the particular Customer failed. Then you can fix that issue and re-import just those failed and fixed rows again.
For example, here is the error: Failed. Phone: is invalid
How you can fix it?
- One way is to correct the number in the Excel sheet, if you know, what is the correct one, and import the file again.
- Another option is to delete the phone number from the column Address Phone. You can put into column Note so that it is not lost. And then import the file.
Step 7: See your Magento Customers in Shopify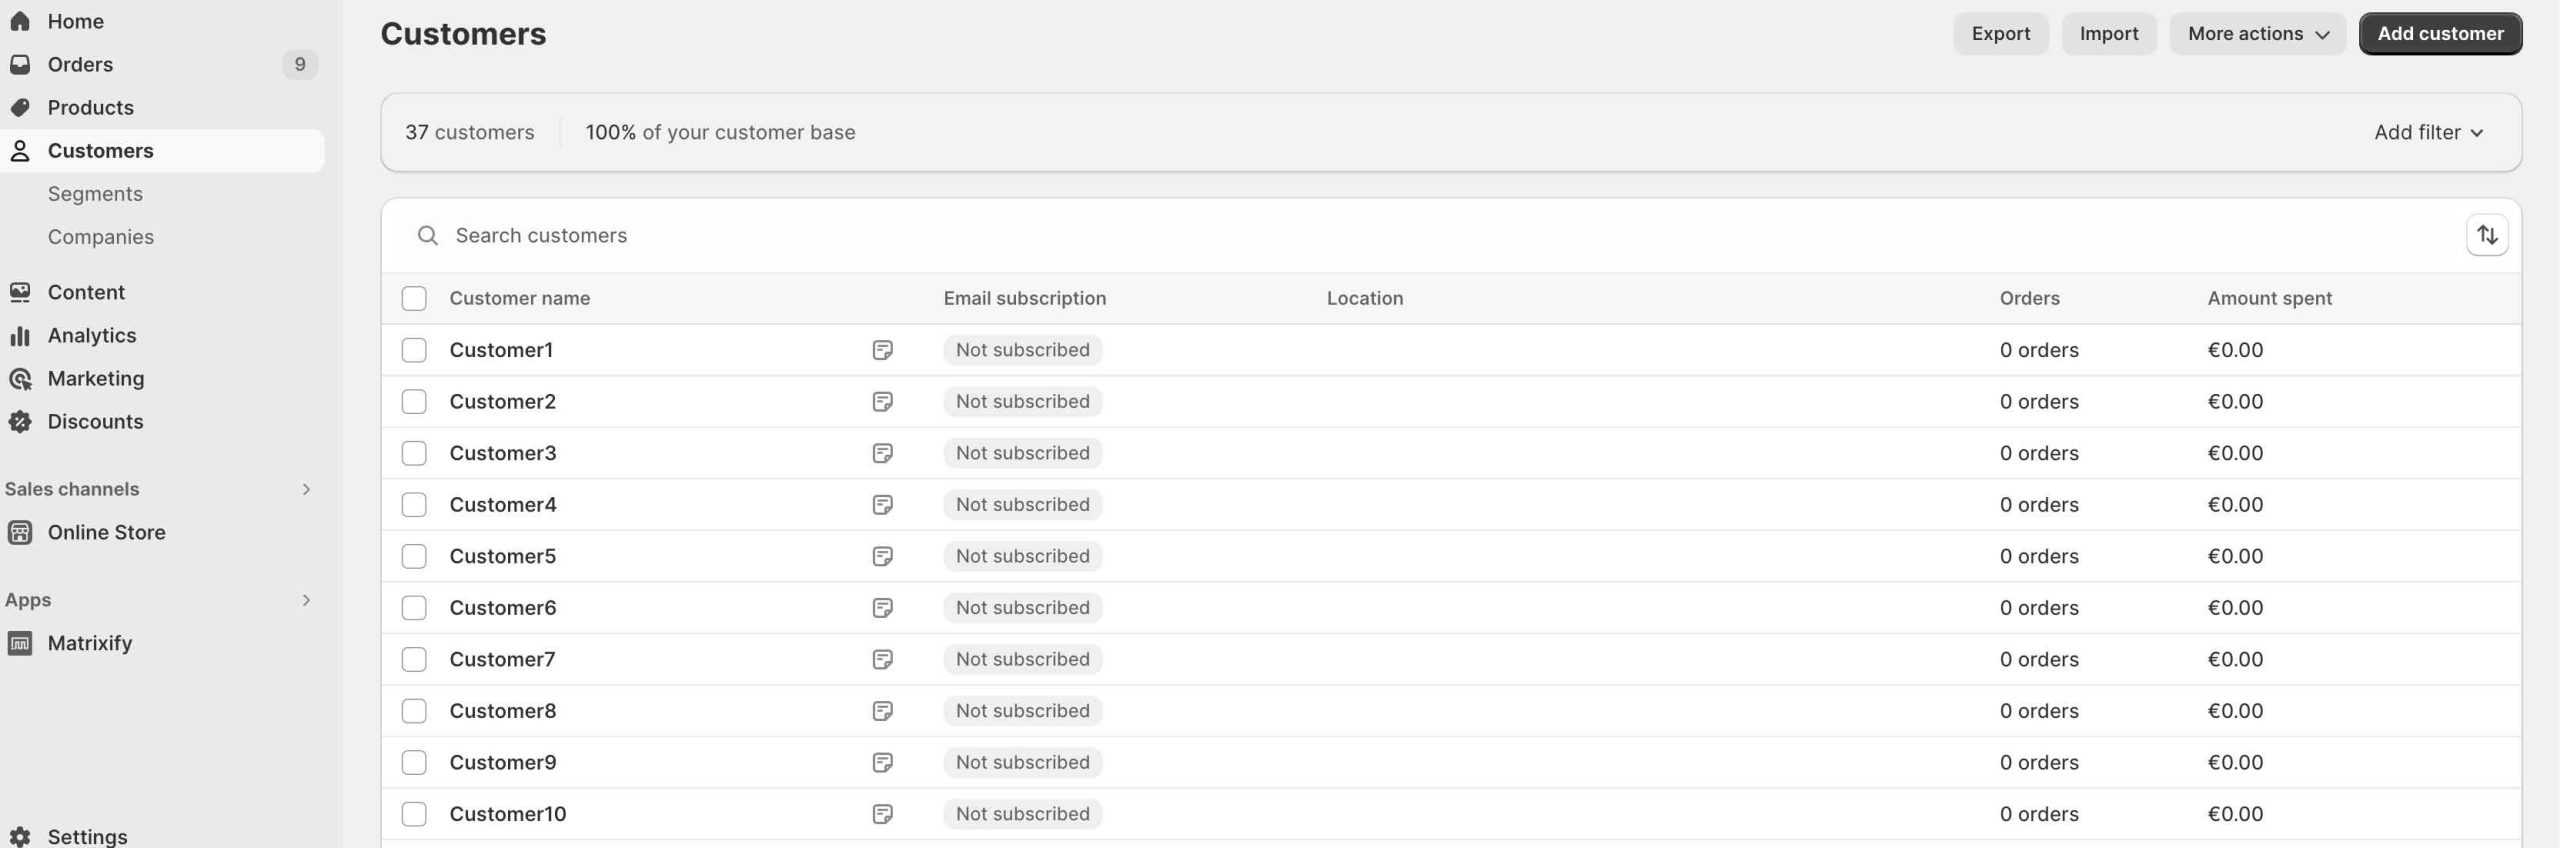
Where to go from here?
- Create your Shopify store.
- Install the Matrixify app.
- Read the Customers template documentation.
- Learn more about migrations to Shopify and what other types of data Matrixify can migrate to Shopify in bulk.
- Contact Matrixify support.


