Start your Magento to Shopify Order migration here!
So you decided to migrate your Orders from Magento to Shopify.
With Matrixify you can do exactly that with very little or no manual sheet editing involved.
Note – The app will link Order line items to existing Products in Shopify by the line items SKU.
This is why we strongly suggest to first migrate your Magento Products to Shopify and only then migrate Orders.
Let’s dig into how to migrate your Magento Orders to Shopify! 🙂
In Short, how to Migrate Orders from Magento
- Export Orders data tables from the Magento database to CSV files.
- Zip those CSV files into one single zip file, and make sure the zip file name includes a word “magento” and “order” in it, like “Magento_Orders.zip”.
- Upload that Magento zip file to the Matrixify app.
- When it’s done analyzing, check the checkbox “Dry run” under the Options – to generate the Matrixify Excel file but not import just yet.
- Download the Import Results Excel file – you will have it in the Matrixify Orders template format.
- Inspect that file, make any checks and data cleanup or adjustments as you need.
- Import the ready Excel file using the Matrixify app.
Steps on how to migrate Orders from Magento to Shopify
1. Export Orders data tables from the Magento database
When you connect to the Magento database, you will see many tables there.
You need to use the database tool to export the following tables with their data to the CSV files – each table goes to its own CSV file with the following names:
| Table Name (Magento v1.x) | Table Name (Magento v2.x) |
| sales_flat_order.csv | sales_order.csv |
| sales_flat_order_item.csv | sales_order_item.csv |
| sales_flat_order_address.csv | sales_order_address.csv |
| sales_flat_order_payment.csv | sales_order_payment.csv |
| sales_flat_shipment_track.csv | sales_shipment_track.csv |
| sales_flat_order_status_history.csv | sales_order_status_history.csv |
CSV file format requirements
- Include column headings.
- Column separator: , (comma)
- Quotes symbol: “ (regular double-quotes)
- Escape symbol: “ (regular double-quotes)
- Newline symbol: \n (proper newline character)
- NULL values to be empty.
1.1. Install a database client app
A good free database tool to do this export is DBeaver (https://dbeaver.io/download/), works on Windows, MacOS and Linux.
You can, of course, choose any other database tool if you have a preferred one.
This tutorial will assume you are using the DBeaver.
1.2. Connect to your Magento database
If you don’t have the login details to your Magento database, usually, you can get those from your system administrator.
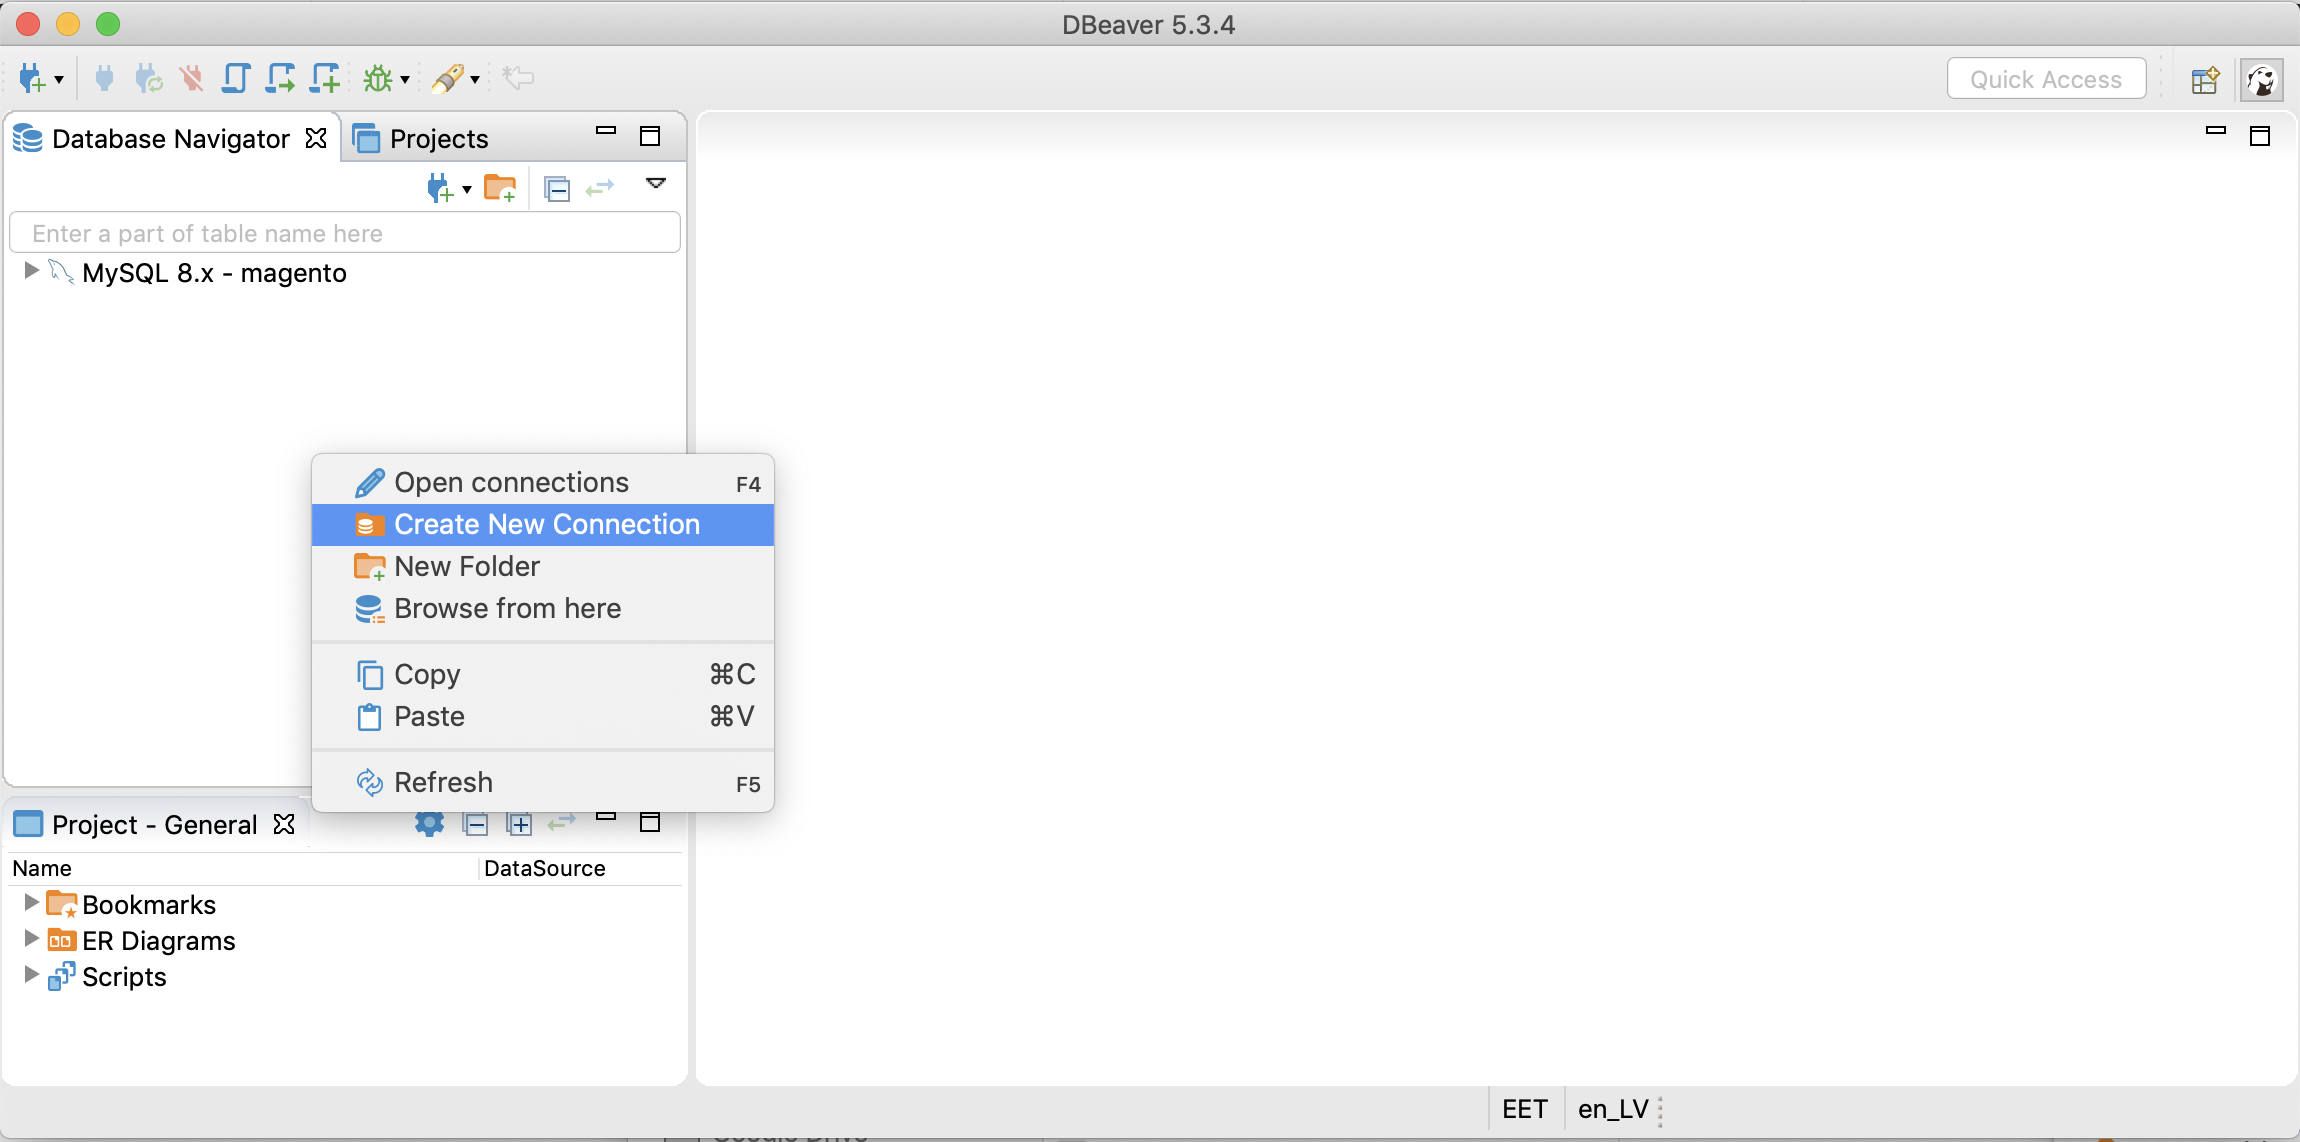
Right-click in DBeaver “Database Navigator” and choose “New Connection“.
Choose MySQL 8.x. Most likely your Magento is running on MySQL database unless you have a special custom setup.
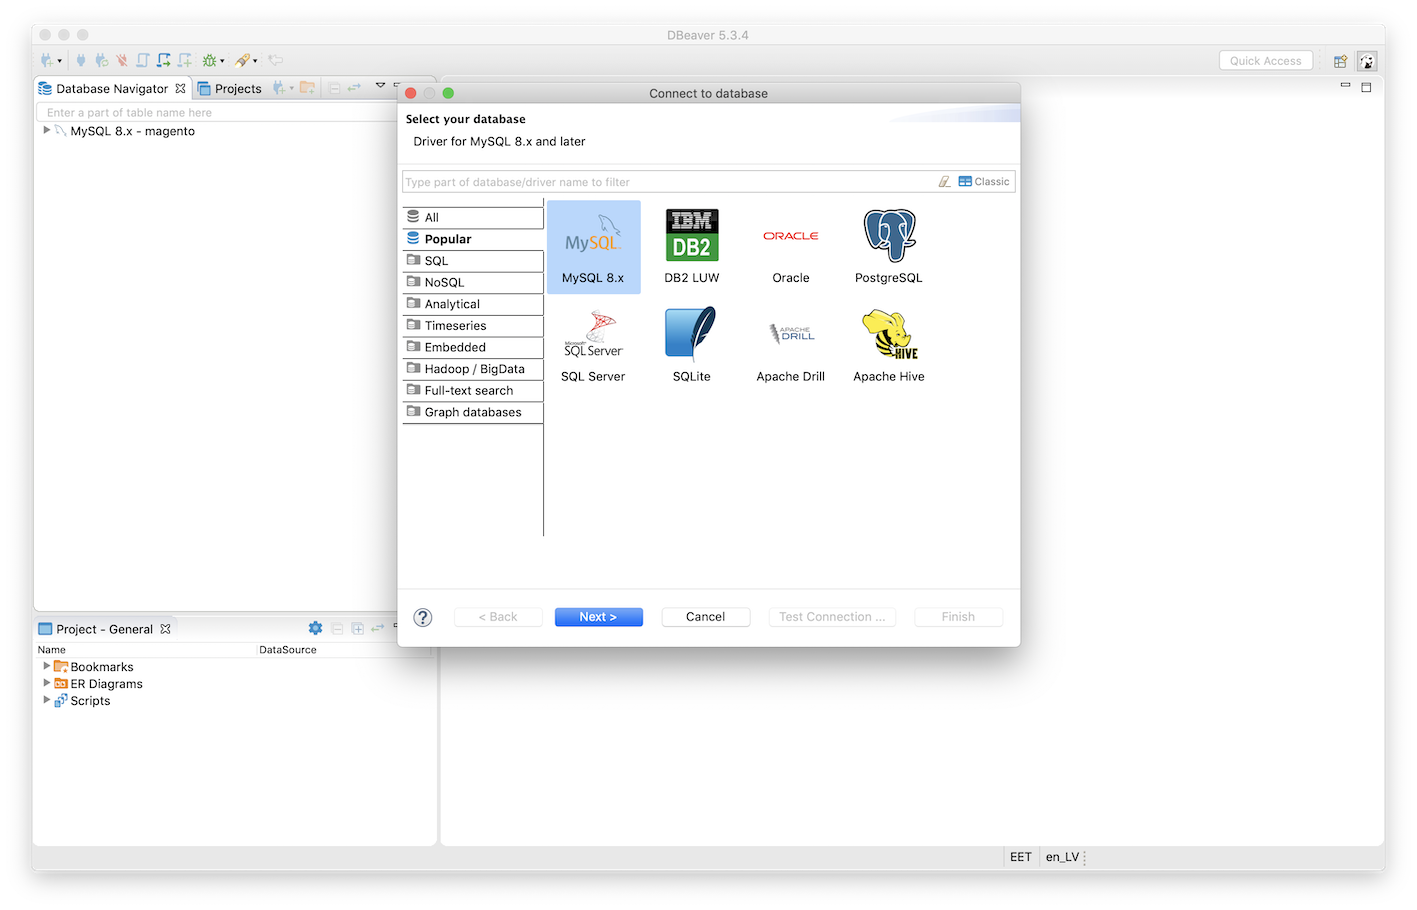
Press Next.
Then enter the Connection Settings to connect to your database.
If it asks to download some drivers, just press “Download” button and it will download them itself – no need to do anything special for that.
You should enter the connection parameters to your database:
- Server host: that’s the address to the server. It will be either an IP address like “127.0.0.1″ or the full internet domain name.
- Port: usually it is “3306“.
- Database: typically it’s “magento” but it might be something else, as configured by your administrator.
- User name
- Password
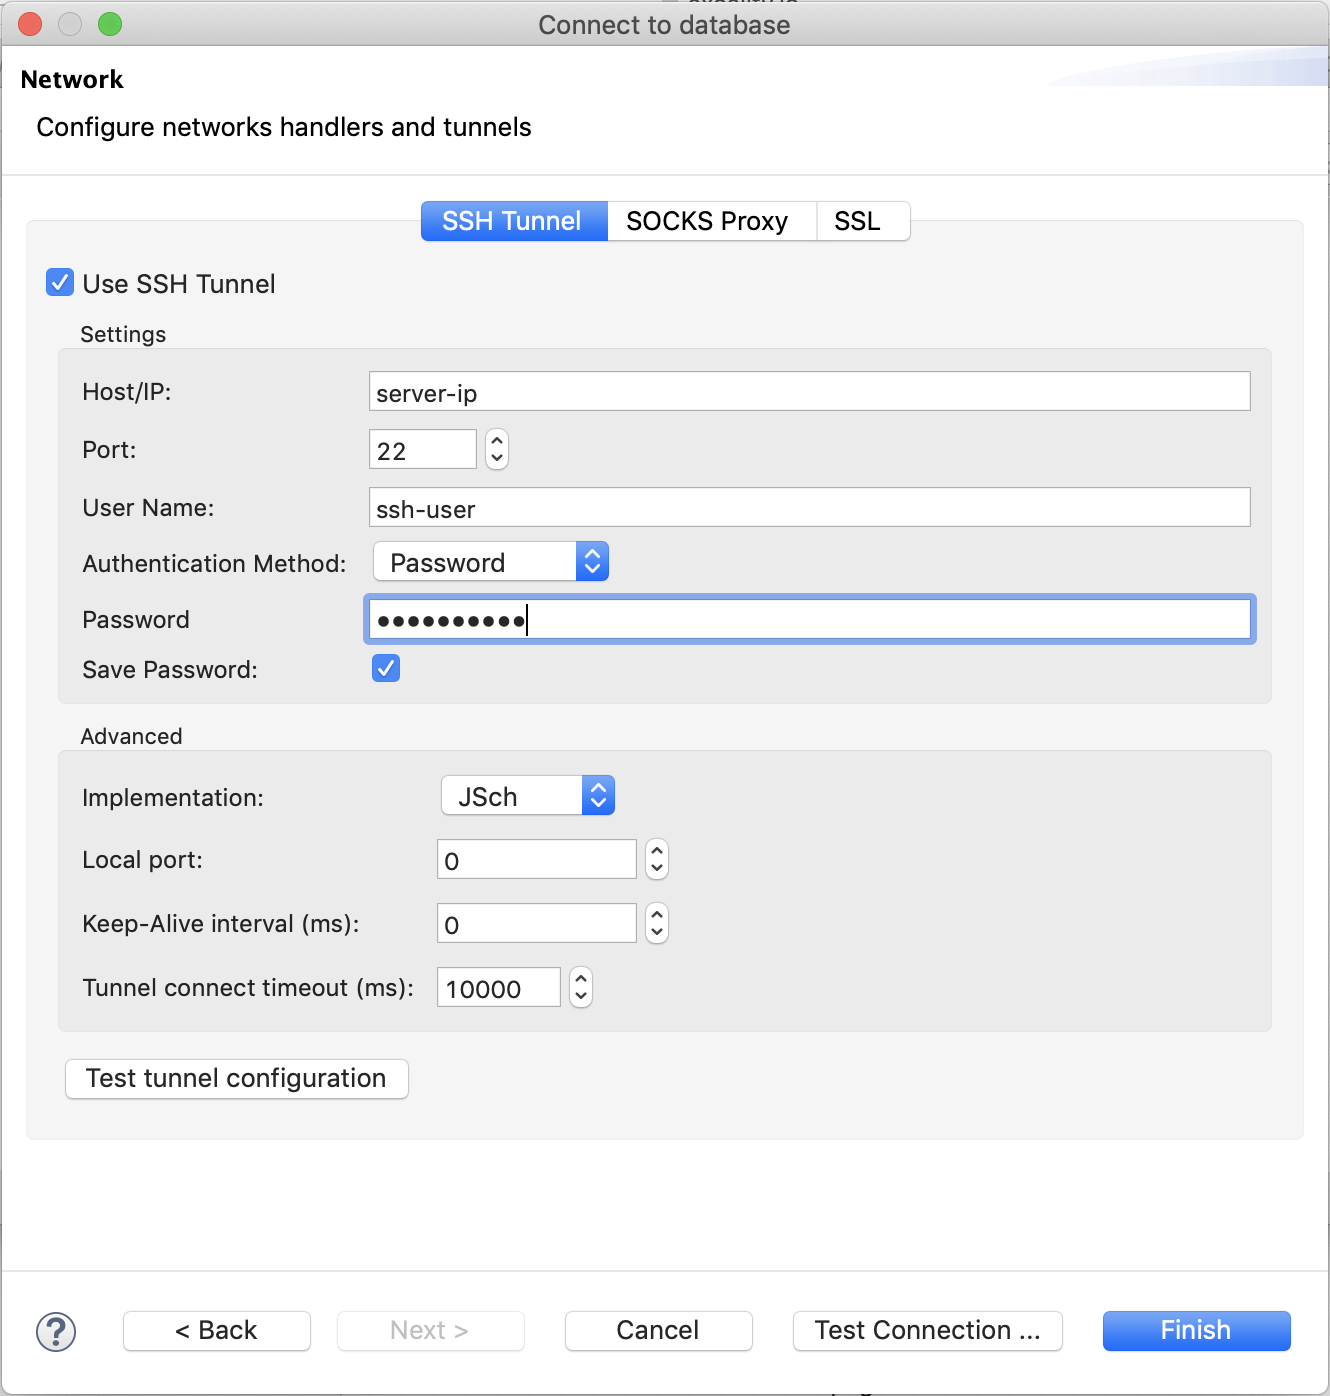
 Quite often your Magento database is running on some other server which you need to “tunnel” in. In that case, you will have additional “server” login details which you need to press the “Network settings (SSH, SSL, Proxy, …)” button and enter this data there.
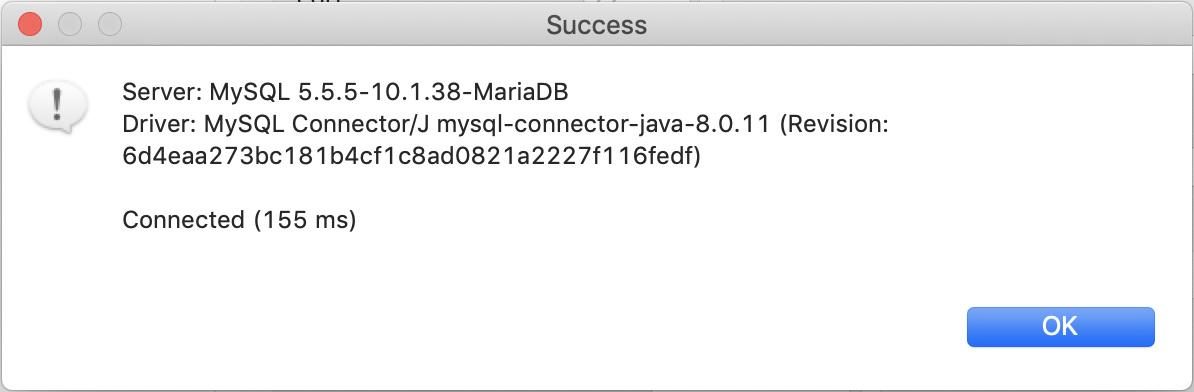
When entered all the connection details, press the button “Test Connection…“.
That should show the confirmation window telling that the connection was successful.
The window should look like this:
 If it doesn’t say the “Success” then please check your all login details.
If it says “Success” then you are all good to connect – press the “Finish” button and you should get connected to your Magento database.
1.3. Find the needed tables to export Orders data
In the “Database Navigator” side panel you should see the “MySQL 8.x – magento” database which you added.
Expand that tree here: MySQL 8.x – magento -> Databases -> magento -> Tables.
There you should see all your Magento database tables like this:
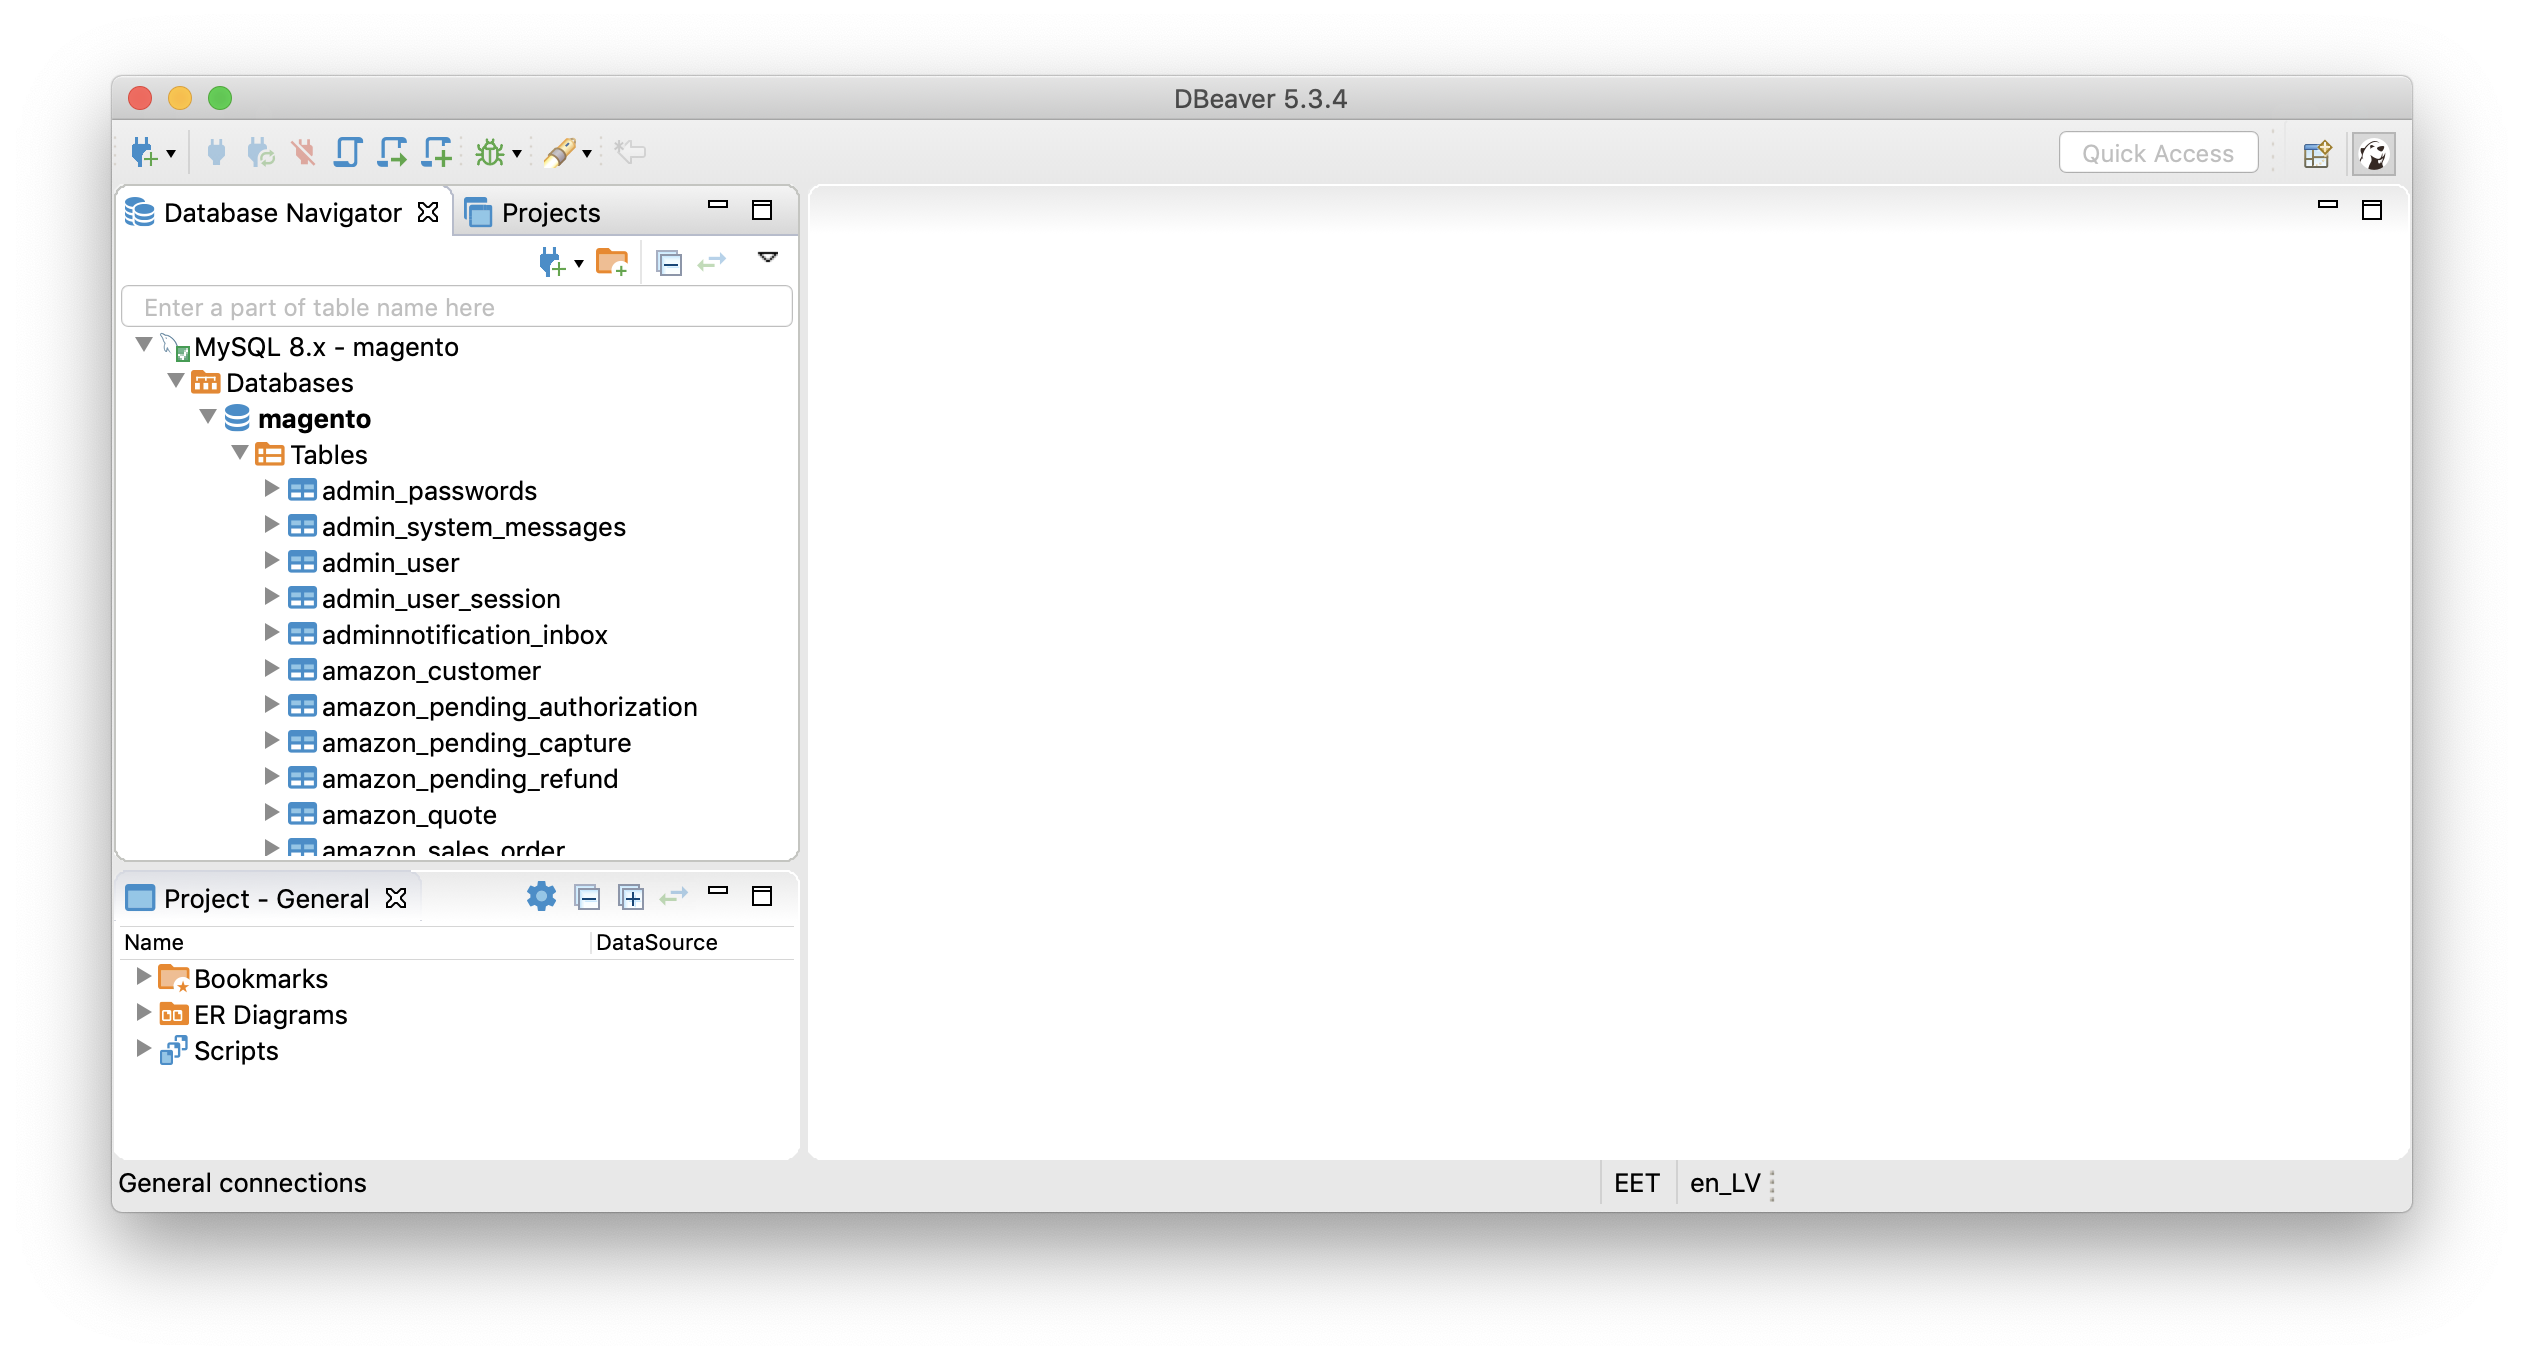 Scroll down till you see the tables starting with “sales_flat_order…” if you are on Magento 1 or “sales_order…” if you are on Magento 2.
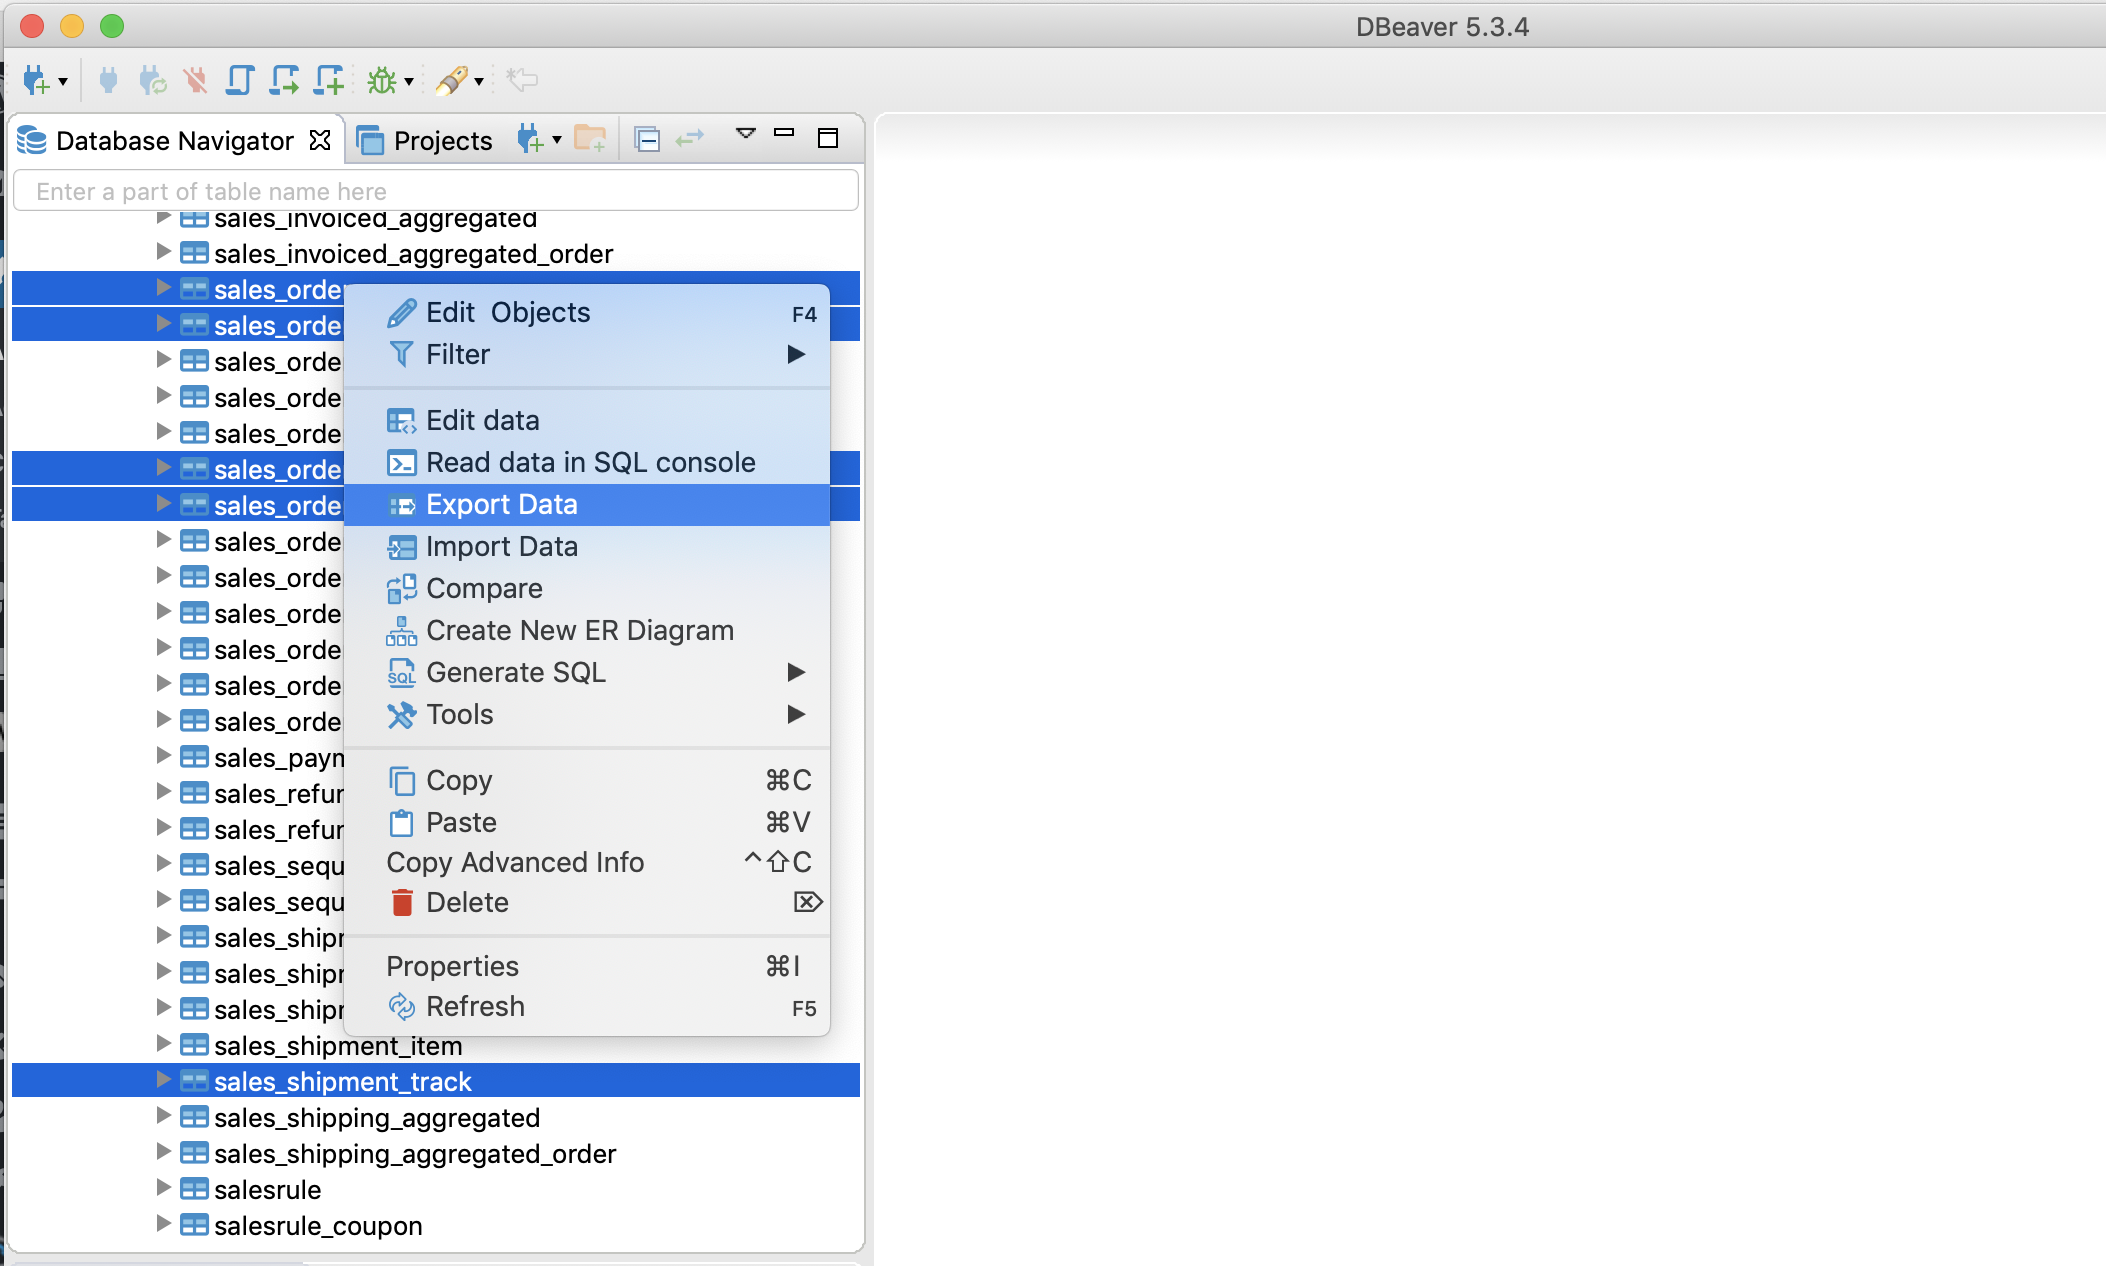
While holding Ctrl key on Windows or Cmd key on Mac, select all the required tables to export.
If you have Magento 1, then you need to select the following tables:
- sales_flat_order
- sales_flat_order_item
- sales_flat_order_address
- sales_flat_order_payment
- sales_flat_shipment_track
- sales_flat_order_status_history
In our Magento 2 example, those will be the following tables:
- sales_order
- sales_order_item
- sales_order_address
- sales_order_payment
- sales_shipment_track
- sales_order_status_history
When you have selected those tables, right-click with the mouse on any of the tables, and in the pop-up menu choose “Export Data“.
1.4. Export those Orders tables to CSV files
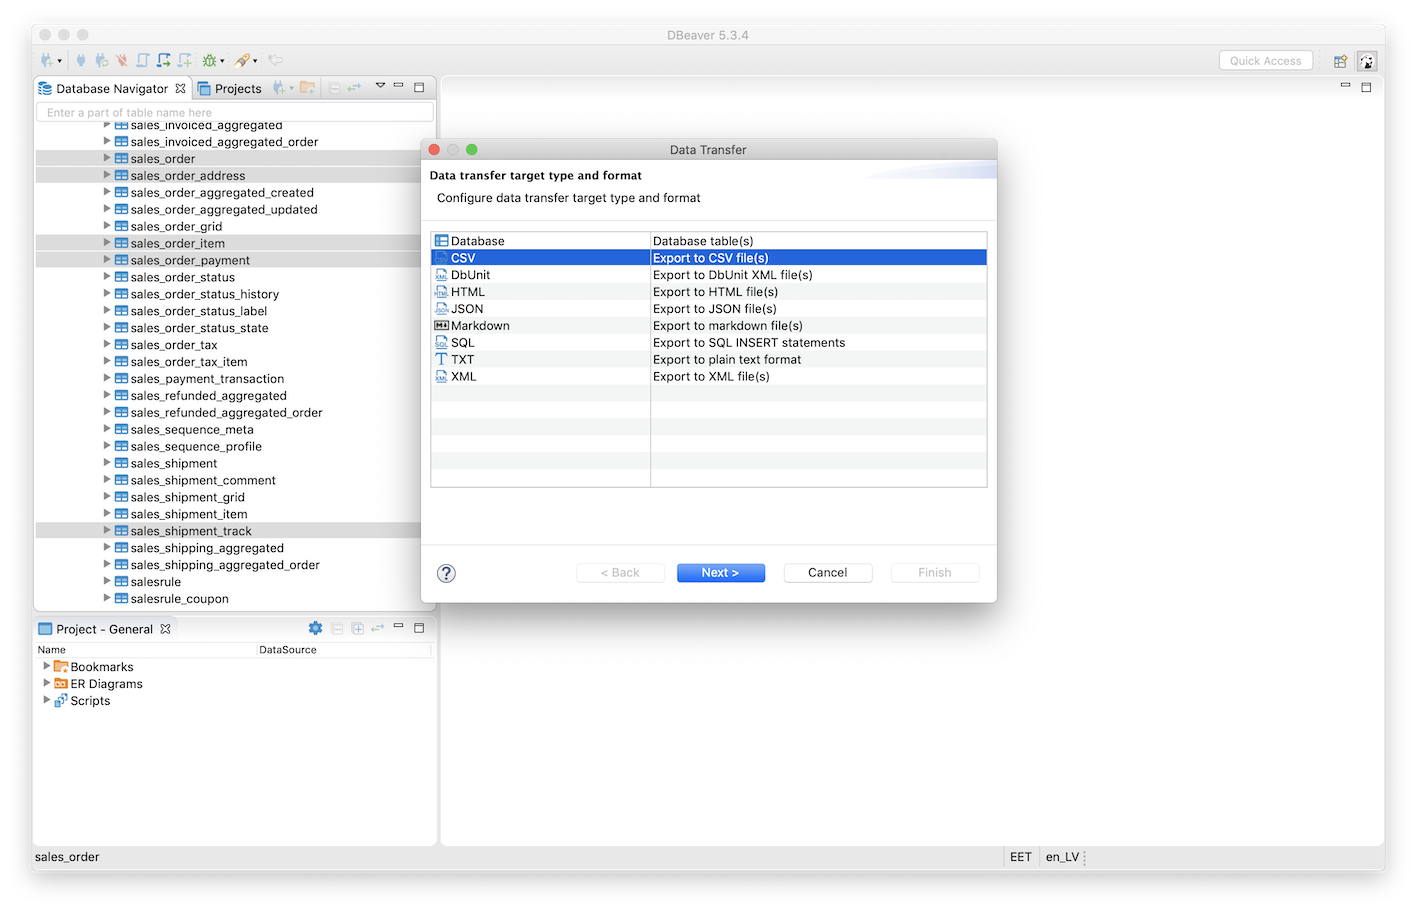
You should see the “Data Transfer” window open where you can choose the different export formats.
Choose the CSV there and press Next.
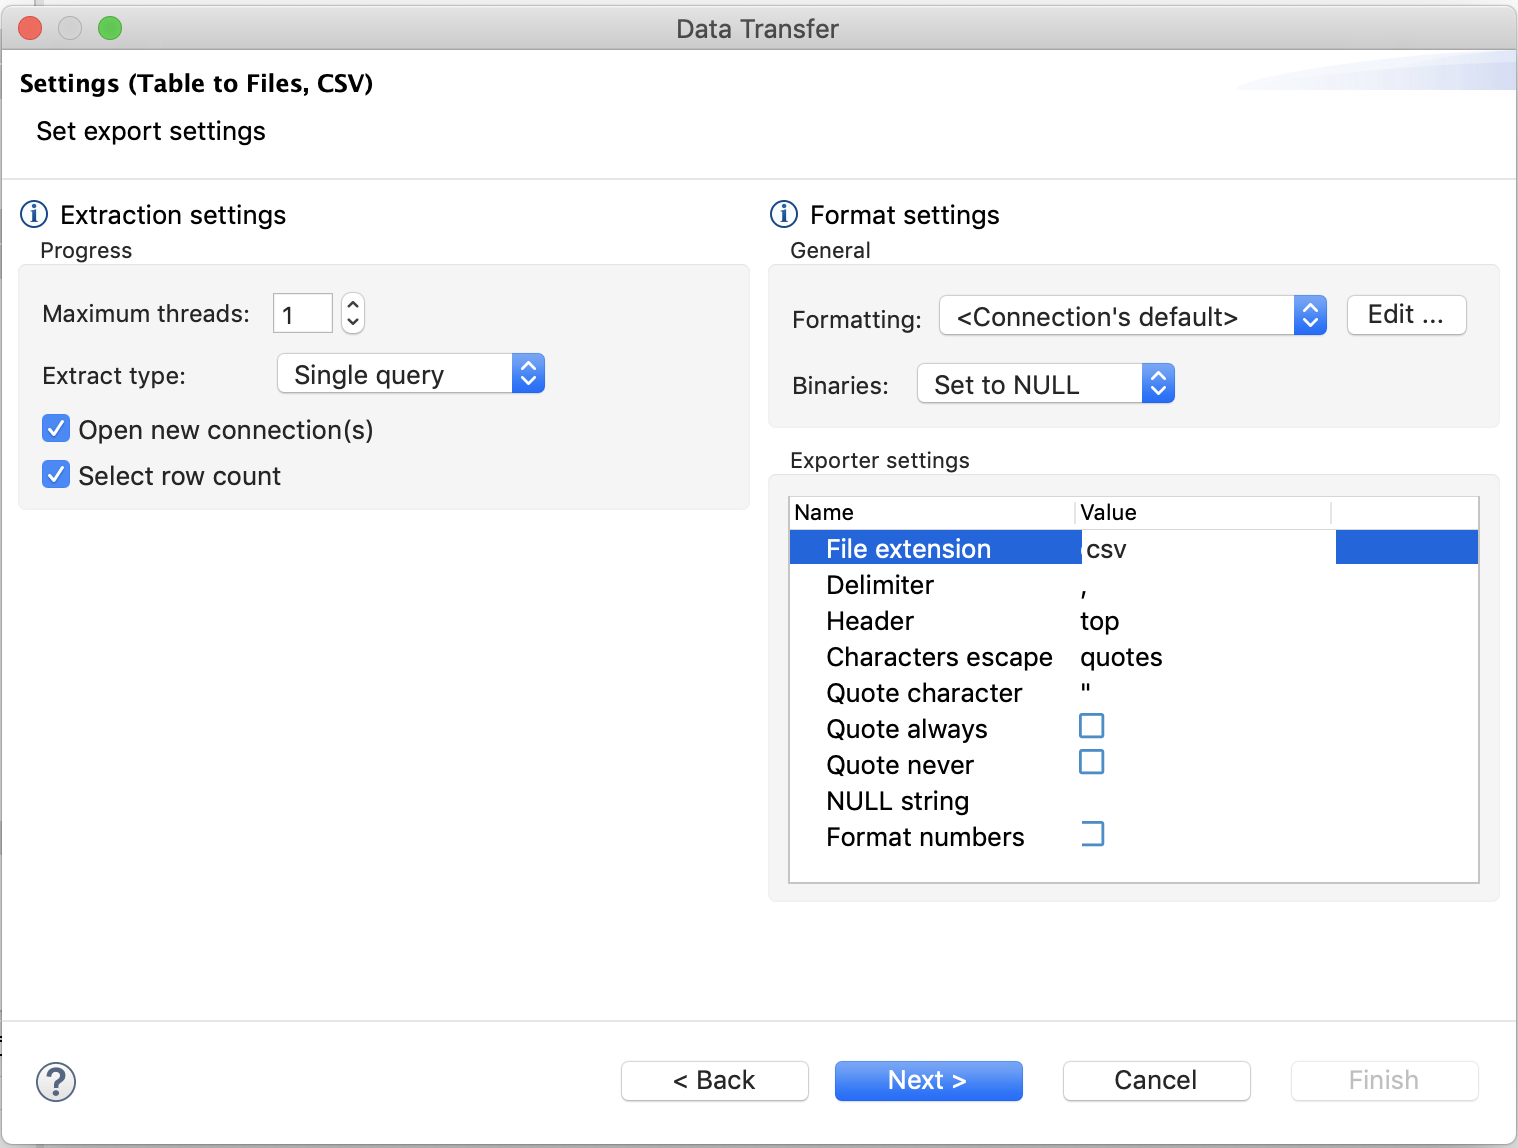
Then you will see the Format settings window for the CSV files.
The default values are good for the export, but just in case, check that those are like this:
- File extension: csv
- Delimiter: ,
- Header: top
- Characters escape: “ (regular double-quotes)
- Quote character: “
- Quote always: off
- Quote never: off
- NULL string: this must be empty
- Format numbers: off
 Choose the export directory – where to place those CSV files. A good place to put those is in the Downloads directory:
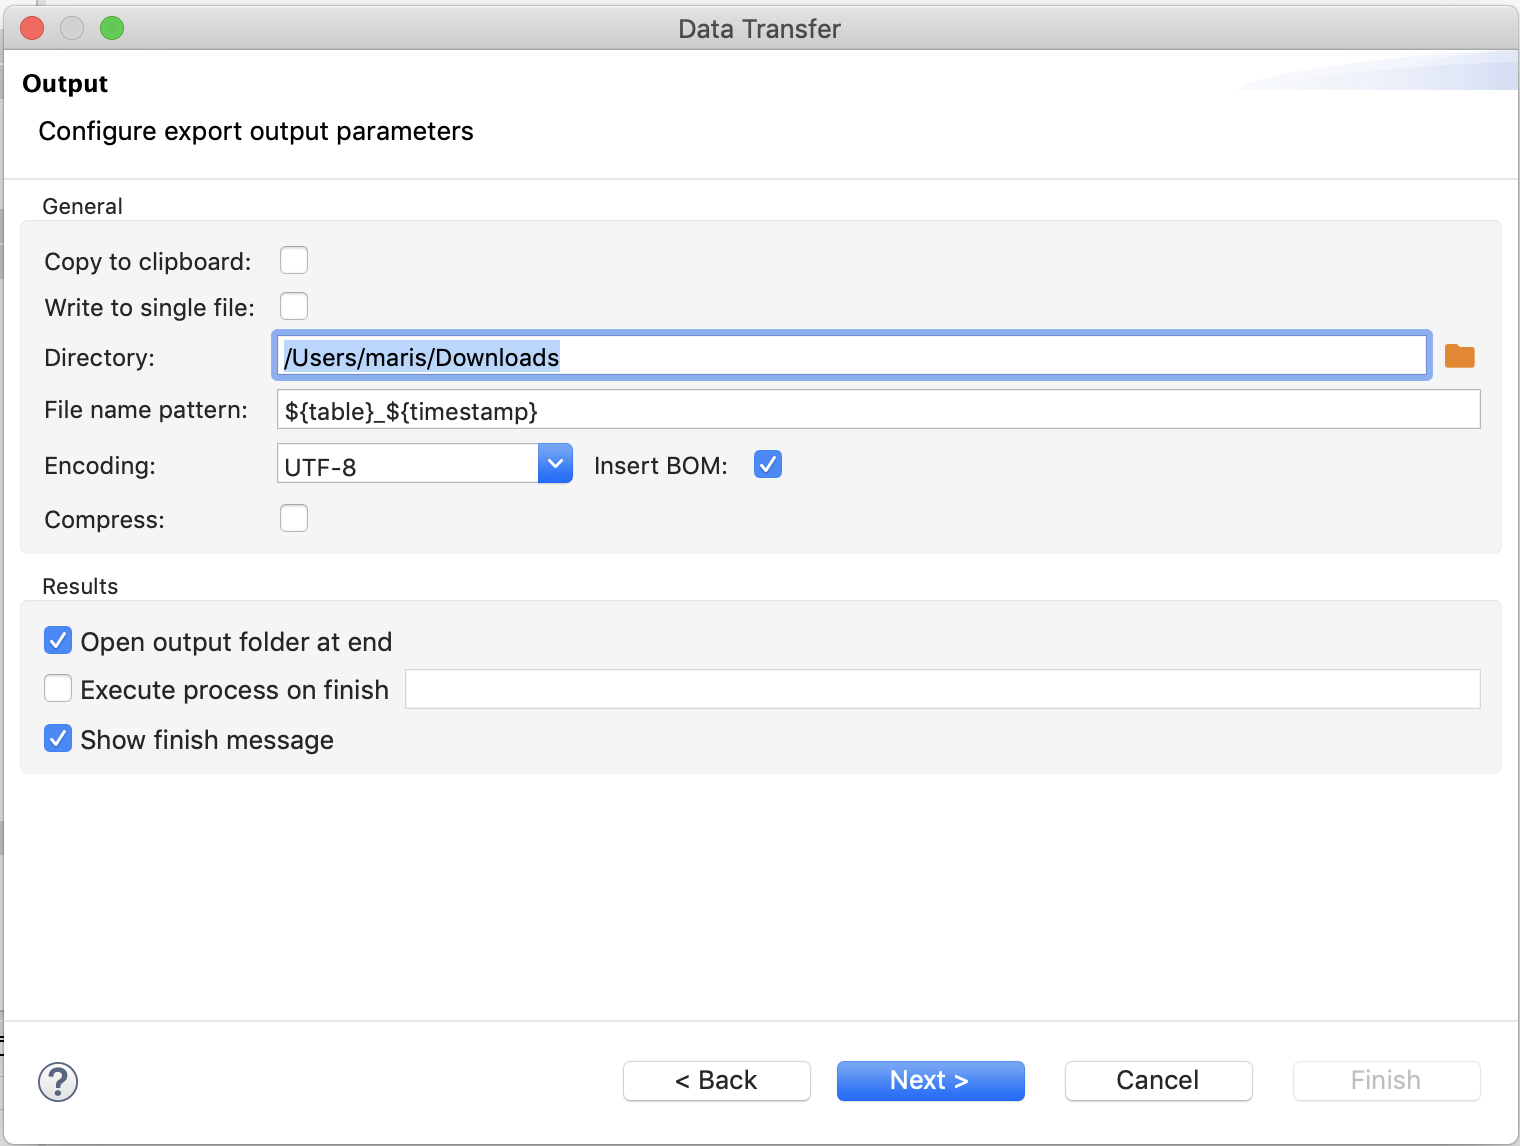 When you have chosen the directory then press Next and Finish.
You should have your files exported fairly quickly, depending on the database size, but usually, it takes less than 1 minute.
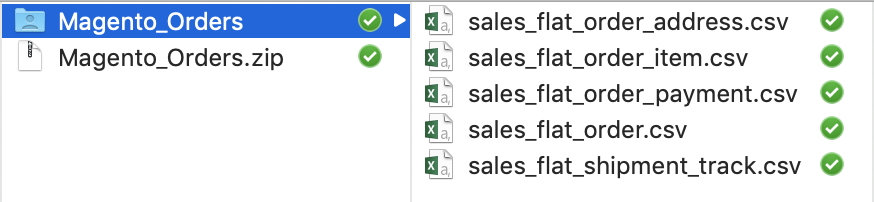
2. Zip CSV files into one single zip file, and rename the zip to contain the word “magento”
Put all those CSV files in the same folder, and give that folder a name, like “magento_orders”. It’s important that the zip file name should include the name “magento” in it. That’s how the app will know you are having the Magento data in that file.
And zip that folder into the zip file, like “magento_orders.zip”.
Note for Windows users: When zipping the files, do not use Windows default zip but use 7Zip (because Windows uses special zipping algorithm which cannot be unzipped on some systems).
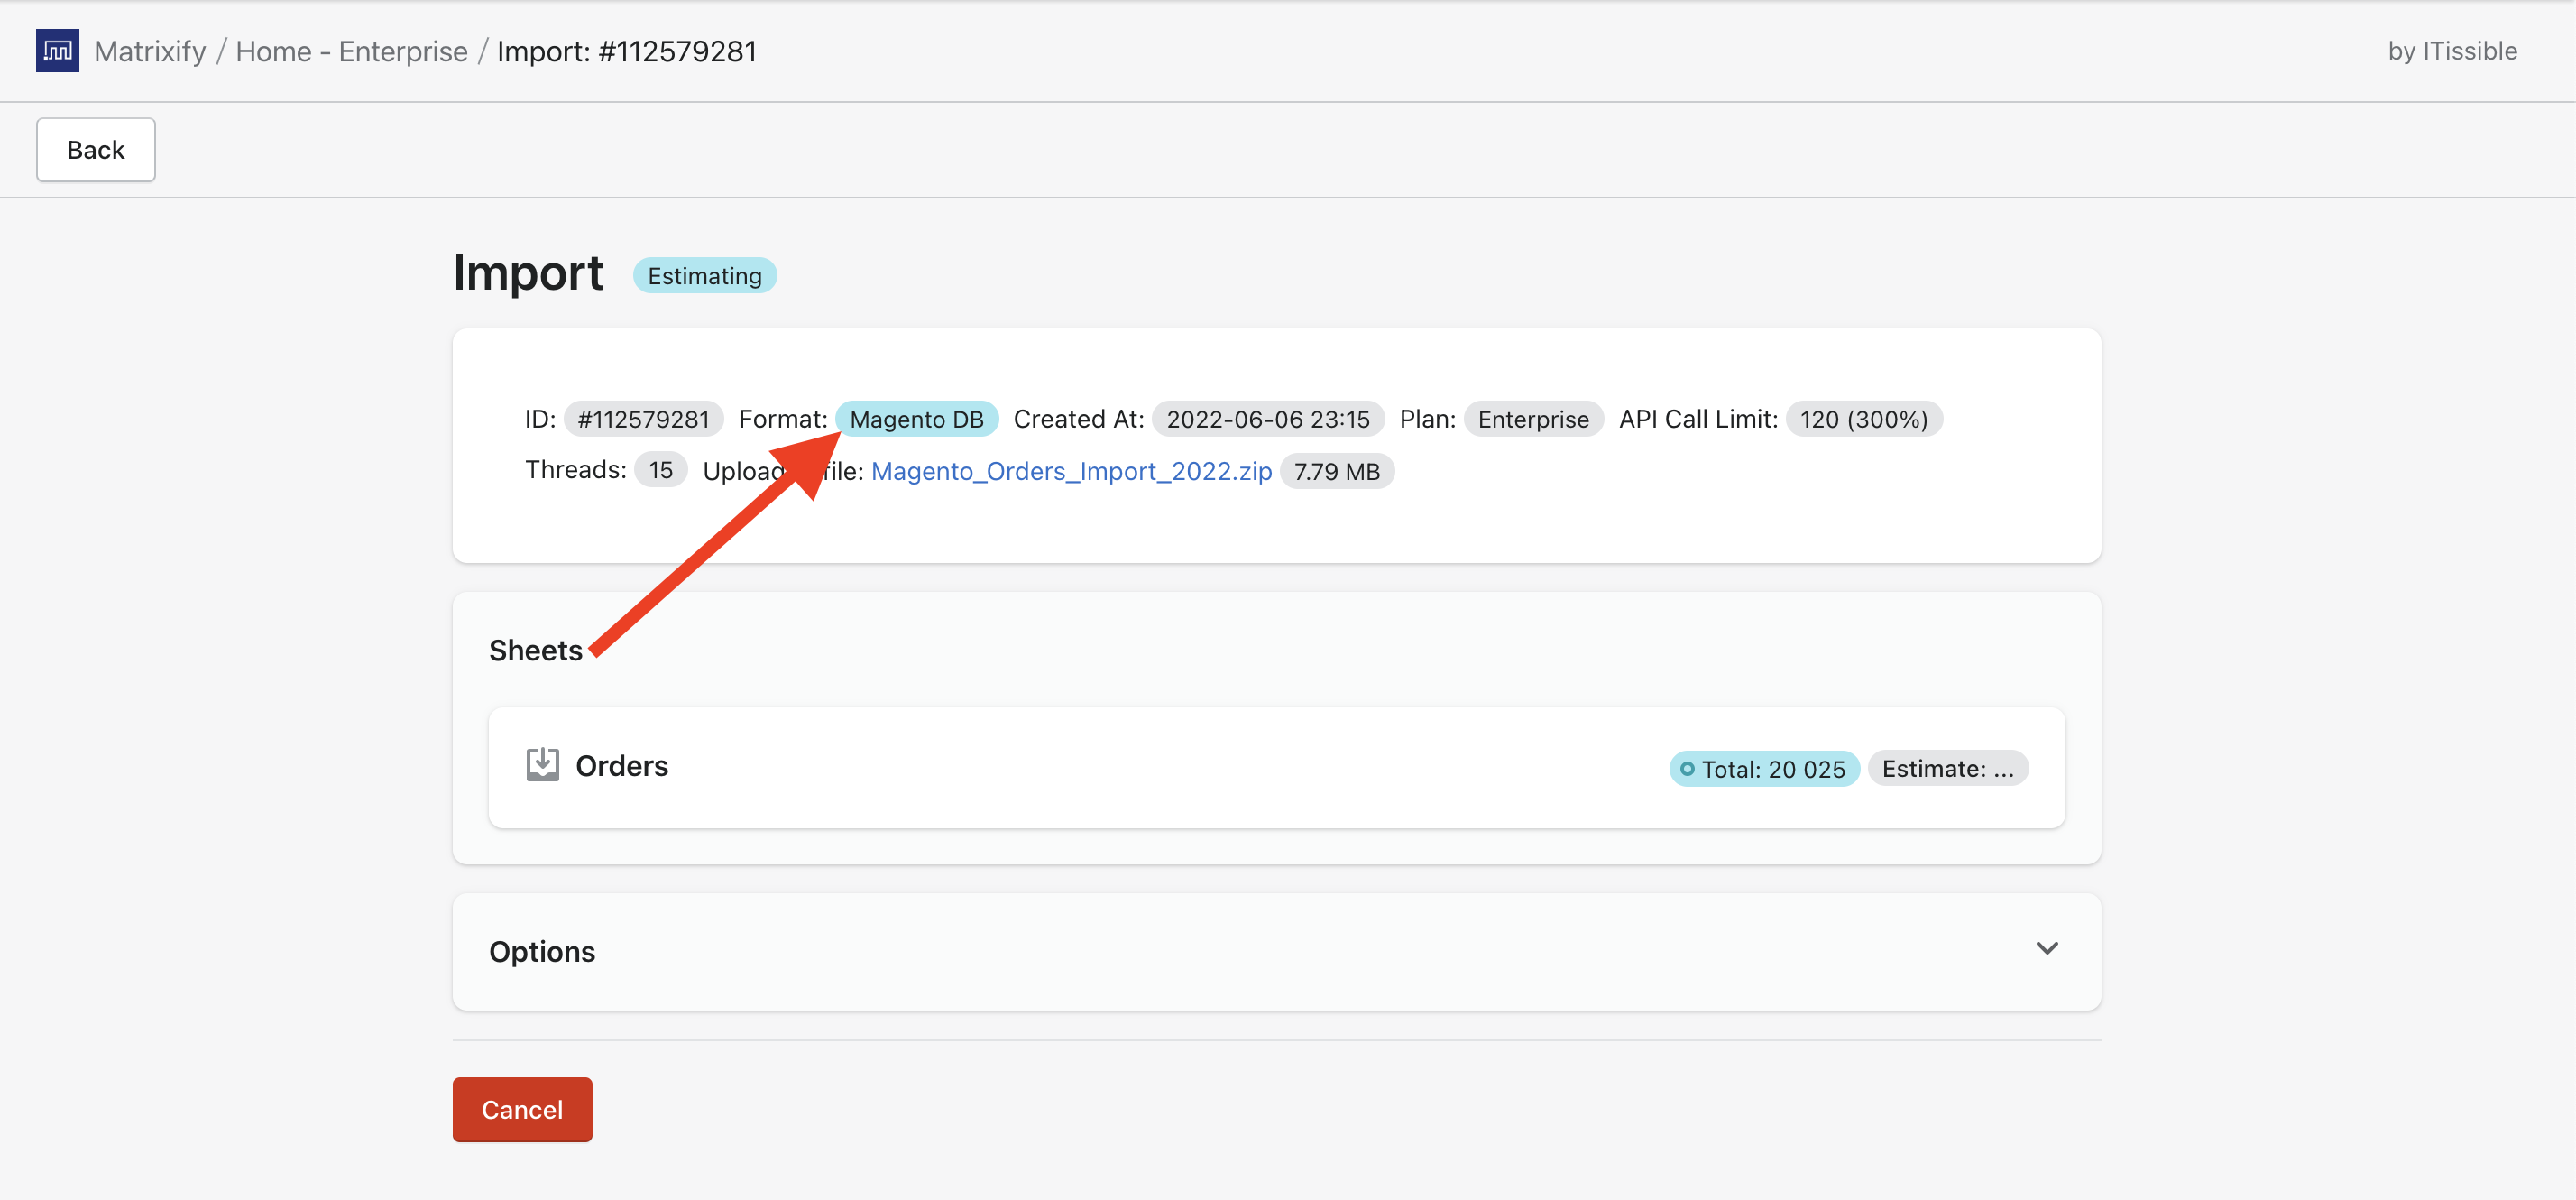
3. Upload that Magento zip file to the Matrixify app
When you will upload that Magento zip file to the Matrixify app, you should see that the app recognized it as Magento format, and runs through the Analyzing process to count how many Orders it finds in those files.
4. Check the checkbox “Dry run” under the Options
Press the “Options” drop-down and click the “Dry run – convert the file and test as far as possible without actually importing anything” checkbox.
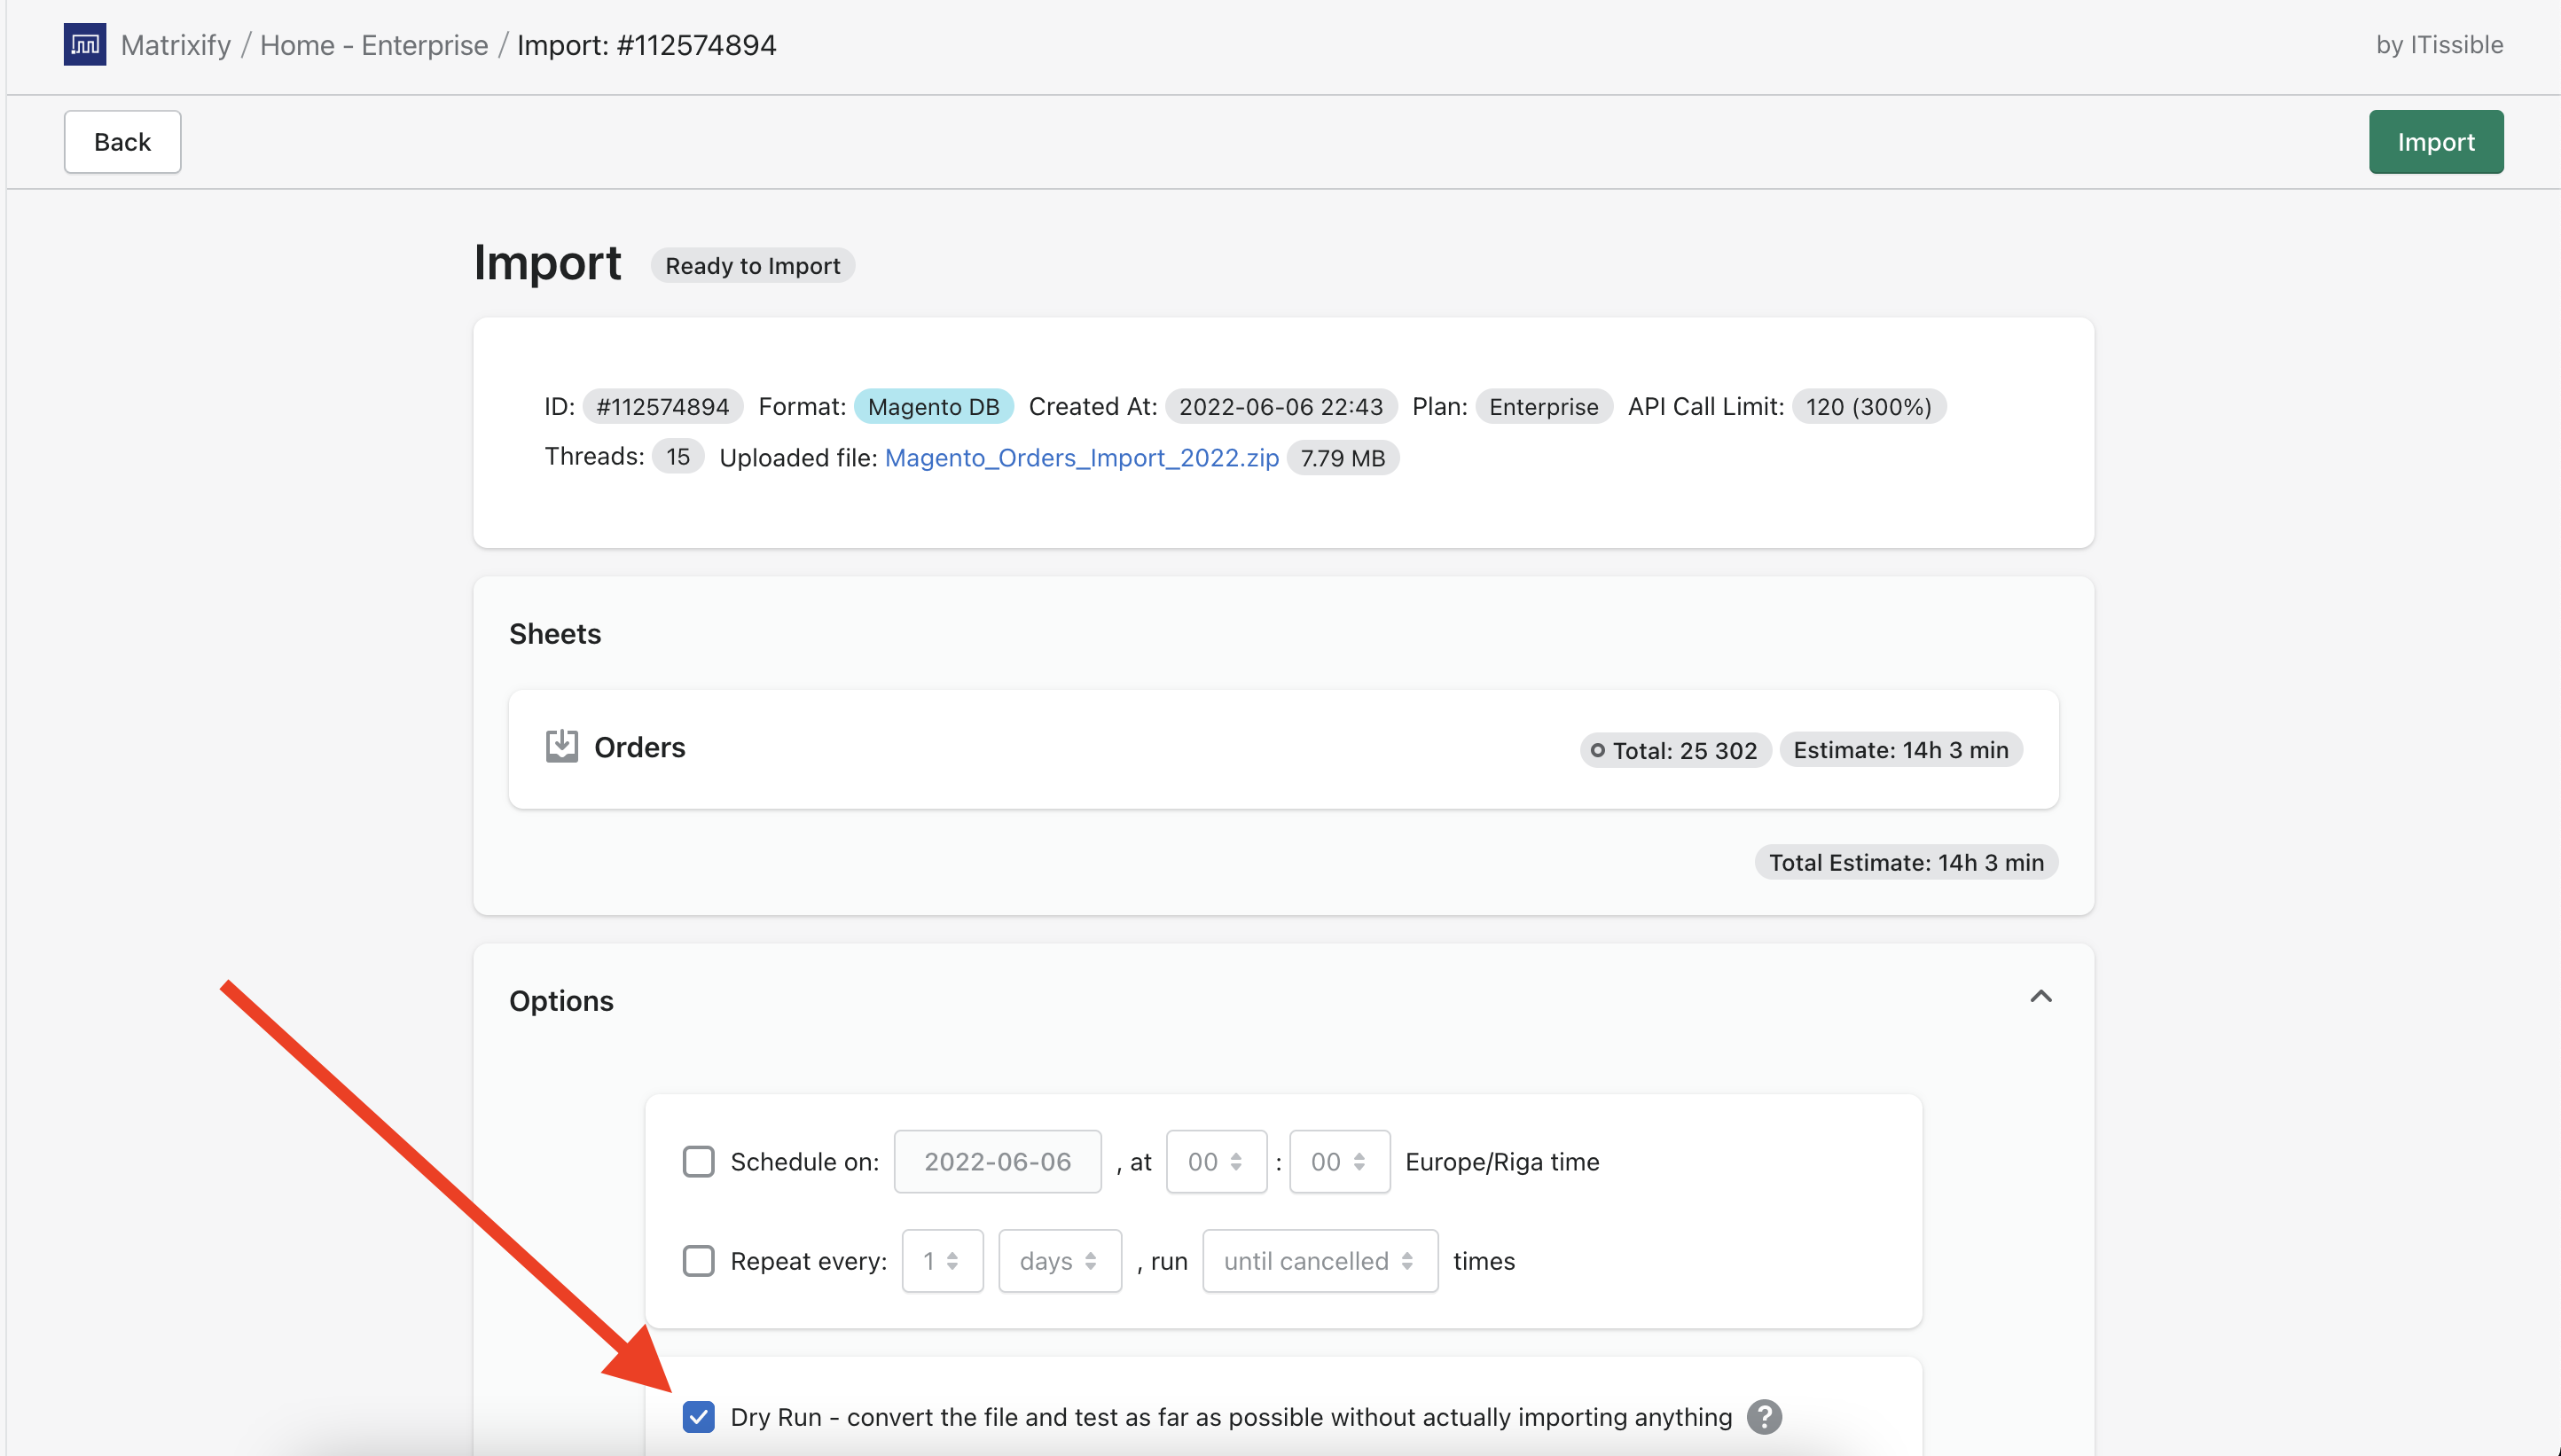 That will not do any real import just yet – it will just run through our data transformation engine to simulate the import, and as a result, you will get the “Import Results” Excel file which is in the Matrixify “Orders” import template format.
Press the “Import” button. Don’t worry – if the Dry run is on, there will be no changes done to your shop data just yet.
5. Download the Import Results Excel file
When the “dry import” is finished, you will see the Download button.
Press it and download the “Import Results” file of your test Orders import – it will be in the Matrixify Excel file format. Do not worry if there are any errors or warnings! In the “Import Results” file you will be able to correct any errors and inspect the data. If anything is unclear, you can always write to our support team.
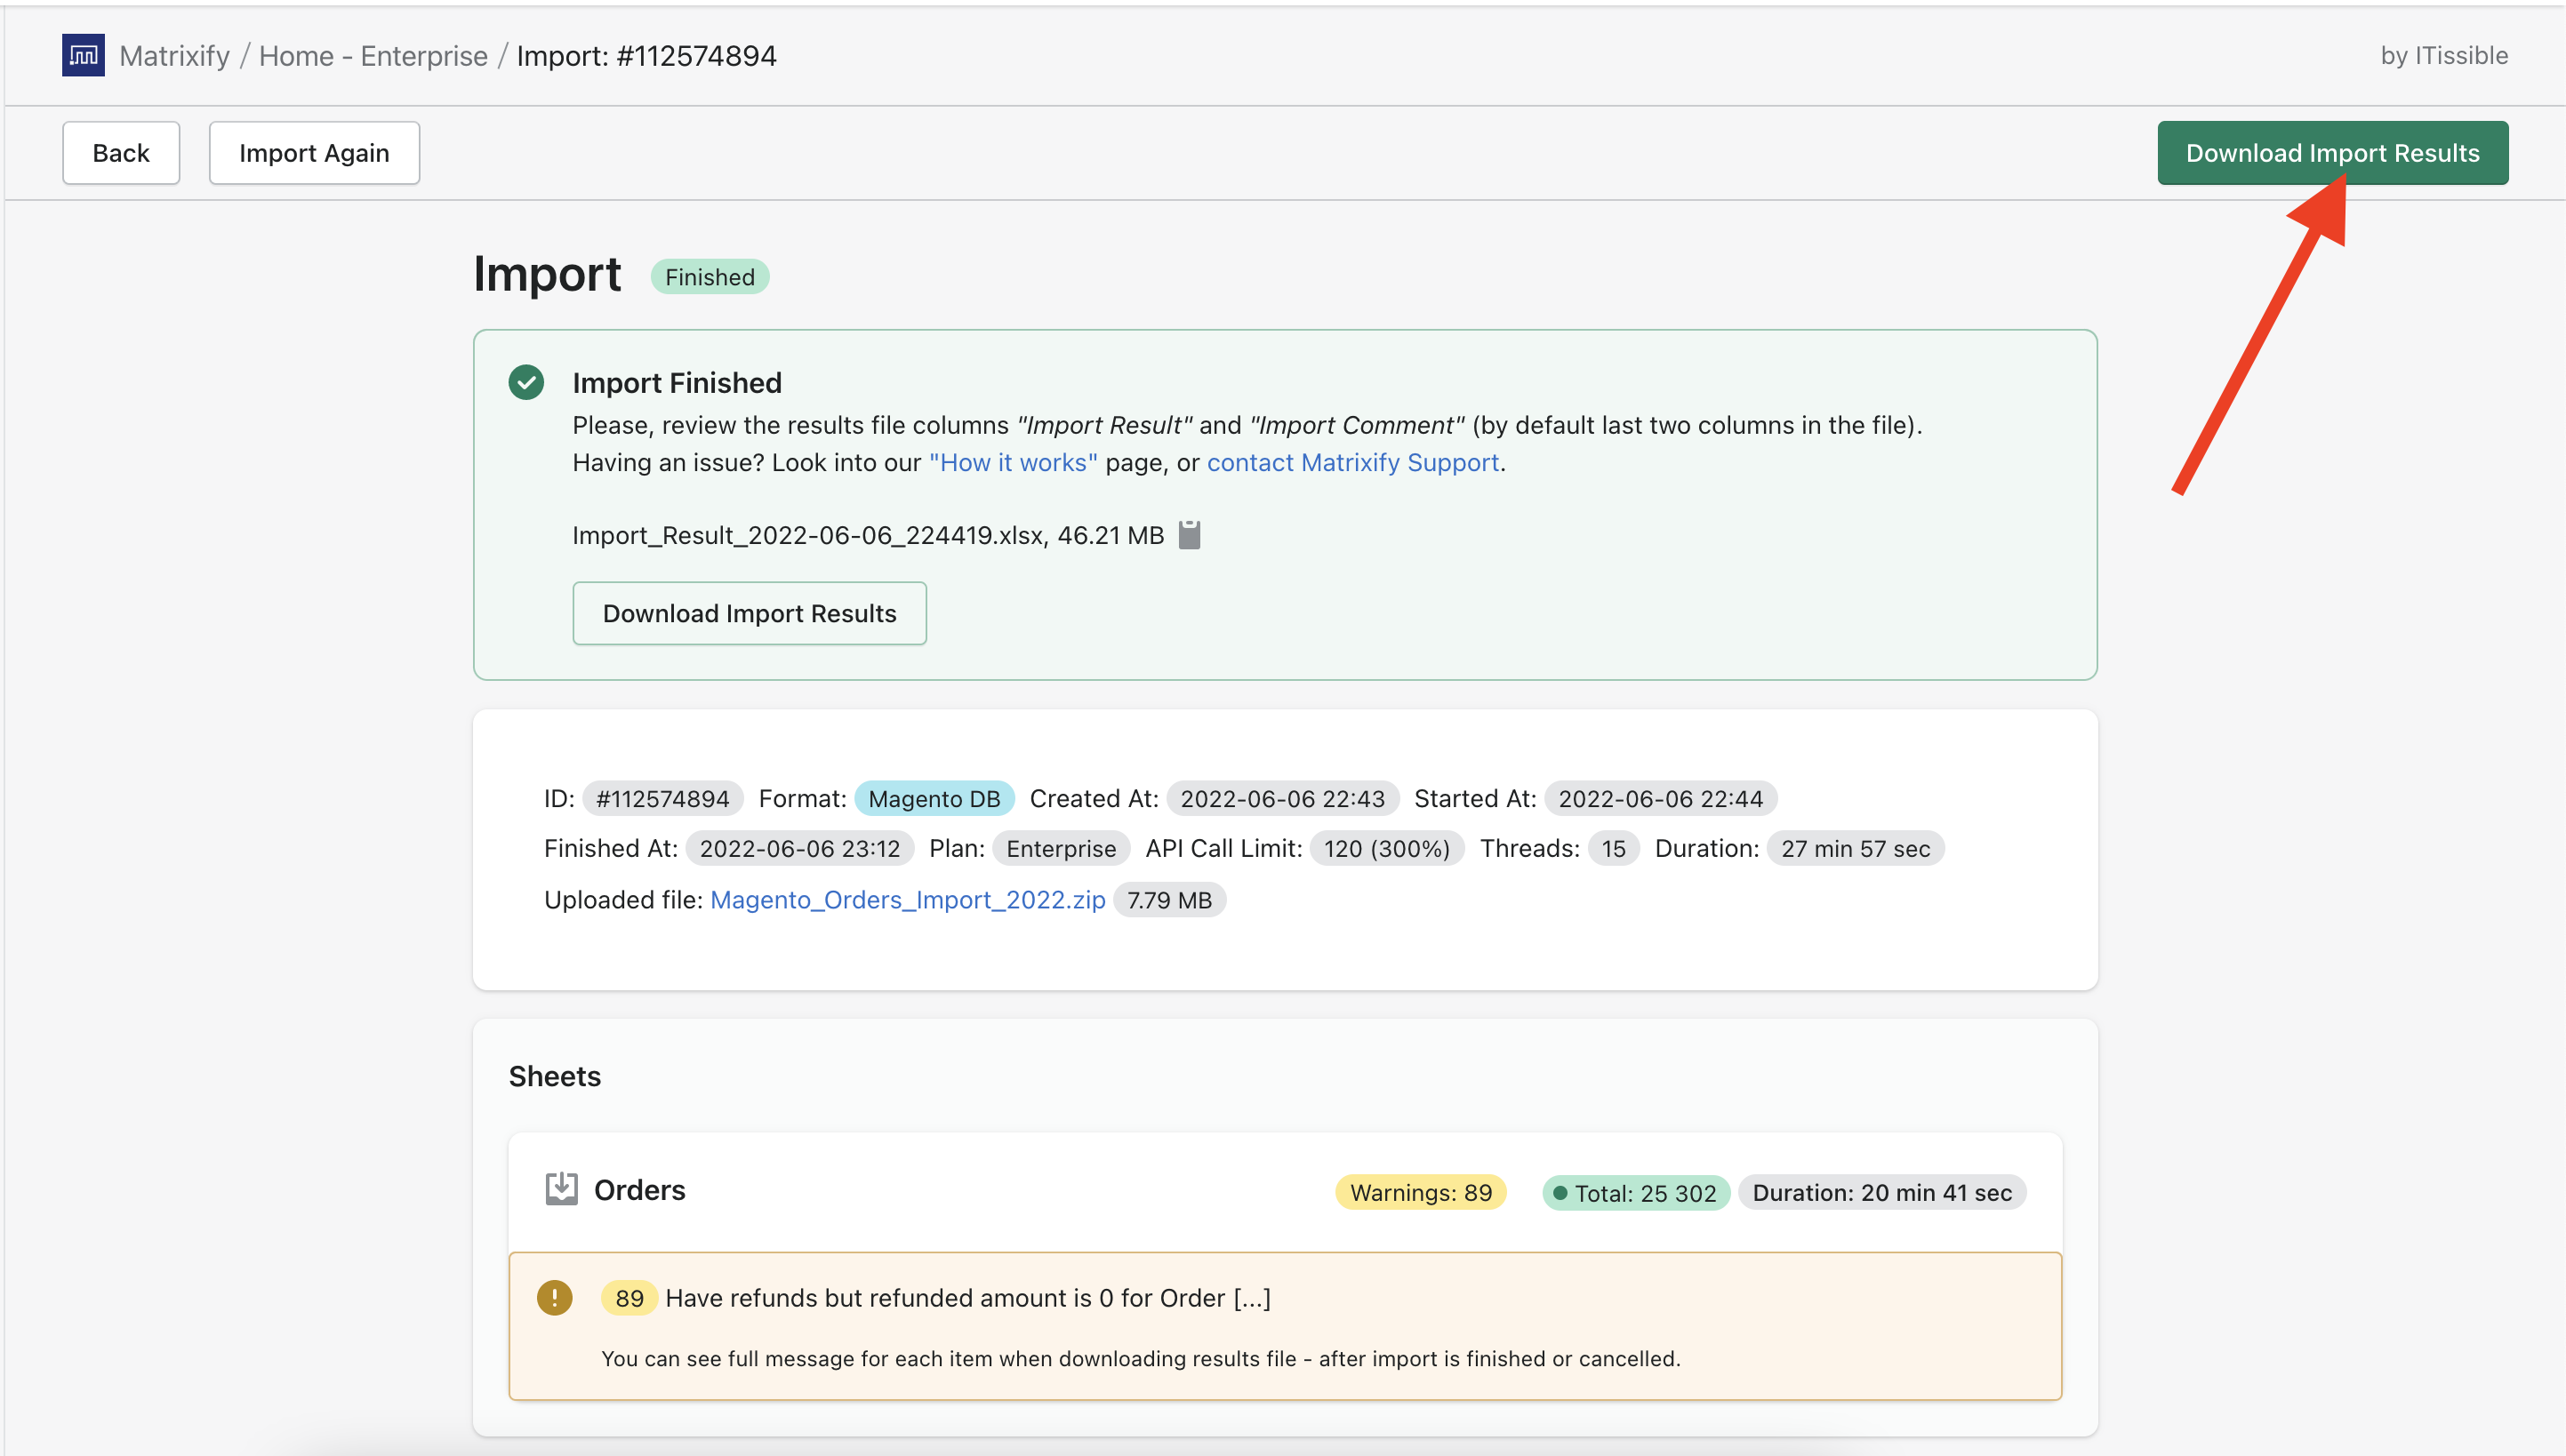
The file will contain all of the Orders, their customer data, line items, shipping cost, refunds, fulfillments, and financial transactions.
6. Inspect that file, make any adjustments if needed
You might want to look at the total amounts, check the currencies, transactions.
Maybe improve the data of some of your customers, check that their phone prefixes are correct, as Shopify requires international phone codes for all phone numbers.
Check customer address data, their countries, cities, regions, streets.
Also, you might want to check the totals for line items, and Orders themselves, and the Taxes, tax codes, etc.
You can do all of those changes in the Excel file. Or… in the Magento system, and then re-export that data to CSV files again, and repeat the process until you are satisfied with what you are about to import.
If you do wish to send out a receipt to the customer for some orders, then you can update the column “Send Receipt” to the value TRUE for your orders.
7. Disable notifications from Admin
If you don’t want to receive e-mail notifications for creating each Order, go to Admin -> Settings -> Notifications -> Staff Notifications, and disable the “New order“ notifications.
8. Import the ready Excel file using the Matrixify app.
Also, you might want to try importing just 1-2 Orders from that file first, to look how they look in Shopify.
Once you feel ready, grab the prepared Excel file and import that by uploading again using the same Matrixify app import section.
When importing, be patient – there is a lot of stuff going on under the hood to construct your Orders, so it might take a while to complete, but it should be worth the wait.
Good to know
- It is also possible to Migrate Orders from a specific time interval! You can filter only the
sales_orderorsales_flat_ordertable depending on your Magento version (and keep the other CSV files as full data). You can keep all the other tables unfiltered, because we will collect data from them based on the mainsales_order.csv/sales_flat_order.csvfile.You can do this using the SQL query:
If using Magento v2.x –SELECT * FROM sales_order WHERE created_at >= '2020-01-01;
If using Magento v1.x –SELECT * FROM sales_flat_order WHERE created_at >= '2020-01-01;And export it to thesales_order.csv/sales_flat_order.csvor file. - If you feel like a kamikaze, you can skip the whole “Dry run” part, and just import the Orders zip file directly, without looking at the Matrixify Orders format file.
- Read about all the fields you see in the Orders Matrixify template Excel file.
- If you don’t want to migrate the History comments, then don’t include the file “sales_order_status_history” in the upload file.
- If you see that some Orders import is showing as Failed, don’t worry – you can downlaod the “Import Results” file of that import, and at the last columns you will see the comments for why those failed. Then you can resolve those issues, and re-import just the Failed rows.
- If the import speed is important to you, the higher plan you upgrade to, the quicker the import will be, as for example, Enterprise Plan essentially spins off 10 parallel import processes, achieving the effect as if 10 apps would import your data in parallel.
- If you have the error like this: “Missing or stray quote in line …” – please, make sure that your CSV files are prepared according to the requirements stated on this tutorial.
- Learn more about migrations to Shopify and what other types of data Matrixify can migrate to Shopify in bulk.
- If you feel stuck with something, our Support is willing to help you – just reach out to us.


