

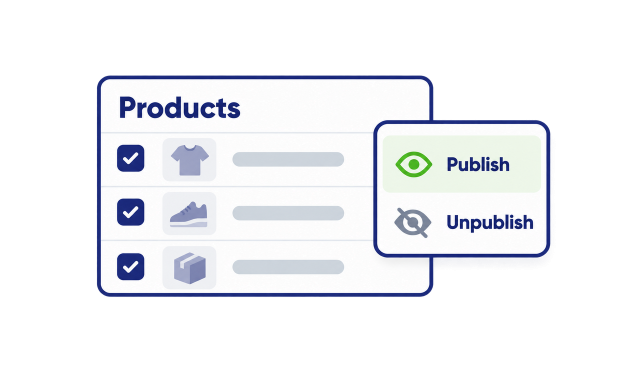
A Sales Channel is a place where you sell your Shopify Products: Online Store, Point of Sale, Facebook, Google & YouTube, and others. Each Product is published on its own set of channels, and in the Shopify Admin you change them Product by Product.
In the Matrixify app, you can quickly Export where your Products are published, change it in Excel and Import the file back to publish or unpublish Products on any Sales Channel in bulk.
Steps in short
- Export Products with ID, Handle and the Published and Published At columns of the Sales Channels you want to change.
- In the exported file set TRUE to publish or FALSE to unpublish each Product on each Sales Channel.
- Import the file in the Matrixify app to update the Sales Channels of all Products in the file.
- Check the Publishing section of the Products in the Shopify Admin.
1. Export Products with Sales Channels columns
In the Matrixify app Home create a new Export by using the New Export button. Select the Matrixify: Excel format and select to Export the Products sheet.
Click on the Products sheet card to expand it and select only these columns:
- From
Basic Columnscolumn group selectIDandHandle - From
Sales Channelscolumn group selectPublished: ...andPublished At: ...
By default, the Matrixify app will Export columns for all Sales Channels in your store. To get columns only for the channels you want to change, click the Select ... button under the Sales Channels column group, check the channels in the list, for example Online Store and Facebook & Instagram, and press Add.
The file will then have only the Published: ... and Published At: ... columns of Online Store and Facebook & Instagram sales channels.
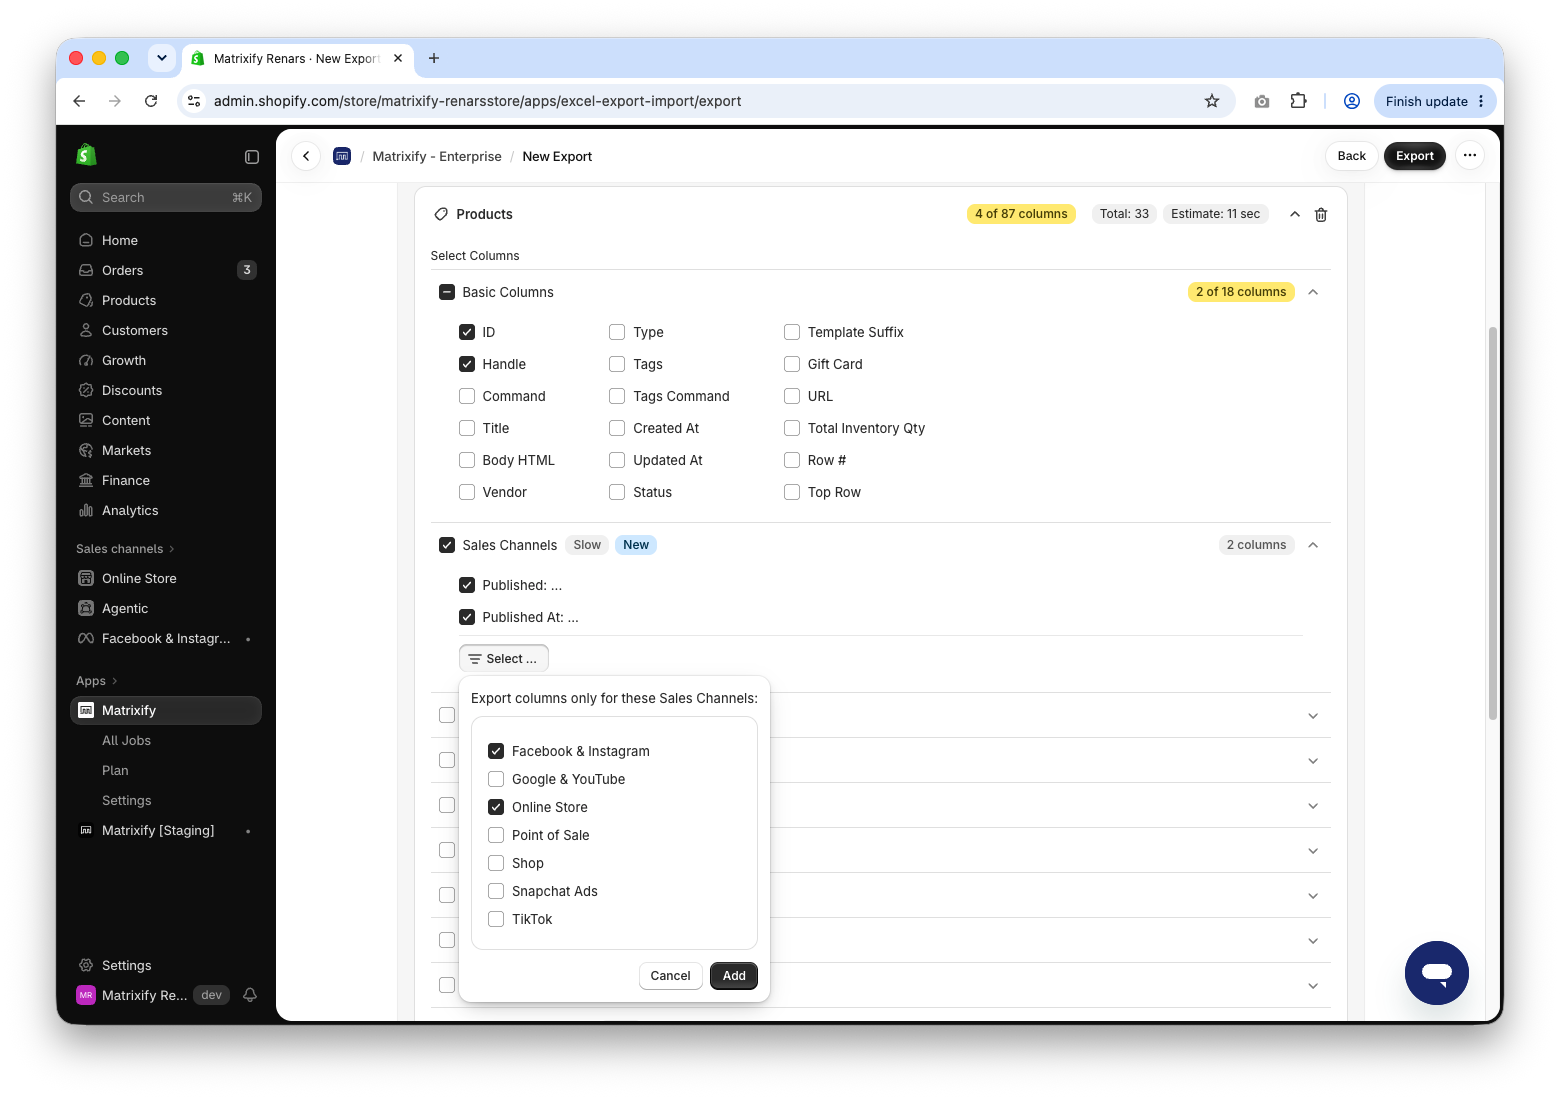
Press Export, wait for the Export to finish and download the exported file.
2. Publish or unpublish Products on Sales Channels in Excel
Open the exported file. Each Sales Channel has two columns:
Published: ...shows whether the Product is published on that channel,Published At: ...shows since when it is published there, and it is empty where the Product is not published.
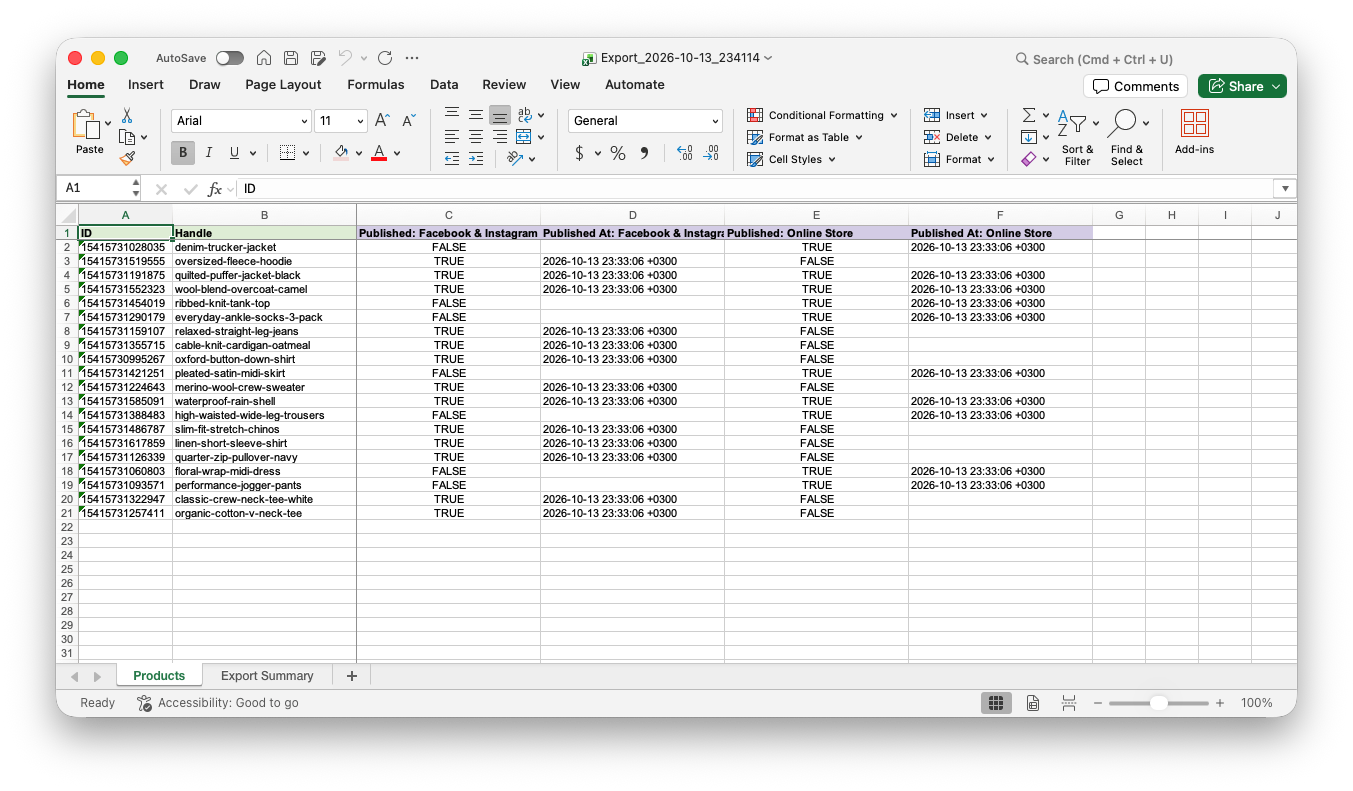
Change the Published column values you need:
TRUE– publishes the Product on that Sales Channel.FALSE– unpublishes the Product from that Sales Channel. The Product is not deleted and stays on its other channels.- Empty cell – nothing changes on that channel.
To make all Products available on a Sales Channel, set its whole column to TRUE.
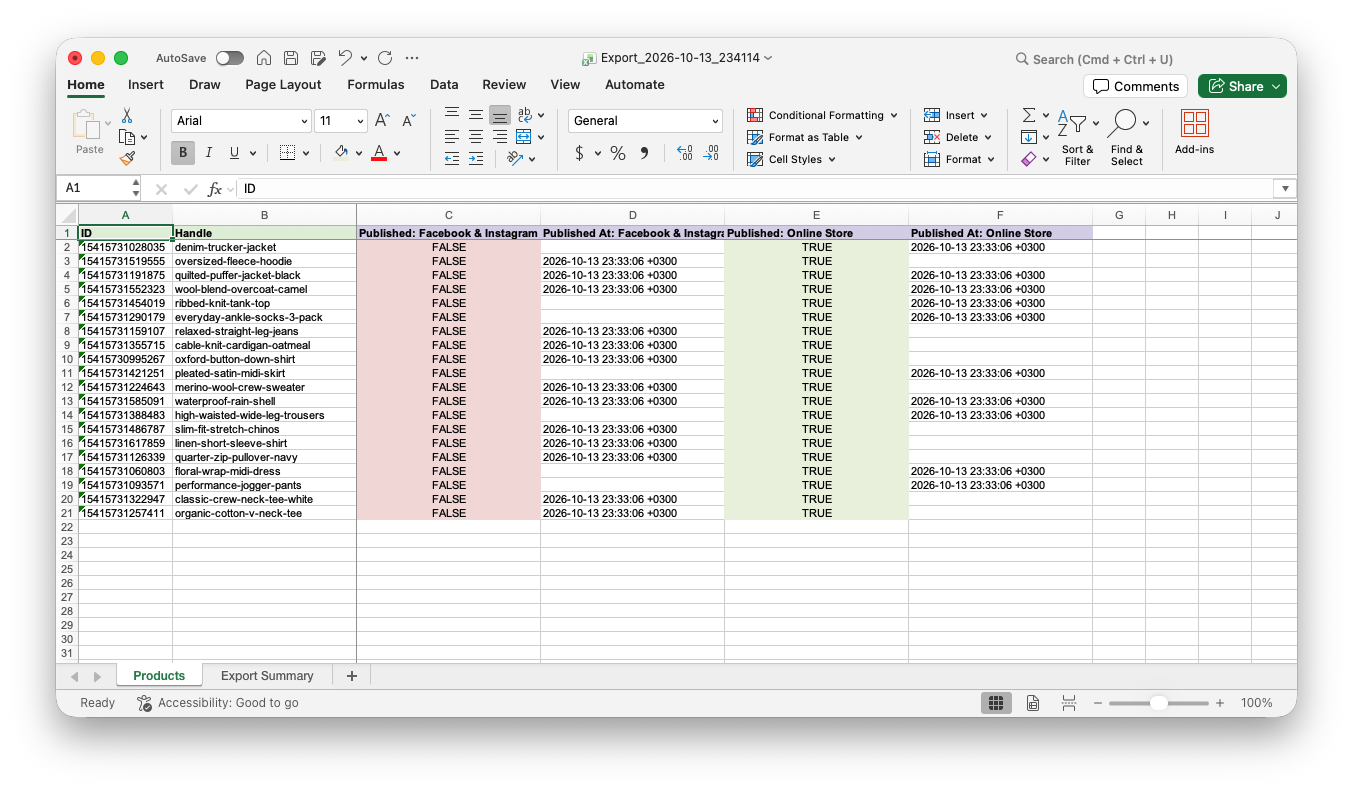
You can keep the Published At: ... dates in the file as they are. A Product you publish with an empty date gets the time of the Import as its publish date, and if you unpublish a product, the date value in Published At: ... for that channel will be ignored.
To publish on a later date, use the Published At: ... column with a future date – see how to publish Shopify Products at a future date in bulk.
3. Import Products to update Sales Channels
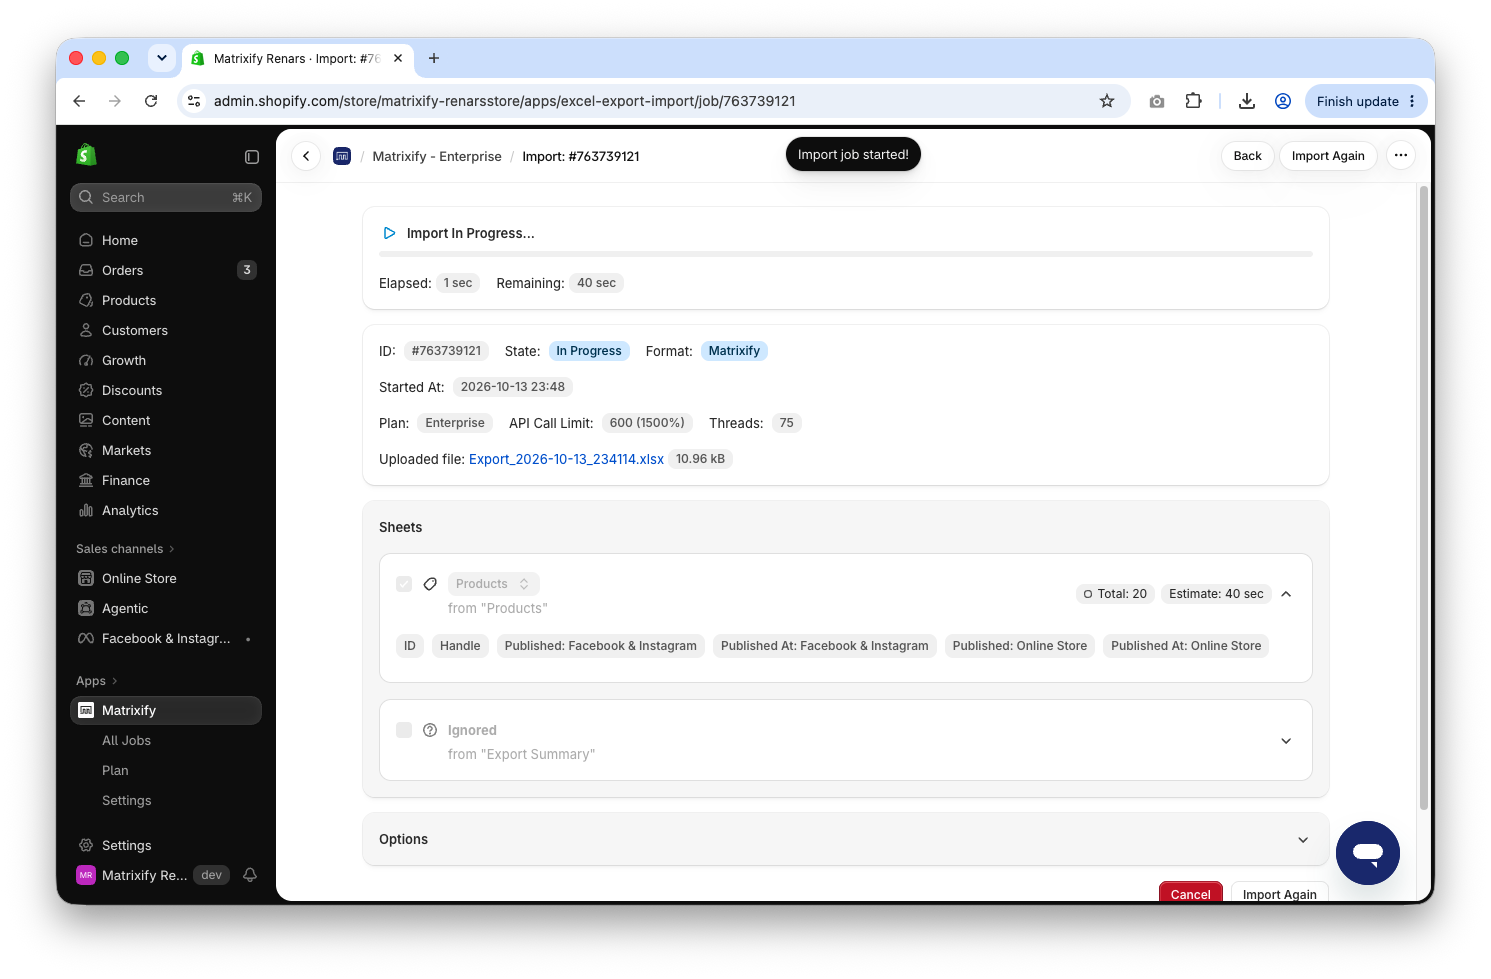
In the Matrixify app Home page, upload the file in the Import section. Once the file is analyzed, make sure that the app detects the sheet as Products and the Product count looks correct. Default Import Options will work fine.
If a column name does not match any Sales Channel of your store, the app shows a warning and skips that column.
Press Import to start the Import.
4. Check Product Sales Channels in Shopify Admin
When the Import is finished, the job status will be “Finished”. If some Products failed, download the Import Results file and check the Import Comment column – it tells why.
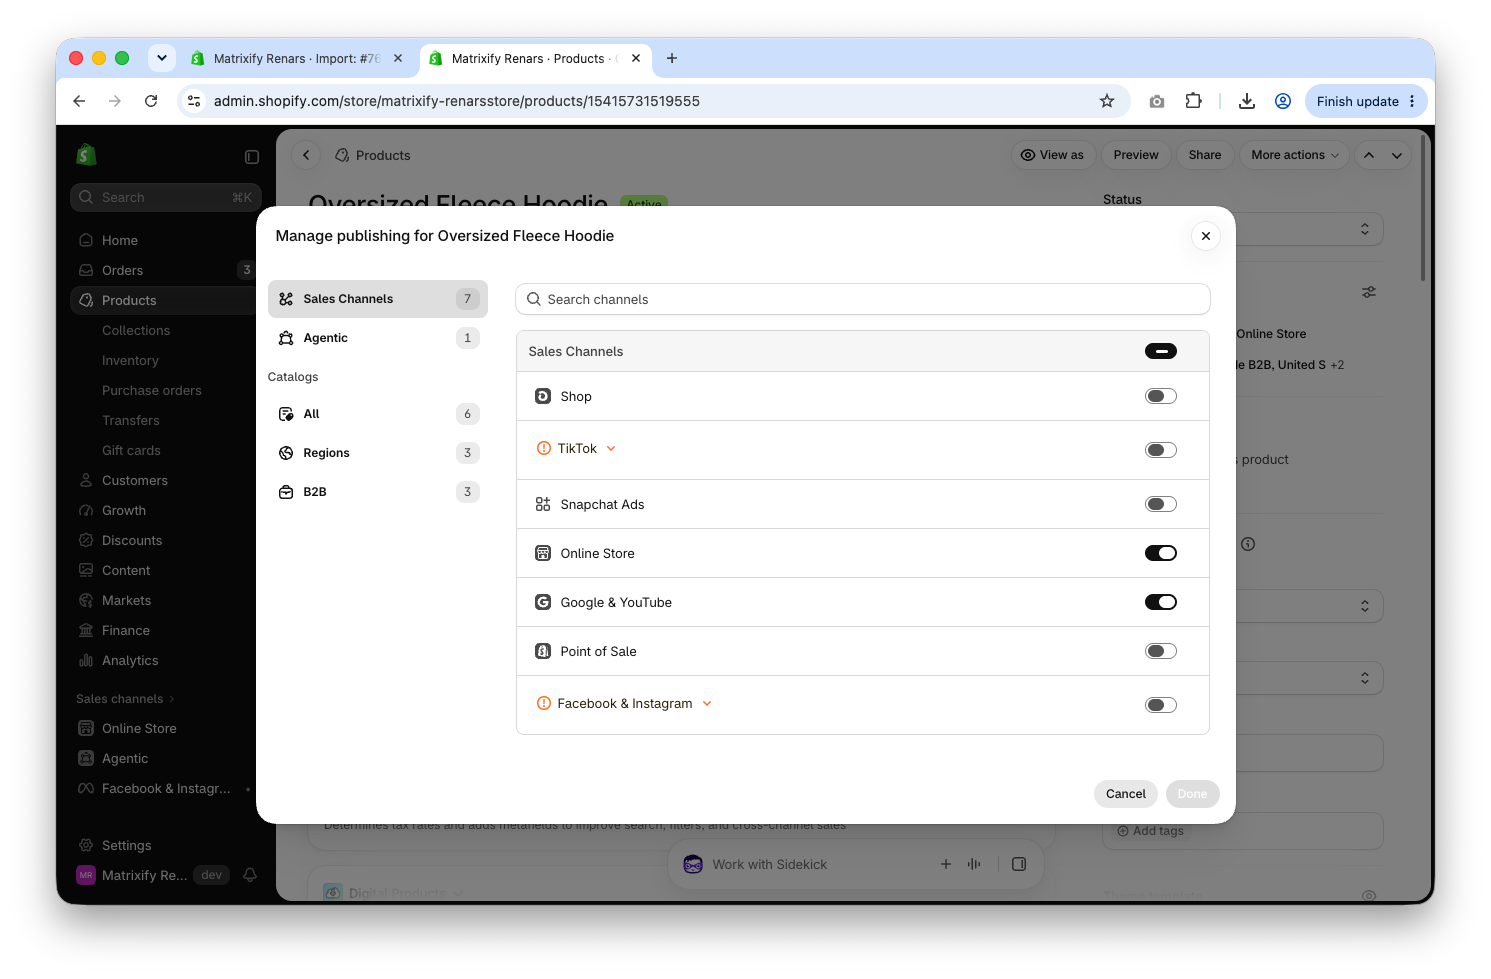
In the Shopify Admin open one of the Products. The Publishing section shows the Sales Channels where the Product is now published.
Good to know
- Some channels, like Google & YouTube, auto-publish every new Product by themselves. To keep new Products off such a channel when creating the Products with an import, set that Sales Channels Published value to
FALSE. - Older files with
PublishedandPublished Scopecolumns still work for the Online Store and Point of Sale. - To hide only one Variant on a channel and keep the rest of the Product there, use the
Variant Published: ...columns. - Read more about your stores Sales Channels in Shopify Help Center.
- You can set the Publishing also for Draft and Archived Products, and they will show on those channels as soon as you change their Status to Active.
- You can use the file created in this tutorial to schedule an Import for any sales channel at a future date, even those that Shopify does not allow future publishing. When uploading file to the app (step 3) you can open Options section to schedule the import to run at a future date.
What to do next?
- Change Draft, Active and Archived Products in bulk – how to bulk update Shopify Product Status.
- Hide Products that have no stock – bulk hide sold out Products from your Shopify store.
- See all columns you can Export and Import in the Products documentation.
- Contact Matrixify support if you have questions.


