

Importing from Google Sheets is a bit different than importing from a file that is saved on Google Drive, that’s why we will look at it as a separate tutorial.
If you want to import Excel or CSV files that are stored on Google Drive, read this tutorial: Schedule import to Shopify from Google Drive.
Steps to import file from Google Sheets to Shopify
- Prepare your Google Sheet on your Google Docs account.
- Make that Google Sheet viewable from a public link.
- Paste your Google Sheet link in the app.
- Schedule the regular import from that Google Sheet URL.
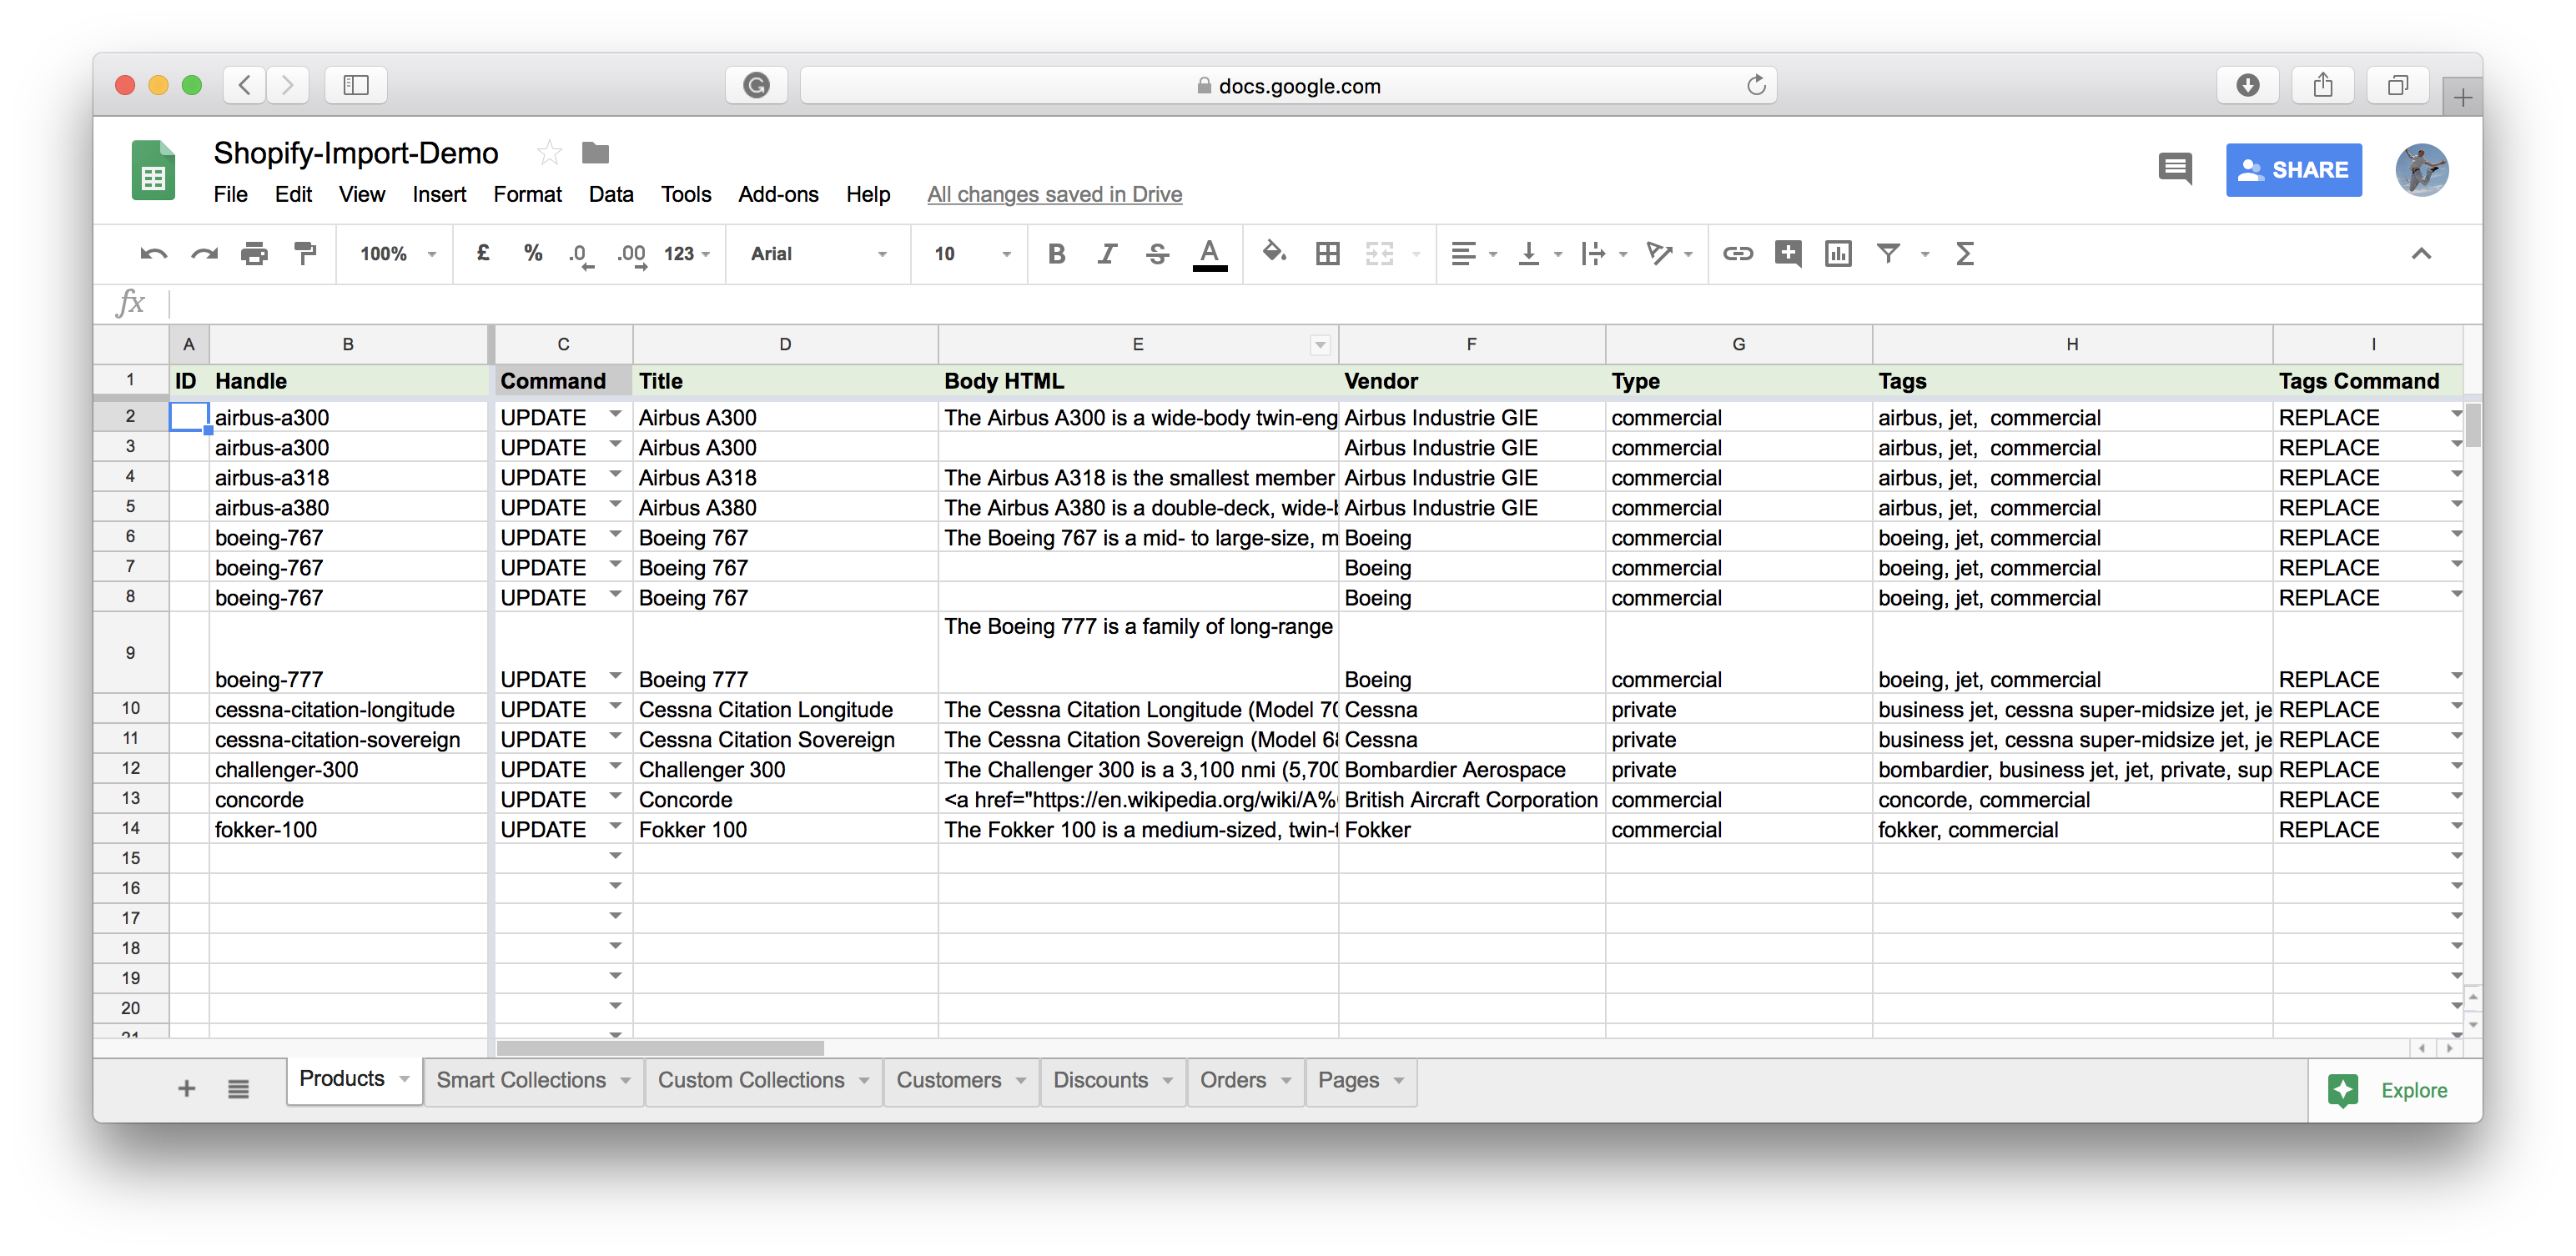
1. Prepare your Google Sheet on your Google Docs account
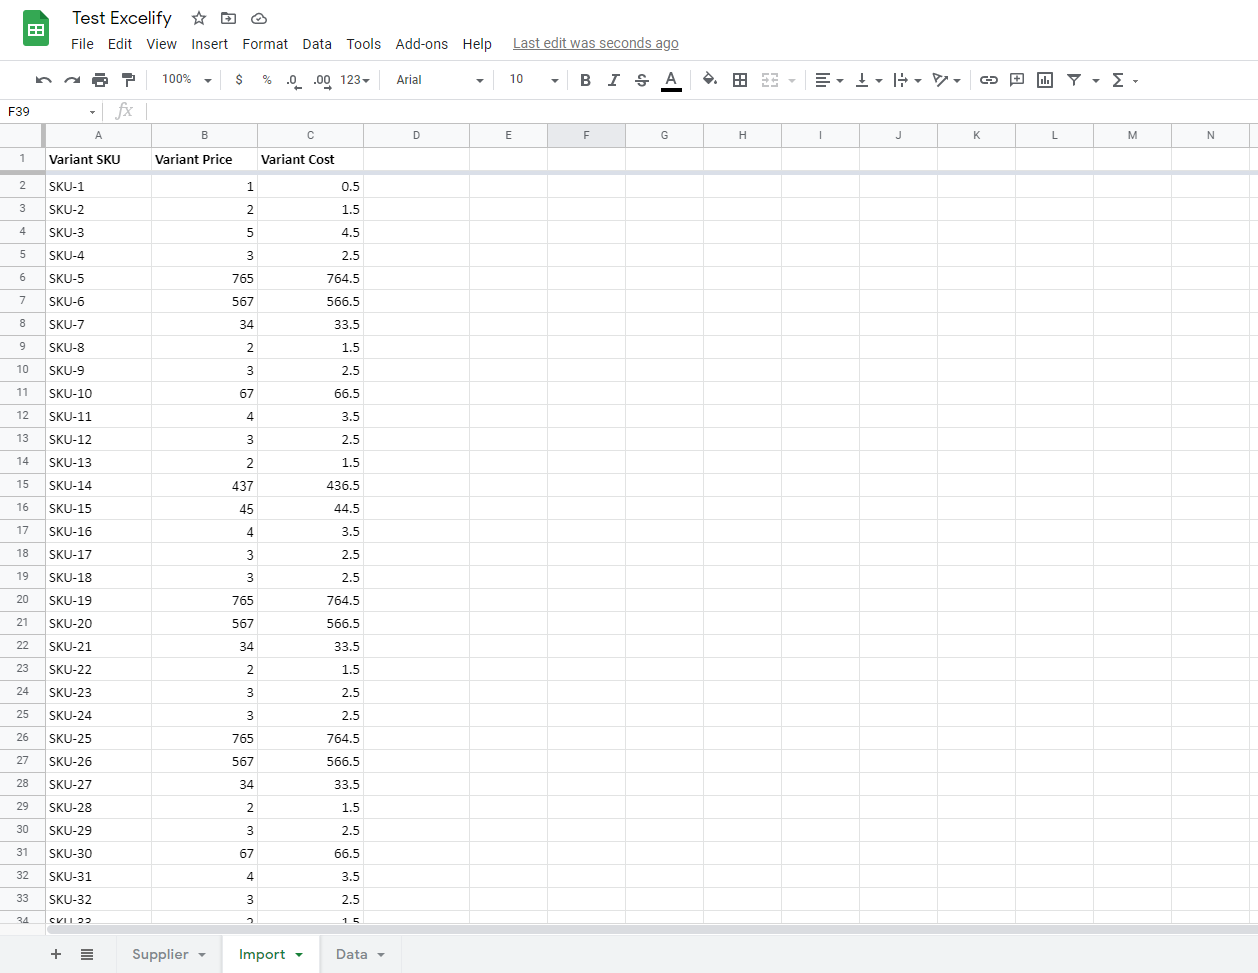
Your Google Sheets document needs to be prepared in the same manner as the “Matrixify: Excel” file – with the sheet names, and columns that are understandable by “Bulk Import Export Update with Excel” app.
Basically, it will look like this:
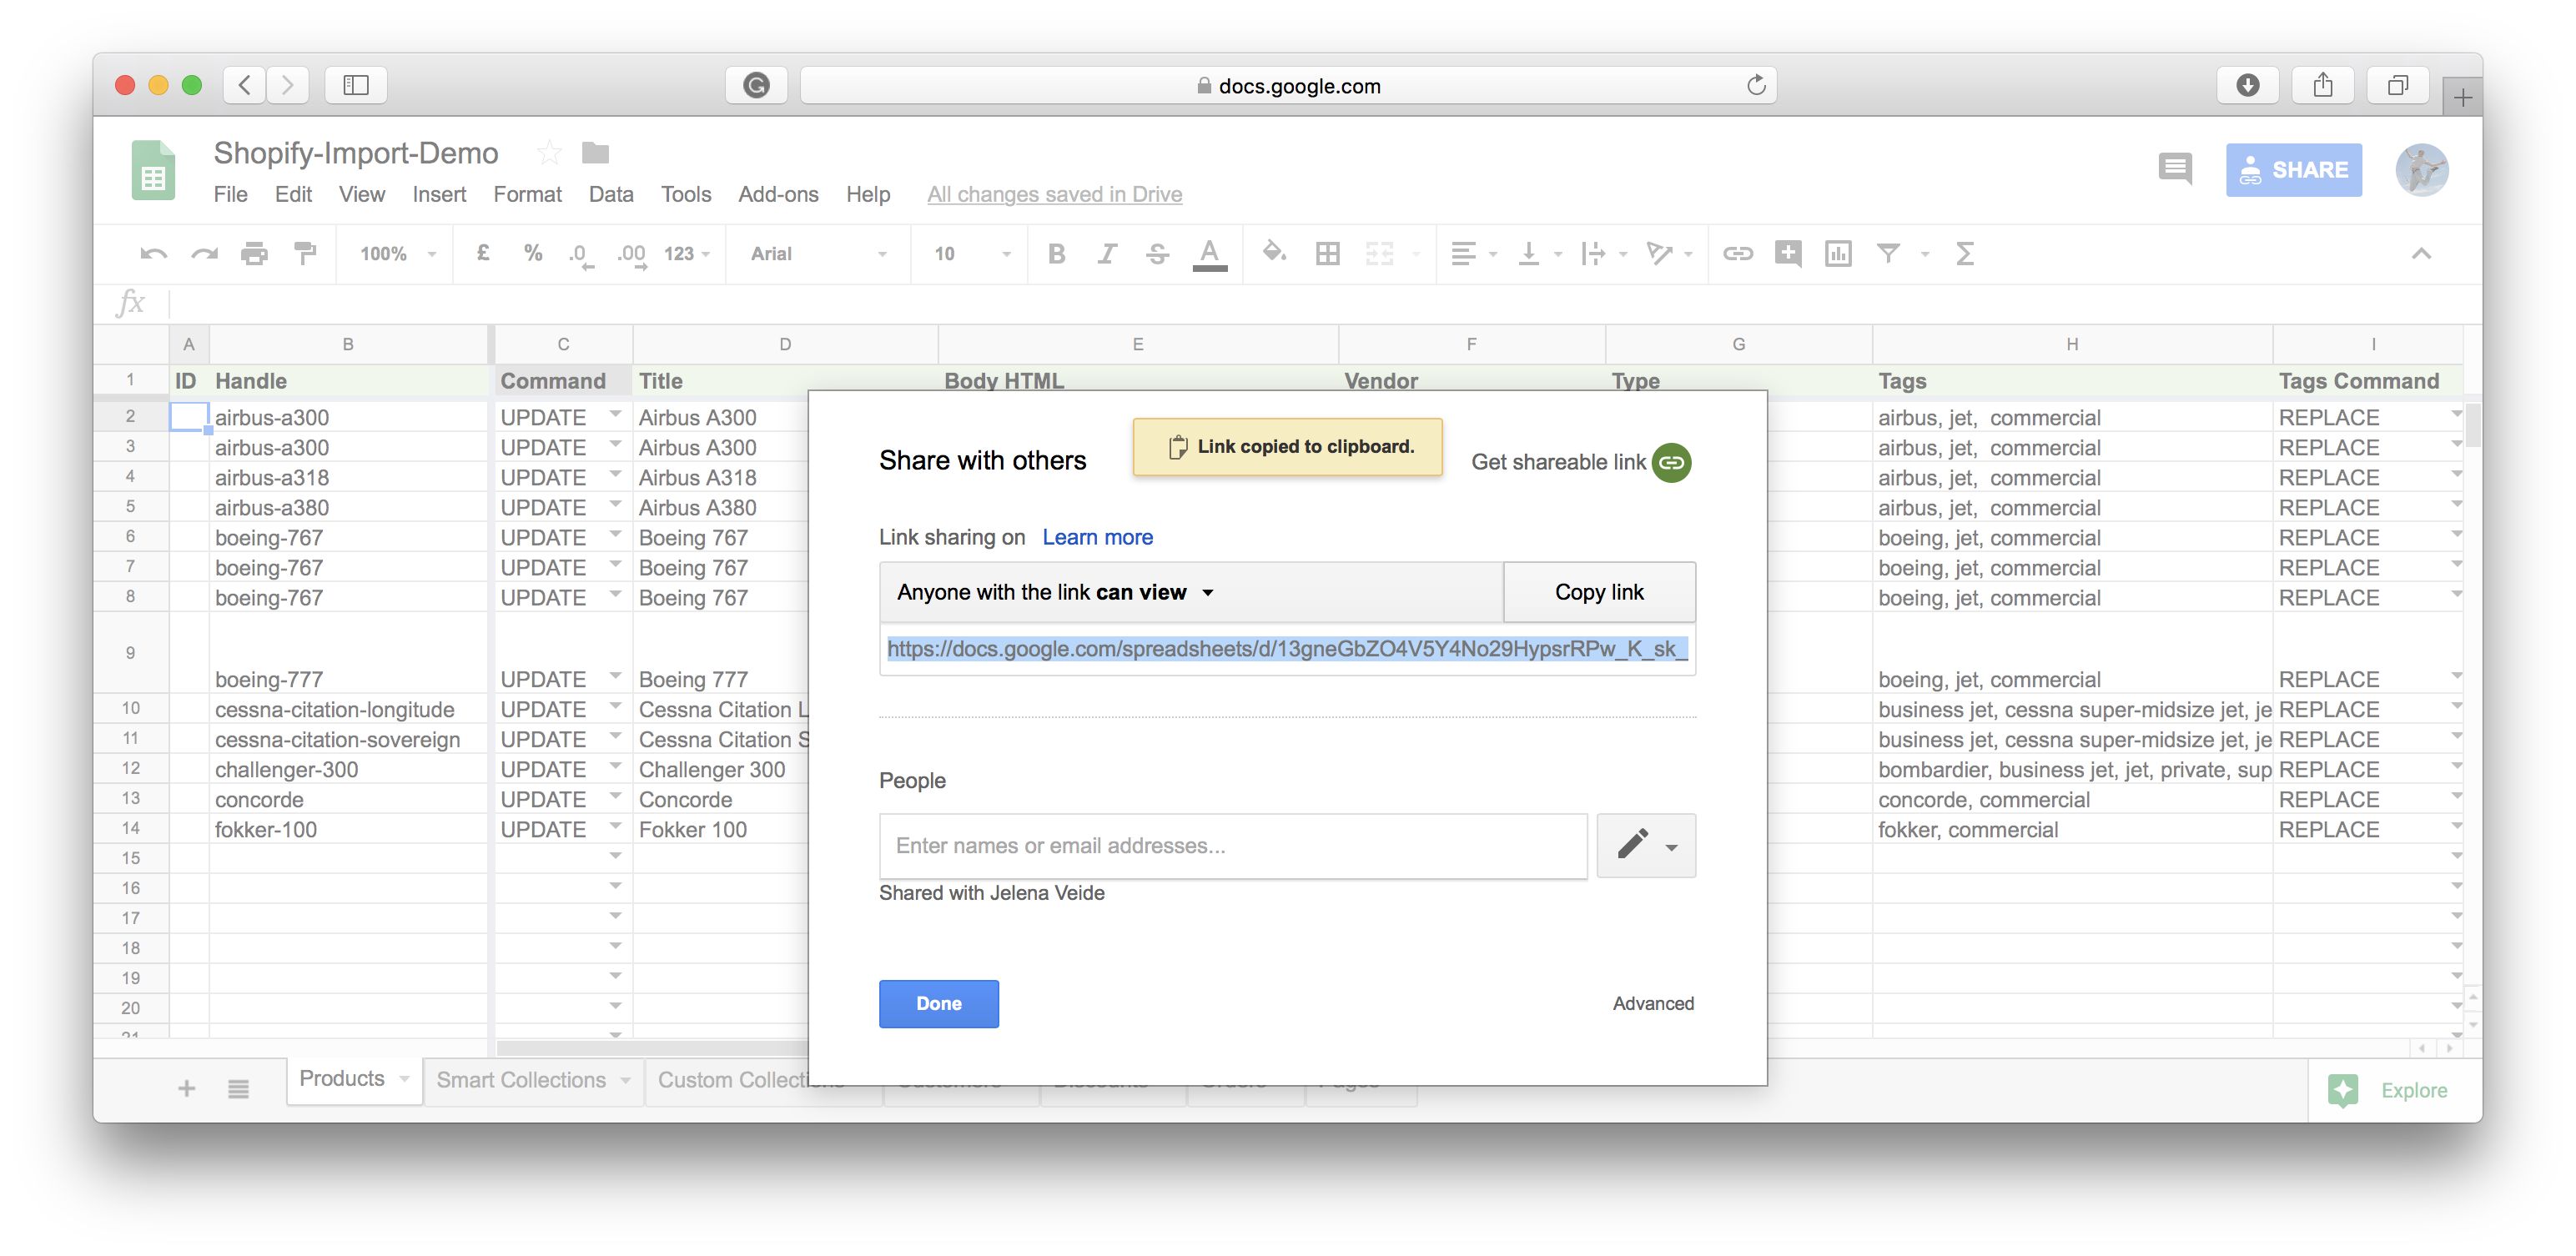
2. Make that Google Sheet viewable from a public link
Press the “SHARE” button and make the publicly shareable link to this Sheet.
You just need to give it permission “Anyone with the link can view” – no need for a write permission.
Copy that link.
If using view permissions then in the file Share pop-up, click on the cogwheel icon for Settings and make sure that you have enabled the setting – Viewers and commenters can see the option to download, print, and copy.
It should be enabled by default but if it is not then the app will not be able to download the file and Google Sheets will return 400 Bad Request error.
3. Paste your Google Sheet link in the app
Open the “Bulk Import Export Update with Excel” app in your Shopify store, install it if you haven’t already.
Scroll down to the “Import” section, and paste the URL there.
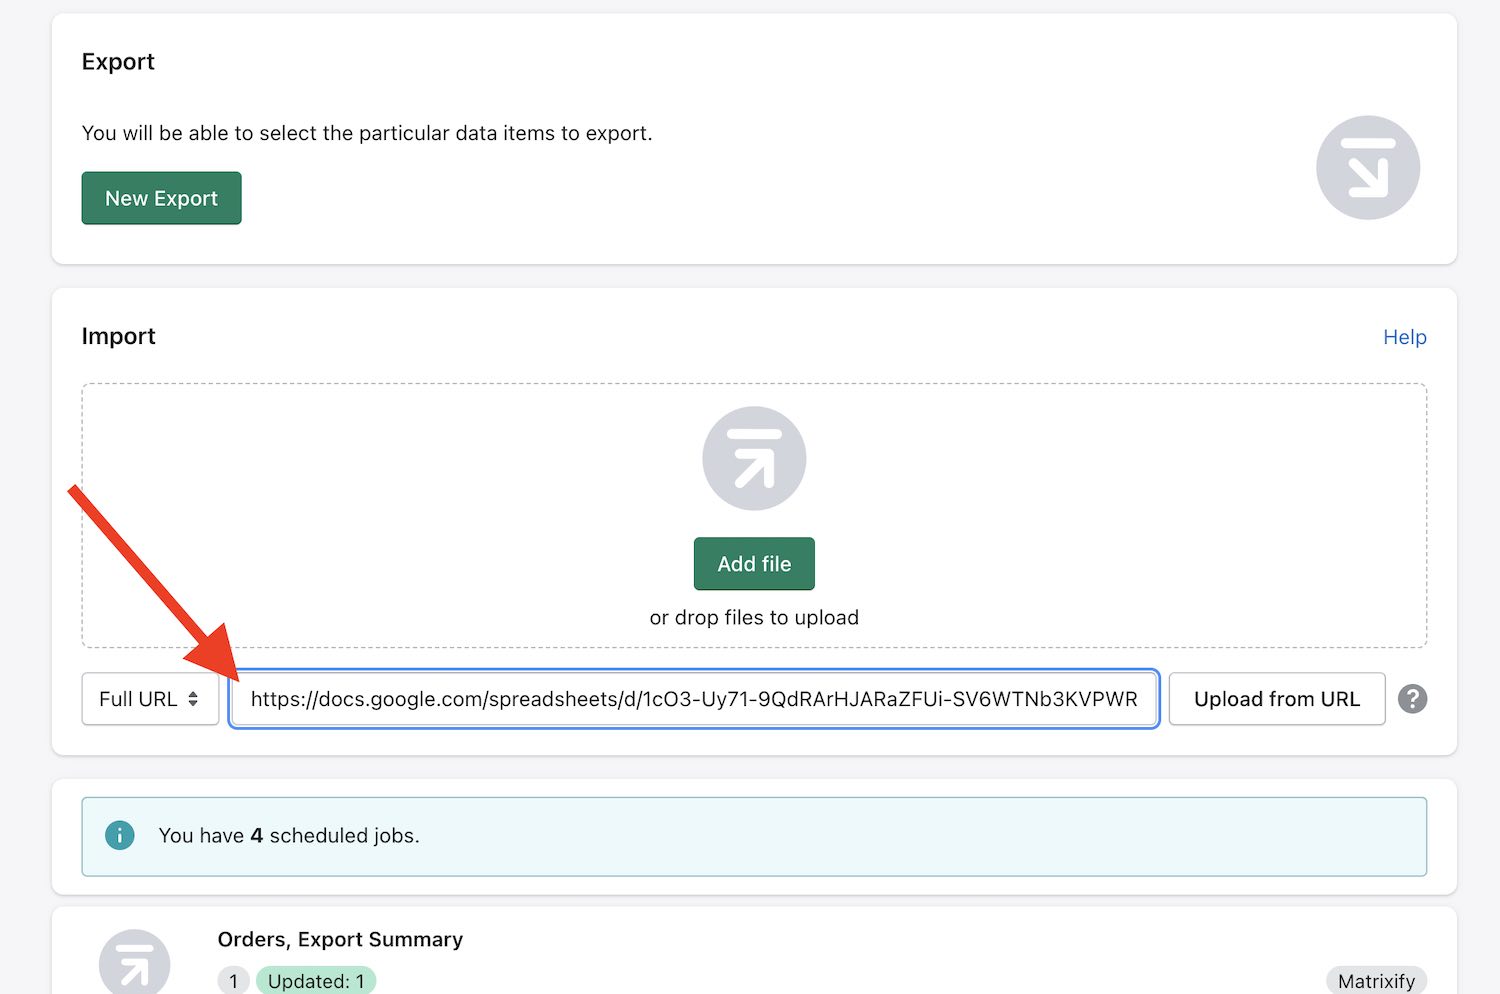
Then press the blue “Upload from URL” button – so that the app can upload the file and analyze it.
Don’t worry – it will not import that just yet, you will need to set additional options first.
4. Schedule the regular import from that Google Sheet URL
After the app has finished uploading and analyzing the file, you will see the “Options” button there.
Press that button and set up the import options – the scheduled time for your next import in your Shopify store time zone.
And repeating time interval.
Your eventual options will look like this:
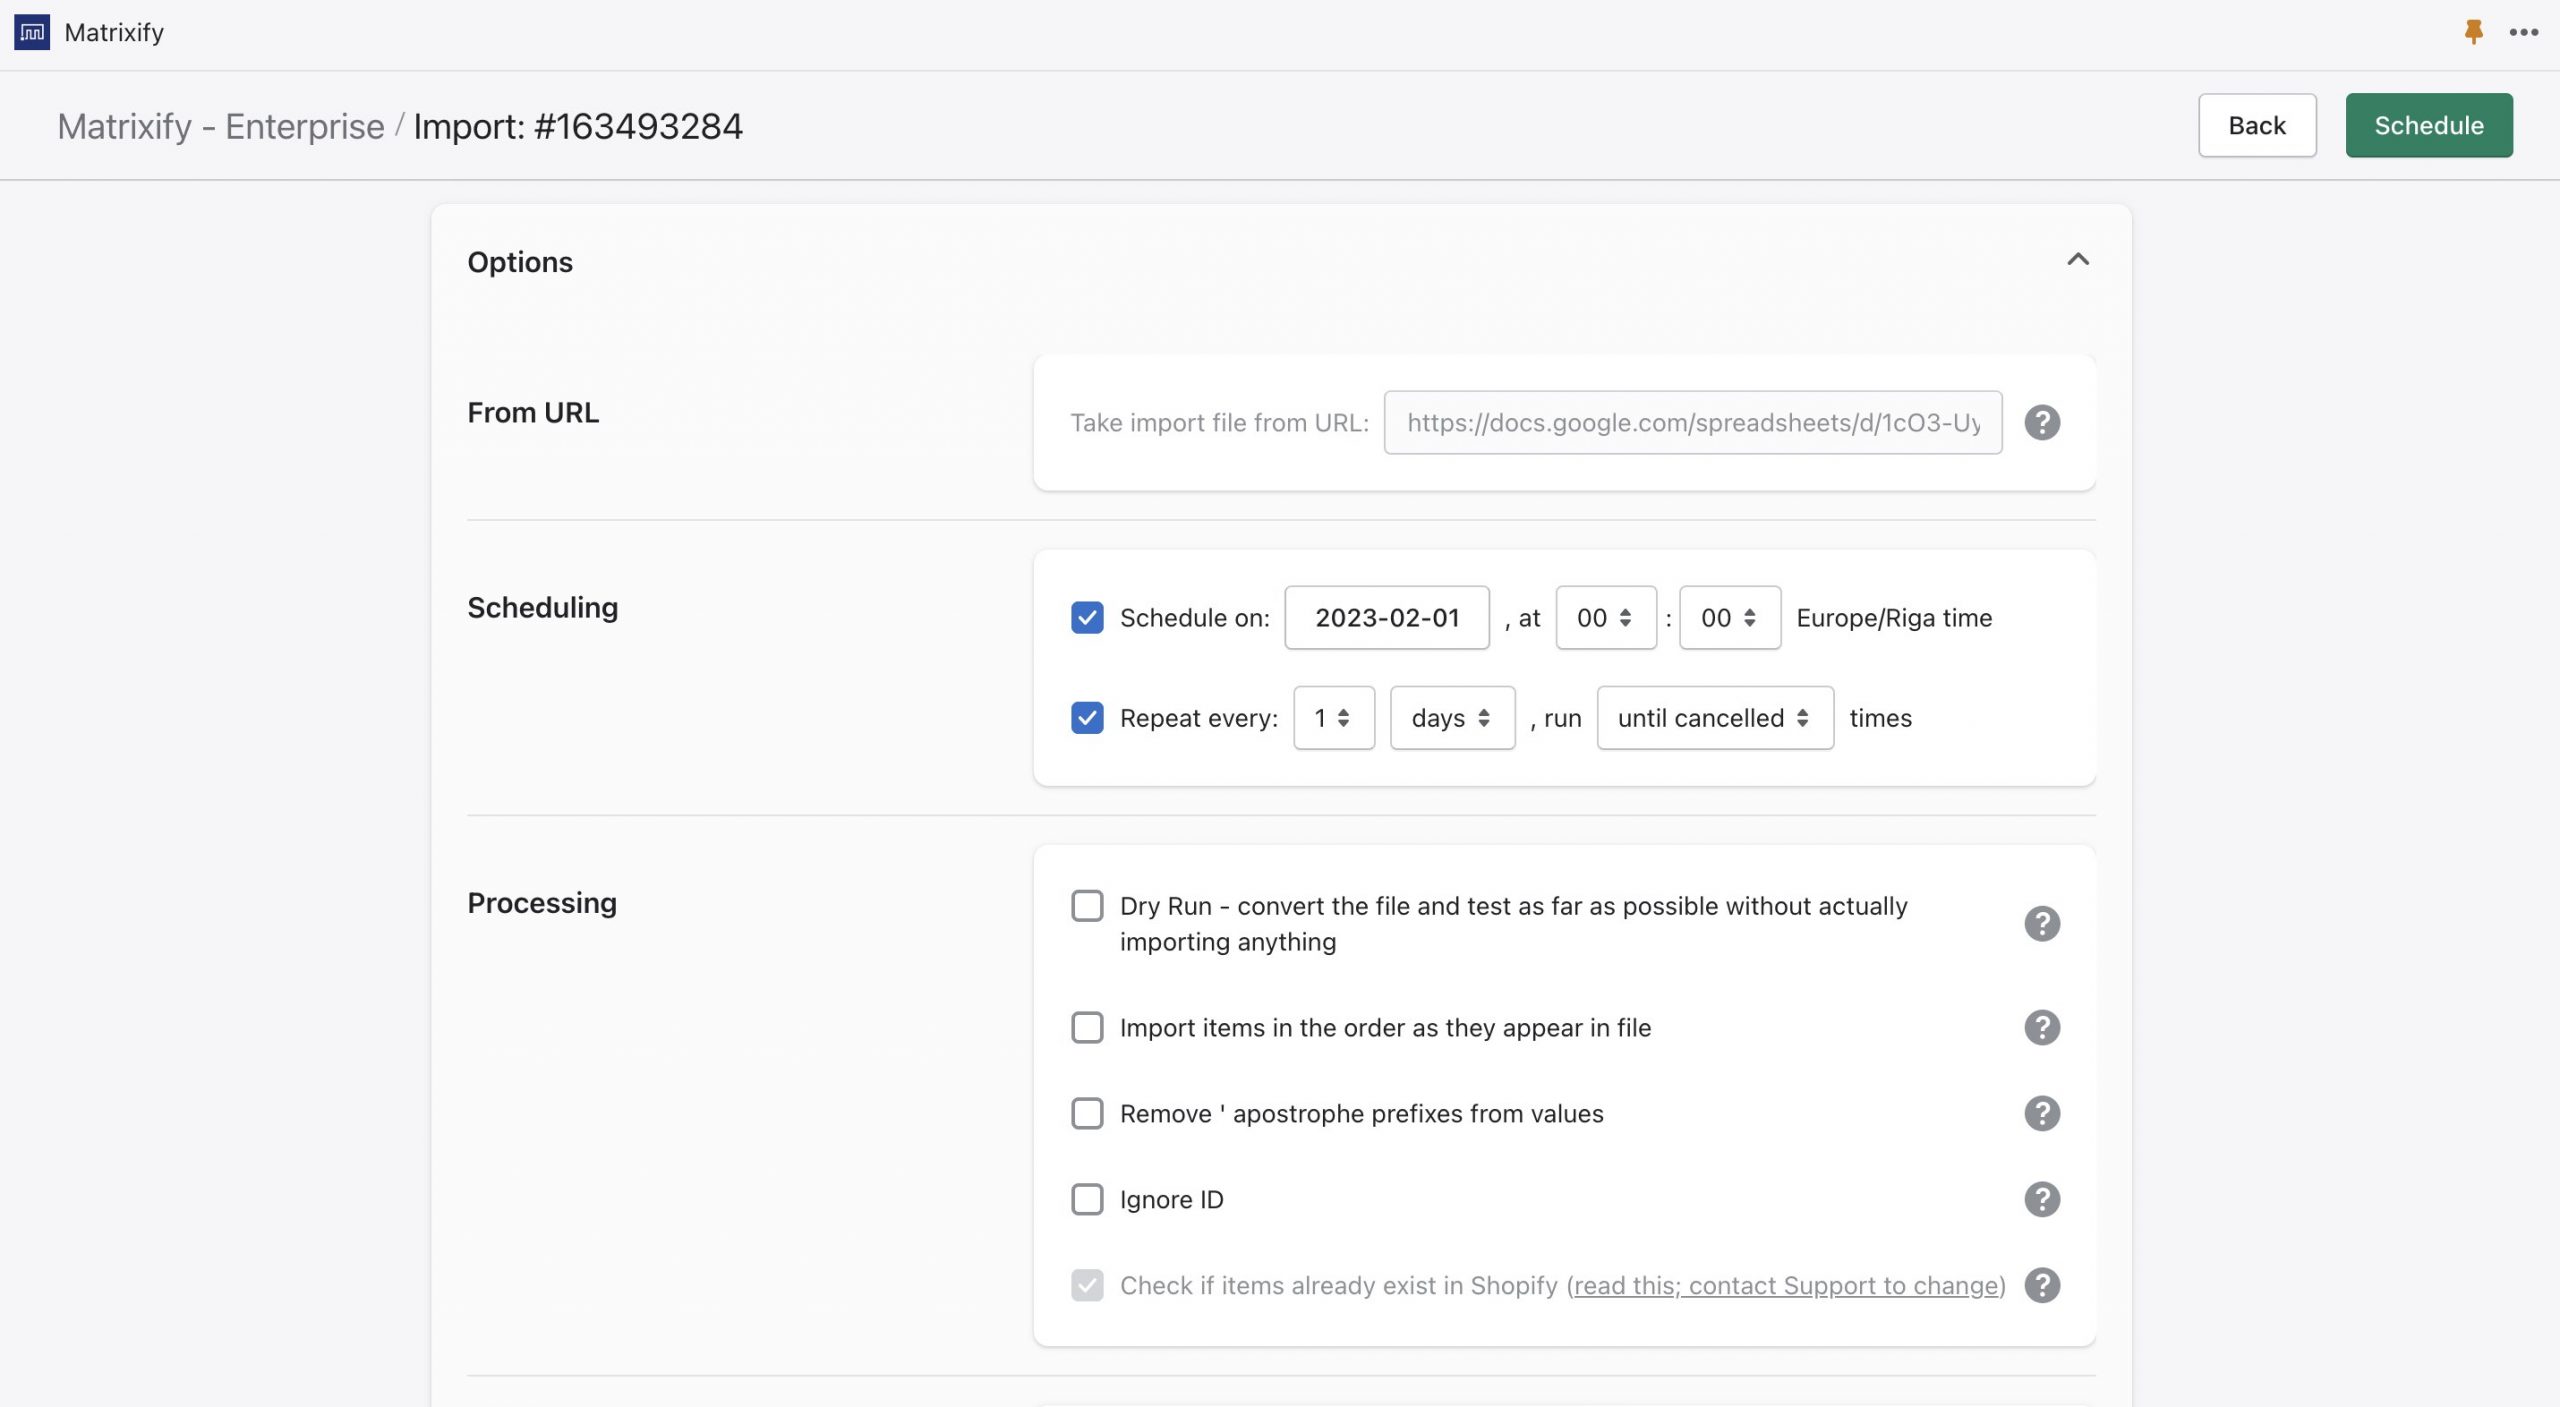
Notice the “Take import file from URL” – that is pointing to your Google Sheet. The app will download the fresh file each time it repeats the import.
Now, press the “Schedule” button.
It will schedule the import and if the date and time for the first import have already passed, then the app will start the first import shortly after you schedule it.
Importing from Google Sheets as CSV file
By default, copying the shared Google Sheets link it will import as excel XLSX file, which is usually preferred.
But in some unique automation cases, you might need to import from Google Sheets as CSV file.
Why import from Google Sheets as CSV?
The main reason would be if you need for Matrixify Import Results file to be returned as a CSV file.
Importing CSV file in the app will return the Results file also as CSV file.
Together with the ability to set the custom fixed file name for the Matrixify Import Results file, you can then use the fixed link to the CSV results file to again automatically import into another Google Sheets file.
How to import from Google Sheets as a CSV file?
To import a specific sheet/tab as a CSV file from Google Sheets, you will need to first construct the correct URL.
Take your shared Google Sheets link and replace the last part “/edit?usp=sharing” with “/gviz/tq?tqx=out:csv;outFileName:data&sheet=”
After the “sheet=” you need to enter the sheet/tab name that you wish to import.
For example:
The sheet URL is:
https://docs.google.com/spreadsheets/d/1LSahu1QAIJVsRin-AuPOIcCvThGn_OJ1mqBhy01xiAB/edit?usp=sharing
And sheet/tab name in this example to import is “Import”.
Construct the following URL:
https://docs.google.com/spreadsheets/d/1LSahu1QAIJVsRin-AuPOIcCvThGn_OJ1mqBhy01xiAB/gviz/tq?tqx=out:csv;outFileName:data&sheet=Import
Tell the app what you are importing!
By default, the app will import the file as Products. If you need to import other entity than Products, you can specify that by changing the returned file name.
In your link, you can do so by changing the outFileName parameters value. For example, if you wish to import Orders then the file should be “orders.csv” thus outFileName parameter would have value orders and the URL would look like this:
https://docs.google.com/spreadsheets/d/1LSahu1QAIJVsRin-AuPOIcCvThGn_OJ1mqBhy01xiAB/gviz/tq?tqx=out:csv;outFileName:orders&sheet=Import
You can use this link in the Matrixify app Import section to upload a specific Google Sheets tab as a CSV file!
Good to know
- You can see the progress of all your scheduled imports and exports in the “All Jobs” page loaced on left-side navigation menu. You can also cancel any of those jobs from there and download the import results file from there, too.
- The scheduled time is in your Shopify store time zone.
- You can also schedule import files to Shopify store from FTP, Dropbox or Google Drive the same way.
- You can also import files from Google Sheet manually – by just pasting that Google Sheet link.
- Import, not just Products data – import and update any of supported by Matrixify formats.


