

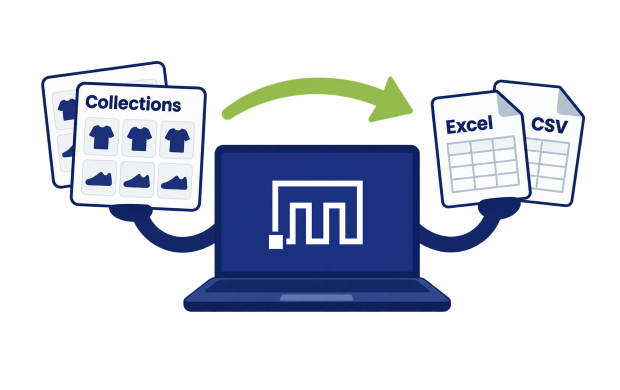
Shopify Admin has no export for Collections. The Products CSV export does not include Collections either, so there is no built-in way to get a list of your Collections with their rules, Products and images into a spreadsheet. With the Matrixify app you can export all Collections – manual, automated and mixed – to an Excel or CSV file.
Here we will export the Collections sheet, pick the column groups that fit the task, and look at how the exported file is structured.
Steps in short
- In the Matrixify app create a new Export with Matrixify: Excel format and the Collections sheet.
- Select the column groups you need – Basic Columns for a plain list, Sources & Conditions and Linked Products for rules and Products.
- If you only need some Collections, add a filter such as Title or Products Count.
- Press Export and download the file with Download Exported File.
- Open the file and use the Top Row column to see one row per Collection.
1. Create a new Collections export
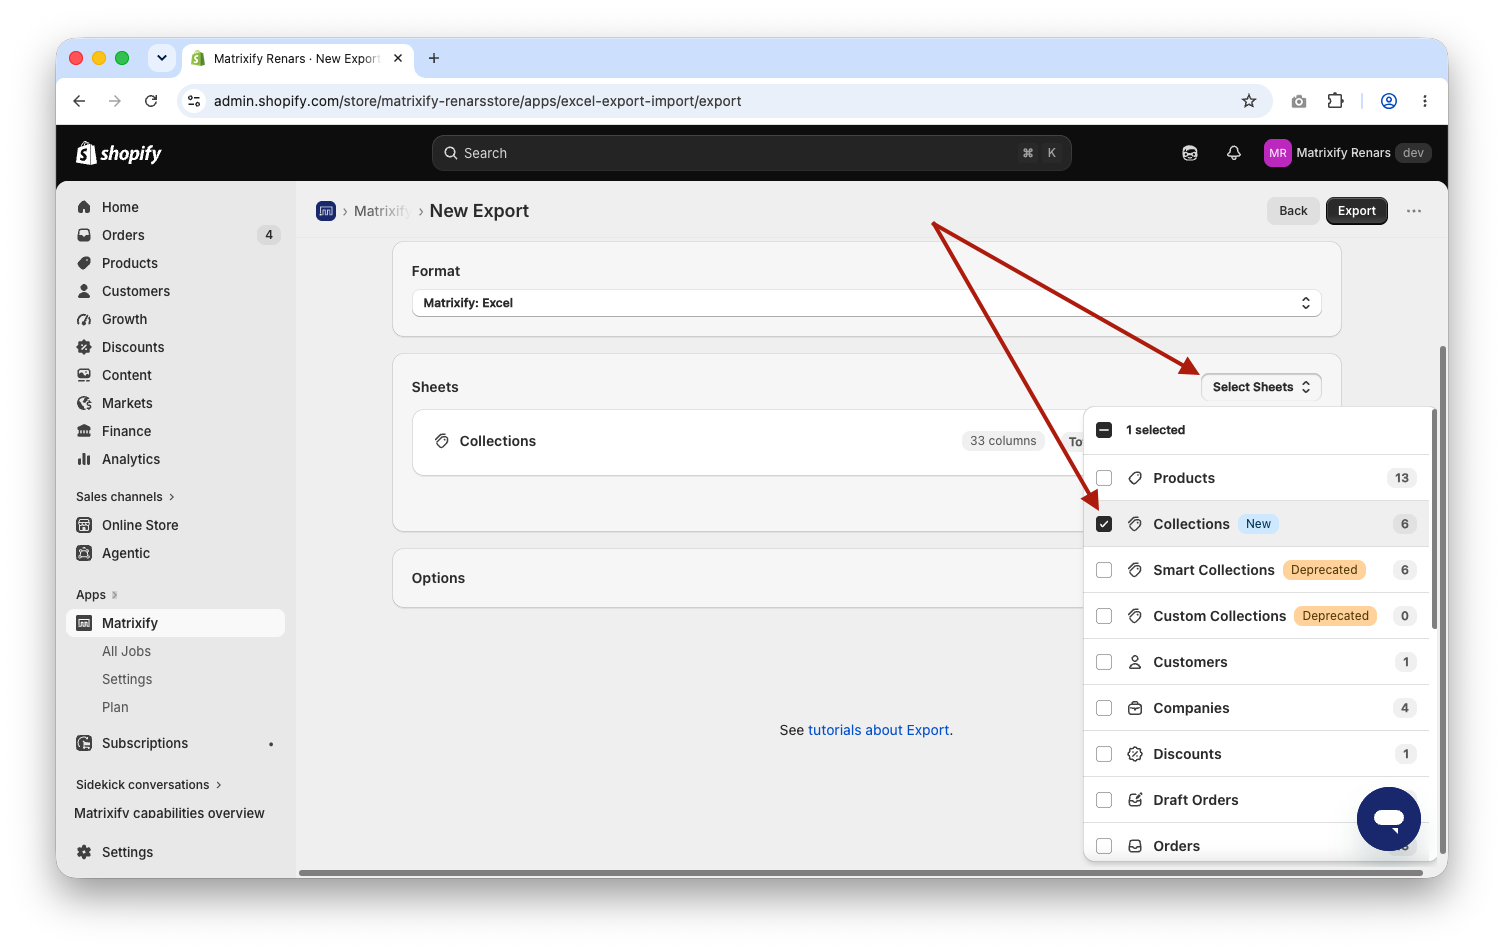
In the Matrixify app Home create a new Export by using the New Export button.
- In the
Formatsection selectMatrixify: Excel. If you have tens of thousands of Collections with many Products in each, selectMatrixify: CSV– it has no row limit. - Press
Select Sheetsand selectCollections.
Shopify no longer separates manual and automated Collections. One Collection can have automated rules and manually picked Products at the same time. The Collections sheet exports all of them.
2. Select columns to export
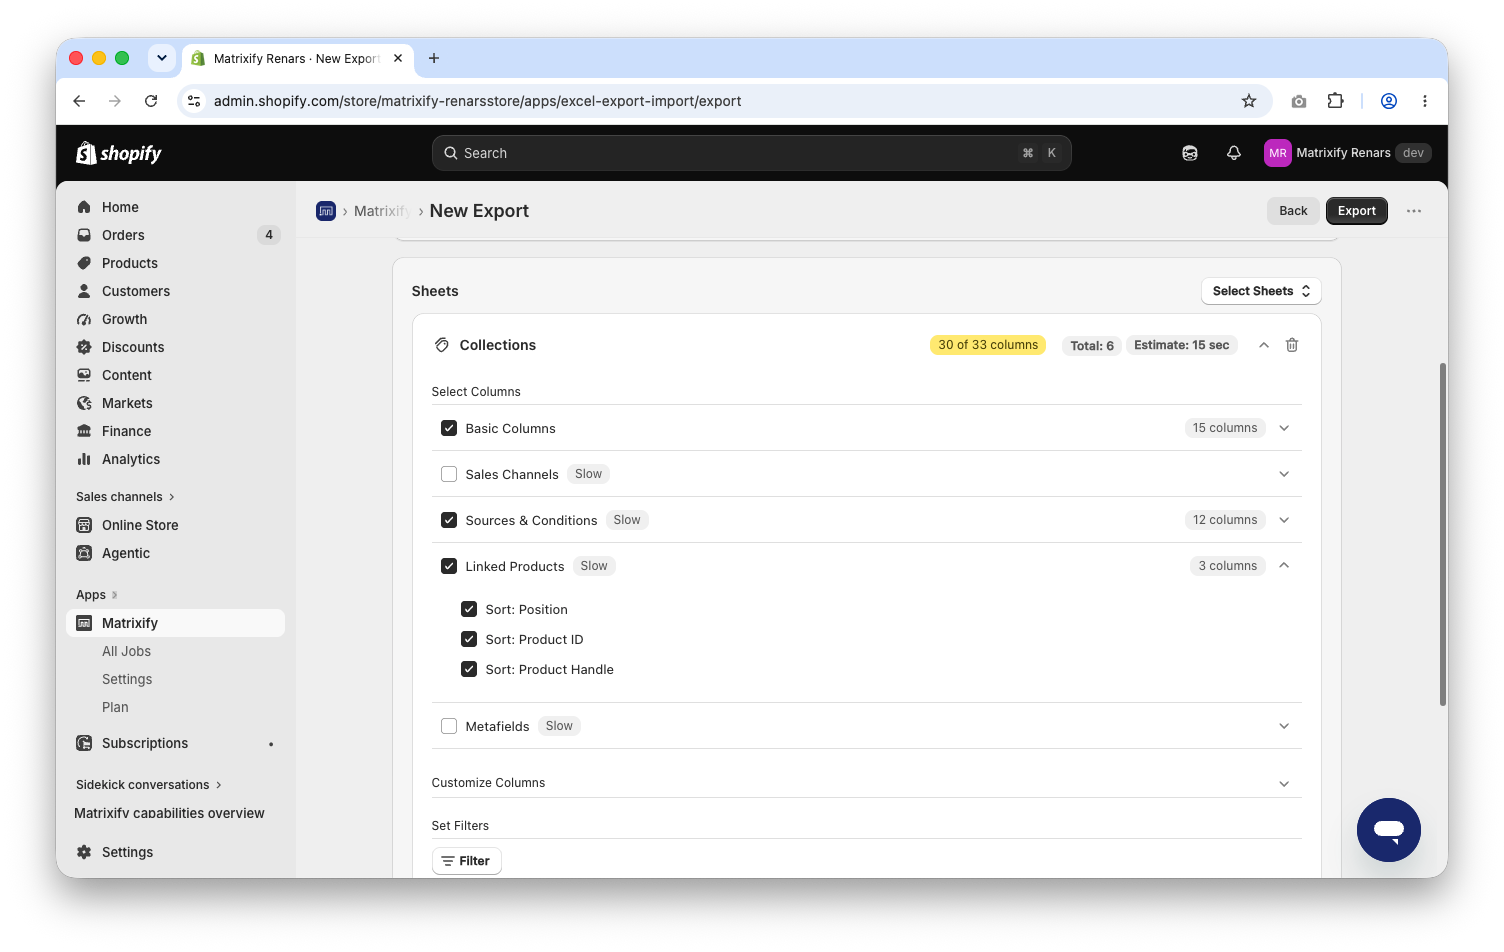
Click on the Collections sheet card to expand it. In Select Columns select the column groups you need:
Basic Columns– Title, Handle, description, Sort Order, featured image and Products Count. Enough for a list of Collections or for a review of titles and descriptions.Sales Channels– onePublished: ...and onePublished At: ...column for each Sales Channel in your store, for examplePublished: Online Store.Sources & Conditions– the rules of automated Collections and the manually selected Products, one Condition per row.Linked Products– which Products are in each Collection and their position, one Product per row.Metafields– Collection Metafields. The SEO title and description are here asMetafield: title_tagandMetafield: description_tag.
Column groups with the Slow tag need extra Shopify API calls for each Collection, so the export takes longer. Select only what you need. Expand a column group to unselect individual columns.
3. Filter which Collections to export
Without filters the export contains every Collection in the store. To export only some of them, press the Filter button in the Collections sheet card, select a filter, set the condition and press Add. Some examples:
Title–contains any of–Saleexports all Collections with “Sale” in the title.Products Count–equals–0exports empty Collections.Updated At–relative date–1weeksexports Collections changed during the last full week.
You can add several filters. A Collection is exported only when it matches all of them. The item count shown next to the sheet does not change when you add filters – the app knows how many Collections match only when the export runs.

4. Export and download the file
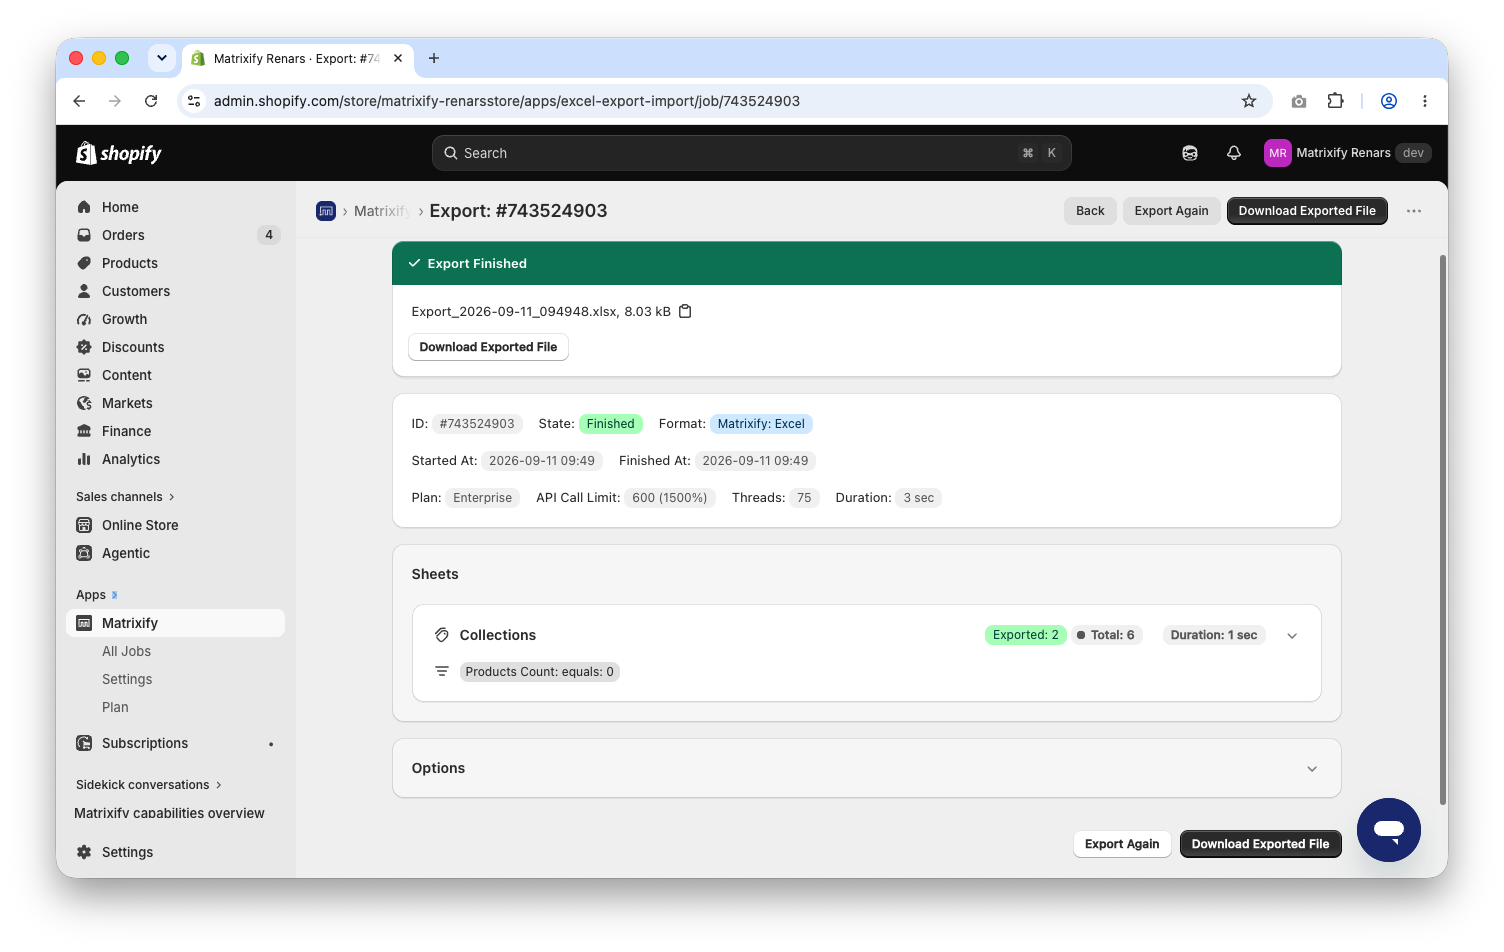
Press the Export button at the bottom of the page. While the export runs you can see how many Collections are processed and how many match your filters. When it is finished press Download Exported File.
The file stays available in All Jobs, so you can download it again later without running a new export.
5. Understand the exported file
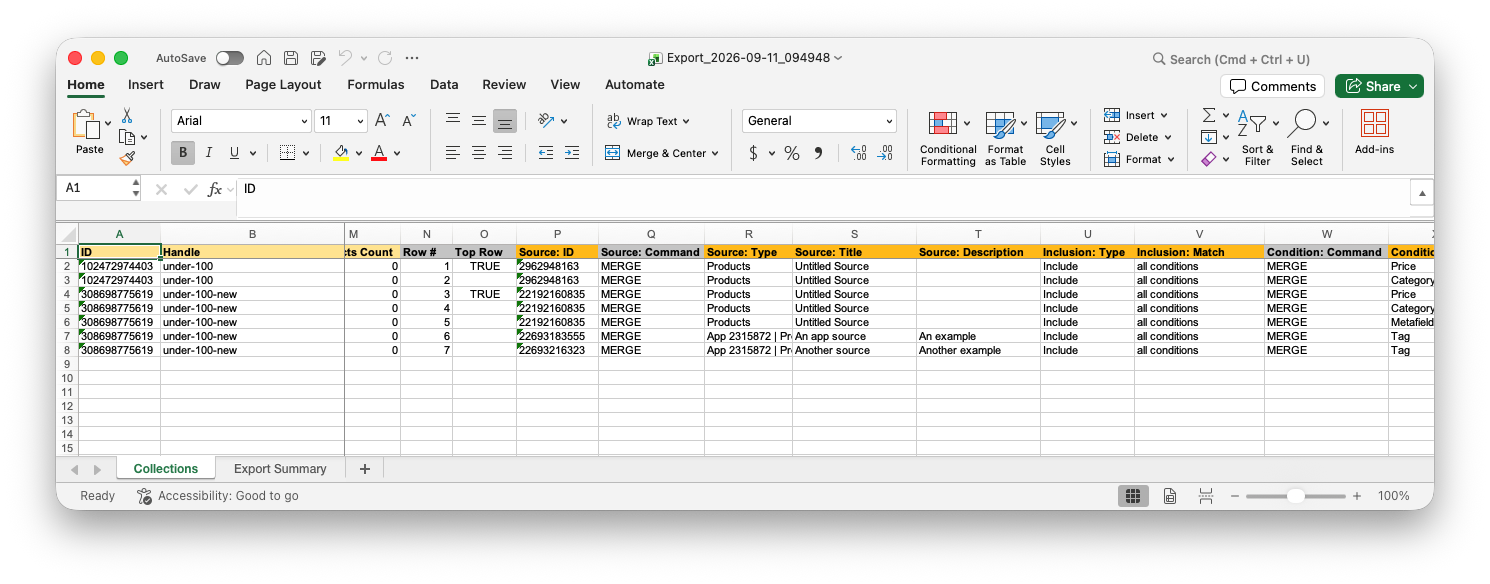
The Excel file has a Collections sheet and an Export Summary sheet with the job details. In the CSV format each sheet is a separate CSV file inside a ZIP.
A Collection takes more than one row when you export Sources & Conditions or Linked Products. Each Condition and each linked Product is on its own row, and the first row of the Collection also holds the Basic Columns. A Collection with 3 rules and 50 Products will have around 50 rows. Two columns help with that:
Top RowisTRUEon the first row of each Collection. Filter this column in Excel toTRUEto see one row per Collection.Row #keeps the original row order, so you can sort the file back after sorting it by other columns.
In the Sources & Conditions columns, automated rules have Condition: Field set to Tag, Vendor, Price and so on, with Condition: Relation and Condition: Value. Manually picked Products have Condition: Field set to Manual Selection and the Product Handle in Condition: Value. Sort: Position in Linked Products has a value only when the Sort Order of the Collection is Manual.
Good to know
- If the data is over the Excel limits, the app switches the export to CSV automatically.
Updated At,Products Count,Image Width,Image Height,Row #andTop Roware export-only columns. You can keep them in the file when importing back – the app ignores them.- The same file can be edited and imported back to update Collections in bulk – titles, descriptions, rules, Products, images or Metafields.
- Save the setup as an Export Preset to repeat it later, or use the
Optionssection to schedule the export and repeat it automatically. - If you need Collections per Product instead, export the Products sheet with the
Collectionscolumn group – it adds aCollectionscolumn with the Handles of all Collections the Product is in.
What to do next?
- See the Collections sheet documentation.
- Read the tutorial on how to bulk import and create Shopify Collections.
- Read the tutorial on how to bulk change Product positions in Shopify Collections.
- Read the tutorial on how to bulk delete Collections from Shopify.
- See all tutorials about Shopify Collections.
- Contact Matrixify support if you have questions.


