
Exporting Shopify Orders to an Excel or CSV spreadsheet is essential for building custom reports, auditing sales, and keeping an offline backup of your Order data. Whether you need line items, customer details, payments, refunds, tags, or any other Order data, having everything in a spreadsheet makes analysis fast and flexible.
With Matrixify, you can export full Shopify order details into Excel (XLSX) or CSV file using a simple, configurable workflow. Choose the exact columns you need, apply filters (date ranges, financial/fulfillment status, tags), and download a clean file ready for Excel, Google Sheets, or your BI tool.

Exporting your Shopify Orders
1. Create a new export
To export Shopify Orders, first, you will need to create a new export in the Matrixify app.
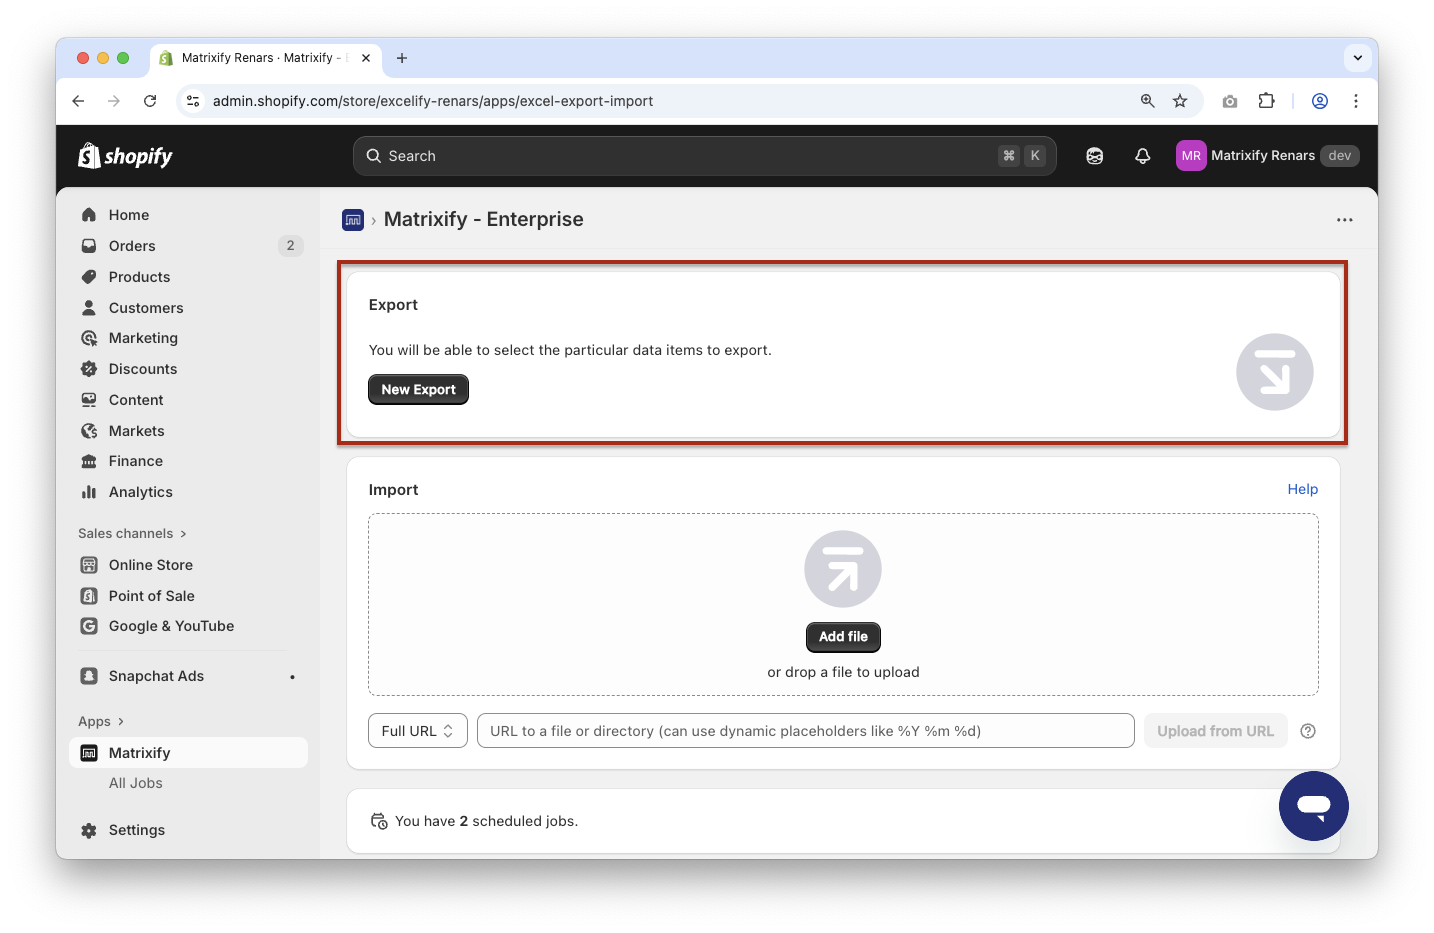
In the Home screen of the app, one of the first things you can see is the Export section with a New Export button. Clicking this button will direct you to the New Export page, where you can set up, configure, and start your export.
2. Select export format
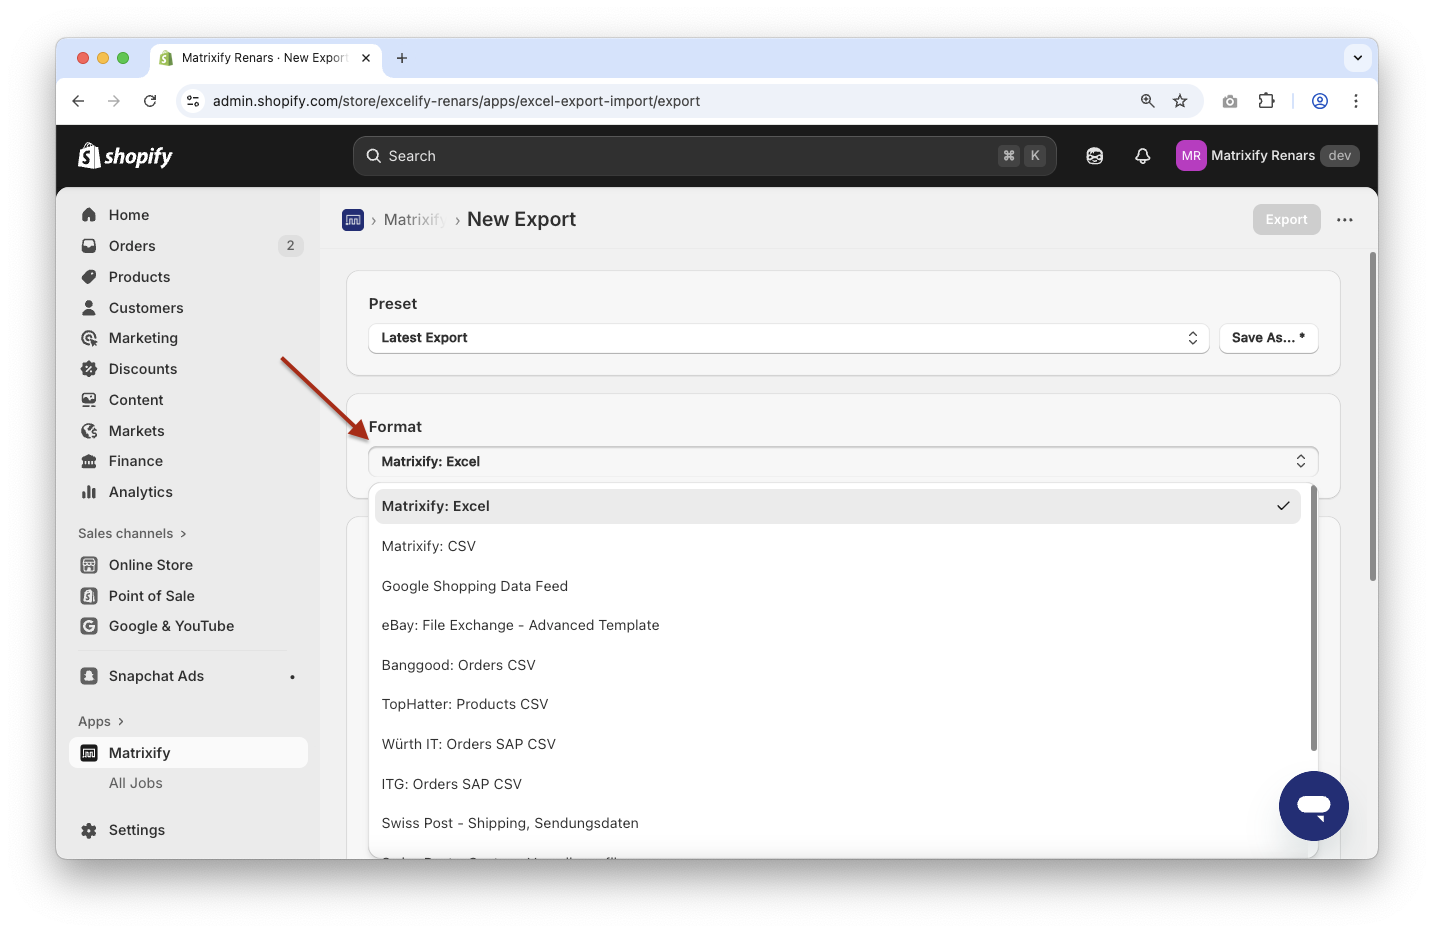
In the New Export page, you will first see a Format section where you can select the exported files’ format.
In this case, we will specifically look into using the Matrixify: Excel or Matrixify: CSV format.
When should you export to Excel?
If you plan on using Excel to edit data and to construct your reports is handy and more practical than CSV.
Due to various Excel limitations, you should use Excel if your exported data will be less than 1’000’000 rows and/or 16’000 columns.
We highly recommend exporting data to an Excel XLSX file format. It is a lot more user-friendly, and if your export data grows to be over the Excel limit, the Matrixify app will automatically switch the format to CSV.
When should you export to CSV?
When working with CSV files in Excel, the single biggest issue is that by default, Excel will turn long numbers, such as IDs, into scientific numbers, and when saved with an Excel to CSV file, the saved value will cut the ID, for example, from 123123123 to 123000000.
If you only plan to use the exported Orders as a backup, then CSV is your best and quickest option.
3. Configure to export Orders
You can select to export Orders by clicking the Select Sheets dropdown and selecting the Orders checkbox.

Now you can click on the Orders sheet and further configure which column to export.
By selecting specific checkboxes, you specify what groups of data you wish to be included in your Orders export.
This allows you to export only specific groups of fields. For example, if you just wish to export Transactions from the Orders, then you do not need to include Fulfillments or other checkboxes.
You can also click on each column group to see individual columns within that group and select to export only specific data fields.
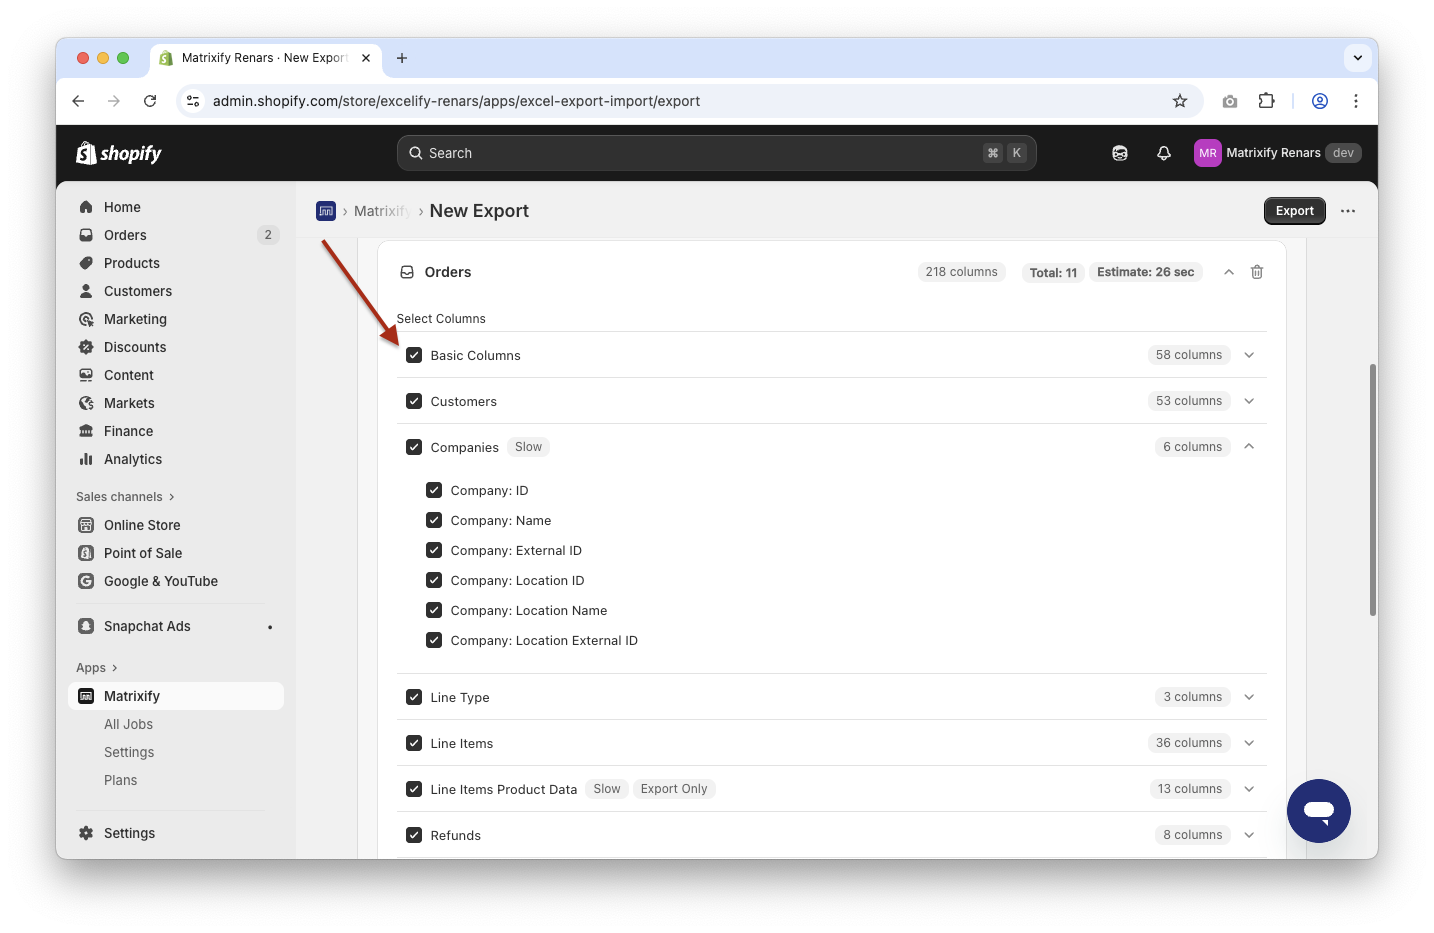
Basic Columns
Basic Columns group includes basic order information, such as internal Shopify Order ID, Order Name, Tags, Total amounts, various Order statuses, and others.
Customers
Customers group will include in the export all of the customer fields that are available for the Order, such as Shopify Customer ID, Name, Email, Phone, Billing and Shipping addresses, and other customer-related fields.
Line Items
Line Items are Products within the Order. By selecting this checkbox, you will export all Line Item information for the Order, such as Shopify Product ID (if the actual Product is linked to the Order), Title, SKU, Quantity, Price, Discount, and other fields.
Line Item Product Data
Line Item Product Data column group will add multiple columns of data that are not actually stored for the Order, but will take from the actual Product information from the Shopify Admin if the actual Product is linked to that Order. This is different from the Line Items because Line Items have the data on how it was at the moment of the purchase, but here you will see the product data as it is now for your current Shopify Products.
Exported data will add product Type, Tags, SKU, Barcode, Weight, Weight Unit, Inventory Qty, and Cost.
This is very handy if you want to calculate, for example, the profit – price items sold price compared to their cost.
Refunds
Refunds group will add the Order refund information if an Order is fully or partially refunded.
If the Order has multiple refunds, then all of them will be exported to give the most detailed export.
Each new Refund will be in a new row of the Order, thus duplicating basic Order information.
Transactions
Selecting Transactions column group will make sure that all transactions from the Order are included in the exported file.
Exported information will include data such as Shopify transaction ID, transaction kind, processed date, amount, currency, status, message, gateway, error code, and credit card details with the masked card number.
Fulfillments
Fulfillments column group will add fulfillment lines to your export to see what Line Items have been fulfilled and the fulfillment statuses, etc.
Exported data will include Line Item information that has been fulfilled in this row, fulfillment ID, status, created and last updated dates, tracking company, fulfillment location, shipment status, tracking number and tracking URL.
Metafields
Matrixify also offers the ability to export Shopify order Metafields.
Metafields are custom fields that can be created for your Shopify store items, such as Products, Customers, Orders, etc. They may be used by custom theme setups, various apps or just to store custom values.
4. Apply export filters
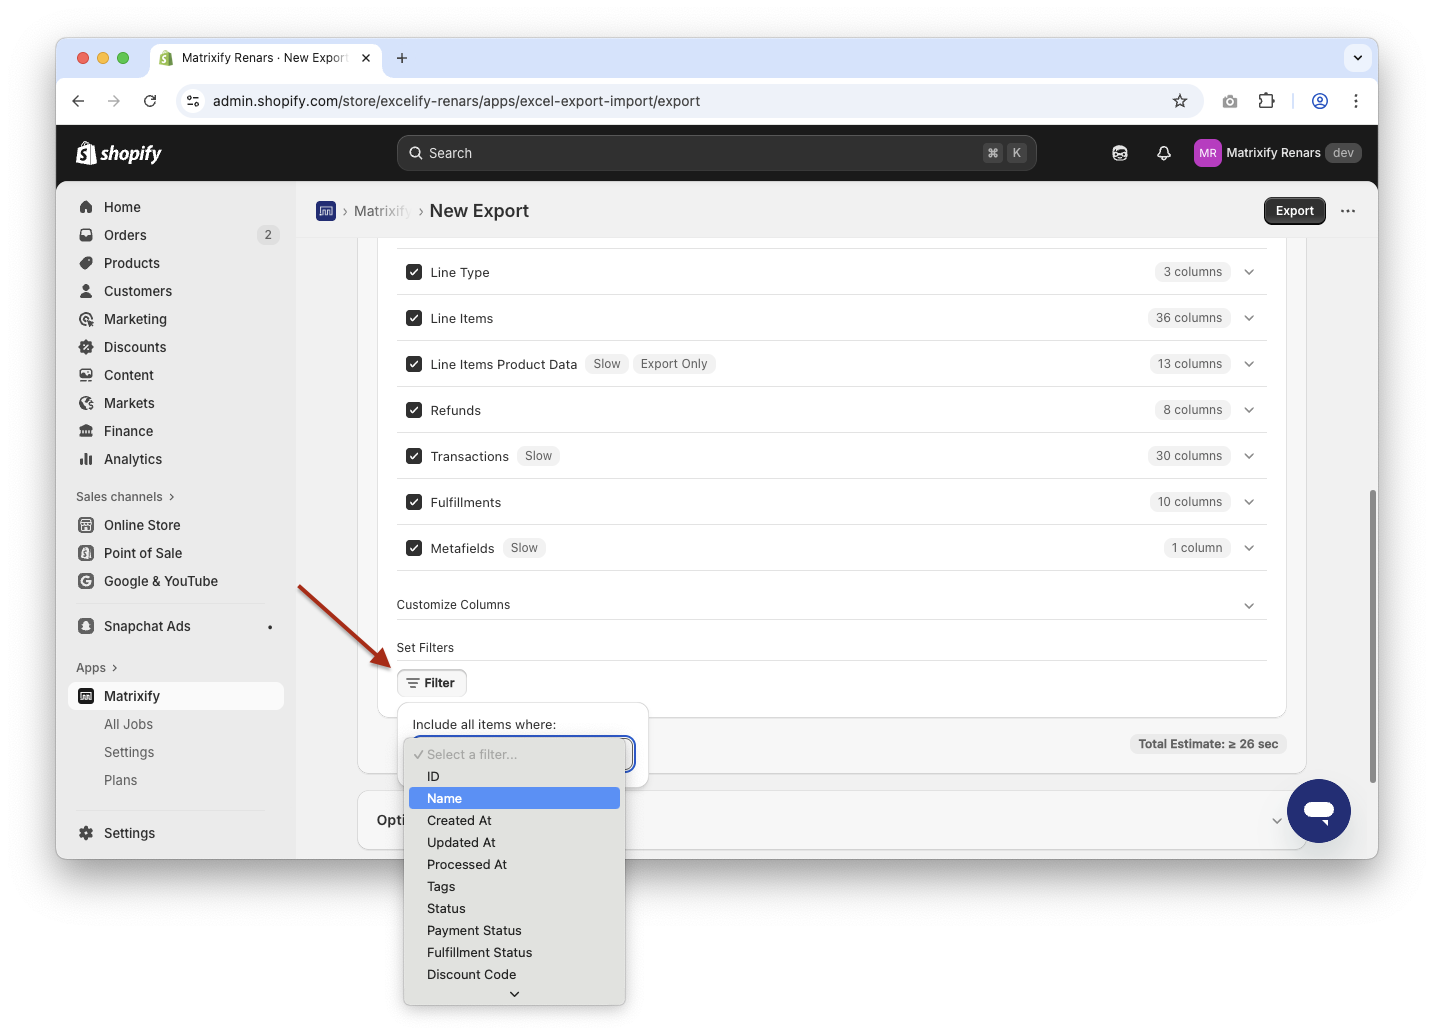
If you only wish to export specific Orders, not all of them, then you can apply one or more filters to specify what data will get exported.
To apply filters, simply press the Filters button, select the filter, select the condition, and enter your values.
You can also apply multiple filters for a single export.
5. Select options
In the “Options” section at the bottom of the page, you can select and apply various details for your exports, such as scheduling the export to run in the future, repeating automatically, giving a custom export file name, uploading exported files to servers, and much more.
Usually, for regular one-time data exports, you would not need to change any of the options, and they can remain as they are with default values.
6. Start the export
Once the export has been configured, you can click the Export button to start the export job.
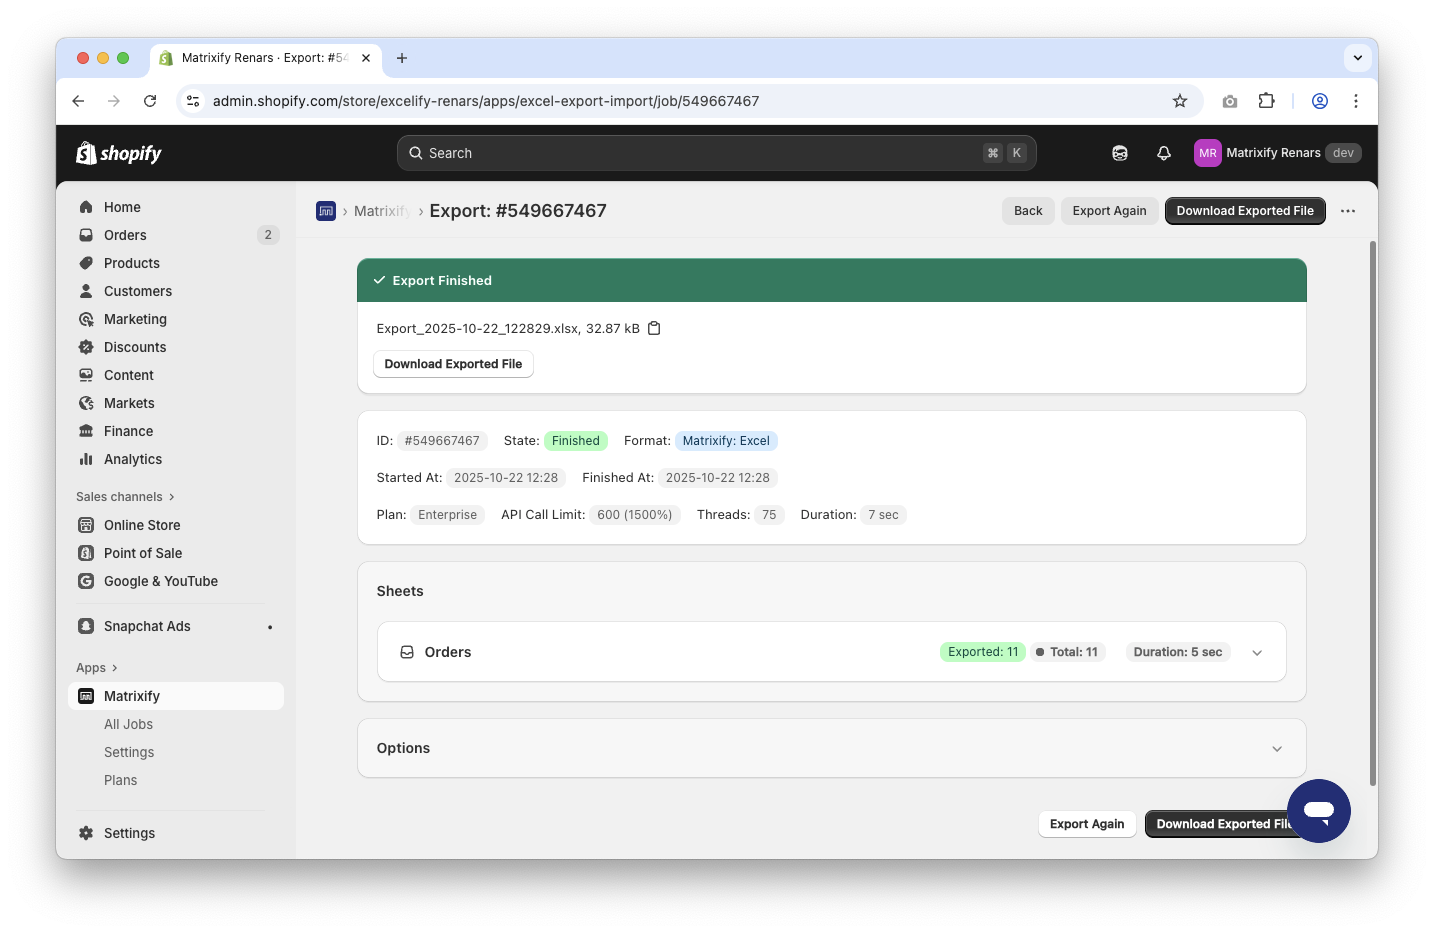
In the started export job, you will see all details about the export, such as:
- Matrixify job ID,
- dates when the export has been started, created, and finished,
- selected format,
- exported and total item counts,
- applied filters,
- selected columns and column groups,
- job duration and finish estimate,
- and more…
You are free to leave this page at any time. You can always find your past jobs in the All Jobs section of the app and click on the job from the list to bring up the job’s detail page.
Once the export has finished, you can download the exported file by pressing the Download Exported File button.
Understanding your Orders file
The exported Orders file might seem a bit complicated at the beginning, but once the construction of it is understood, this format starts to make a lot of sense and can fit any Shopify Orders field in it, no matter how complicated your Order is.
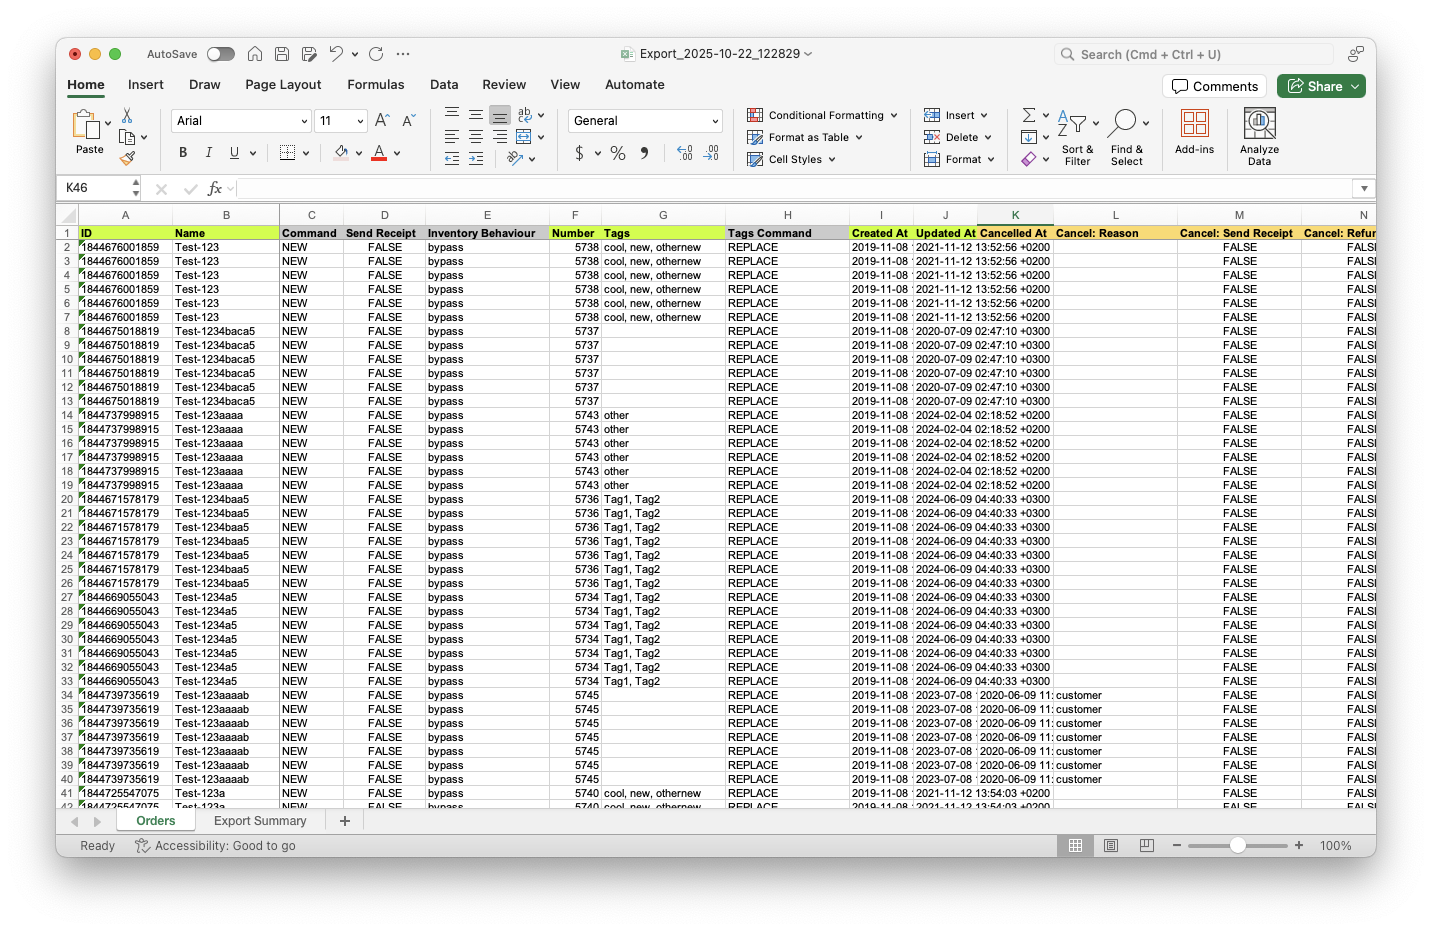
Multiple rows per Order
In your exported file, if you have selected all export checkboxes, you will have multiple rows for each order. You can see which rows belong to what Order by the ID and Name columns. All rows from the same Order will be adjacent to each other in the exported file.
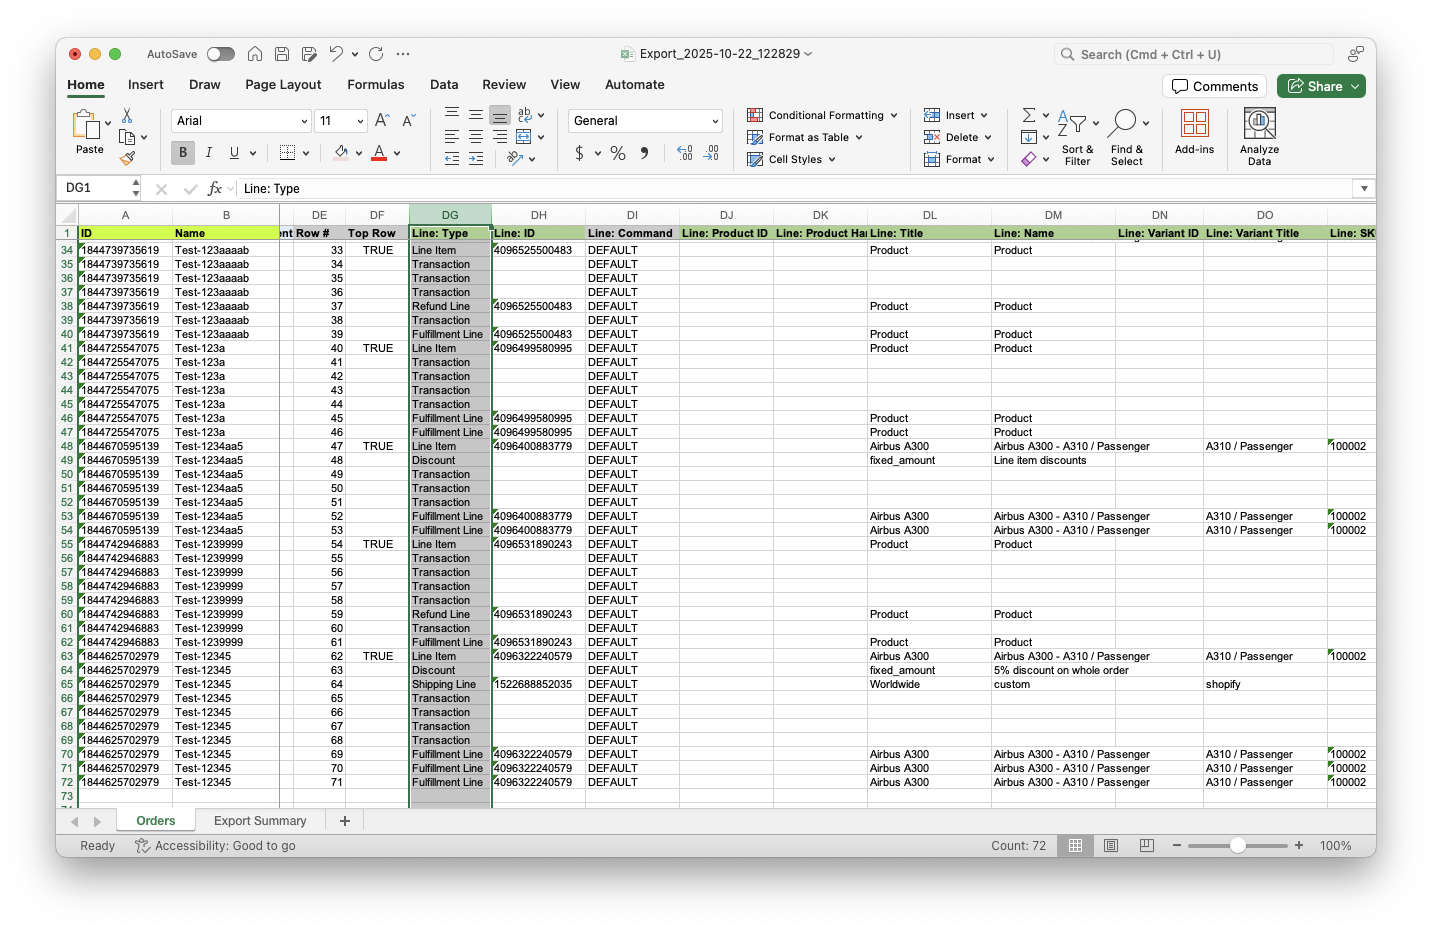
Rows by Line: Type
To decode what each row means, you need to look into the Line: Type column.
Possible values in this row are:
Line Item– export with “Line Items” checkboxDiscount– export with “Line Items” checkboxShipping Line– export with “Line Items” checkboxTransaction– export with “Transactions” checkboxRefund Line– export with “Refunds” checkboxRefund Shipping– export with “Refunds” checkboxFulfillment Line– export with “Fulfillments” checkbox
All of these Line Types might have Line: … columns filled to indicate for what Line Item the row is meant, for example, if your Order is partially filled, then you can look into rows where Line: Type is Fulfillment Line and in columns starting with Line: you will see to what Line Items the fulfillments are for.
Transactions, Refunds, and Fulfillments will also have their own additional columns to give more information about the specific row.
You can also configure your export to only include rows with specific line types by using the Line: Type filter in your export setup with Include only matching Lines selected for the filter.
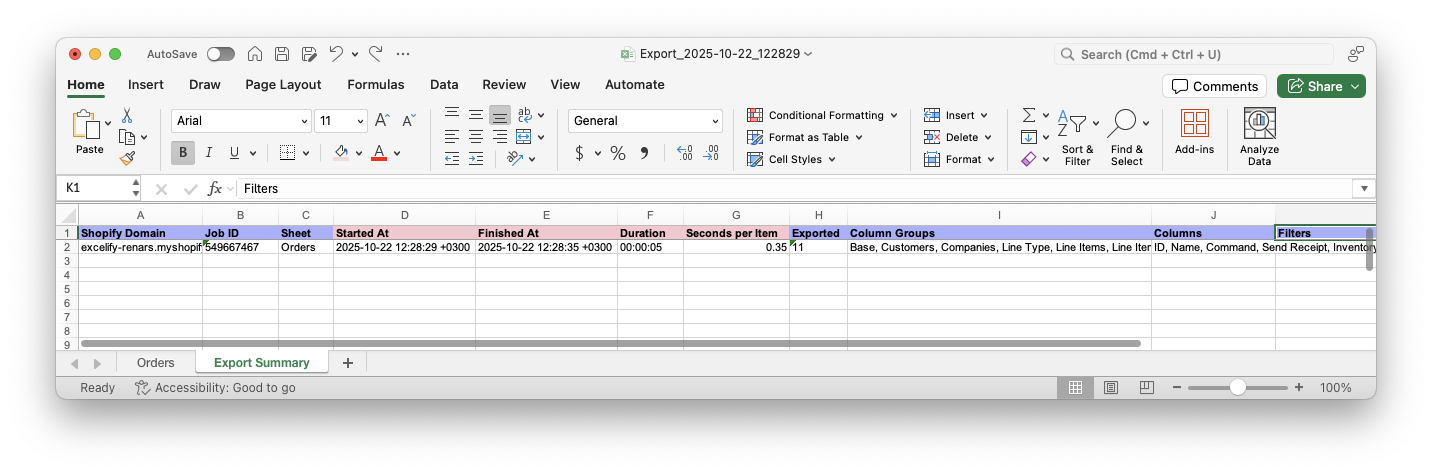
Export Summary
In the exported file, you will also have an Export Summary sheet.
In this sheet, you can see all details about the export job – basic job details, what fields and columns were selected, what filters have been applied, and more.
What to do next?
- Install the Matrixify app.
- Wish to see an example of the exported data? Download our Demo template file.
- Wondering what exactly each column means? Look it up in our “Orders” sheet documentation.
- Check out our order-related tutorials.
- Look into how you can export Shopify Products with Matrixify.
- Look into our “How it works” page to understand other details and things you can do with the app.
- Contact Matrixify support if you have any questions or issues.


